# Lookup tables
SUMMARY
- Lookup tables enable quick reference of frequently used data in recipes, such as zip code lookup or unit conversion.
- You can add and edit table data through CSV import, manual entries, or recipe actions.
- Tables have a maximum limit of 10 columns and 100,000 entries.
- Supported lookup table actions include adding, looking up, searching, getting all entries, updating, deleting entries, and truncating the table.
WHO CAN USE THIS FEATURE?
Lookup tables may not be available on some plans. Reach out to your Workato Customer Success Manager for more info.
Lookup tables — similar to cross-reference tables — allow you to easily look up frequently used data in a recipe.
Lookup tables are structured with rows and columns. You can look up entries in a lookup table by matching data in one or more columns.
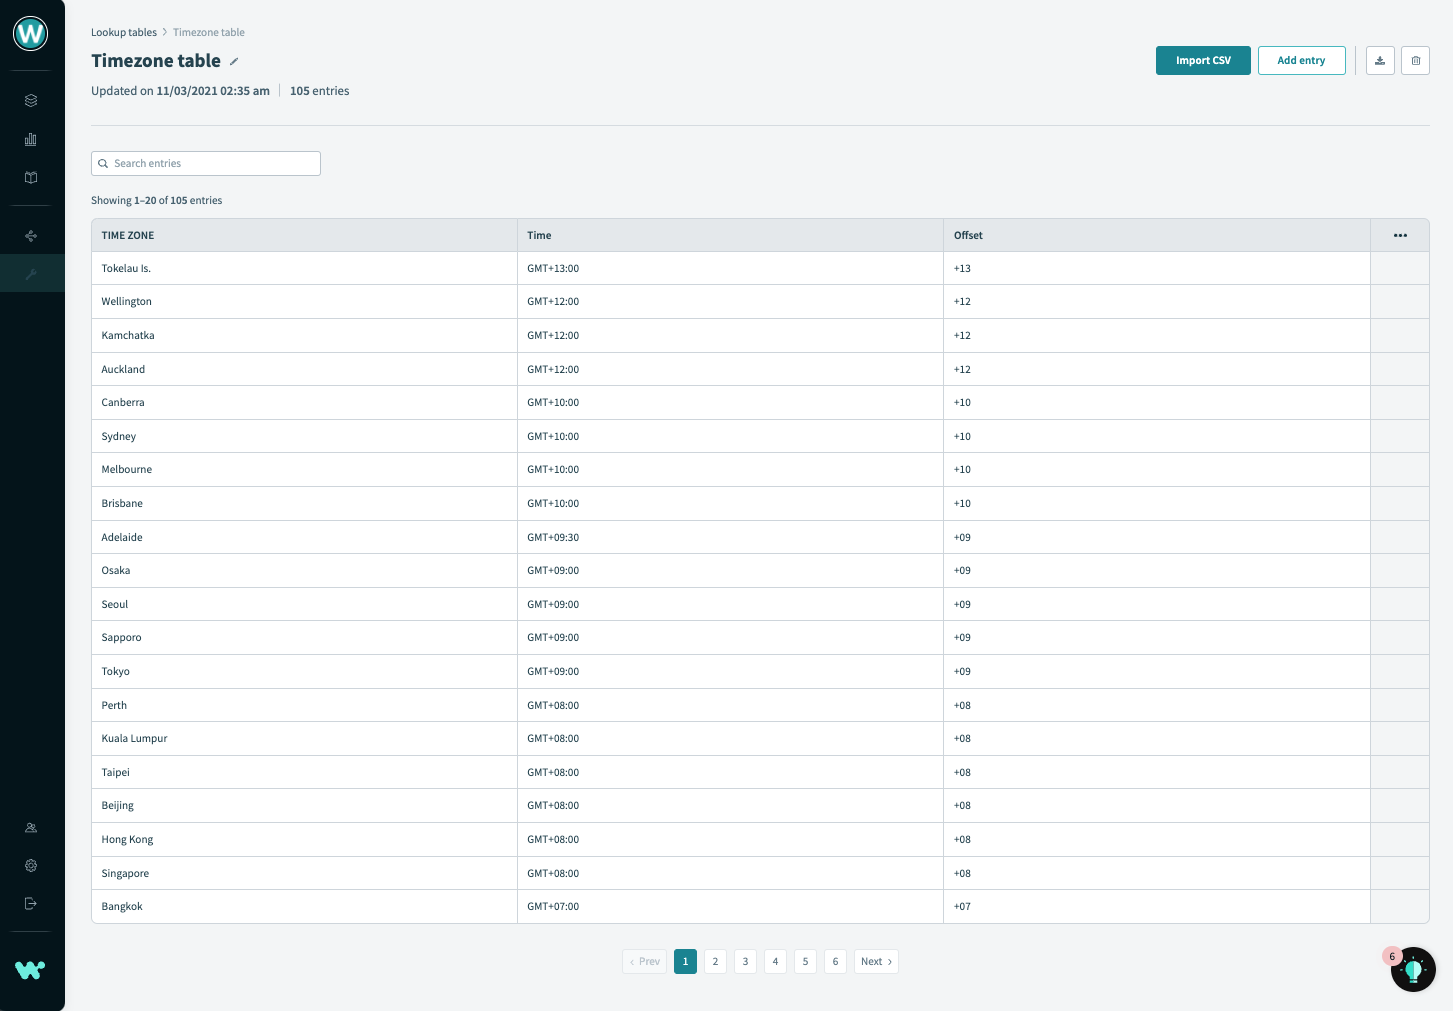 Lookup table with timezones, time, and offsets
# Limitations
Lookup tables in Workato have the following limitations:
- Maximum of 10 columns
- Maximum of 100,000 entries
# Usage inspiration
CHECK OUT THE AUTOMATION INSTITUTE COURSE!
Are you fascinated by lookup tables? Check out the Automation Institute's Lookup tables course (opens new window) to become a certified Automation Pro!
Need some inspiration? Using Lookup tables, you could:
- Look up a zip code using a city name
- Convert metric measurements to imperial for a downstream app
- Retrieve vacation accrual rates by department and rank
- ... and much more!
# Permissions
Workato enables you to set granular permissions for lookup tables by creating a custom role and using role-based access control (RBAC).
Lookup table permissions are available in Workspace admin > Collaborator roles > + Add collaborator role in the Platform tools section under Data storage. The permissions you define here control access to lookup tables that are global (scoped to All projects) and local (scoped to a specific project). Workato enables you to set granular permissions for lookup tables by restricting access to the lookup tables UI and scoping lookup tables to projects.
# Role-based access control for lookup tables
Manage access to the lookup tables interface using role-based access control (RBAC). Control who has permission to create or edit the lookup tables in your workspace.
Lookup table permissions are available in Workspace admin > Collaborator roles, in the Platform tools section under Data storage. Learn more about lookup table privileges.
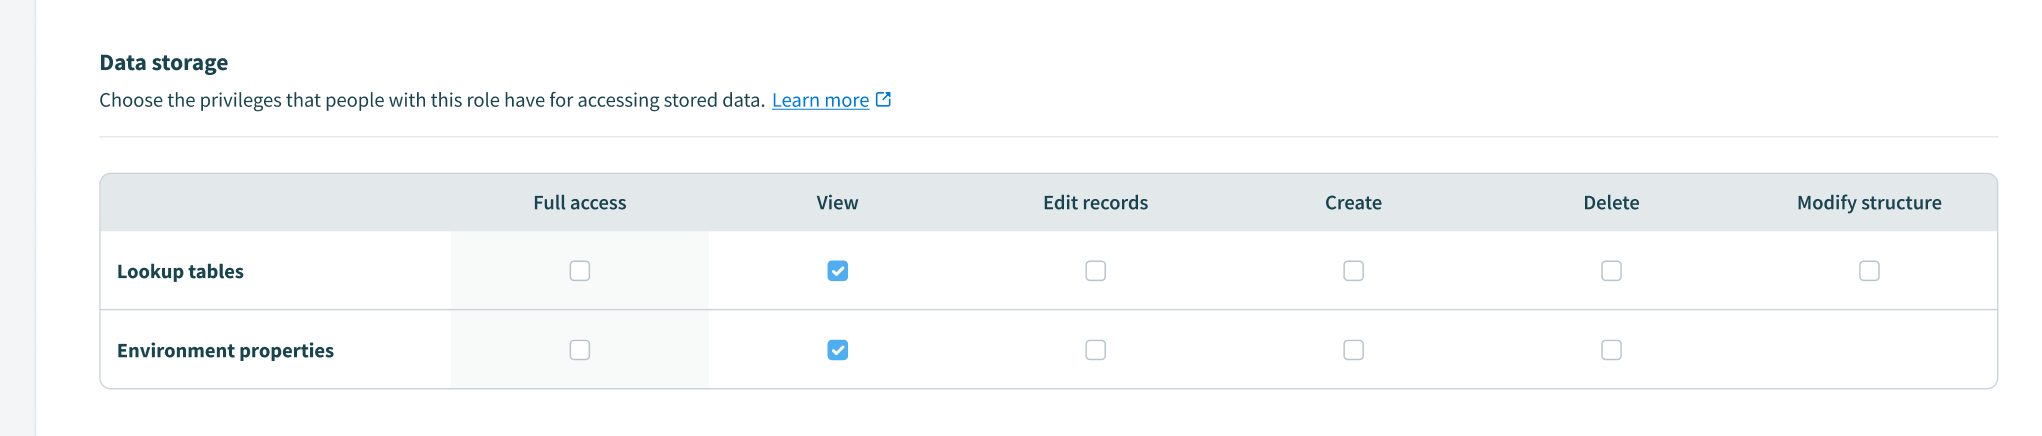 Lookup table permissions
SCOPE OF LOOKUP TABLE PRIVILEGES
The Collaborator roles interface manages access to the lookup tables web interface only. Collaborators can still view and edit records (add, update, or delete) for lookup tables they have access to through the lookup table connector.
# Assign lookup tables to specific projects
Workato enables you to make lookup tables available to all projects, or assign them to specific projects. When you assign a lookup table to a specific project, the lookup table is only accessible to users who have access to the project.
If you intend to restrict user access to lookup tables within the recipe editor, follow these steps:
Scope your lookup tables to specified projects.
Enforce role-based project access for your collaborators by restricting the projects they can access.
REMOVE LOOKUP TABLES CONNECTOR ACCESS
If you want a user to have zero access to lookup tables using the connector, you must first restrict project access for this collaborator. Next, ensure that none of your lookup tables are assigned to those projects or All projects.
CHANGING LOOKUP TABLE SCOPE CAN AFFECT RUNNING RECIPES
When you update the scope of a lookup table, Workato displays a warning message, as changing the availability of a lookup table can affect recipes that use the table.
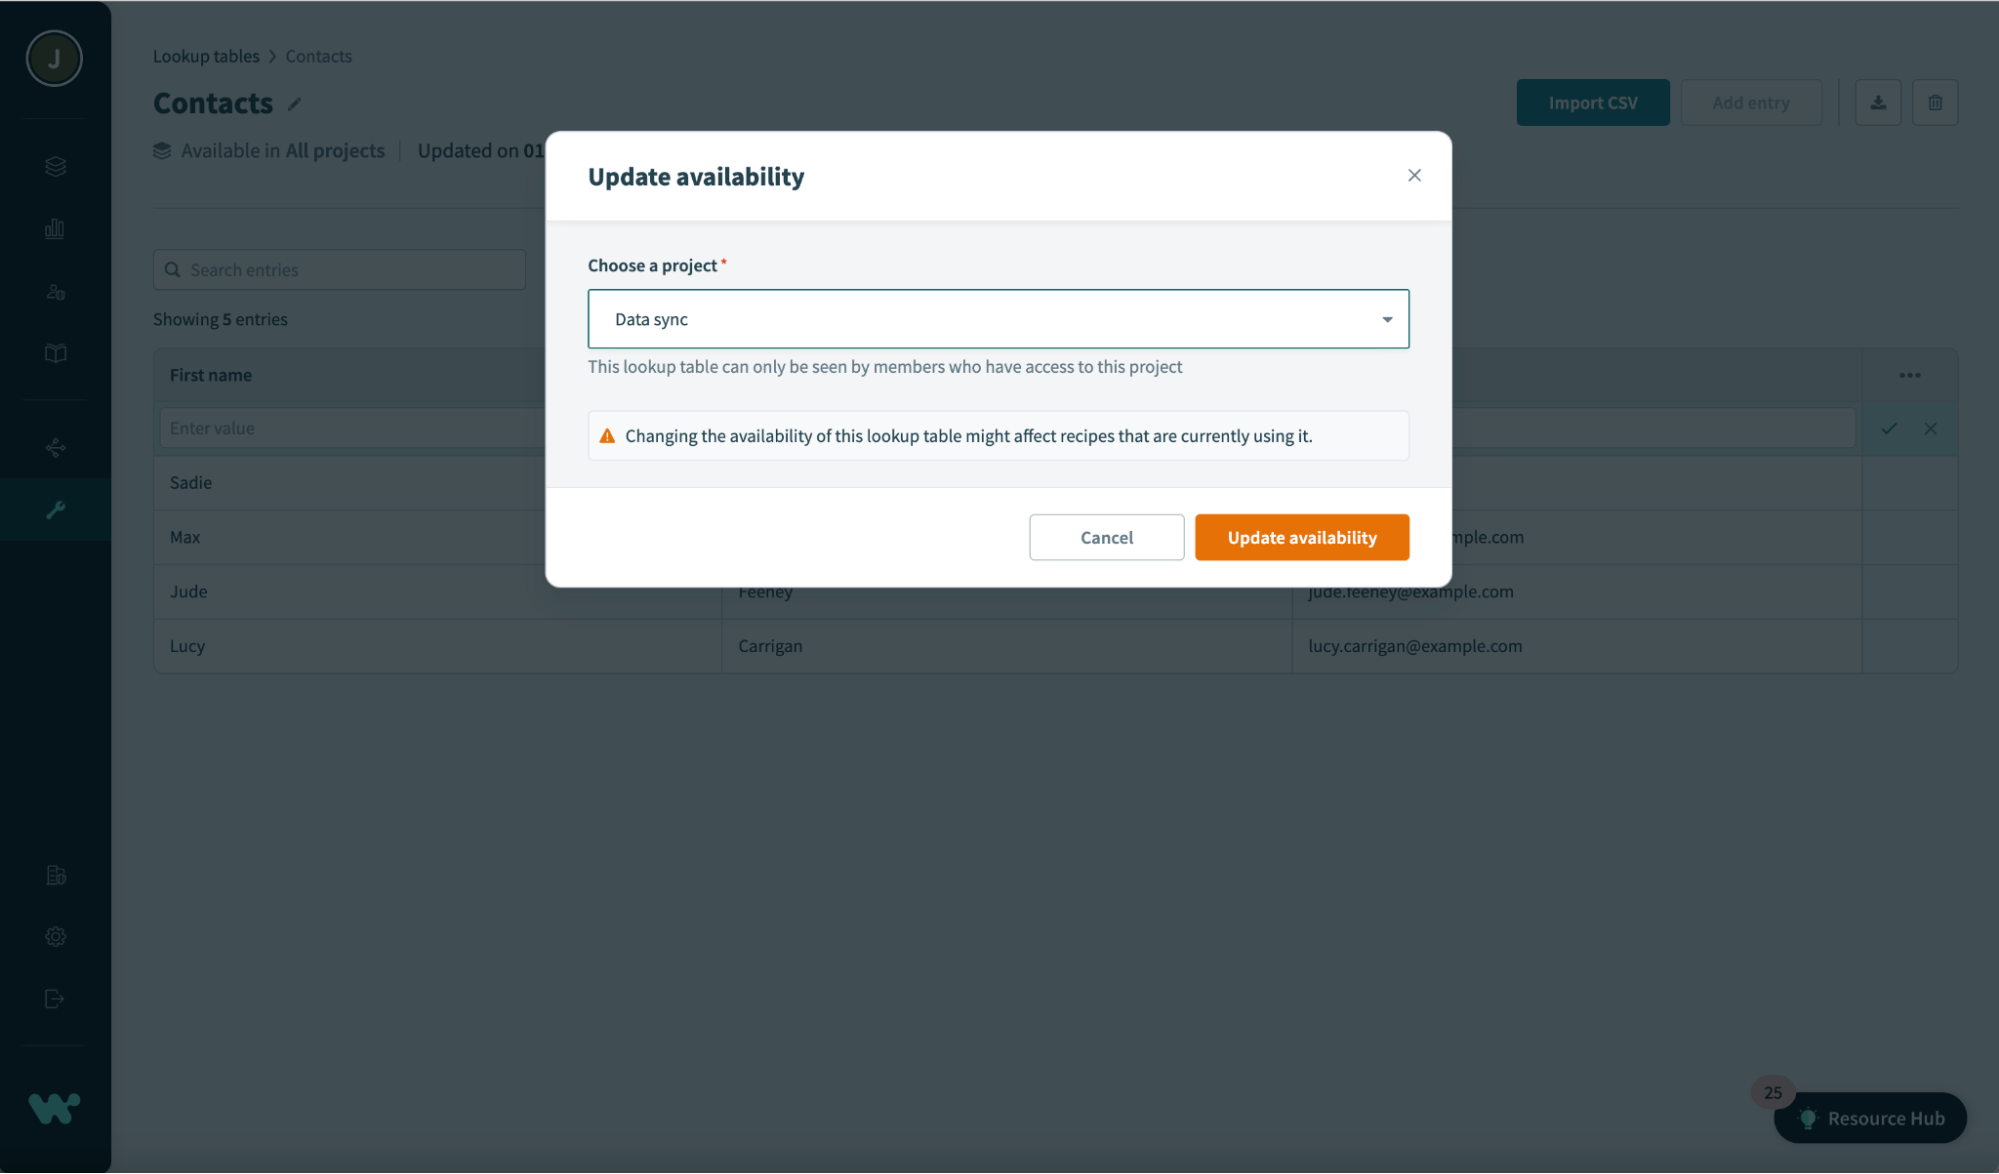 Changing the availability of a lookup table may affect your recipes
HOW TO VIEW THE LOOKUP TABLES A USER CAN ACCESS USING THE CONNECTOR
Log in as the user.
Open a project.
Create a new recipe.
Configure an if action.
Select the app Lookup tables by Workato.
Select any action.
Select the Lookup tables dropdown to view a list of lookup tables the user has access to.
The user can access lookup tables scoped to All projects and lookup tables scoped to the project containing the recipe they are working on.
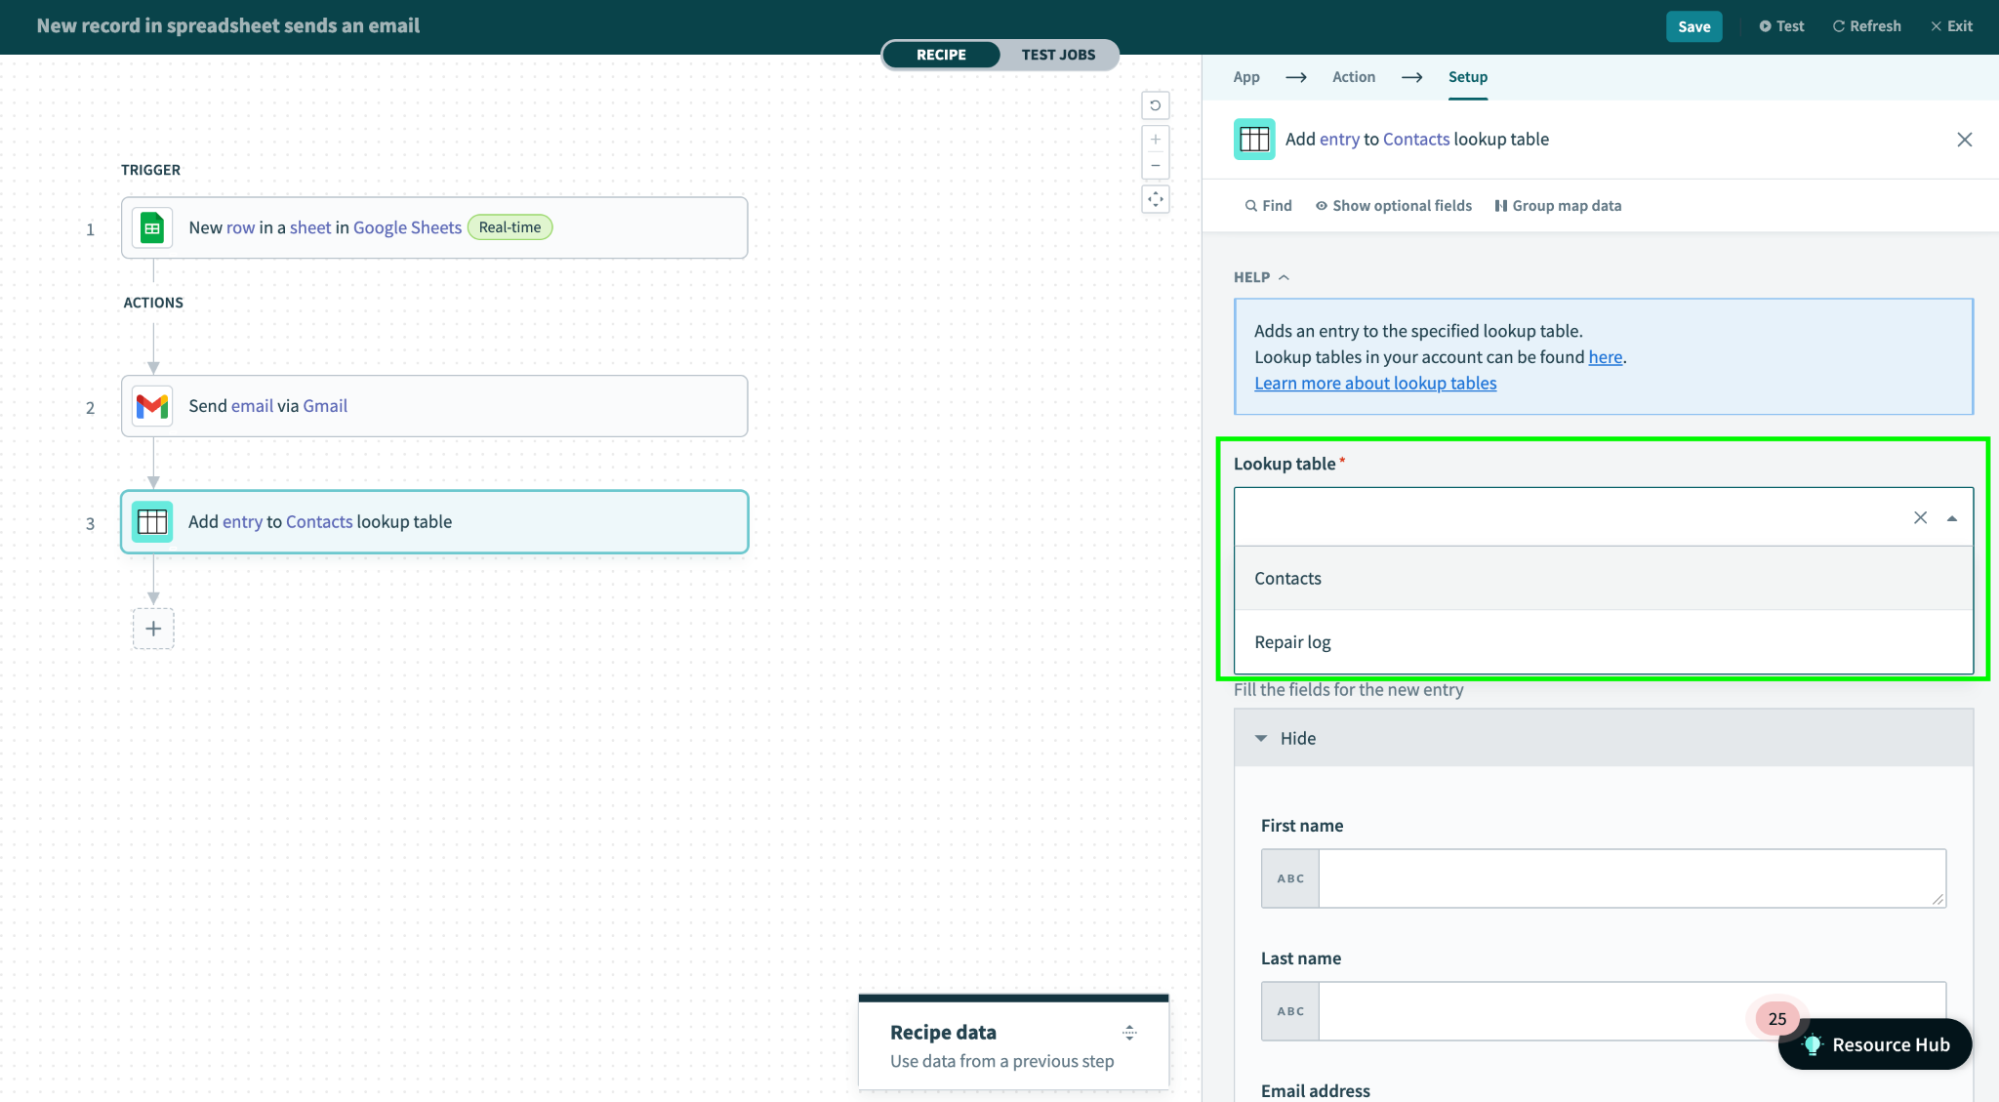 Available lookup tables
# Set up your lookup table
WHO CAN USE THIS FEATURE?
To perform the tasks in this section, you must have either of the following roles or privileges in Workato:
To create a new lookup table, follow these steps:
In your Workato account, navigate to Tools > Lookup tables.
Select + New table.
In the top left corner, select the pencil icon to enter a name for the table.
Next, you'll add entries to the table. You can add entries by:
Importing a CSV
Select the Import CSV button.
In the window that displays, add the CSV file. You can drag and drop the file or select upload from device to upload the file.
When finished, select Import CSV.
Workato uses the first row and applies simple formatting like capitalization and replacing underscores with spaces in the CSV to create column names.
Important: Make sure you check the column names after import. You can edit column names at any time.
Adding entries manually
Select the Add entries manually button.
Enter names for the two default columns and select the checkmark.
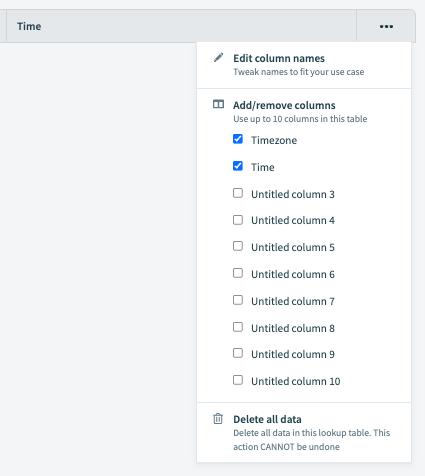
To add additional columns, select the three dots on the right side of the table and then select the columns you want to add:
To add entries, select the Add entry button located in the top right corner of the page:
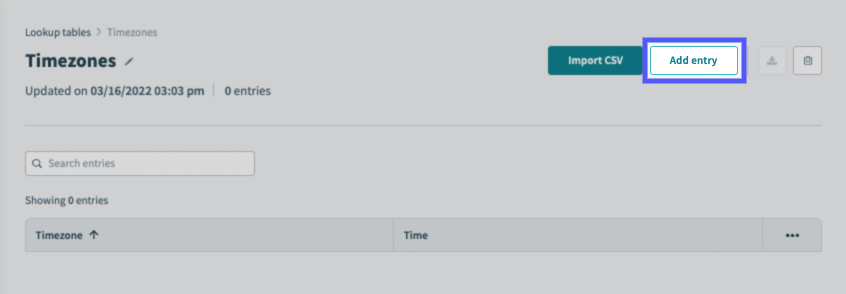
A new row displays in the table. Enter row values in each of the columns.
Select the checkmark when finished:

# Add and update lookup table data
You can add and edit lookup table entries:
# Import a CSV file
WHO CAN USE THIS FEATURE?
To import a CSV file into a lookup table, you must have the Lookup tables privilege or the Admin, or Analyst system role.
To import a CSV file into a lookup table:
On the lookup table page, select the Import CSV button. The Import CSV window displays:
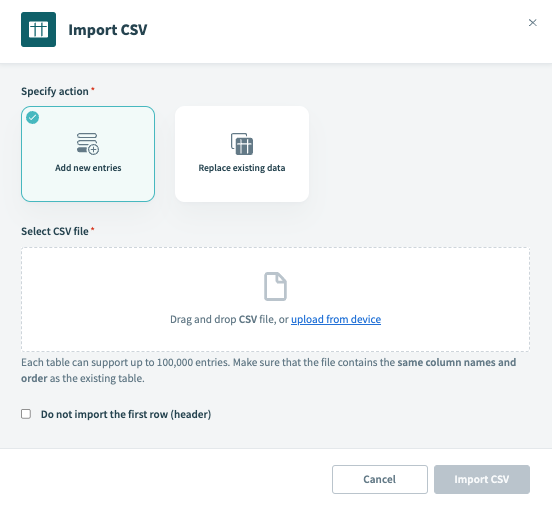
In the Specify action section, choose how existing entries are affected.
- Add row entries: Workato adds CSV rows as new entries. Existing entries are not affected.
- Replace existing data: Workato overwrites existing entries with rows from the new CSV.
In the Select CSV file section, add the CSV file. You can drag and drop the file or select upload from device to upload the file.
Optional: If you do not want to import the first row in the CSV, select Do not import the first row (header).
Select Import CSV.
# Add or edit entries manually
WHO CAN USE THIS FEATURE?
You must have the Lookup tables privilege or have the Admin, or Analyst system role to manually add or edit a lookup table entry.
# Add entries
To add entries, select the Add entry button located in the top right corner of the page:
A new row displays in the table. Enter row values in each of the columns.
Select the checkmark when finished:
# Edit entries
To edit an existing entry, hover over the last column in the entry. Select the pencil icon that appears:

When you select the pencil icon, the columns for the entry become editable. Update the values and select the checkmark to save.
# Using a recipe action
Using the Lookup tables connector, you can automate adding and updating lookup table entries with the Add entry and Update entry actions.
# Using the Lookup table connector
The Lookup table connector allows you to work with lookup tables using the following recipe actions:
# Add entry action
Adds a new entry to an existing lookup table. You can use this action to keep your lookup tables updated. For example, you can read newly created job titles from job applications and create a new entry for each created job title in your lookup table.
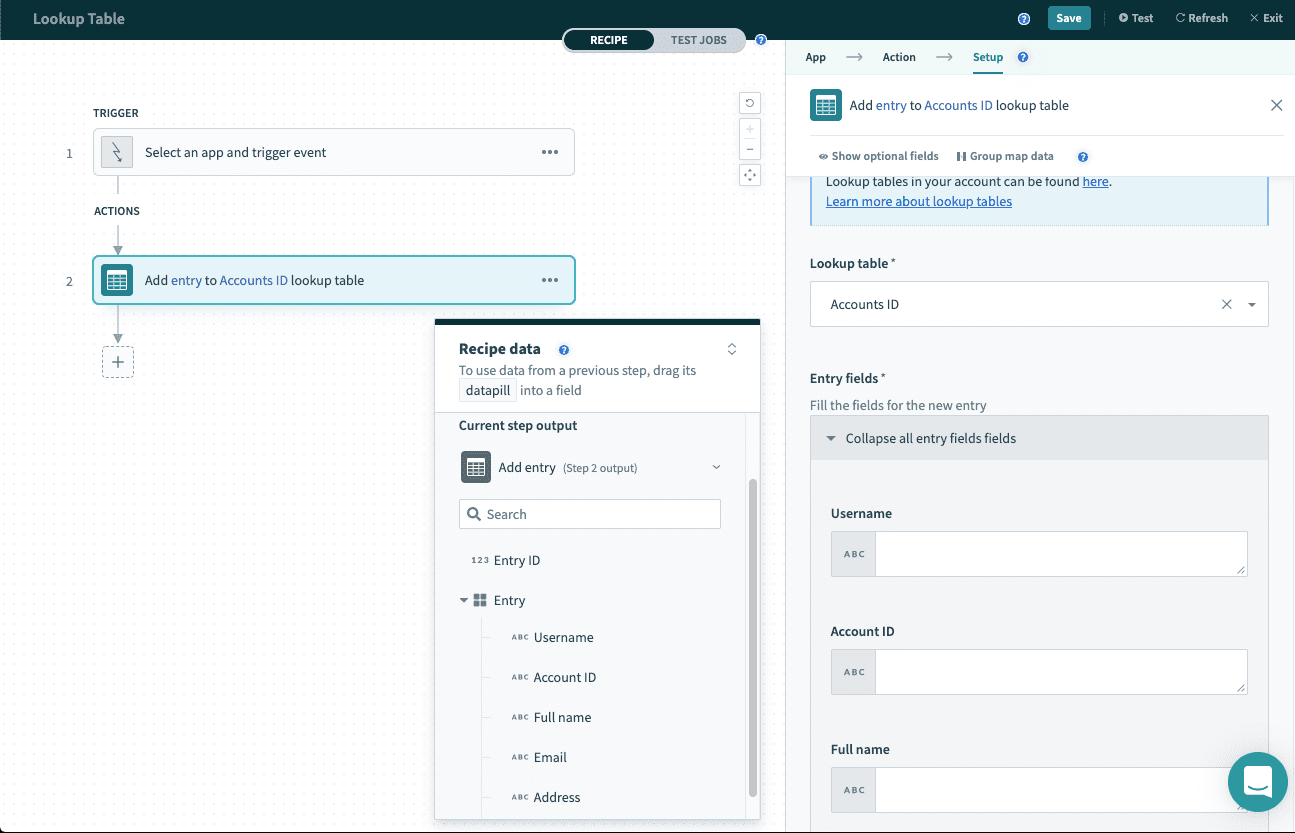 Select the lookup table to write to and then input the values to provide for each cell of the row
# Lookup entry action
Searches for an existing entry in a lookup table using any of the entry's values. The result is the first entry that matches the search criteria.
If Workato doesn't find an entry, the recipe returns an Unable to find an entry matching search parameters error.
 Lookup entry action
# Search entries action
Searches for existing entries in a lookup table using provided search criteria. The result is a list of all entries that match the criteria. Use this action if you expect Workato to return multiple entries. In the Search by field, switch to formula mode to input an array, allowing you to search for multiple values at once. This feature enables batch searches, permitting multiple criteria queries in a single operation.
 Search entries action
# Get all entries action
Returns all entries in a table, up to the maximum of 10,000.
 Get all entries action
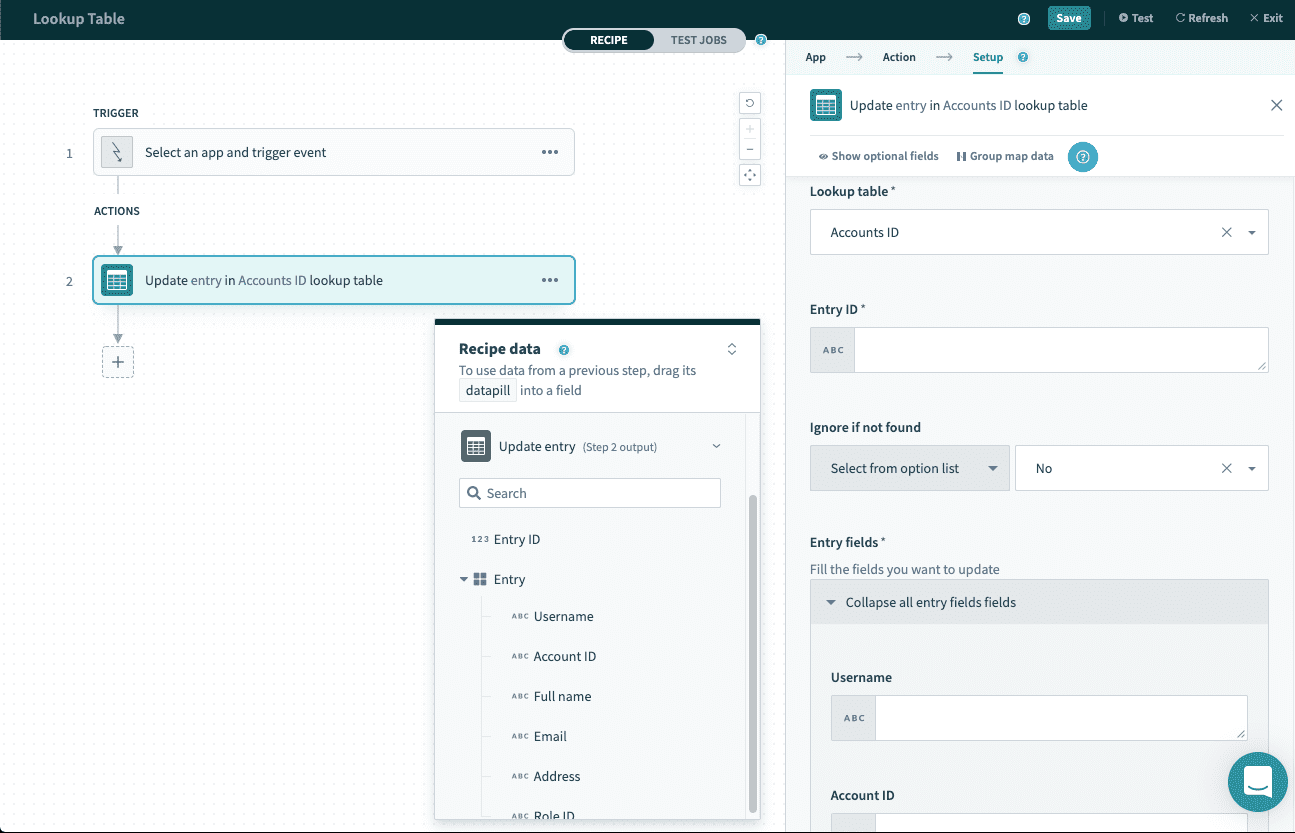
# Update entry action
Updates an entry in an existing lookup table using its unique Entry ID. Entry IDs are available in the output of the following actions:
 Update entry action
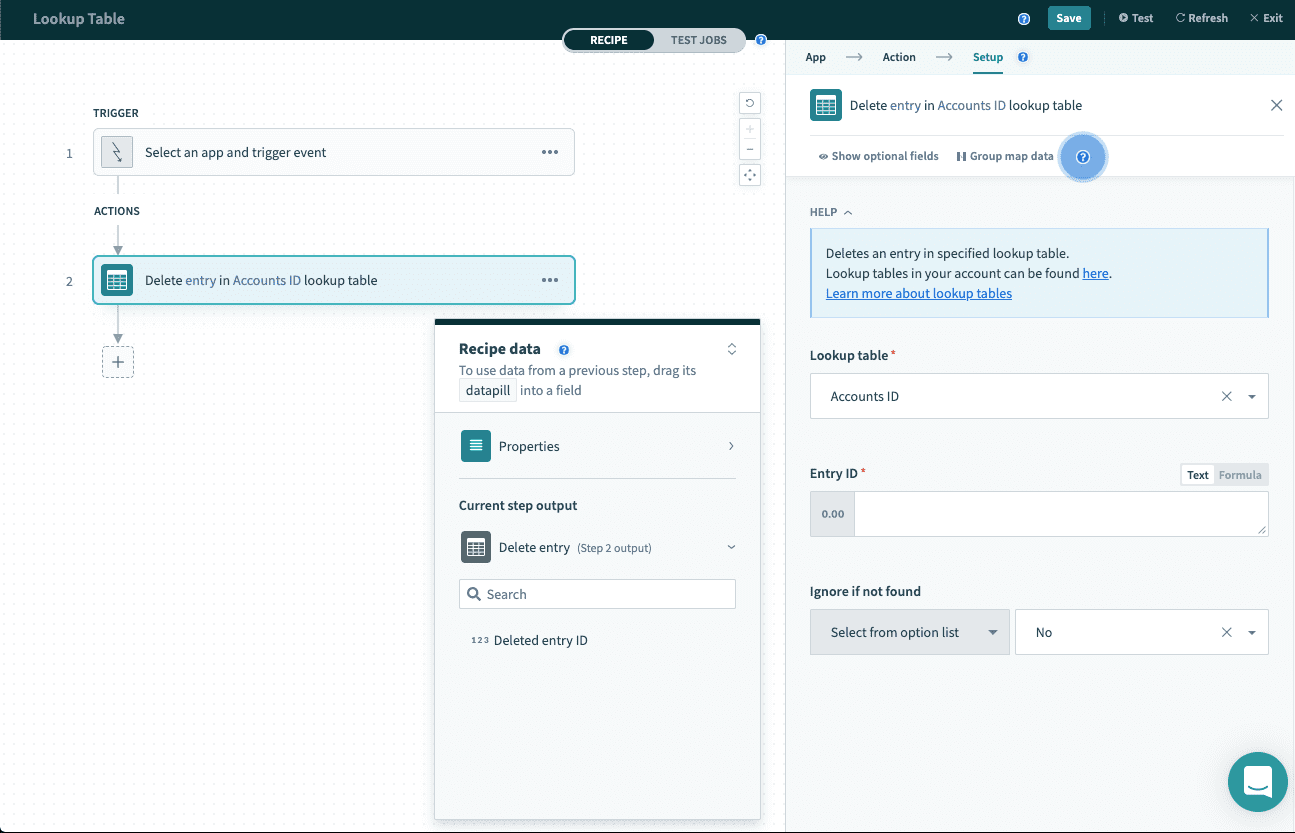
# Delete entry action
Deletes an entry in the specified lookup table using its unique entry ID. Entry IDs are available in the output of the following actions:
 Using the delete entry action to delete Jeans data in the table Account
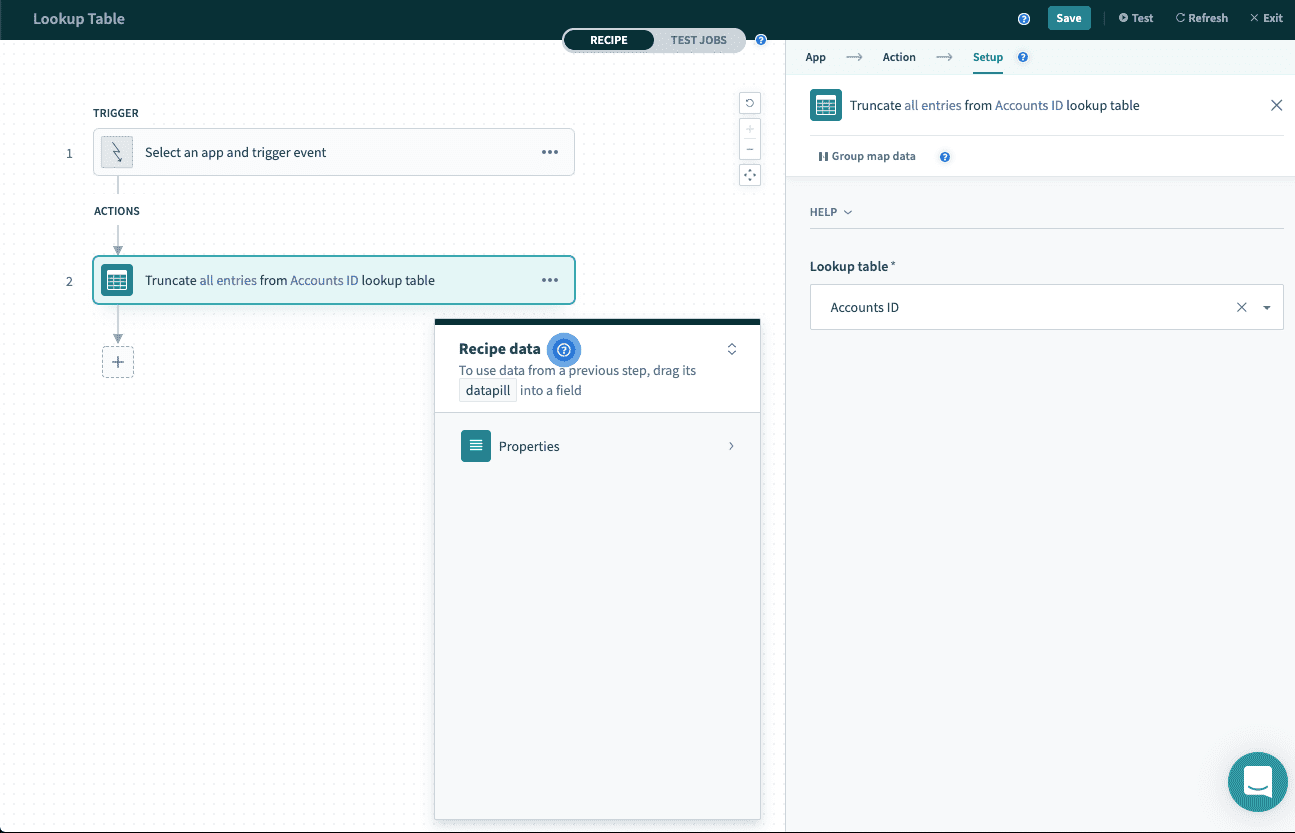
# Truncate table action
WARNING
This action cannot be undone.
Deletes all entries from the specified lookup table. This action cannot be undone, even during a test job.
 Truncate table action
# Using formulas to look up entries
An alternative to using an action step to work with a lookup table is to use a formula to look up entries in your lookup table. This approach is equivalent to the Lookup entry action and can be used in input fields.
To use the formula in an input field, set the input field to formula mode and enter the following formula:
lookup("TABLE_NAME", "REFERENCE_COLUMN": datapill)["LOOKUP_COLUMN"]
The preceding example contains the following elements:
TABLE_NAME- The name of the lookup table.REFERENCE_COLUMN- The name of the column in the lookup table to be used as a reference.LOOKUP_COLUMN- The name of the column in the lookup table you plan to look up data for.
Let's look at an example:
lookup("Account IDs", "Salesforce account ID": datapill)["Intacct account ID"]
This formula uses the Account IDs table. It looks up the Intacct account ID of the first entry that matches any given Salesforce account ID.
If you want to use multiple reference columns to look up entries in your lookup table, use the following formula in an input field:
lookup("TABLE_NAME", "REFERENCE_COLUMN": datapill, "REFERENCE_COLUMN_2": datapill2)["LOOKUP_COLUMN"]
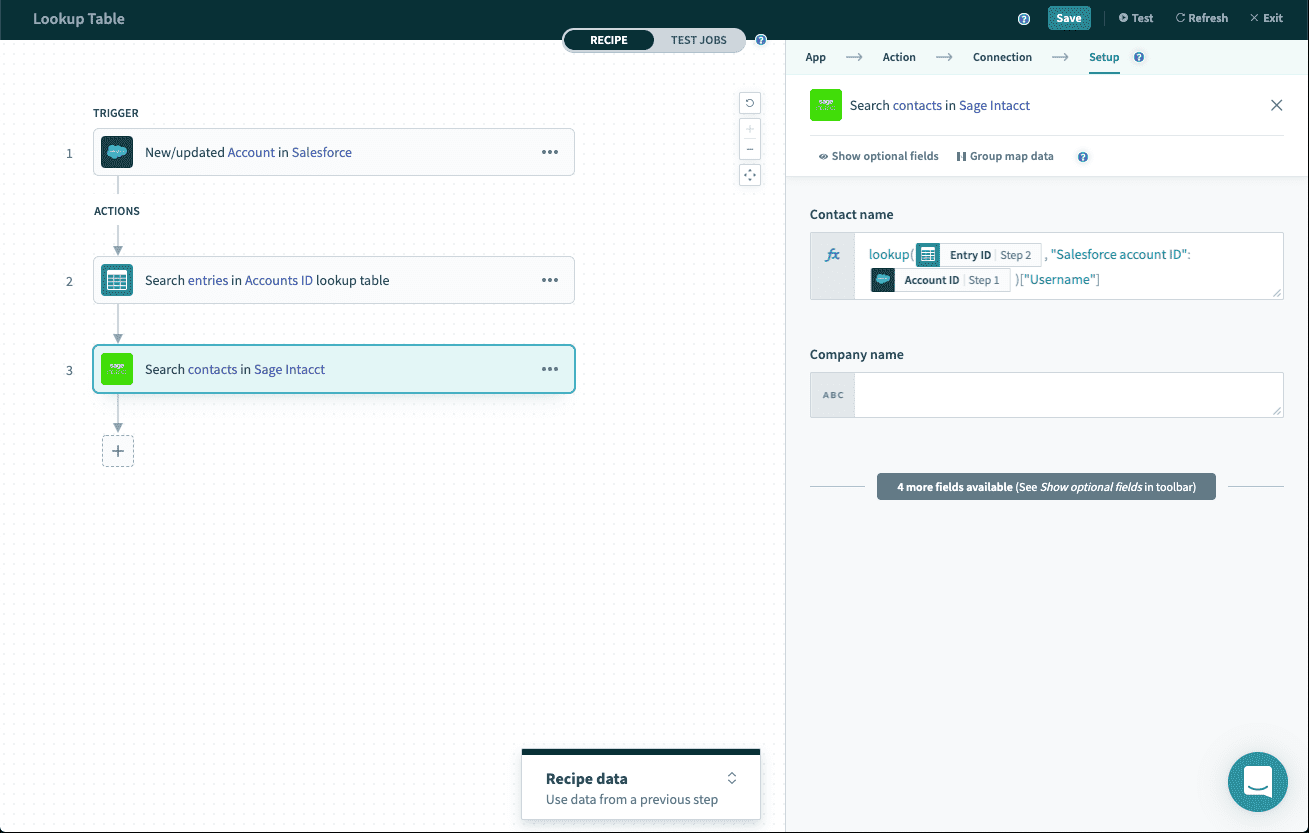
# In-memory lookup tables
You can use the output of a Search entries action as an in-memory lookup table. This is useful when a recipe calls the lookup function on the same lookup table thousands of times because the action reduces the time required to perform the lookup.
To use a lookup formula on an in-memory table, you must create a Search entries action. This action should return a list of entries that you require for your use case. Next, set the input field to formula mode and enter the formula in this format:
lookup(Entries, "REFERENCE_COLUMN": datapill)["LOOKUP_COLUMN"]
For example:
lookup(Entries, "REFERENCE_COLUMN": datapill)["LOOKUP_COLUMN"]
 Lookup an in-memory table
Similar to the preceding example, this formula looks up the Intacct account ID of the first entry in the Account IDs table that matches any given Salesforce account ID. This time, however, it looks up entries more quickly and only searches the reduced list of entries obtained in the initial search.
Last updated: 3/20/2024, 9:13:08 PM