# Creating a Command Reply
Use either the Post command reply or Post message action to respond to the user on Slack. You can configure Workbot to return data that was queried by the command or to respond to the user with a message confirming whether the command was successful or not. See the graphic below for an example use case.
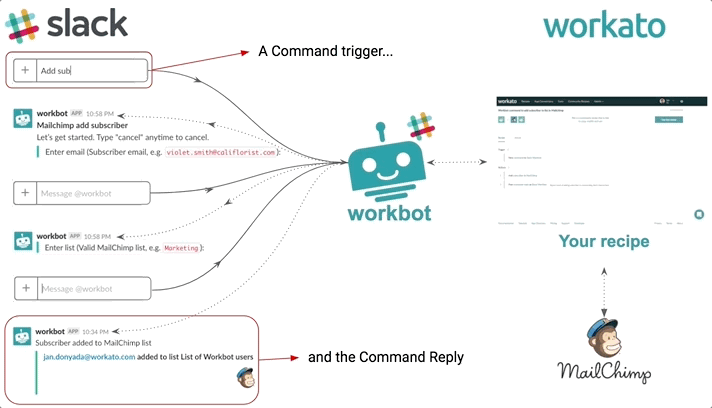 Example of a Command reply
This page guides you through the second part of building your first Workbot - create an issue in Github (opens new window). If you have not already done so, follow the steps in configure the New command trigger.
# Step two: Configure the Post command reply action
In the following steps, you configure the Post command reply action with datapills from the GitHub action output.
- Under the Github action, click to add a new action. Select Workbot for Slack > Post command reply.
- Select the connection that you have established.
- In the Message text field, enter the message that Workbot will use in its reply: Issue
Numbercreated
Use theNumberdatapill from the GitHub action output. - Expand the Message attachment options and configure these fields with the following text and datapills:
- Title: Name of issue
Title - Title link:
URL - Attachment text: Description
Body
AssigneeUsername - Attachment color: Select Good
This sets the vertical bar to the left of the message to green.
- Title: Name of issue
- Click Save.
This is how the Message attachment fields should look: 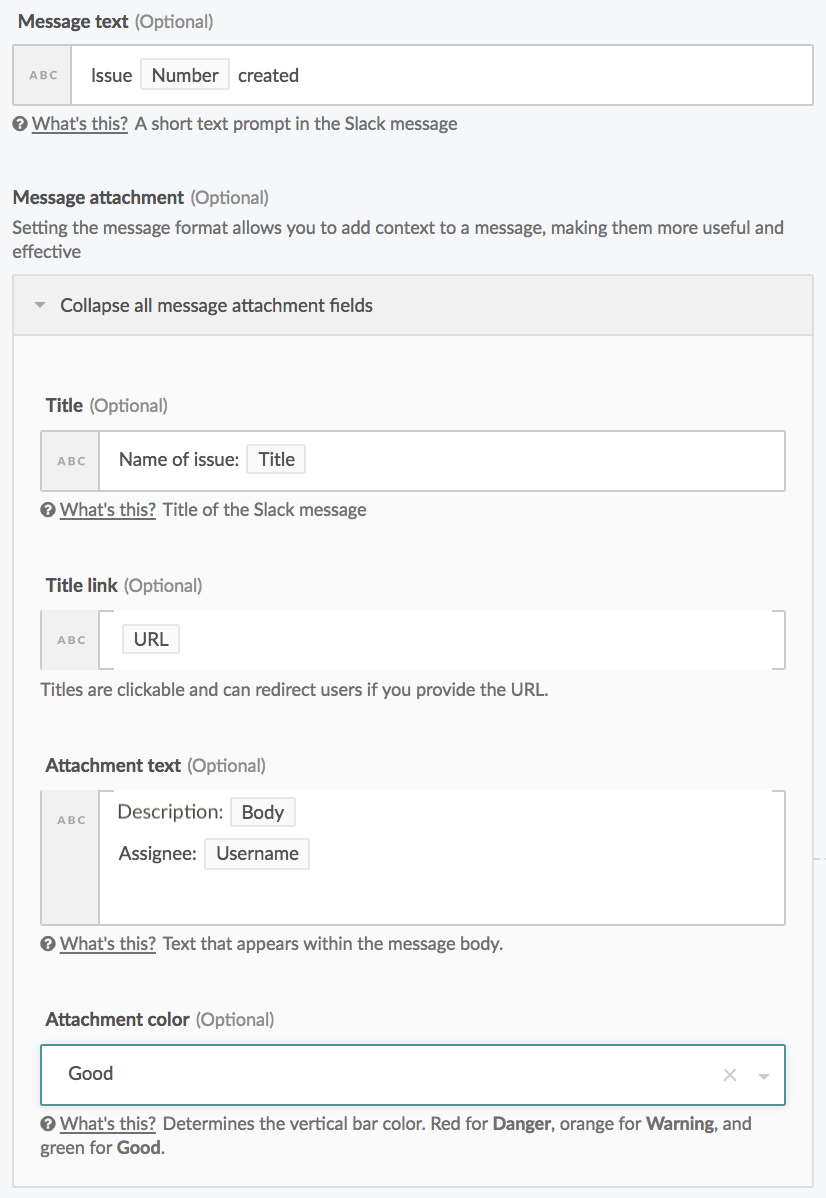
This is how the message will appear to users in Slack: 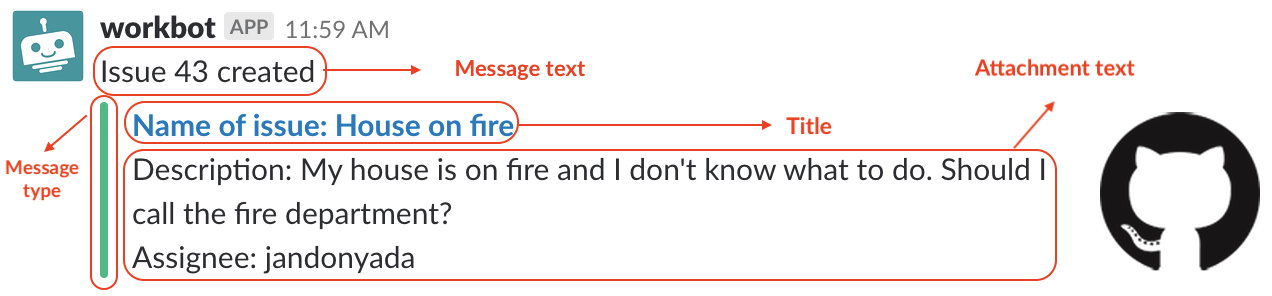
# Test the command
To test the command, start the recipe and open the Slack workspace in which Workbot is installed.
- In Slack, send a direct message to Workbot, and enter
github create issue.
Workbot responds withEnter issue:as demonstrated in the screenshot below: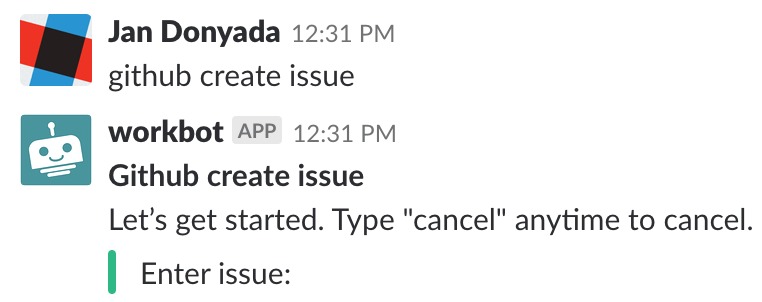
- Enter the issue title.
Workbot responds withEnter descriptionas demonstrated in the screenshot below: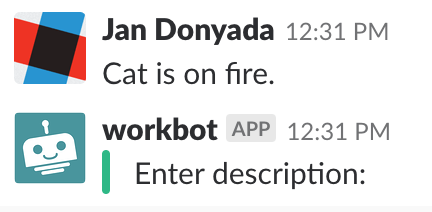
- Enter the description of the issue.
Workbot responds withEnter assignee:
- Enter your name.
Workbot takes the information you provided, creates a new issue in Github, and returns a confirmation message. See the screenshot below for an example confirmation message: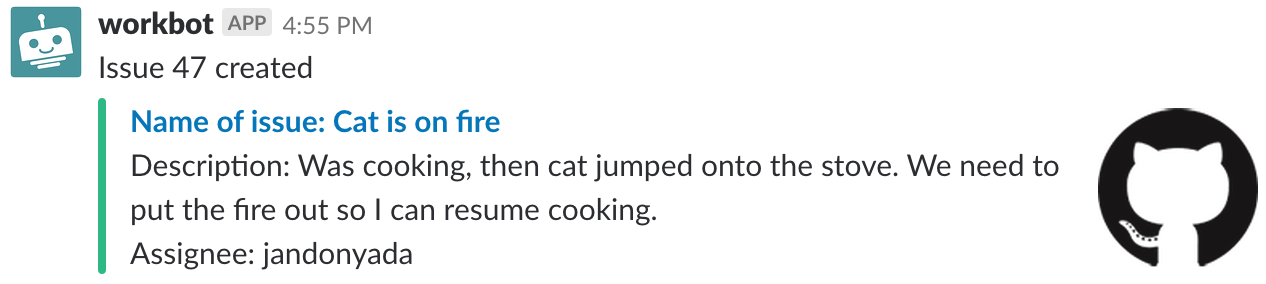
# Next
You can make the command reply more interactive by including attachment fields, images, buttons, and message menus. To learn more, see Designing the Workbot experience.
Explore other ways Workbot has automated tasks for our community of users in Community Recipes (opens new window).
Last updated: 5/6/2021, 5:47:26 PM