# Build your first Workbot
One of the most common ways to interact with Workbot is through the use of a command. When you enter a command into a Slack channel, such as Mailchimp add subscriber, Workbot triggers a recipe that performs a specific action in an app and returns data to the Slack channel. For example, it adds a subscriber to a list in Mailchimp and returns a confirmation message.
The recipe of a command is comprised of the New command trigger, actions to send or retrieve data from other apps, and the Post reply action.
This page and the subsequent page guide you through building a Workbot that creates a new issue in Github and posts a notification with the issue details in the Slack channel. A user triggers Workbot to run this recipe by sending the message Create a Github issue to Workbot.
This is the recipe you will build: Create an issue in Github (opens new window).
# Before you start
- If you have not already done so, set up Workbot before proceeding to the section below
- Set up a connection to GitHub
# Step 1: Configure the New command trigger
- Create a new recipe that is triggered from an app.
- Click to add the trigger. Select Workbot for Slack > New Command.
- Select the connection that you have established.
- Configure the following fields:
- App: Select
GitHub - Action: Select
Create - Action data: Select
Issue
- App: Select
In addition to configuring the trigger, the values that you provided in step 4 (GitHub Create Issue) make up the command for triggering this recipe. Since Workbot has built-in Natural Language Understanding (NLU) capabilities, Workbot is flexible with how you phrase the command. You can enter the values in the sequence that is most natural to you, such as create an issue in Github.
- Configure the command input fields. When Workbot runs, it will prompt the user for information necessary to run the recipe.
Click Add command input to create these three input fields:- Name:
Issue, Data type: String, Optional: No - Name:
Description, Data type: String, Optional: No - Name:
Assignee, Data type: String, Optional: No
- Name:
This is how your command should look: 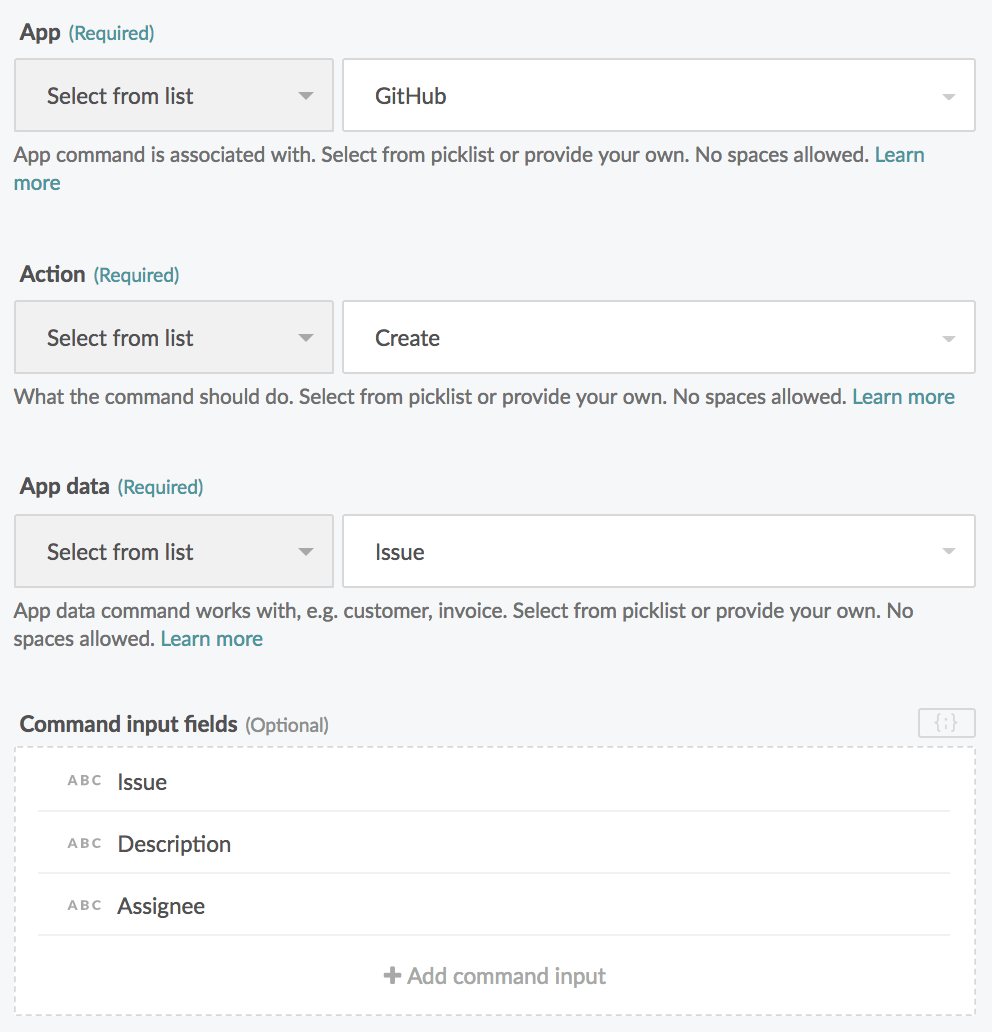
How the user will see it in Slack: 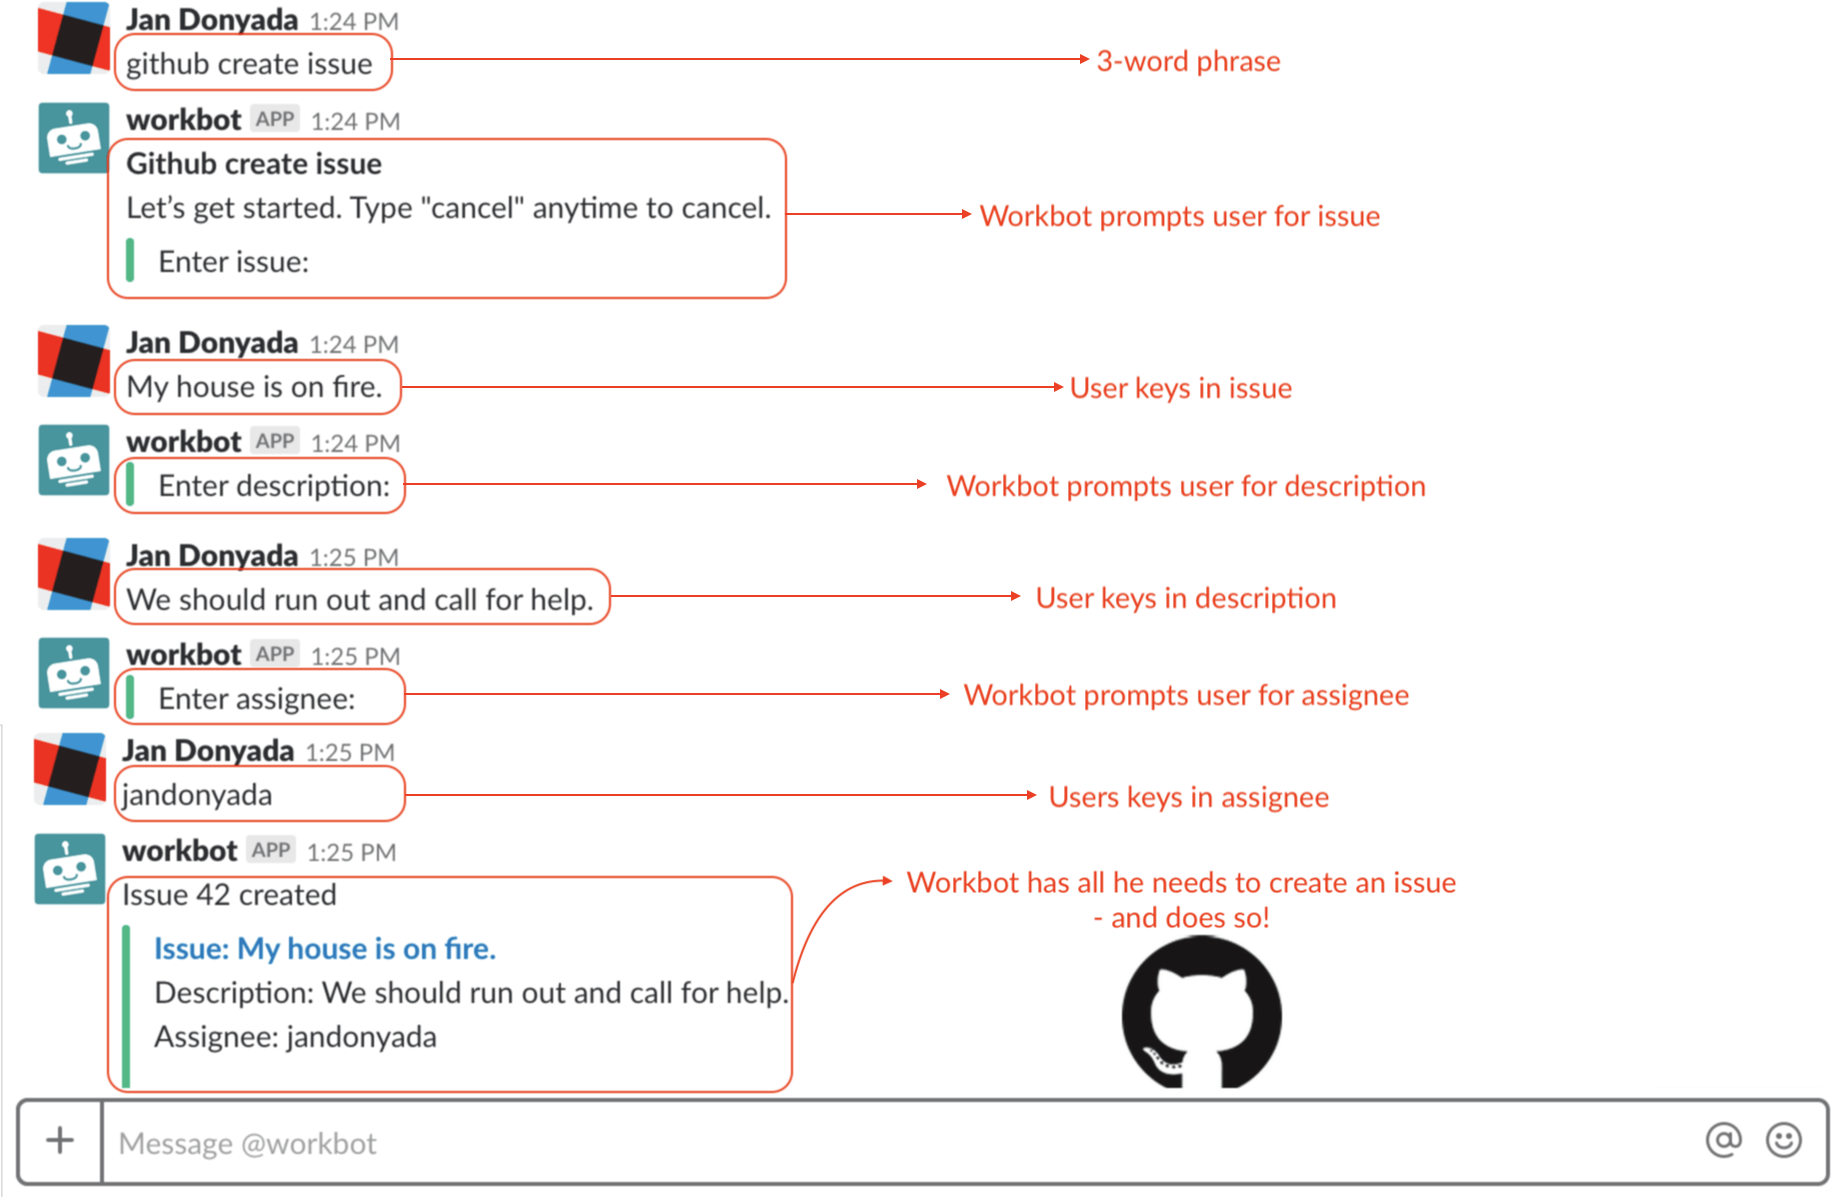
# Next
In order for Workbot to create the issue in Github, you must to configure a GitHub > Create issue action. Use the Step 1 output datapills Issue, Description, and Assignee in the Create issue action. Refer to the screenshot below.
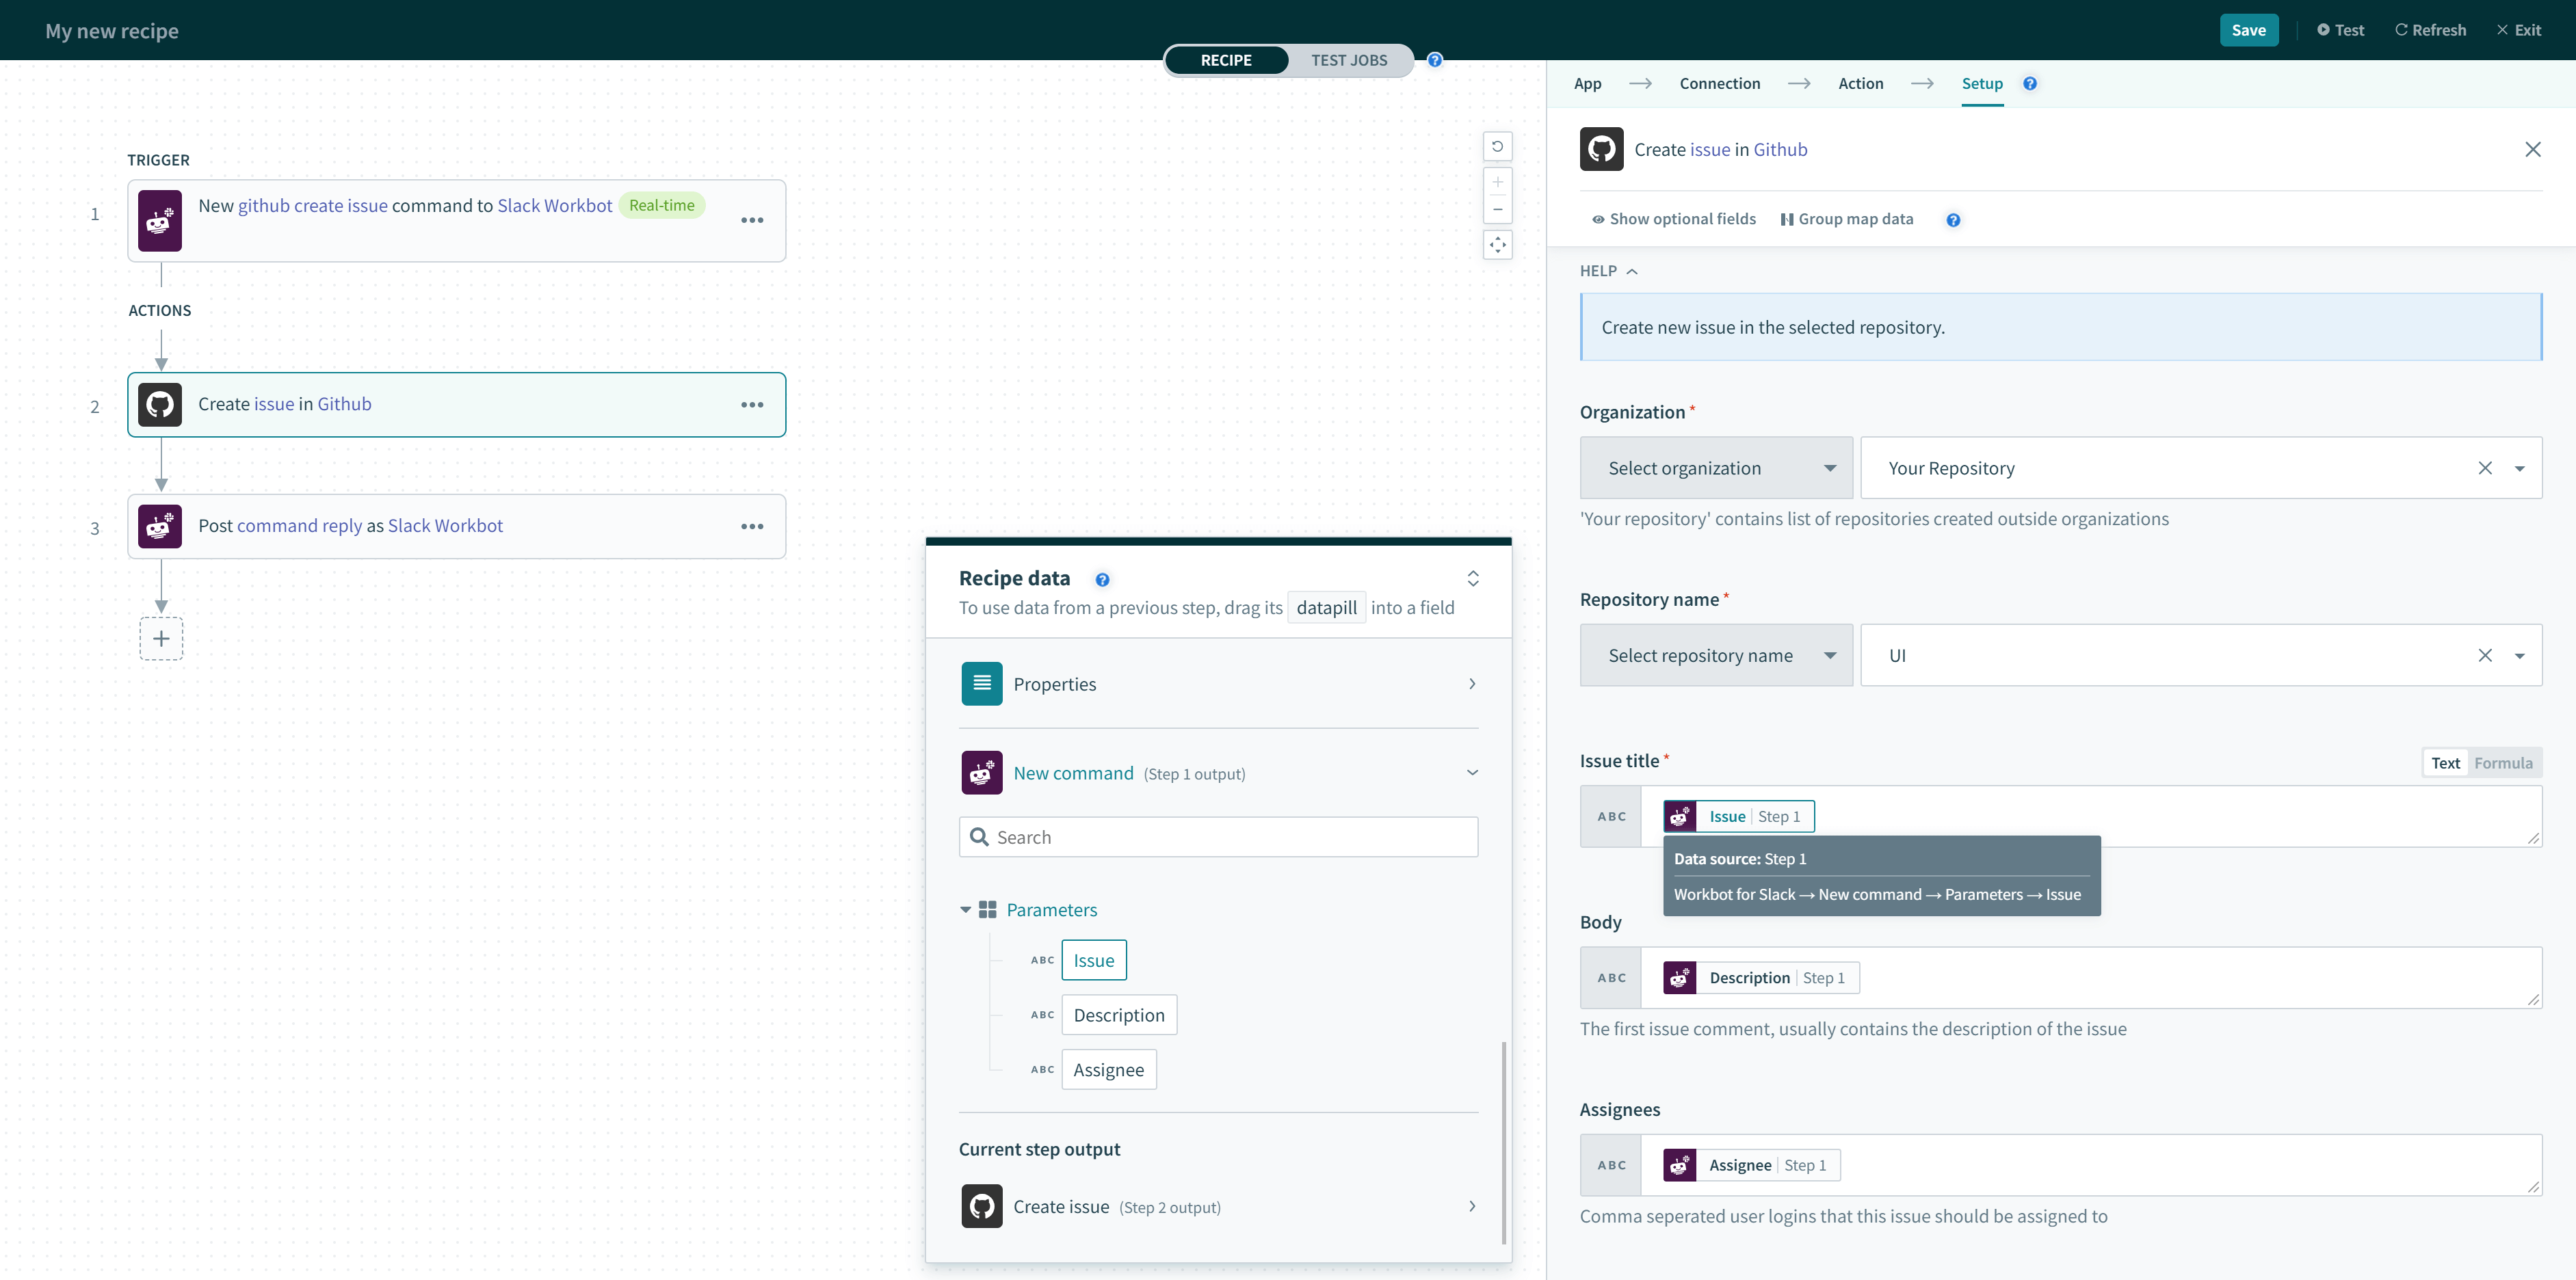
After you configure the GitHub action, proceed to create a command reply.
Last updated: 7/2/2021, 8:18:31 AM