Aconex
Aconex is a cloud-based project management and collaboration platform for construction and engineering industries. The Aconex connector helps you manage documents, workflows, and communications across project teams globally.
This connector has the following capabilities:
- Monitor and retrieve new updated documents in real-time
- Download document files from Aconex projects
- Track document modifications with timestamps
- Integrate Aconex documents with other business systems
This connector supports the following objects:
- Documents
- Document files
Install Aconex from the community library
Complete the following steps to install the Aconex connector from the community library:
Complete the following steps to install the Aconex connector from the community library:
Open the recipe editor and search for a connector. Alternatively, you can search for a connector in the community library.
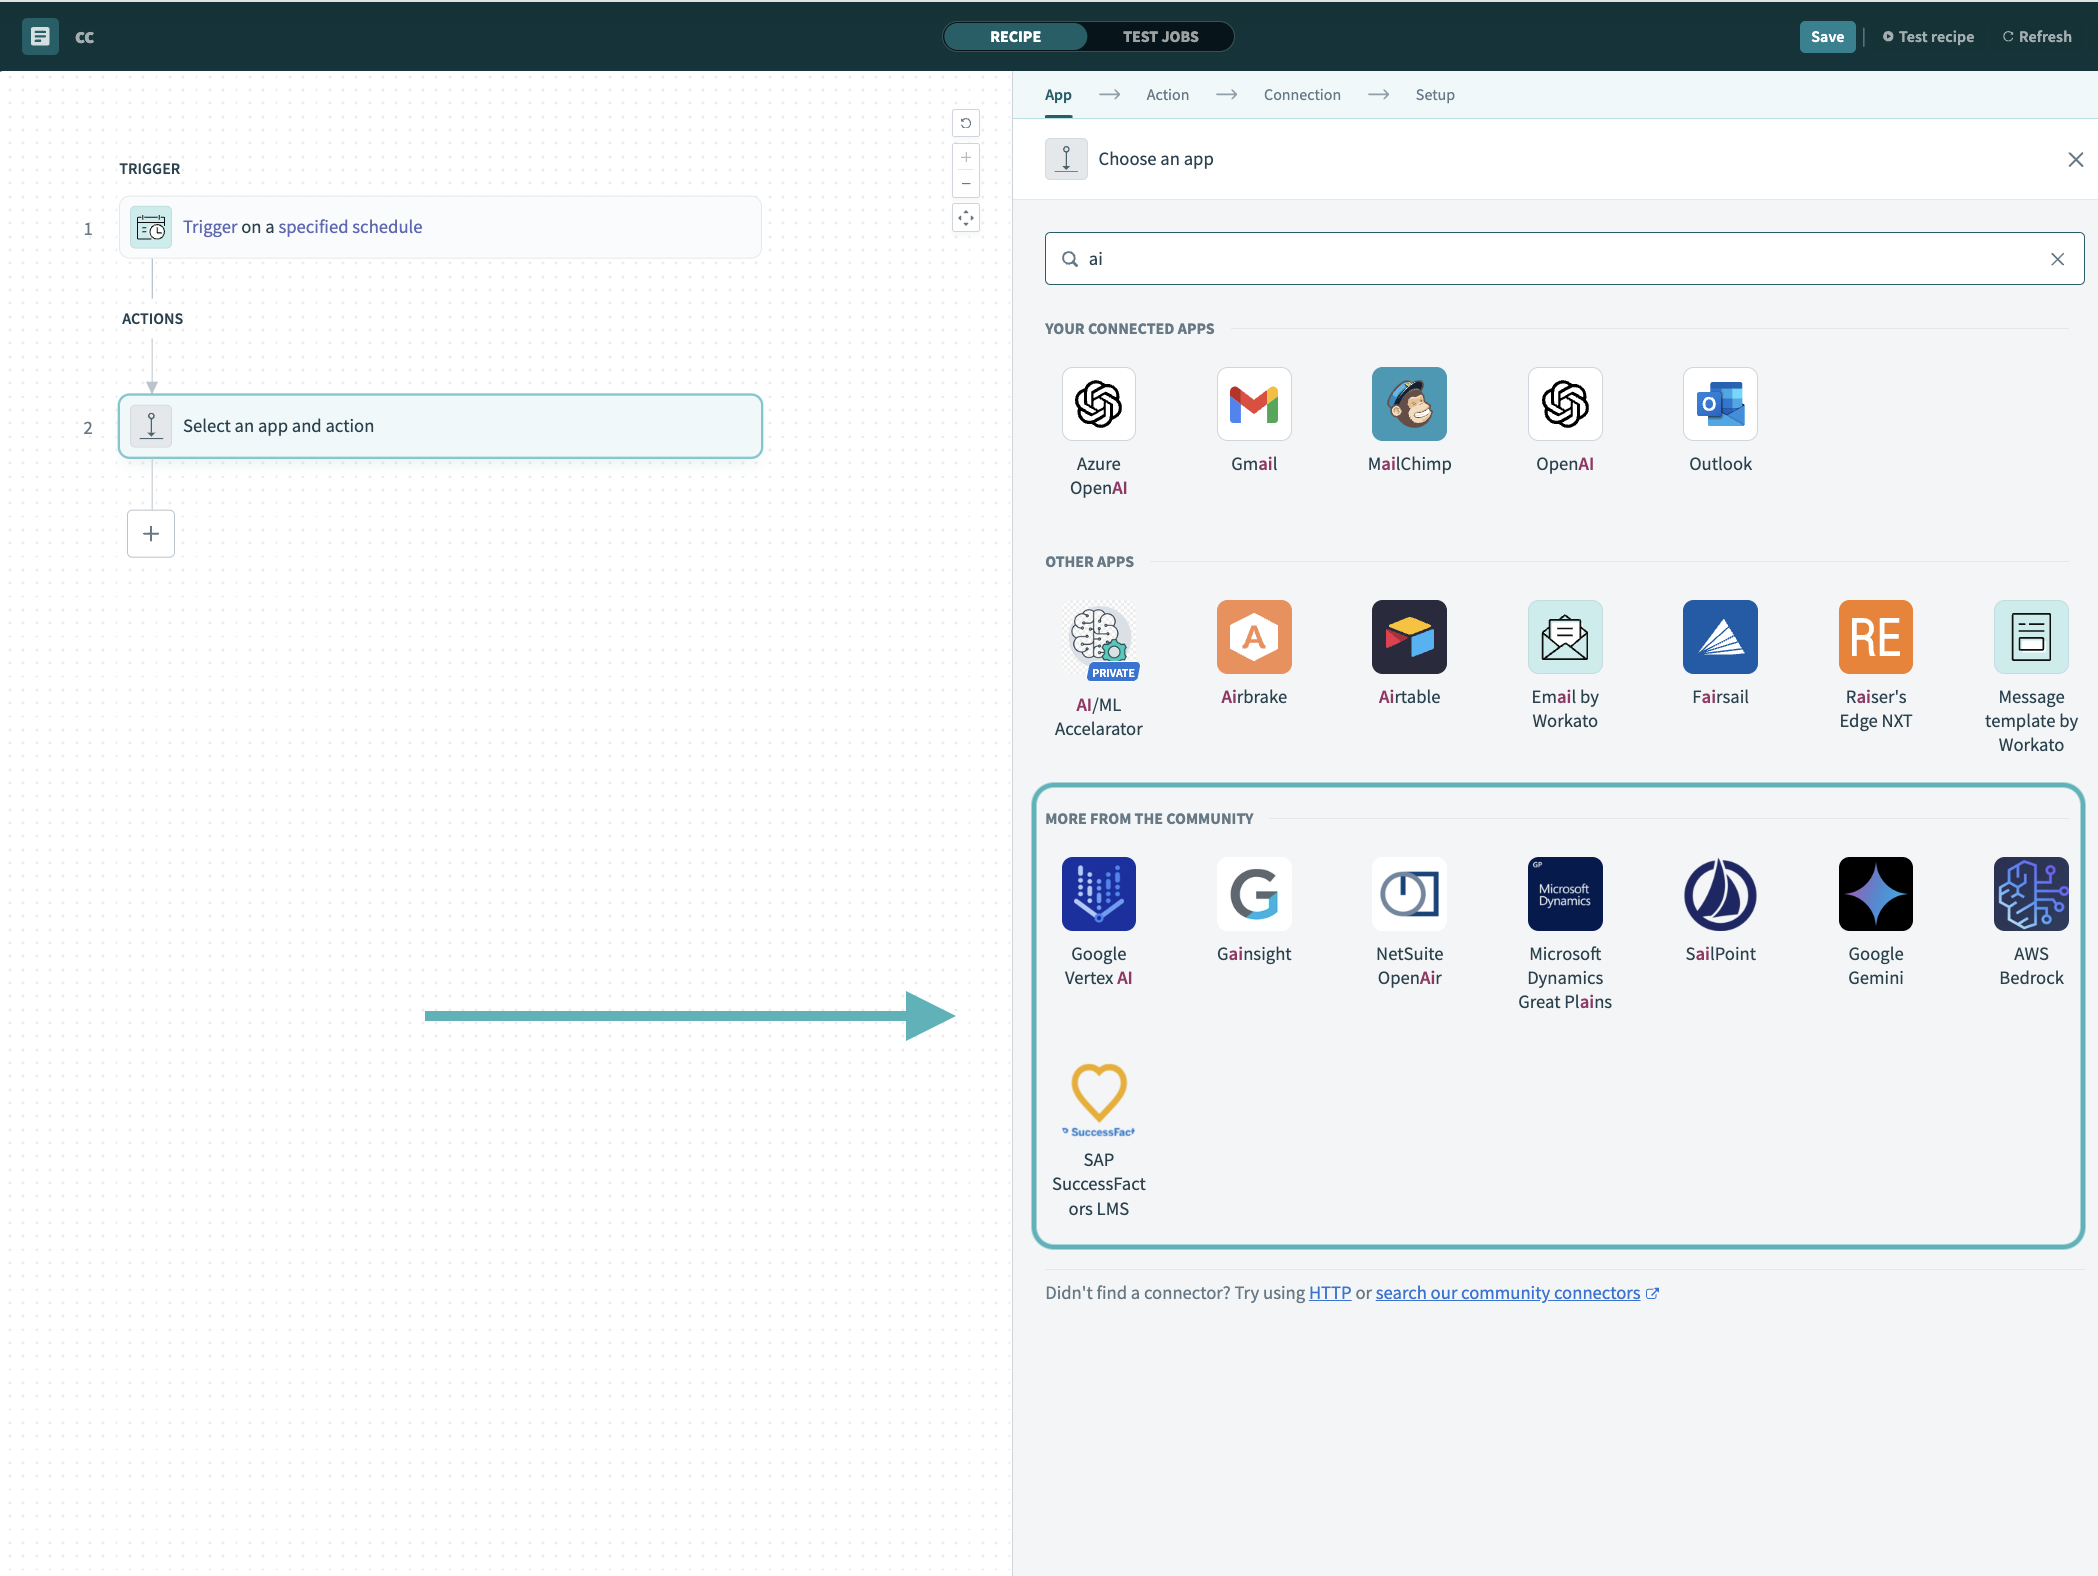 Search for community connectors in the recipe editor
Select the community connector you plan to install.
Click Install to install the connector from the community library.
 Click Install
Select Release connector. Alternatively, select Review code to review and modify the connector code before releasing it to the workspace.
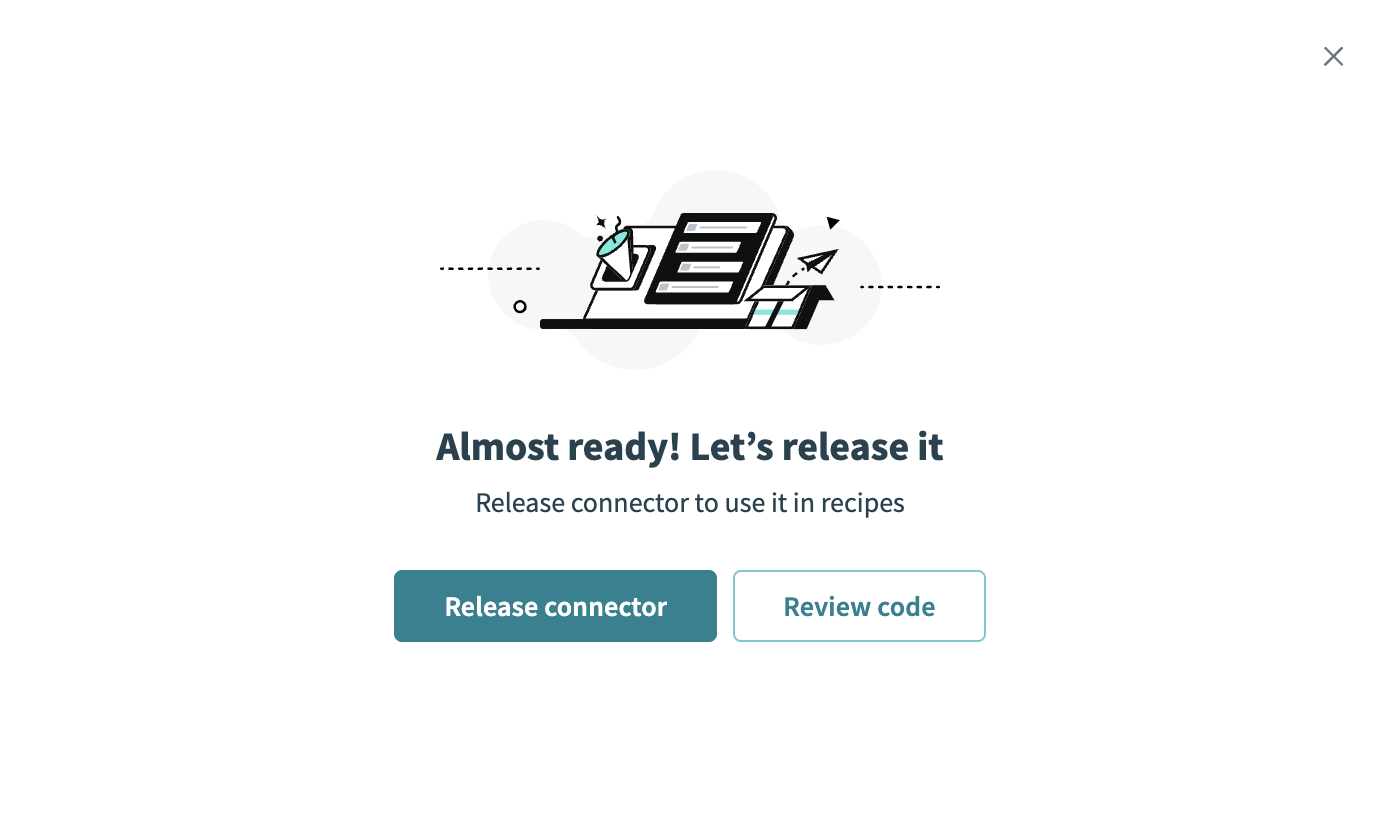 Release the connector
Summarize any changes you made to the connector, then click Release to allow workspace collaborators to use the connector in recipes.
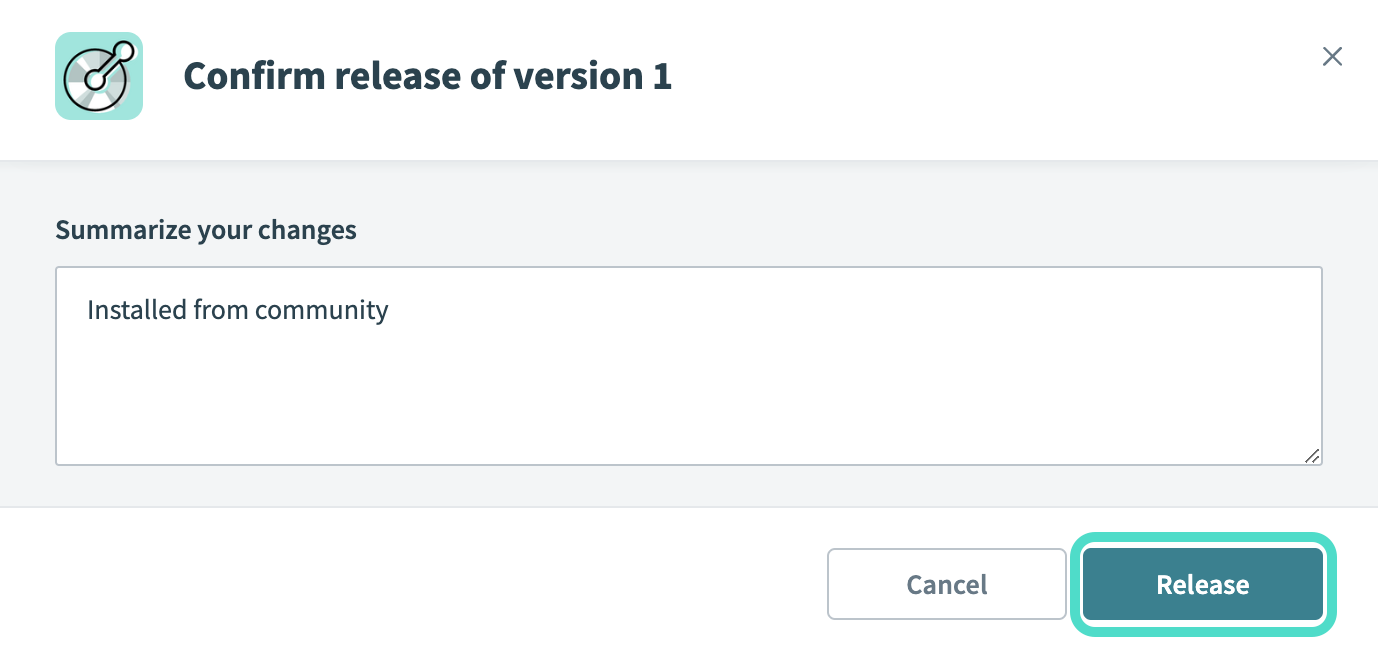 The Confirm release dialog
Connection setup
The Aconex connector supports the following authentication types:
OAuth 2.0 authentication
Workato recommends using OAuth 2.0 authentication. OAuth 2.0 authentication provides security by using an access token to identify the authenticated user.
Set up OAuth 2.0 authentication
Complete the following steps to set up a connection using OAuth 2.0 authentication:
Sign into your Aconex account.
Create a new OAuth client.
Select OAuth Clients from the main menu.
Click Add to create a new OAuth client or select an existing OAuth client.
Enter a Name for your OAuth client.
Enter a Description for your OAuth client.
Select the Resource application to connect to.
Select the integration Type to register.
Click the eye icon on the newly created OAuth client to view the client secret.
Identify your Lobby URL. Your lobby URL varies based on the type of Aconex instance you are using. The lobby URL for all commercial instances is https://constructionandengineering.oraclecloud.com. The lobby URL for Aconex Early Access instances is https://constructionandengineering-ea.oraclecloud.com.
Identify your Aconex instance hostname. Your hostname is found in you Aconex login URL. For example, if the login link is eu1.aconex.com, the instance hostname is eu1.
Connect to Aconex using OAuth 2.0
Complete the following steps to set up an OAuth 2.0 connection to Aconex in Workato:
Click Create > Connection or press C twice.
Search for Aconex and select it as your app on the New Connection page.
Enter a name for your connection in the Connection name field.
 Connect to Aconex
Use the Location drop-down menu to select the project where you plan to store the connection.
Use the Authentication type drop-down menu to select OAuth 2.0.
Use the Lobby URL drop-down menu to select the Oracle construction and engineering lobby URL.
Enter the Aconex instance hostname, such as us1.aconex.com, in the Instance Hostname field.
Enter the OAuth 2.0 client ID from your registered web server app in the Client ID field.
Enter the client secret from your registered web server app in the Client secret field.
Click Connect.
Basic authentication
Use basic authentication when you are setting up non-interactive integrations, with no user interface, in Aconex. Workato doesn't recommend using basic authentication with applications where users enter Aconex user account credentials.
Set up basic authentication
Complete the following steps to set up basic authentication in Aconex:
Identify your Aconex instance hostname. Your hostname is found in you Aconex login URL. For example, if the login link is eu1.aconex.com, the instance hostname is eu1.
Identify your Aconex username. This is the name you use to sign in to your Aconex account. Save this username to use when creating a connection in Workato.
Identify your Aconex password. This is the password you use to sign in to your Aconex account. Save this password to use when creating a connection in Workato.
Create an integration ID.
Sign in to your Aconex account.
Click Setup >Integration IDs.
Click Create Integration ID.
Enter a Name for your integration ID.
Enter a Description for your Integration ID.
Click to accept the Aconex terms of use. Refer to the Aconex documentation for more information about Integration IDs.
Connect to Aconex using basic authentication
Complete the following steps to set up a basic authentication connection to Aconex in Workato:
Click Create > Connection or press C twice.
Search for Aconex and select it as your app on the New Connection page.
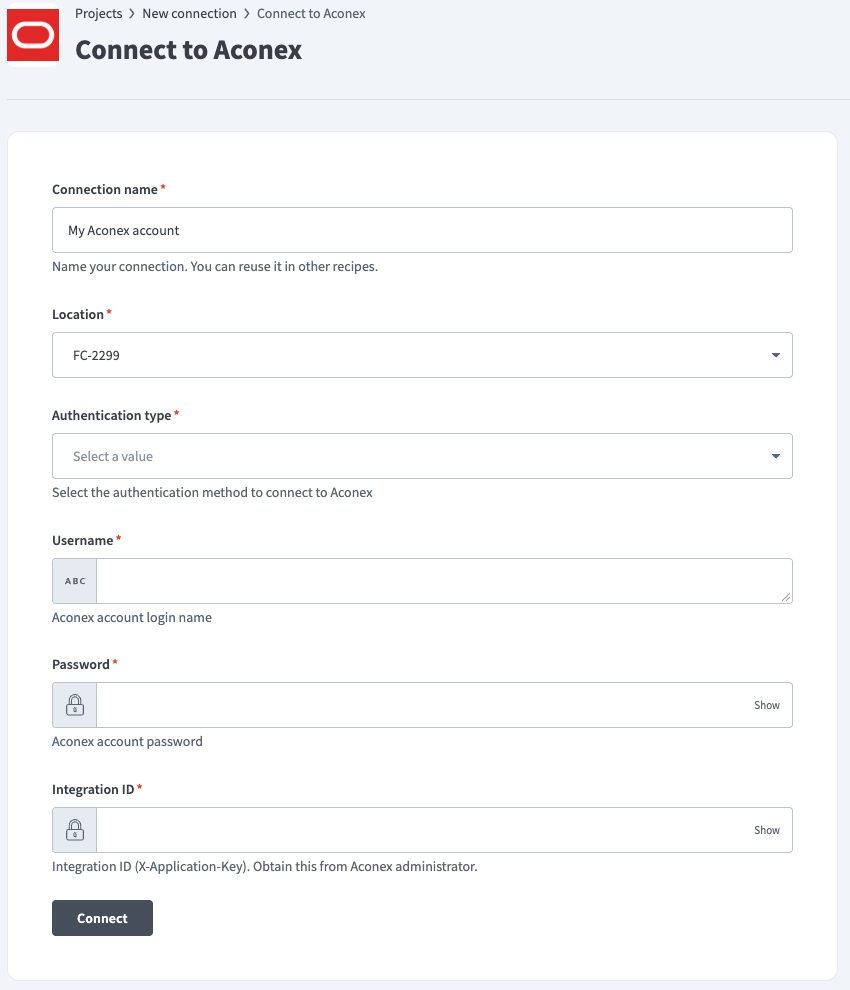
Provide a unique name for the connection in the Connection name field.
Connect to Aconex
Use the Location drop-down menu to select the project where you plan to store the connection.
Use the Authentication type drop-down menu to select Basic authentication.
Enter the Instance hostname for your Aconex instance.
Enter your Username for your Aconex account.
Enter the Password for your Aconex account.
Enter the Integration ID for your Aconex instance.
Click Connect.
Last updated: