Configure OneDrive as your data pipeline source
Set up OneDrive as a data pipeline source to extract and sync records into your destination.
Use this guide to review connection setup, pipeline configuration, and key behavior for working with .csv and .parquet files stored in OneDrive folders.
Features supported
The following features are supported when you use OneDrive as a data pipeline source:
- File format support: Extract and sync data from
.csvand.parquetfiles in OneDrive folders. - Full and incremental sync: Runs a full sync when the pipeline starts, then incremental syncs on every later run to pick up files created or modified since the last run.
- Drive selection: Select a specific OneDrive drive to sync from, including a shared drive or a SharePoint site document library.
- Field-level selection: Choose which fields to extract and replicate to your destination.
- Field-level data protection: Hash sensitive fields before they sync to your destination.
Prerequisites
Connecting OneDrive as a data pipeline source requires:
- A Microsoft OneDrive account: personal, business, or tied to a specific tenant
- Credentials for your chosen authentication method:
- Authorization code grant: Register an app in the Azure portal and assign it the required permissions. Refer to Connect to OneDrive for setup steps.
- Client credentials grant: Register a tenant-specific app in the Azure portal, generate a client secret, and obtain the tenant, client, and user IDs. This method is only available for tenant-specific accounts. Refer to Connect to OneDrive for setup steps.
REQUIRED PERMISSIONS
OneDrive data pipelines are read-only. They extract and sync file contents but don't create, update, move, or delete files in OneDrive. Grant only the scopes needed for your chosen authentication method.
Supported connection types
OneDrive data pipelines support the following authentication methods:
- Authorization code grant (OAuth 2.0): Sign in with a Microsoft personal, business, or tenant-specific account. Refer to Connect to OneDrive for setup steps.
- Client credentials grant (OAuth 2.0): Authenticate using a tenant-specific app's client ID and client secret, without an interactive user sign-in. This method is only supported for tenant-specific accounts.
Connect to OneDrive
The OneDrive connector supports the following authentication types:
- Authorization code grant authentication (OAuth 2.0)
- Client credentials-based authentication (OAuth 2.0)
MICROSOFT MFA ENFORCEMENT
Microsoft is rolling out mandatory multifactor authentication (MFA) gradually to different applications and accounts in phases. This enforcement continues throughout 2025 and beyond. Refer to the Microsoft Mandatory multifactor authentication for Azure and admin portals documentation for more information.
We strongly recommend enabling MFA now for all Microsoft accounts used with Workato to avoid service disruptions from short-notice enforcement changes.
Complete the following steps to maintain uninterrupted service:
Enable MFA for your Microsoft organization following the Microsoft MFA setup guide. Refer to Set up multifactor authentication for Microsoft 365 for more information.
Reconnect your Microsoft connection in Workato.
Complete the OAuth flow with MFA when prompted.
Test your recipes to ensure they work with the updated connection.
Authorization code grant authentication (OAuth 2.0)
Use the Tenant ID/Domain value with tenant-specific account types.
Minimum and default scopes
The OneDrive connector requests the following scopes by default. These scopes support all triggers and actions. You must assign these as Delegated permissions in the Azure portal:
Files.ReadWriteGroup.Read.AllFiles.Readoffline_access
You must add the following minimum scopes to establish a connection to OneDrive with authorization code grant authentication:
Files.Readoffline_access
OneDrive setup for authorization code grant authentication
Complete the following steps to set up OneDrive for authorization code grant authentication:
- Register the Workato app in Azure portal
- Assign permissions to your app
- Obtain the Directory (tenant) ID from the Azure portal
Register the Workato App in Azure portal
View register the Workato app in the Azure portal steps
Complete the following steps to register the Workato app in the Azure portal:
Sign in to the Azure portal.
Select App registrations > + New registration.
Enter a unique name for the application.
Use the Supported account types drop-down menu to select an account type.
Select Web from the Select a platform drop-down menu.
Use the following URI for the Redirect URI:
https://www.workato.com/oauth/callbackSelect Register.
Assign permissions to your app
View assign permissions to your app steps
Complete the following steps to assign permissions to your app:
Go to your newly registered app and select Manage > API permissions in the navigation sidebar.
Click + Add a permission and select Microsoft Graph APIs.
Add the required permissions. Depending on your connection type, you must assign Application or Delegated permissions.
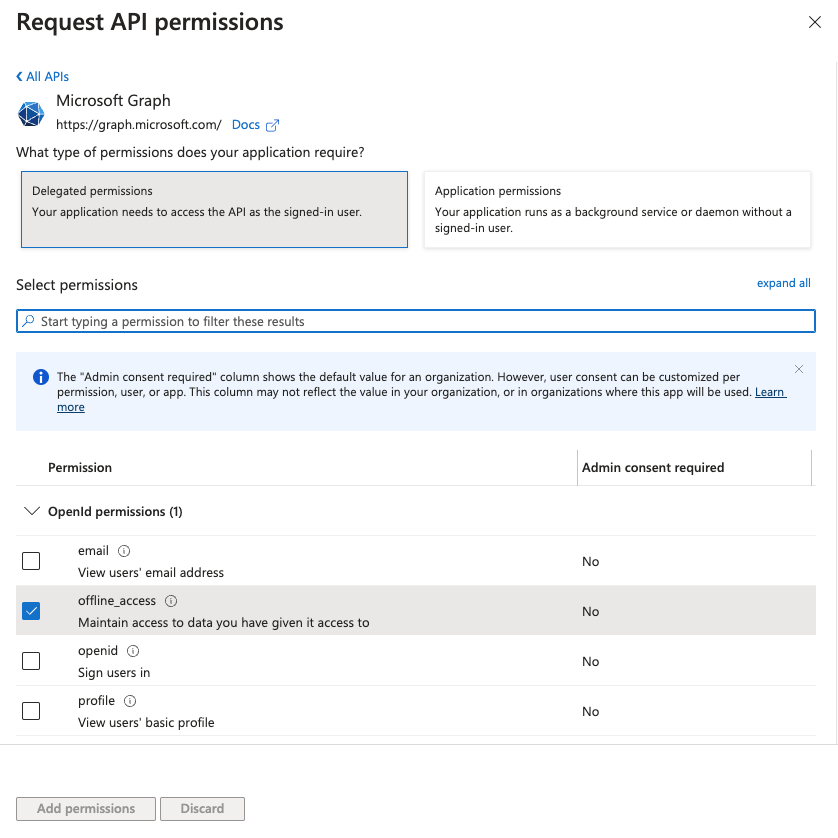 Add permissions
Click Add permissions. If specific permissions require admin consent, refer to Connect Microsoft Entra ID to the Outlook connector to learn more.
Obtain the Directory (tenant) ID from the Azure portal
View obtain the Directory (tenant) ID from the Azure portal steps
Complete the following steps to obtain the Directory (tenant) ID from the Azure portal:
Go to the Overview > Essentials section.
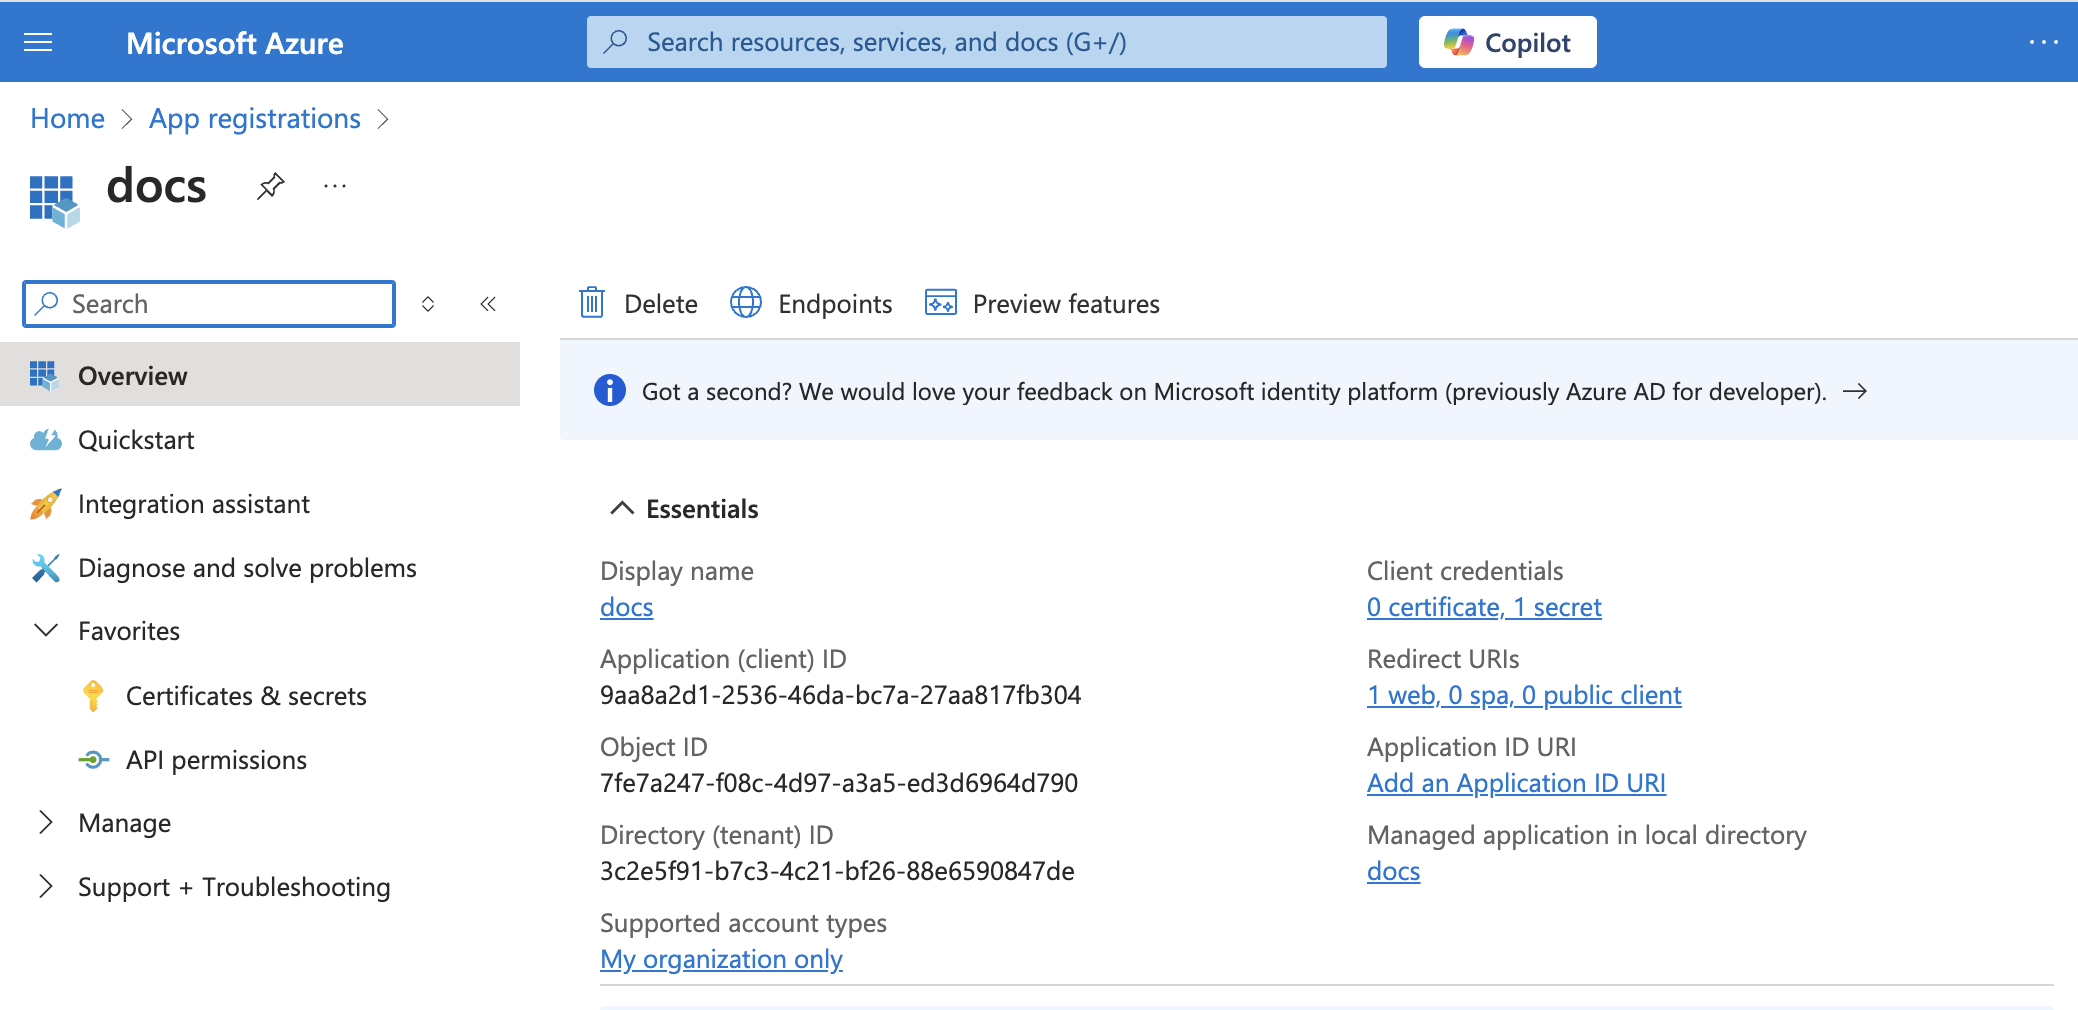 App details
Copy and save the Directory (tenant) ID for use in Workato.
Connect to OneDrive with authorization code grant authentication
View connect to OneDrive with authorization code grant authentication steps
Complete the following steps to set up a authorization code grant connection to OneDrive in Workato:
Click Create > Connection.
Search for OneDrive and select it as your app.
Enter a name for your connection in the Connection name field.
Use the Location drop-down menu to select the project where you plan to store the connection.
Use the Connection account type drop-down menu to select the type of account you plan to use. The available choices are Personal, Business, and Tenant-specific.
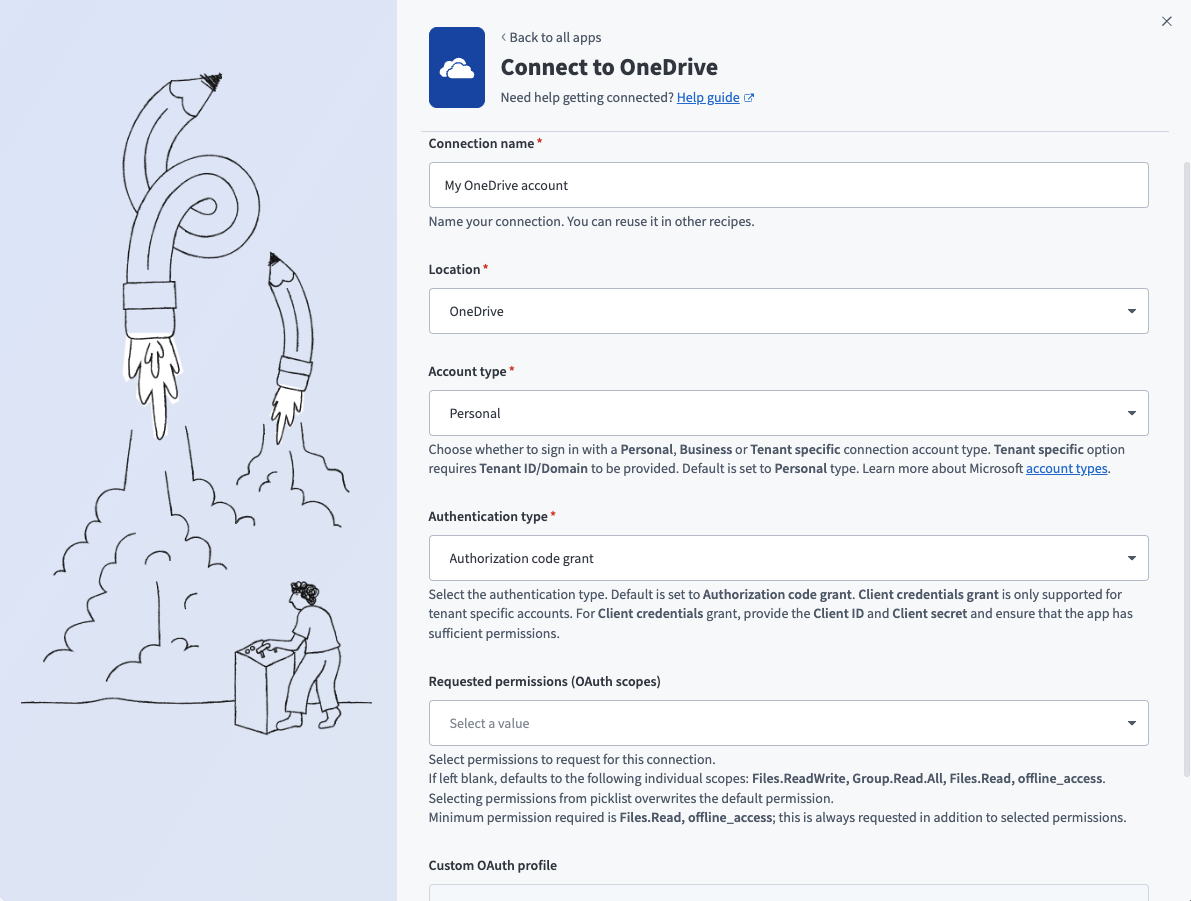 Personal connections
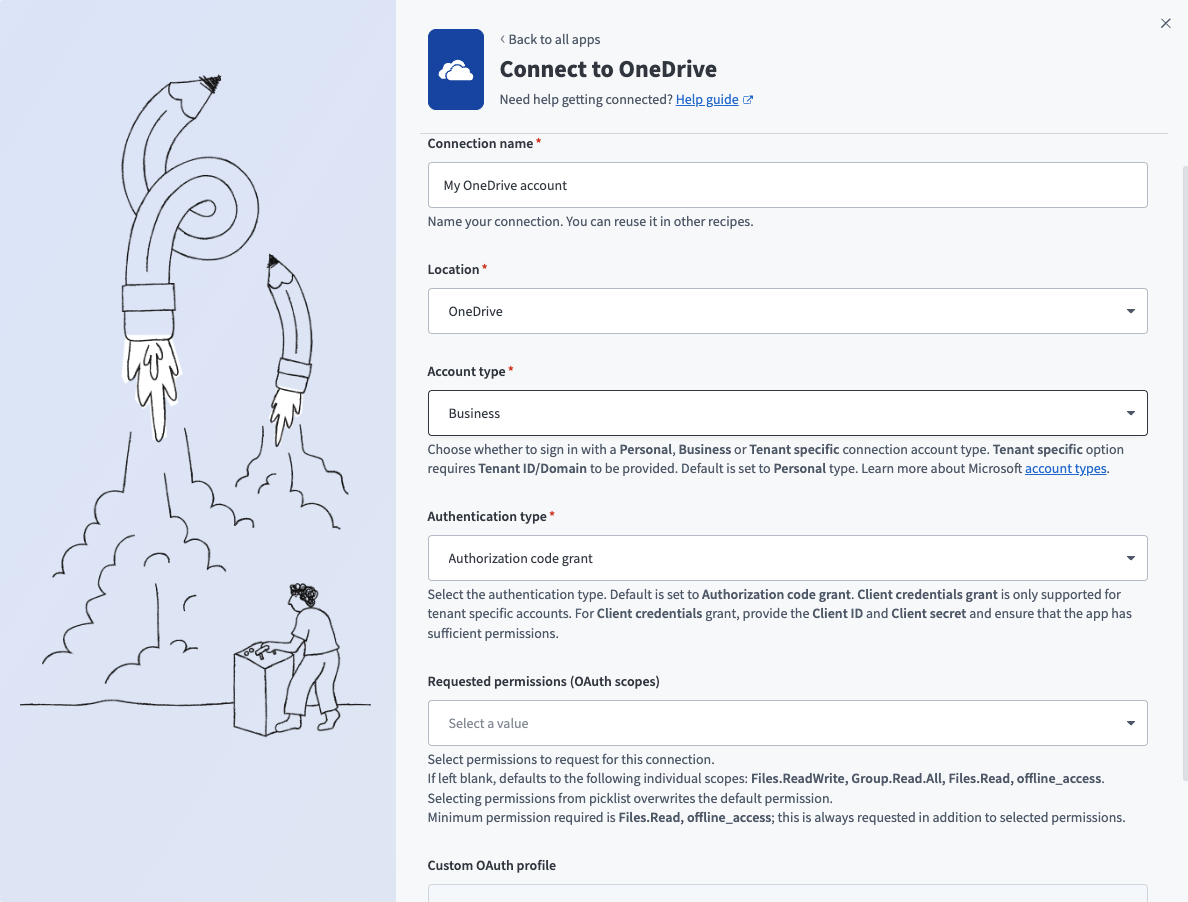 Business connections
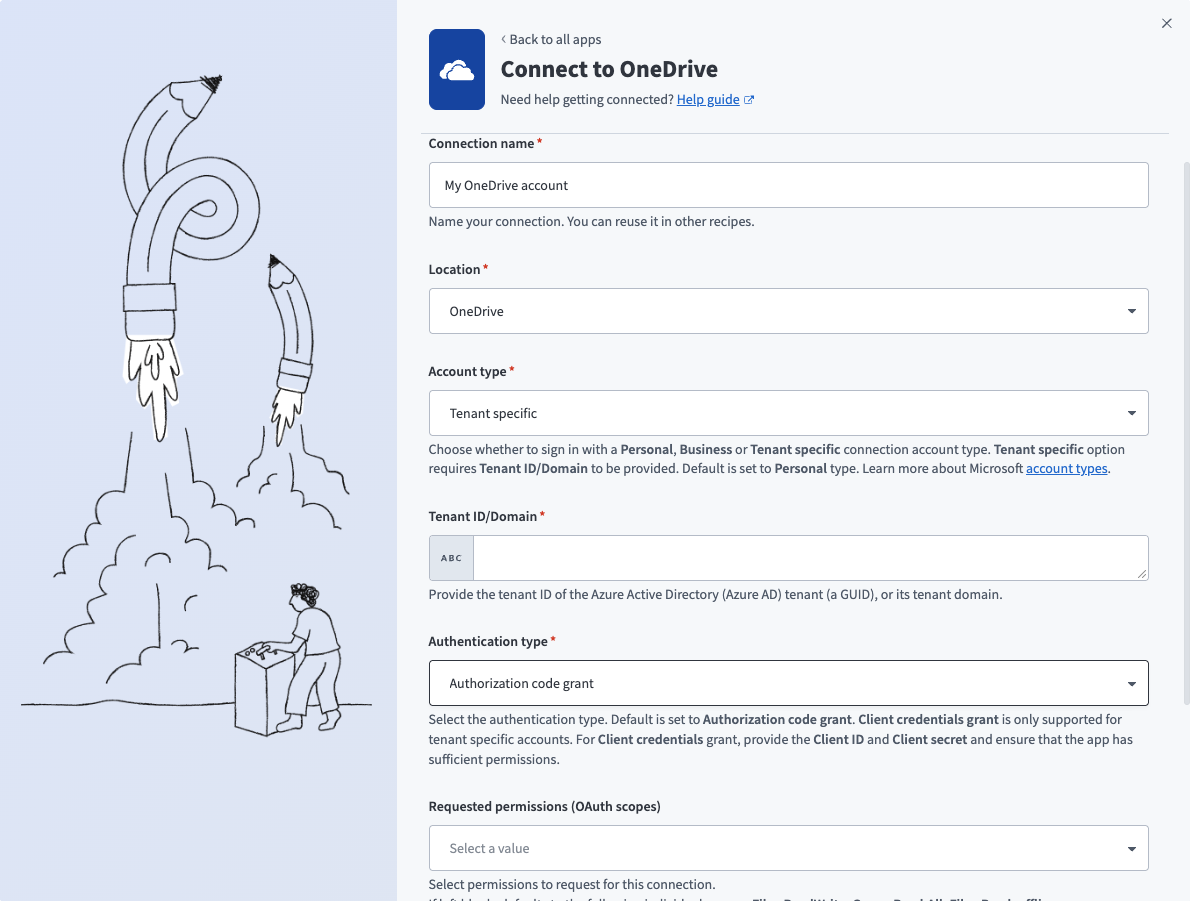 Tenant specific connections
Use the Authentication type drop-down menu to select Authorization code grant.
Optional. Use the Requested permissions (OAuth scopes) field to select specific permissions. The minimum permissions required to establish a connection are Files.Read and offline_access. Workato always requests these permissions regardless of the permissions you select. Refer to Minimum and default scopes for more information.
Optional. Use the Custom OAuth profile drop-down menu to select a custom OAuth profile for your connection.
Click Sign in with Microsoft.
Client credentials-based authentication (OAuth 2.0)
This authentication type requires the following values:
- Tenant ID/Domain
- User ID
- Client ID
- Client secret
Minimum and default scopes
We recommend the following scopes for client credentials-based connections. These scopes support all triggers and actions. You must assign these as Application permissions in the Azure portal:
Files.Read.AllFiles.ReadWrite.AllGroup.Read.AllSites.ReadWrite.All
You must add the following minimum scopes to establish a connection to OneDrive with client credentials-based authentication:
Files.Read.All
OneDrive setup for client credentials-based authentication
Complete the following steps to set up OneDrive for client credentials-based authentication:
- Register the Workato app in the Azure portal
- Assign permissions to your app
- Generate a client secret
- Obtain the Application (client) ID, Object ID, and Directory (tenant) ID from the Azure portal
- Obtain the User ID from the Azure portal
COMPATIBLE AUTHENTICATION
Client credentials-based authentication is only compatible with tenant-specific connections.
Register the Workato App in the Azure portal
View register the Workato app in the Azure portal steps
Complete the following steps to register the Workato app in the Azure portal:
Sign in to the Azure portal.
Select App registrations > + New registration.
Enter a unique name for the application.
Use the Supported account types drop-down menu to select an account type.
Select Web from the Select a platform drop-down menu.
Use the following URI for the Redirect URI:
https://www.workato.com/oauth/callbackSelect Register.
Assign permissions to your app
View assign permissions to your app steps
Complete the following steps to assign permissions to your app:
Go to your newly registered app and select Manage > API permissions in the navigation sidebar.
Click + Add a permission and select Microsoft Graph APIs.
Add the required permissions. Depending on your connection type, you must assign Application or Delegated permissions.
Add permissions
Click Add permissions. If specific permissions require admin consent, refer to Connect Microsoft Entra ID to the Outlook connector to learn more.
Generate a client secret
View generate a client secret steps
Complete the following steps to generate a client secret:
Go to Manage > Certificates & Secrets > Client secrets.
Click + New client secret.
Provide a Description for the client secret and specify an Expires date.
Click Add.
Copy and save the client secret Value—not the Secret ID—for use in Workato.
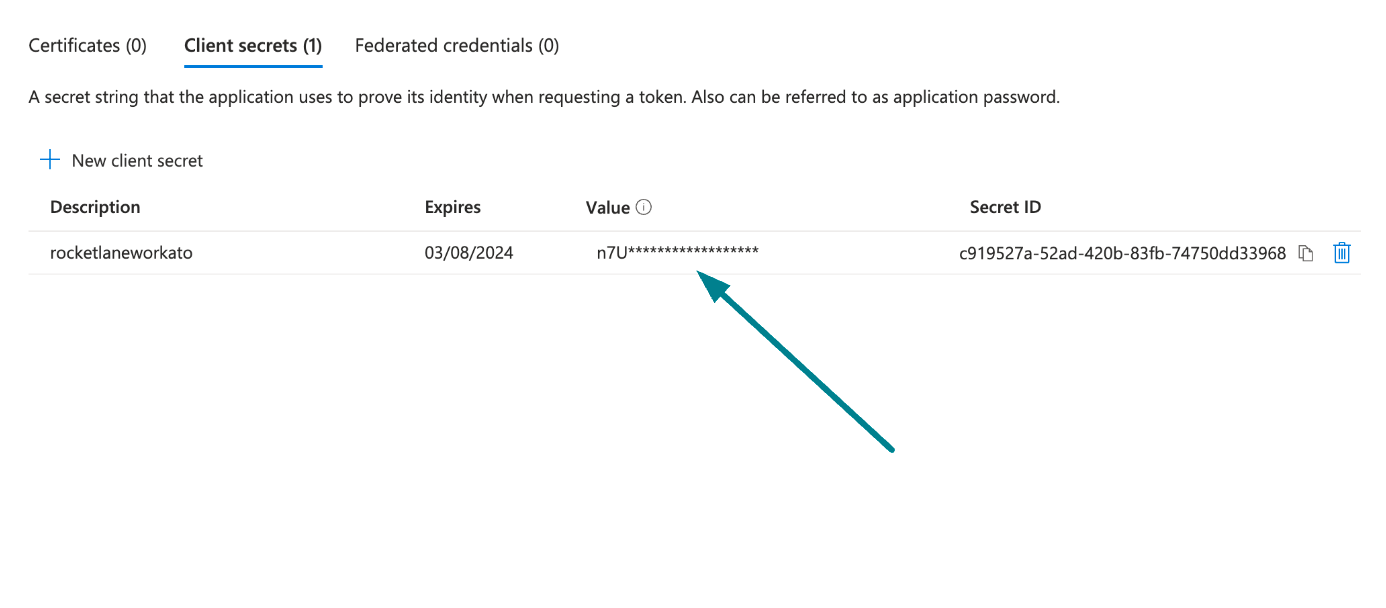 Copy and save the client secret value
Obtain the Application (client) ID, Object ID, and Directory (tenant) ID from the Azure portal
View obtain the Application (client) ID, Object ID, and Directory (tenant) ID from the Azure portal steps
Complete the following steps to obtain the Application ID, Object ID, and Directory (tenant) ID from the Azure portal:
Go to the Overview > Essentials section.
App details
Copy and save the Application (client) ID, Object ID, and Directory (tenant) ID for use in Workato.
Obtain the User ID from the Azure portal
View obtain the User ID from the Azure portal steps
Complete the following steps to obtain the User ID from the Azure portal:
Go to Home > Users to obtain the User ID.
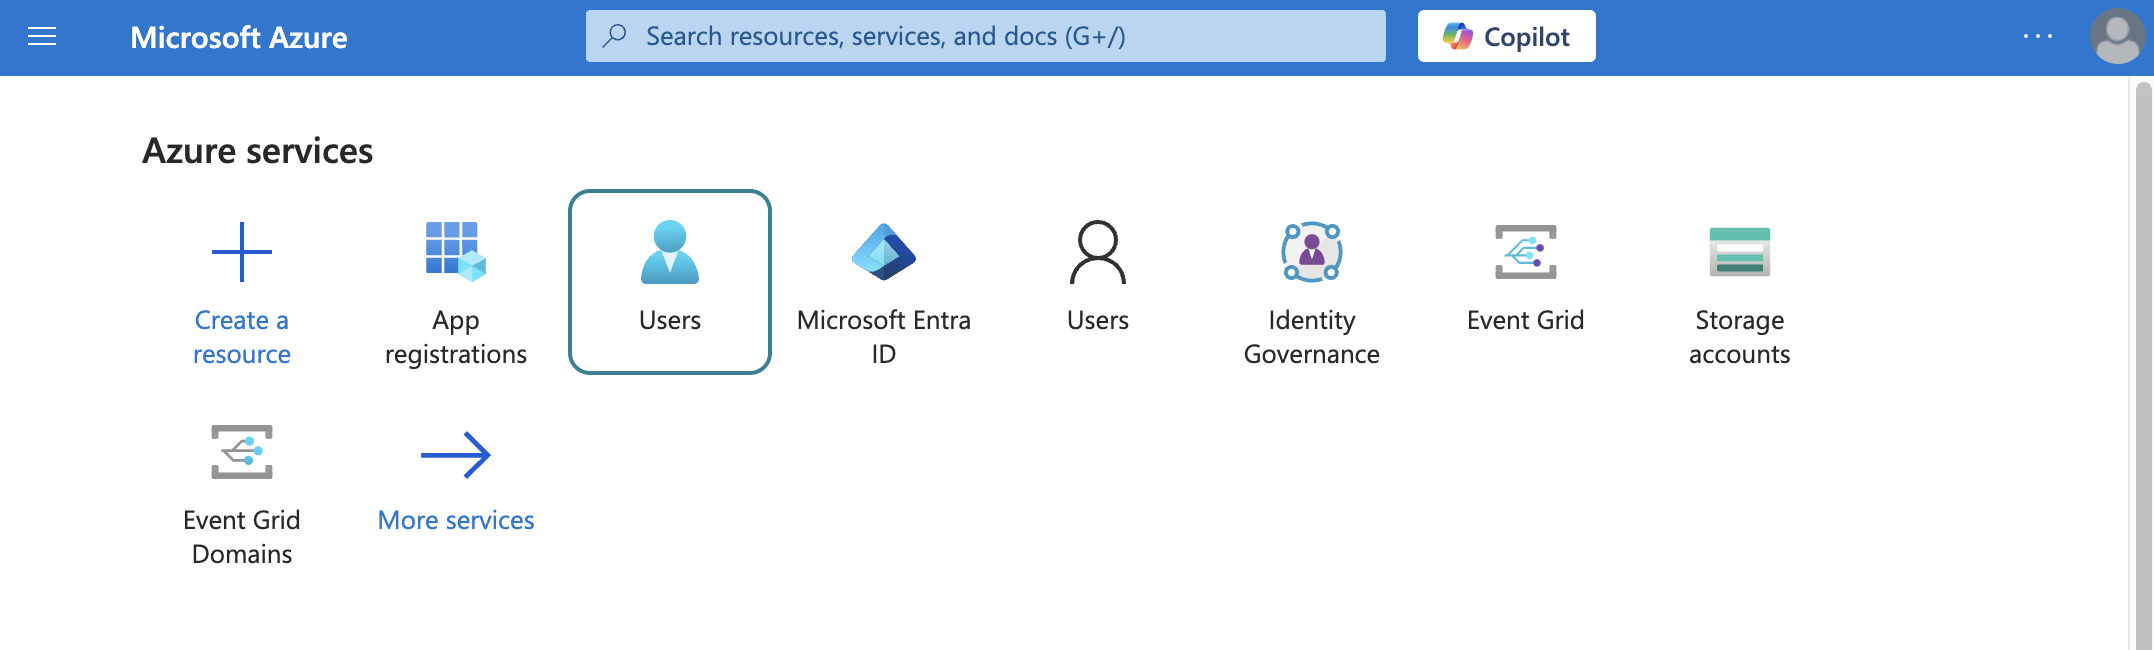 Select users
Search for and select the default user you plan to use to perform operations. This user doesn't establish the connection but is required for performing certain operations that an app can't perform. It's also required in picklists to pull user data. For example, the folder picklist populates folders belonging to the default user.
Copy and save the User principal name. Use this value as the User ID in Workato.
Connect to OneDrive with client credentials-based authentication
View connect to OneDrive with client credentials-based authentication steps
Complete the following steps to set up a client credentials-based connection to OneDrive in Workato:
Click Create > Connection.
Search for OneDrive and select it as your app.
Enter a name for your connection in the Connection name field.
Use the Location drop-down menu to select the project where you plan to store the connection.
Select Tenant specific as the Connection account type. This option supports accounts tied to a specific organization (tenant).
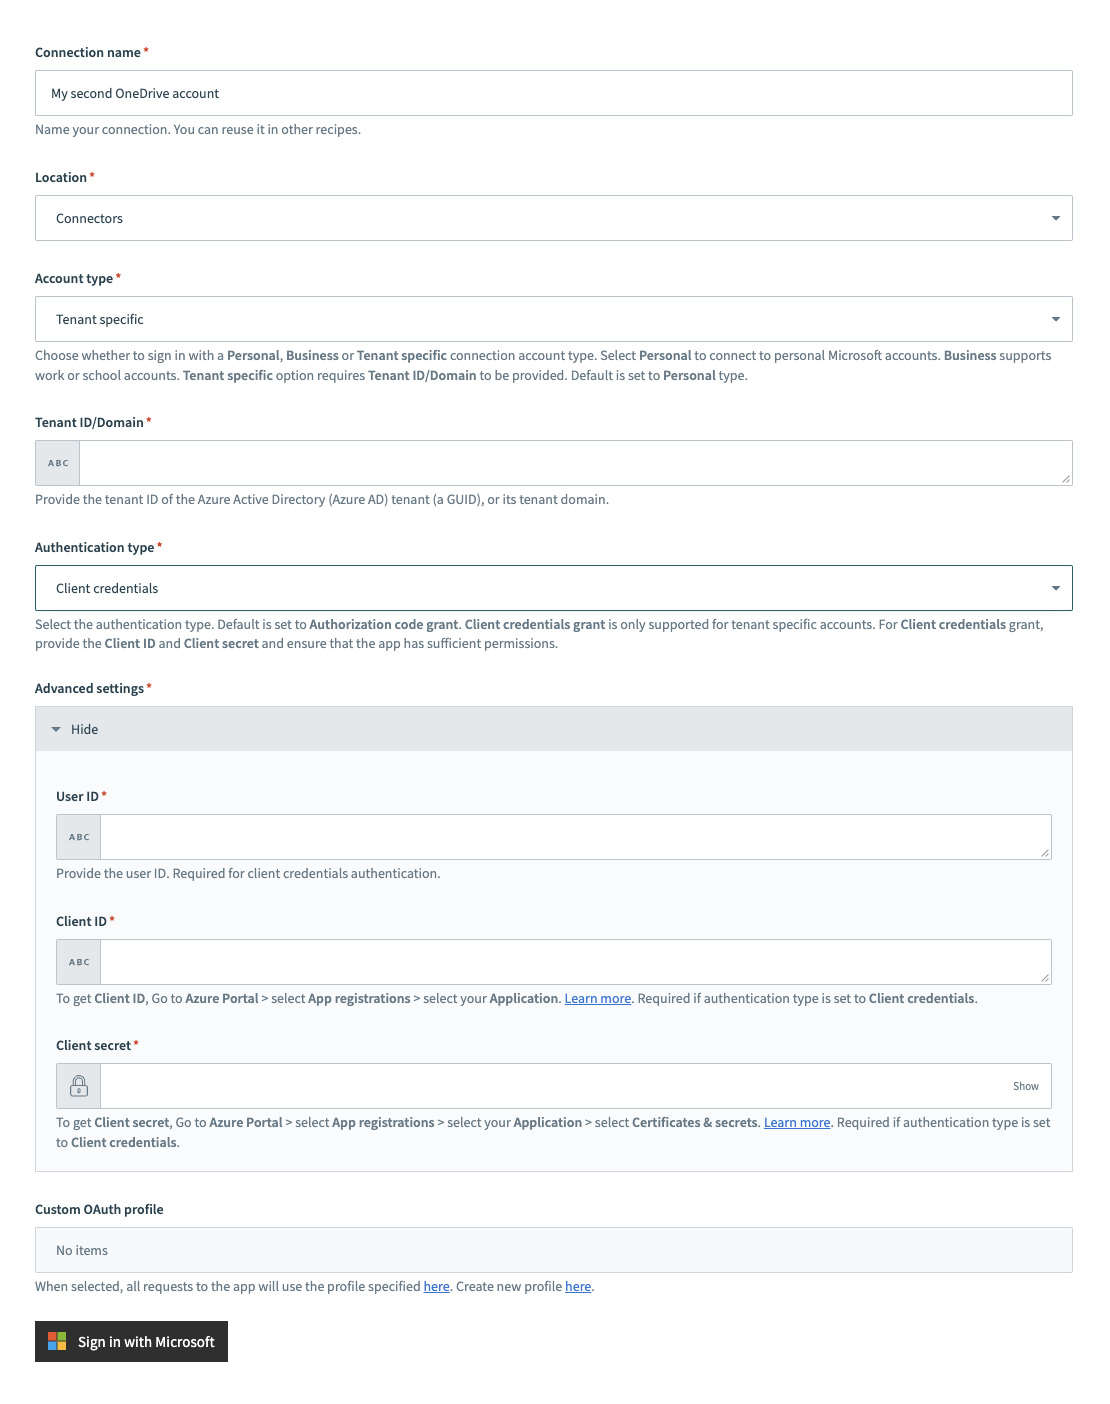 Tenant specific account connection type
Provide your Tenant ID/Domain. This is the Directory (tenant) ID for your app. Refer to Obtain the Application (client) ID, Object ID, and Directory (tenant) ID from the Azure portal for more information.
Use the Authentication type drop-down menu to select Client credentials.
Provide the User ID, Client ID, and Client secret for your app. Refer to Obtain the Application (client) ID, Object ID, and Directory (tenant) ID from the Azure portal and Generate a client secret for more information.
Optional. Use the Custom OAuth profile drop-down menu to select a custom OAuth profile for your connection.
Click Sign in with Microsoft.
Connect Microsoft Entra ID to the OneDrive connector
View connect Microsoft Entra ID to the OneDrive connector steps
To connect to the OneDrive connector using a Microsoft Entra ID account, ensure that all the consent requests are granted by admins.
Complete the following steps to grant admin consent using an admin account:
Sign in to your Azure portal and navigate to Enterprise Applications > Activity > Admin consent requests.
Approve the necessary consent requests.
Configure the pipeline
Complete the following steps to configure OneDrive as your data pipeline source:
Select Create > Data pipeline or press C+I.
Enter a name for the data pipeline in the Data pipeline name field.
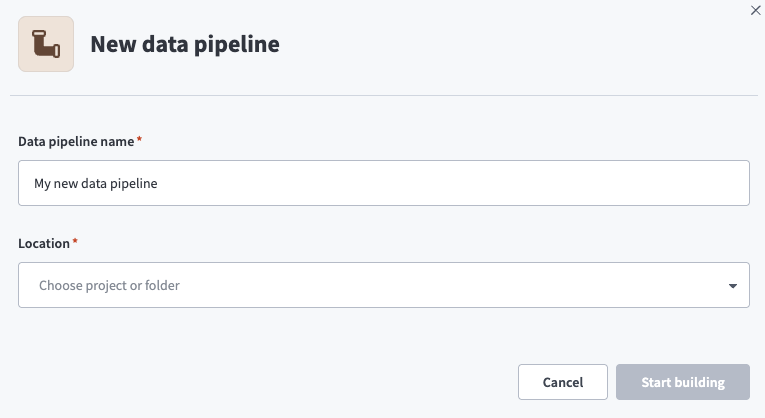 Data pipeline setup
Use the Location drop-down menu to select the project where you plan to store the data pipeline.
Click Start building.
Click the Extract new/updated records from source app trigger. This trigger defines how the pipeline retrieves data from OneDrive.
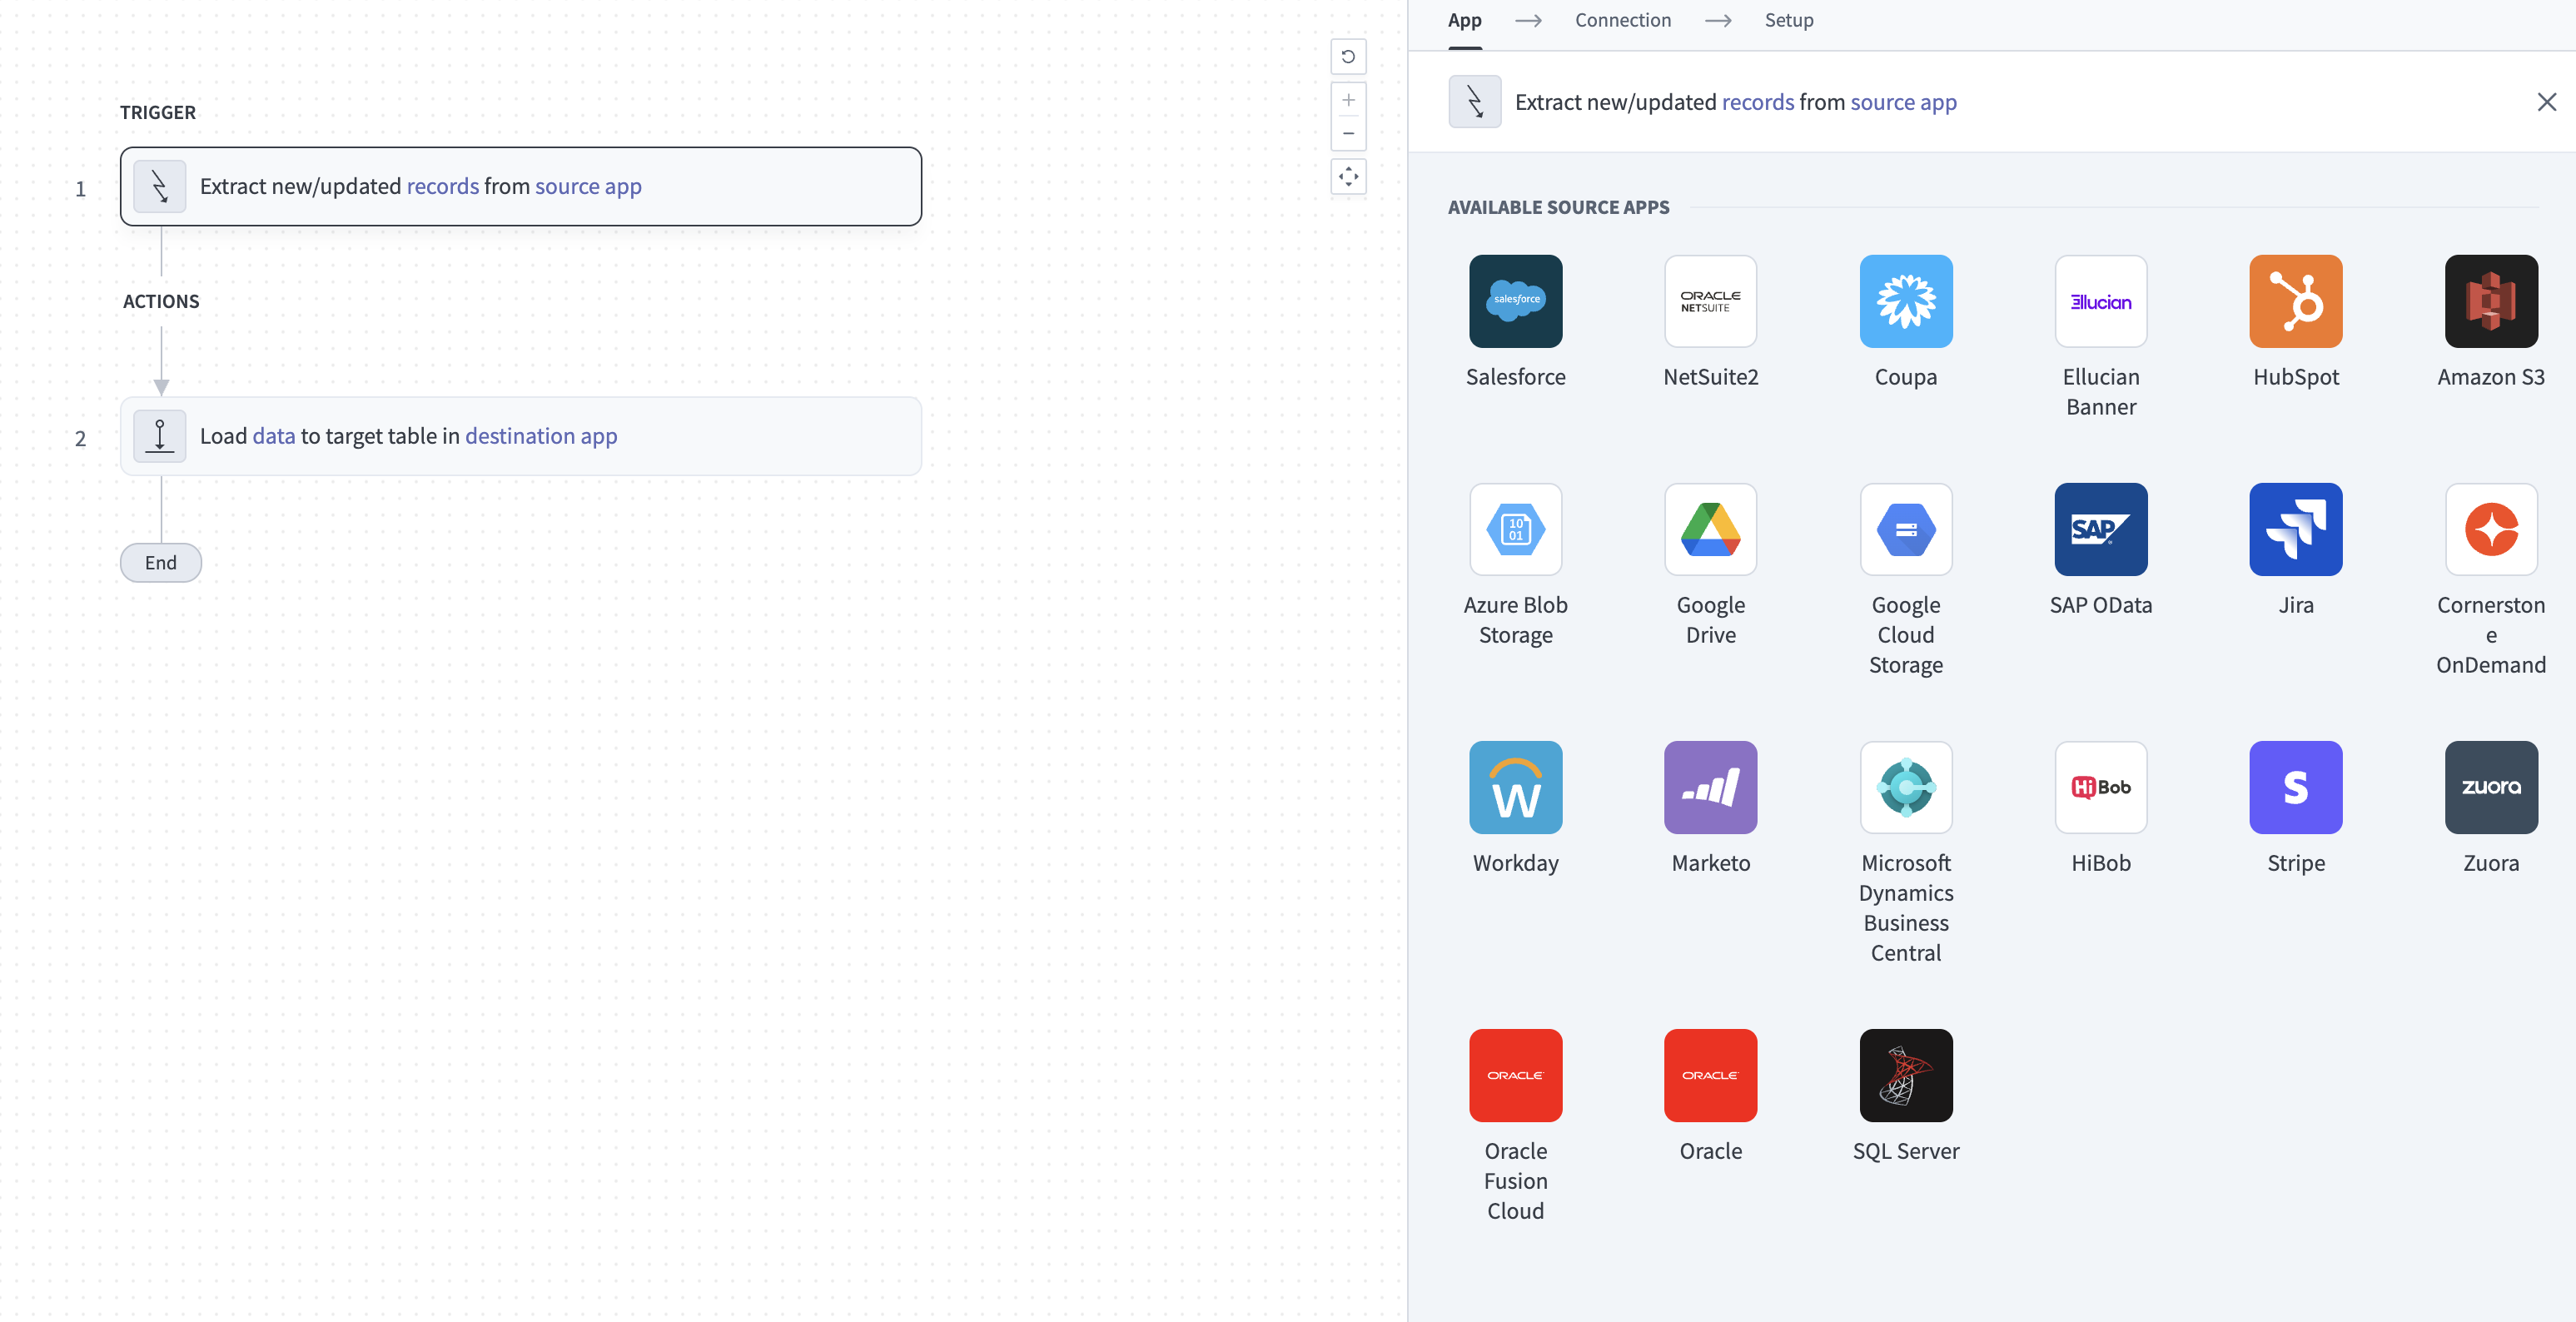 Configure the Extract new/updated records from source app trigger
Use the Your Connected Source Apps drop-down menu to select OneDrive.
Choose the OneDrive connection you plan to use for this pipeline. Alternatively, click + New connection to create a new connection.
Optional. Enter a Drive ID. Leave this field blank to use the authorized user's personal OneDrive drive. To list files and folders from a shared OneDrive drive or a SharePoint site document library, provide the drive ID that the authorized user can access. You can find the drive ID in the OneDrive URL as the cid parameter. For example, in https://onedrive.live.com/?id=244DDFC44A57%21103&cid=24C9A8FC44A57, 24C9A8FC44A57 is the drive ID.
Click Add object to open the New object panel.
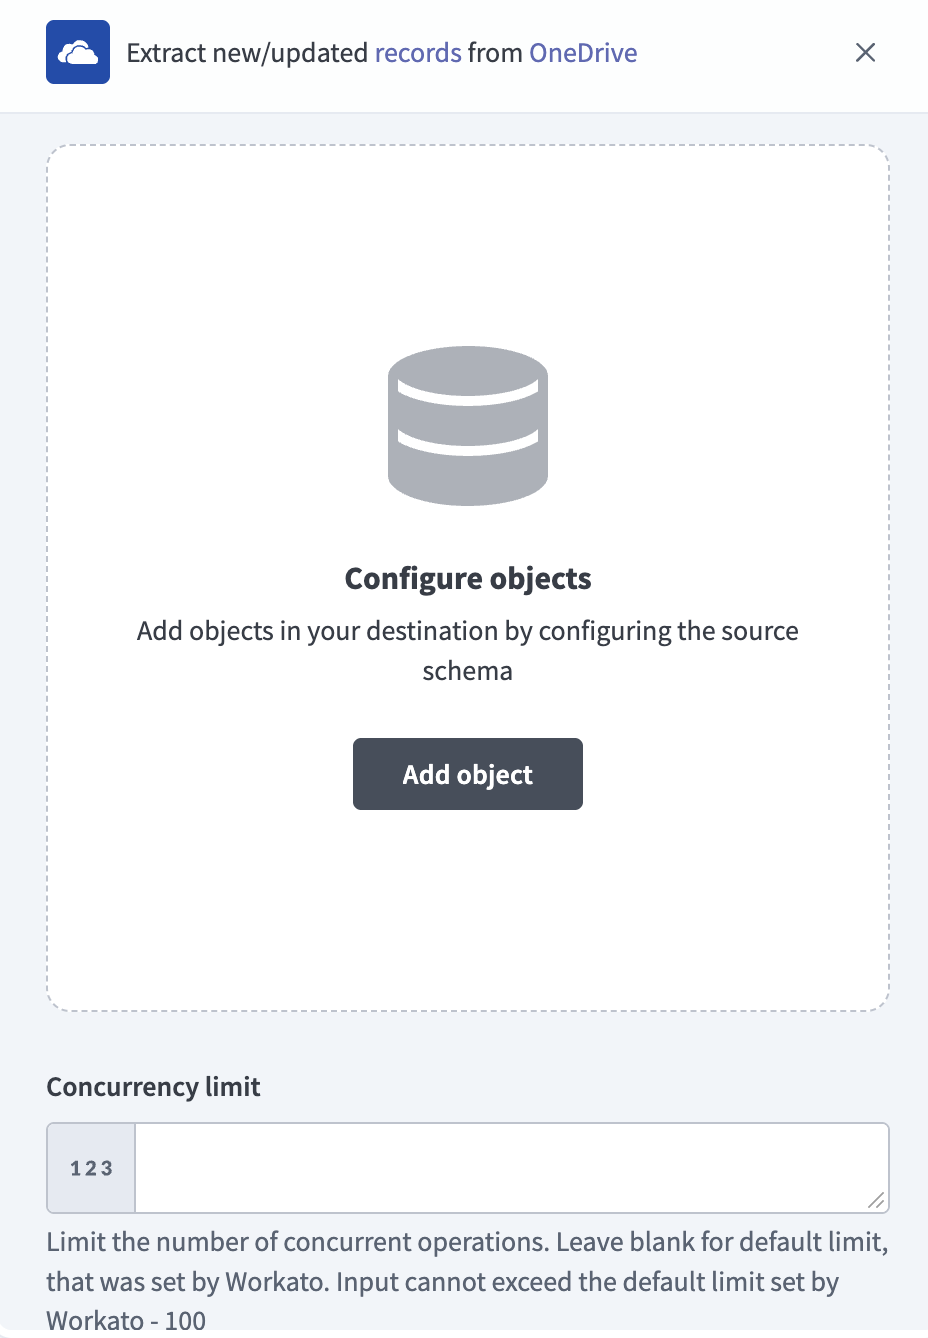 Add object
Enter the folder path to monitor in the Source Folder path field. The pipeline lists direct child files in this folder and fetches files that match your filename pattern.
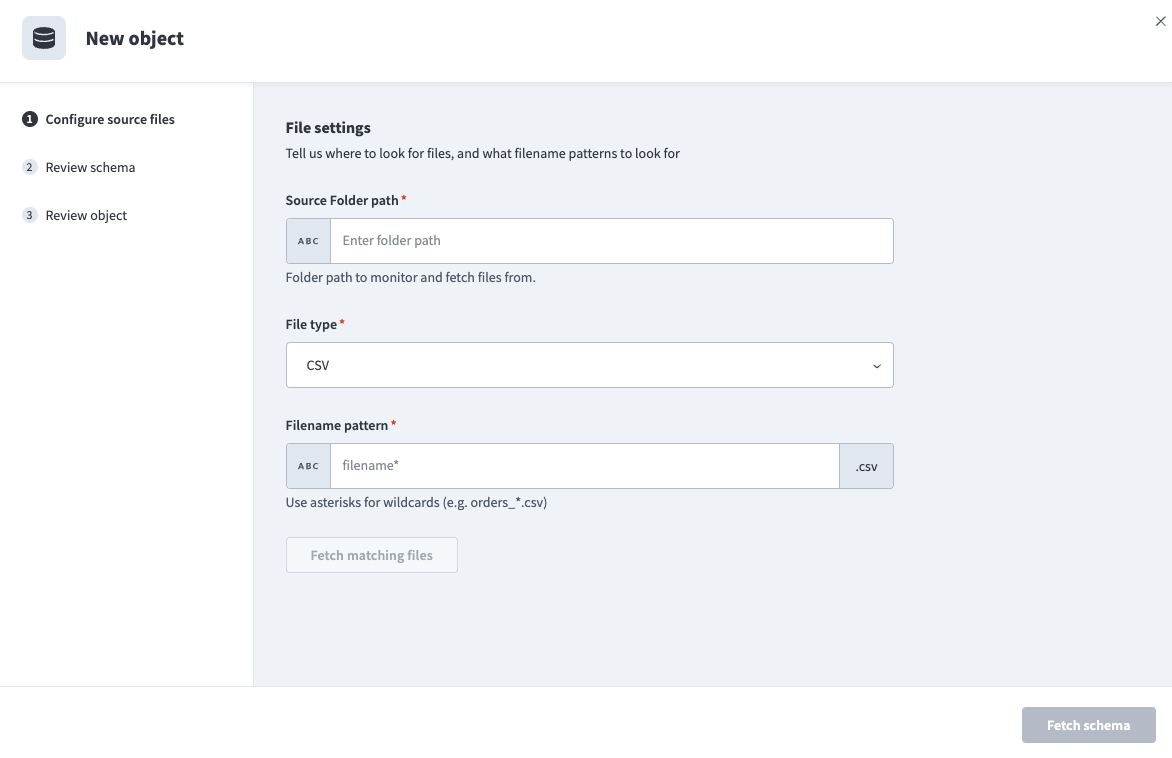 Configure file settings
NESTED FOLDER LIMITATION
OneDrive data pipelines only fetch files located directly within the folder specified in the Source Folder path field. Files in nested subfolders aren't fetched. If your pipeline expects files in subfolders, move those files to the top-level folder.
Use the File type drop-down menu to select CSV or Parquet as the file format to extract.
Define which files to fetch using a pattern in the Filename pattern field. Use wildcards such as orders_* to include multiple files. The file extension is appended automatically based on the File type you selected.
Click Fetch matching files to preview files matching the defined pattern.
Select a Reference file to define the schema for your destination table.
Configure File type settings:
Click Fetch schema to retrieve the schema from the reference file.
Review the schema to ensure it matches your expected table structure. The schema preview includes the columns from your source file along with the following system-generated columns:
_file: The name of the source file each row originated from._line: The line or row number of each record within the source file.
Configure how rows are merged in the destination table in the Choose a merge strategy field:
- Upsert (default): Inserts new rows and updates existing rows. When you choose Upsert, the Merge method field appears. You can select one or more columns to use as the primary key for the destination table. If you leave Merge method blank, the pipeline uses the system-generated
_fileand_linecolumns as a composite primary key. - Append only: Inserts all rows without attempting to match or update existing records. Append-only tables also include a system-generated
_modifiedcolumn so you can track each row's source file modification time.
Click Review object to confirm your setup. This screen displays your file settings, file type-specific options, and merge details.
Enter an Object name. This name defines the destination table name.
Click Finish to save the object configuration.
Review and customize the schema for each selected object. The pipeline automatically fetches an object's schema when you select it. This ensures the destination matches the source.
Expand an object to view associated fields. Keep all fields selected to extract all available data, or deselect specific fields to exclude them from data extraction and schema replication.
Optional. Configure field-level data protection by expanding an object and choosing how to handle each field:
- Replicate as is: Data values at the source replicate identically to the destination.
- Hash: Hash sensitive data values in the field before syncing to your destination.
Workato recommends hashing personally identifiable information (PII) and other sensitive fields. Refer to Sensitive data handling for a list of fields that commonly contain PII.
Click Add object again to add more objects. Repeat this step to include additional OneDrive objects in your pipeline.
Use the Choose how to handle schema changes drop-down menu to select a schema drift handling option:
- Auto-sync new fields: Automatically detects and syncs new fields added in the source.
- Block new fields: Keeps the schema fixed after the pipeline starts. You must add new fields manually. This option may cause the destination to fall out of sync if the source schema updates.
Refer to Schema replication and schema drift management for more information.
Optional. Enter a value in the Concurrency limit field to cap the number of concurrent operations. Leave the field blank to use the default limit set by Workato. The maximum value is 100.
Choose either a standard time-based schedule or define a custom cron expression in the Frequency field. This determines how often the pipeline syncs data from OneDrive to the destination.
Supported objects
OneDrive doesn't have a fixed object catalog. Instead, each folder and filename pattern configuration you add becomes an object that syncs as a separate table in your destination:
| Object | Sync modes | Delete tracking |
|---|---|---|
CSV files | Full sync, then incremental | No |
Parquet files | Full sync, then incremental | No |
Refer to Sync modes and Delete tracking for more information.
Sync modes
OneDrive data pipelines run a full sync followed by incremental syncs on every later run. This sequence isn't configurable.
Full sync
A full sync lists all files matching the configured folder path, file type, and filename pattern, and extracts all rows from each matching file. This full sync runs only once, when the pipeline starts. Every later run is an incremental sync.
Incremental sync
Incremental sync is file-level, not row-level. Each run lists matching files and processes only files created or modified after the last recorded modification time. OneDrive doesn't provide row-level change tracking inside a CSV or Parquet file, so a modified file is reprocessed in full rather than diffed row by row.
Delete tracking
OneDrive doesn't support delete tracking. Workato doesn't remove or mark rows as deleted in your destination when a source file is removed, regardless of the merge strategy you choose. Include a column to track deletions in your source files if you require this behavior.
Schema and data type handling
OneDrive data pipelines infer the schema from the selected CSV or Parquet file:
- CSV files: Workato samples the file to infer column names and types. Ambiguous or unsupported values remain strings.
- Parquet files: Workato reads the embedded Parquet schema directly from the file. Nested structures and repeated fields are preserved according to the shared Parquet reader, with nested structures serialized as JSON strings where required.
All files matched by the same object configuration must maintain the same column structure and data format to ensure accurate schema mapping.
Synthetic columns
Workato adds the following synthetic columns to each destination table:
| Column | Purpose |
|---|---|
_file | The name of the source file each row originated from. |
_line | The line or row number of each record within the source file. |
_modified | The source file's last-modified timestamp. Only added when you choose the Append only merge strategy. |
Refer to the Configure the pipeline steps for how to choose a merge strategy and primary key.
Sensitive data handling
OneDrive files can contain arbitrary customer data, including personally identifiable information (PII) and other sensitive or confidential content. Because file columns are customer-defined rather than fixed source API fields, OneDrive data pipelines don't expose a fixed list of sensitive fields.
Use the Hash option in field-level data protection during pipeline configuration to protect PII before it reaches your destination. Refer to the Configure the pipeline steps for more information.
Limitations
The following limitations apply when you use OneDrive as a data pipeline source:
Supported file formats
OneDrive data pipelines only support .csv and .parquet files. Other formats, including Excel, JSON, XML, PDF, images, and other binary files, aren't supported.
Folder traversal
OneDrive data pipelines only fetch files from the direct children of the configured folder. Files in nested subfolders aren't fetched or synced.
Maximum file size
Each file must be 10 GB or smaller.
Minimum sync frequency
The minimum supported sync interval is 15 minutes. You can't trigger syncs more frequently than this.
Last updated: