Set up a decision model
Use the following sections to create and configure a decision model:
Create a decision model
Complete the following steps to create a decision model:
Go to Projects > All assets.
Click Create > Decision model or press C+D.
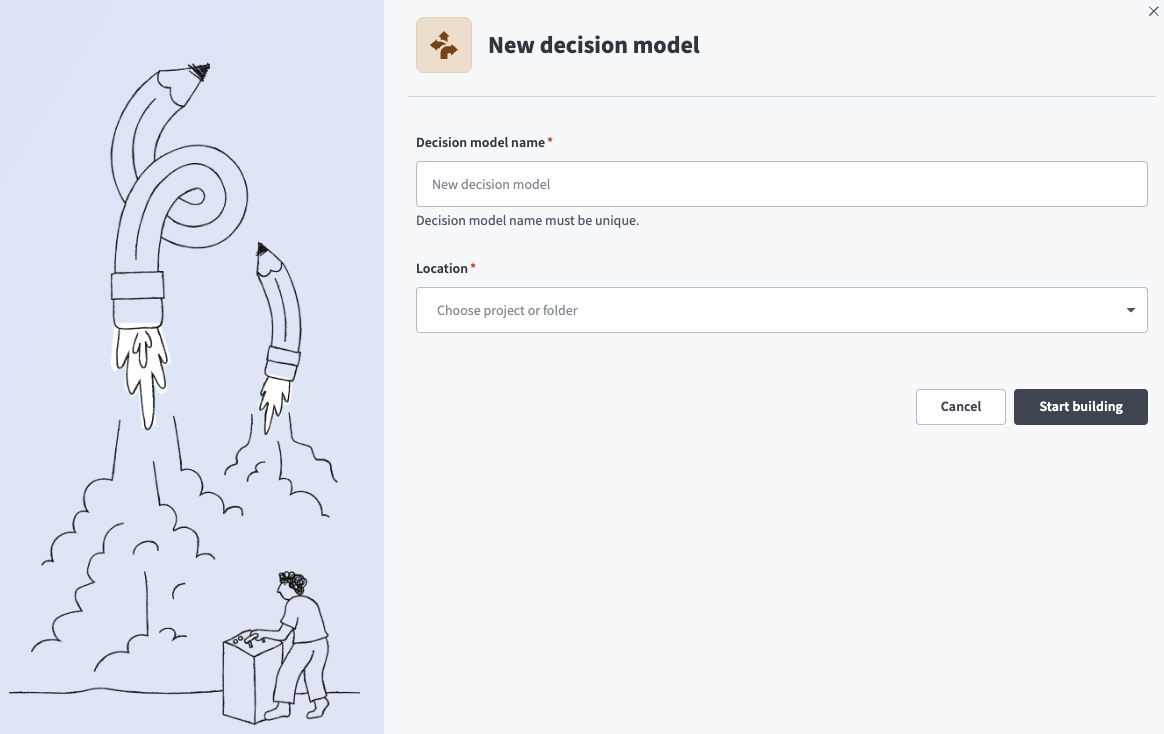
Enter a Decision model name.
 Enter a Decision model name
Use the Location drop-down menu to select the project where you plan to store the decision model.
Click Start building. The decision model builder opens.
Refer to the Configure a decision model section to configure the model.
Configure a decision model
You can access decision models from Assets > Decision models or from a specific project.
Refer to the following guides to configure a decision model:
Create an input field
Create an input field
Input fields define the data that enters your model. This is usually the core data evaluated by Decision table nodes. Input fields are available to all nodes, including nodes not directly connected to the Model Inputs node.
RETURN INPUT FIELDS UNCHANGED
You can select input fields in the Model Outputs node to return them to the calling recipe. This helps in cases where the input value isn't otherwise available in the recipe, such as when a formula calculates the value in the input field.
Complete the following steps to create an input field using the Model Inputs node or the decision table's Inputs section:
 Create a new field
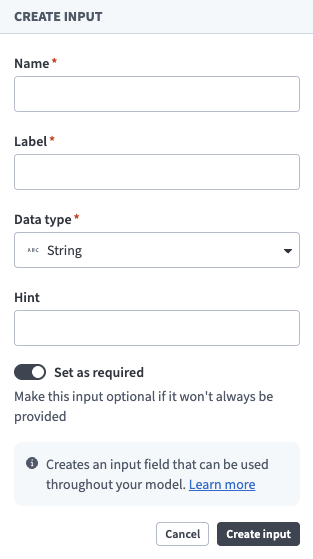 Input field configuration
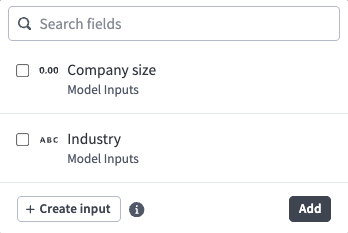 Select fields for the table to evaluate
Delete an input field
Delete an input field
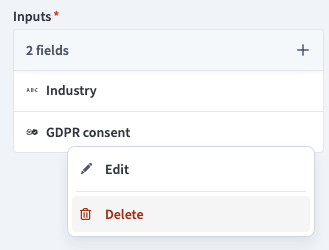
Complete the following steps to delete an input field:
REMOVE INSTANCES BEFORE DELETING
You can't delete an input field that's in use. You must remove the field from all nodes before you can delete it.
Select the Model Inputs node.
Hover over the field to delete and click ... (ellipsis).
 Click the ellipsis on the field to delete
Click Delete (trash icon).
 Click Delete (trash icon)
Click Delete again to confirm the deletion.
Create a model field
Create a model field
Model fields define the data passed between nodes. Model fields are required even in simple single-table models, where they carry table outputs to the Model Outputs node, and become increasingly important in more complex models where they pass outputs between nodes as intermediate values.
OVERRIDING VALUES
You can reuse a model field as an output in multiple nodes. Each node can overwrite the field value.
Complete the following steps to create a model field using the Fields sidebar or the decision table's Outputs section:
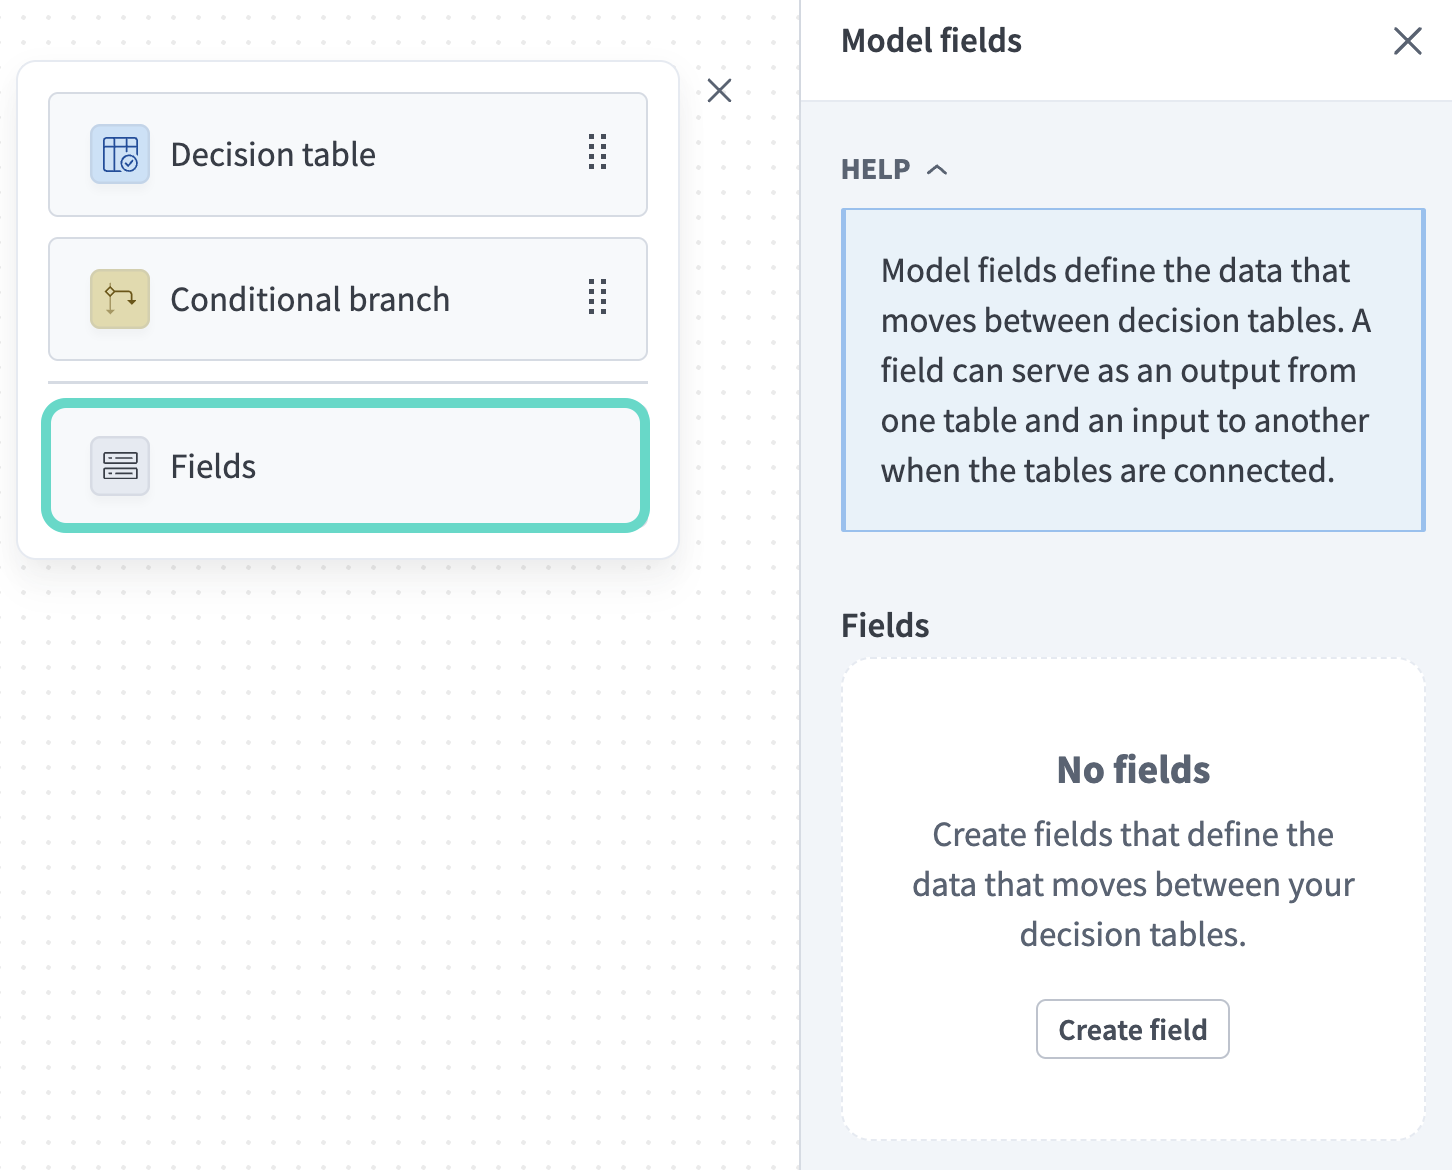 The Fields sidebar
 Select fields to pass from this table to the next node
Create a Decision table node
Create a Decision table node
Decision table nodes define conditional business rules. They intake data (Input fields), evaluate it based on business logic you specify, and output results (Output fields) accordingly.
Complete the following steps to create a Decision table node:
Go to the toolbar and drag a Decision table node into the model builder.
Click and drag between edges to configure the order of nodes. You can hover over a node connection and click Delete edge to remove it.
 Add the node to the model flow
Select the Decision table node.
Optional. Edit the automatically generated table Name.
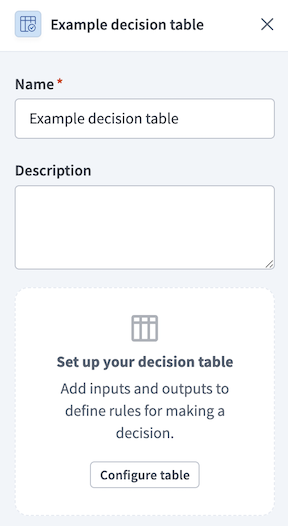 Decision model node configuration
Optional. Enter a Description for the table.
Click Configure table to open the decision table.
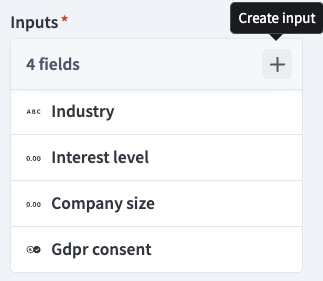
Click + (Add inputs). Inputs provide data to evaluate using the table's business rules.
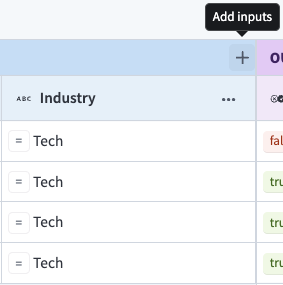 Click + (Add inputs)
Select existing fields or create a new input field:
Click + (Add outputs). Output fields pass values to the next node based on the table's decisions.
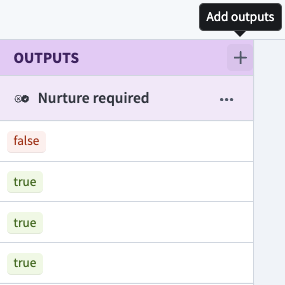 Click + (Add outputs)
Select existing fields or create a new model field:
Refer to the Configure decision table rules documentation to configure decision table evaluation logic.
Configure output fields
Configure output fields
Output fields define the data that the model returns to the recipe that called it.
Complete the following steps to configure output fields:
Select the Model Outputs node.
Click Add output if there are no existing outputs. Otherwise, click + (Add output).
Select which input and model fields to return to the recipe that called the model. All input fields are available. You can only select model fields from nodes directly connected to this node.
Click Add.
Create conditional branches
Create conditional branches
Conditional branches define a set of conditions that control the flow of data in the model using business logic you specify. They allow you to route data to different decision tables based on prior decisions, input fields, or model fields passed from upstream nodes. This makes it possible to handle variations in business logic within a single model, ensuring consistency and ease of maintenance.
FIELDS ARE PASSED UNCHANGED
The Conditional branch node passes all received fields unchanged to branches that evaluate to True.
Complete the following steps to add conditional branches to a decision model:
Go to the Toolbar and drag a Conditional branch node into the model builder.
Click and drag between edges to configure the order of nodes. You can hover over a node connection and click Delete edge to remove it.
 Add the conditional branch to the model flow
Use the node's drop-down menu to select one of the following options:
- Every matching condition: Runs every branch that matches a condition.
- First matching condition: Runs the first branch that matches a condition.
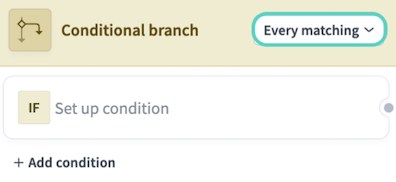 The conditional branch drop-down menu
Optional. Click + Add condition to add additional conditions.
Each condition you create can contain multiple evaluation criteria. For example:
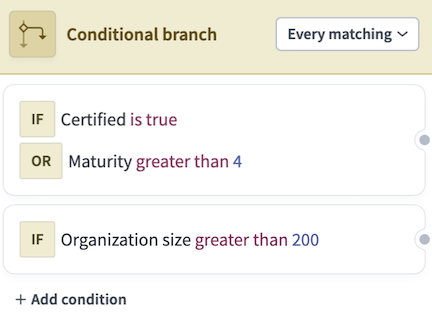 Each condition you create can contain multiple evaluation criteria.
Select a condition to open its configuration sidebar.
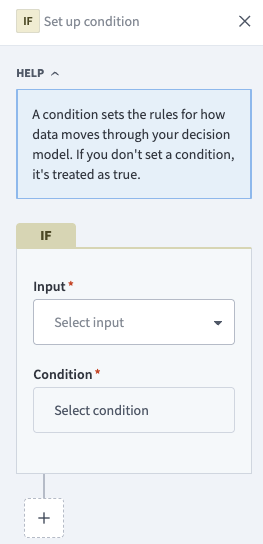 The condition configuration sidebar
Use the Input drop-down menu to select a field. All input fields are available. You can only select model fields from nodes directly connected to this node.
Use the Condition drop-down menu to select an operator. The condition is treated as True if you leave this field blank. Refer to Available operators to see the operators available for each data type.
Enter a Value to compare against the Input using the Condition.
Optional. Click the + (plus) icon to create an additional condition, then select one of the following:
- AND: Inputs are treated as
Trueif they satisfy all conditions. - OR: Inputs are treated as
Trueif they satisfy any condition.
Model fields
Model fields define the data that moves between nodes in a decision model. Unlike input fields, which receive data from the calling recipe, model fields store intermediate values produced by decision tables and pass them to downstream nodes.
The following describes how data flows through a decision model:
- The calling recipe provides values for input fields.
- Input fields are passed to the decision tables and conditional branches directly connected to the Model Inputs node.
- Decision tables and conditional branches evaluate conditions using input fields or model fields from upstream nodes.
- Decision tables write outputs to model fields and pass them to downstream nodes. Conditional branches pass all received fields unchanged to branches that evaluate to
True. - The Model Outputs node returns selected input and model fields to the calling recipe.
Refer to Create a model field to add fields to a model.
Troubleshooting
Refer to the following sections to troubleshoot issues related to model field sources:
Missing source
A field becomes invalid when its source is unavailable. This occurs when a connection breaks or an upstream node no longer outputs the field. Restore the source connection to make the field valid again.
 An invalid output field
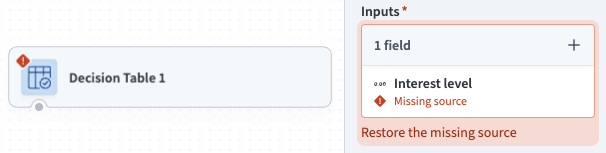 An invalid input field
Source conflict
A source conflict occurs when multiple decision tables update the same field in a downstream node. The model continues to function, and the downstream node uses values from the decision table that appears first alphabetically. You can remove one of the sources to resolve this conflict.
 A source conflict
Alternatively, you can use conditional branches to ensure the source nodes are mutually exclusive. The conflict warning still appears, but only one path carries data at a time, so no conflict occurs at runtime.
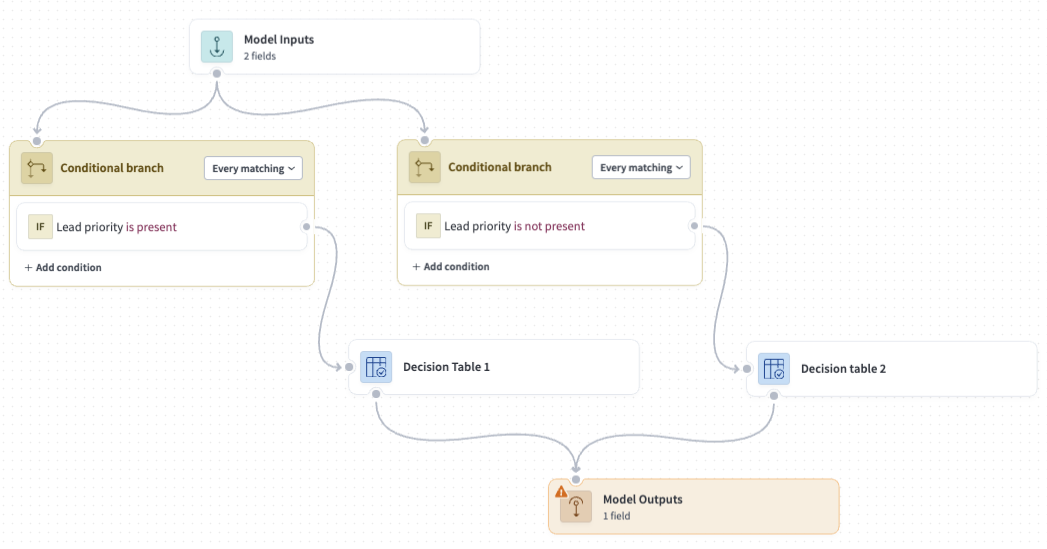 Mutually exclusive source nodes
Last updated: