Zoom Meetings MCP server
The Zoom Meetings MCP server enables LLMs to interact with Zoom meeting functionality through natural conversation. It provides tools to search for past meetings, retrieve recordings and transcripts, check attendance, and create or update meetings without requiring direct interaction with the Zoom interface.
Uses
Use the Zoom Meetings MCP server to perform the following actions:
- Search for past meetings you've hosted or attended
- Retrieve detailed information about specific meetings
- Access cloud recording links for meetings
- Retrieve auto-generated transcripts for meeting review
- Check who attended a meeting and for how long
- Create new scheduled Zoom meetings
- Update existing scheduled meetings
Example prompts
Use the following example prompts to invoke Zoom Meetings MCP server tools:
Find my meetings with Mei from last week.Get the details for meeting ID 12345678.Share the recording link for yesterday's standup.Show me the transcript from the client call on Monday.Who attended the team meeting on Friday?Schedule a Zoom meeting for tomorrow at 2pm with the engineering team.Update the product review meeting to start at 3pm instead.
Zoom Meetings MCP server tools
The Zoom Meetings MCP server provides the following tools:
| Tool | Description |
|---|---|
| search_meetings | Searches for Zoom meetings the user has hosted or attended. |
| get_meeting_details | Retrieves detailed information about a specific Zoom meeting. |
| get_meeting_recording | Retrieves cloud recording links for a Zoom meeting. |
| get_meeting_transcript | Retrieves the auto-generated transcript for a Zoom meeting. |
| get_meeting_participants | Retrieves the attendance list for a Zoom meeting that has occurred. |
| create_meeting | Creates a new Zoom meeting. |
| update_meeting | Updates an existing scheduled Zoom meeting. |
| get_recording_vtt | Reads the VTT caption file content for a Zoom cloud recording. |
Install the Zoom Meetings MCP server
Complete the following steps to install a prebuilt MCP server to your project:
Sign in to your Workato account.
Go to AI Hub > MCP servers.
Click + Create MCP server.
Go to the Start with pre-built MCP Servers using your connected apps section and select the prebuilt MCP server you plan to use.
Click Use this server.
Provide a name for your MCP server in the Server name field.
Use the Location drop-down menu to select the project for the MCP server.
Go to the Connections section and connect to your app account.
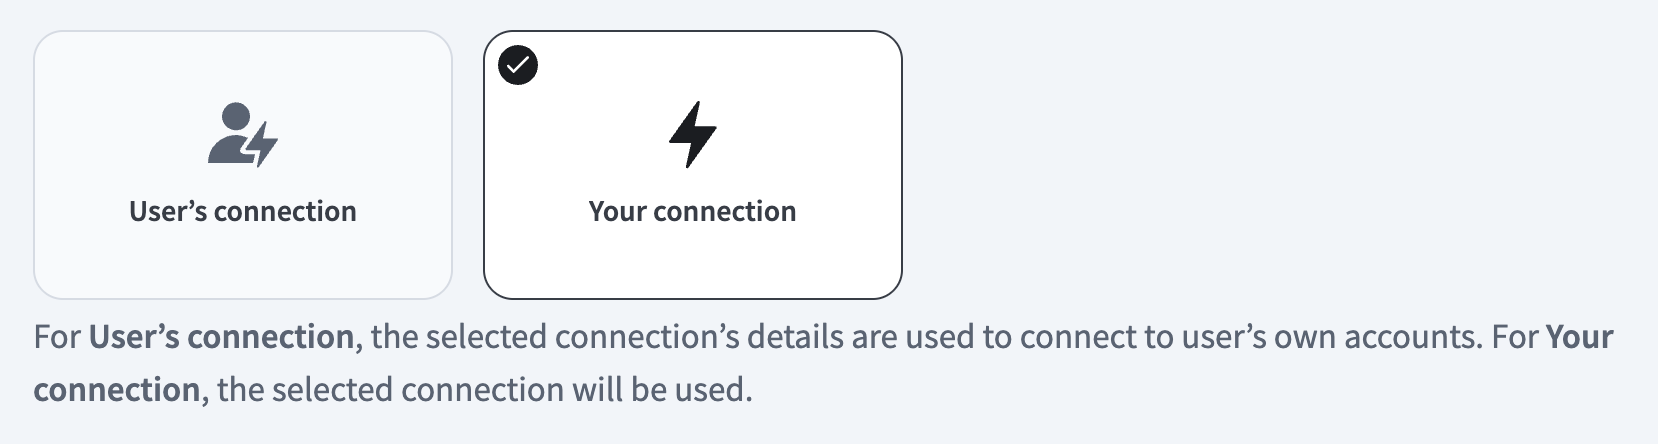
Select the connection type you plan to use for the MCP server template.
- User's connection: MCP server tools perform actions based on the identity and permissions of the user who connects to the application. Users authenticate with their own credentials to execute the skill.
- Your connection: This option uses the connection established by the recipe builder and follows the same principles as normal app connections.
 Select your connection type
VERIFIED USER ACCESS AUTHENTICATION REQUIREMENTS
Only app connections that use OAuth 2.0 authorization code grant are available for user's connection. Refer to Verified user access for more information.
Complete the app-specific connection setup steps in the following section.
Zoom connection setup
View Zoom connection setup steps
The Zoom connector uses OAuth 2.0 authentication.
Complete the following steps to connect to Zoom in Workato with OAuth 2.0 authentication:
RECOMMENDED SETUP
We recommend that you set up a dedicated API user account in Zoom or create a custom OAuth profile to authorize Workato. This allows you to assign the API user to a role with only the necessary permissions.
Alternatively, you can use an existing Zoom owner or admin account if it has the required permissions. Some admin accounts may have restricted access based on their configuration.
Add an API user
View add an API user steps
Complete the following steps to set up a provisioned API user for Workato:
Sign into your Zoom account.
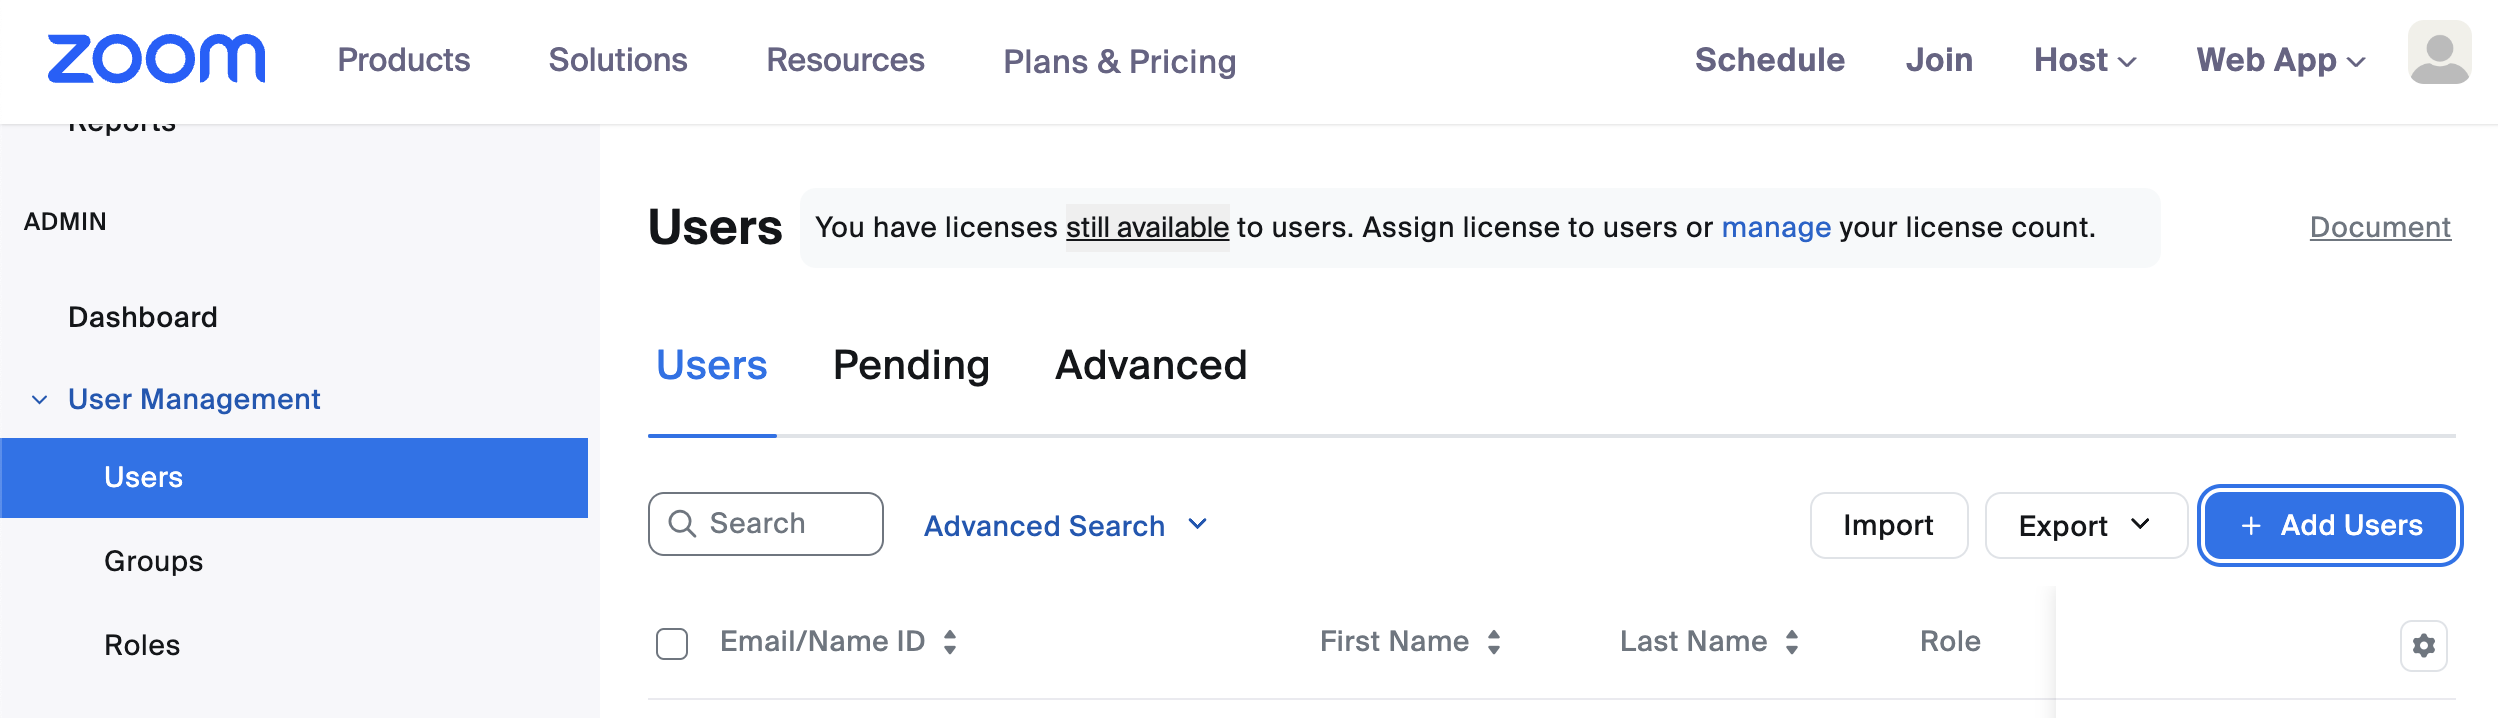
Go to Admin > User Management > Users.
 Add users
Click Add Users.
Enter an appropriate email for the API user. We recommend an IT admin alias.
Enter N/A or make selections based on your requirements for the following fields: Department, Manager, Job Title, Location, and User Groups.
Click Add.
Go to Admin > Roles.
Select Add Role.
Provide a Role Name and Description.
Click Add.
Go to Roles > Roles Settings and add the following permissions to your Zoom role. Role permissions are required to allow the Workato Zoom connector to perform account-level actions, such as scheduling meetings or webinars on behalf of other Zoom users.
Users: View and EditRole management: View and EditGroups: View and EditRecording management: View and EditZoom rooms: View and EditMeetings: ViewWebinars: ViewUsage reports: ViewSchedule tracking fields: View and Edit
Click Save Changes.
Go to User Management > Users and locate the user you created in the preceding steps.
Click Edit and use the User Role drop-down menu to select the role you created.
Click Save.
Create a custom OAuth profile
View create a custom OAuth profile steps
Complete the following steps to create a custom OAuth profile for Workato:
Go to Tools > Custom OAuth profiles in Workato.
Click + New custom profile.
Search for Zoom and select it as your app.
Enter a name for your custom OAuth profile in the Name field.
Click Create new app.
Go to the Zoom App Marketplace and sign in to your Zoom account if you're not signed in already.
Click Develop > Build App.
 Build app
Choose the kind of app to create from the following options: General App, Server to Server OAuth App, or Webhook Only App. If you can't select the options, you must enable the Zoom for developers role. Refer to the Zoom Select general app features page to learn how to enable the Zoom for developers role.
Click Create.
Enter a name for your app and select how the app is managed. Refer to the Zoom Step 2: Maintain basic information page for more information.
Copy and save the Client ID and Client Secret for use in Workato.
 Copy the Client ID and Client Secret
Enter https://www.workato.com/oauth/callback in the OAuth Redirect URL field.
Optional. Configure settings in the Access, Surface, and Embed tabs as required.
Go to Scopes and click + Add Scopes to add the required scopes.
Search for and select the required scopes for your connection.
Click Done.
Go to the Local Test tab and select Preview your app listing page to ensure your settings are properly configured.
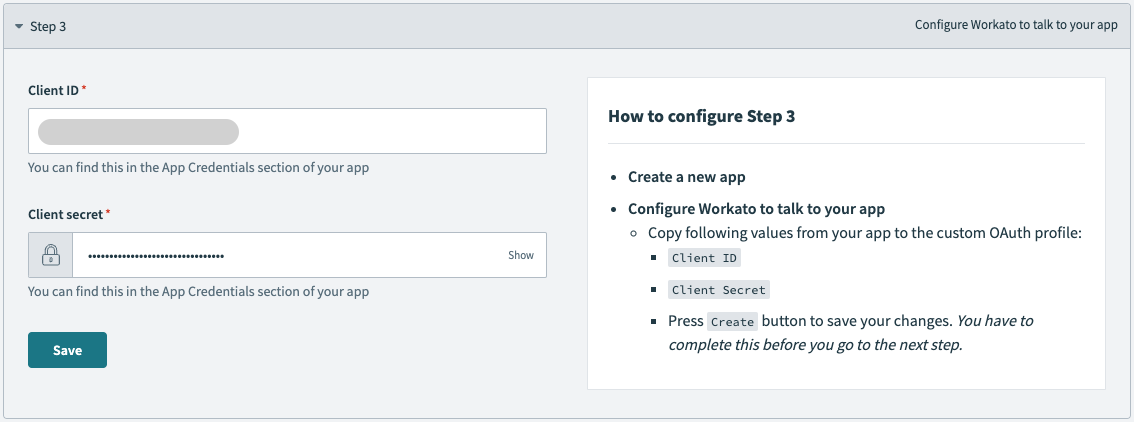
Return to the New custom profile page in Workato and paste the Client ID and Client secret into their respective fields.
 Paste the client ID and client secret
Click Save.
Connect to Zoom with OAuth 2.0 authentication
View connect to Zoom with OAuth 2.0 authentication steps
Complete the following steps to connect to Zoom in Workato:
Click Create > Connection.
Search for Zoom and select it as your app.
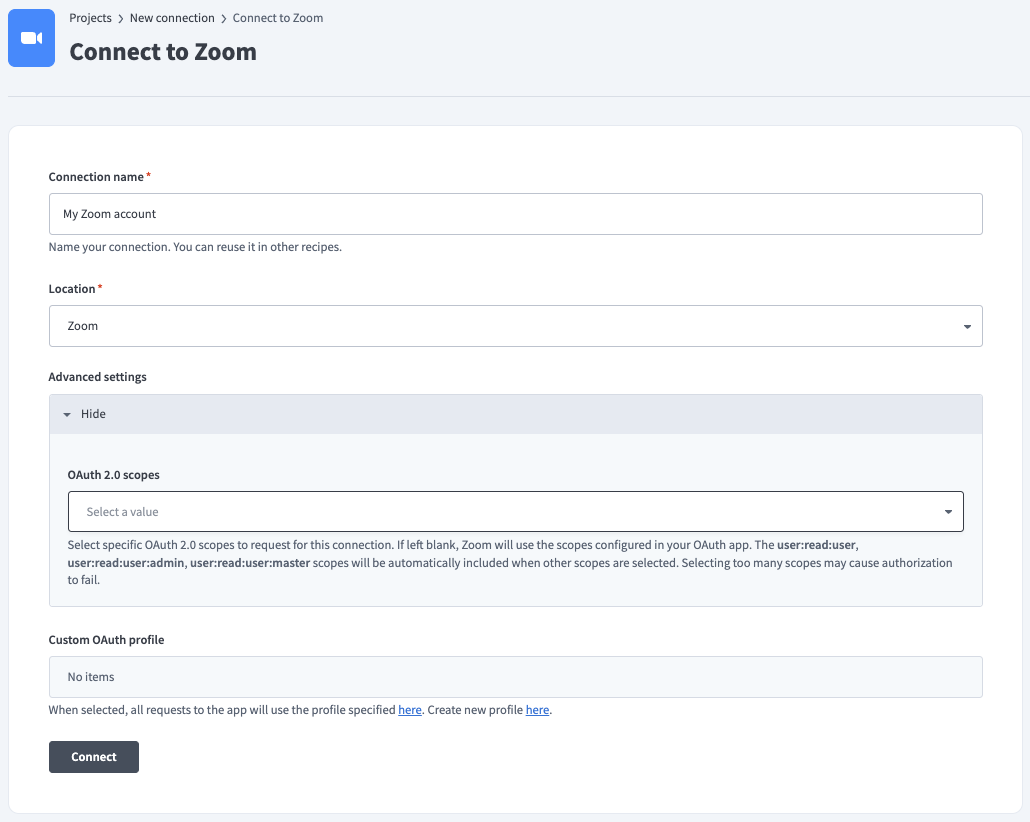
Enter a name for your connection in the Connection name field.
 Name your connection
Optional. Expand the Advanced settings section and use the OAuth 2.0 scopes drop-down menu to specify OAuth scopes to request for your connection.
Optional. Use the Custom OAuth profile drop-down menu to select a custom OAuth profile to use for the connection.
Click Connect.
Sign in to your Zoom account.
Project property configuration
The Zoom Meetings ZOOM_SEARCH_TOPIC_MAX_RANGE_DAYS defaults to 60 days when you provide a topic filter. A maximum of 60 days prevents the API request from timing out.
You can configure the default search topic maximum days range for your Zoom Meetings MCP server at the project level.
Complete the following steps to configure your search topic maximum days range:
View Project property configuration steps
Sign in to your Workato account and go to Projects.
Go to the project that contains your MCP server.
Click the Settings tab.
 Click the Settings tab.
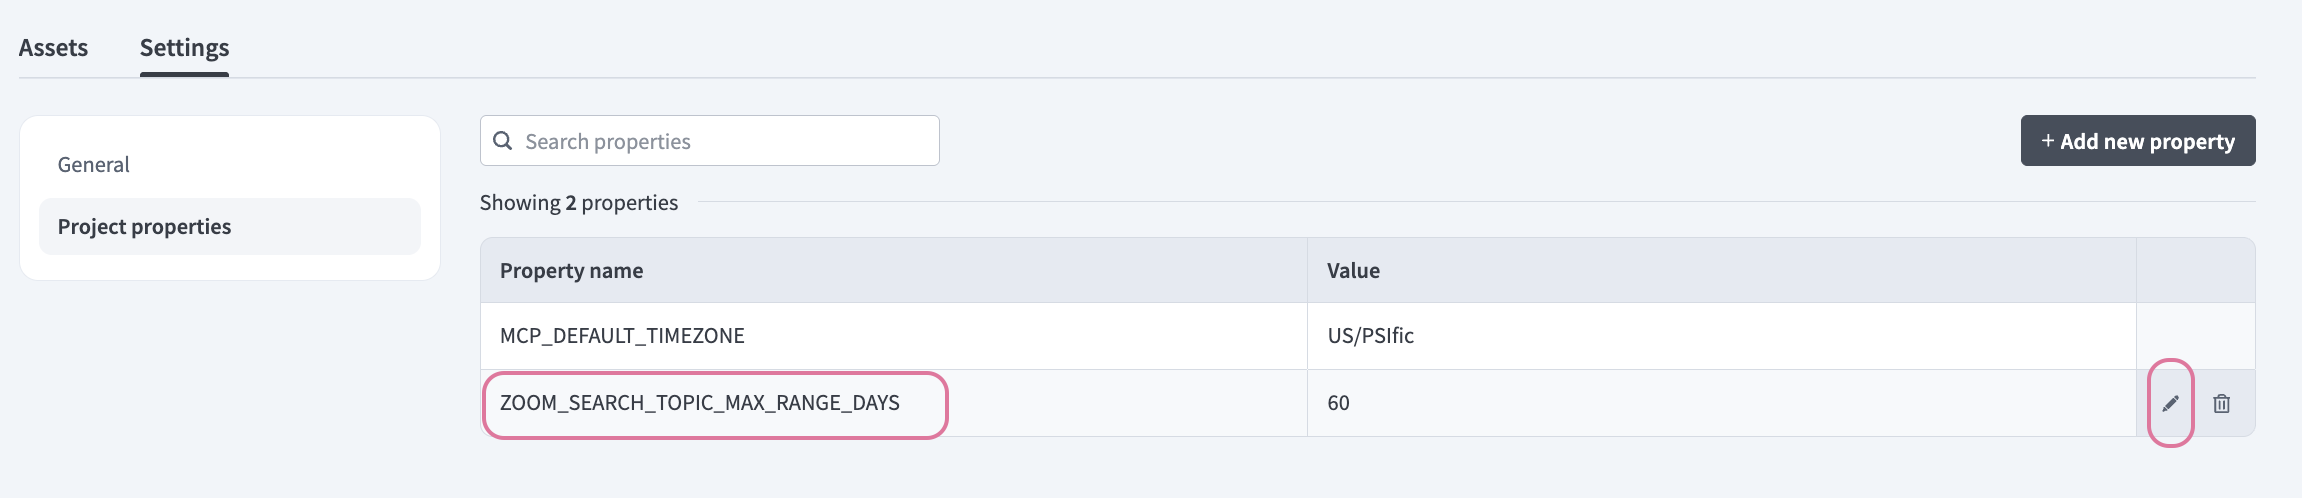
Select Project properties.
Go to the ZOOM_SEARCH_TOPIC_MAX_RANGE_DAYS property and click the Edit (pencil) icon.
 Click the Edit (pencil) icon.
Go to the Value field and enter the maximum number of days you plan for Zoom to search through by topic. For example: 30 or 15.
How to use Zoom Meetings MCP server tools
Refer to the following sections for detailed information on available tools:
search_meetings tool
The search_meetings tool searches for Zoom meetings you have hosted or attended with optional filters for participant email, date range, and topic keywords. Your LLM uses this tool to find a past meeting even when you don't have the meeting ID. Results are limited to 50 meetings. Use date range filters to narrow results if needed.
Try asking:
Find my meetings with Josh from last week.Search for meetings about the product launch.Show me all meetings from December.Find the client call we had on Monday.
get_meeting_details tool
The get_meeting_details tool retrieves detailed information about a specific Zoom meeting including topic, scheduled time, duration, host, participant list, join URL, and passcode. Your LLM uses this tool to provide full details about a meeting, either using a known meeting ID or through a general search.
Try asking:
Get the details for meeting ID 12345678.Show me the full information for yesterday's standup.What's the join URL for the team meeting?Get the passcode for this meeting.
get_meeting_recording tool
The get_meeting_recording tool retrieves cloud recording links for a Zoom meeting including video, audio, and chat files if available. Your LLM uses this tool to access or share a meeting recording. Recording links are subject to Zoom access controls and retention policies. Recipients may need Zoom authentication or a passcode to access recordings.
Try asking:
Get the recording link for yesterday's standup.Share the recording from the client call on Monday.Is the recording available for meeting ID 12345678?Get all recording files from the product demo.
get_meeting_transcript tool
The get_meeting_transcript tool retrieves the auto-generated transcript for a Zoom meeting with speaker labels and timestamps if available. Your LLM uses this tool to provide a meeting summary, action items, or to search for what was said. Transcript availability depends on the host's Zoom settings. Large transcripts may truncate due to response size limits.
Try asking:
Show me the transcript from the client call on Monday.Get the transcript for yesterday's team meeting.What was discussed in the product review meeting?Summarize the key points from the meeting transcript.
get_meeting_participants tool
The get_meeting_participants tool retrieves the attendance list for a completed Zoom meeting, including participant names, emails (if available), join and leave times, and total duration. Your LLM uses this tool to verify who attended a meeting or check attendance patterns.
Try asking:
Who attended the team meeting on Friday?Show me the attendance list for yesterday's standup.How long did Marco stay in the client call?Get the participant list for meeting ID 12345678.
create_meeting tool
The create_meeting tool creates a new Zoom meeting with specified topic, start time, duration, agenda, and invitees. Your LLM uses this tool to schedule a new Zoom meeting.
Try asking:
Schedule a Zoom meeting for tomorrow at 2pm with the engineering team.Create a meeting called 'Product Demo' for next Monday at 10am.Set up a 30-minute standup for Friday morning.Schedule a client call for next Wednesday at 3pm and invite [email protected].
update_meeting tool
The update_meeting tool updates an existing scheduled Zoom meeting including topic, start time, duration, or agenda. Your LLM uses this tool to modify an existing meeting's time, title, or description.
Try asking:
Update the product review meeting to start at 3pm instead.Change the topic of tomorrow's meeting to 'Q1 Planning'.Extend the client call duration to 90 minutes.Move Friday's standup to 10am.
get_recording_vtt tool
The get_recording_vtt tool fetches the VTT caption file content for a Zoom cloud recording. Your LLM uses this tool to read the captions of recordings. This tool requires the download_url returned by a prior get_meeting_recording call because it doesn't perform its own recording lookup.
Try asking:
Get the captions from the recording we pulled earlier.Show me the VTT file content for this recording.Fetch the caption file from yesterday's meeting recording.Read the VTT captions for the client call recording.
Getting started
View and manage your MCP server tools in the Overview page Tools section. Tool management provides the following capabilities:
TOOLS MUST BE STARTED
Your LLM can only access active tools in your MCP server connector.
Last updated: