Azure DevOps
Azure DevOps provides version control, work item tracking, pipelines, and release management for software development teams. The Azure DevOps connector lets you work with Azure DevOps projects, boards, builds, and pipelines in Workato.
This connector supports the following objects:
- Project
- Board
- Board columns
- Build
- Build log
- Run
- Work item
API version
The Azure DevOps connector uses the Azure DevOps API v6 and later. Previous versions may be compatible, but Workato has not tested earlier versions.
Install Azure DevOps from the community library
Complete the following steps to install the Azure DevOps connector from the community library:
Open the recipe editor and search for a connector. Alternatively, you can search for a connector in the community library.
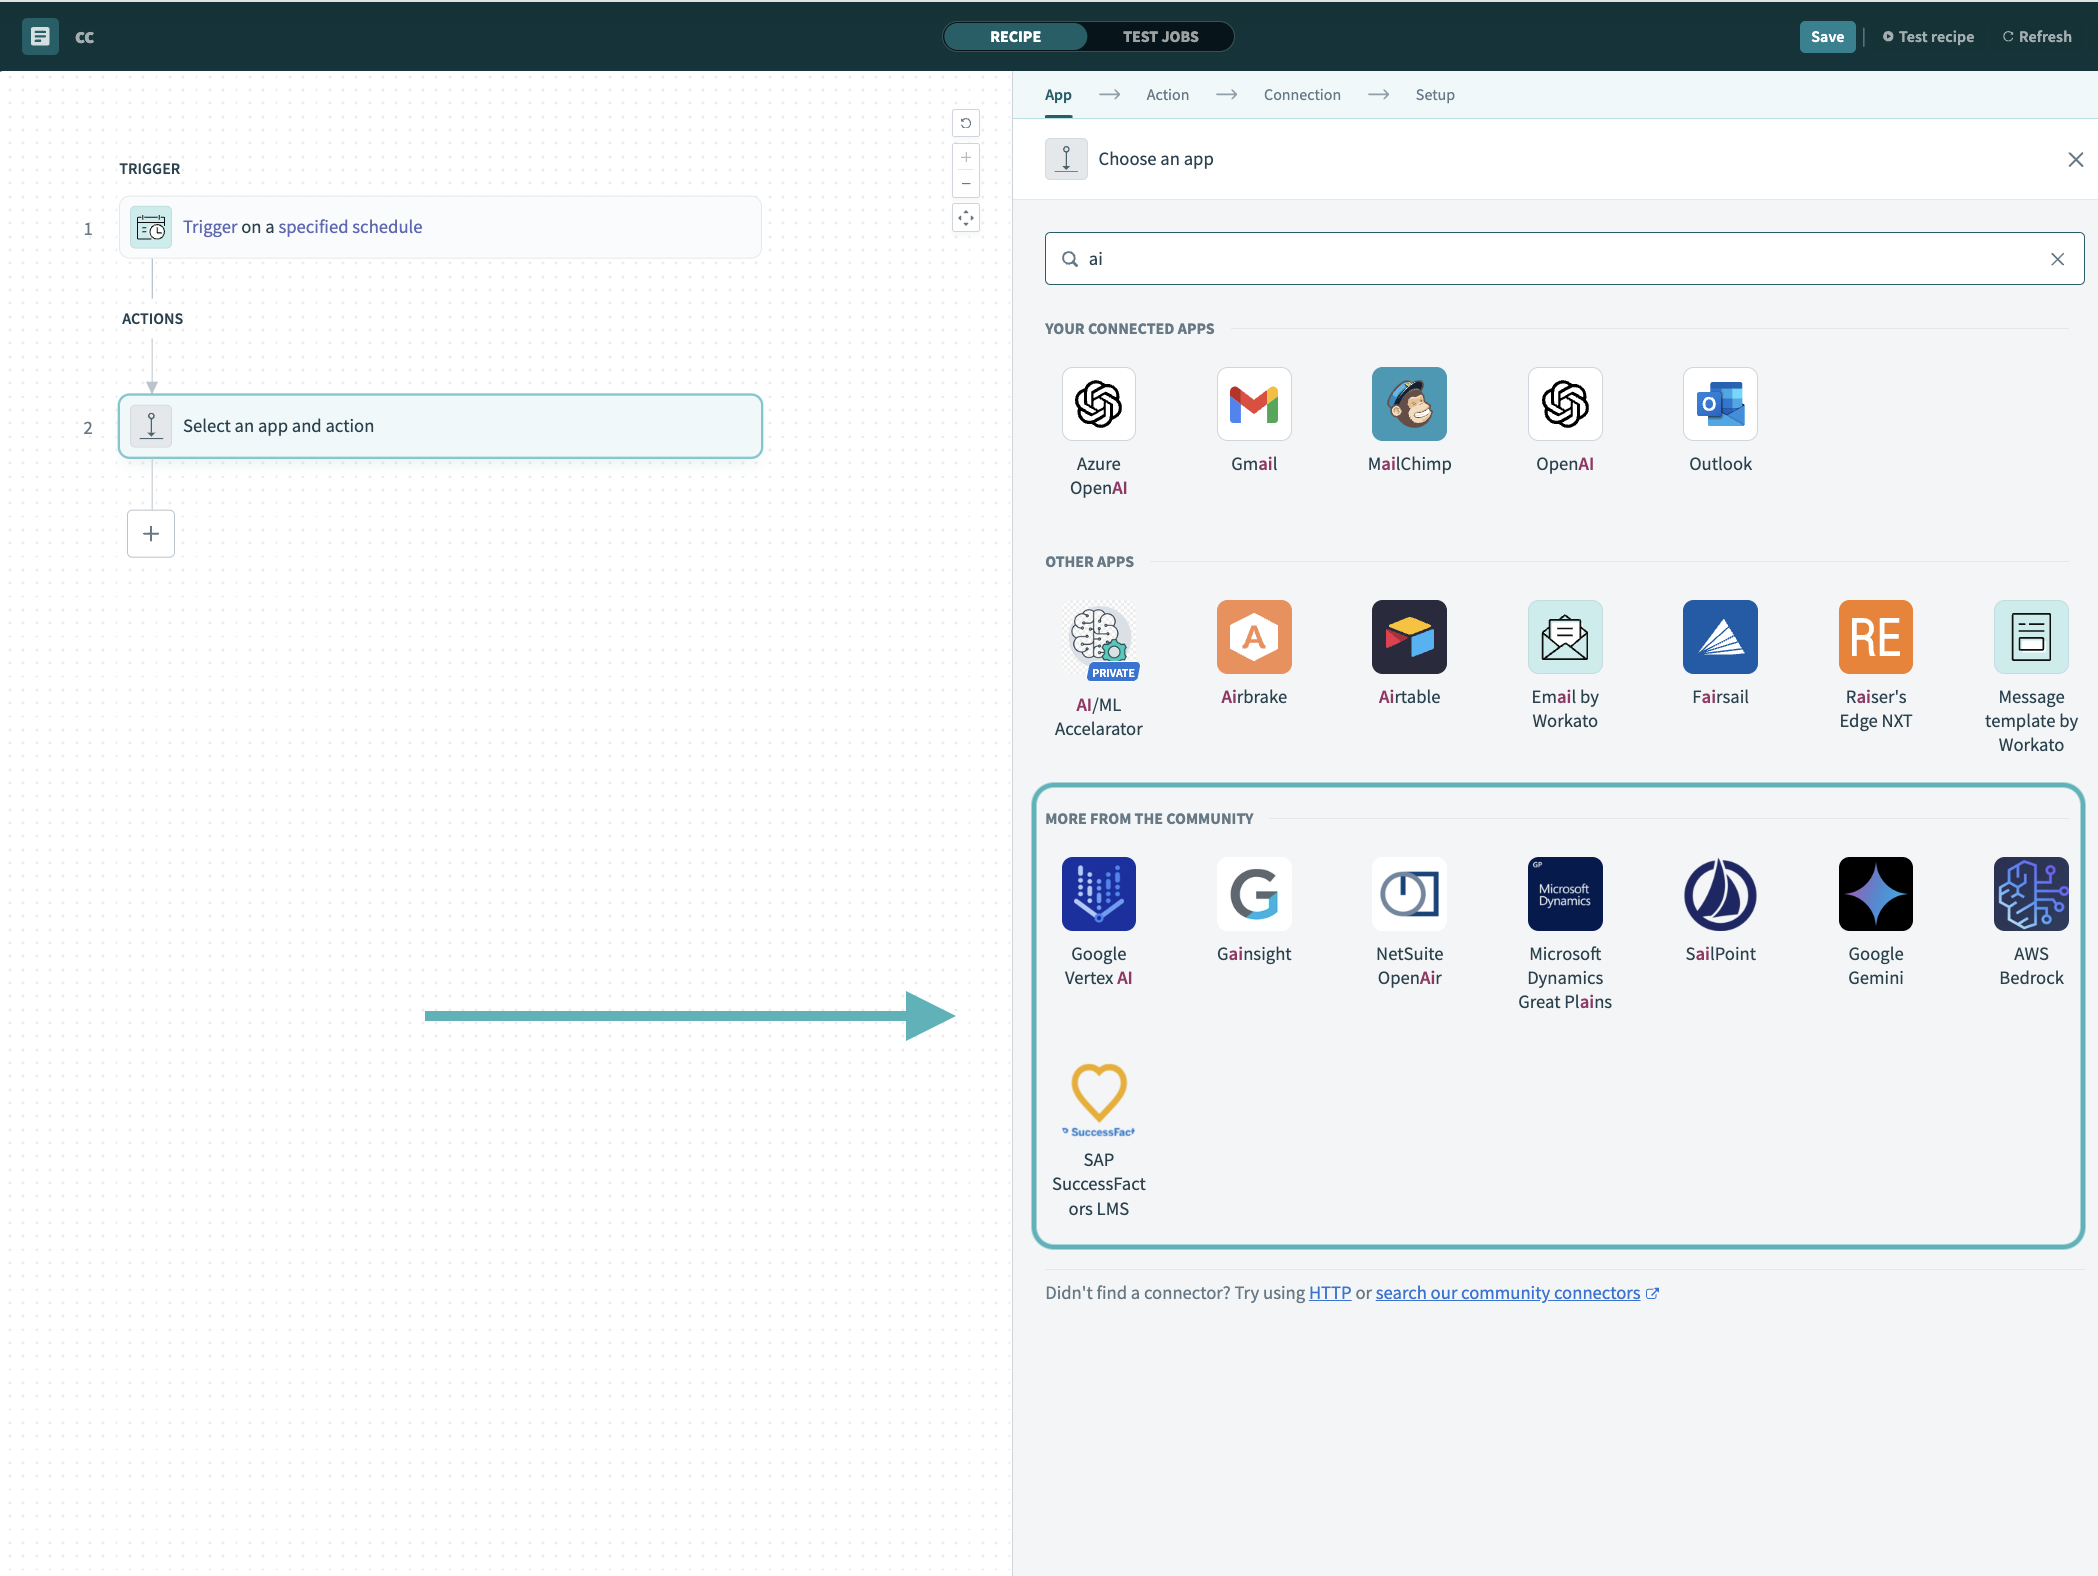 Search for community connectors in the recipe editor
Select the community connector you plan to install.
Click Install to install the connector from the community library.
 Click Install
Select Release connector. Alternatively, select Review code to review and modify the connector code before releasing it to the workspace.
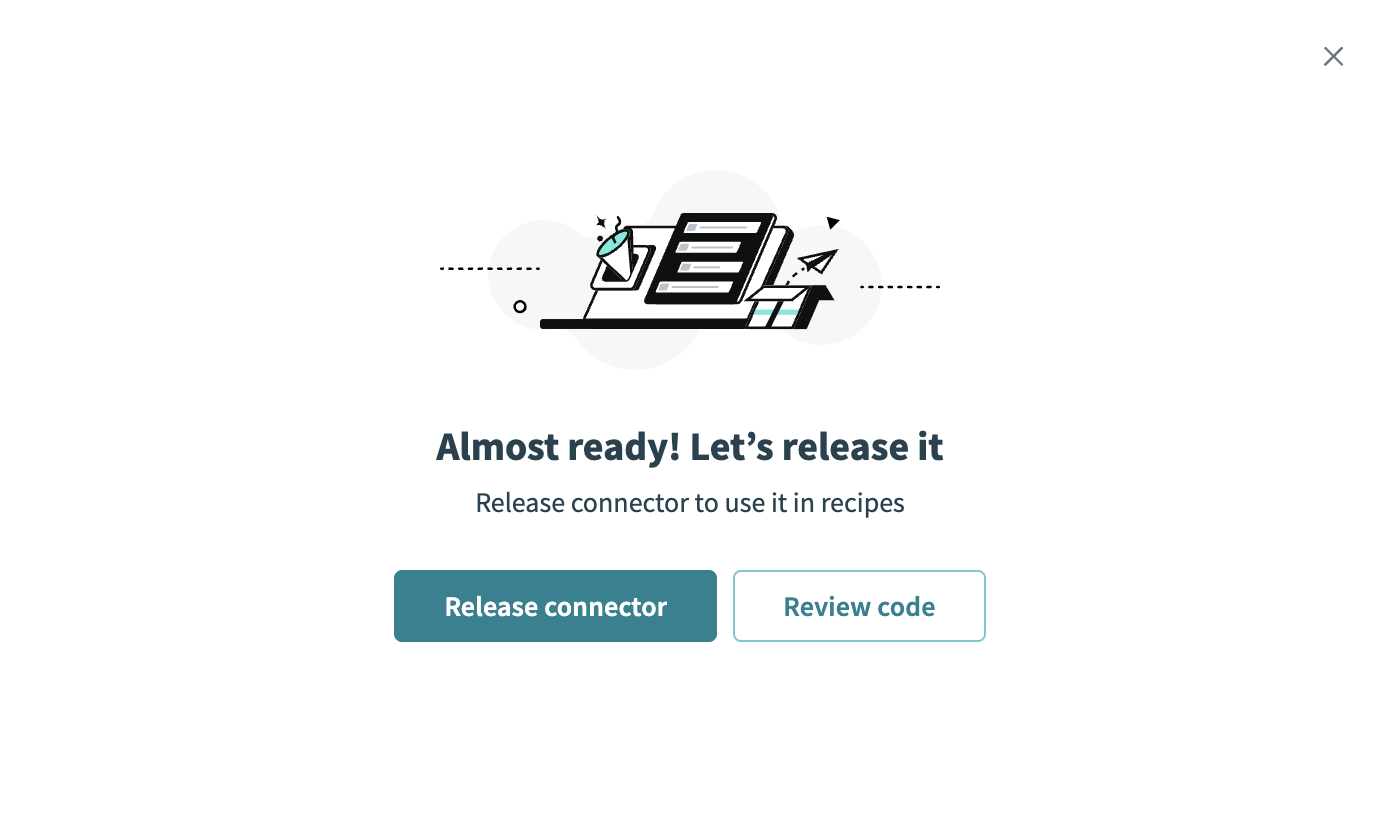 Release the connector
Summarize any changes you made to the connector, then click Release to allow workspace collaborators to use the connector in recipes.
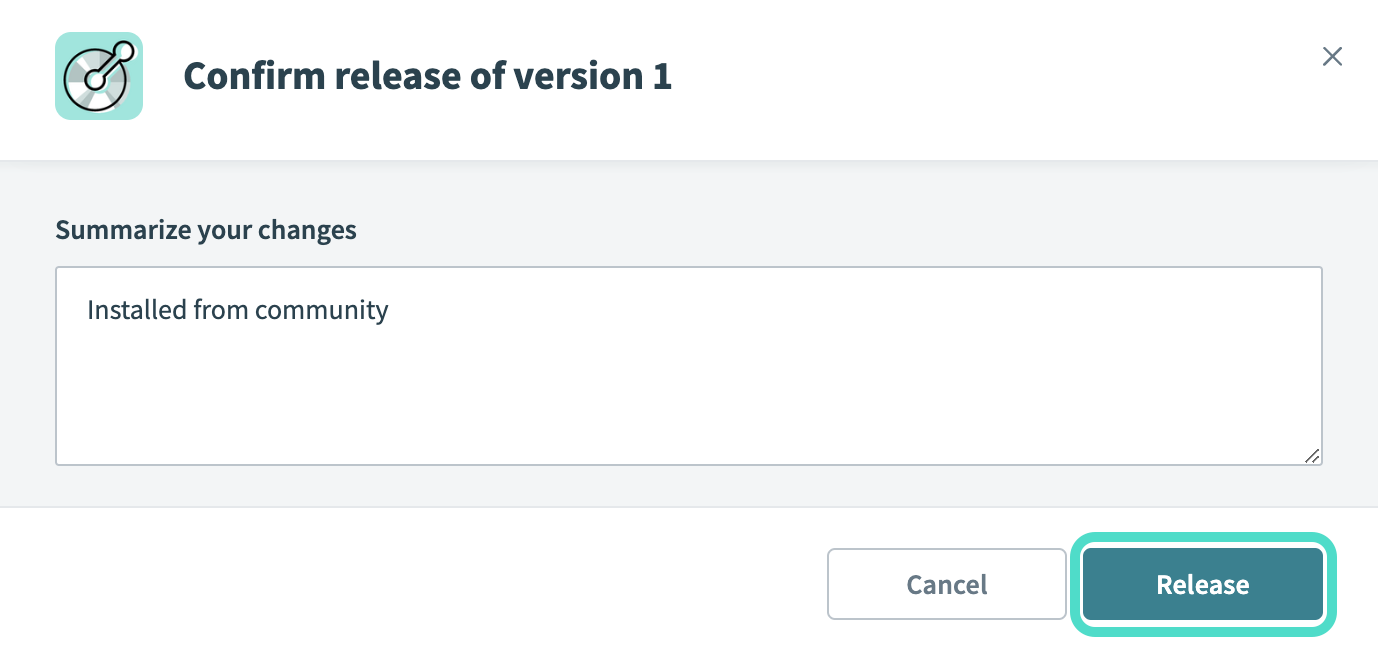 The Confirm release dialog
Connection setup
The Azure DevOps connector supports the following authentication types:
Authorization code grant authentication
You can use authorization code grant authentication to create an Azure DevOps connection in Workato. Use this method when you want recipes to run with a specific user's permissions, or when you want users to authorize Workato through a browser consent flow.
To use OAuth 2.0, you must first register an application and configure it to access Azure DevOps.
Azure DevOps setup
Complete the following steps to set up Azure DevOps for authorization code grant authentication:
Sign in to your Azure portal with an account that has permission to register applications in your Microsoft Entra tenant.
Go to Microsoft Entra ID > App registrations, then click New registration.
Enter a name for your application in the Name field.
Enter supported tenants that can use this application in the Supported account types field.
Select Web and enter https://www.workato.com/oauth/callback in the Redirect URI field.
Click Register.
Copy and save the Application (client) ID and the Directory (tenant) ID from the On the application's Overview page. You need these values to configure the Workato connection.
Select Certificates & secrets > New client secret. Enter a description and expiration, then click Add.
Copy and save the client secret for use in Workato. The secret is only displayed once.
Select API permissions > Add a permission.
Select Azure DevOps > Delegated permissions. Select the user_impersonation scope. Select additional scopes as needed for your Azure DevOps instance.
Click Add permissions. Click Grant admin consent if your tenant requires admin consent.
Connect to Azure DevOps with authorization code grant authentication
Complete the following steps to set up an authorization code grant authentication connection to Azure DevOps in Workato:
Click Create > Connection or press C twice.
Search for Azure DevOps and select it as your app.
Provide a unique name for the connection in the Connection name field.
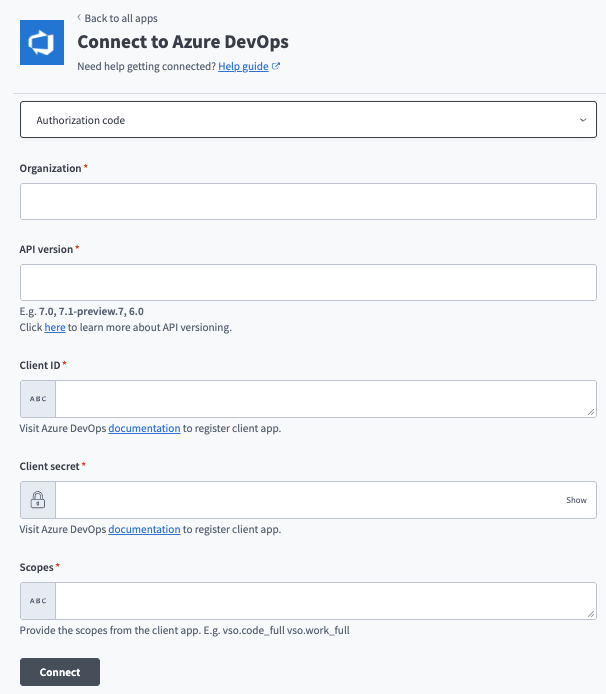 Set up Authorization code grant authentication in Azure DevOps
Use the Location drop-down menu to select the project where you plan to store the connection.
Use the OAuth 2.0 grant type drop-down menu to select Authorization code.
Enter your Azure DevOps organization name in the Organization field.
Enter your API version.
Enter the Client ID.
Enter the Client secret.
Enter any scopes from the client app in the Scopes field.
Click Connect.
Click Authorize to grant Workato access to Azure DevOps. After you authorize the application, Microsoft redirects you back to Workato and the connection becomes active.
Personal access token grant authentication
You can use a personal access token (PAT) grant to authenticate an Azure DevOps connection in Workato. Use a PAT for development, testing, or recipes owned by a single user.
Azure DevOps setup
Complete the following steps to set up a personal access token in Azure DevOps:
Sign in to your Azure DevOps organization at https://dev.azure.com/{your_organization}.
Select User settings (the user icon) > Personal access tokens.
 User profile settings icon
Click New Token.
Enter a name for the token in the Name field.
Enter the Azure DevOps organization the token applies to in the Organization field.
Enter the date the token expires in the Expiration field. Maximum is one year.
Enter the minimum scopes required for the recipes you plan to build in the Scopes field.
Refer to Azure DevOps scopes for more information about scopes.
Click Create.
Copy and save the token for use in Workato. The token is only displayed once.
Connect to Azure DevOps with a personal access token
Complete the following steps to set up a connection to Azure DevOps with a personal access token in Workato:
Click Create > Connection or press C twice.
Search for Azure DevOps and select it as your app.
Provide a unique name for the connection in the Connection name field.
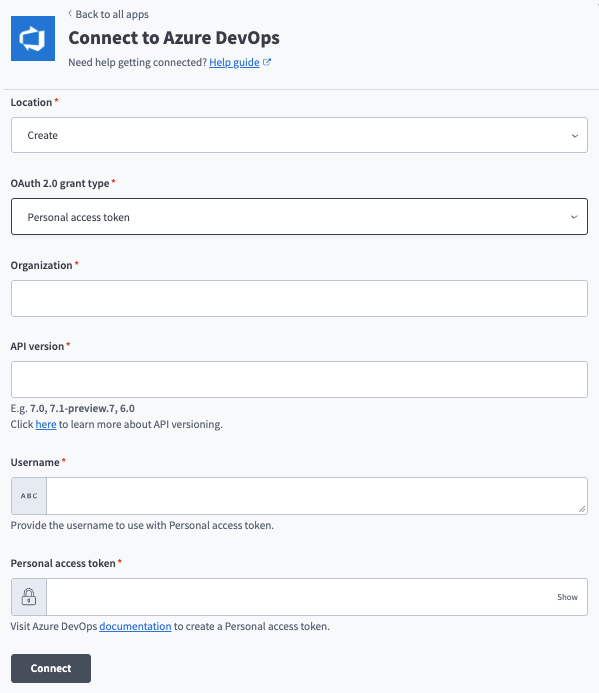 Set up personal access token with Azure DevOps
Use the Location drop-down menu to select the project where you plan to store the connection.
Use the OAuth 2.0 grant type drop-down menu to select Personal access token.
Enter your Azure DevOps organization name in the Organization field. This is the value that appears in your Azure DevOps URL: https://dev.azure.com/{organization}.
Enter your API version.
Enter your Username.
Enter your Personal access token.
Click Connect.
Click Authorize to grant Workato access to Azure DevOps. After you authorize the application, Microsoft redirects you back to Workato and the connection becomes active.
Service principal grant authentication
You can use a service principal OAuth 2.0 grant to create an Azure DevOps connection in Workato.
Service principals and managed identities authenticate to Azure DevOps as a non-human identity, using Microsoft Entra ID. Use this method for production workflows, scheduled jobs, or recipes that should run without a specific user's credentials.
REQUIRED PERMISSIONS
Adding service principals or managed identities to an Azure DevOps organization requires Project Collection Administrator permissions.
Azure DevOps setup
Create an identity and client secret in Microsoft Entra ID for service principal grant authentication in Azure DevOps :
Create the identity in Microsoft Entra ID.
Go to Microsoft Entra ID > App registrations > New registration.
Enter a name for your application in the Name field.
Enter tenant support in the Account types field.
Enter a Redirect URI. Leave blank for service-to-service scenarios.
Go to Certificates & secrets > New client secret.
Copy and save the Application (client) ID, Directory (tenant) ID, and the secret Value for use in Workato.
Sign in to your Azure DevOps organization at https://dev.azure.com/{your_organization}.
Go to Organization settings > Users, then click Add users.
Enter the display name of the service principal in the Users or service principals field.
Enter the access level you plan to grant in the Access level field. Select Basic for full Azure DevOps functionality.
Add the projects the identity can access in the Add to projects field.
Select Project Contributors, or another group that grants the required permissions, in the Azure DevOps groups field.
Click Add.
Confirm that the identity appears in the Users list with the access level you assigned.
Connect to Azure DevOps with service principal grant authentication
Complete the following steps to set up a service principal grant connection to Azure DevOps in Workato:
Click Create > Connection or press C twice.
Search for Azure DevOps and select it as your app.
Provide a unique name for the connection in the Connection name field.
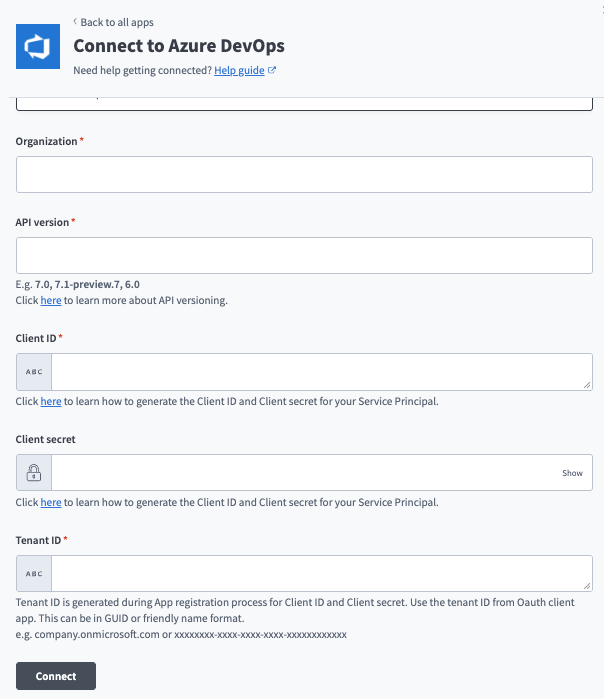 Set up service principal grant authentication in Workato
Use the Location drop-down menu to select the project where you plan to store the connection.
Use the Authentication type drop-down menu to select Service principal.
Enter your Azure DevOps organization name in the Organization field.
Enter your API version.
Enter the Client ID.
Enter the Client secret.
Enter the Tenant ID.
Click Connect.
Click Authorize to grant Workato access to Azure DevOps. After you authorize the application, Microsoft redirects you back to Workato and the connection becomes active.
Last updated: