Configure Jira as a data pipeline source
Set up Jira as a data pipeline source to extract issues, projects, users, and related records into your destination. Use this guide to set up a connection, configure your pipeline, add objects, and understand sync behavior and known limitations.
Features supported
The following features are supported when you use Jira as a pipeline source:
- Cloud and on-premise connectivity: Connect to Jira Cloud through HTTPS, or to Jira Server and Jira Data Center through an on-prem group. Refer to Supported connection types for the connection options available for each deployment.
- Full refresh and incremental sync: Supports full refresh and incremental sync modes. Refer to Sync modes for more information.
- Object-level selection: Select Jira objects to sync as separate tables in your destination.
- Field-level selection: Choose which fields to include or exclude from each object during extraction and schema replication.
- Schema drift detection and handling: Detect and apply schema changes automatically with Auto-sync new fields, or keep the schema fixed with Block new fields.
- Field-level data masking: Replicate sensitive fields as is or hash them before they reach your destination.
- Configurable sync frequency: Schedule syncs on a time-based interval or with a cron expression.
Prerequisites
Complete the following requirements before you connect Jira as a data pipeline source.
- A Jira Cloud, Jira Server, or Jira Data Center instance with API access enabled.
- The hostname for your Jira instance. For example,
workato.atlassian.net. - Read access to the objects you plan to sync.
- Credentials for your chosen authentication method. Refer to Supported connection types for details.
Required permissions
The connected Jira account must have permission to read the data you plan to sync. Jira enforces permissions at multiple levels, and missing permissions cause the pipeline to receive a 403 - Forbidden response and skip the affected records.
The connected account must satisfy each of the following:
- Project permissions: The account must have the Browse Projects permission for every Jira project that contains data you plan to sync. Permissions are granted through permission schemes assigned to each project. Refer to the Atlassian permissions guide for more information.
- Issue security levels: If a project uses an issue security scheme, the account must be a member of the security levels assigned to the issues you plan to sync. Issues at security levels the account can't access are excluded from extraction.
- Application access: The account must have application access to the Jira product that contains the data. For example, reading the
Boardsobject requires Jira Software application access.
Supported connection types
Jira data pipelines support the following authentication methods. Select the corresponding value in the Auth type field when you create the connection.
- API token: Authenticate with an Atlassian API token. Select API token for a personal Atlassian account, or Service account (API token) for an Atlassian service account. Both options use the same setup procedure and the same fields. This method doesn't support on-premise Jira connections.
- OAuth 2.0: Authorize Workato access from your Jira account. Select OAuth 2.0 (Cloud - Atlassian-hosted Jira) for Jira Cloud, or OAuth 2.0 (Data Center) for on-premise Jira. The Data Center option additionally requires you to generate a client ID and client secret in Jira and provide them in Workato.
- Personal access token: Authenticate with a personal access token (PAT) generated in your Jira account. This method supports on-premise Jira connections.
- Basic authentication with password: Authenticate with a username and password. Atlassian deprecated this method for cloud connections in December 2018.
AUTHENTICATION LIMITATIONS
The Jira authentication methods have the following limitations:
- API token authentication doesn't support on-premise Jira connections.
- Basic authentication with password is deprecated for Jira Cloud and supports on-premise Jira only.
Connect to Jira
There are four ways to connect to Jira:
We strongly recommend using API tokens, OAuth 2.0, or personal access tokens to connect to Jira instead of basic authentication with password.
LIMITATIONS
Authentication methods for the Jira connector have the following limitations:
- Real-time triggers aren't supported with OAuth 2.0.
- On-prem Jira connections aren't supported with API token authentication.
- Atlassian deprecated basic authentication for cloud connections in December 2018. On-premise Jira is not affected.
API token
View API token steps
API tokens authenticate your Atlassian account without using a username and password. API token authentication doesn't support connections to on-premise Jira.
Prerequisites
You must generate an Atlassian API token for this authentication method. Refer to the Atlassian Manage API tokens guide for more information.
Connect to Jira using an API token
Complete the following steps to connect to Jira in Workato using an API token:
Click Create > Connection or press C twice.
Search for and select Jira as your connection on the New connection page.
Provide a name for your connection in the Connection name field.
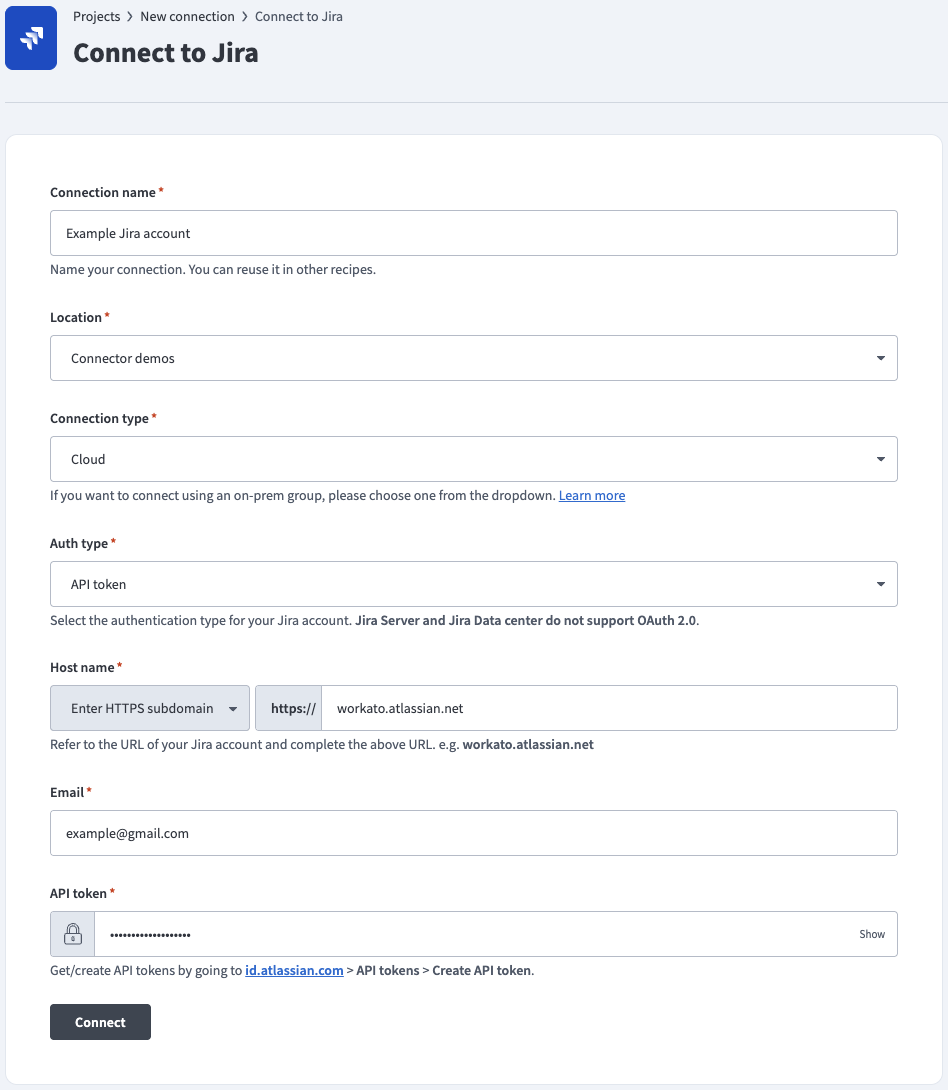 API token auth
Use the Location drop-down menu to select the project where you plan to store the connection.
Use the Connection type drop-down menu to select your connection type.
Use the Auth type drop-down menu to select API token or Service account (API token), depending on your account type.
Enter the URL subdomain for your Jira instance in the Host name field. For example: workato.atlassian.net
Enter the Email of the Jira account to link to Workato.
Enter the API token for your Atlassian account. Refer to the Atlassian Manage API tokens guide to generate this value.
Optional. Use the Custom OAuth profile drop-down menu to select a custom OAuth profile for your connection.
Click Connect.
OAuth 2.0
View OAuth 2.0 steps
OAuth 2.0 enables you to share specific data with an application while keeping your username, password, and other information private. OAuth 2.0 supports on-premise Jira connections.
REAL-TIME TRIGGERS NOT SUPPORTED
OAuth 2.0 doesn't support real-time triggers because it is incompatible with webhooks. As an alternative, you can register the Webhooks connector in Jira to use Jira's static webhook functionality. Refer to the Cloud Jira or Jira Datacenter webhook documentation for registration steps.
Prerequisites
You must generate an Atlassian client ID and client secret if you plan to connect to Jira Data Center using OAuth 2.0. Refer to the Atlassian Configure an incoming link guide to generate these values using https://www.workato.com/oauth/callback as the redirect URI.
Connect to Jira using OAuth 2.0
Complete the following steps to connect to Jira in Workato using OAuth 2.0:
Click Create > Connection or press C twice.
Search for and select Jira as your connection on the New connection page.
Provide a name for your connection in the Connection name field.
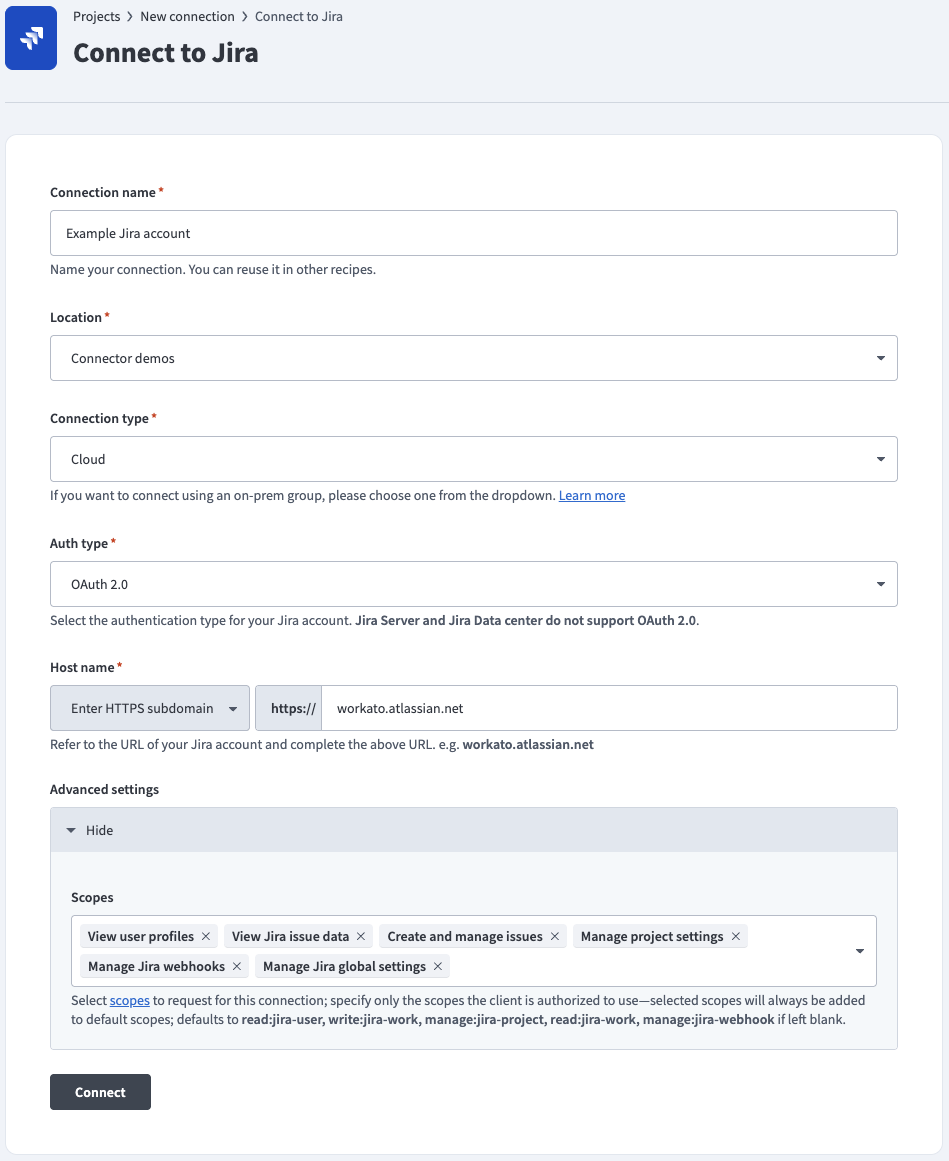 OAuth 2.0 auth
Use the Location drop-down menu to select the project where you plan to store the connection.
Use the Connection type drop-down menu to select your connection type.
Use the Auth type drop-down menu to select OAuth 2.0 (Cloud - Atlassian-hosted Jira), or select OAuth 2.0 (Data Center) to connect to an on-prem Jira instance.
Enter the URL subdomain for your Jira instance in the Host name field. For example: workato.atlassian.net
Go to the Advanced settings section and enter your Atlassian Client ID and Client secret if you're connecting to an on-prem Jira instance. Refer to the Prerequisites section to generate these values.
Optional. Use the Scopes drop-down menu to select the authorization scopes to request. Workato requests the following scopes by default:
Cloud-hosted Jira defaults:
read:jira-userwrite:jira-workmanage:jira-projectread:jira-workmanage:jira-webhook
Jira Data Center defaults:
READWRITE
Optional. Use the Custom OAuth profile drop-down menu to select a custom OAuth profile for your connection.
Click Connect and sign in to your Jira instance.
Authorize Workato's request to access your Jira instance.
Personal access tokens
View Personal access tokens steps
Personal access tokens (PATs) authenticate your Atlassian account without using a username and password. PAT authentication supports on-premise Jira connections.
Prerequisites
You must generate an Atlassian personal access token for this authentication method. Refer to the Atlassian Using Personal Access Tokens guide for more information.
Connect to Jira using a personal access token
Complete the following steps to connect to Jira in Workato using a personal access token:
Click Create > Connection or press C twice.
Search for and select Jira as your connection on the New connection page.
Provide a name for your connection in the Connection name field.
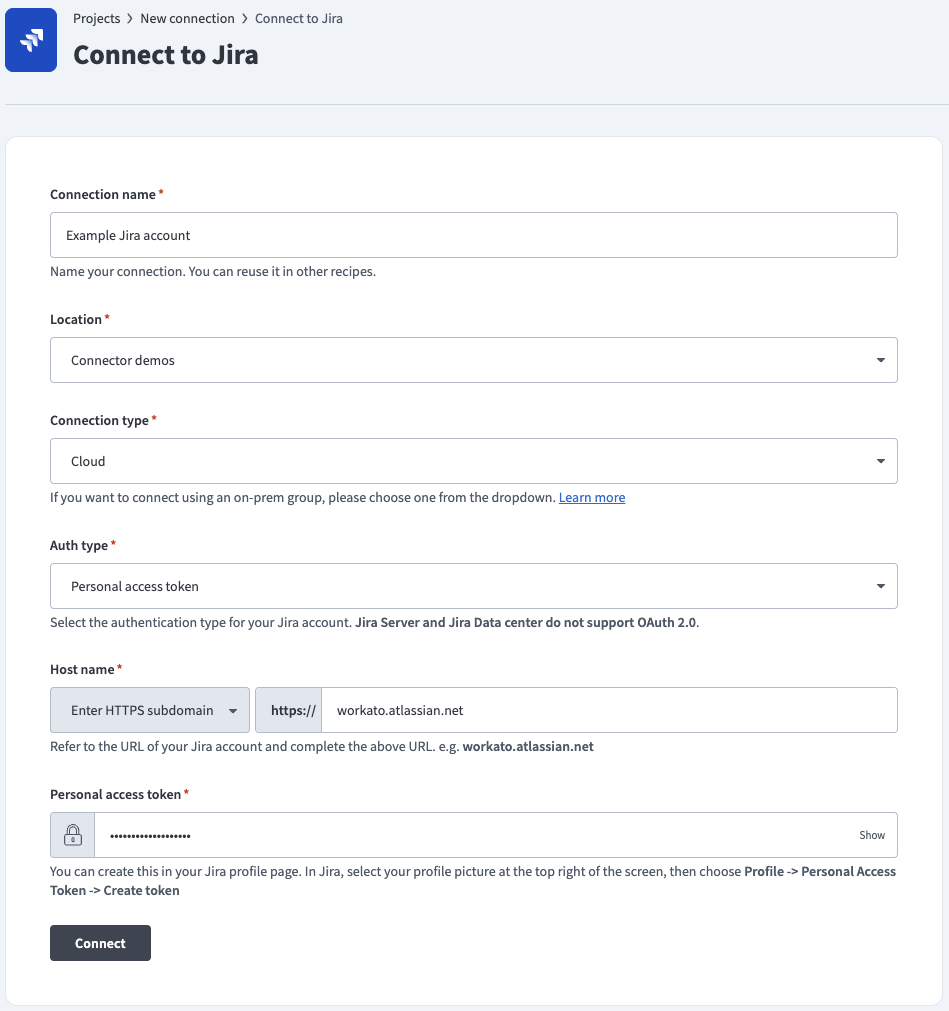 Personal access token auth
Use the Location drop-down menu to select the project where you plan to store the connection.
Use the Connection type drop-down menu to select your connection type.
Use the Auth type drop-down menu to select Personal access token.
Enter the URL subdomain for your Jira instance in the Host name field. For example: workato.atlassian.net
Enter the Personal access token of the Jira account to link to Workato. Refer to the Atlassian Using Personal Access Tokens guide to generate this value.
Optional. Use the Custom OAuth profile drop-down menu to select a custom OAuth profile for your connection.
Click Connect.
Basic authentication with password
View Basic authentication with password steps
Basic authentication connects to your Atlassian account using a username and password. Basic authentication supports on-premise Jira connections.
DEPRECATED PASSWORD AUTHENTICATION
Atlassian deprecated basic authentication for cloud connections in December 2018. On-premise Jira is not affected.
Connect to Jira using basic authentication
Complete the following steps to connect to Jira in Workato using basic authentication:
Click Create > Connection or press C twice.
Search for and select Jira as your connection on the New connection page.
Provide a name for your connection in the Connection name field.
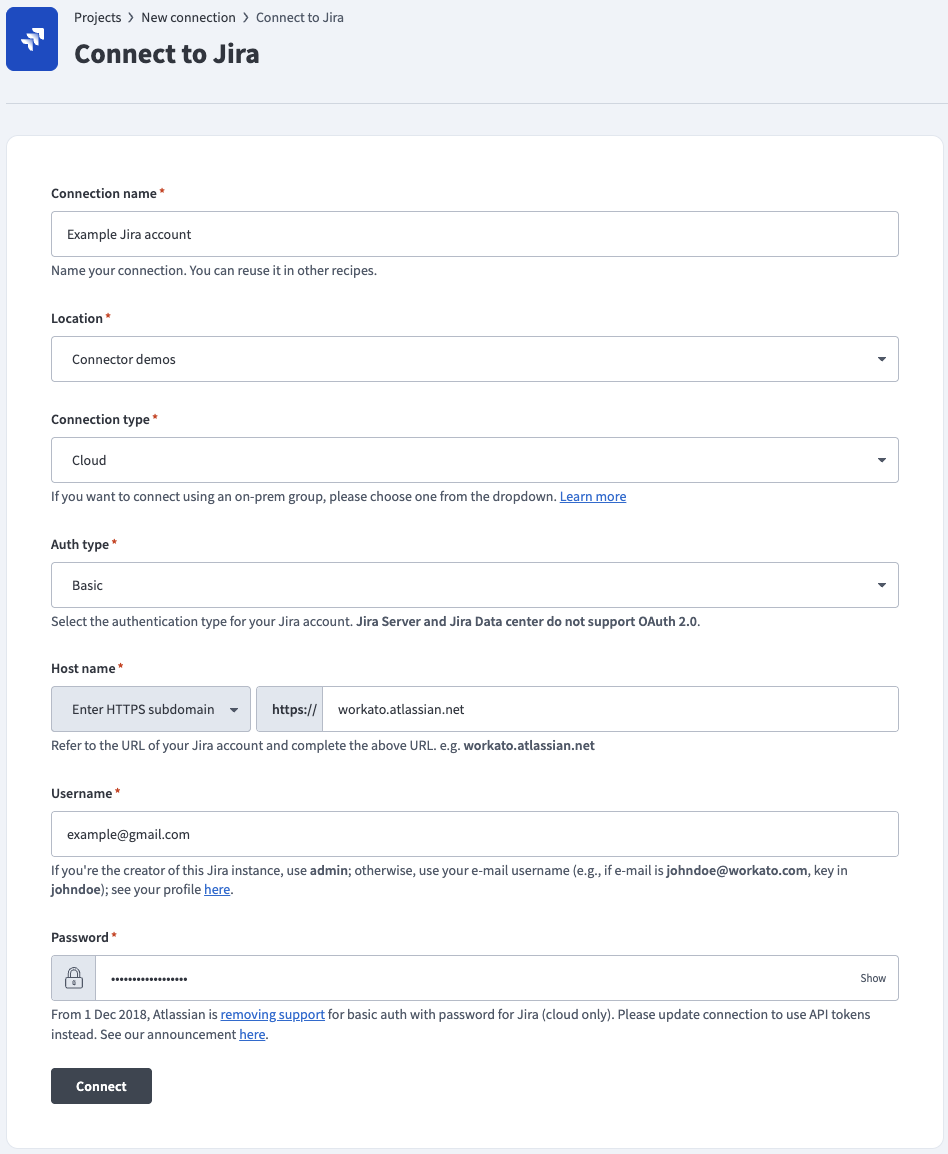 Basic password auth
Use the Location drop-down menu to select the project where you plan to store the connection.
Use the Connection type drop-down menu to select your connection type.
Use the Auth type drop-down menu to select Basic.
Enter the URL subdomain for your Jira instance in the Host name field. For example: workato.atlassian.net
Enter your Jira Username and Password.
Optional. Use the Custom OAuth profile drop-down menu to select a custom OAuth profile for your connection.
Click Connect.
Configure the pipeline
Complete the following steps to configure Jira as your data pipeline source.
Select Create > Data pipeline or press C+I.
Enter a name for the data pipeline in the Data pipeline name field.
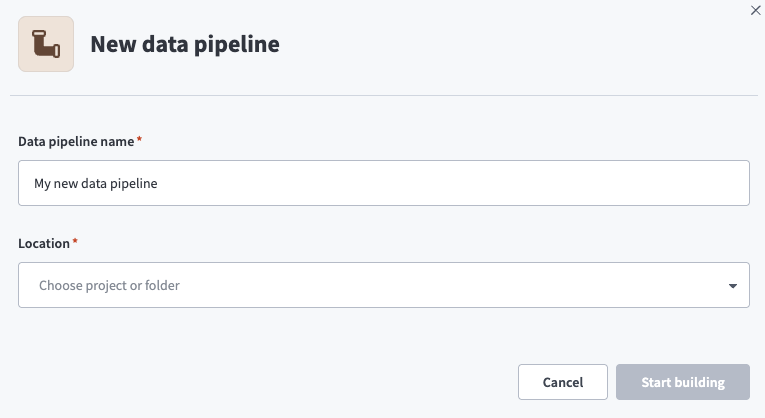 Data pipeline setup
Use the Location drop-down menu to select the project where you plan to store the data pipeline.
Click Start building.
Click the Extract new/updated records from source app trigger. This trigger defines how the pipeline retrieves data from Jira.
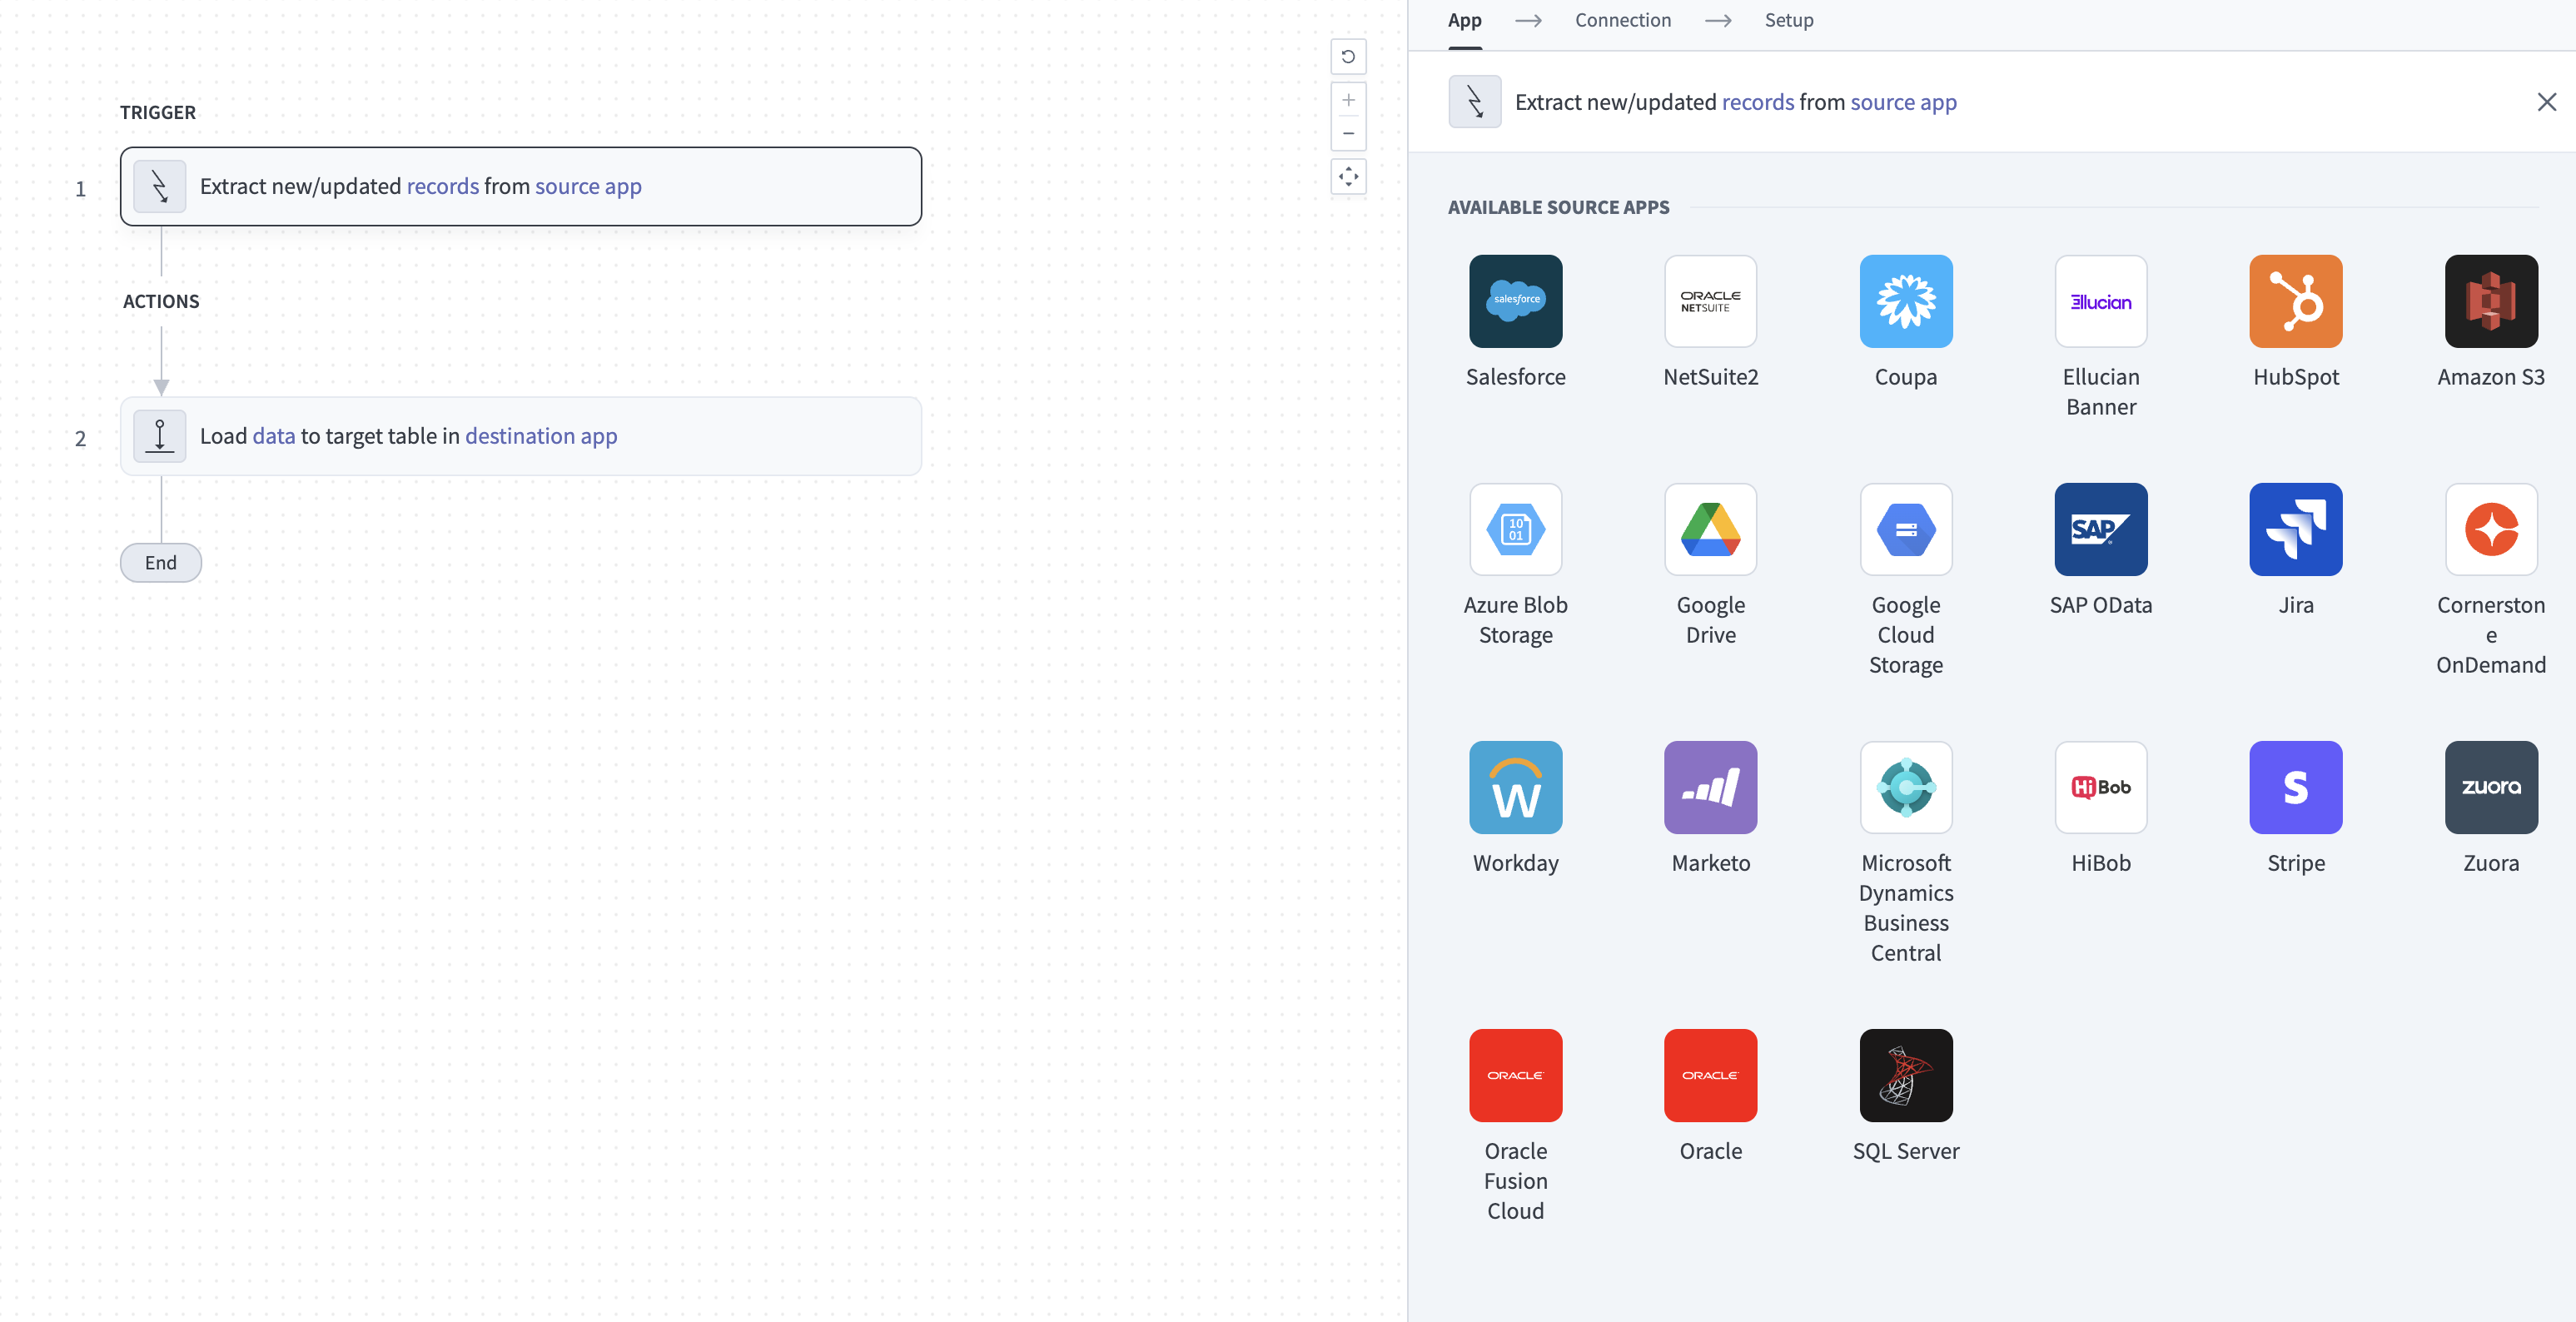 Configure the Extract new/updated records from source app trigger
Select Jira from the list of available source apps.
Choose the Jira connection you plan to use for this pipeline. Alternatively, click + New connection to create a new connection.
Click Add object to open the Add new objects panel.
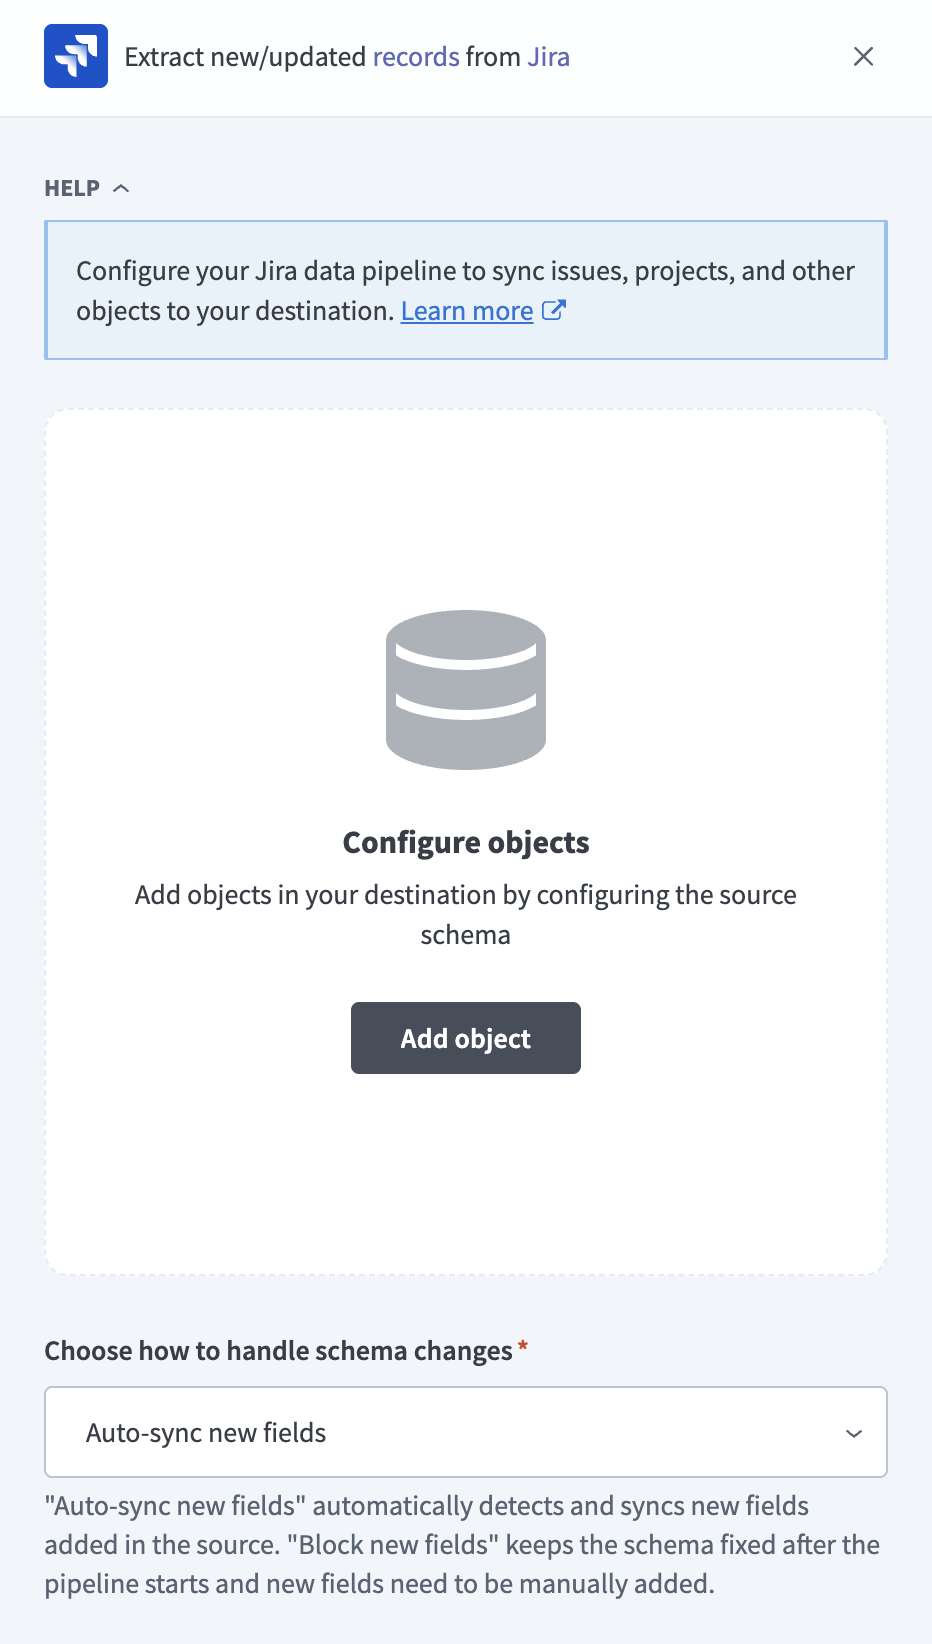 Add objects
Search or browse the list of available Jira objects, select the objects you plan to sync, and click Add. Refer to Supported objects for more information.
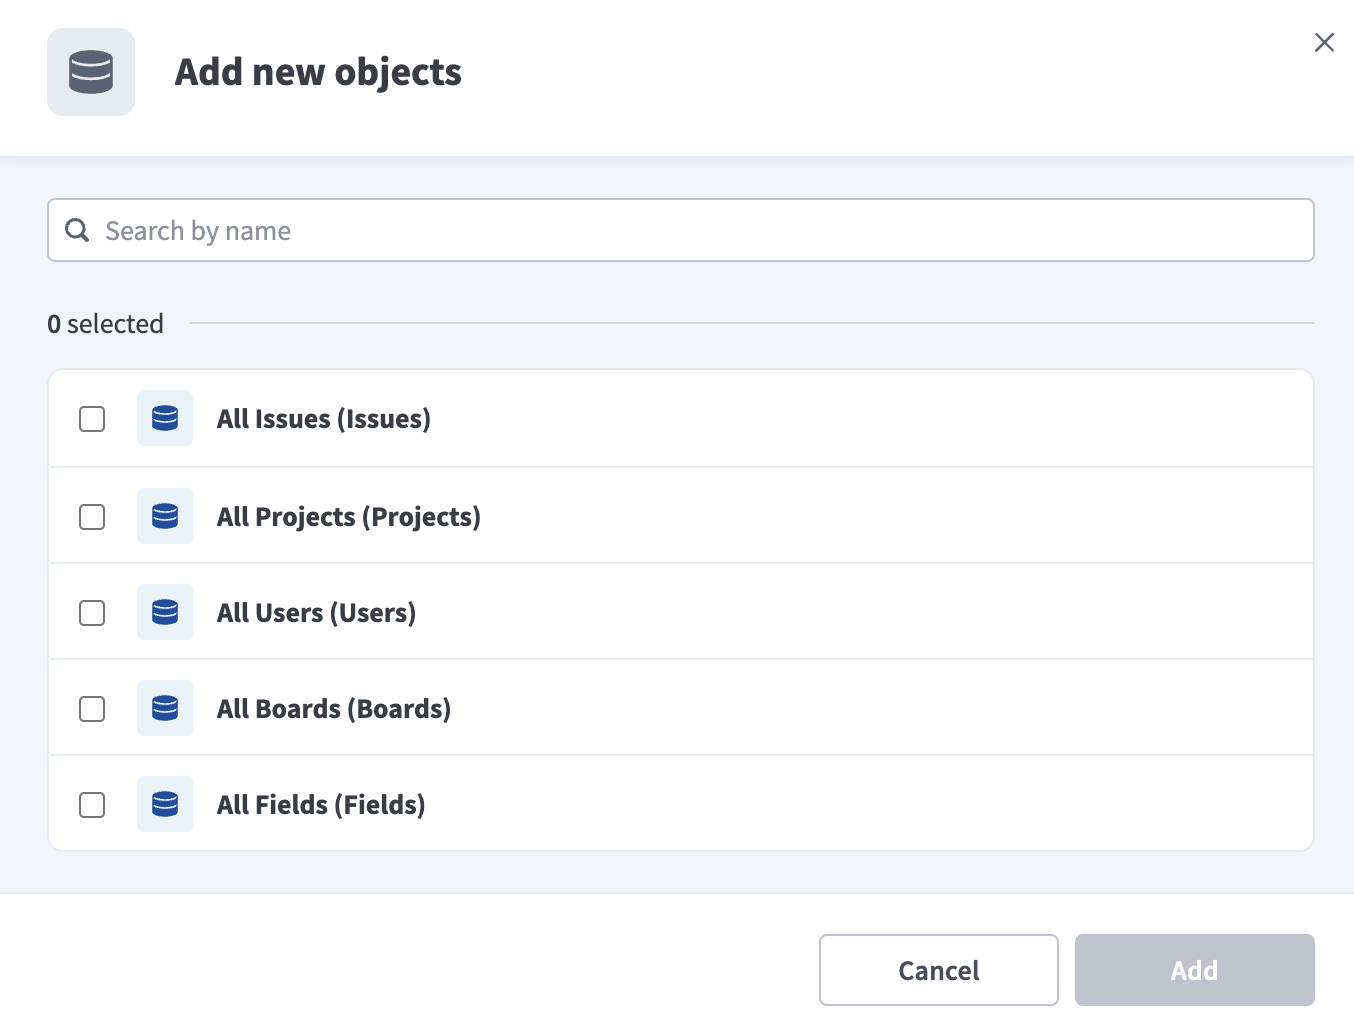 Select objects
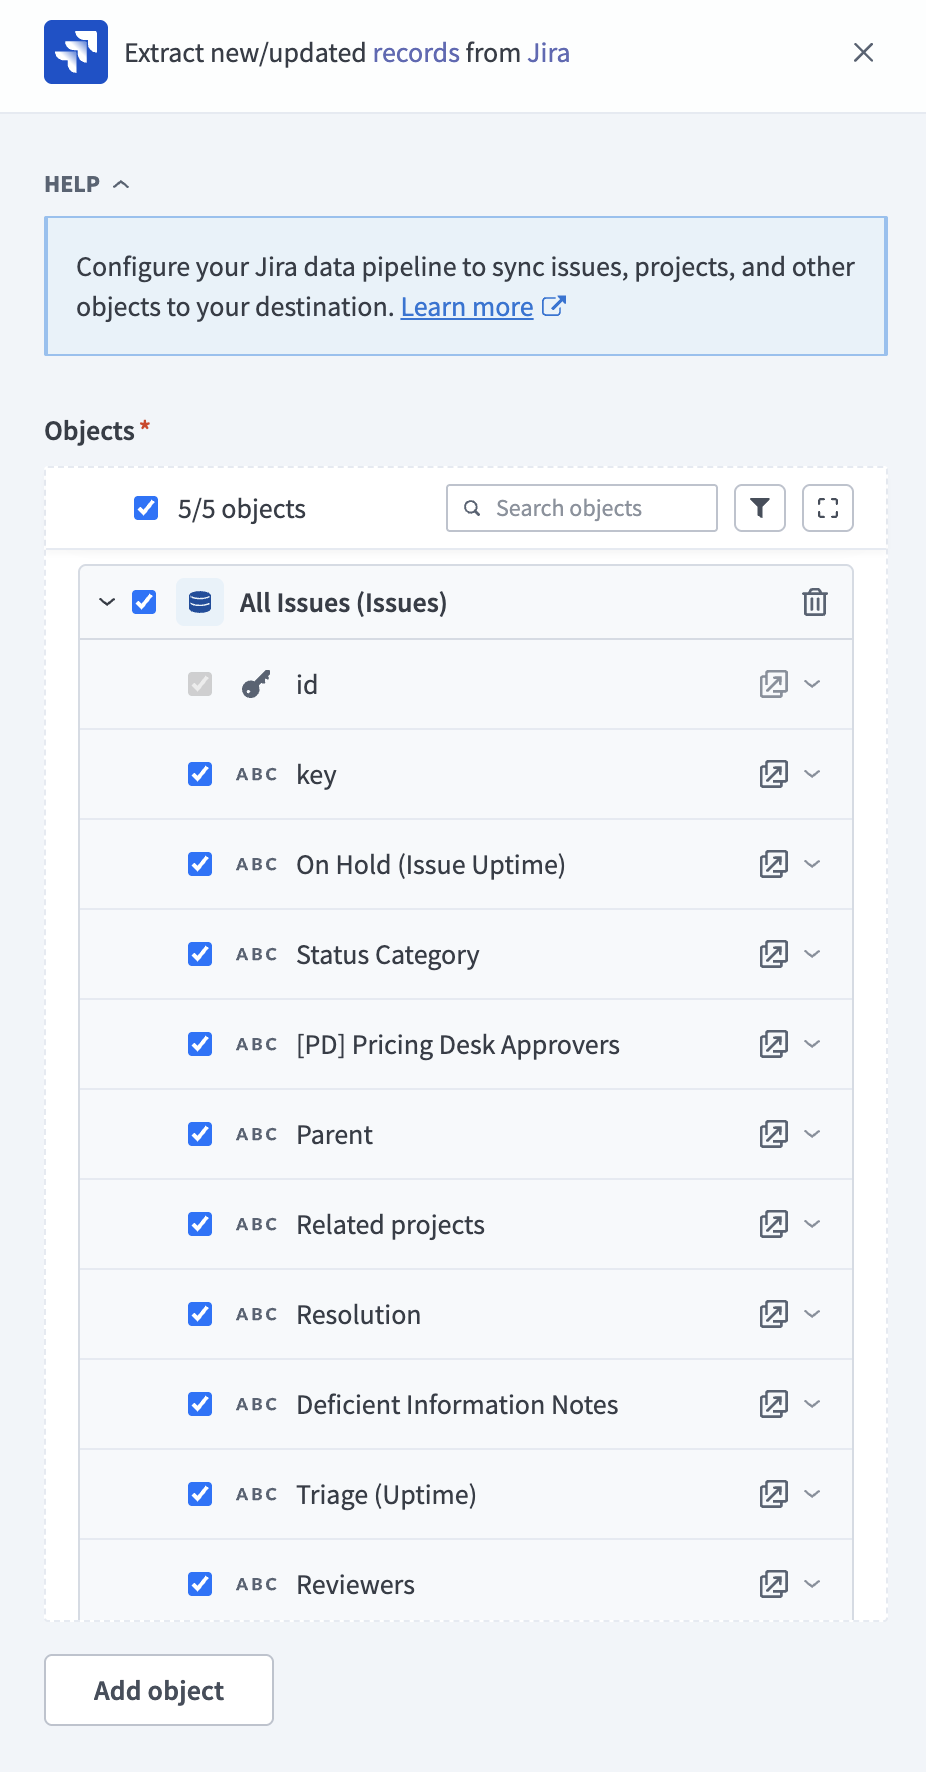
Review and customize the schema for each selected object. When you select an object, the pipeline automatically fetches its schema, including standard fields and custom fields configured in your Jira instance, to ensure the destination matches the source.
Expand any object to view its fields. Keep all fields selected to extract all available data, or deselect specific fields to exclude them from data extraction and schema replication. Primary key fields, such as id, can't be deselected.
 Expand object
Optional. Configure field-level data masking by selecting the icon next to each field and choosing how to handle the field:
- Replicate as is: Data values at the source replicate identically to the destination.
- Hash: Hash sensitive data values in the field before syncing to your destination.
Workato recommends hashing personally identifiable information (PII) and other sensitive fields.
Click Add object again to add more objects. Repeat this step to include additional Jira objects in your pipeline.
Use the Choose how to handle schema changes drop-down menu to select a schema drift handling option:
- Auto-sync new fields: Automatically detects and syncs new fields added in the source.
- Block new fields: Keeps the schema fixed after the pipeline starts. You must add new fields manually.
Configure how often the pipeline syncs data from Jira to the destination in the Frequency field. Choose either a standard time-based schedule or define a custom cron expression.
Supported objects
Jira data pipelines sync data from Jira REST API resources. Each object you select syncs as a separate table in your destination. The objects available for selection depend on your Jira instance configuration. For example, Jira Software products expose additional objects such as boards.
Available objects include the following:
Issues: Issue records, including standard fields and any custom fields configured in your Jira instance.Projects: Jira project records.Users: Jira user records.Boards: Boards from Jira Software products.Fields: Field metadata, including custom field definitions.
Sync modes
Jira data pipelines support full refresh and incremental sync.
Full refresh
A full refresh sync reads all available records from Jira for the selected object and overwrites the destination table. Use full refresh for objects where you need a complete snapshot on each run.
Incremental sync
An incremental sync extracts only records that have changed since the last successful run.
Schema and data type handling
The following considerations apply to schema and data types when you sync data from Jira.
Custom fields
The pipeline automatically discovers custom fields configured on Jira objects and includes them in the schema alongside standard fields. For example, the Issues object includes standard fields such as id, key, and Resolution together with any custom fields configured on issues in your Jira instance. Deselect individual custom fields to exclude them from extraction and schema replication.
Primary keys
Each object has a primary key field that can't be deselected. For example, id is the primary key for the Issues object.
Limitations
The following limitations apply when you use Jira as a data pipeline source.
Authentication method limitations
The following authentication limitations apply:
- API token authentication doesn't support on-premise Jira connections.
- Basic authentication with password is deprecated for Jira Cloud and supports on-premise Jira only.
Minimum sync frequency
The minimum supported sync interval is 15 minutes. You can't trigger syncs more frequently than this.
Last updated: