Workday End User MCP server
The Workday End User MCP server enables your LLM to access employee self-service workflows within Workday HCM through natural conversation. It provides tools to manage everyday HR tasks by allowing you to check your profile and reporting chain, view your team if you're a manager, check time-off balances, submit or cancel time-off requests, and approve or reject requests without requiring direct interaction with the Workday interface.
Uses
Use the Workday End User MCP server when you plan to perform the following actions:
- View your employee profile, including job title, manager, and contact details
- Check who your direct manager is
- View your complete reporting chain
- See your direct reports if you're a manager
- Check your time-off balances by type
- View your time-off request history and status
- Submit new time-off requests
- Cancel pending time-off requests
- View time-off requests for your direct reports
- Approve or reject time-off requests for team members
- List available time-off types
- Get details about specific time-off plans
Example prompts
Use the following example prompts to invoke Workday End User MCP server tools:
What's my job title and who is my manager?Show me my complete reporting chain.Who are my direct reports?How much PTO do I have available?Show me my time-off request history.Request 3 days of vacation for next week.Cancel my pending PTO request.Who on my team has pending time-off requests?Approve Mei's vacation request.What types of time off can I request?
Workday End User MCP server tools
The Workday End User MCP server provides the following tools:
| Tool | Description |
|---|---|
| get_my_profile | Retrieves the employee's core worker profile information. |
| get_my_manager | Retrieves the employee's direct manager information. |
| get_my_reporting_chain | Retrieves the employee's upward reporting hierarchy. |
| list_my_direct_reports | Retrieves a manager's direct reports and their core profile information. |
| get_my_time_off_balances | Retrieves the employee's time-off balances grouped by type. |
| get_direct_report_time_off_requests | Retrieves time-off requests for a direct report. Your LLM uses this tool to view PTO requests for a direct report. |
| submit_time_off_request | Submits a new time-off request for the employee. |
| cancel_time_off_request | Cancels a pending time-off request. |
| action_time_off_request | Approves or rejects a time-off request for a direct report. |
| list_time_off_types | Retrieves the employee's available time-off types. |
| get_direct_report_time_off_balances | Retrieves a direct report's PTO balances for vacation days, sick days, or leave. |
| list_my_time_off_requests | Lists the user's PTO history and time-off request status. |
Install the Workday End User MCP server
Complete the following steps to install a prebuilt MCP server to your project:
Sign in to your Workato account.
Go to AI Hub > Enterprise MCP.
Click + Create MCP server.
Go to the Start with pre-built MCP Servers using your connected apps section and select the prebuilt MCP server you plan to use.
Click Use this server.
Provide a name for your MCP server in the Server name field.
Use the Location drop-down menu to select the project for the MCP server.
Go to the Connections section and connect to your app account.
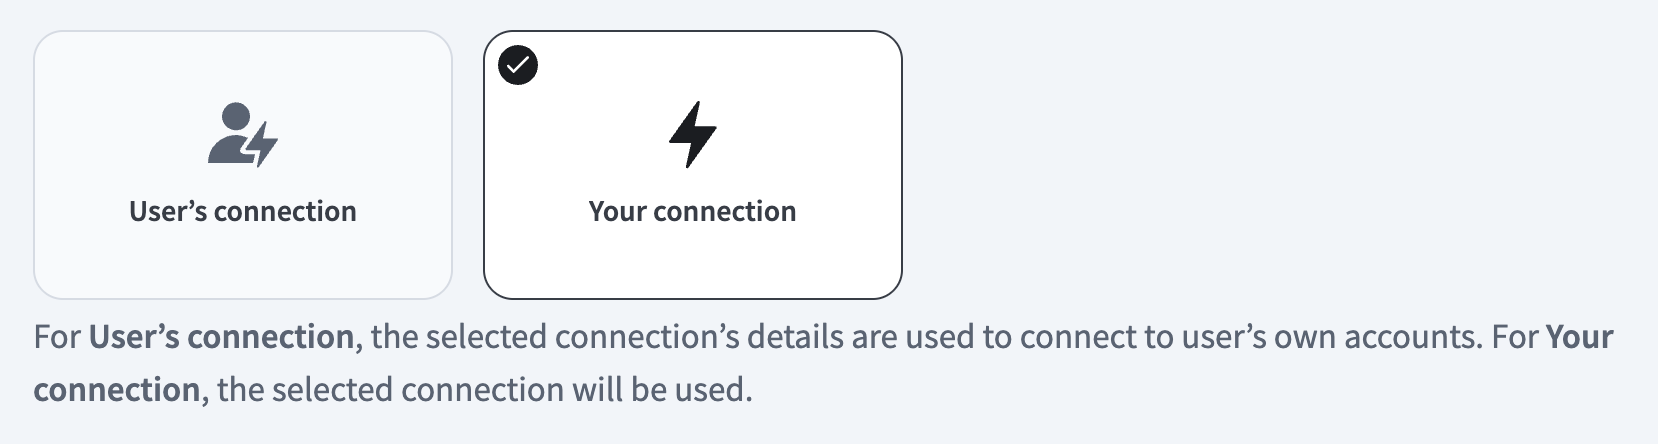
Select the connection type you plan to use for the MCP server template.
- User's connection: MCP server tools perform actions based on the identity and permissions of the user who connects to the application. Users authenticate with their own credentials to execute the skill.
- Your connection: This option uses the connection established by the recipe builder and follows the same principles as normal app connections.
 Select your connection type
VERIFIED USER ACCESS AUTHENTICATION REQUIREMENTS
Only app connections that use OAuth 2.0 authorization code grant are available for user's connection. Refer to Verified user access for more information.
Complete the app-specific connection setup steps in the following section.
Workday REST connection setup
View Workday REST connection setup steps
The Workato Workday connector is categorized into three distinct types: the main Workday connector, the Workday Web Services connector, and the Workday REST connector. Each type follows a similar authentication pattern but differs slightly in support capabilities and functionalities.
We recommend that you create an Integration System User (ISU) before you integrate your Workday with Workato. An ISU ensures that all integration operations are logged under a designated user, separate from regular workflow processes. This is essential as changes to a regular worker’s security profile or their termination could disrupt integrations reliant on their account. Limit each ISU to a single integration system, such as Workato, for enhanced security.
The Workday REST API requires authentication through an OAuth client setup. This means you must register a Workday API client if your integration includes Workday custom objects.
API CLIENTS FOR INTEGRATION NOT SUPPORTED
API clients for Integration isn't supported in the Workday End User MCP server.
Minimum permissions
View minimum permissions
The Workday End User MCP server requires the following minimum permissions:
API client scopes for functional areas
Add the following scopes:
- Organizations and Roles
- Staffing
- Tenant non-configurable
- Time Off and Leave
Business process security policies for Request Time Off type
Add the following scopes for each group:
Employee As Self service security group
- Request Time Off (REST Service)
- Cancel
- ViewAll
Manager security group
- Approve
- Deny
- ViewAll
Business process security policies for Correct Time Off type
Employee As Self service security group
- Correct Time Off Entry (REST Service)
- Cancel
- ViewAll
Manager security group
- Approve
- Deny
- ViewAll
Register Integration System User in Workday
Your Integration System User (ISU) must be assigned the required permissions to create a successful integration. You may receive a 403 error if your ISU has insufficient permissions.
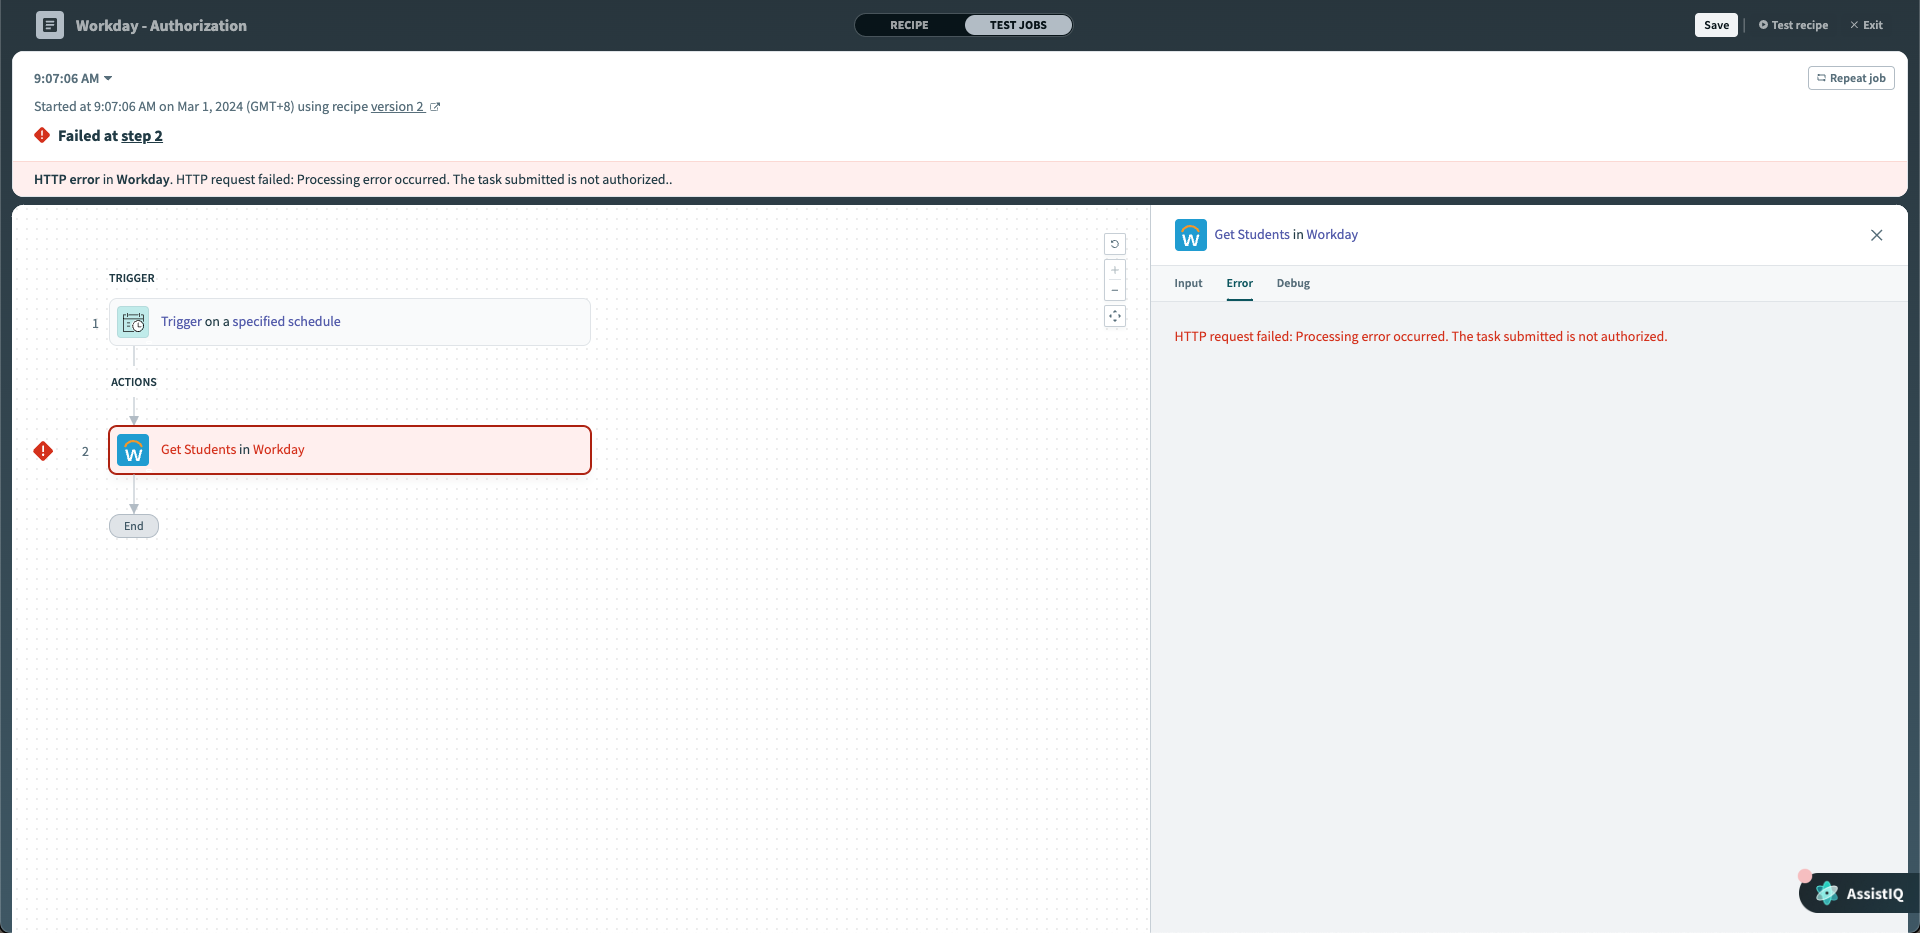 Error message when ISU doesn't have enough permissions
A 403 error may indicate that the ISU lacks the required domain-level permissions. Refer to the Grant domain access to security group section to ensure that your ISU is granted the appropriate permissions.
View ISU setup steps
Create an Integration System User
Complete the following steps to create an ISU in Workday:
Type Create Integration System User into Workday's search bar and select the task from the results.
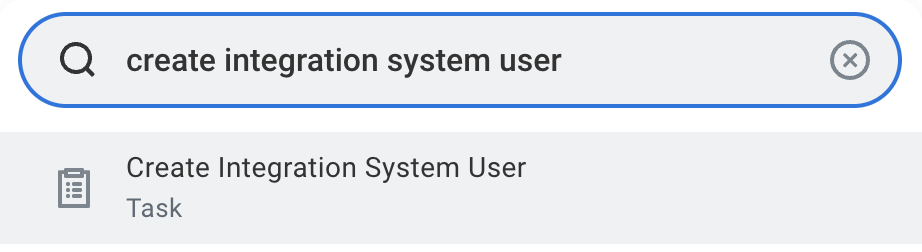 Search for Create Integration System User task in Workday
Enter a username and set a password in the Create Integration System User task.
ISU USERNAMES
Spaces in Workday ISU usernames can cause encoding and formatting issues. We strongly recommend that you use underscores (_) or hyphens (-) instead of spaces.
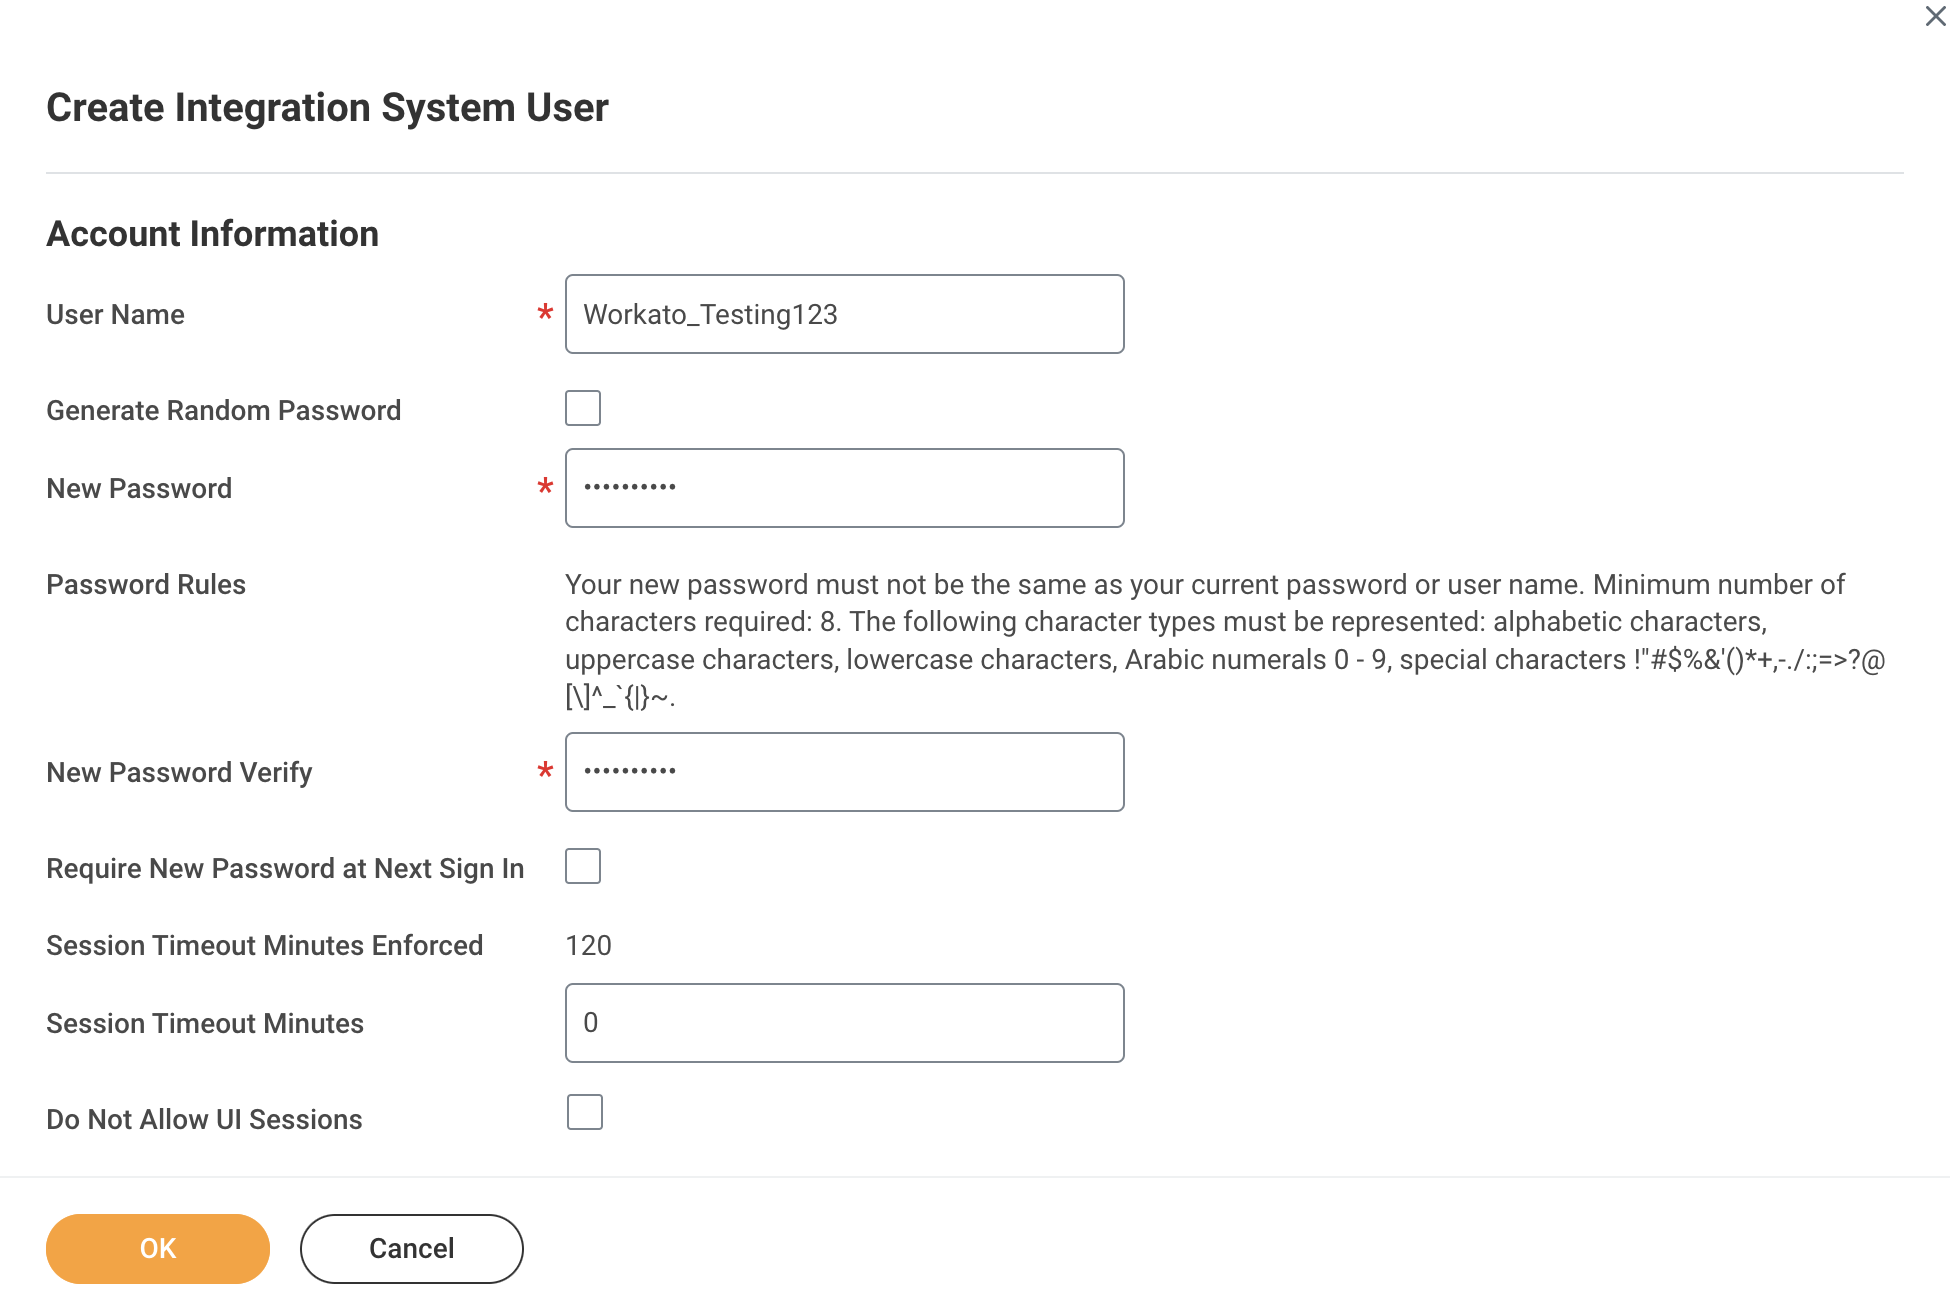 Create Integration System User
Set Session Timeout Minutes to 0 to prevent the ISU from timing out.
Ensure that the Do Not Allow UI Sessions checkbox isn't selected.
Go to the Maintain Password Rules task.
Exempt the integration system user from password expiration by adding them to the System Users exempt from password expiration field.
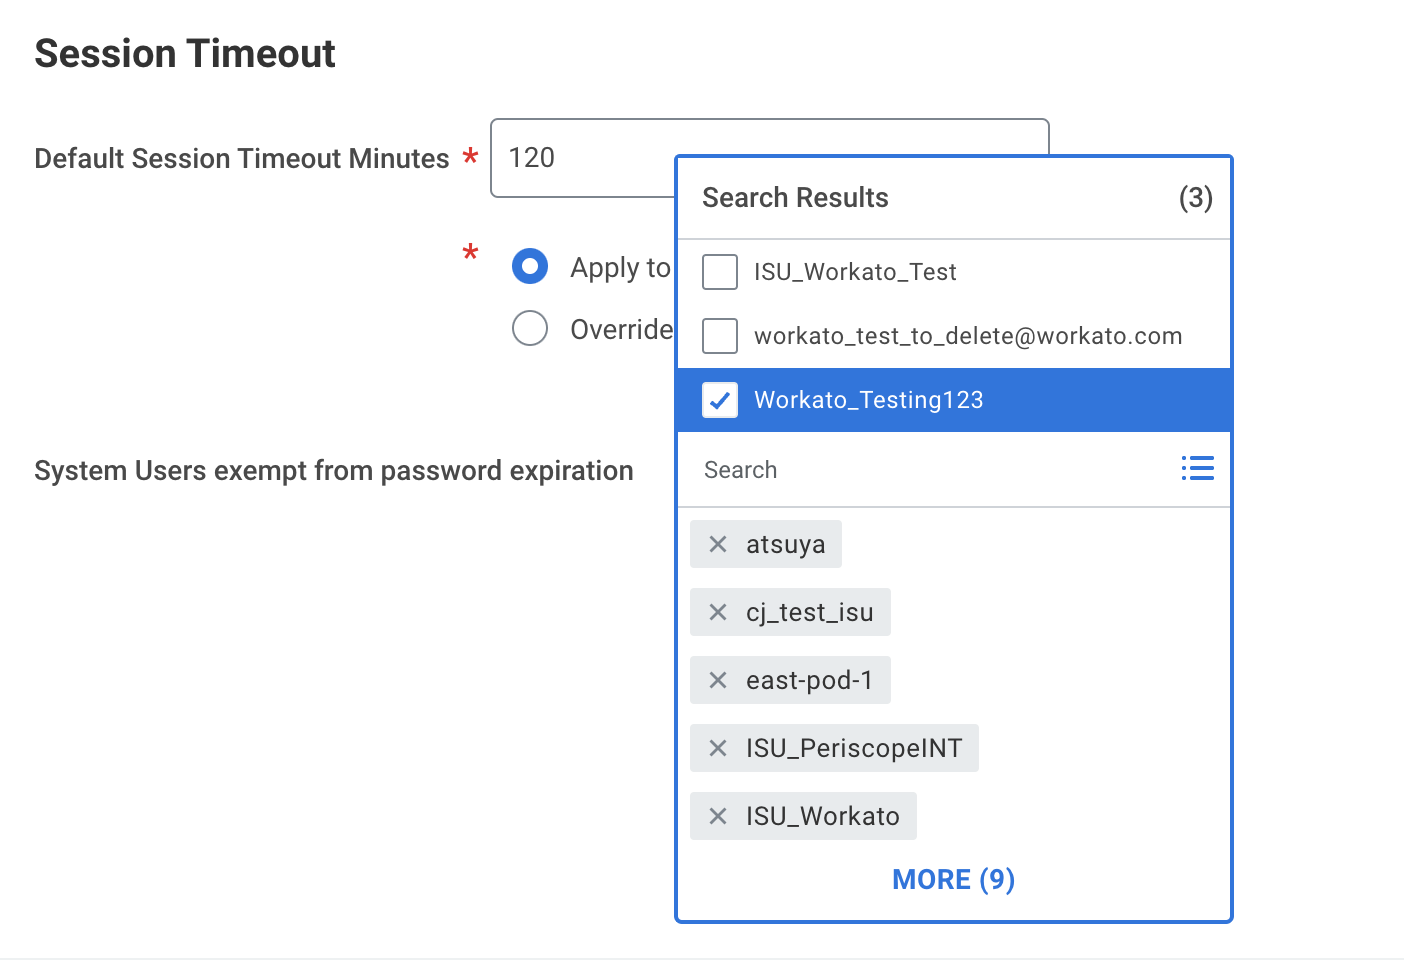 Exempt ISU from password expiration
Register a new API client
Complete the following steps to register an API client in Workday REST:
Sign in to your Workday REST account.
Enter Register API Client to locate the Register API Client task.
Enter a name for your API client in the Client Name field.
Go to the Client Grant Type section and select Authorization Code Grant.
Go to the Access Token Type section and select Bearer.
Enter https:www.workato.com/oauth/callback in the Redirection URI field.
Enter 30 in the Refresh Token Timeout (in days) field.
Enter the scopes for the connection in the Scope (Functional Areas) field. Refer to Workday End User MCP server Minimum permissions if you're connecting to the Workday End User MCP server.
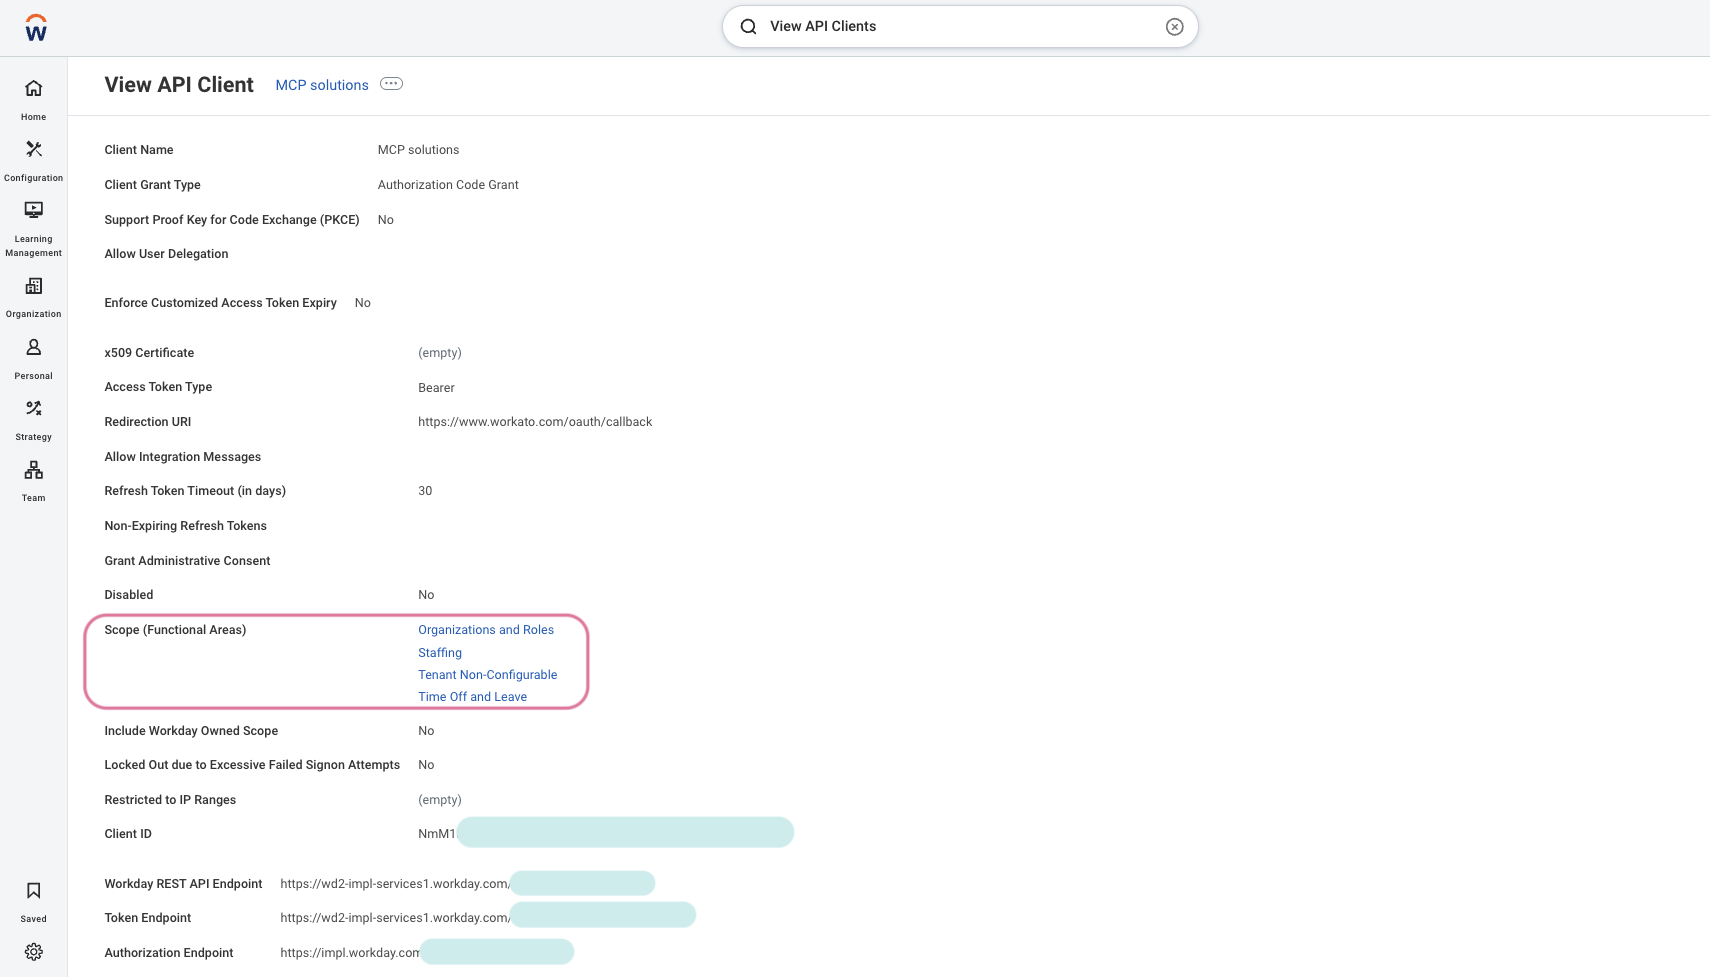 Enter the scopes for the connection in the Scope (Functional Areas) field
Enter your client ID in the Client ID field.
Enter your REST API endpoint in the Workday REST API Endpoint field. You can find this endpoint in your API client details page in Workday. For example: https://wd2-impl-services1.workday.com/xxx/api/v1/example
Enter your token endpoint in the Token Endpoint field. You can find this endpoint in your API client details page in Workday. For example: https://wd2-impl-services1.workday.com/xxx/oauth2/example/token
Enter your authorization endpoint in the Authorization Endpoint field. You can find this endpoint in your API client details page in Workday. For example: https://impl.workday.com/example/authorize
Click Done.
Find your token endpoint URL
Complete the following steps to find your token endpoint URL in Workday:
Enter View API Clients into the search field in Workday.
Access the View API Clients report from the search results.
Save the URLs listed in the Token Endpoint and Authorization Endpoint fields. These URLs are required for the OAuth 2.0 connection.
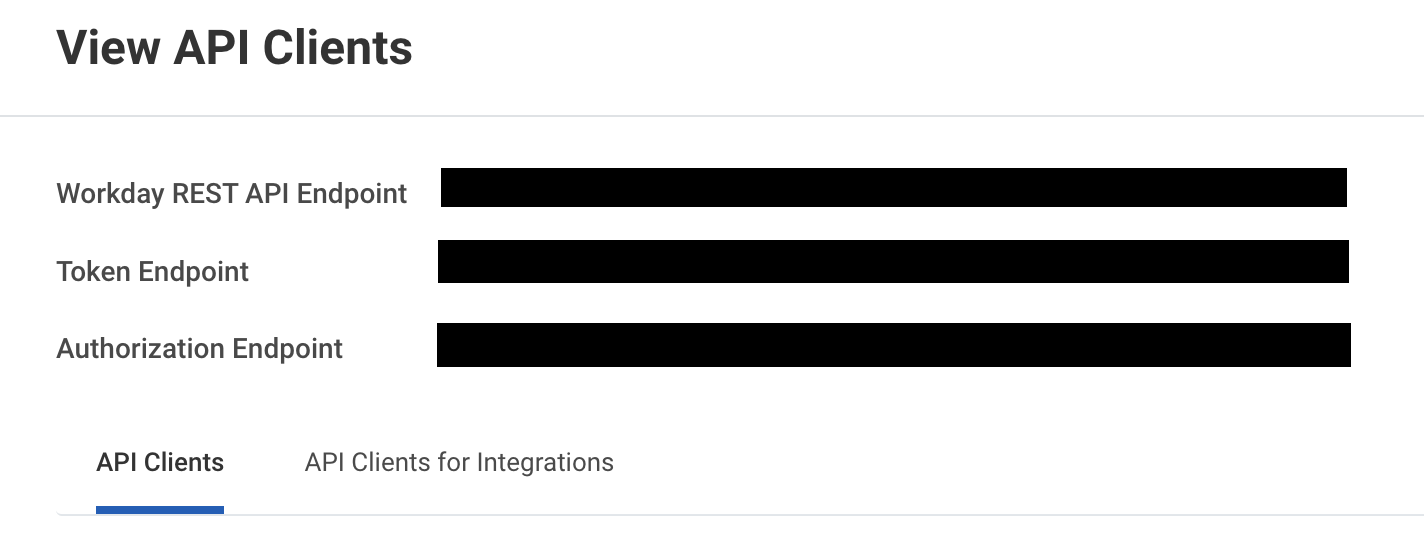 Save the token endpoint and authorization endpoint URLs
OAuth 2.0 authentication
Complete the following steps to configure your Workday connection in Workato using OAuth 2.0 authentication:
View OAuth 2.0 authentication steps
Complete the following steps to find your token endpoint URL in Workday:
Enter View API Clients into the search field in Workday.
Access the View API Clients report from the search results.
Save the URLs listed in the Token Endpoint and Authorization Endpoint fields. These URLs are required for the OAuth 2.0 connection.
Save the token endpoint and authorization endpoint URLs
How to use Workday End User MCP server tools
Refer to the following sections for detailed information on available tools:
get_my_profile tool
The get_my_profile tool retrieves your worker profile information, including job title, manager, location, contact details, employment status, and hire date. Your LLM uses this tool to retrieve information about your employee profile.
Try asking:
What's my job title?Show me my employee profile.Who is my manager?What's my work location?When did I start working here?
get_my_manager tool
The get_my_manager tool retrieves your direct manager information. Your LLM uses this tool to retrieve your manager's information.
Try asking:
Who is my manager?Show me my direct manager's information.Who do I report to?Get my manager's contact details.
get_my_reporting_chain tool
The get_my_reporting_chain tool retrieves your upward reporting hierarchy. Your LLM uses this tool to retrieve your management hierarchy or to see who your manager reports to.
Try asking:
Show me my complete reporting chain.Who does my manager report to?What's my management hierarchy?Show me the chain of command up to the CEO.
list_my_direct_reports tool
The list_my_direct_reports tool retrieves your direct reports and their profile information. Your LLM uses this tool to see who reports to you or view your team.
Try asking:
Who are my direct reports?Show me my team.List everyone who reports to me.Get the profiles of my direct reports.
get_my_time_off_balances tool
The get_my_time_off_balances tool retrieves your time-off balances grouped by type. Your LLM uses this tool to check your PTO, vacation, or sick leave balances.
Try asking:
How much PTO do I have available?Show me my vacation balance.What's my sick leave balance?How many days off do I have remaining?
get_direct_report_time_off_requests tool
The get_direct_report_time_off_requests tool retrieves time-off requests for a direct report. Your LLM uses this tool to view PTO requests.
Try asking:
Show me time-off request history for Marco.List PTO requests pending approval for Sarah.List all the vacation requests from this year for Josh.
submit_time_off_request tool
The submit_time_off_request tool submits a new time-off request. Your LLM uses this tool to request time off.
Try asking:
Request 3 days of vacation for next week.Submit a PTO request for December 20-22.Request sick leave for tomorrow.I need to take vacation from March 1-5.
cancel_time_off_request tool
The cancel_time_off_request tool cancels a pending time-off request. Your LLM uses this tool to cancel a pending request.
Try asking:
Cancel my pending PTO request.Cancel my vacation request for next week.Remove my time-off request for March 1-5.I need to cancel my pending sick leave request.
get_direct_report_time_off_balances tool
The get_direct_report_time_off_balances tool retrieves the time-off balances for a direct report. Your LLM uses this tool view a direct report's vacation days, sick days, and leave balances.
Try asking:
Show me how many sick days Josh has available?How many vacation days does Sarah have?How many vacation days has Marco taken this year?
action_time_off_request tool
The action_time_off_request tool approves or rejects a time-off request for a direct report. Your LLM uses this tool to approve or reject a team member's request.
Try asking:
Approve Josh's vacation request.Reject the PTO request from Marco with a note about coverage.Approve the time-off request for March 1-5.I need to deny this sick leave request.
list_time_off_types tool
The list_time_off_types tool retrieves your available time-off types. Your LLM uses this tool when you need to know what types of time off are available.
Try asking:
What types of time off can I request?Show me all available PTO types.What are my time-off options?List the different types of leave I can take.
list_my_time_off_requests tool
The list_my_time_off_requests tools retrieves your PTO history or time-off request status. Your LLM uses this tool retrieve PTO balances and availability, and the status of submitted time-off requests.
Try asking:
How many vacation days have I taken this year?What's the status of time-off request submitted last week?What's my sick day balance?Do I have vacation days available?
Getting started
View and manage your MCP server tools in the Overview page Tools section. Tool management provides the following capabilities:
TOOLS MUST BE STARTED
Your LLM can only access active tools in your MCP server connector.
Last updated: