Create your first recipe
Build your first recipe with this video guide
Recipes are automated workflows that connect your apps. Each recipe contains a trigger and one or more actions. When you start a recipe, it waits for a triggering event to run the actions.
The following steps guide you through building a recipe that closes a case in Salesforce whenever an issue with the same name is closed in Jira.
Create a new recipe
Complete the following steps to create a new recipe:
Sign in to your Workato account.
Go to the Projects page.
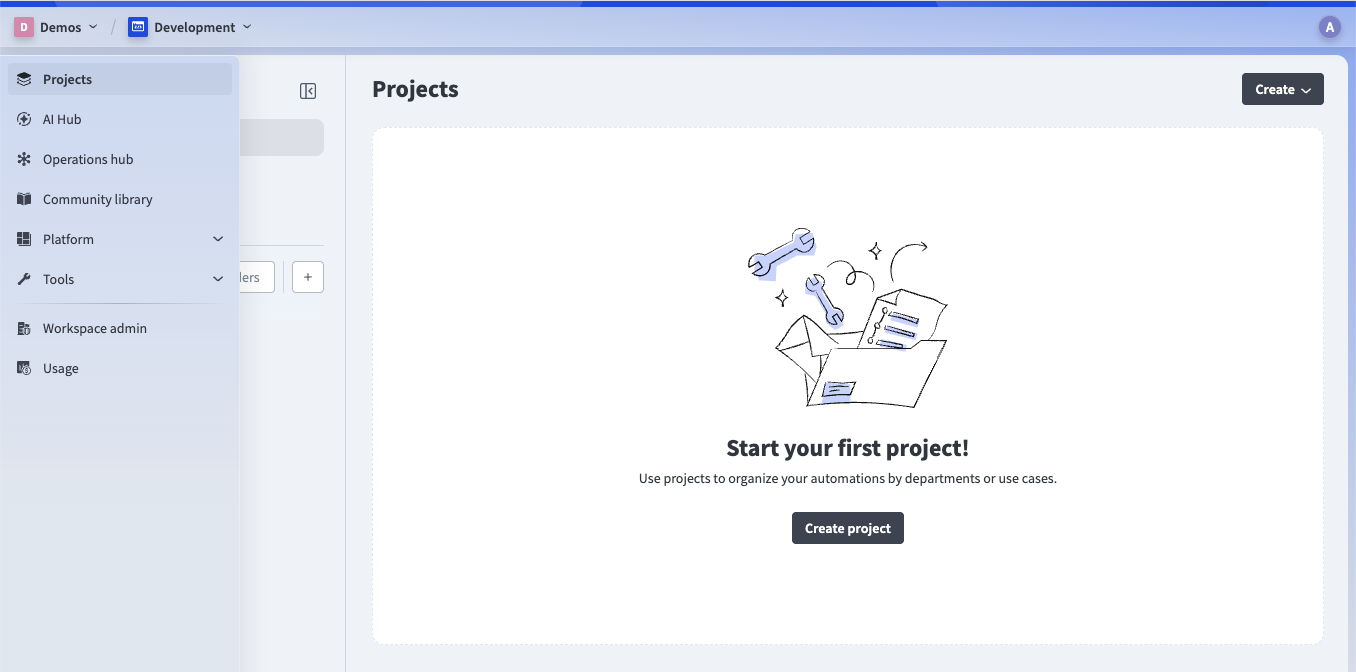 The Projects page
Select an existing project or use one of the following methods to create a new one:
- Click Create > Project
- Press C+P
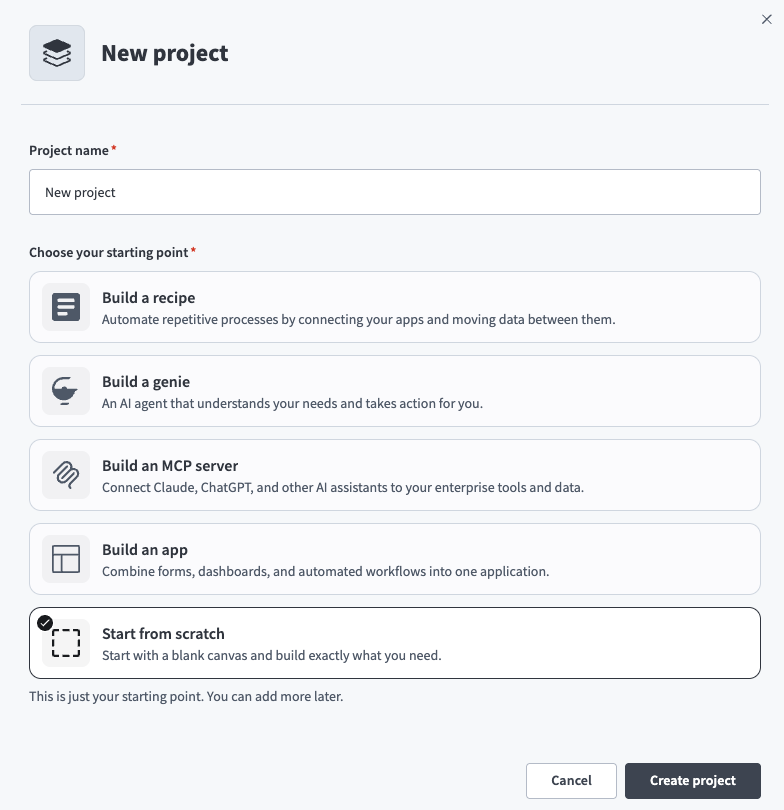
Enter a Project name.
 Enter a project name
Click Build a recipe.
Click Create project.
Enter My first recipe in the Recipe name field.
Ensure Trigger from an app is selected as the recipe starting point, then click Start building. 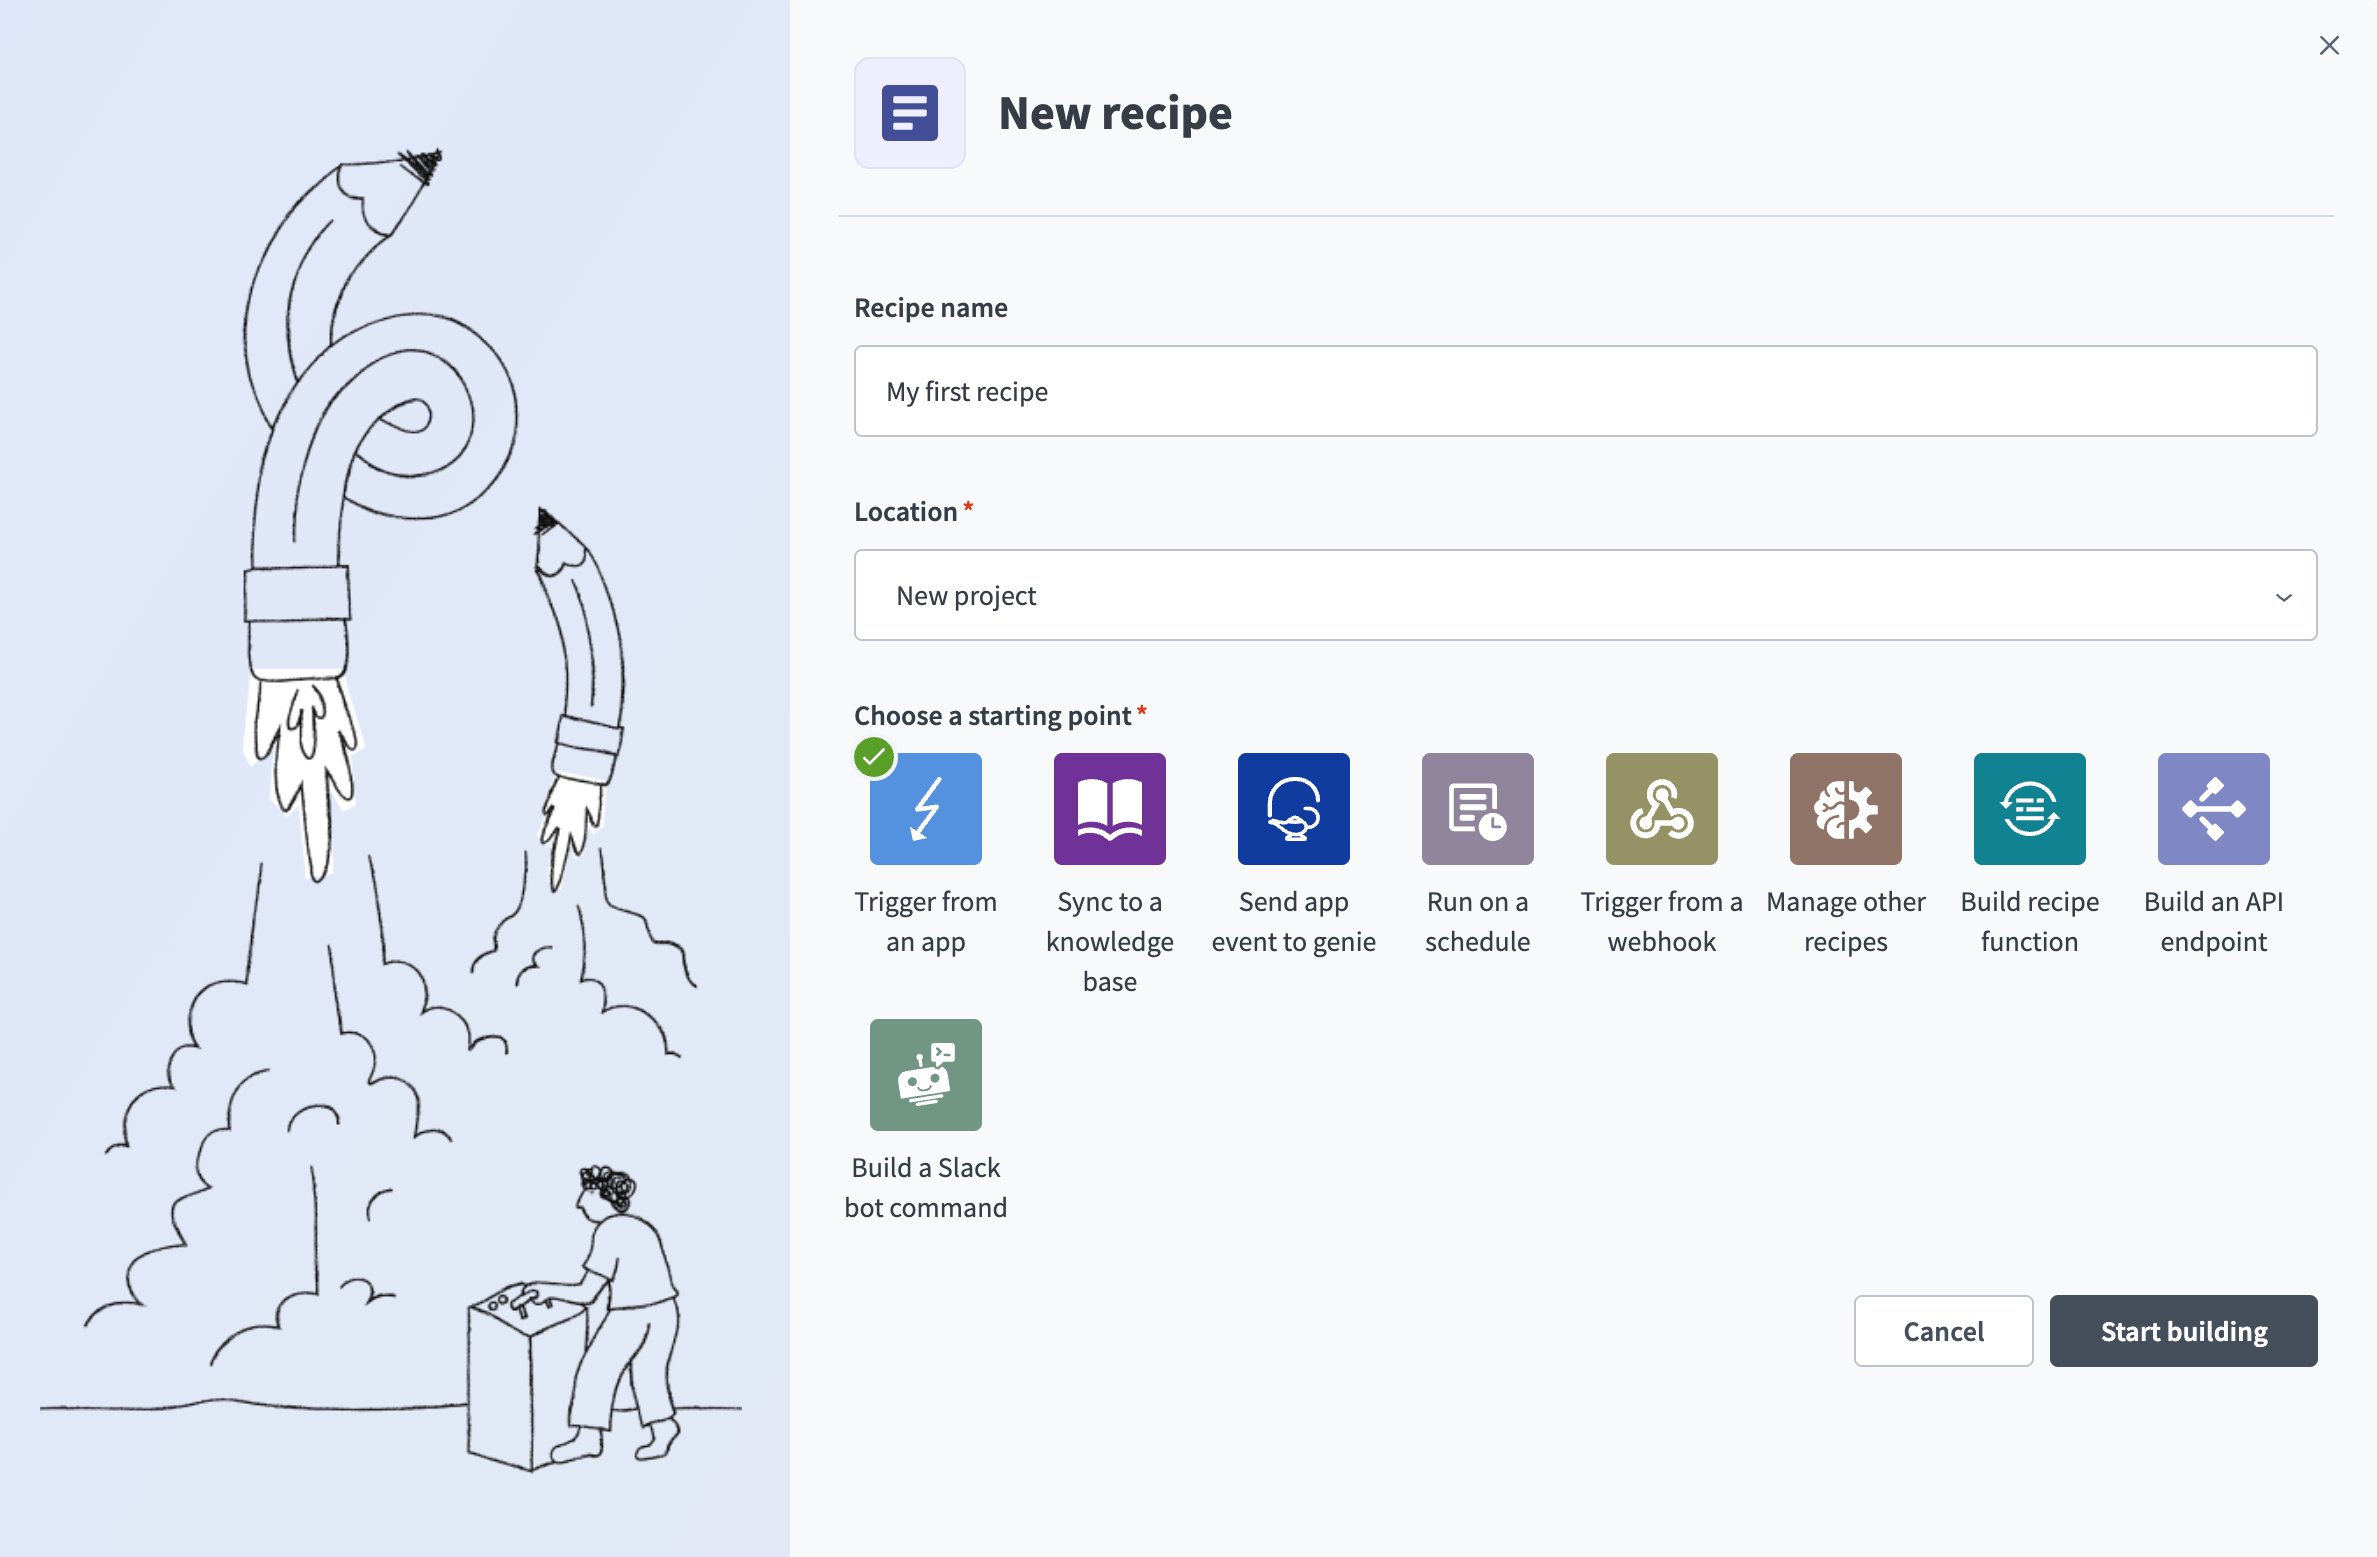 The Set up your recipe menu
Connect to Jira
Complete the following steps to connect to Jira:
Search for and select Jira in the Choose an app search box.
Select the Updated issue trigger.
Enter a descriptive and unique name for the connection in the Connection name field.
Select API token in the Auth type field.
Enter the URL of your Jira account in the Host name field.
Enter your Jira account email in the Email field.
Enter your Atlassian API token in the API token field.
How can I create an Atlassian API token?
To create a new API token in Atlassian, complete the following steps:
Go to Account settings > Security.
Click Create and manage API tokens.
Click Create API token.
Enter a name for your token in the Name field, and then click Create.
Click Copy to retrieve your new API token.
Click Connect. 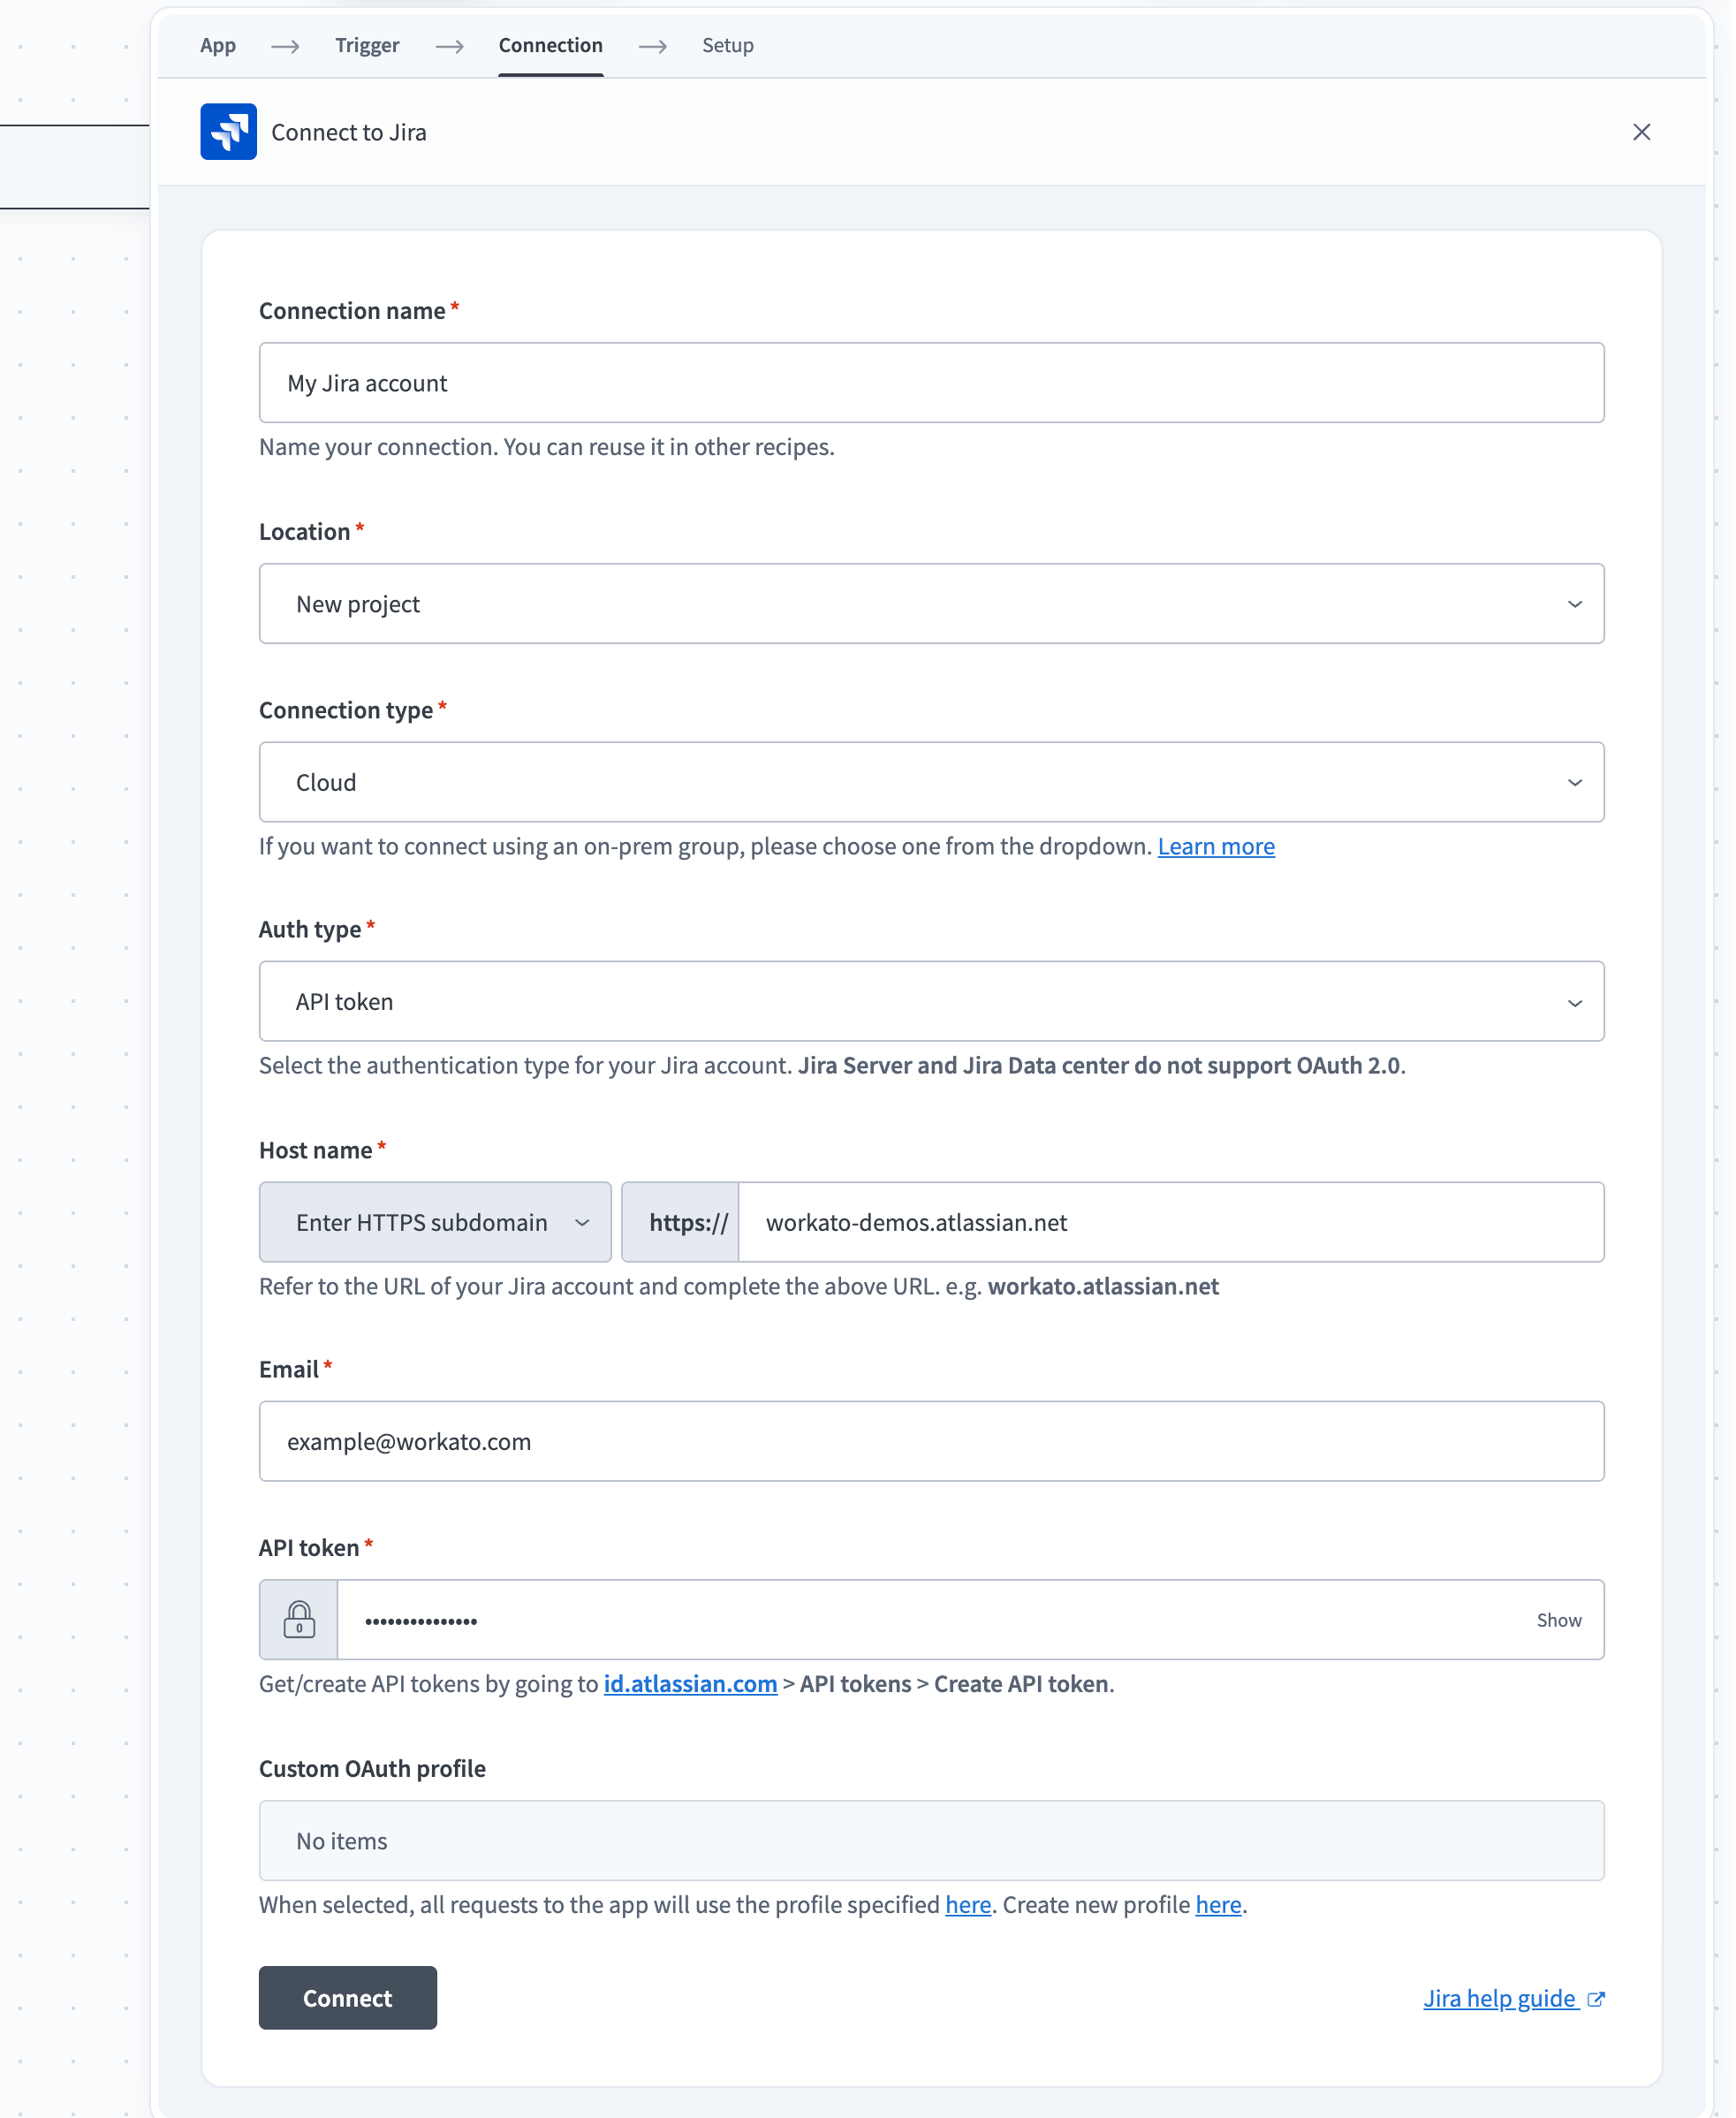
Set up the trigger
The following trigger activates whenever an issue is closed in Jira. When you start the recipe, it checks for matching events from the previous seven days.
Complete the following steps to set up the trigger:
Switch the When first started, this recipe should pick up events from field to formula mode and enter 7.days.ago.
Click the Set trigger condition toggle.
Locate the Jira NameStep 1 datapill in the Recipe data menu under Updated issue (Step 1 output) > Fields > Status and map it to the Trigger data field.
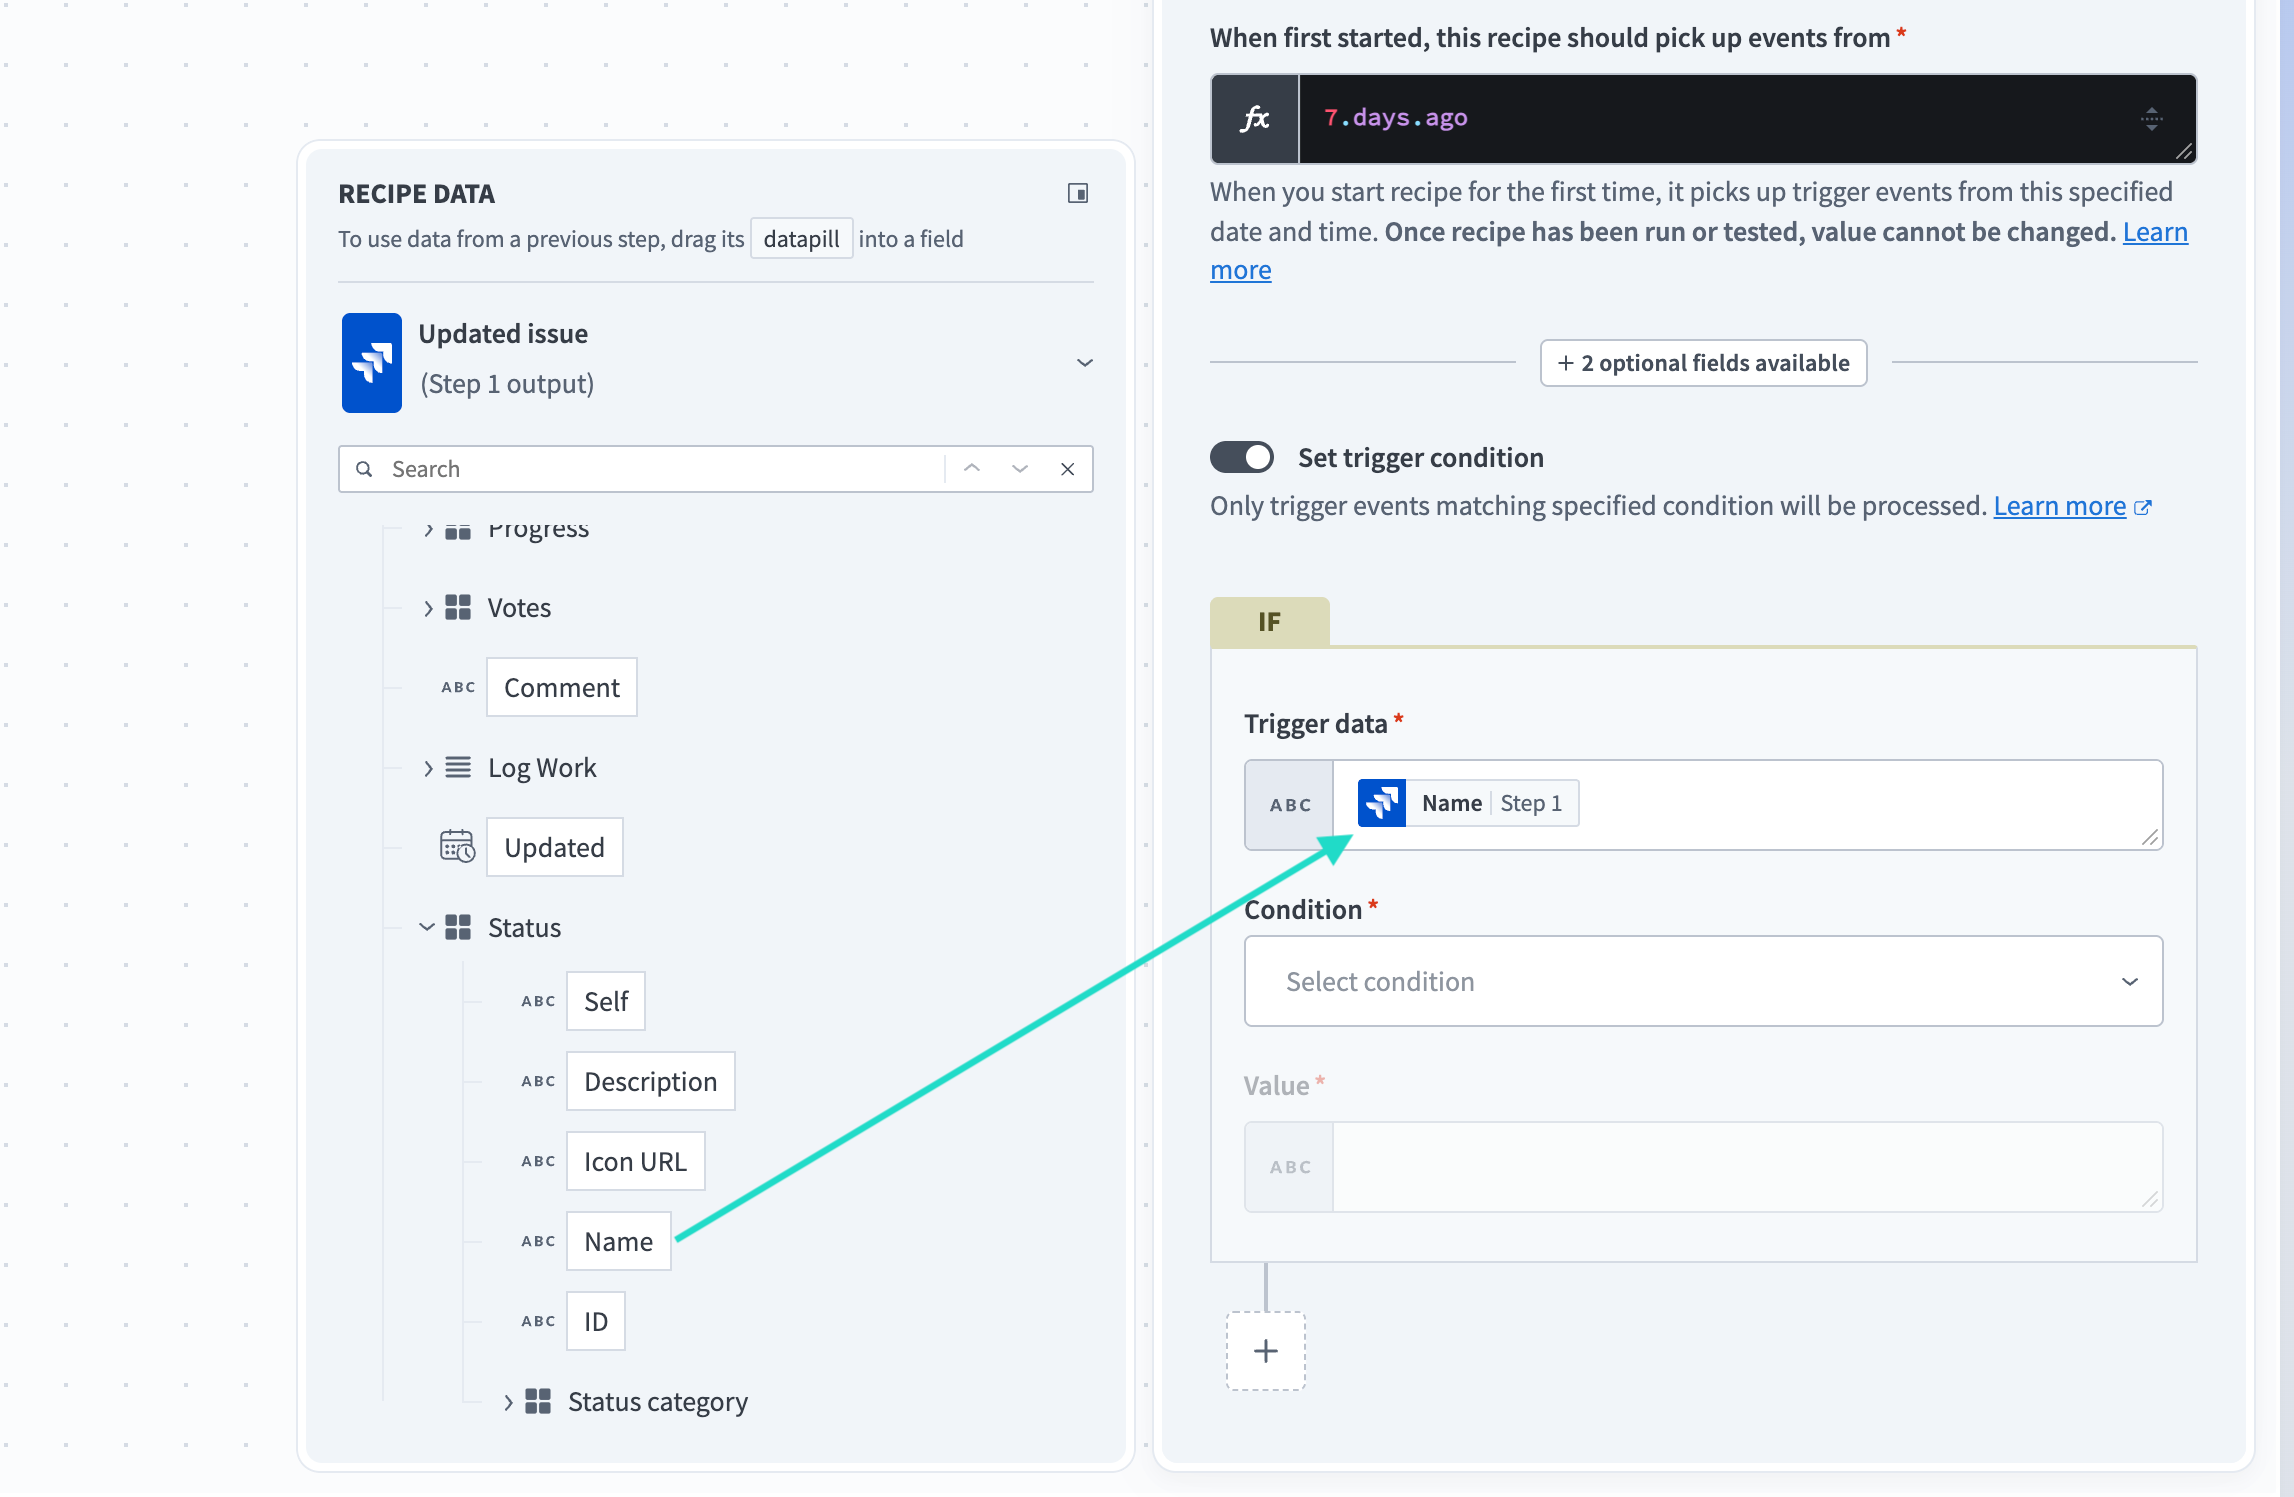 Locate the NameStep 1 datapill
Select contains in the Condition field.
Enter Closed in the Value field. 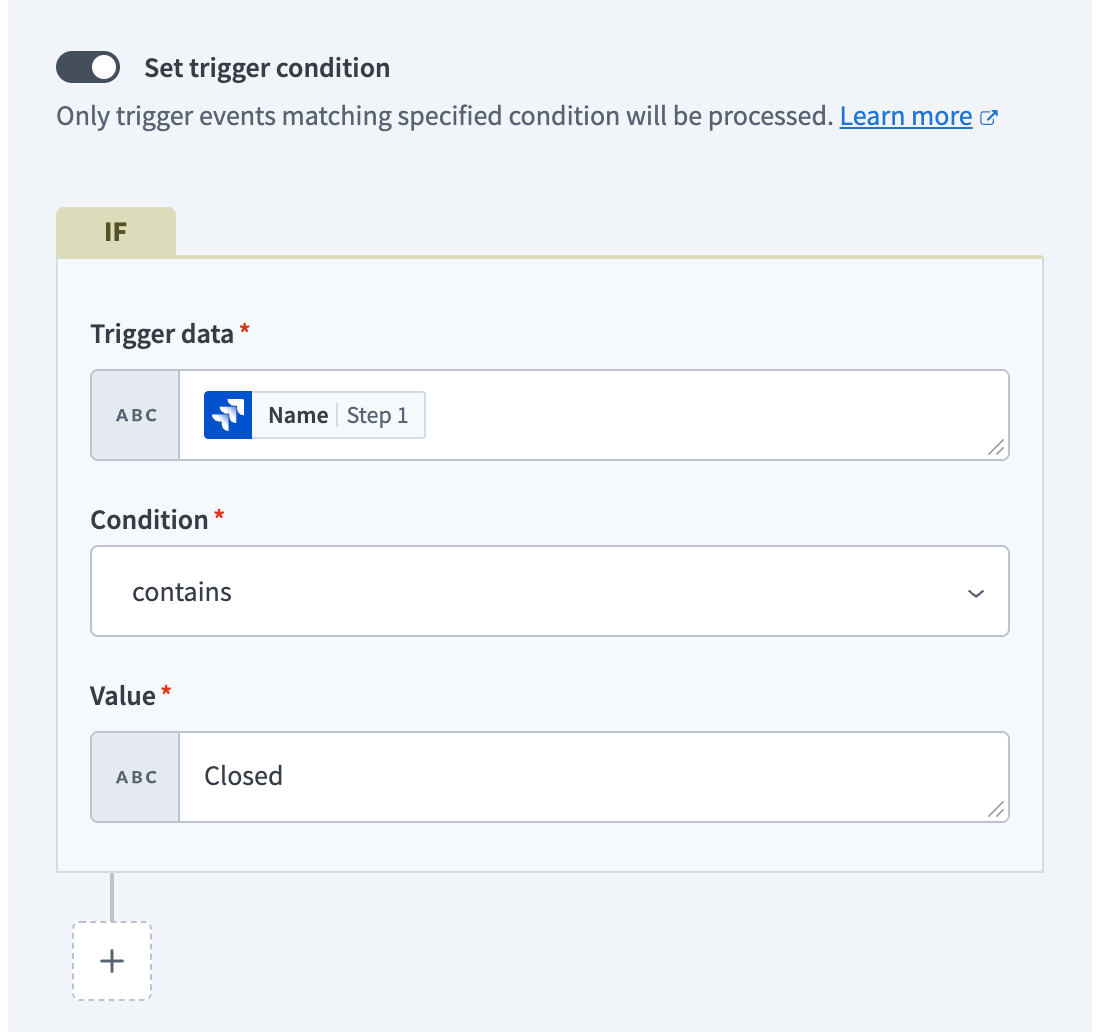 Completed Updated issue trigger fields
Connect to Salesforce
Complete the following steps to connect to Salesforce:
Click + Add step, and then select Action in app. 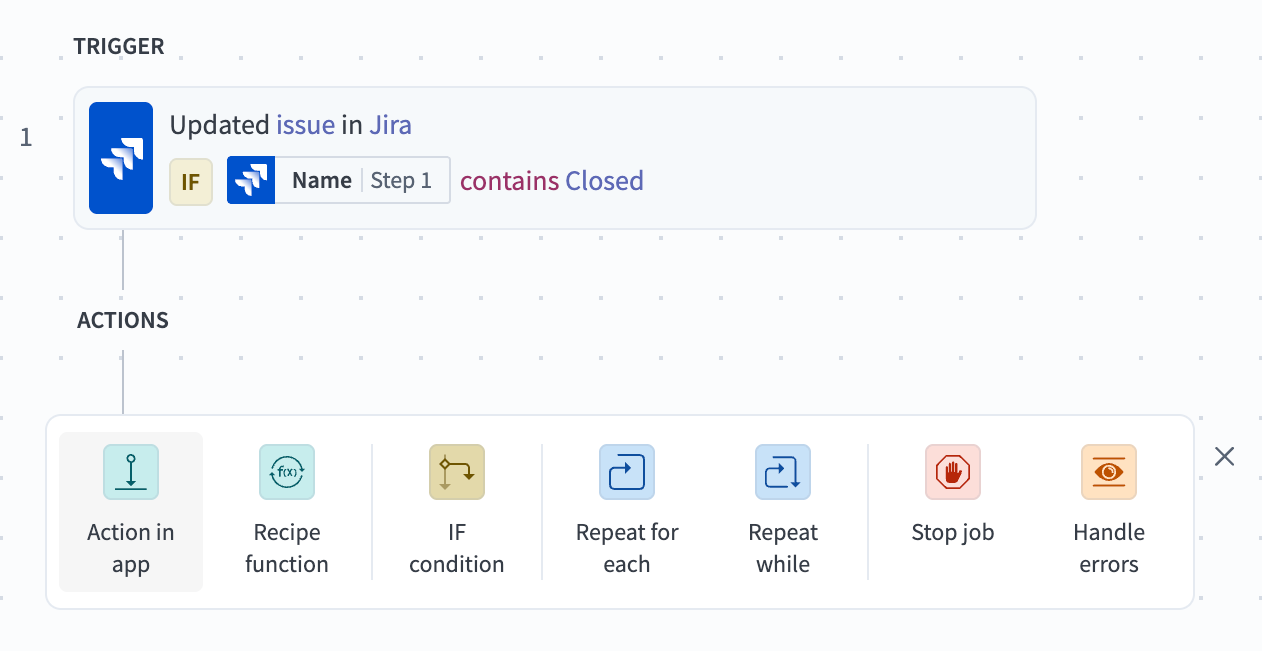 The Add step button
Search for and select Salesforce in the Choose an app search box.
Select the Search records (batch) action.
Enter a descriptive and unique name for the connection in the Connection name field.
Select OAuth 2.0 in the Auth type field.
Click Connect to open the Salesforce sign-in dialog. 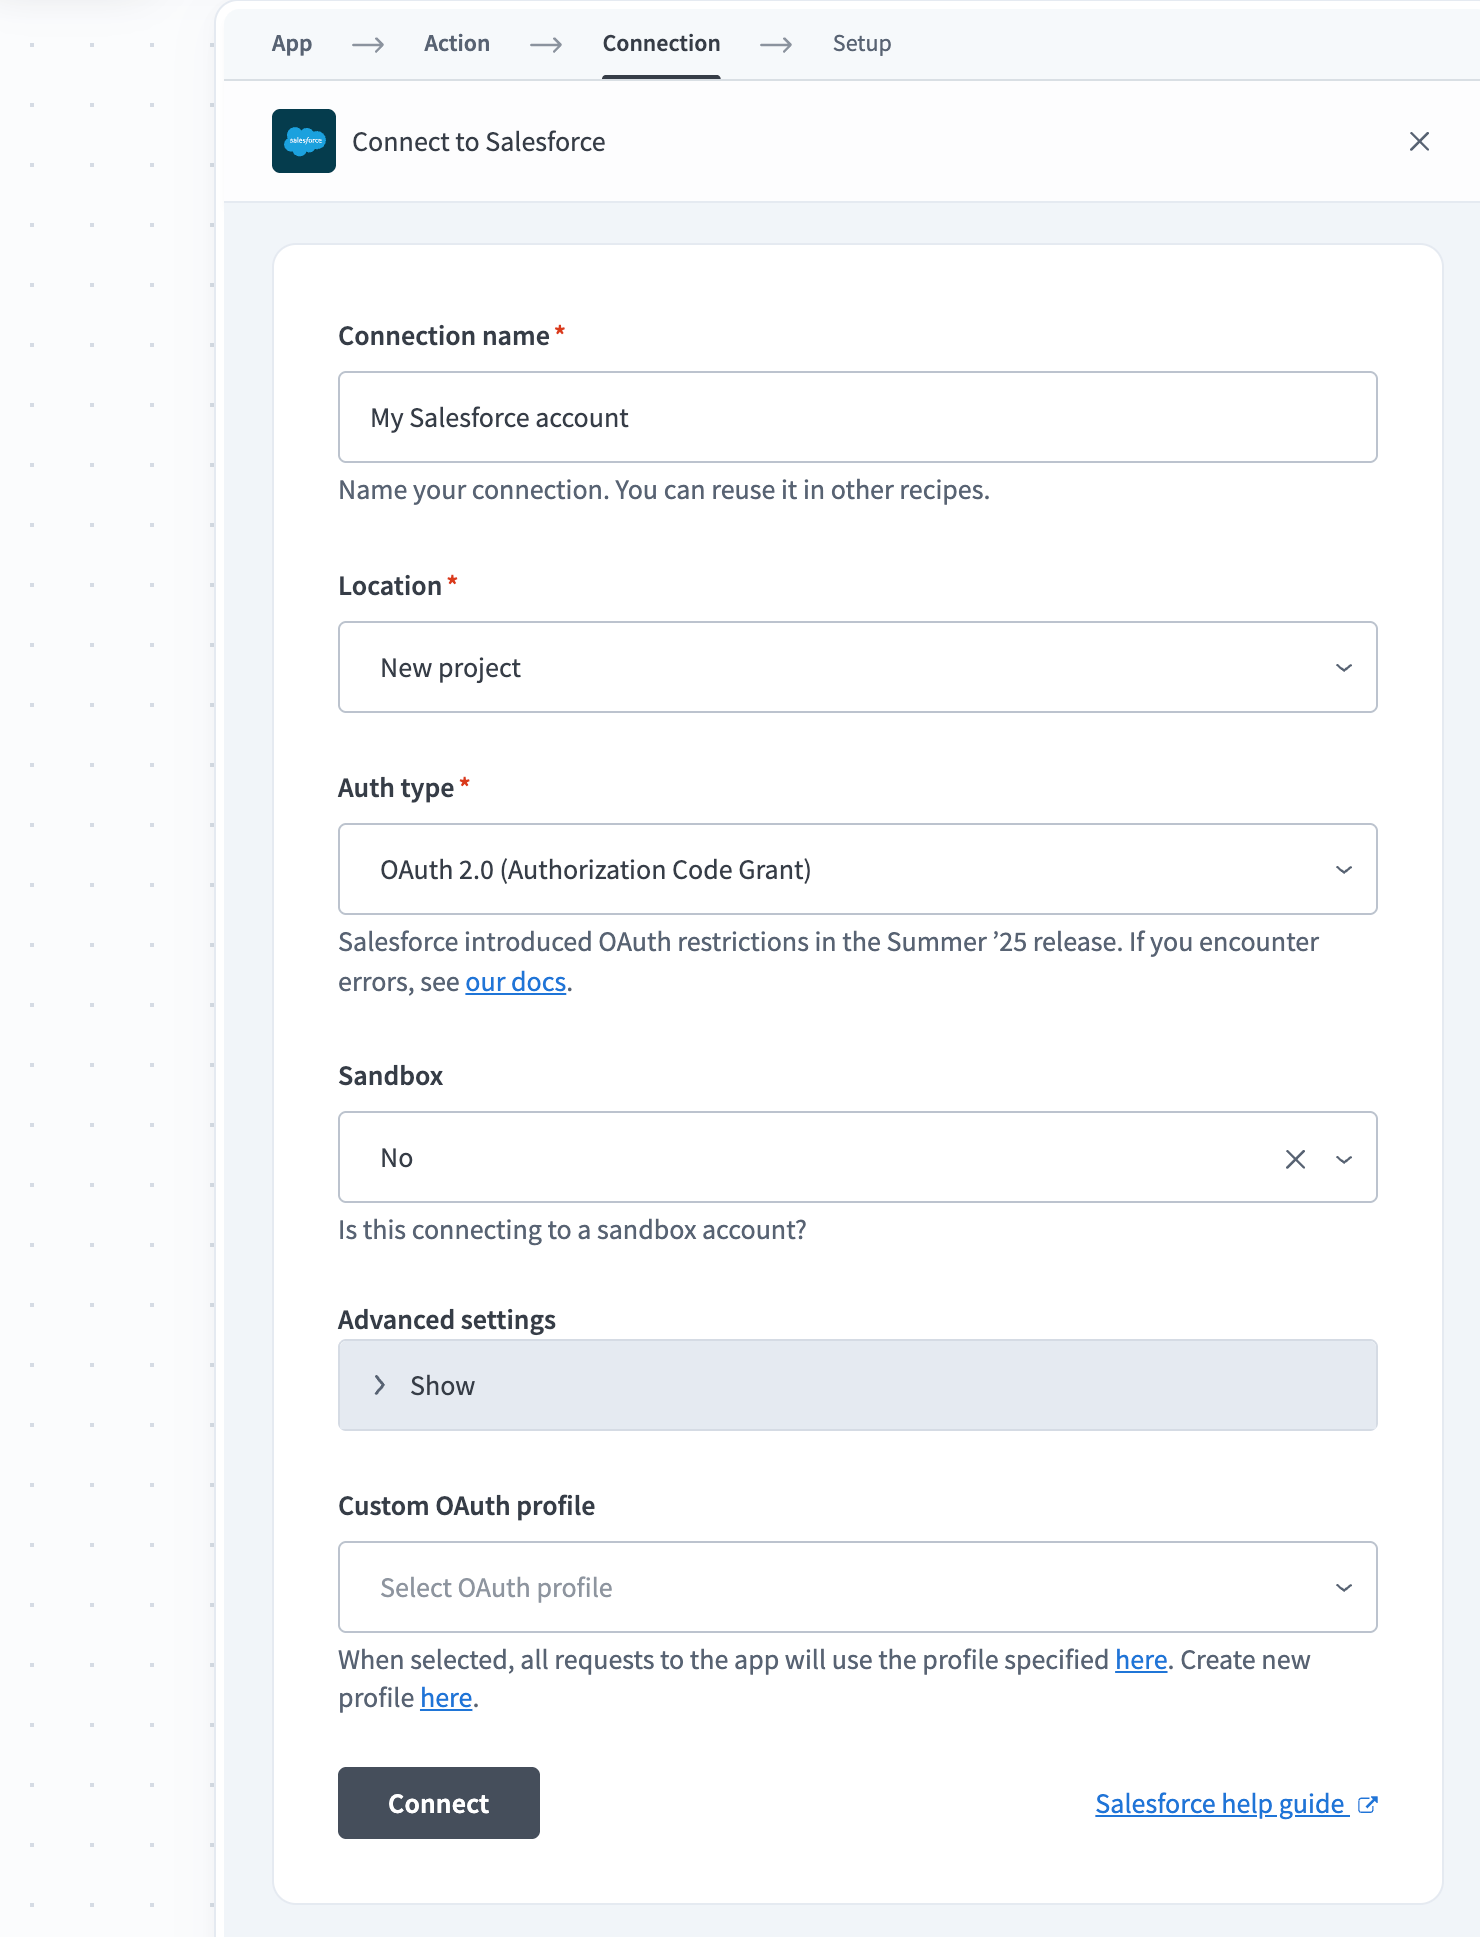 Completed Salesforce connection fields and the Connect button
Sign in to your Salesforce account.
Set up the action
The following action searches for cases in Salesforce with the same case name as the Jira issue.
Complete the following steps to set up the action:
Select Case in the Search for field.
Enter 150 in the Limit field to restrict the number of records the action returns.
Locate the Jira SummaryStep 1 datapill in the Recipe data menu under Updated issue (Step 1 output) > Fields > Parent > Fields and map it to the Subject field.
 Completed Search for Cases fields
Set up the conditional statement
The following IF condition checks if the matching Salesforce case from the previous step is open. If it is, the recipe closes the case.
Complete the following steps to set up the conditional statement:
Click + Add step, and then select IF condition. 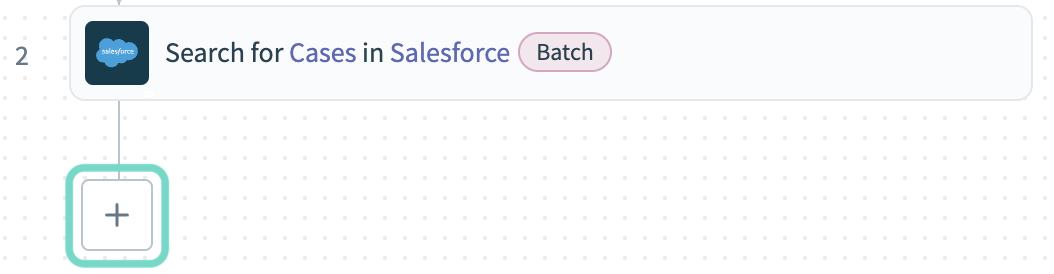 The Add step button
Locate the Salesforce StatusStep 2 datapill in the Recipe data menu under Search Cases (Step 2 output) > Cases and map it to Data field.
Select does not equal in the Condition field.
Enter Closed in the Value field. 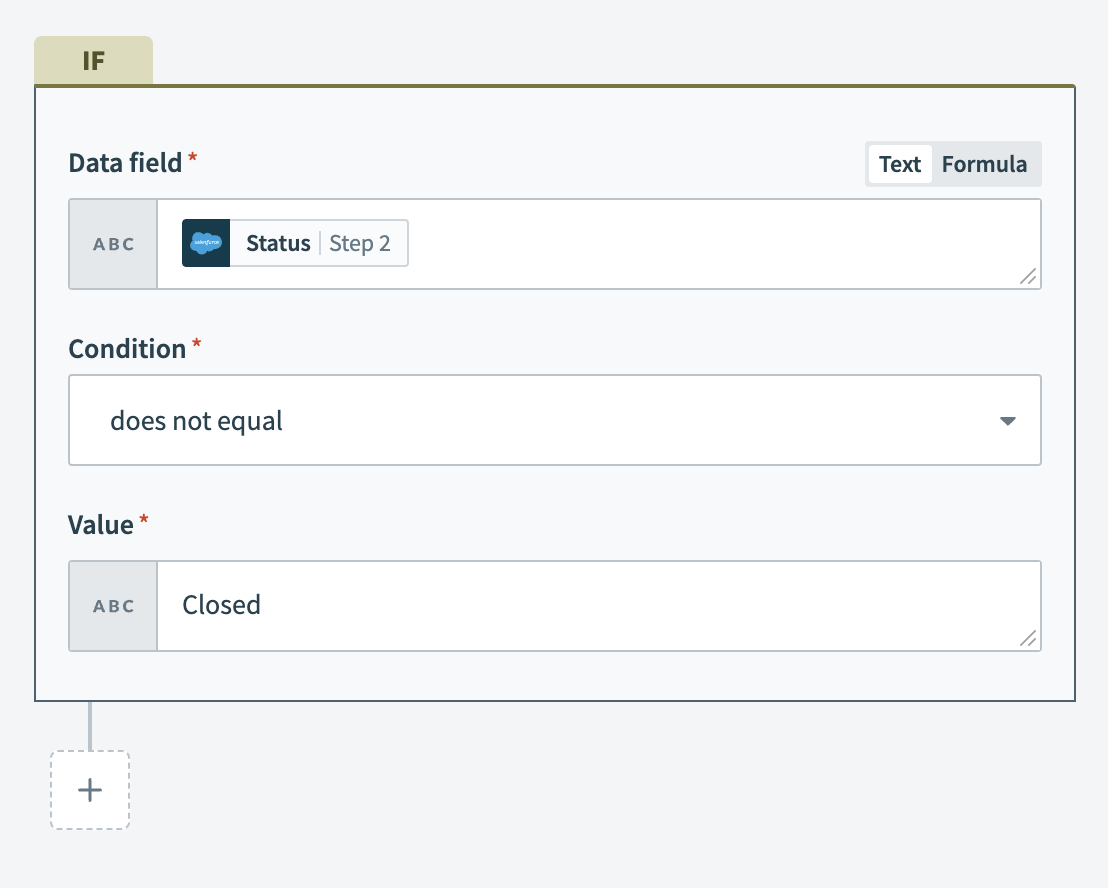 Completed IF condition fields
Click Select an app and action.
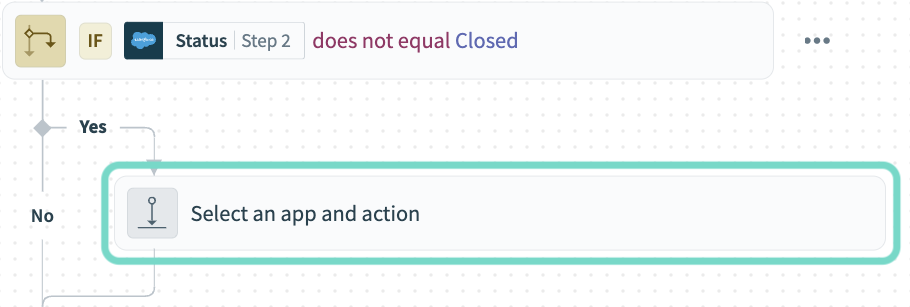
Search for and select Salesforce in the Choose an app search box.
Select the Update record action.
Select Case in the Object field.
Locate the Salesforce Case IDStep 2 datapill in the Recipe data menu under Search Cases (Step 2 output) > Cases and map it to the Case ID field.
Select Closed in the Status field. 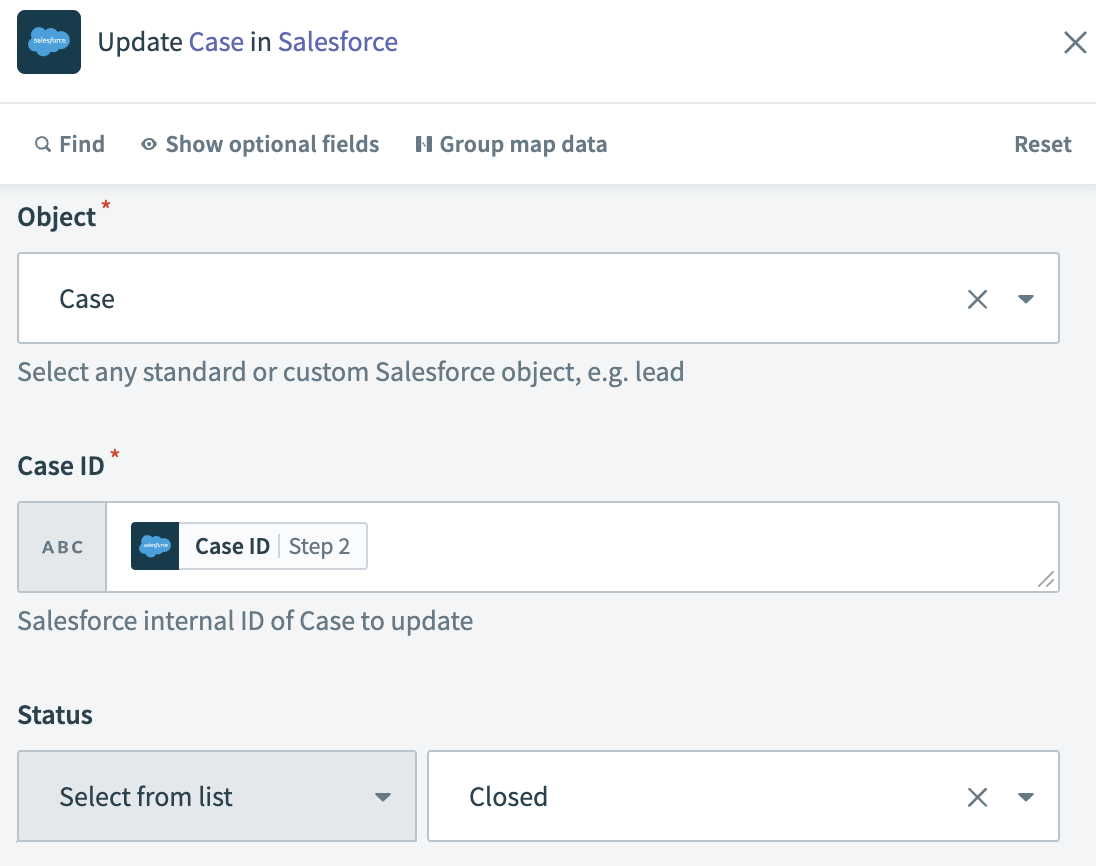 Completed Update case fields
Save and start your recipe
Complete the following steps to save and start your recipe:
Click Save, then Exit.
Click Start recipe. Your completed recipe should resemble the following screenshot: 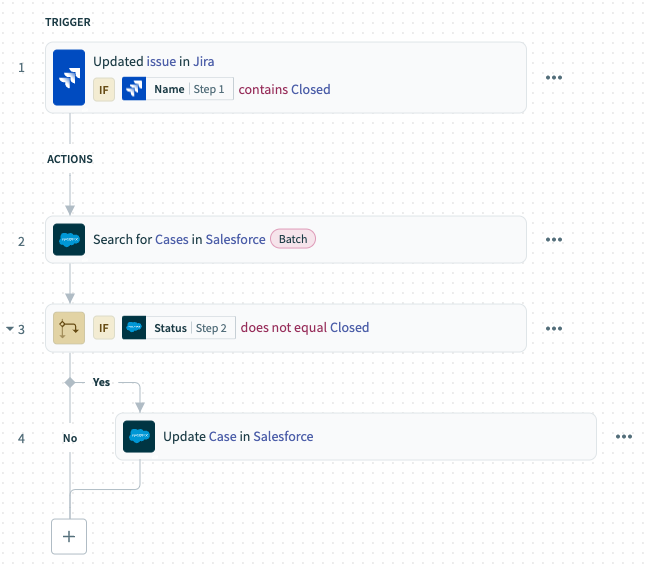 Example recipe
NEXT STEPS
- Explore the community library to find ready-to-use recipes built by other users.
- Learn about other types of triggers and actions in Recipe design.
Last updated: