Agentic
Agentic is a low-code, no-code platform for building and managing AI agents that take action and orchestrate workflows dynamically. Agents built on Workato are called genies. Each genie has a job description, skills, and knowledge bases that define how it acts across your systems, collaborates with other agents, and executes complex workflows end to end.
Workato Agent Registry
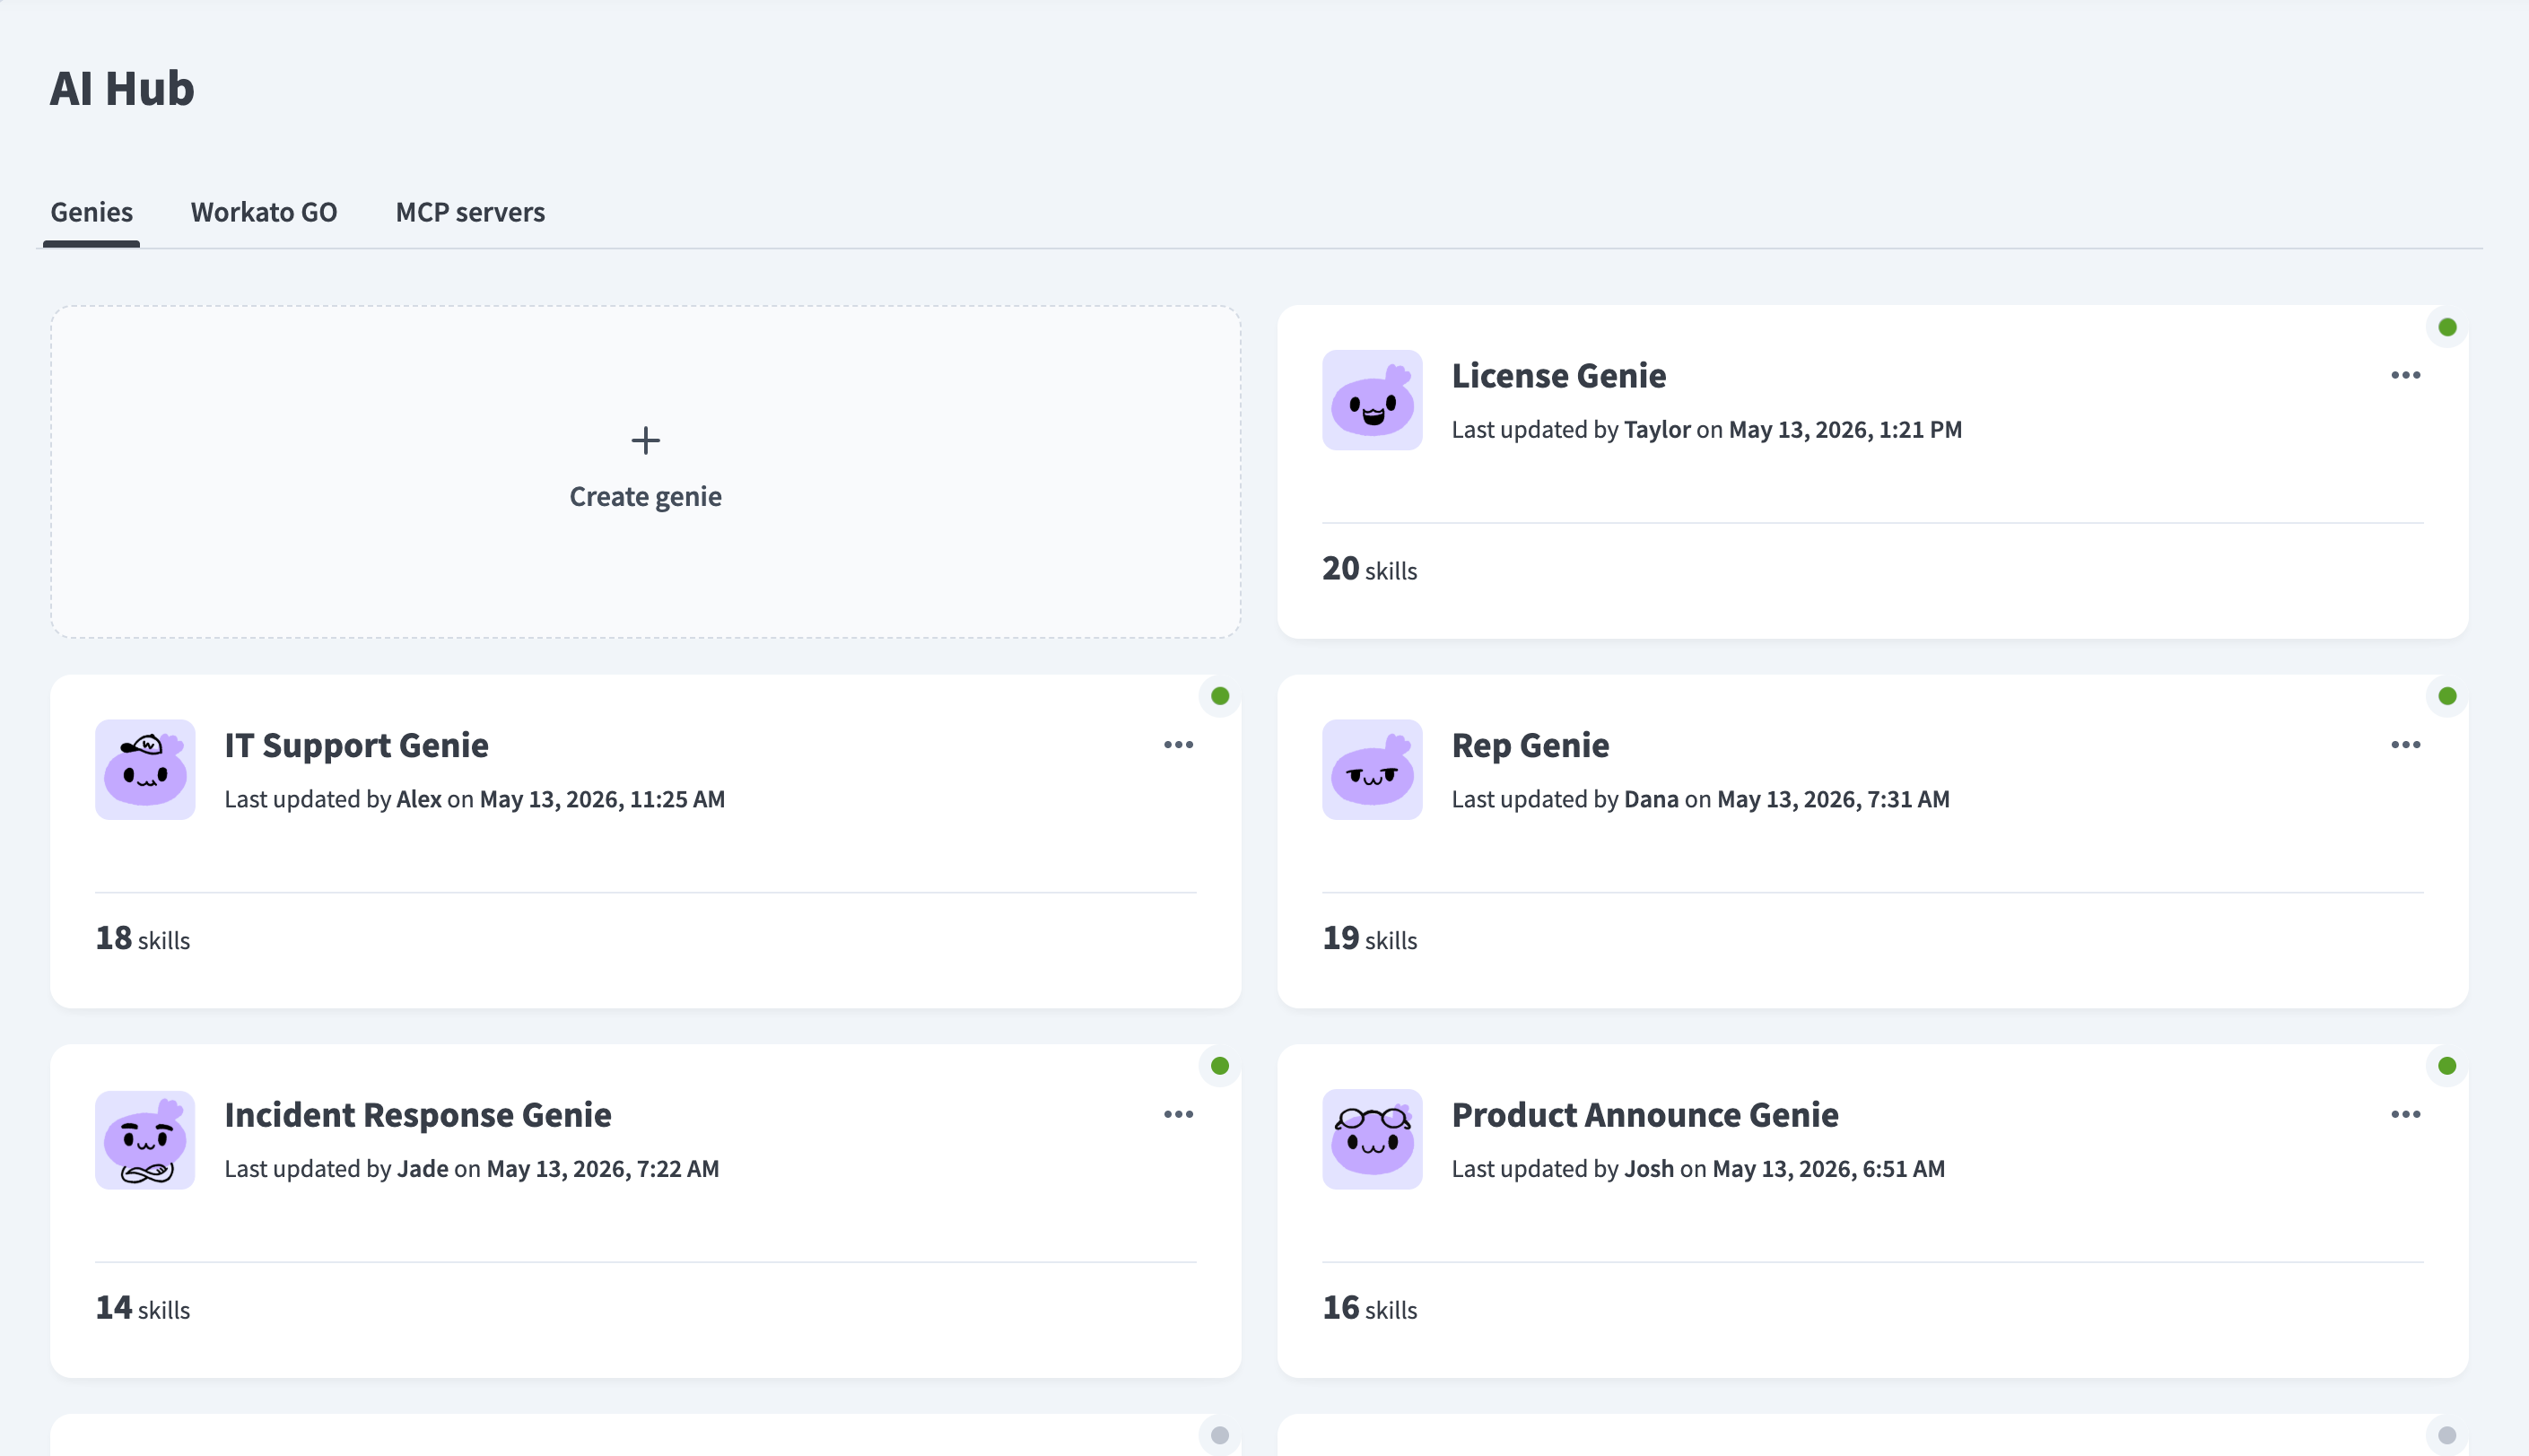
AI Hub serves as a centralized agent registry for your organization. It provides a single place to publish, discover, consume, and govern access to every genie in your organization, whether packaged or custom.
 AI Hub
Each genie in the registry has an agent card that describes the genie's capabilities and configuration. Agent cards contain the following information:
- AI model: The LLM powering the genie
- Chat interface: The interface through which users interact with the genie, such as Slack, Microsoft Teams, or Workato GO
- Job description: The genie's defined role, goals, and behavioral constraints
- Skills: The actions and workflows the genie can execute
- App events: Triggers from external systems that enable the genie to act proactively without waiting for user input
- KPIs: The outcomes the genie is designed to drive or measure
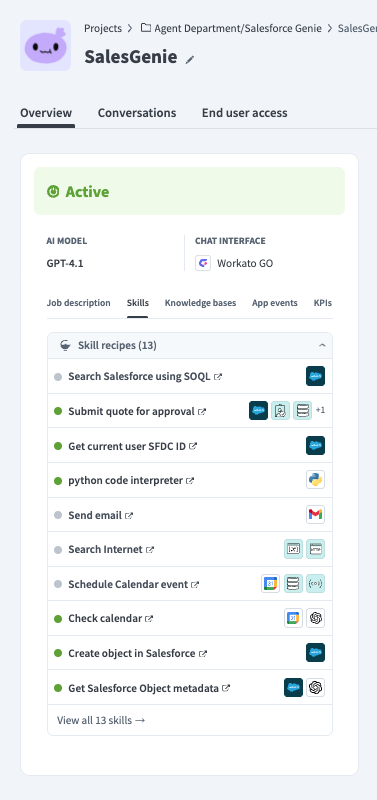 Agent cards display the genie's AI model, skills, job description, and more
Agent cards give enterprises a standardized way to describe and manage agents across their organization, with access controls that define who can consume or interact with each genie.
To distribute genies across workspaces, you can use XChange to package genies through a governed review and approval workflow. Approved packages can be distributed to child workspaces or published to the community library, where users with XChange access can discover and install them.
Agent version management
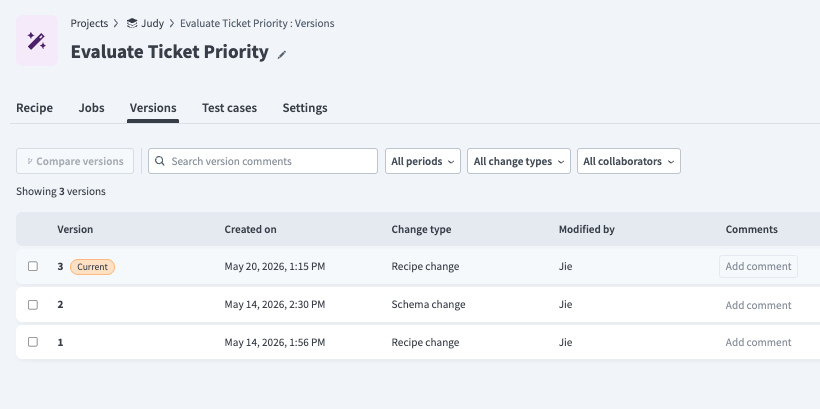
You can manage versions at two levels as you iterate on a genie's skills, prompts, and job description:
- Skills: Each skill maintains a version history as changes are made. You can compare versions, roll back to a previous version, and run test cases against a specific version. Refer to Skill version management for more information.
- Environments: You can maintain separate copies of a genie across development, test, and production environments. Versions can be deployed from one environment to the next as they are validated, and multiple versions can run in parallel across environments.
 Skill version management
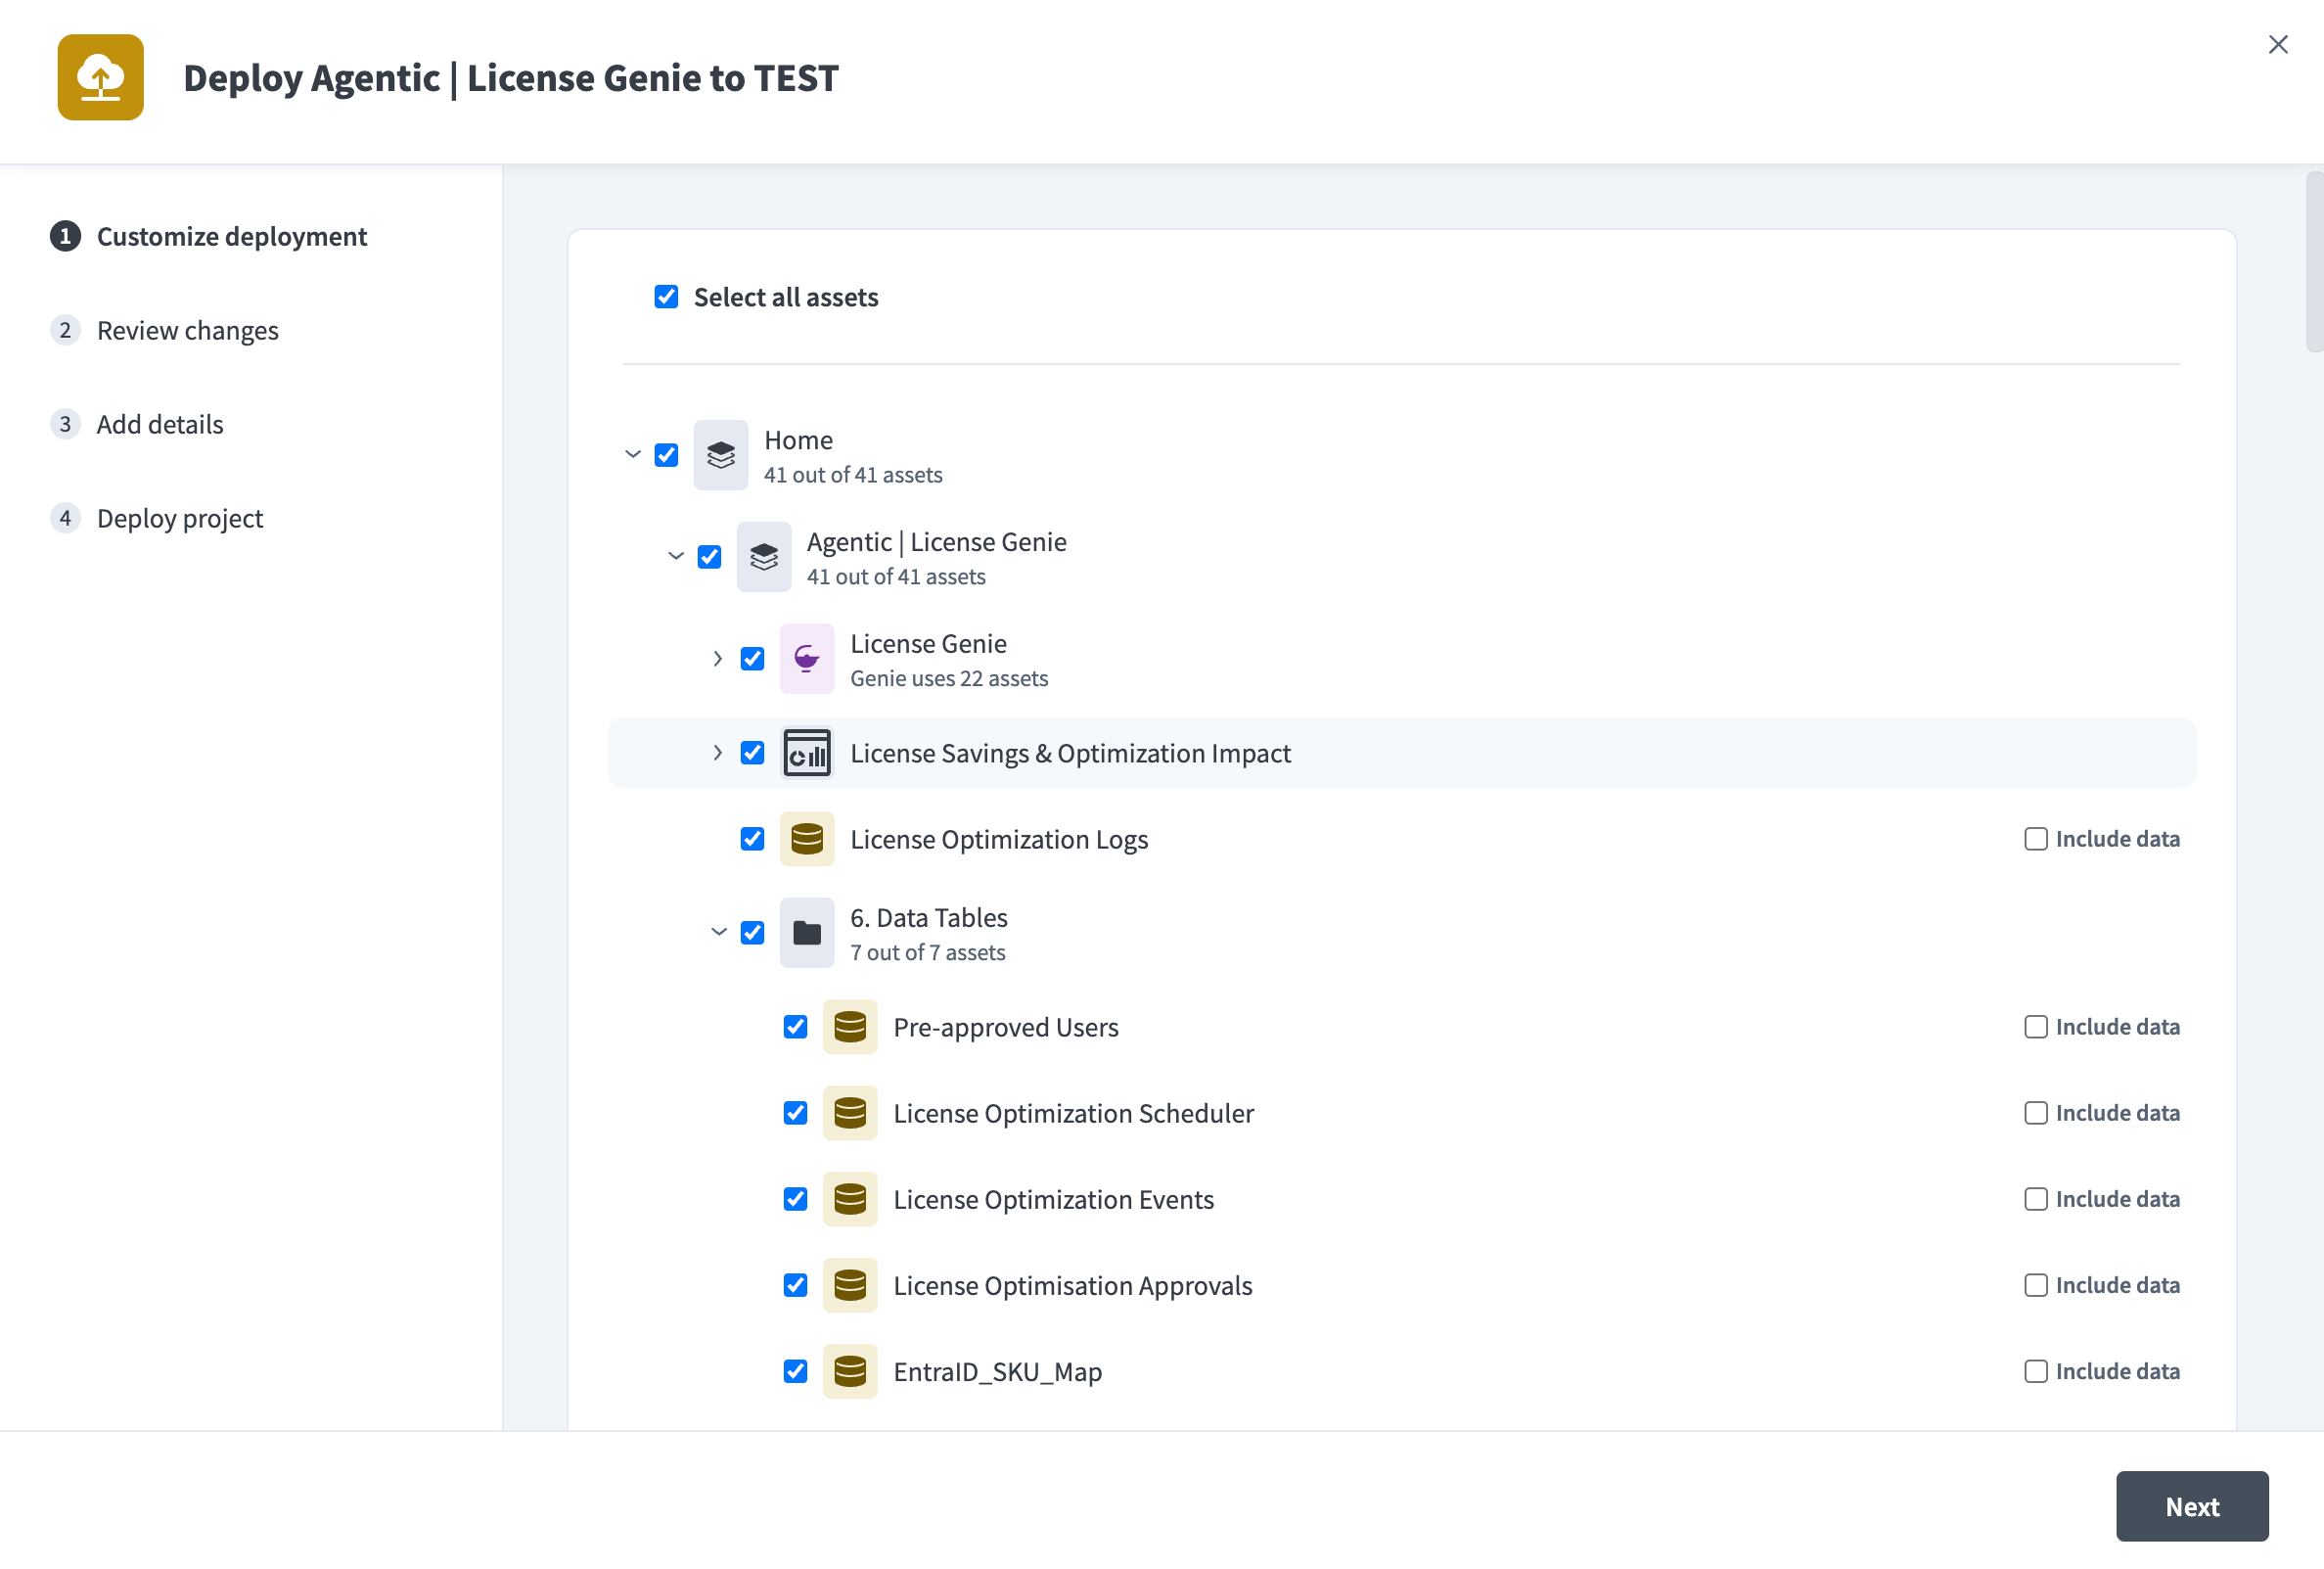 Agent version management
Refer to Lifecycle and operations for more information.
Large action models
Large action models (LAMs) extend LLMs with the ability to plan and execute multi-step workflows autonomously across apps and data systems.
Agent Studio lets you build large action models by extending an LLM of your choice with reasoning, skill discovery, and workflow orchestration. The result is a genie that can execute multi-step business processes autonomously, going beyond knowledge retrieval to take action across enterprise apps. These models continuously improve by observing live process instances on the platform, learning which action sequences succeed and adapting their behavior to increase accuracy and reliability over time.
Multi-modal input and output
Genies support multiple input types including text, images, and documents such as PDFs, Word files, and CSVs. Inputs can come from multiple knowledge bases that store and sync content from connected systems, or directly from end users through chat interfaces such as Slack, Microsoft Teams, and Workato GO. Files submitted through the chat interface can also be passed to skills for downstream processing.
Refer to Upload files and images for supported file types and size limits.
Agent memory
Genies retain context within a session innately, and can reference earlier messages to maintain continuity throughout a conversation.
For persistent memory across sessions, you can configure the following:
- Use knowledge bases to store reference content such as policies, documentation, and conversation history that genies retrieve through semantic search when responding to users. Refer to Connect your knowledge base to Confluence for a worked example.
- Use Data tables to store structured records that genies can query through skills for exact results, aggregations, or user-specific data. For example, store conversation IDs per user so the genie retains context across multiple interactions. Refer to Build a personal assistant genie with Telegram for a worked example.
Decision models and agents
Skills can invoke decision models using the Decision Models connector and enable genies to apply complex conditional business logic without that logic being embedded in the skill itself.
This separates policy management from agent logic. Business rules can be updated in the decision model without modifying the genie's skills or job description.
Refer to the following use cases for worked examples:
- Process purchase orders with a procurement genie: Decision model in a skill for deterministic order fulfillment
- Route requests across agents with a decision model: Decision model for multi-agent routing
Agent-to-agent communication
Genies can delegate tasks to other genies using skills that call the Assign task to genie action. This enables multi-agent architectures where a primary genie hands off subtasks to specialist genies and acts on the returned response, supporting patterns such as classification, routing, validation, and chained processing.
Genies can also call any A2A Protocol-compliant agent using the A2A Protocol connector. A2A is an open standard for AI agent interoperability across frameworks and vendors, including Google ADK, LangGraph, Amazon Bedrock AgentCore, and Azure AI Foundry. This allows Workato genies to delegate tasks to external agents and act on the result, and supports both synchronous and asynchronous patterns.
Genie conversation observability
You can review genie conversation history directly in the Workato UI. The Conversations page shows a full record of past interactions, and each skill invocation runs as a job with its own history in the Operations hub.
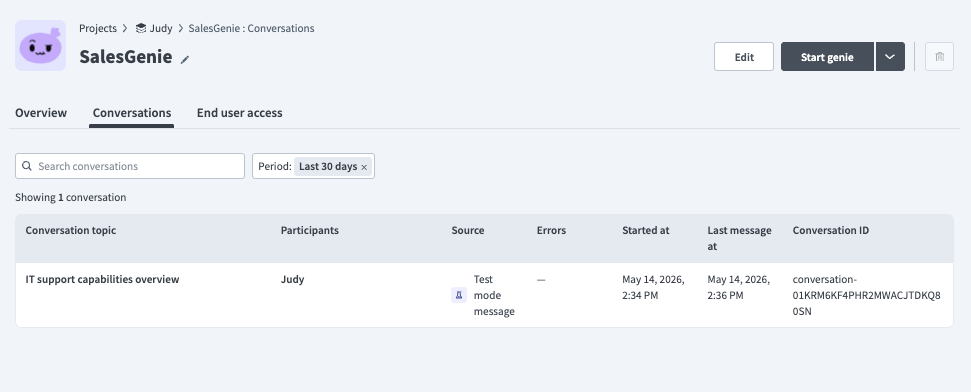 Genie conversation history
Refer to Conversations history for more information on reviewing conversations, debugging errors, and configuring retention and access permissions.
For compliance or integration with external observability pipelines, Workato also supports log streaming to destinations such as Amazon S3, Splunk, or Datadog, and API access to query conversation history programmatically. Refer to Genie conversation events for sample conversation logs.
FEATURE AVAILABILITY
Genie conversation streaming and API access are only available to users on specific pricing plans. Refer to your pricing plan and contract to learn more.
Skills
Skills equip genies with a toolset to take action and respond to end users. Each skill has two parts: the logic that executes when the genie invokes it, and a skill prompt configured on the genie that tells it when and how to use the skill.
Skills can connect to any Workato-supported app, a custom API, a data table, or an external MCP server.
Refer to Skills for more information.
Last updated: