Azure Blob Storage
Azure Blob Storage enables you to create data lakes for analytics and provides storage for building powerful cloud-native and mobile apps.
Azure Blob Storage enables you to store large amounts of unstructured object data. All Azure Blob Storage data is stored within containers. You must create a storage container before you can upload data with your Workato connection.
CONTAINERS ARE REQUIRED
Log streams stop and Workato sends a notification email if you delete a container.
Workato's Azure Blob Storage connector allows you to automate cloud storage tasks and build data pipelines that automatically pull or push data to Azure Blob Storage from various apps.
API version
The Azure Blob Storage connector uses the Azure Blob Storage REST API.
MICROSOFT MFA REQUIREMENTS
Starting October 1, 2025, Microsoft will begin to enforce multi-factor authentication (MFA) for accounts that sign in to Azure Resource Manager API endpoints to perform Create, Update, or Delete operations.
These endpoints are used in the Azure Blob Storage connector to create and manage webhook subscriptions through https://management.azure.com/subscriptions.
This change affects the following triggers:
Choose one of the following options to maintain uninterrupted service:
Option 1: Enable MFA and re-authenticate
Set up MFA for your Azure organization following Microsoft's MFA setup guide.
Reconnect your Azure Blob Storage connection in Workato.
Complete the OAuth flow with MFA when prompted.
Test the recipe to ensure it works with the connection.
Option 2: Migrate to Client Credentials authentication
Configure a Client Credentials Grant connection, which uses a service principal and is exempt from MFA enforcement.
How to connect to Azure Blob Storage on Workato
There are two ways to authenticate to Azure Blob Storage:
- Using an Authorization Code Grant
- Using a Client Credentials Grant
Create an Authorization Code Grant and Integration System User
Use an Authorization Code Grant connection to allow Workato to perform actions on behalf of a user by leveraging Integration System User (ISU) permissions. This setup is required to use Azure Blob Storage's capabilities, including the event webhook trigger.
NETWORK ACCESS REQUIRED
Your Azure Blob Storage account must allow network access from Workato. You can enable public access from all networks or restrict access to specific IP addresses. If you restrict access, you must add Workato IP addresses to your allowlist.
ISU ACCOUNT ACCESS
The ISU must have access solely to the storage account specified in your Workato connection.
Complete the following steps to create an ISU in your Microsoft Entra ID account:
Go to Microsoft Entra ID.
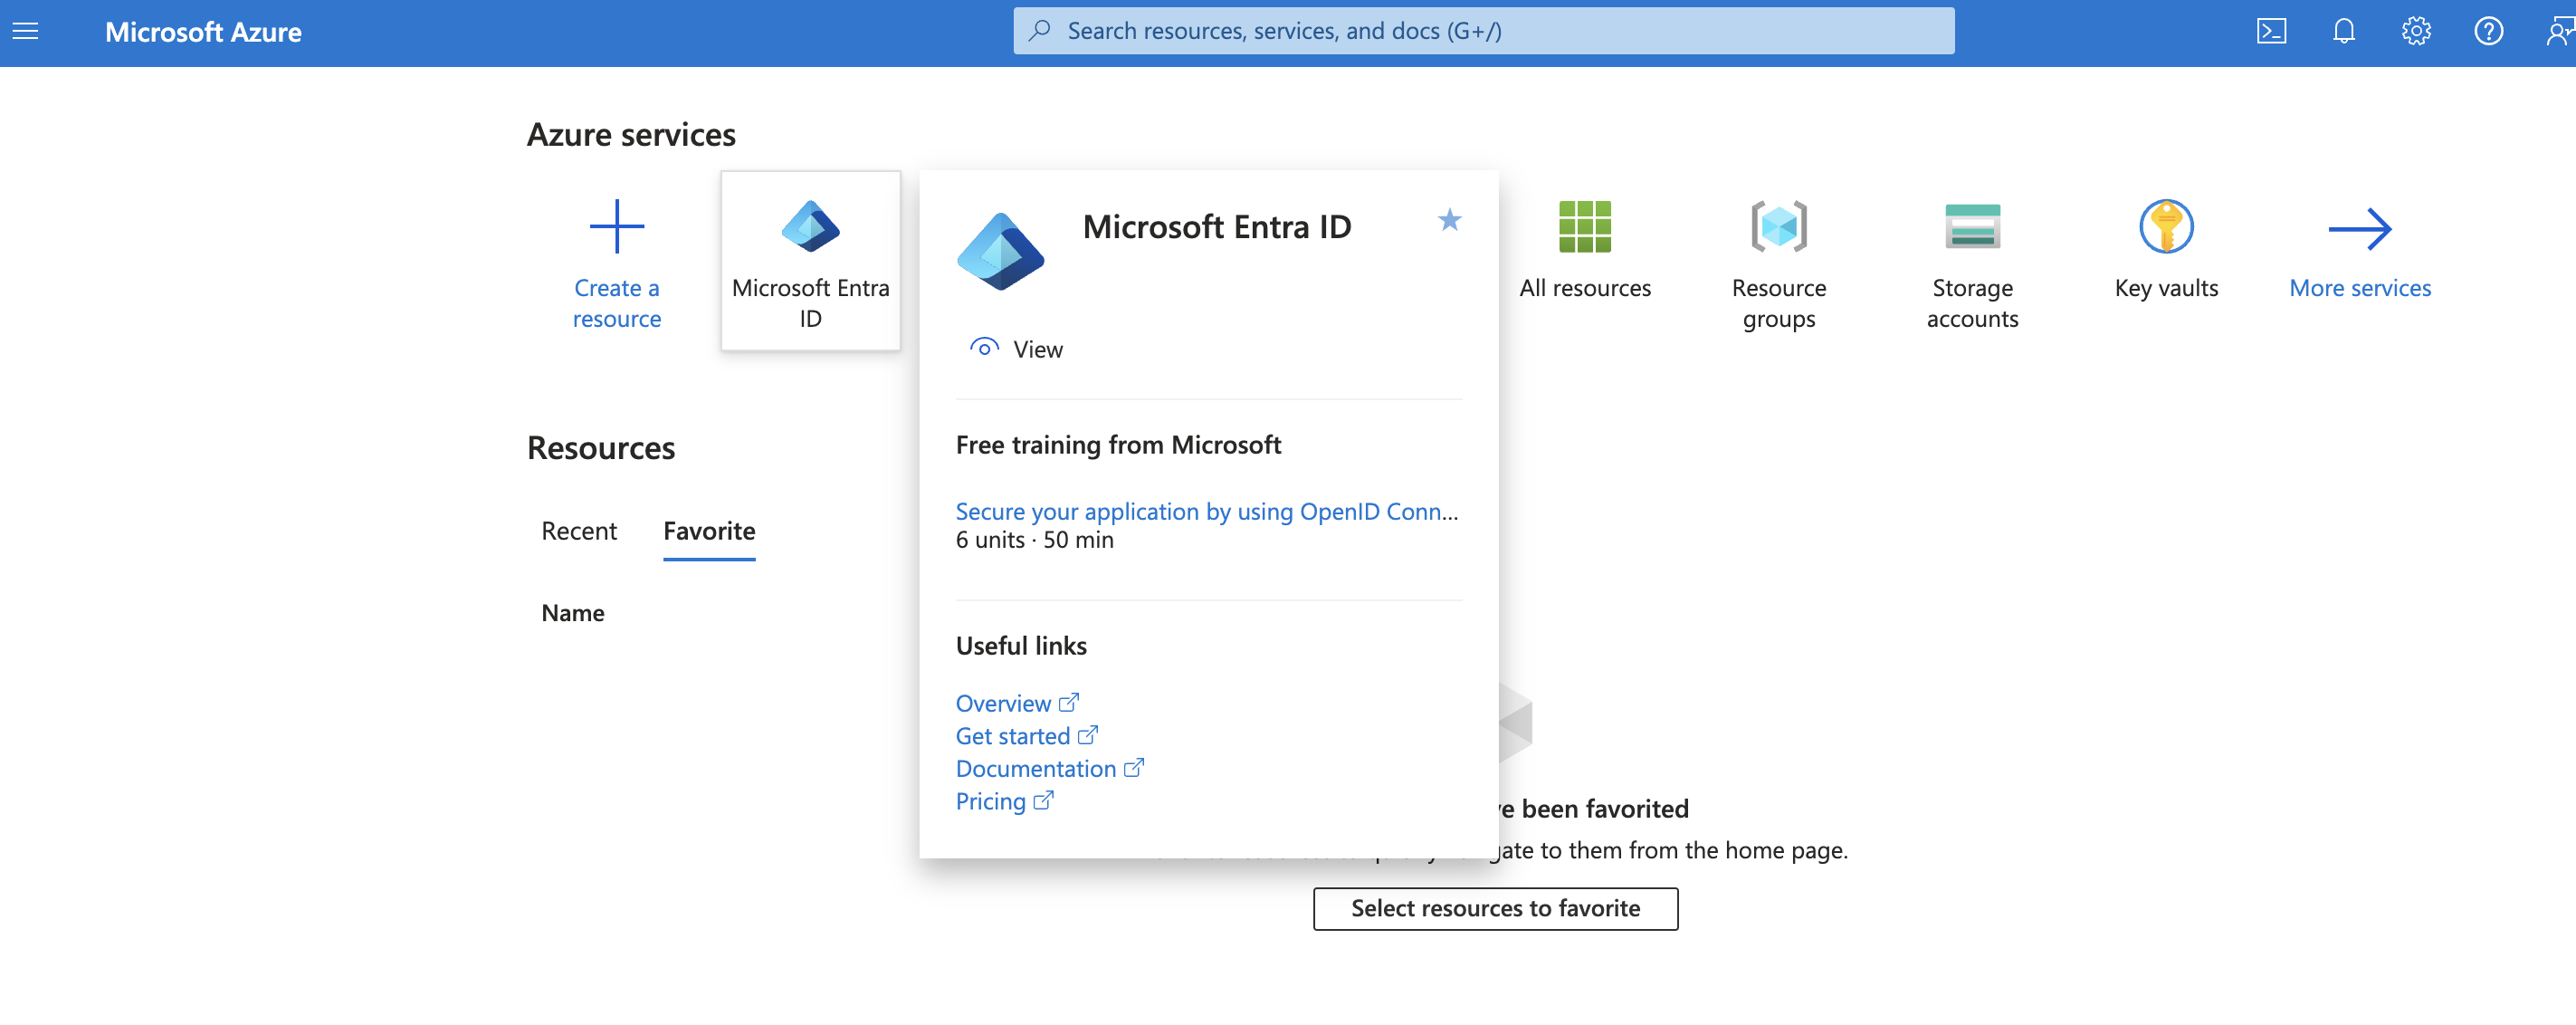 Access Microsoft Entra ID from your Azure portal
Select Add > User > Create new user.
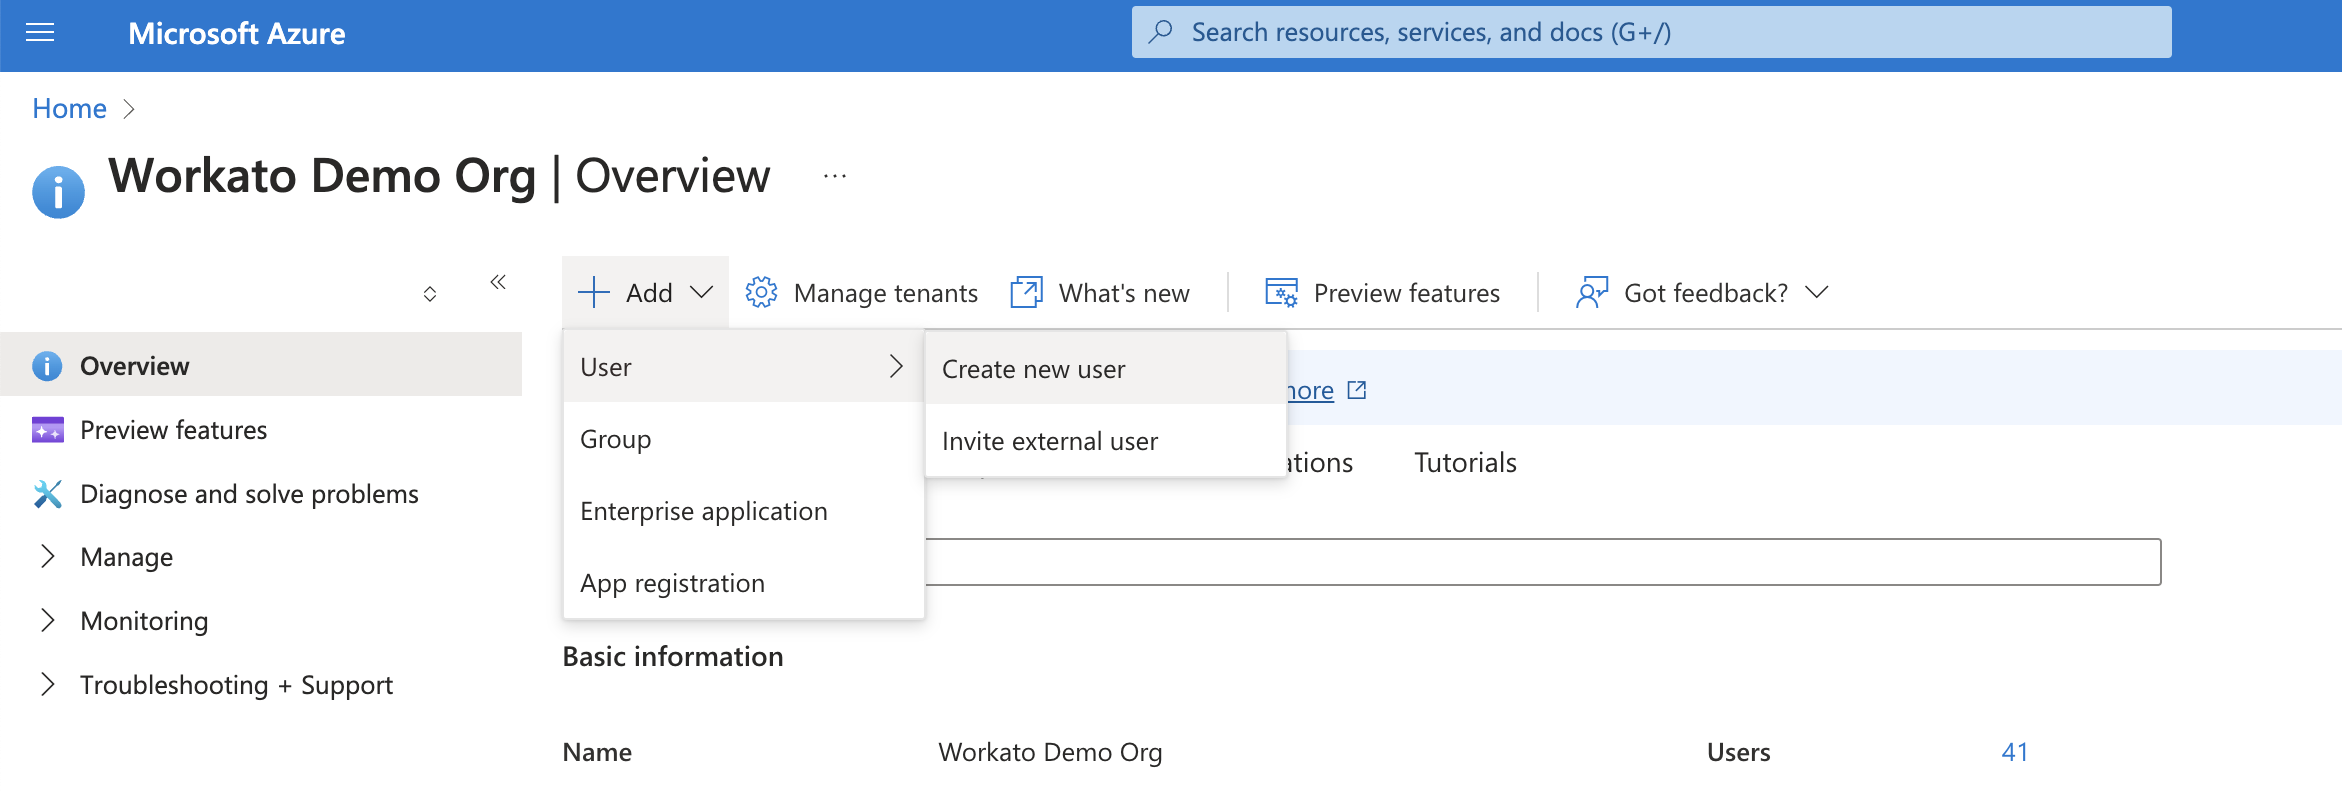 Create a new user
Enter the Identity details for the ISU, such as the User principal name, Display name, and Password.
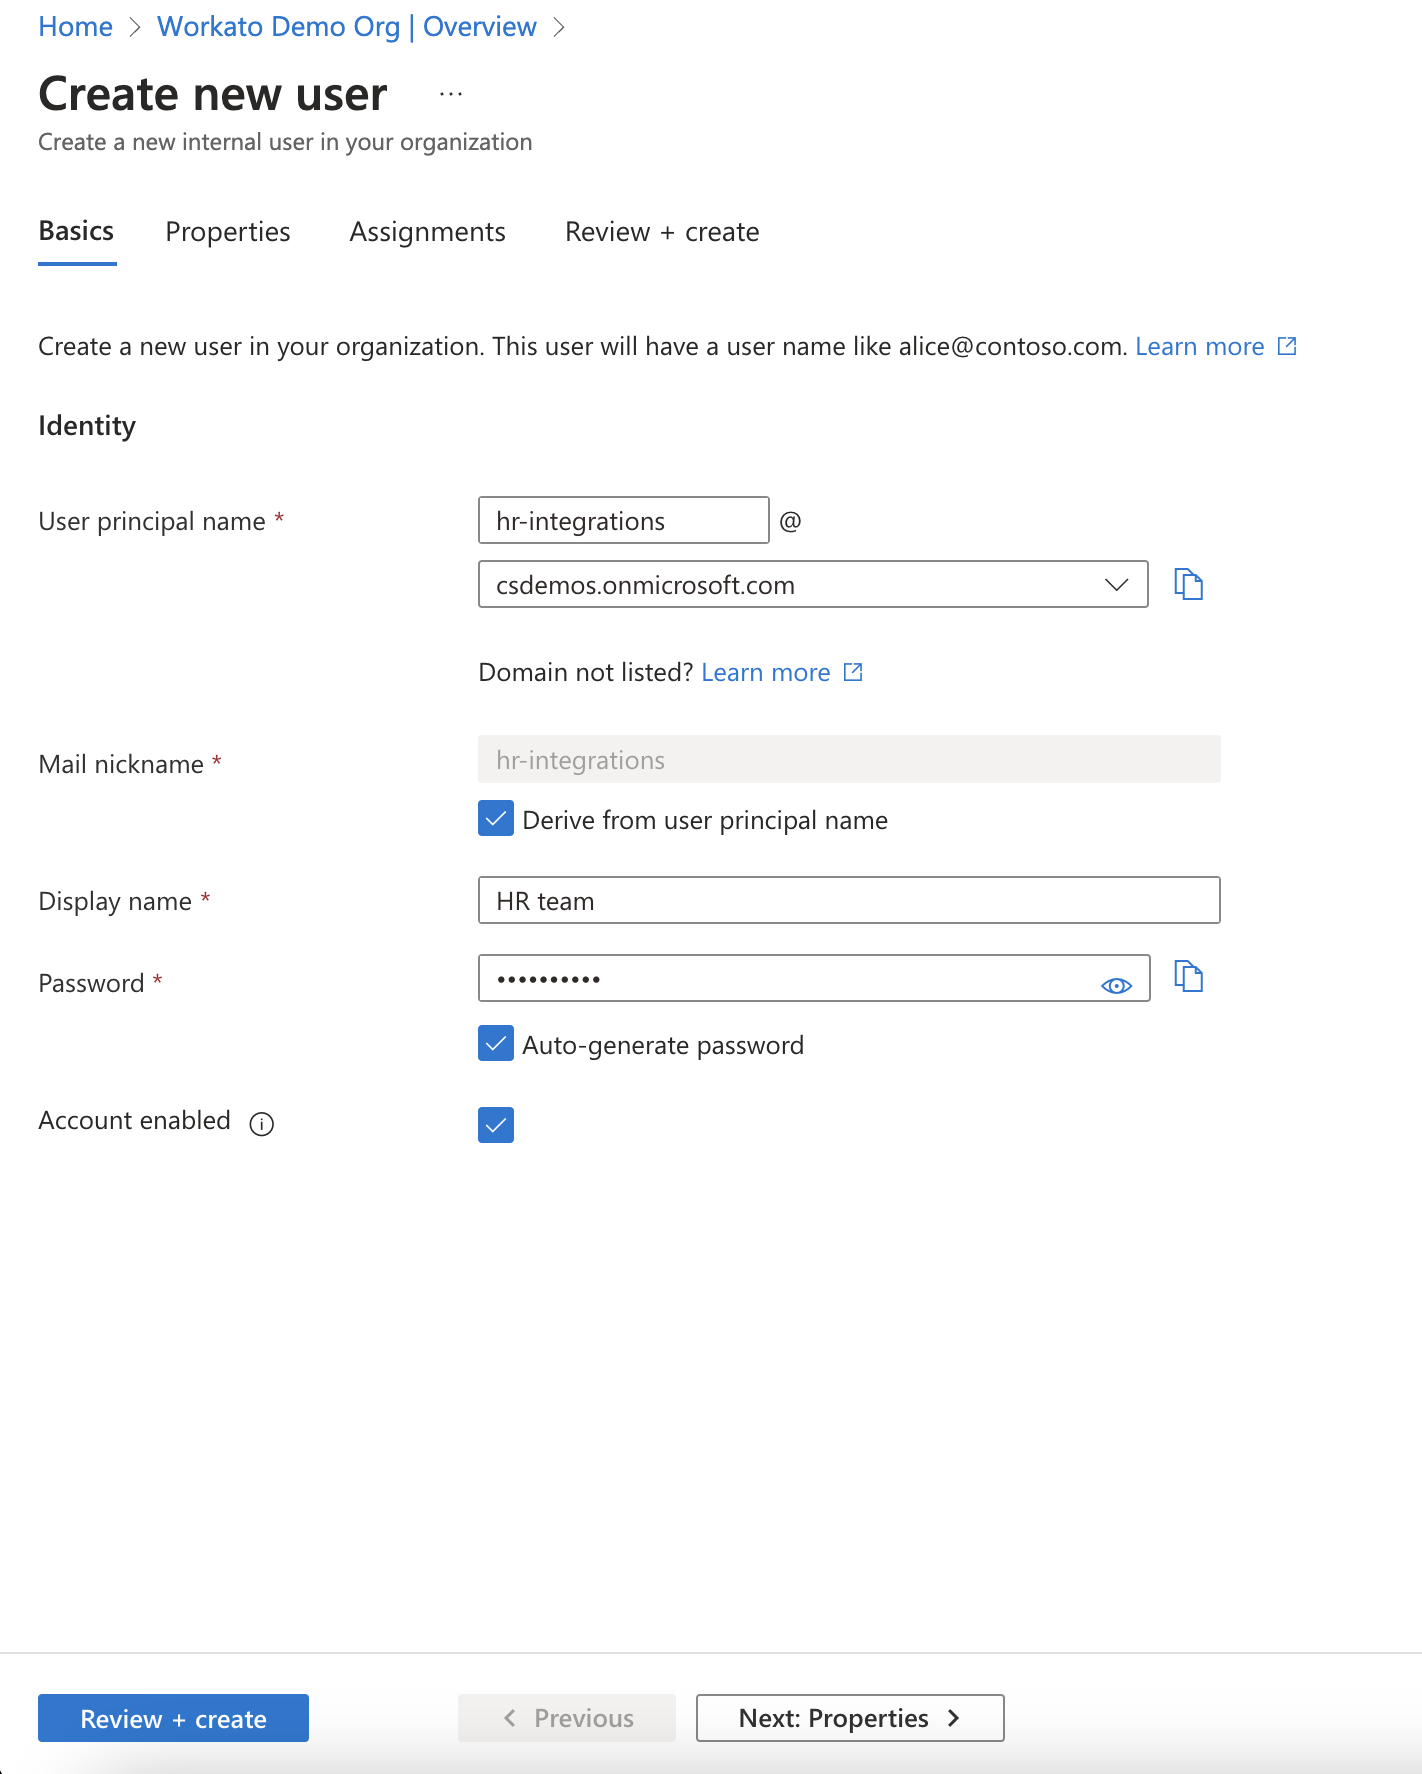 Provide details for the new user.
Select Review + create > Create to create your ISU.
Configure the ISU
Complete the following steps to configure your Workato connection through the Azure portal, ensuring that your ISU has the appropriate permissions and scopes:
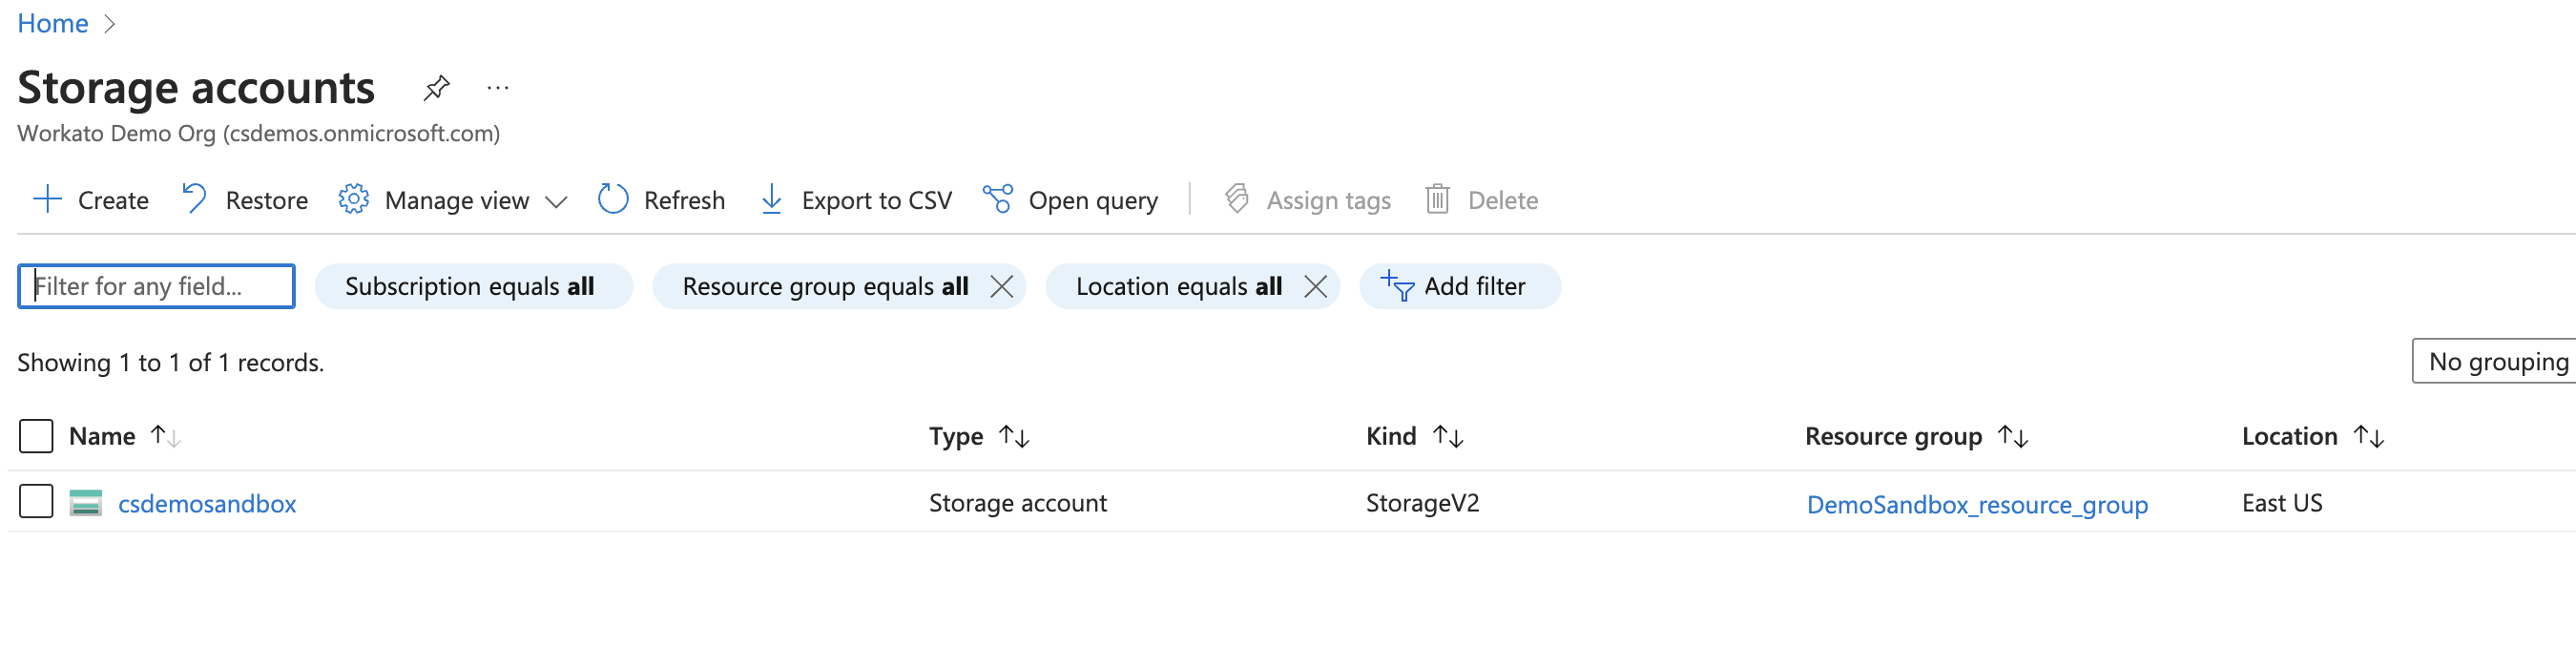
In your Azure portal, go to Storage accounts.
 Navigate to Storage accounts from your Azure portal
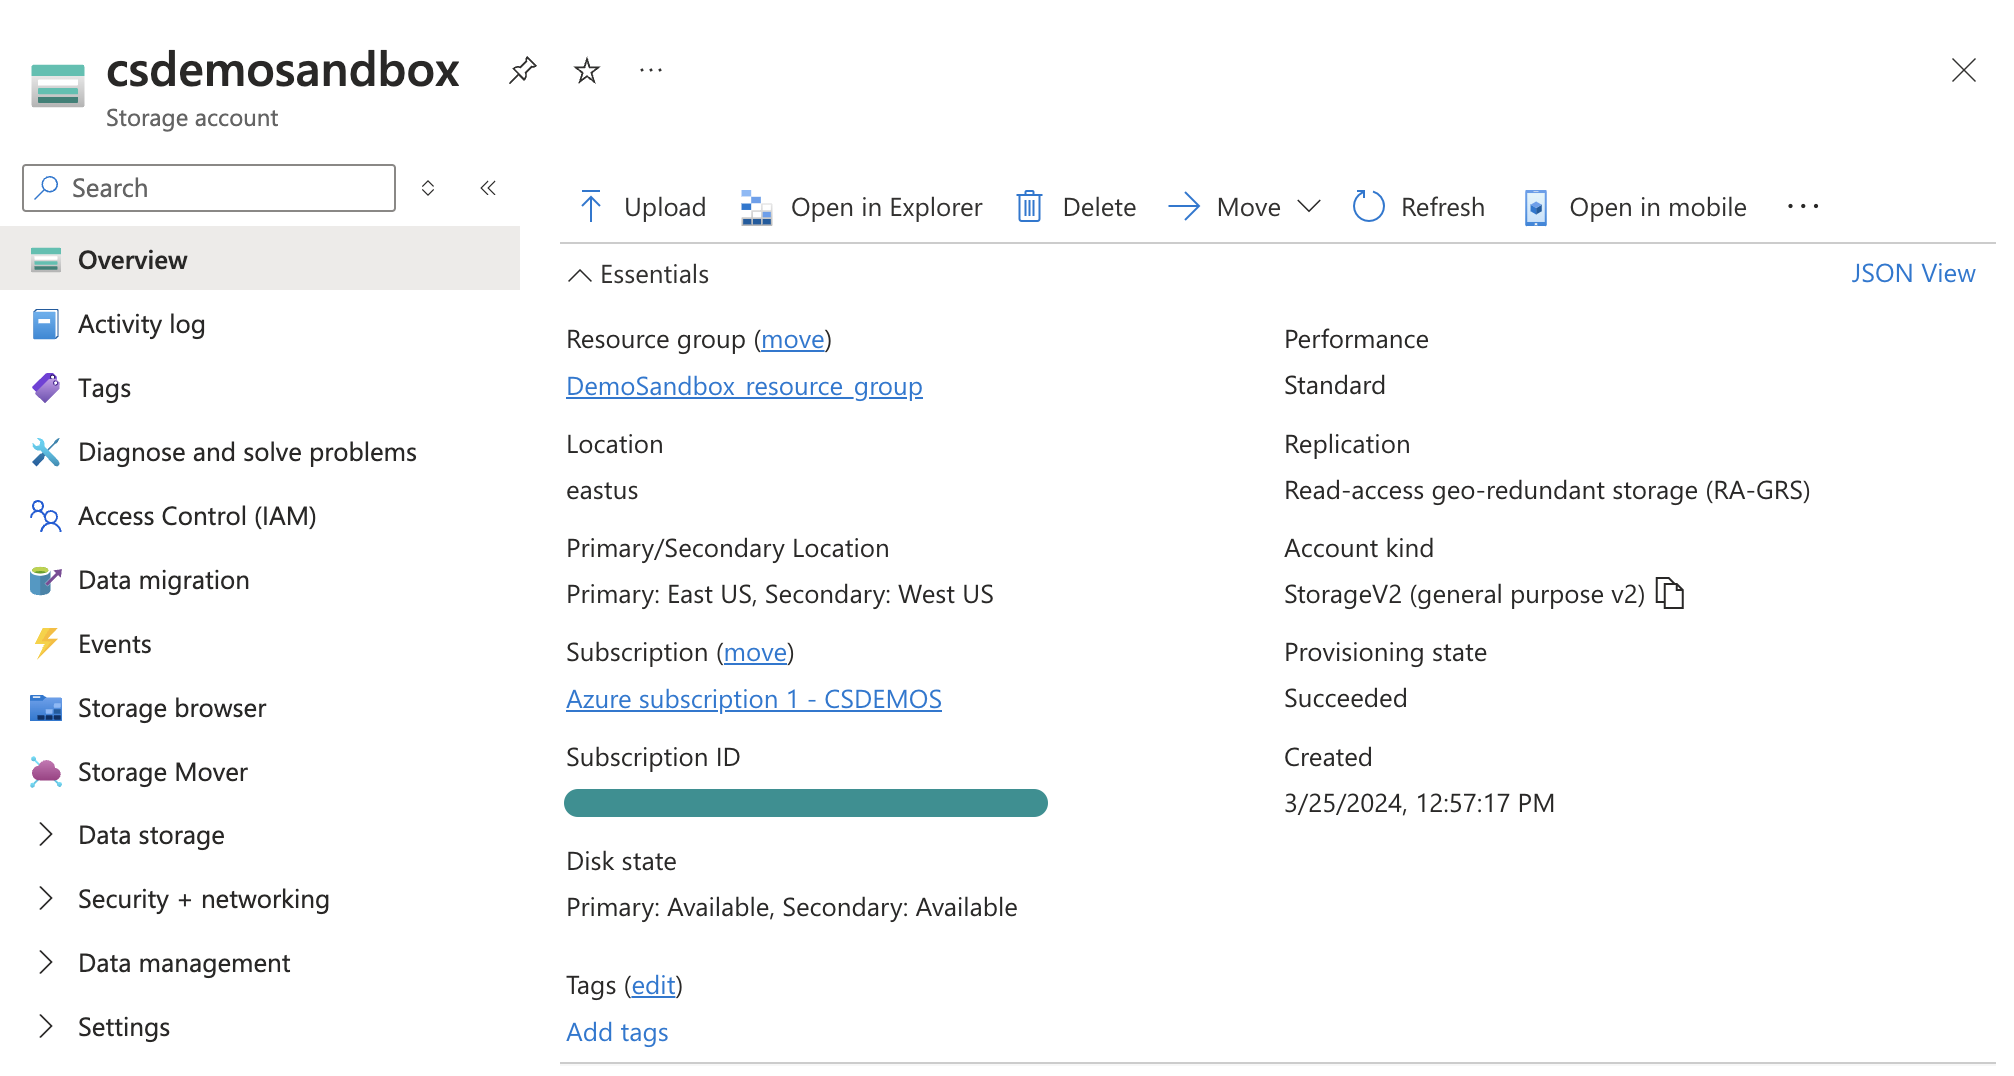
Select your Storage account.
 Specify the Storage account to grant access to Workato
Select the resource group within your Azure Blob Storage account.
 Navigate to the resource group
Go to Access Control (IAM) within the resource group.
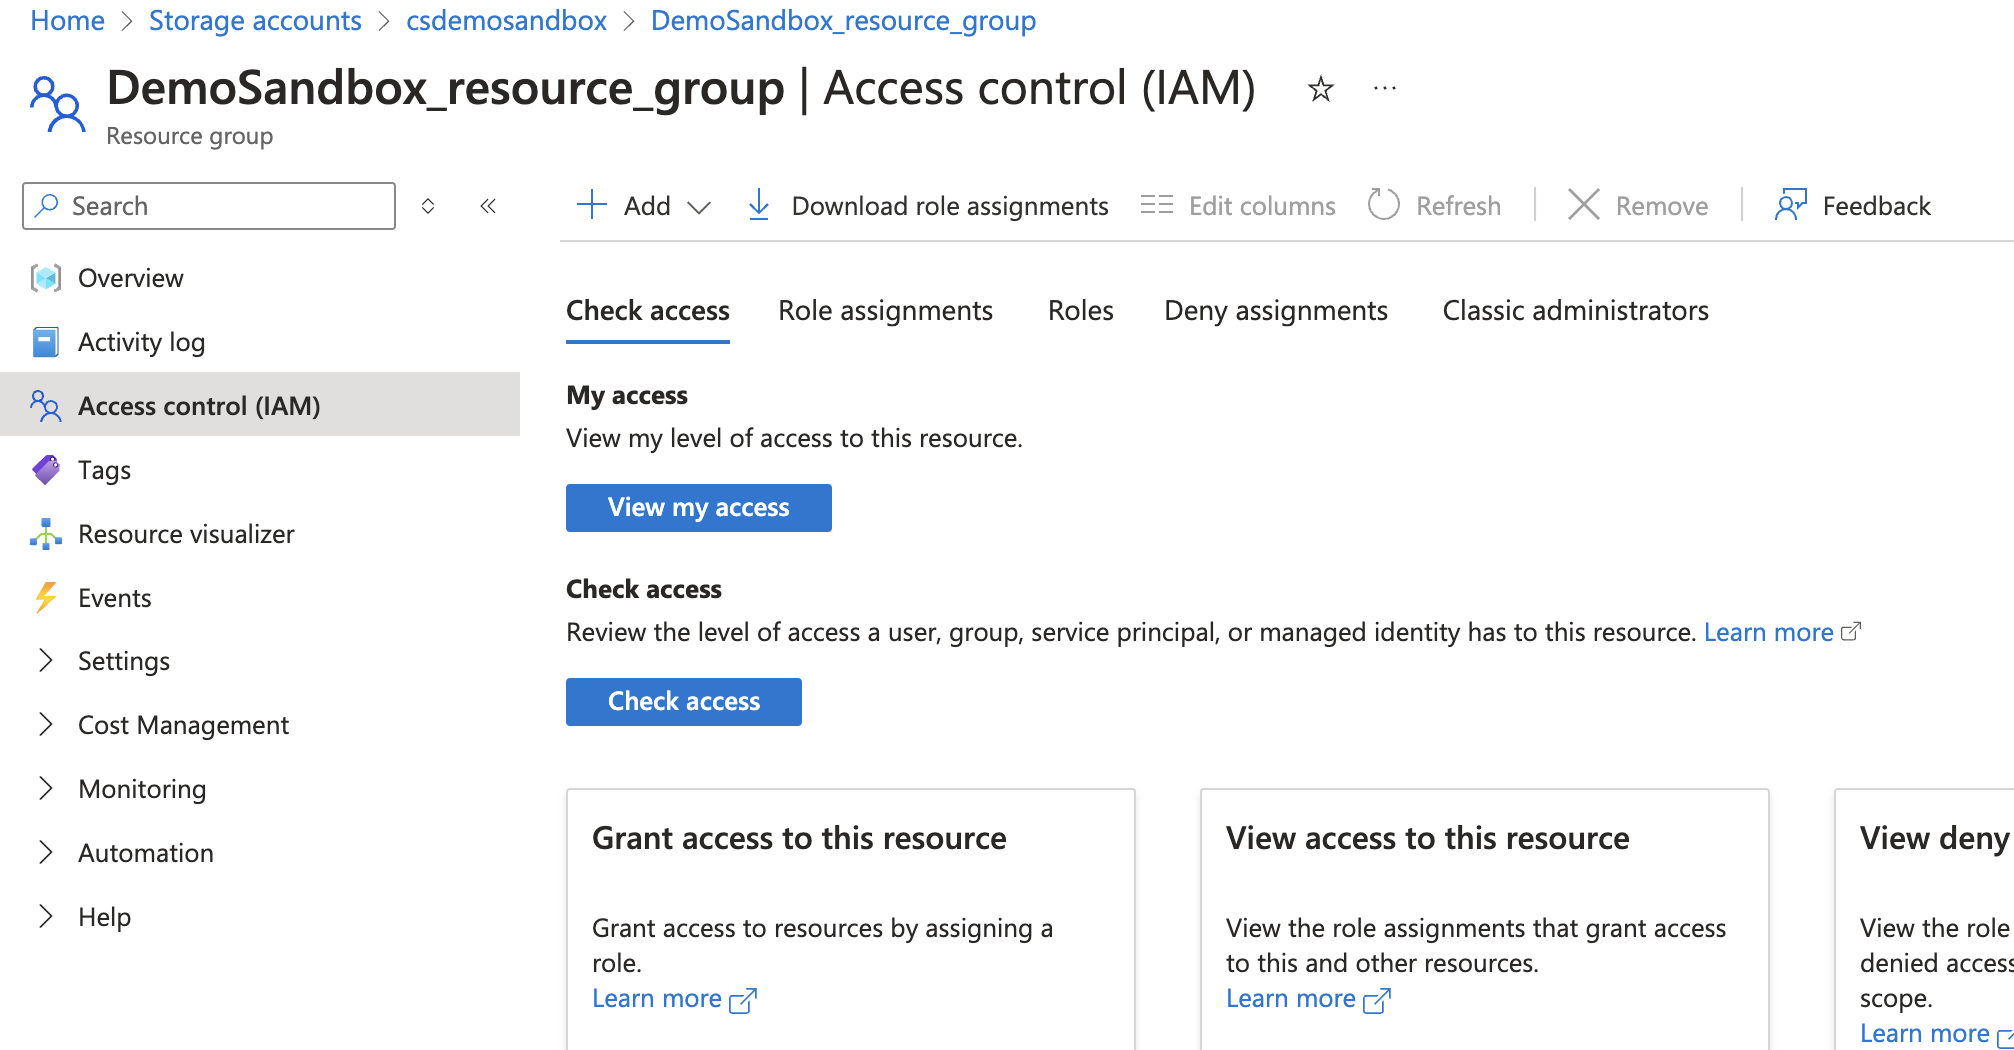 Navigate to Access Control (IAM)
Click Add > Add role assignment to begin assigning roles to the ISU.
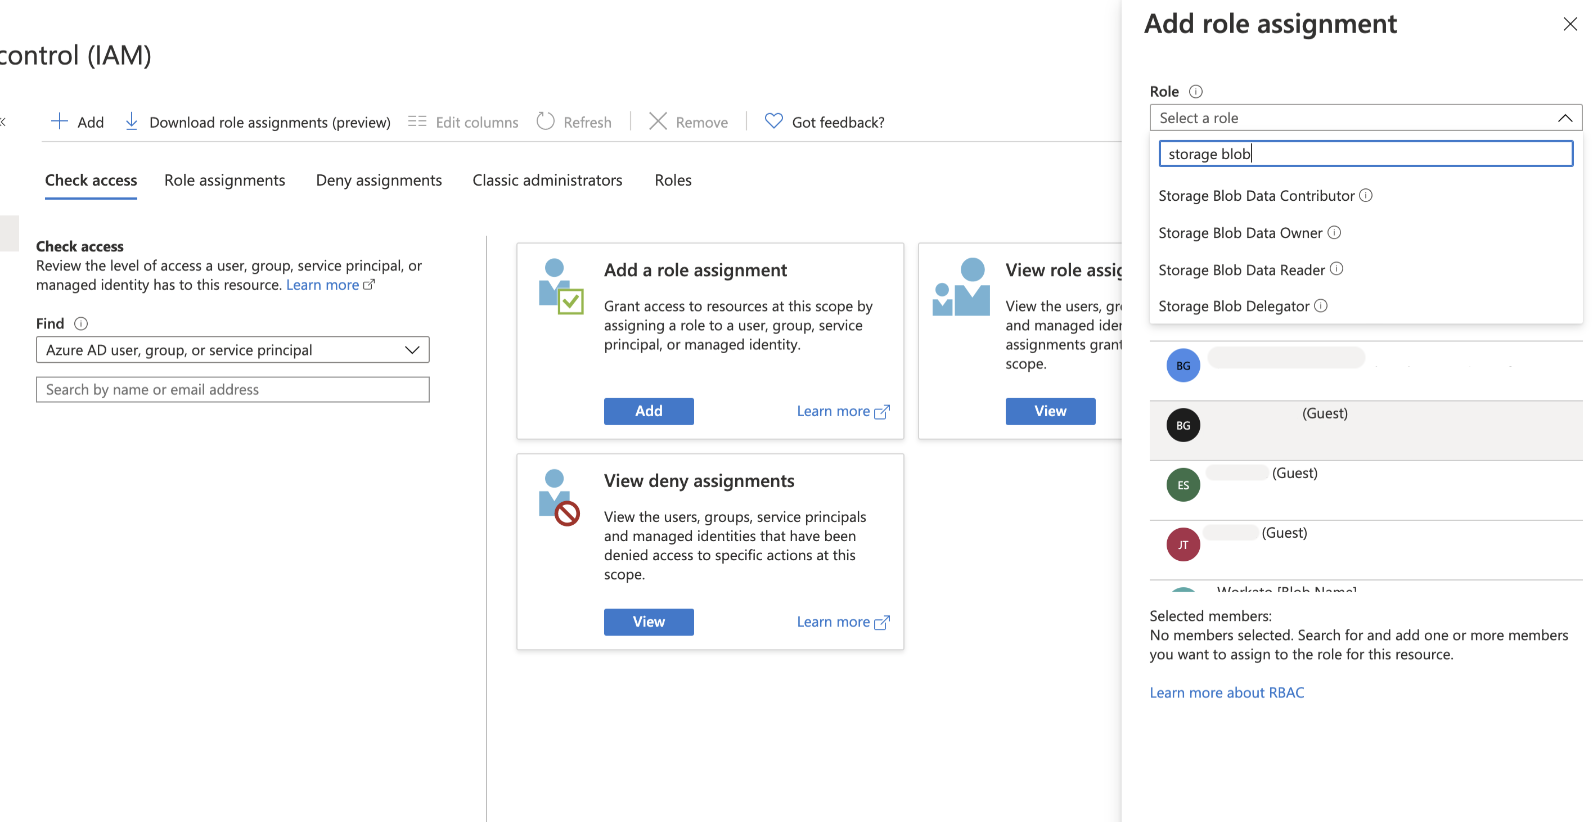 Add a role assignment to the ISU
Provision the required roles for the ISU:
Storage Blob Data Contributor: Grants full read and write access to Azure Blob Storage.
Storage Blob Data Reader: Provides read-only access to Azure Blob Storage.
EventGrid Event Subscription Contributor: Enables the ISU to establish and manage event subscriptions within Azure Blob Storage. This is required for using the new event webhook trigger.
Configure network access for your storage account
Go to your Storage account in the Azure portal.
Go to Security + networking > Networking.
Click Manage in the Public network access section.
Ensure Public network access is set to Enable.
Select one of the following options under Public network access scope:
- Enable from all networks: Allows access from any network
- Enable from selected networks: Restricts access to specific networks. If you select this option, add the Workato IP addresses in the IPv4 Addresses section
Click Save.
Verify that the Storage Data Contributor role is active for write access and the container access level is set to public.
Create a Client Credentials Grant
You can use a Client Credentials Grant to establish a connection with Azure Blob Storage. Use this grant type for:
- Working with tenant-specific connection account types, which are the only supported account type for this grant.
- Service-to-service authentication, where you access Azure with managed identities.
NETWORK ACCESS REQUIRED
Your Azure Blob Storage account must allow network access from Workato. You can enable public access from all networks or restrict access to specific IP addresses. If you restrict access, you must add Workato IP addresses to your allowlist.
Complete the following steps to set up a Client Credentials Grant connection in Azure Blob Storage:
Go to App registrations in your Azure portal.
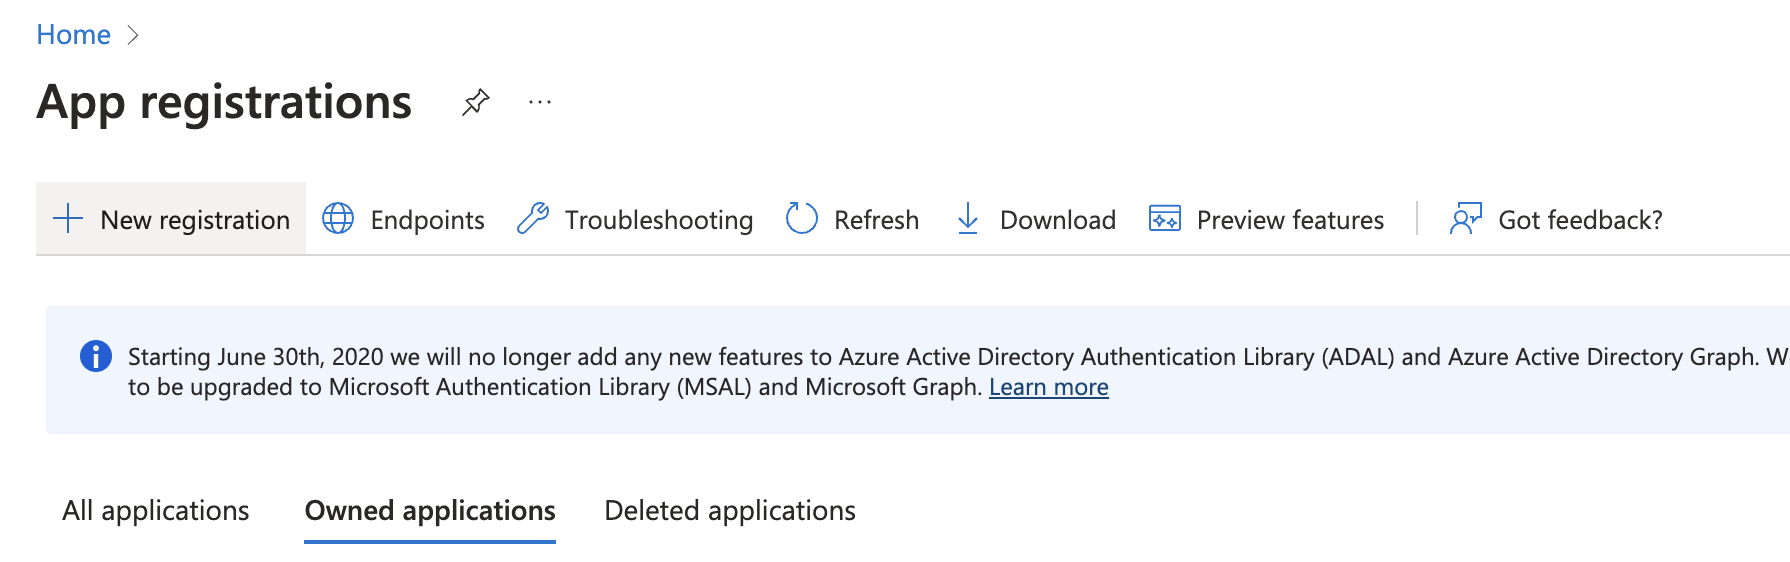 Go to App registrations in your Azure portal
Select New registration.
Enter the Name of the application you plan to register.
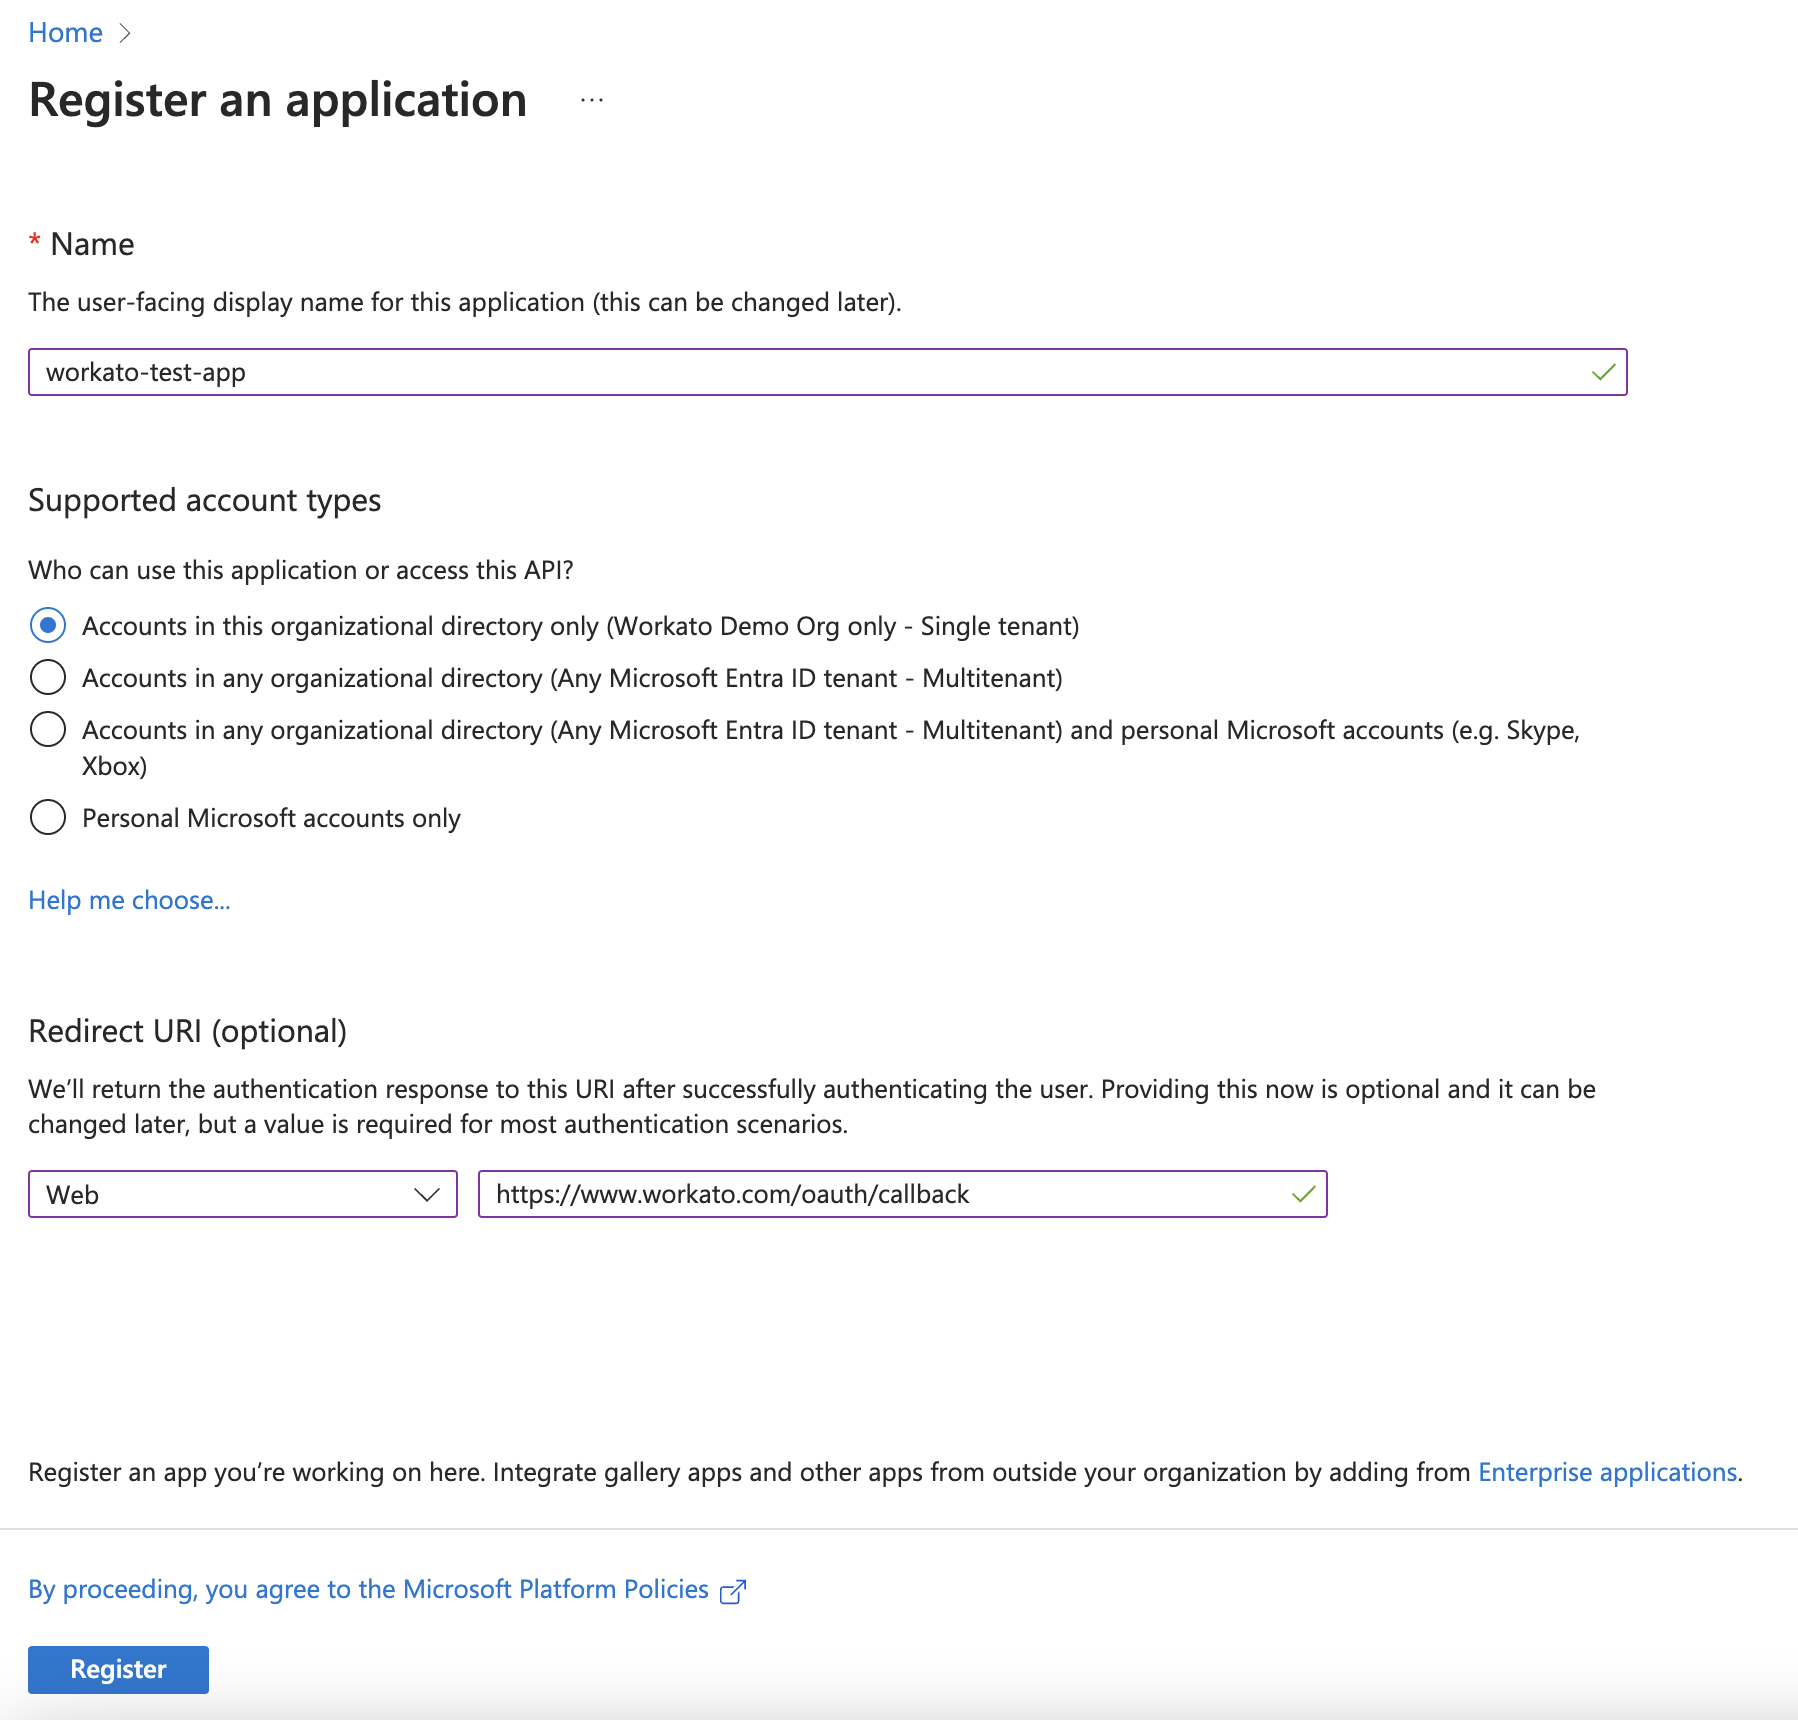 Register an application
Select the Supported account types that can use the application and access the API.
Select Web as the platform and enter https://www.workato.com/oauth/callback in the Redirect URI field.
Click Register to create the application and view the Overview page.
Record the Client ID and Tenant ID for connection setup in Workato.
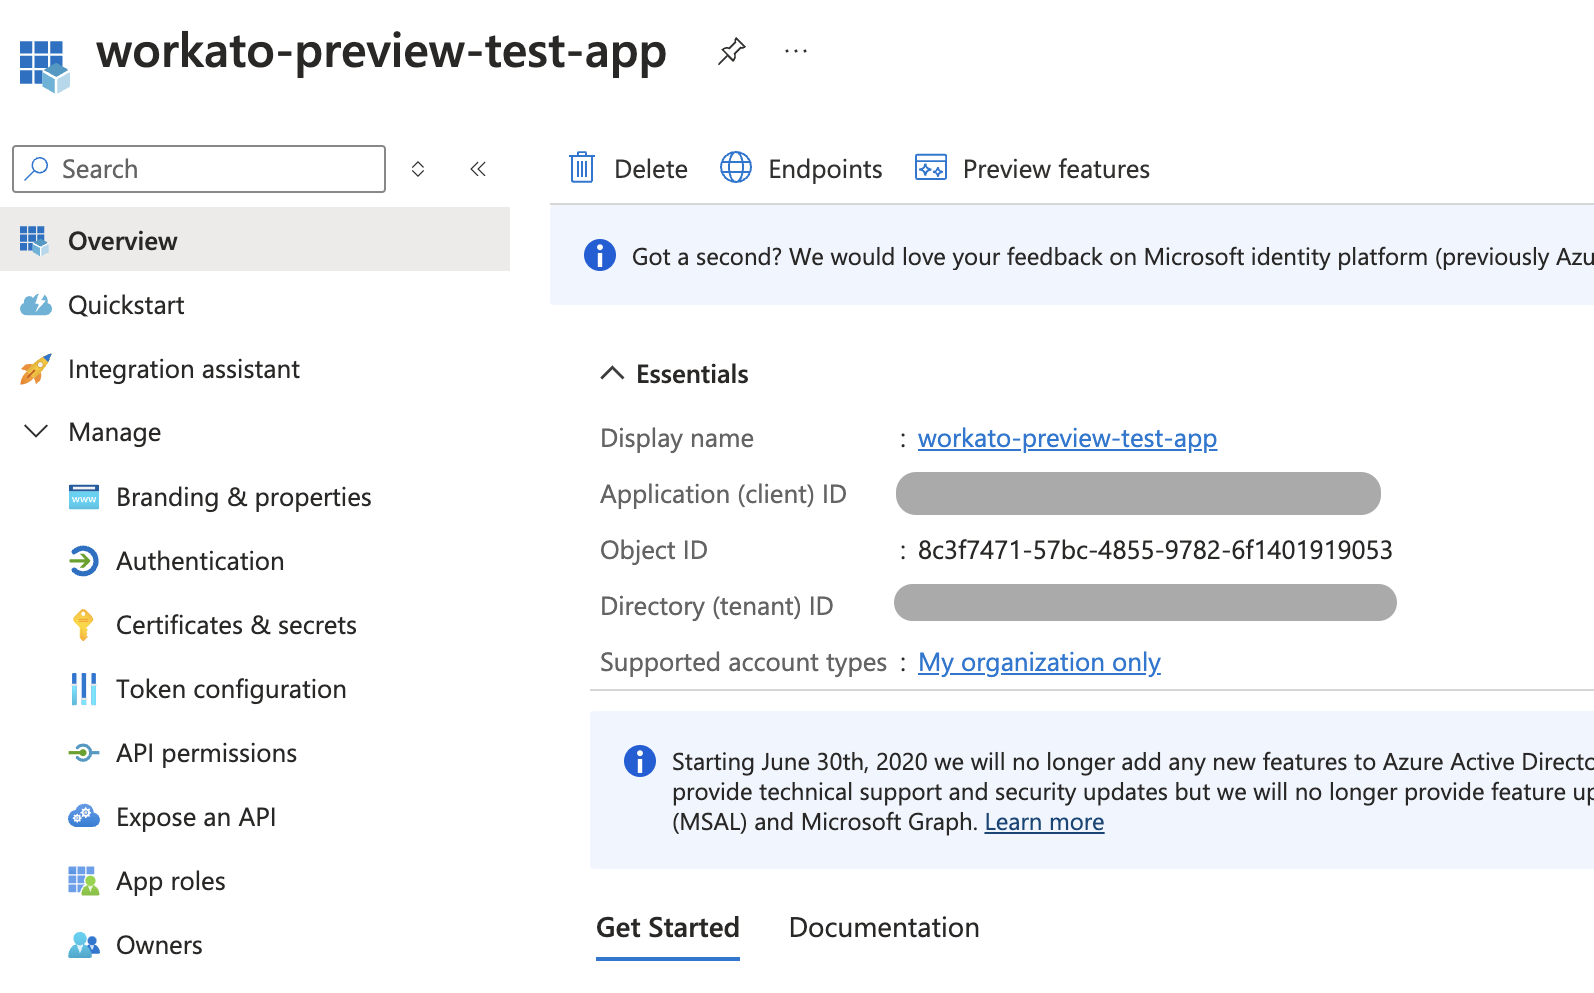 Record IDs
Go to Manage > API permissions.
Select Add a permission.
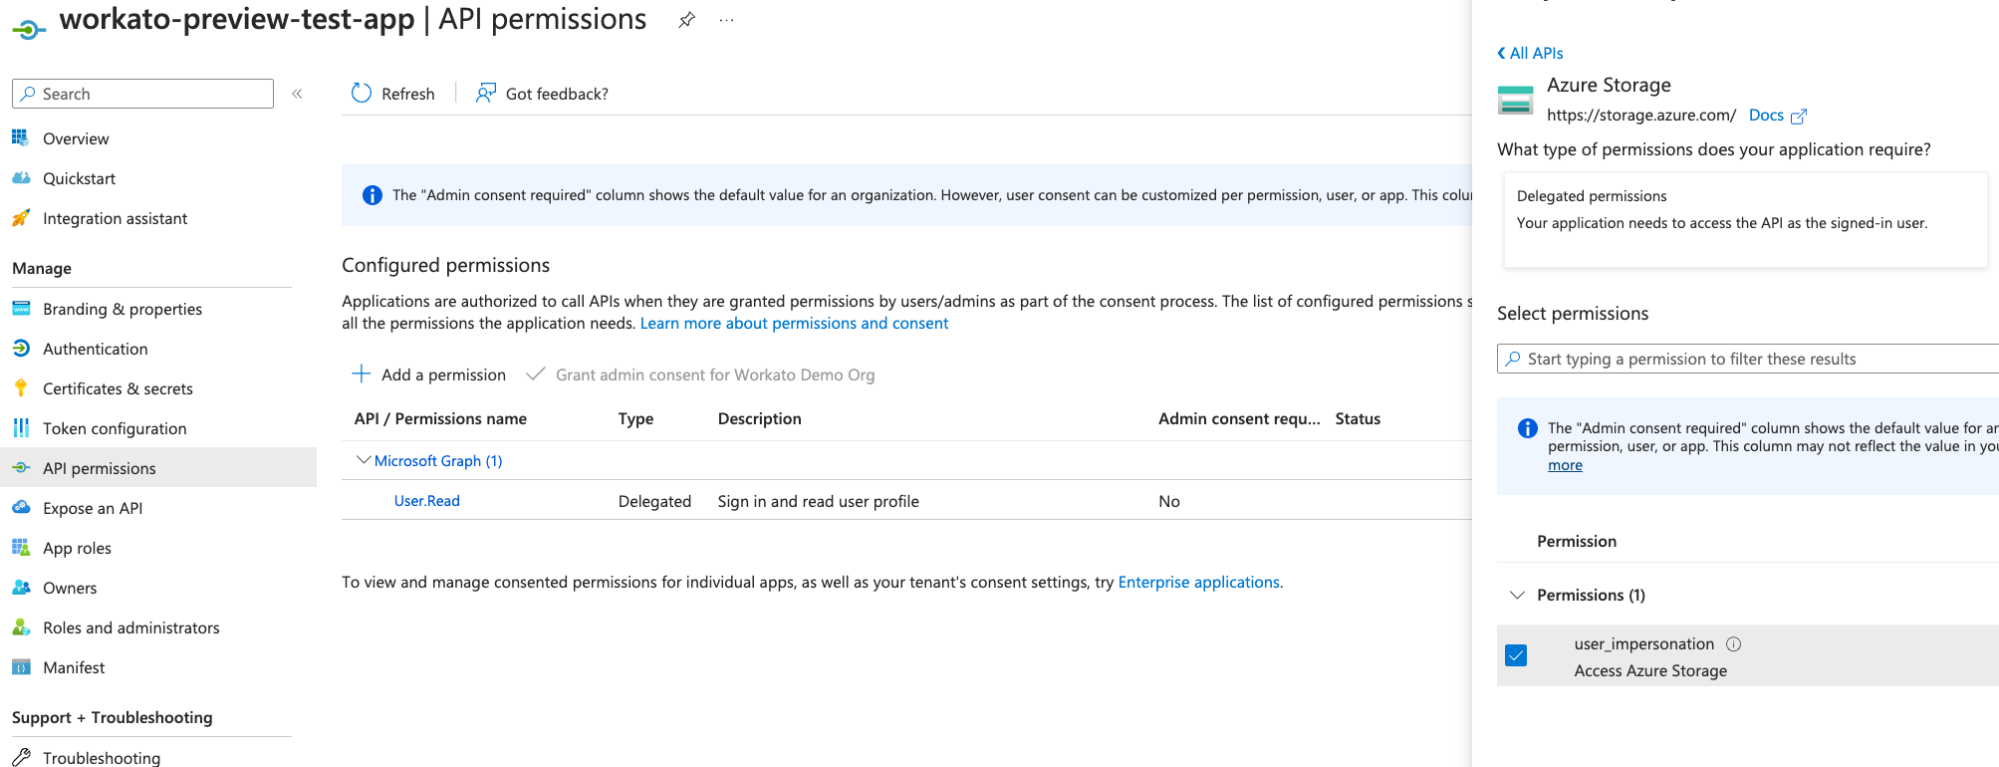 Add a permission
Select permissions for Azure Storage and Azure Service Management on the Request API permissions page, including user_impersonation.
Click Add permissions to grant the permissions.
 Grant permissions
Go to Certificates & secrets > Client secrets.
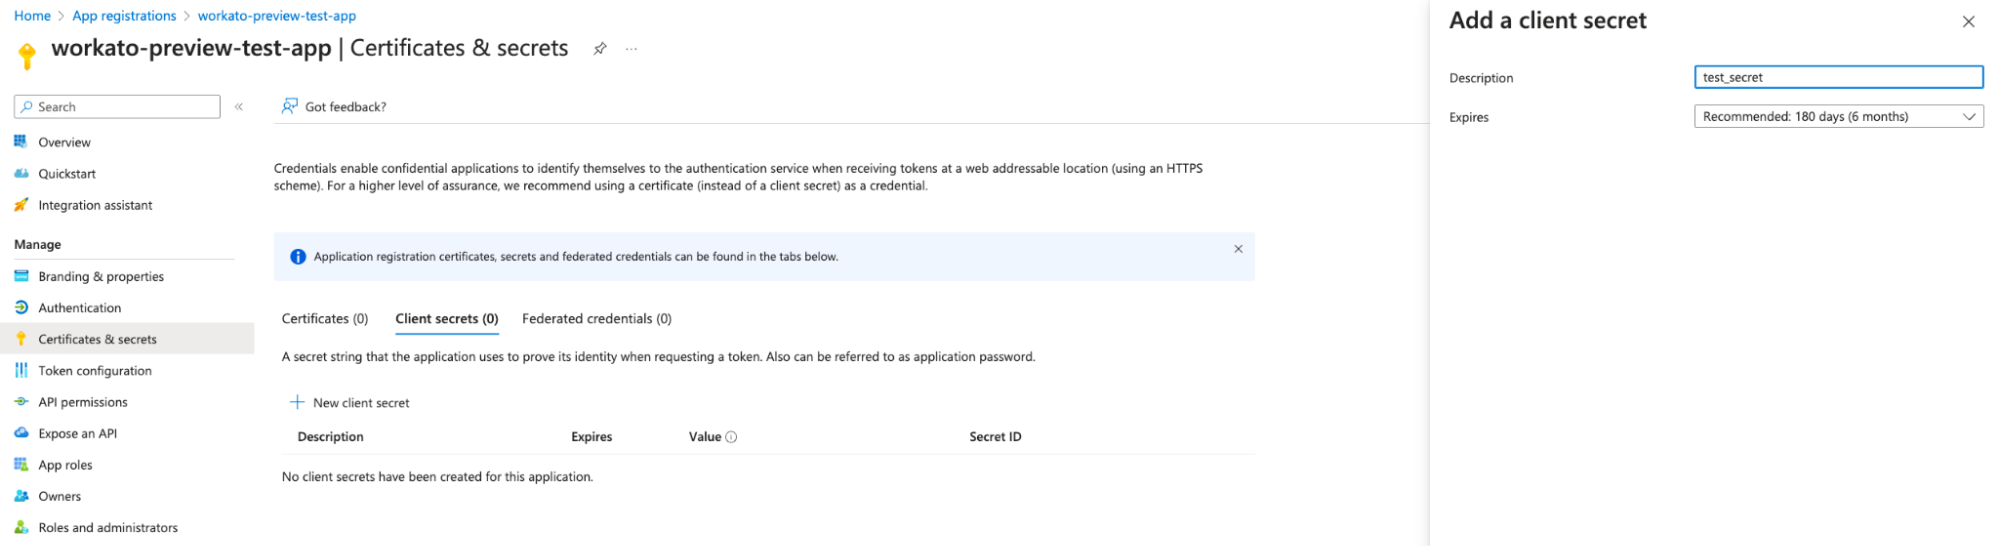 Navigate to Client secrets
Generate a New client secret and securely record its Value.
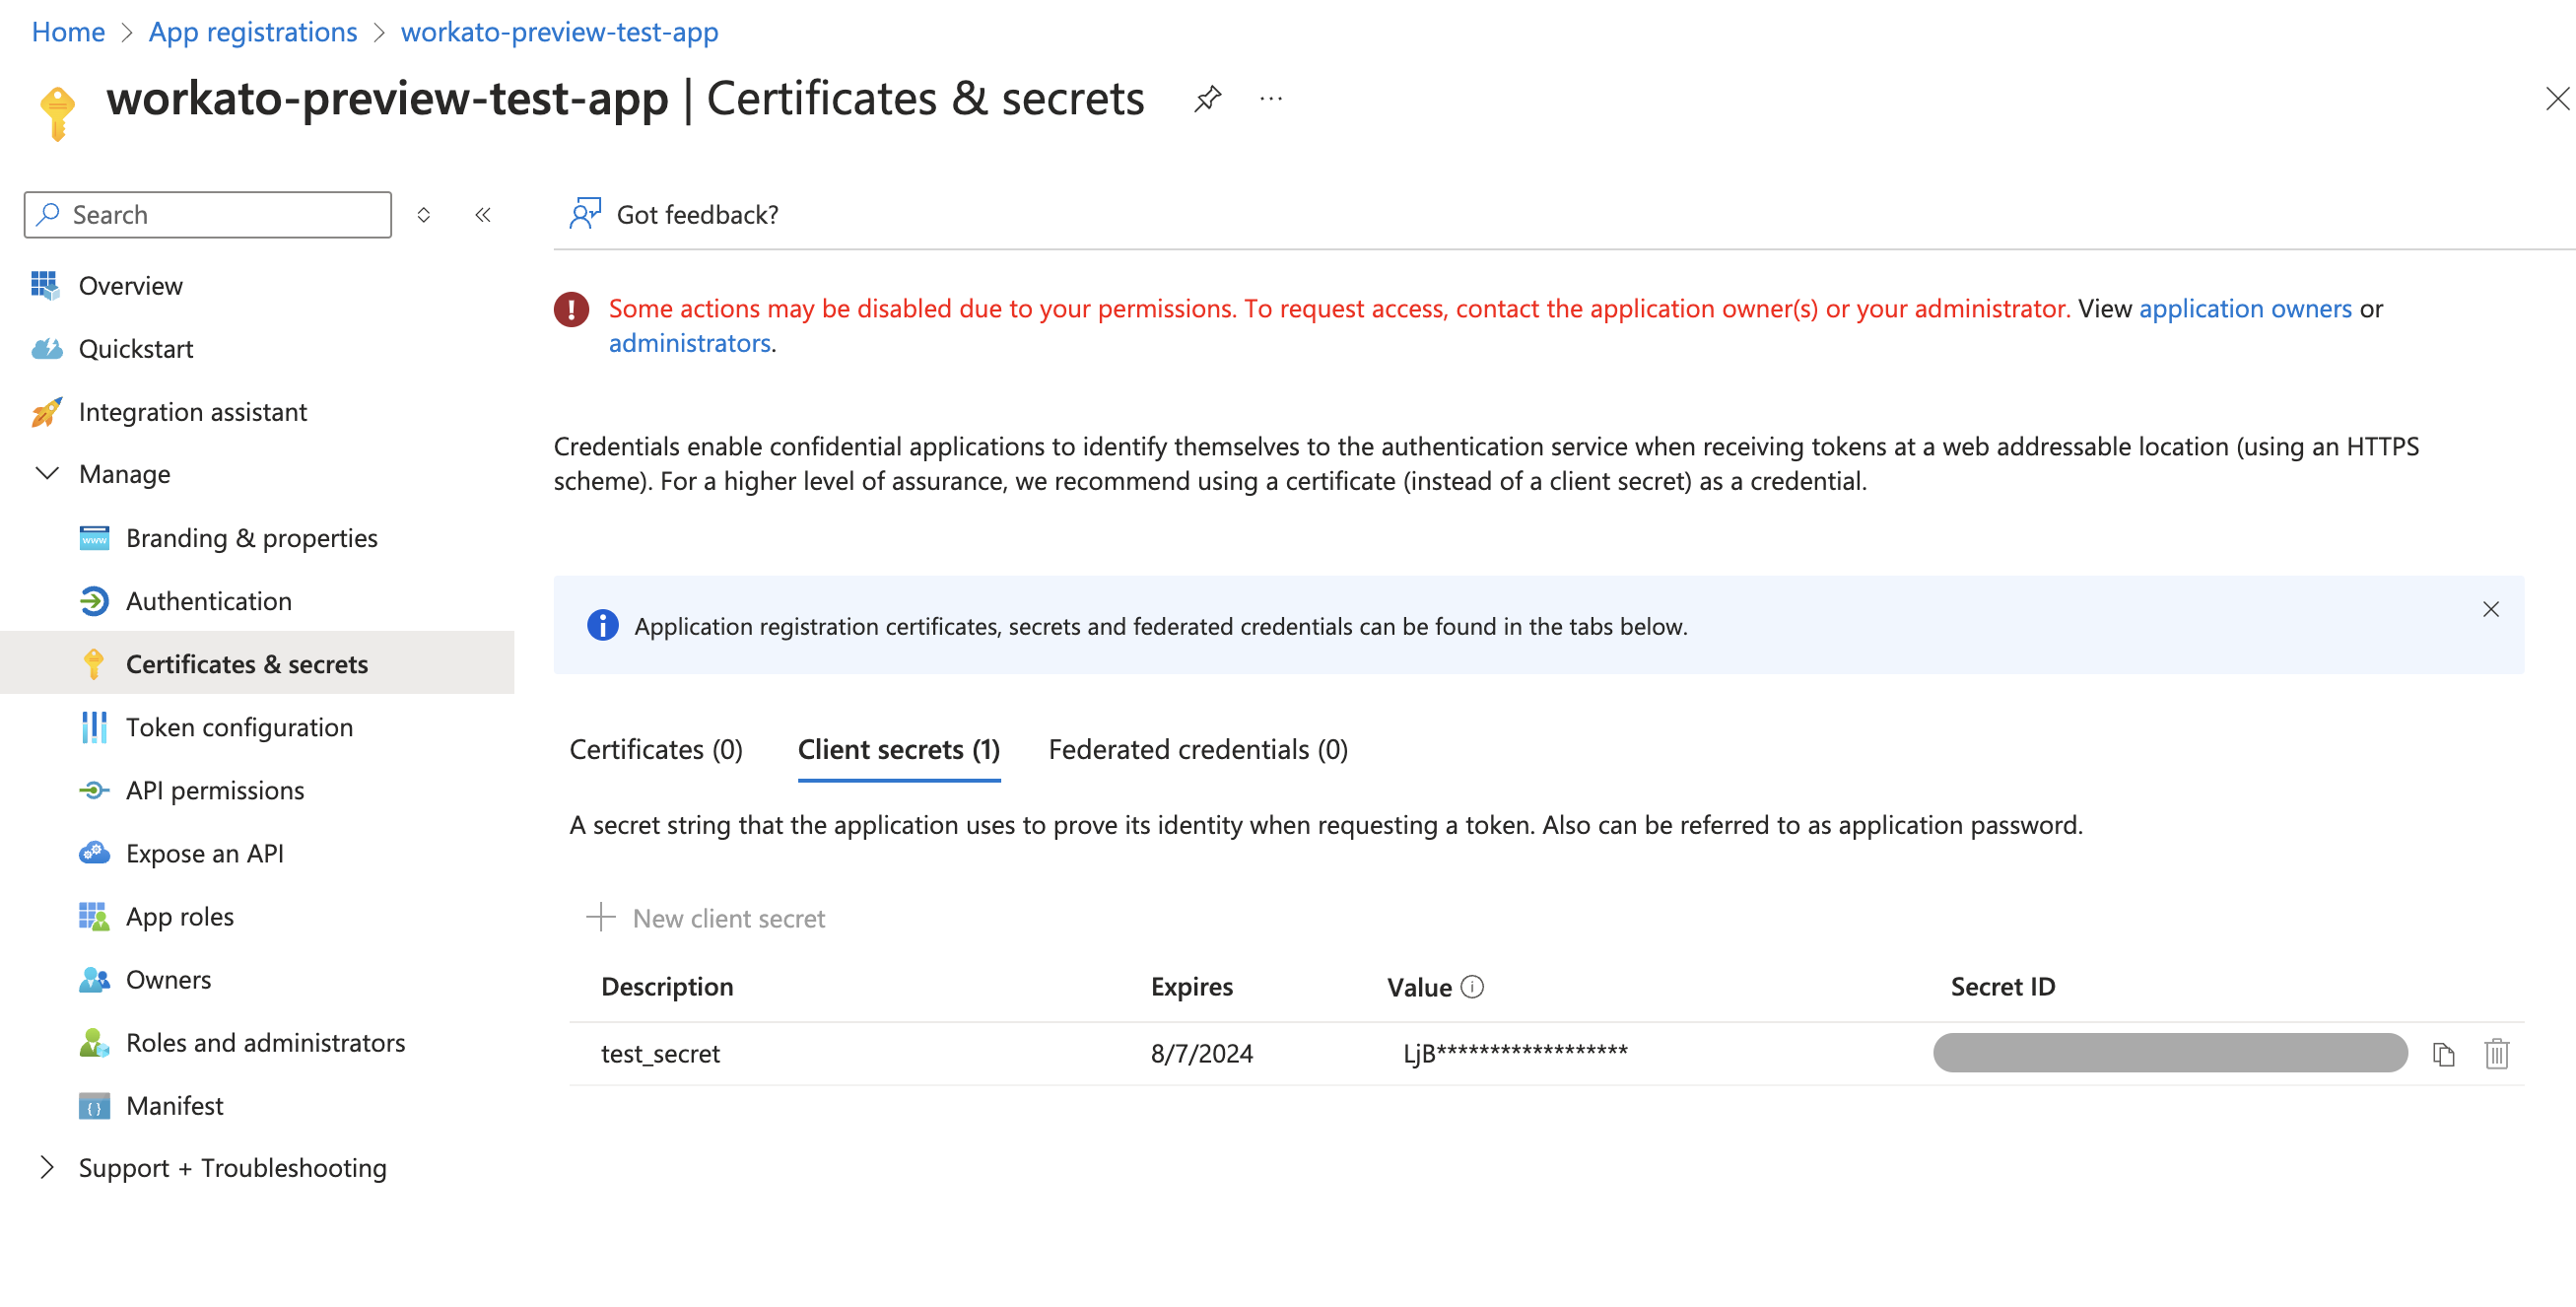 Generate a client secrets
Assign required roles to the application
You must assign the Storage Blob Data Contributor and EventGrid Event Subscription Contributor roles to the application. These roles enable full functionality with Azure Blob Storage actions, triggers, and the new event webhook trigger.
Go to your Storage account in the Azure portal.
Go to the resource group.
Select Access Control (IAM).
Click Add > Add role assignment.
Search for and select Storage Blob Data Contributor.
Click Next.
Select User, group, or service principal.
Click Select members and search for your registered application by name.
Select your application and click Select.
Click Review + assign to complete the role assignment.
Repeat steps 4-10 to assign the EventGrid Event Subscription Contributor role.
Configure network access for your storage account
Go to your Storage account in the Azure portal.
Go to Security + networking > Networking.
Click Manage in the Public network access section.
Ensure Public network access is set to Enable.
Select one of the following options under Public network access scope:
- Enable from all networks: Allows access from any network
- Enable from selected networks: Restricts access to specific networks. If you select this option, add the Workato IP addresses in the IPv4 Addresses section
Click Save.
Use the recorded Client ID, Tenant ID, and Client secret to establish a Client Credentials Grant connection.
Continue to set up your Azure Blob Storage connection in Workato.
Complete setup in Workato
Complete the following steps to connect to Azure Blob Storage in Workato:
Click Create > Connection or press C twice.
Search for and select the Azure Blob Storage as your connection on the New connection page.
Enter a Connection name that uniquely identifies the connection.
Select the project where you plan to store the connection from the Location drop-down menu.
Enter the name of your Storage account from Azure Blob Storage.
Select the Connection account type:
Common: Supports personal, enterprise, and multi-tenant accounts that are not tenant-specific.
Organization: Supports multi-tenant enterprise accounts.
Tenant-specific: Requires you to provide the Tenant ID or Domain.
The default is the Common type.
Go to Advanced settings to manage additional configurations.
Enter the Client ID from your Azure portal.
Enter the Client secret from Certificates & secrets in the Azure portal.
Optional. Enter an Access key for pre-signed URL functionality.
Click Sign in with Microsoft.
Authorize the necessary permissions when prompted to complete the connection setup.
Last updated: