Docusign
Docusign is a secure eSignature solution that provides electronic signature technology and digital transaction management services that enable businesses to create fully digital workflows.
API version
The Docusign connector uses the Docusign eSignature REST API, and calls a mix of v2.0 and v2.1 endpoints depending on the trigger or action. Refer to API version by trigger and action for the version each one calls.
Supported editions and versions
The Docusign connector works with the following Docusign plans:
- Personal
- Standard
- Business Pro
Connection setup
The Docusign connector supports the following authentication types:
AUTHENTICATION AND SENDING
JWT Grant authentication uses the Docusign impersonation scope to send documents from the email address of the user you connect with, without requiring that user to sign in. The impersonated user, or their account admin, must grant consent before you can connect.
OAuth 2.0 (Authorization Code Grant) sends all documents from the email address of the user who signs in to authorize the connection.
ROLES AND PERMISSIONS
Users who can sign in to Docusign can connect it to Workato. Users have the same permissions and capabilities to view, manage, and send envelopes on Workato as in Docusign. Refer to the Docusign Permission Profiles documentation for more information.
JWT Grant
Use JWT Grant authentication to connect to Docusign with a private key for server-to-server authentication. This method sends documents from the email address of the User ID you connect with, using the Docusign user impersonation. That user, or their account admin, must grant consent before you can connect. Refer to Retrieve your User ID for more information.
Docusign setup for JWT Grant authentication
Complete the following to set up JWT Grant authentication:
- Retrieve your User ID
- Create an integration key
- Generate an RSA keypair
- Add the redirect URI
- Optional: Obtain consent for user impersonation
Retrieve your User ID
Complete the following steps to retrieve your User ID in Docusign:
Sign in to Docusign.
Go to Admin > Apps and Keys.
Copy and save the User ID for use in Workato.
Generate an integration key
You must create an app to generate an integration key.
Complete the following steps to generate an integration key in Docusign:
Go to the Apps and Keys page and click Add App and Integration Key.
Enter a name for your application, such as Workato Integration.
Click Create App.
Copy and save the Integration Key (also known as the Client ID) for use in Workato.
Generate an RSA keypair
Complete the following steps to generate an RSA keypair in Docusign:
Go to the Service Integration section in your newly created app settings.
Click Generate RSA to create a new RSA keypair.
Copy the Private Key and save it in a secure location. This value is required to establish the connection in Workato.
SAVE YOUR PRIVATE KEY
The private key is only displayed once. After you close this dialog, you won't be able to retrieve it again. If you lose it, you must generate a new keypair.
Click Close to save the keypair to your integration.
Add the redirect URI
Complete the following steps to add the redirect URI in Docusign:
Go to the Additional settings > Redirect URIs section in your newly created app settings.
Click + Add URI.
Enter https://www.workato.com/oauth/callback in the Redirect URIs field.
Click Save.
Obtain consent for user impersonation
JWT Grant authentication sends envelopes from the email address of the user you connect with, using Docusign's user impersonation. Connecting as that user requires consent, which comes in two forms:
- Admin consent for the JWT app (one-time setup for the organization)
- Individual user consent for the user you connect as
Obtain admin consent
Use the Docusign Admin panel to grant consent to your JWT app on behalf of all users within your organization's claimed domains. This authorization grants app access to all domain users, with access limited by the permissions you specify. This is a one-time configuration.
PREREQUISITES FOR ADMIN CONSENT
- Your organization must have the Docusign Admin feature enabled.
- Your organization must have at least one claimed domain. Refer to the Docusign Claim a domain documentation.
- You must have created an integration key for your app.
Complete the following steps to obtain admin consent:
Sign in to Docusign as an organization administrator.
Open your Organization home page in Docusign Admin.
Select Connected Apps from the navigation pane.
Select Authorize Application and choose your application from the drop-down menu. This menu lists every integration key by name (for example, Workato Integration).
Enter signature impersonation in the Permissions field of the Add New Application dialog.
These permissions apply to every user who's a member of the organization's claimed domains.
Click Add to confirm and authorize the application.
Refer to the Docusign How to obtain admin consent for internal applications documentation for more information.
Obtain individual user consent
Each user you plan to connect as must grant individual consent to your JWT app. This allows the app to act on their behalf when sending envelopes.
INTEGRATION KEY AND REDIRECT URI
Ensure you complete the integration key and redirect URI steps from the JWT Grant setup section before you set up individual consent.
Complete the following steps to obtain individual user consent:
CONSENT DURING CONNECTION
Docusign prompts you to grant consent when you connect with JWT Grant authentication. This grants individual consent for the user who authenticates the connection. You only need to follow the steps above to pre-authorize consent for users who won't personally set up the connection, for example, so an admin can grant consent ahead of time for another user's connection.
Refer to the Docusign How to obtain individual consent documentation for more information.
Connect to Docusign with JWT Grant authentication
Complete the following steps to set up a JWT Grant connection to Docusign in Workato:
Click Create > Connection.
Search for Docusign and select it as your app.
Enter a name for your connection in the Connection name field.
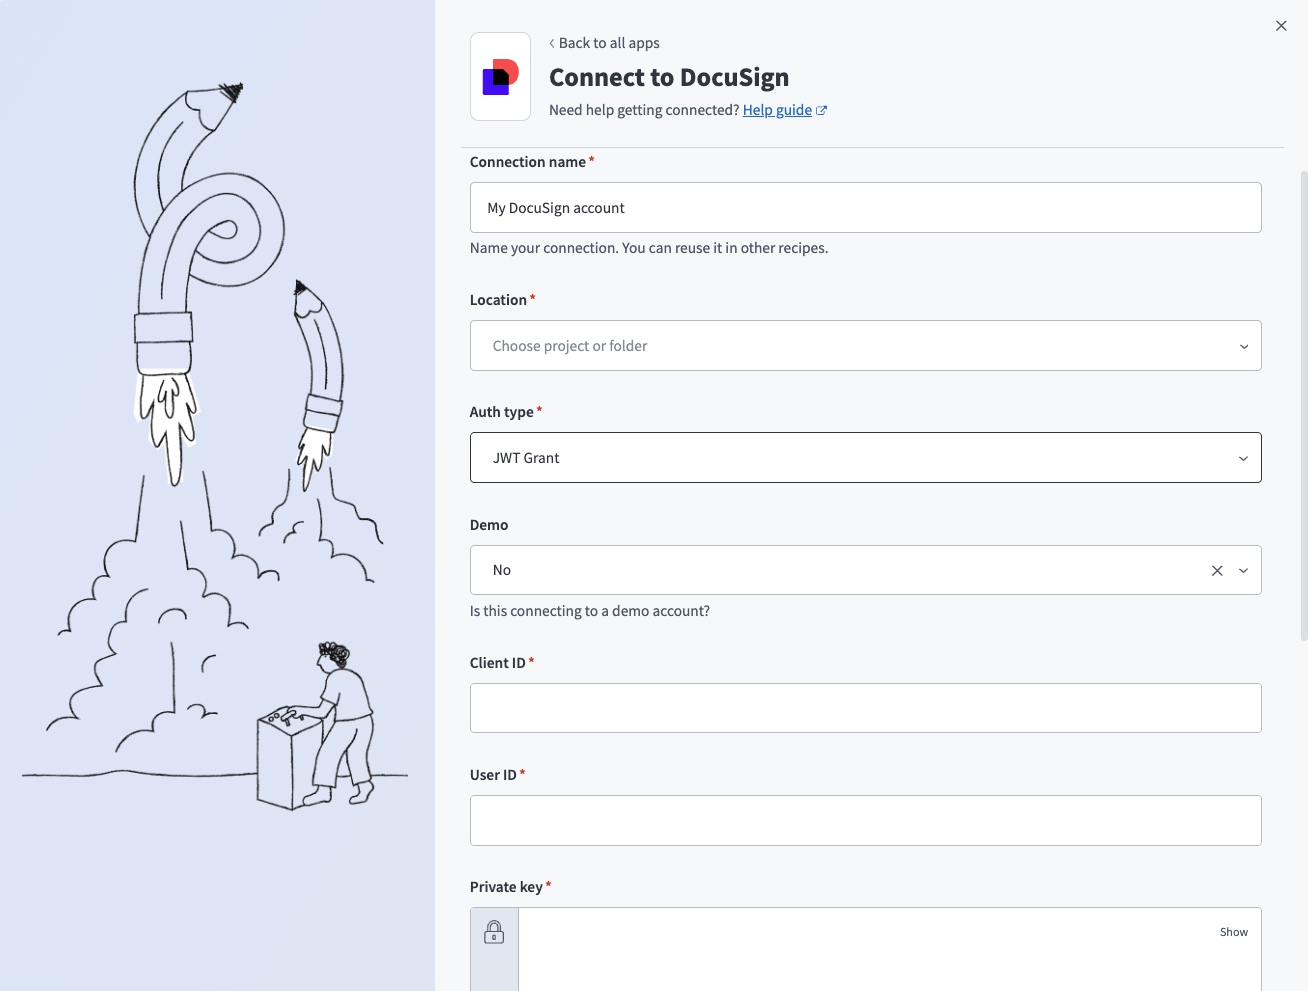 Docusign JWT Grant connection
Use the Location drop-down menu to select the project or folder where you plan to store your connection.
Use the Auth type drop-down menu to select JWT Grant.
Use the Demo drop-down menu to indicate if this is a demo Docusign account. Select Yes for demo/sandbox accounts or No for production accounts.
Enter the integration key from your Docusign application in the Client ID field.
Enter the User ID from the JWT Grant setup steps in the User ID field.
Enter the RSA private key from the JWT Grant setup steps in the Private key field. Enter the complete private key including the -----BEGIN RSA PRIVATE KEY----- and -----END RSA PRIVATE KEY----- headers.
Optional. Enter the Account ID to specify a Docusign account when you have multiple accounts. You can find the account ID by navigating to Admin > Apps and Keys > API Account ID. The connection selects your first Docusign account by default.
Optional. Enter the Connect key in the Connect key field to validate your webhook requests. Refer to the Docusign Add HMAC keys for your app documentation for more information.
Optional. Use the Custom OAuth profile drop-down menu to select a custom OAuth profile for your connection.
Click Connect. Workato redirects you to Docusign to authorize the connection.
Click Allow Access to grant the Workato integration permission to access your account.
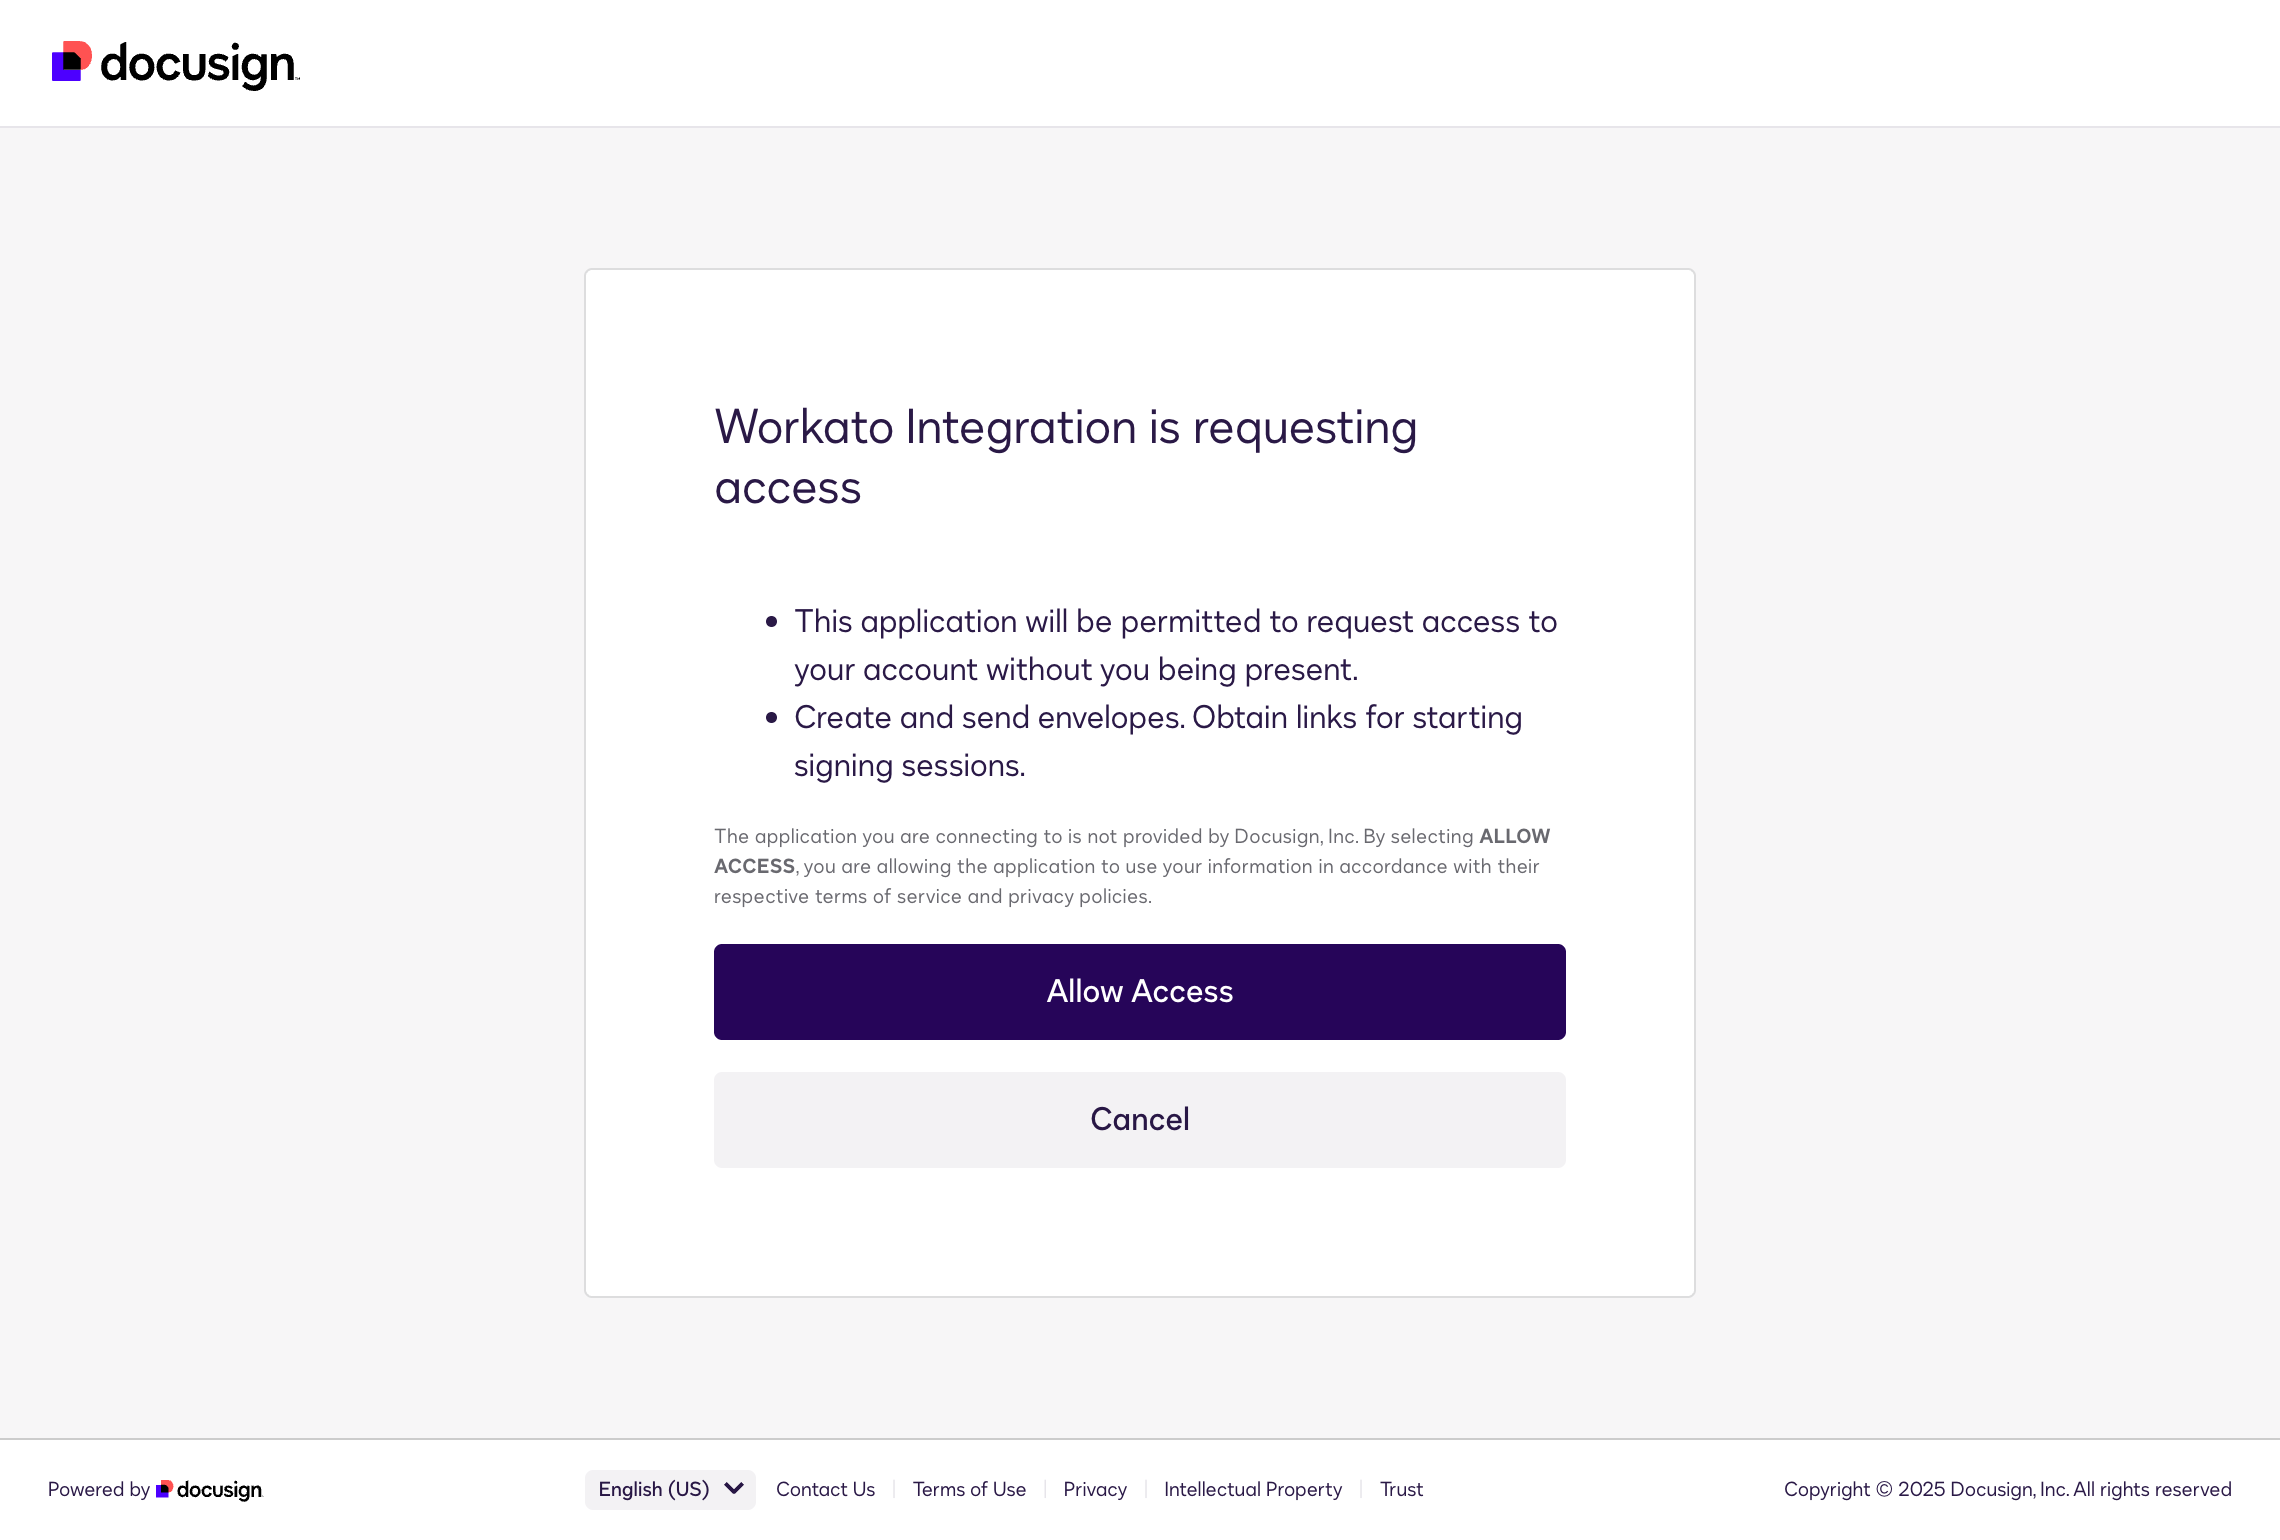 JWT consent screen
OAuth 2.0 (Authorization Code Grant)
Use OAuth 2.0 (Authorization Code Grant) to connect to Docusign by signing in and granting access through Docusign's authorization flow. All documents are sent from the email address of the user who authorized the connection.
Connect to Docusign with OAuth 2.0 (Authorization Code Grant)
Complete the following steps to set up an OAuth 2.0 authentication connection to Docusign in Workato:
Click Create > Connection.
Search for Docusign and select it as your app.
Enter a name for your connection in the Connection name field.
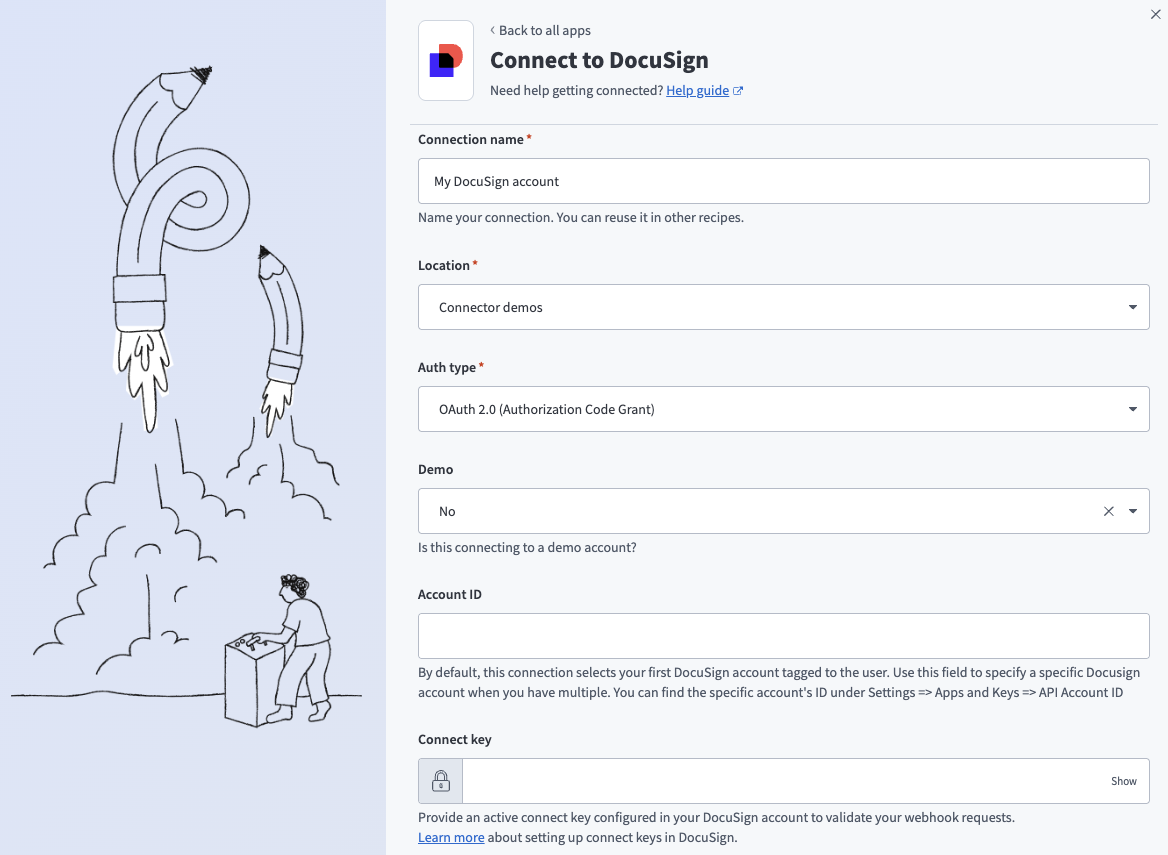 Docusign OAuth 2.0 (Authorization Code Grant) connection
Use the Location drop-down menu to select the project or folder where you plan to store your connection.
Use the Auth type drop-down menu to select OAuth 2.0 (Authorization Code Grant).
Use the Demo drop-down menu to indicate if this is a demo Docusign account. Select Yes for demo/sandbox accounts or No for production accounts.
Optional. Enter the Account ID to specify a Docusign account when you have multiple accounts. You can find the account ID by navigating to Admin > Apps and Keys > API Account ID. The connection selects your first Docusign account by default.
Optional. Enter the Connect key in the Connect key field to validate your webhook requests. Refer to the Docusign Add HMAC keys for your app documentation for more information.
Optional. Use the Custom OAuth profile drop-down menu to select a custom OAuth profile for your connection.
Click Connect.
API version by trigger and action
The Docusign connector's actions and triggers call a mix of Docusign eSignature REST API v2.0 and v2.1 endpoints. If you see response differences from what the Docusign API reference documentation describes, check whether the action or trigger you're using is on v2.0.
| Type | Name | API version |
|---|---|---|
| Trigger | New document event | v2.0 |
| Trigger | New document received | Mixed (v2.1 and v2.0) |
| Trigger | New recipient event | v2.1 |
| Action | Create draft envelope from template | v2.1 |
| Action | Create/send document | v2.0 |
| Action | Download document | v2.0 |
| Action | Get envelope | v2.1 |
| Action | Get envelope form data | v2.1 |
| Action | Get envelope recipients | v2.1 |
| Action | Get template | v2.1 |
| Action | Get template document tabs | v2.1 |
| Action | List documents in envelope (batch) | v2.0 |
| Action | List envelopes (batch) | v2.1 |
| Action | List templates (batch) | v2.1 |
| Action | Resend envelope | v2.1 |
| Action | Send document using a template | v2.0 |
| Action | Send document using composite templates | v2.1 |
| Action | Send envelope by ID | v2.1 |
| Action | Void envelope | v2.1 |
Last updated: