Connect to NetSuite SOAP on Workato
To connect to NetSuite using token-based authentication, you must generate an application ID, a consumer key, a consumer secret, a token ID, and a token secret.
For a step-by-step guide, refer to the following video tutorial:
Prerequisites
To connect to NetSuite in Workato, ensure you have the following:
- The privilege to create connections in Workato.
- Access to a NetSuite Admin account.
- An understanding of the required NetSuite permissions.
Enable web services and token-based authentication
Complete the following steps to enable web services and token-based authentication in your NetSuite instance:
Watch a demonstration of this step
Navigate to Setup > Company > Enable Features > SuiteCloud.
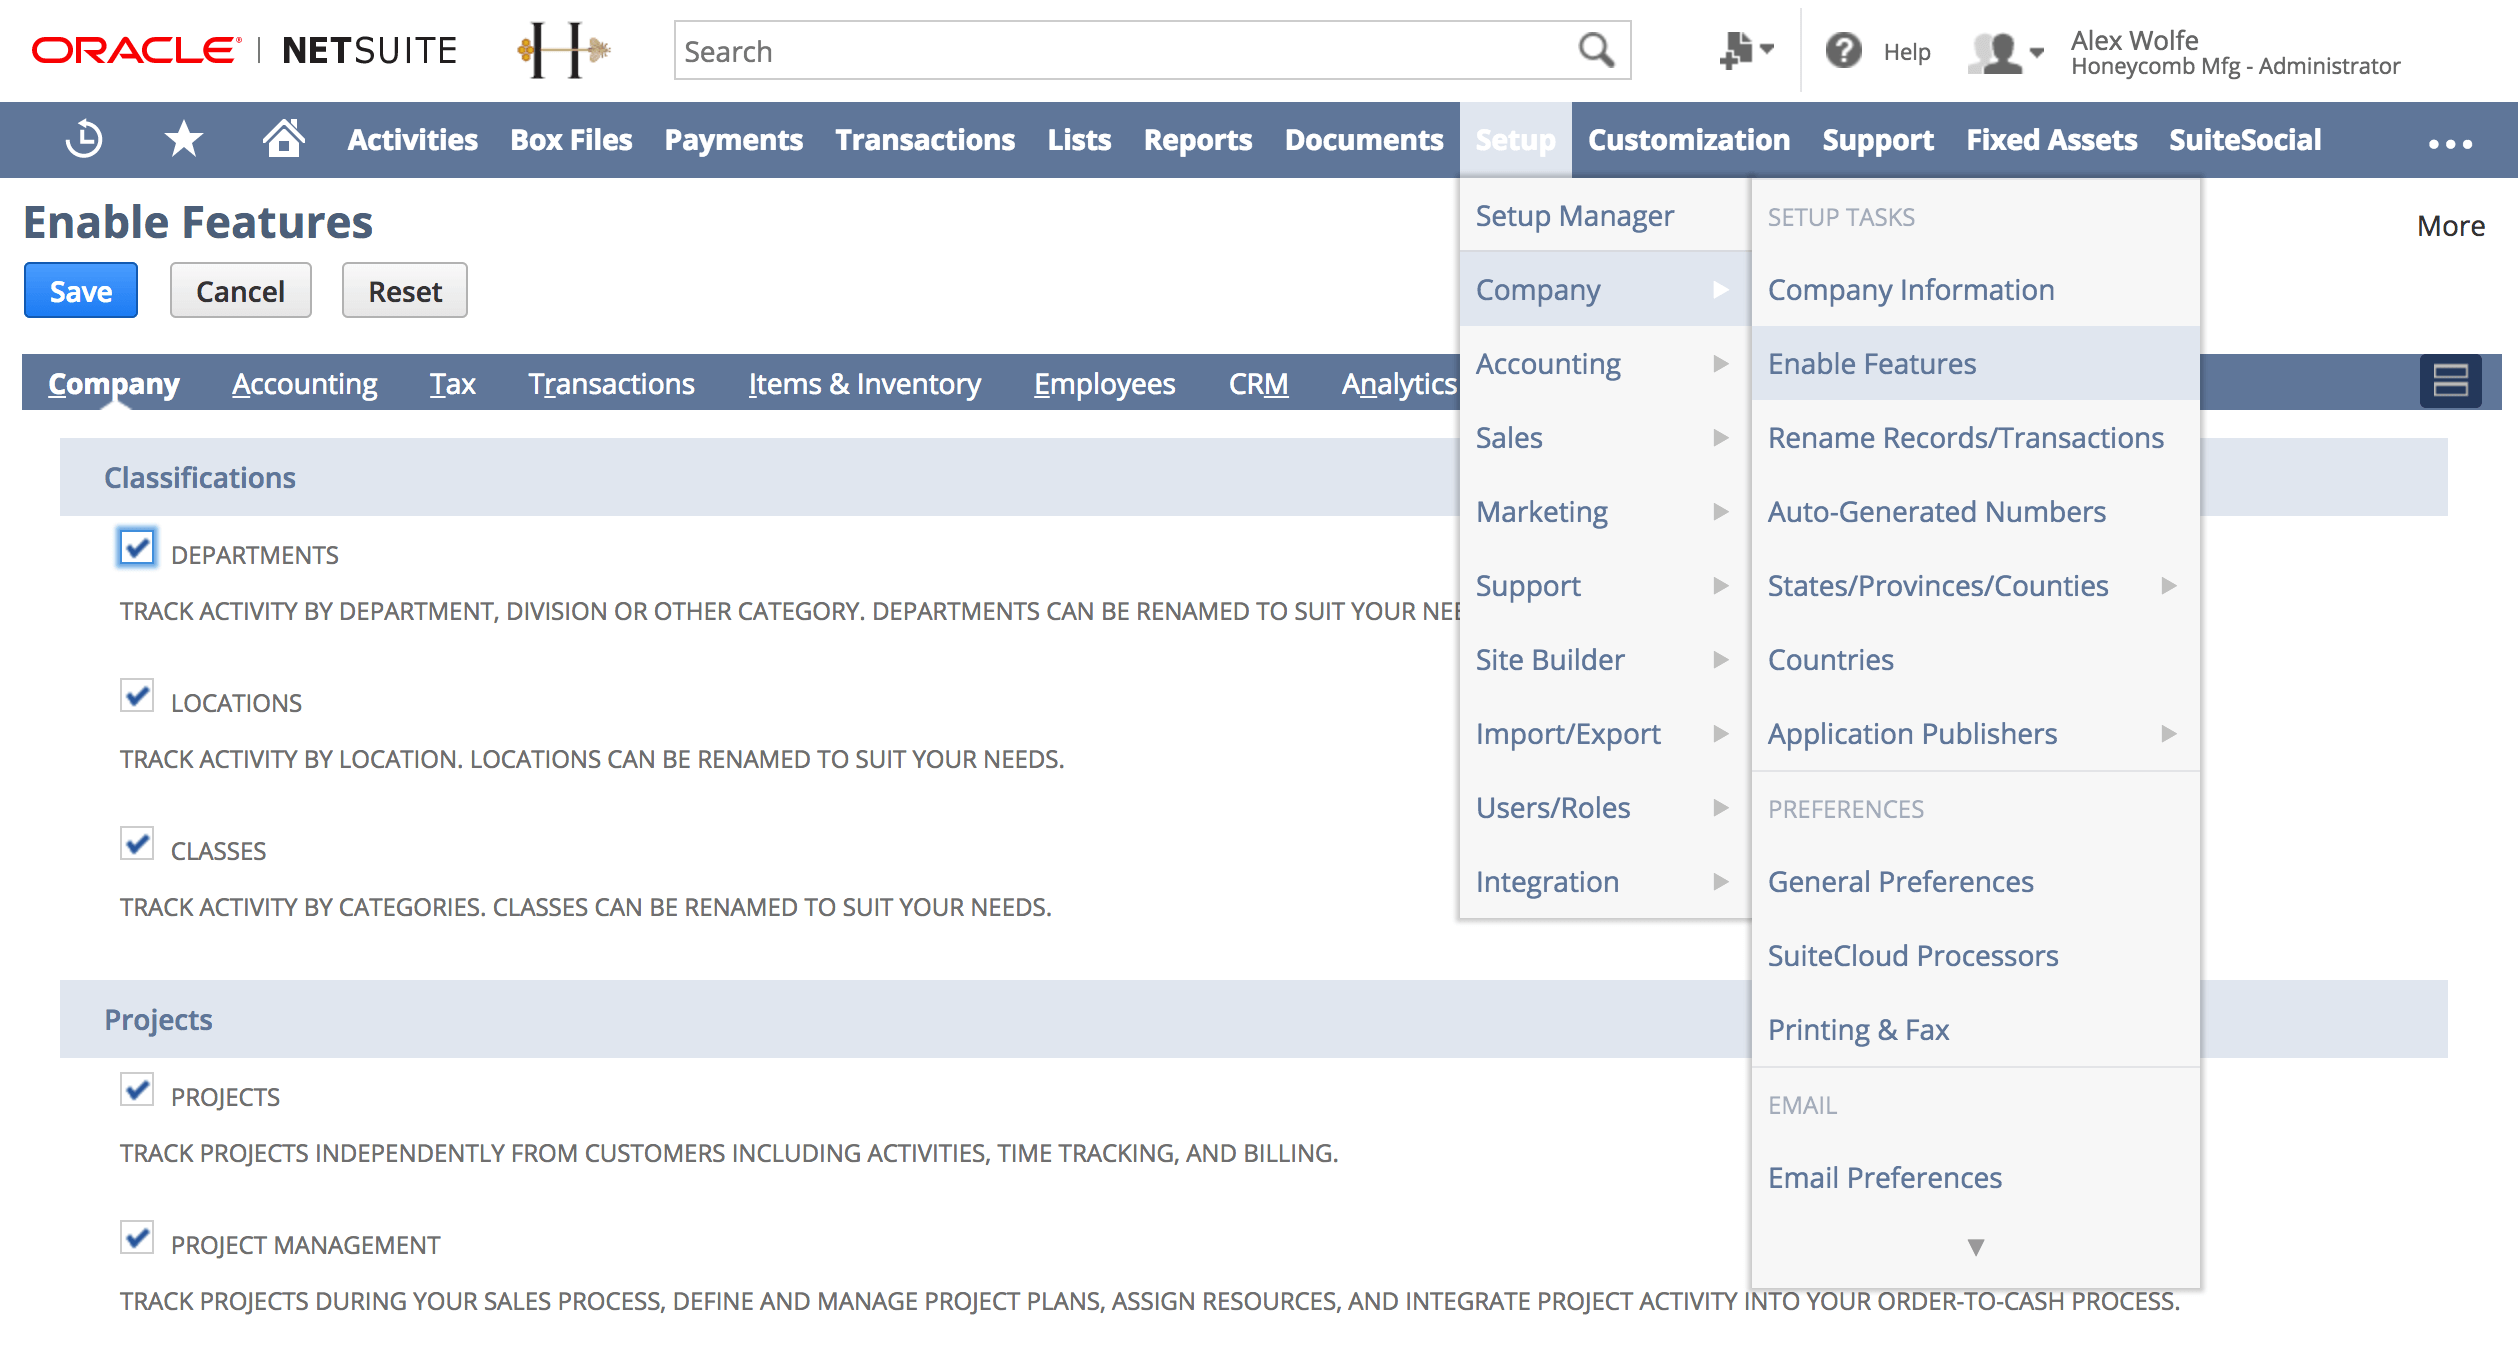 Navigate to Setup > Company > Enable Features > SuiteCloud
Select the Client SuiteScript and Server SuiteScript checkboxes.
 In the SuiteCloud tab, check the Client SuiteScript and Server SuiteScript checkboxes
Navigate to the SuiteTalk (Web Services) section and select the SOAP Web Services and REST Web Services checkboxes.
Navigate to the Manage Authentication section and select the Token-based authentication and OAuth 2.0 checkboxes.
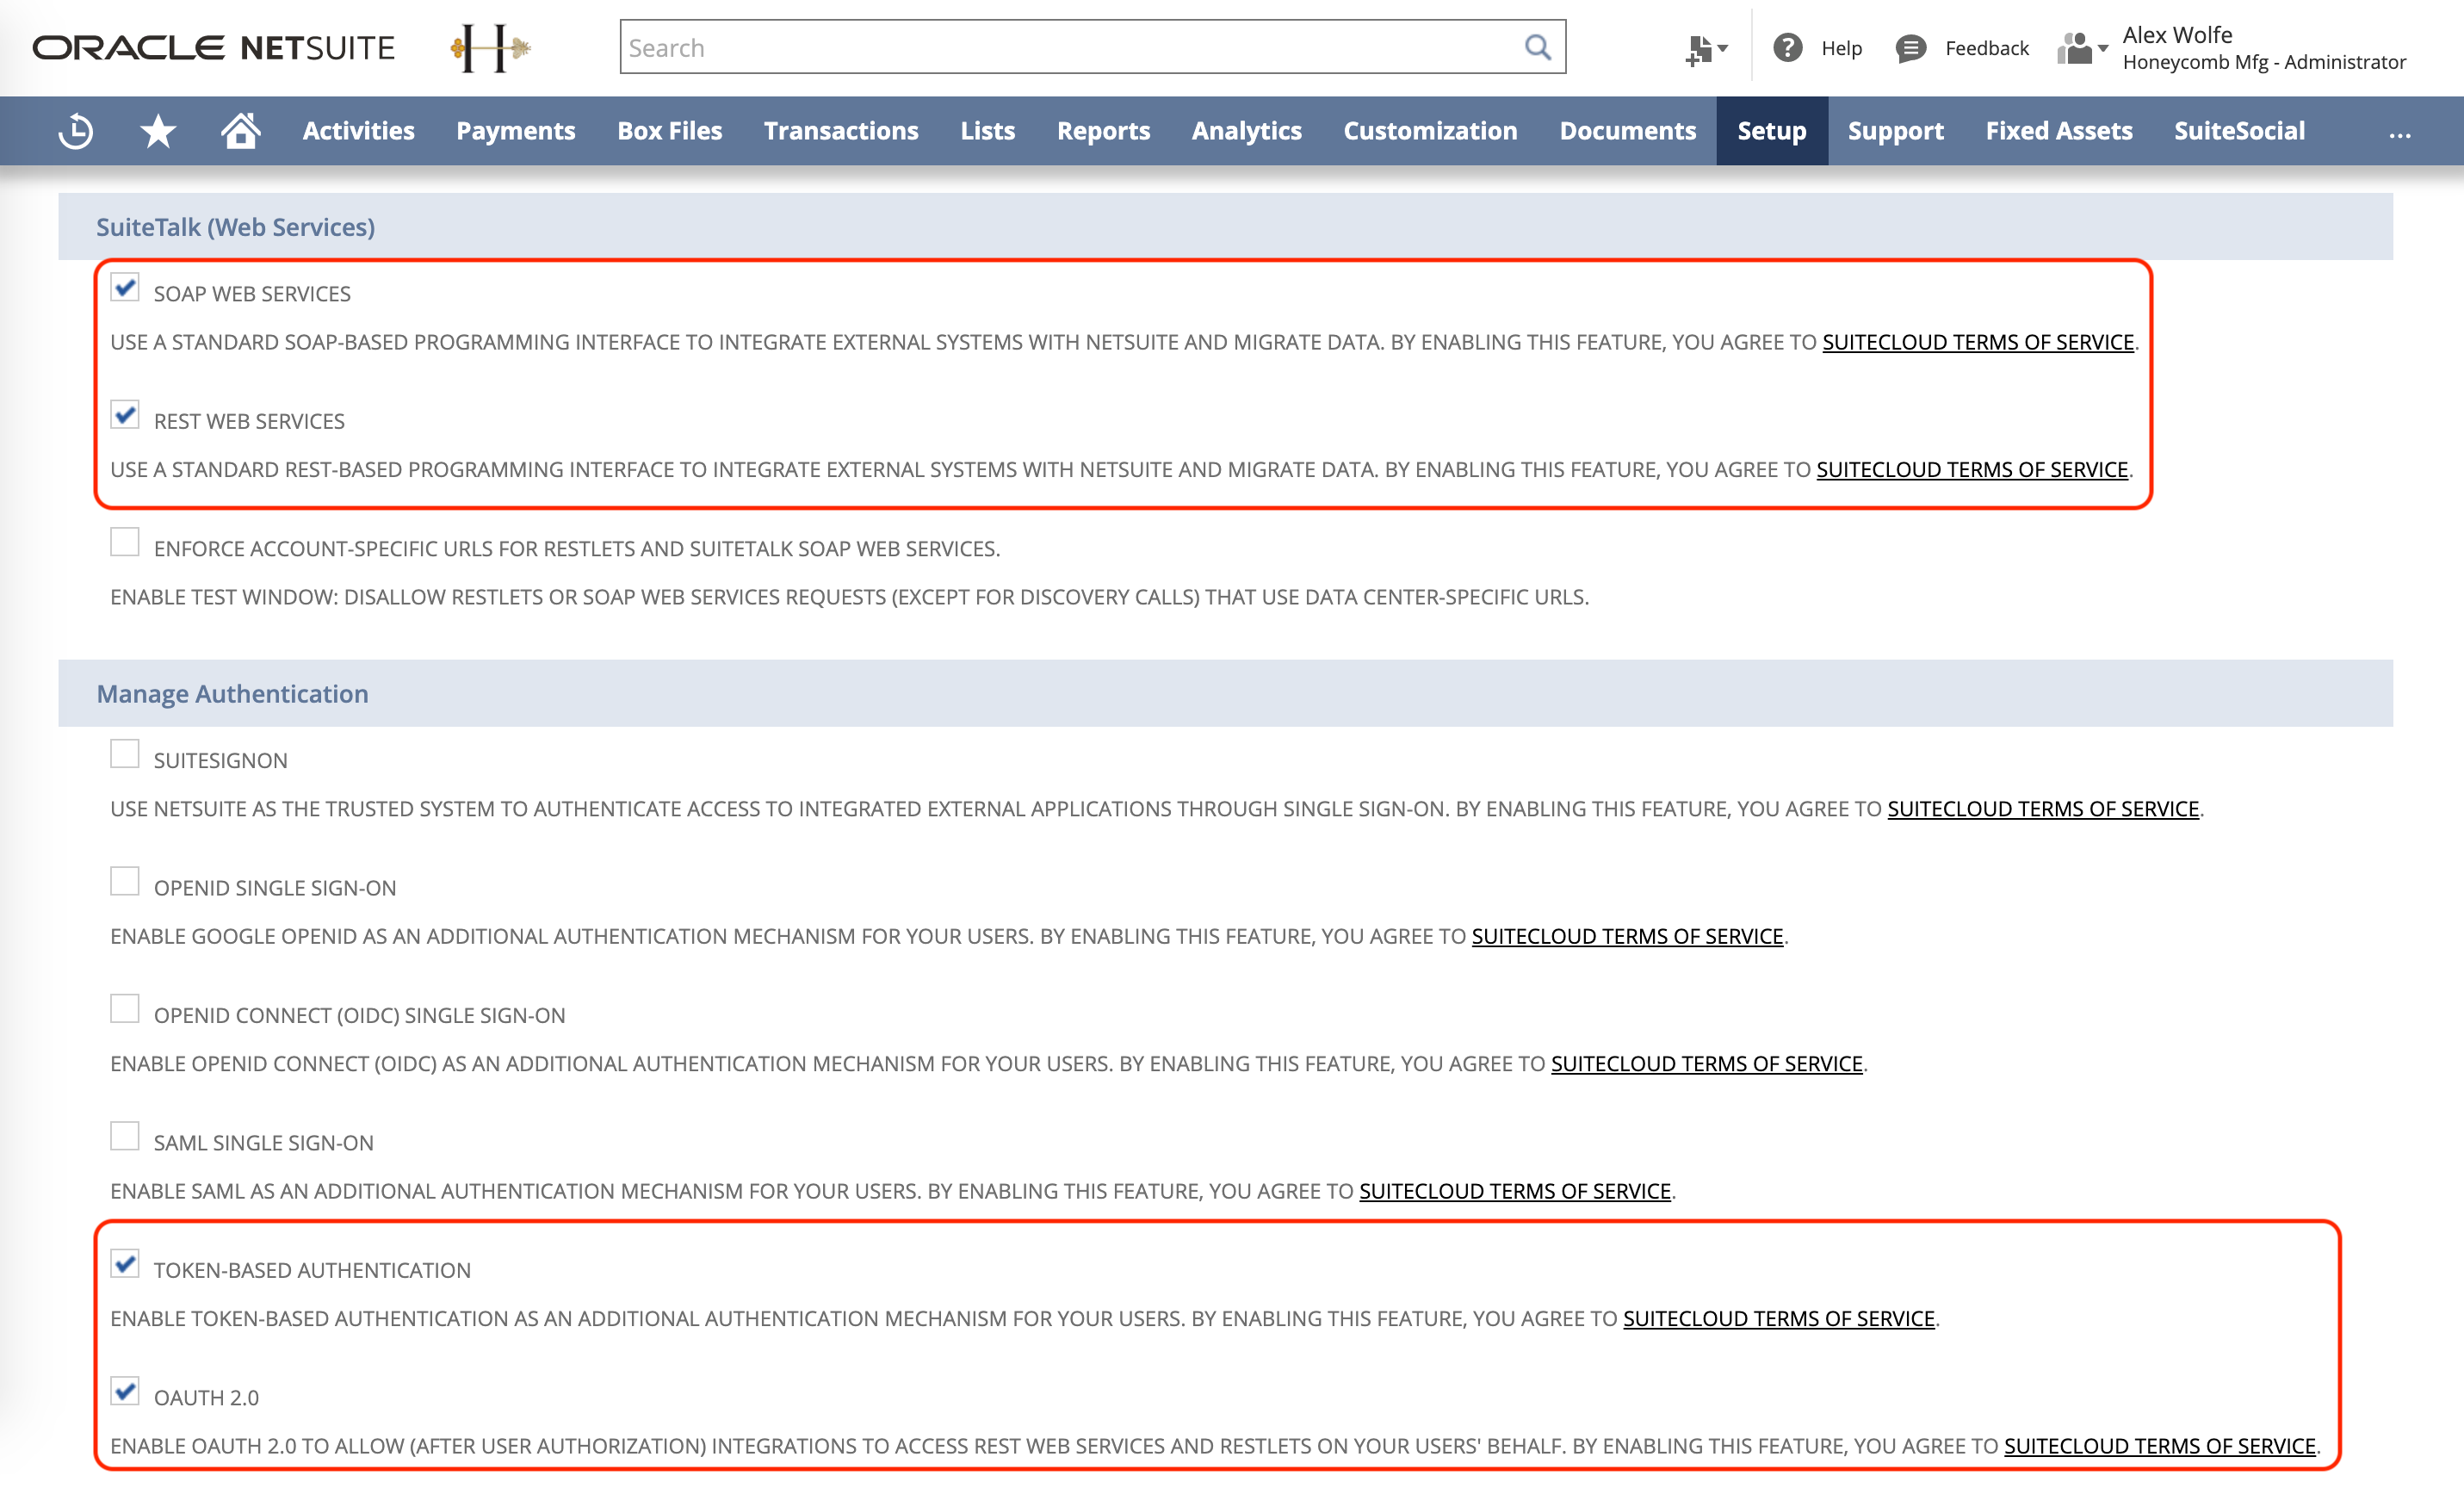 In the SuiteCloud tab, select the SOAP Web Services, REST Web Services, Token-based authentication, and OAuth 2.0 checkboxes
Click Save.
Create an integration record
Complete the following steps to create a new integration record. The integration record represents an app, platform, or tool you plan to integrate with NetSuite.
Watch a demonstration of this step
Navigate to Setup > Integration > Manage Integrations > New.
Provide a name in the Name field.
Ensure the State field is set to Enabled.
Ensure that the Token-based authentication checkbox is selected.
Clear the TBA: Authorization flow and Authorization code grant checkboxes.
Click Save.
Copy the Consumer key / Client ID and Consumer secret / Client secret and store them in a secure location. Workato requires these values to establish a NetSuite connection in Workato.
Create an integration role
Complete the following steps to create an integration role.
Watch a demonstration of this step
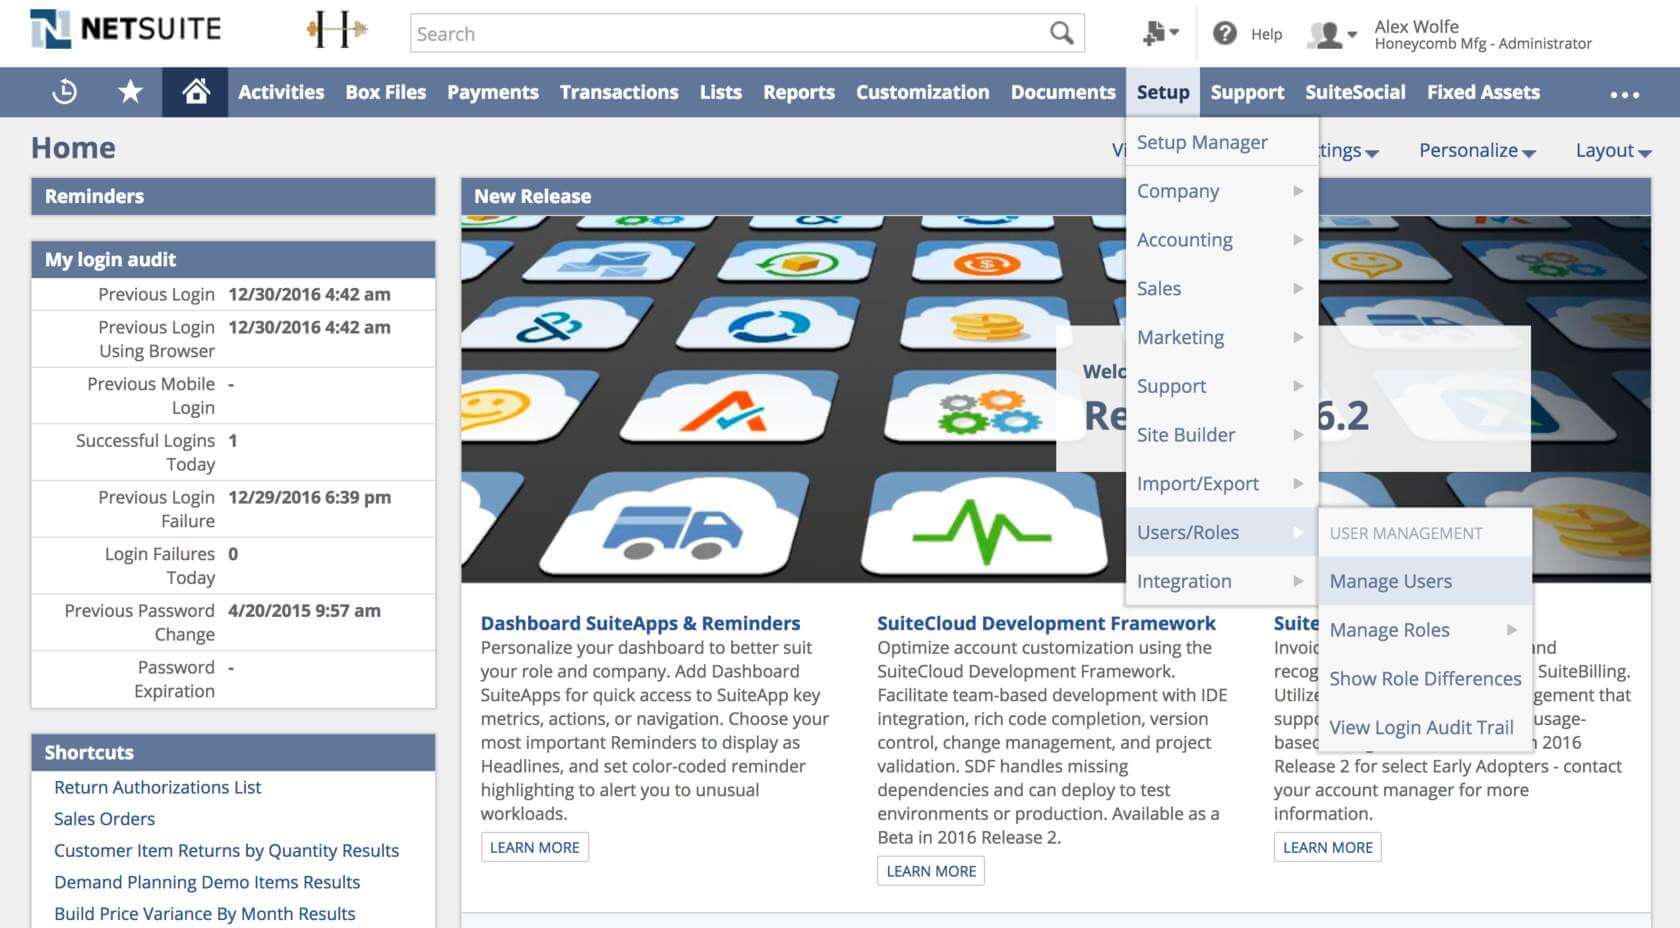
Navigate to Setup > Users/Roles > Manage Roles > New to create an integration role.
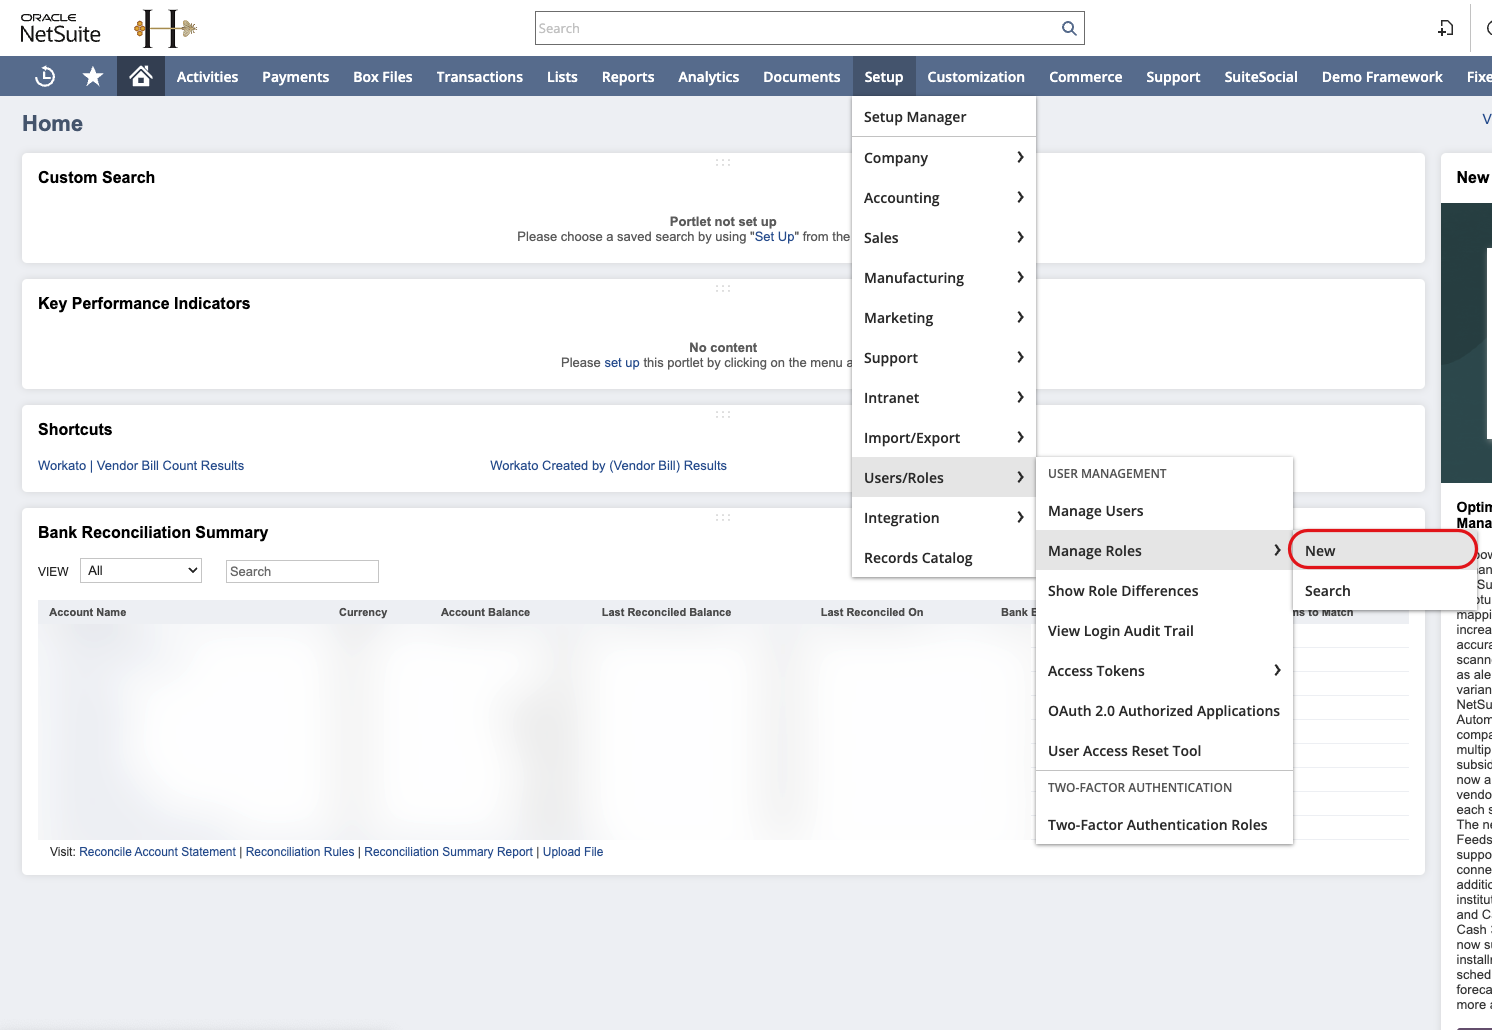 Navigate to Setup > Users/Roles > Manage Roles > New
Provide a name for your integration role in the Name field.
Configure how you plan this role to interact with subsidiaries in the Subsidiary Restrictions section.
Optional. Select the Web Services Only Role checkbox in the Authentication section to restrict this role to API interactions only. This prevents access through NetSuite's user interface (UI).
WEB SERVICES ONLY AUTHENTICATION
Roles with the Web Services Only restriction don't work with RESTlets. Assigning this authentication in the role impacts the Execute RESTlet script action in the NetSuite REST connector.
Navigate to the Permissions tab to specify the extent to which Workato and other applications can interact with NetSuite.
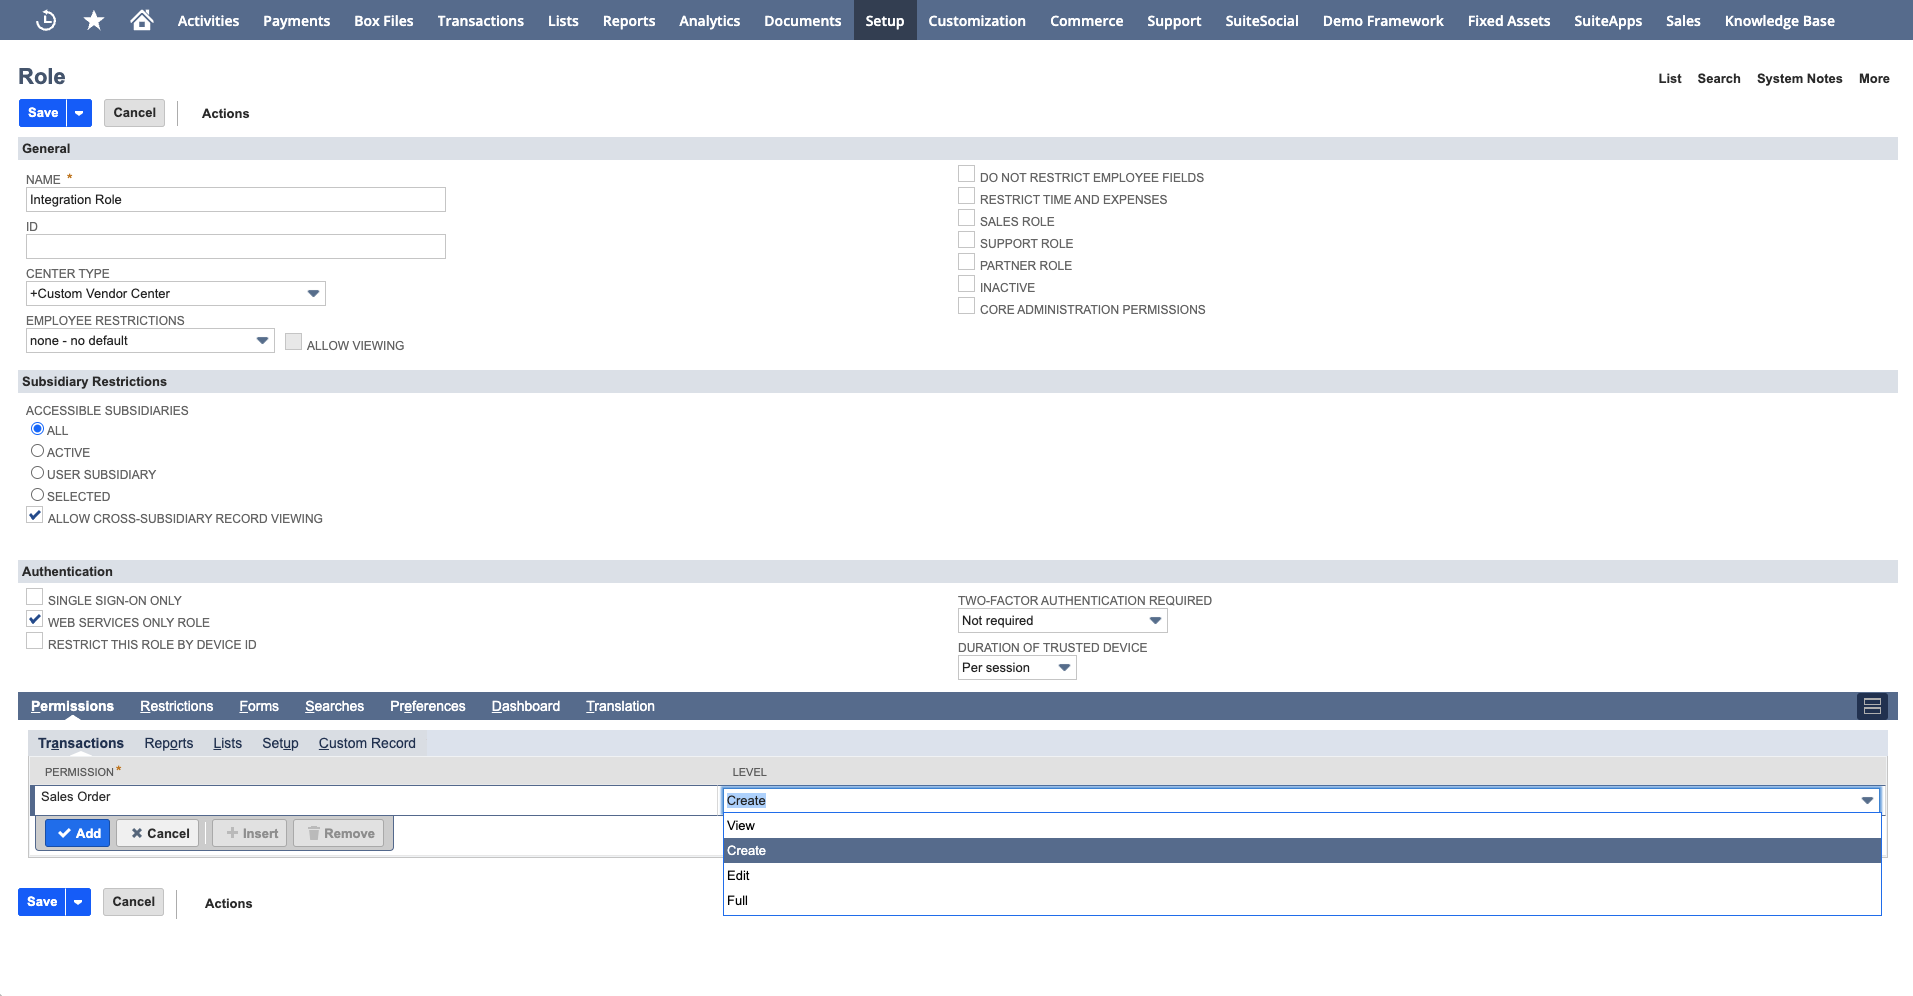 Set up integration-specific permissions
For example, if you plan to create sales orders in NetSuite, search for and select the Sales Order permission and assign it the Create level. If you plan to create, update, and read sales order data, select the Full permission level.
Click Setup.
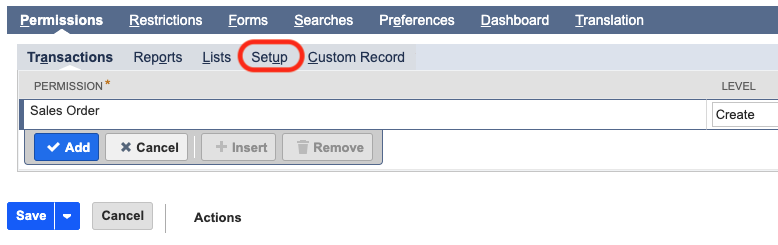 Click Setup
Search for the following permissions, set their permission level to Full, and then click Add:
- Log in using Access Tokens
- Log in using OAuth 2.0 Access Tokens
- REST Web Services
- SOAP Web Services
- Set Up Company
- SuiteScript
- User Access Tokens
- Set Up SOAP Web Services
- Custom Body Fields
- Custom Address Form
- Deleted Records (required for the Deleted standard record trigger)
REST WEB SERVICE PREREQUISITES
Refer to the NetSuite Prerequisites and Setup for REST Web Services guide for more information about the features and permissions required for REST Web Services.
Click Save.
Set up an integration user
After configuring the integration role, you must assign it to the integration user. We recommend creating a separate user for your integrations.
Complete the following steps to edit an existing integration user or create a new one:
Watch a demonstration of this step
 Navigate to Setup > Users/Roles > Manage Users
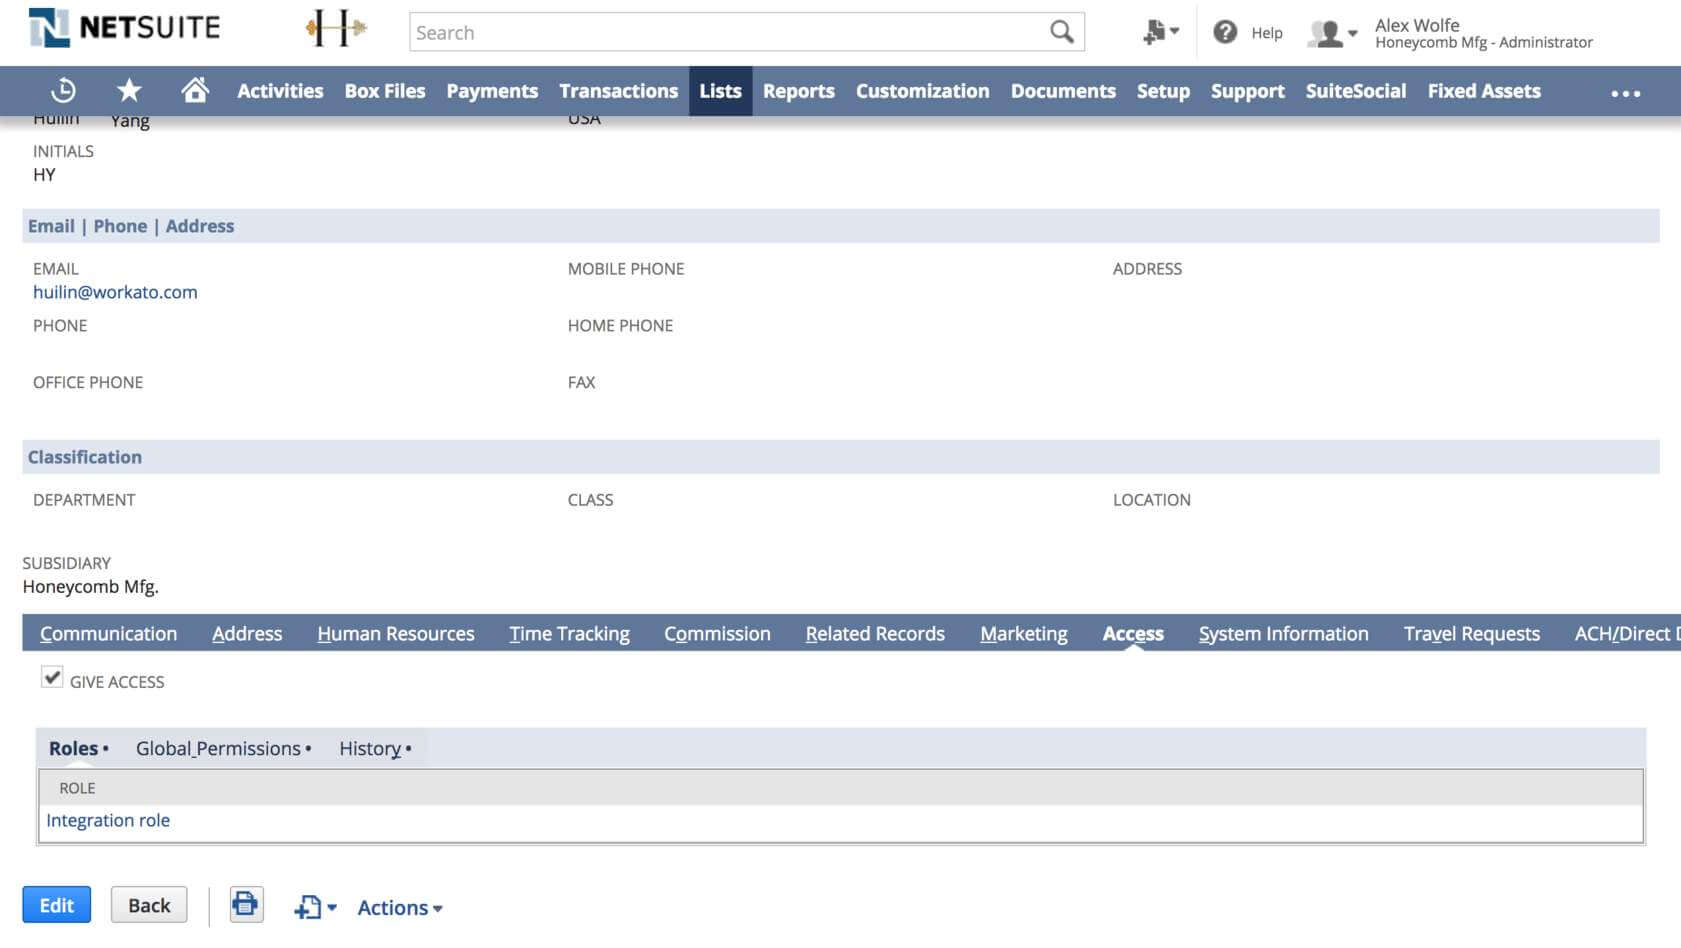 Assign the integration role to a user
Create an access token
Complete the following steps to create an access token for the integration user:
ACCESS TOKENS
If the integration user has the User Access Tokens permission, they can create and revoke their own tokens. If the integration user has only the Log in using Access Tokens permission, a user with the Access Token Management permission must create an access token for the integration user.
Watch a demonstration of this step
Navigate to Setup > Users/Roles > Access Tokens > New.
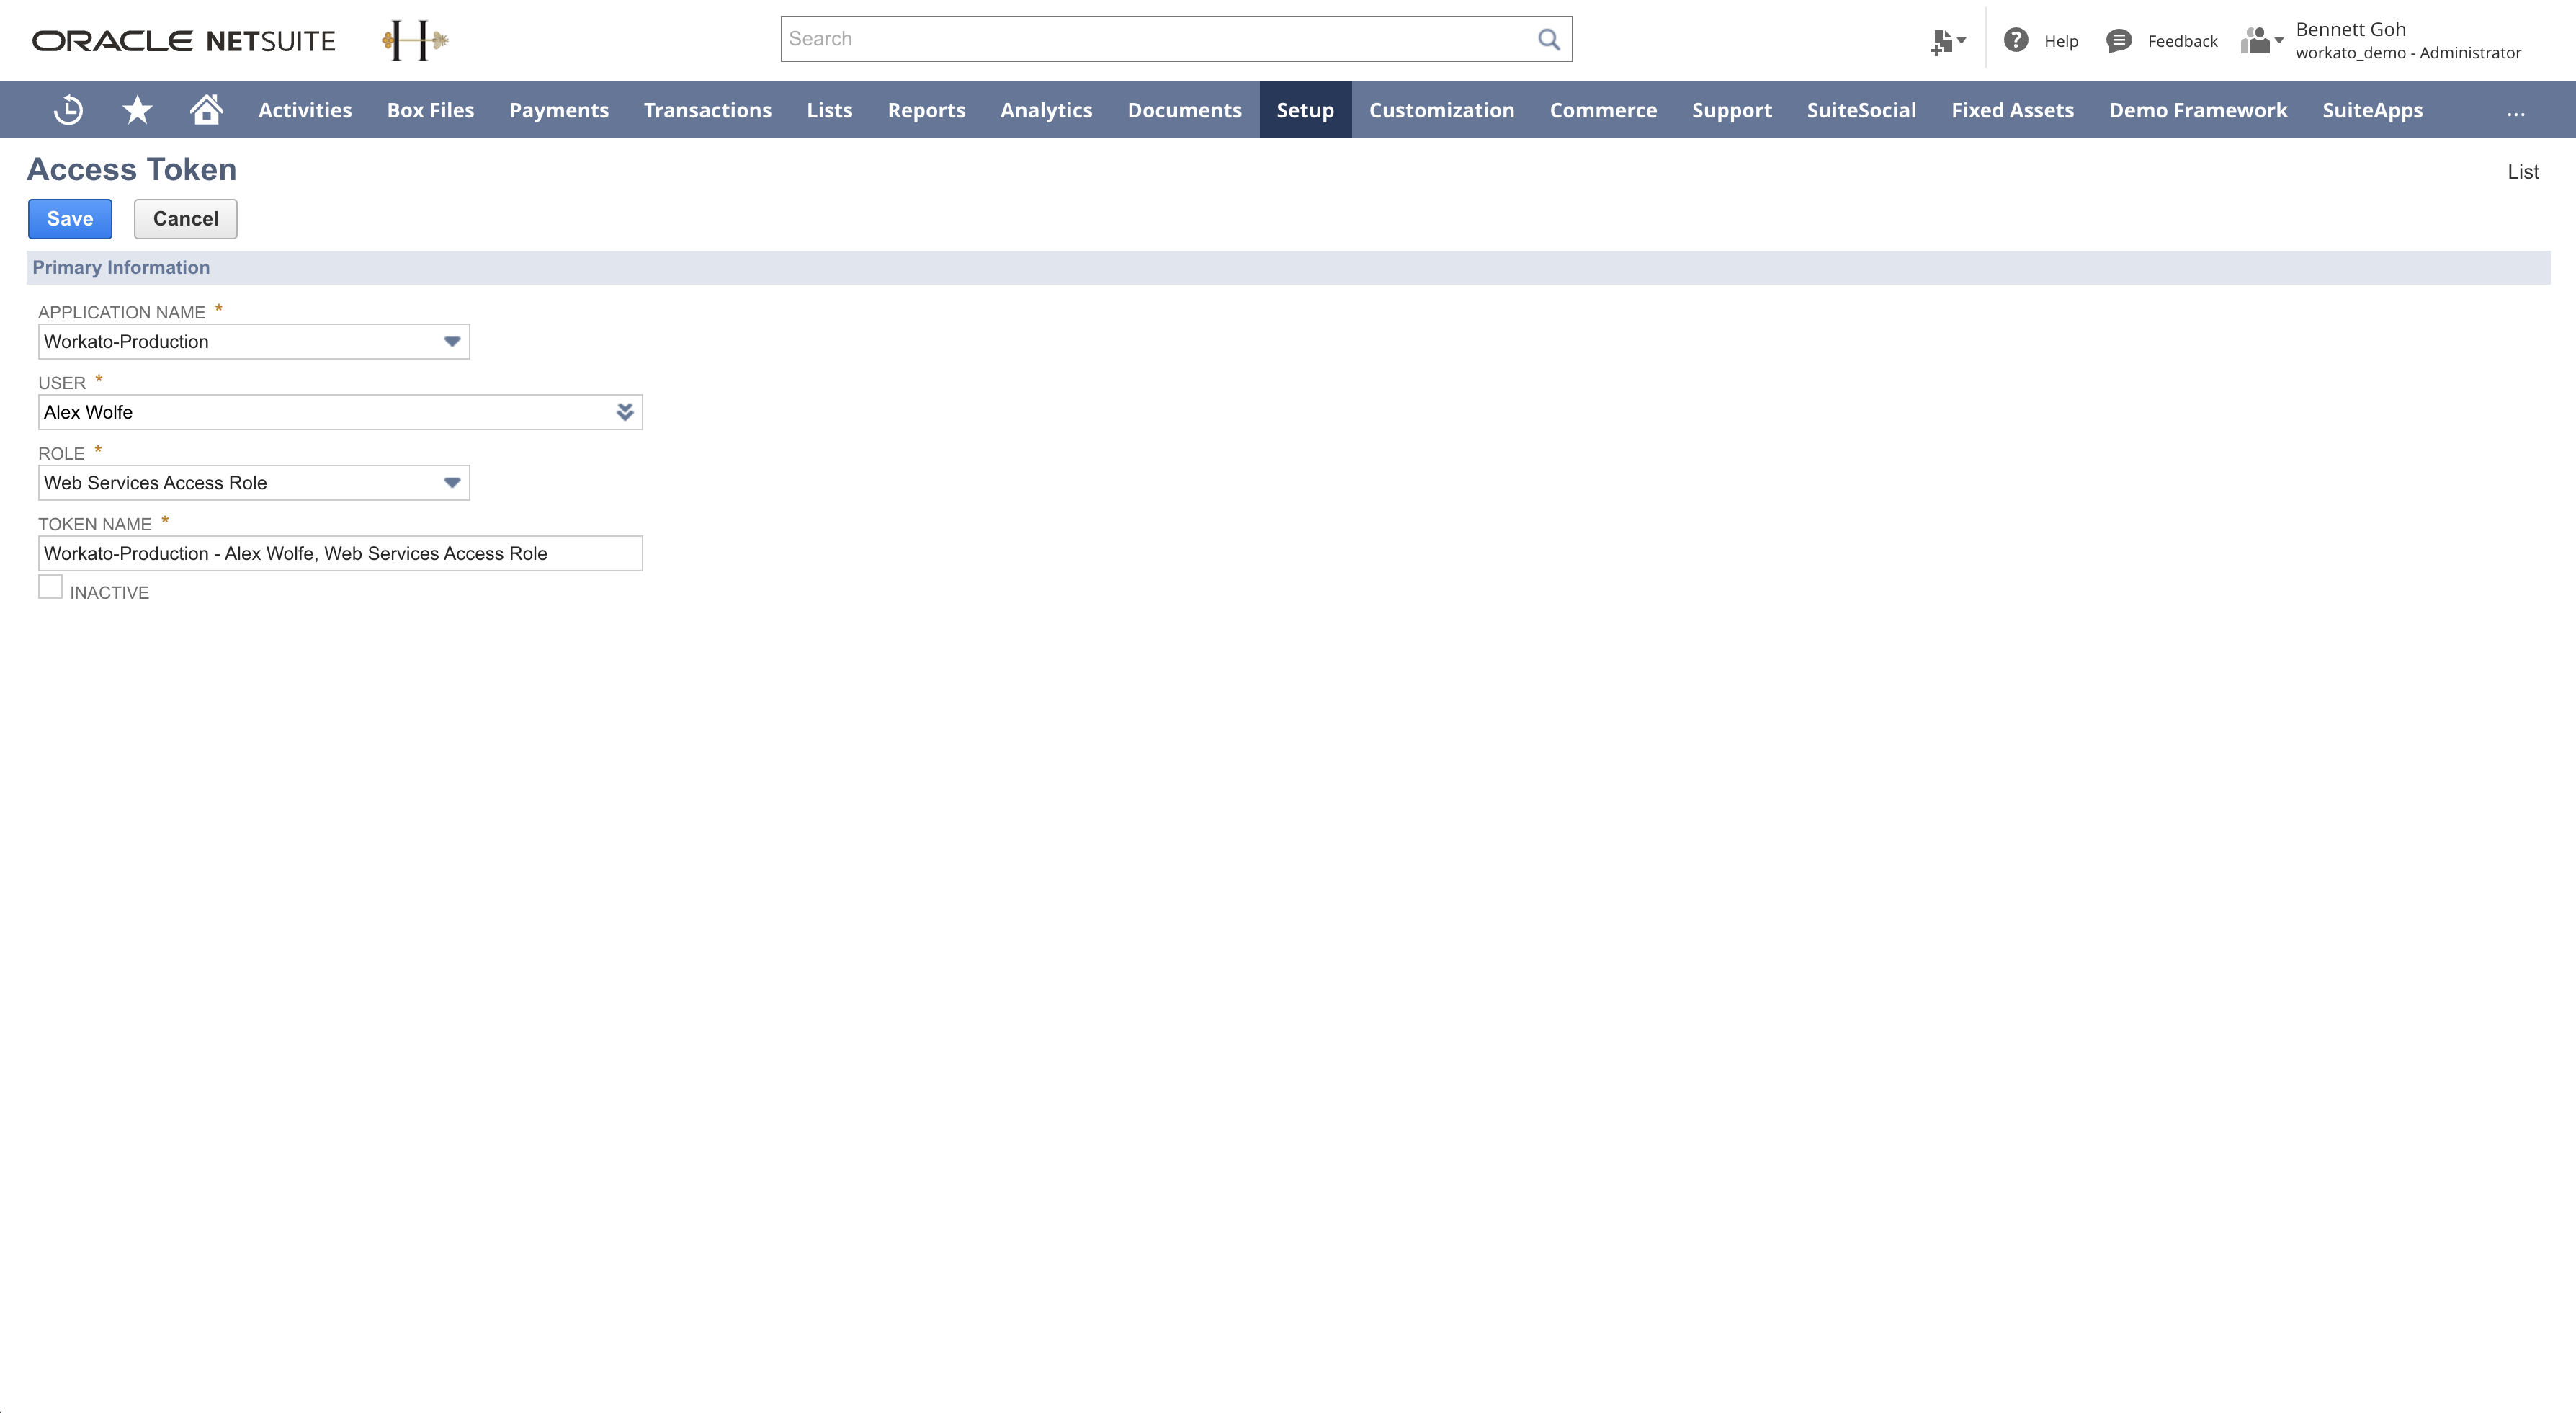 In NetSuite, go to Setup > Users/Roles>Access Tokens > New
Select the integration record you created in the Application name field.
Select the user you created or edited in the User field.
Select the role you created in the Role field.
Use NetSuite's default name or provide one in the Token name field.
Click Save.
Copy the Token ID and Token secret and store them in a secure location. Workato requires these values to establish the NetSuite connection.
Connect to NetSuite on Workato
Complete the following steps to establish a connection with NetSuite SOAP in Workato:
Watch a demonstration of this step
Provide a Connection name that identifies which NetSuite instance Workato is connected to.
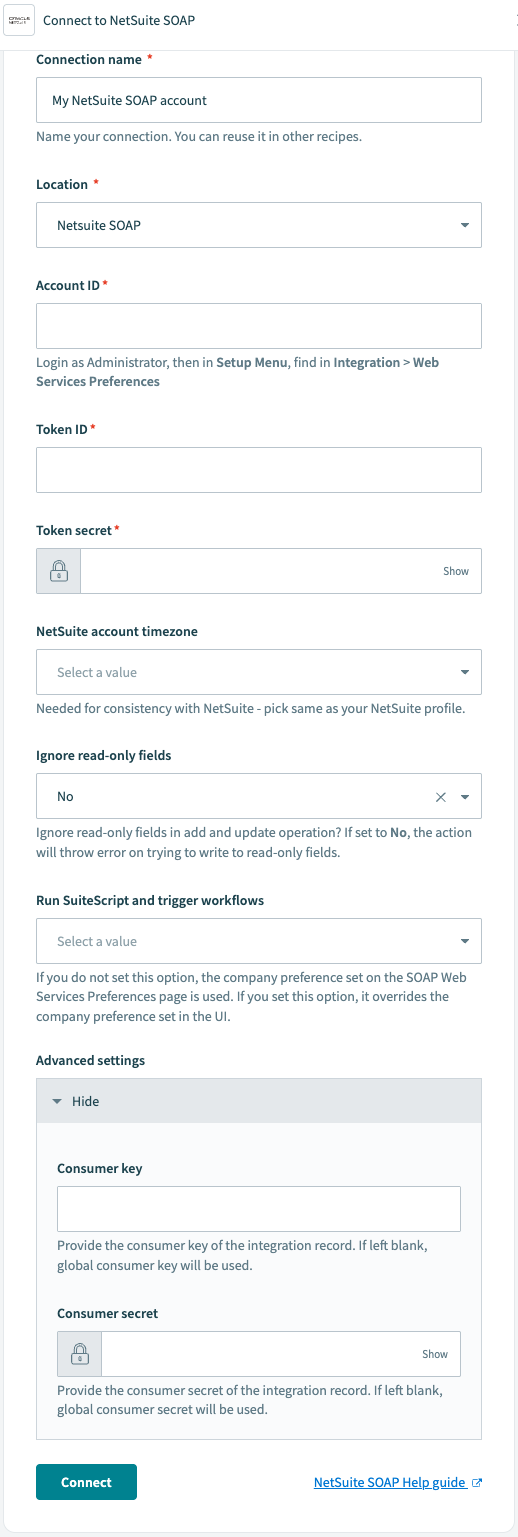 Connection setup
Use the Location drop-down menu to select the project where you plan to store the connection.
Enter your NetSuite Account ID. You can find your account ID by signing in to NetSuite as an administrator and going to Setup > Integration > SOAP Web Services Preferences.
Enter your NetSuite Token ID and Token Secret.
Use the NetSuite account timezone menu to select the timezone in which your NetSuite instance operates.
Configure the Ignore read-only fields to specify whether to ignore read-only fields in add and update operations. Select No to prevent read-only fields from being overwritten and generate an error when attempts are made to overwrite them.
Expand the Advanced settings section and enter the integration record's Consumer key and Consumer secret. If left blank, the global consumer key and secret are used.
Use the Run SuiteScript and trigger workflows field to select whether to enable server SuiteScripts and trigger workflows. Leave this field blank to use the company preference configured in NetSuite. Refer to NetSuite's Request-Level Preferences documentation for more information.
Click Connect to authorize a connection between Workato and your NetSuite SOAP account.
Last updated: