# Redshift - Insert actions
# Insert row
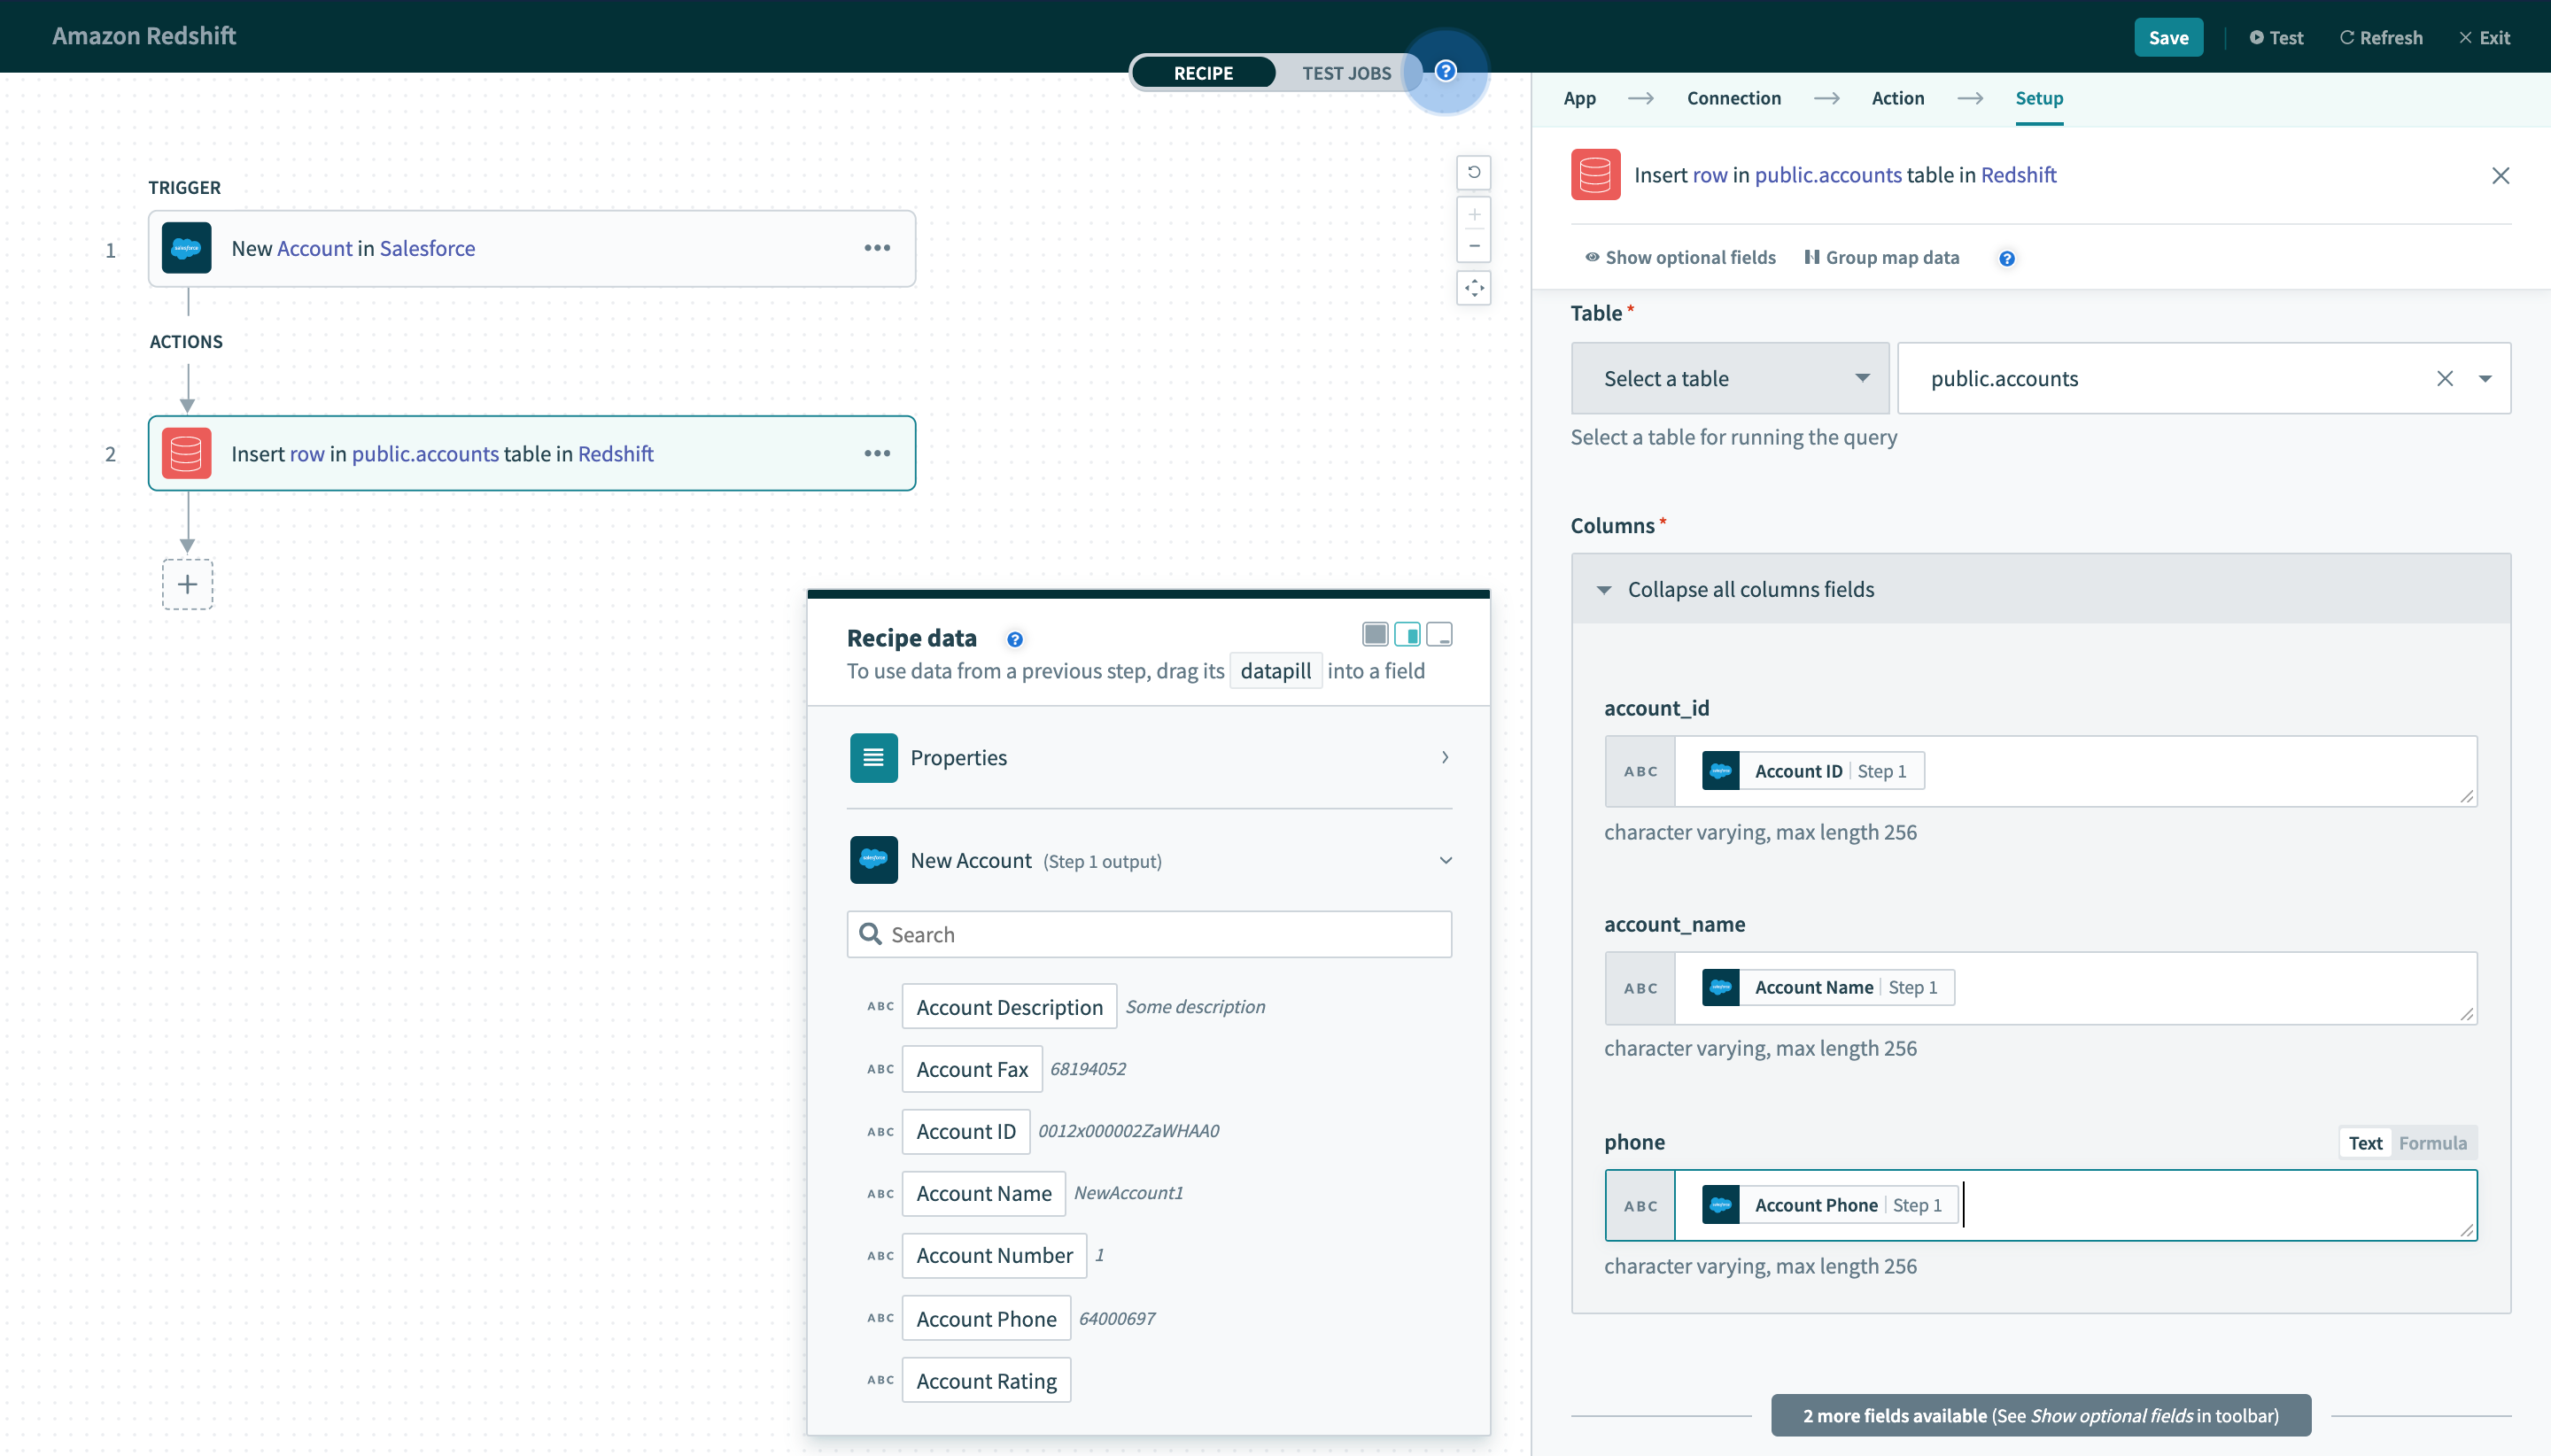
This action inserts a single row into the selected table.
 Insert row action
# Table
First, select a table to insert a row into. This can be done either by selecting a table from the pick list, or toggling the input field to text mode and typing the full table name.
# Columns
Next, map the datapills from your previous triggers or actions into their respective columns. The columns in the selected table are presented as input fields here for you to insert datapills.
# Insert batch of rows
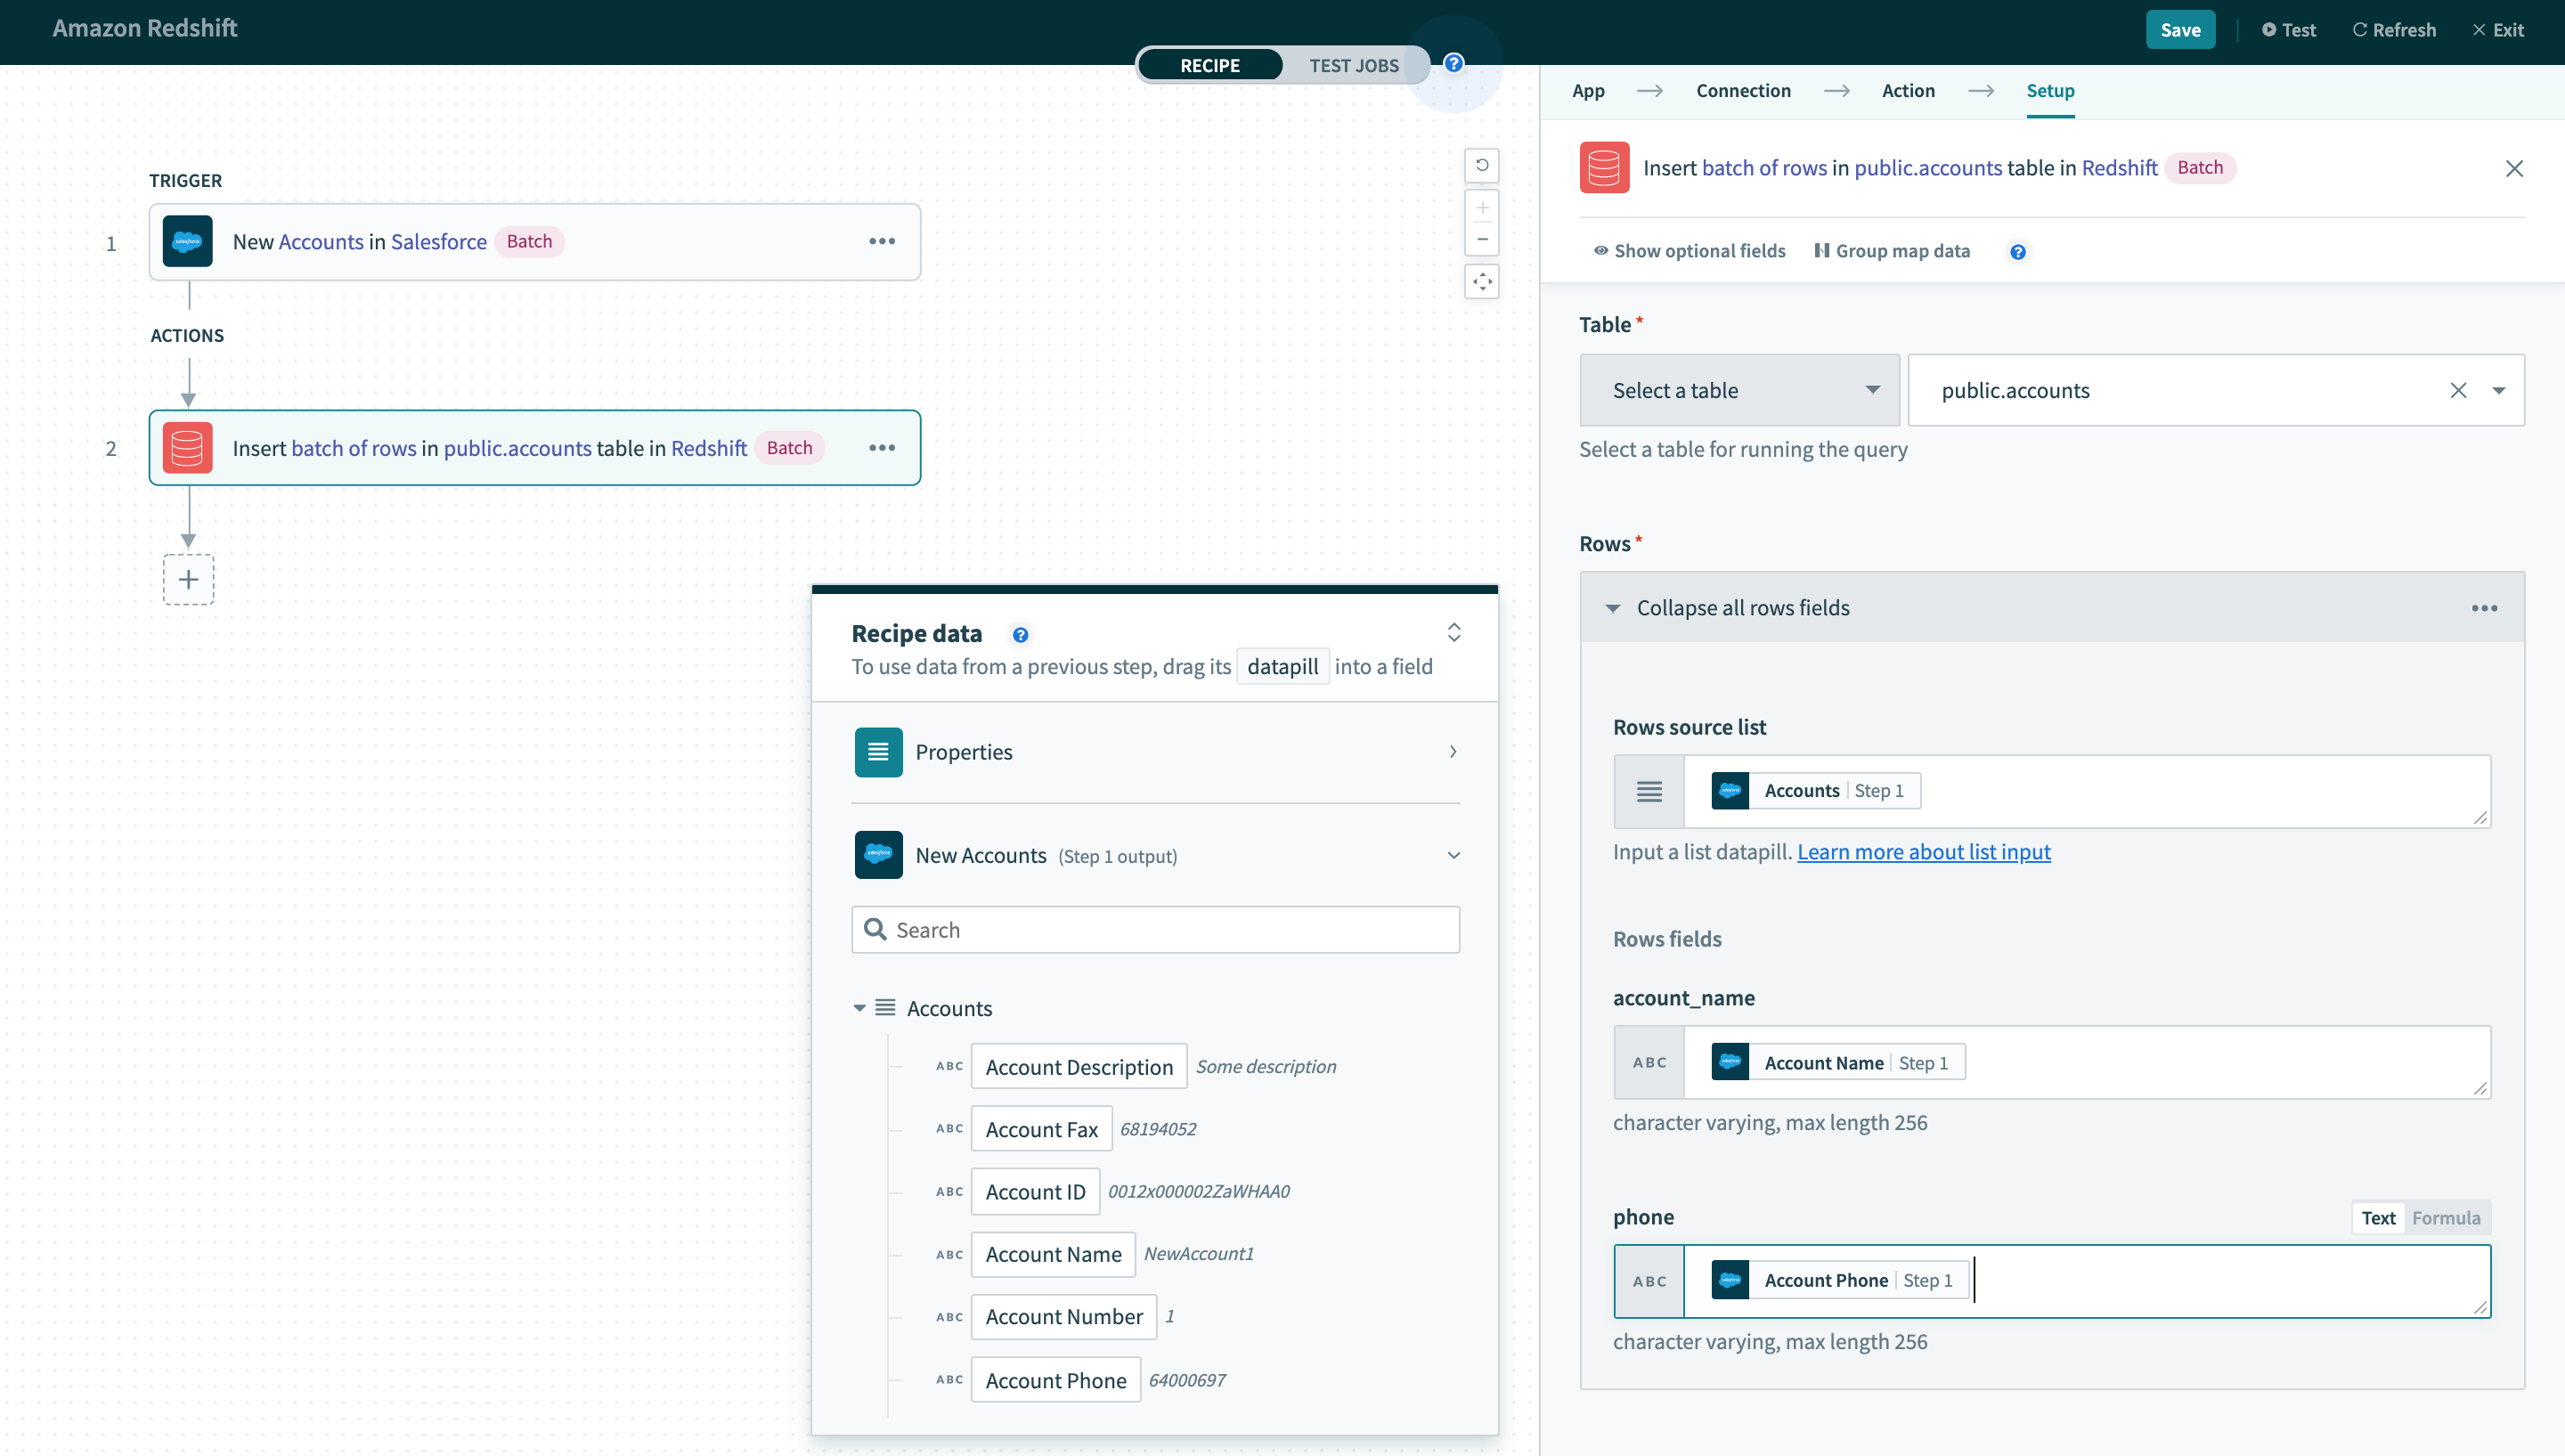
This action allows you to insert multiple rows in a single action instead of one row at a time. This provides higher throughput when you are moving a large number of records from one app to Redshift. Depending on the structure of your recipe and volume of data, this action can reduce integration time by a factor of 100.
 Insert batch of rows action
# Table
Just like with the single row insert action, you need to select the target table first.
# Rows source list
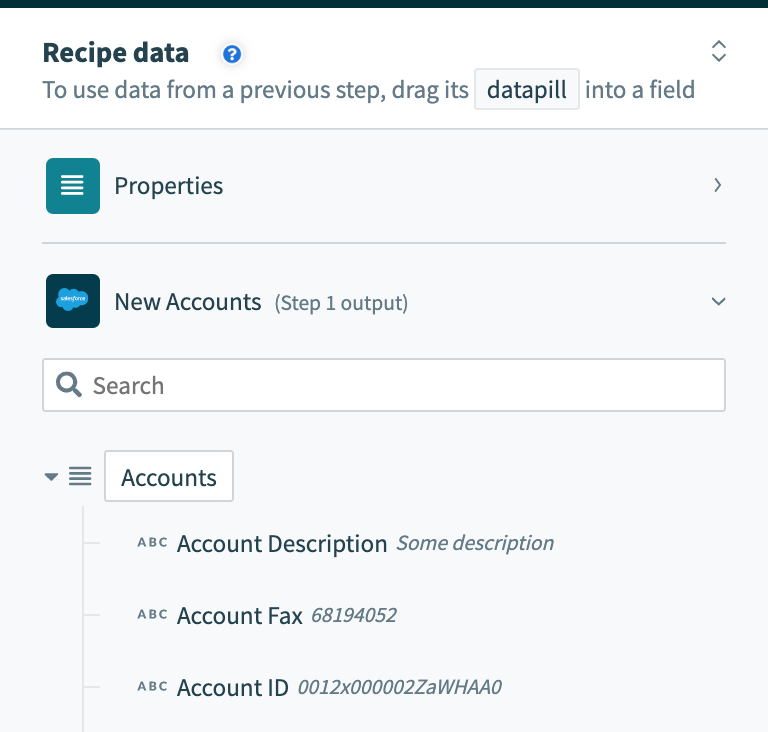
Unlike the Insert row action (where we deal with a single row), we are now dealing with a batch of rows. Hence, the next datapill to input is the source of the batch of rows to insert to the table. This can come from any trigger or action that outputs a list datapill.
 A list datapill from the datatree
If you do not map a list datapill to this field, this action will insert only 1 row and will behave like the Insert row action.
# Columns
Finally, you will need to map the required fields from the output datatree here to insert rows with data from preceding trigger or actions. Take note that datapills mapped to each column here should be from the source list datapill you used earlier. Datapills that are mapped outside the source list datapill will not be iterated.
Refer to the List management guide for more information about working with batches.
Last updated: 5/21/2025, 5:22:32 AM