# Create a custom OAuth profile for Salesforce
This guide explains how to create a custom OAuth profile for Salesforce. The process includes the following steps:
- Create a custom OAuth profile in Workato
- Set up an external client app in Salesforce
- Retrieve the client ID and secret
- Complete setup in Workato
# Create a custom OAuth profile in Workato
Complete the following steps to create a new custom OAuth profile:
Sign in to Workato.
Go to Tools > Custom OAuth profiles.
Click + New custom profile.
Select Salesforce from the Application drop-down menu.
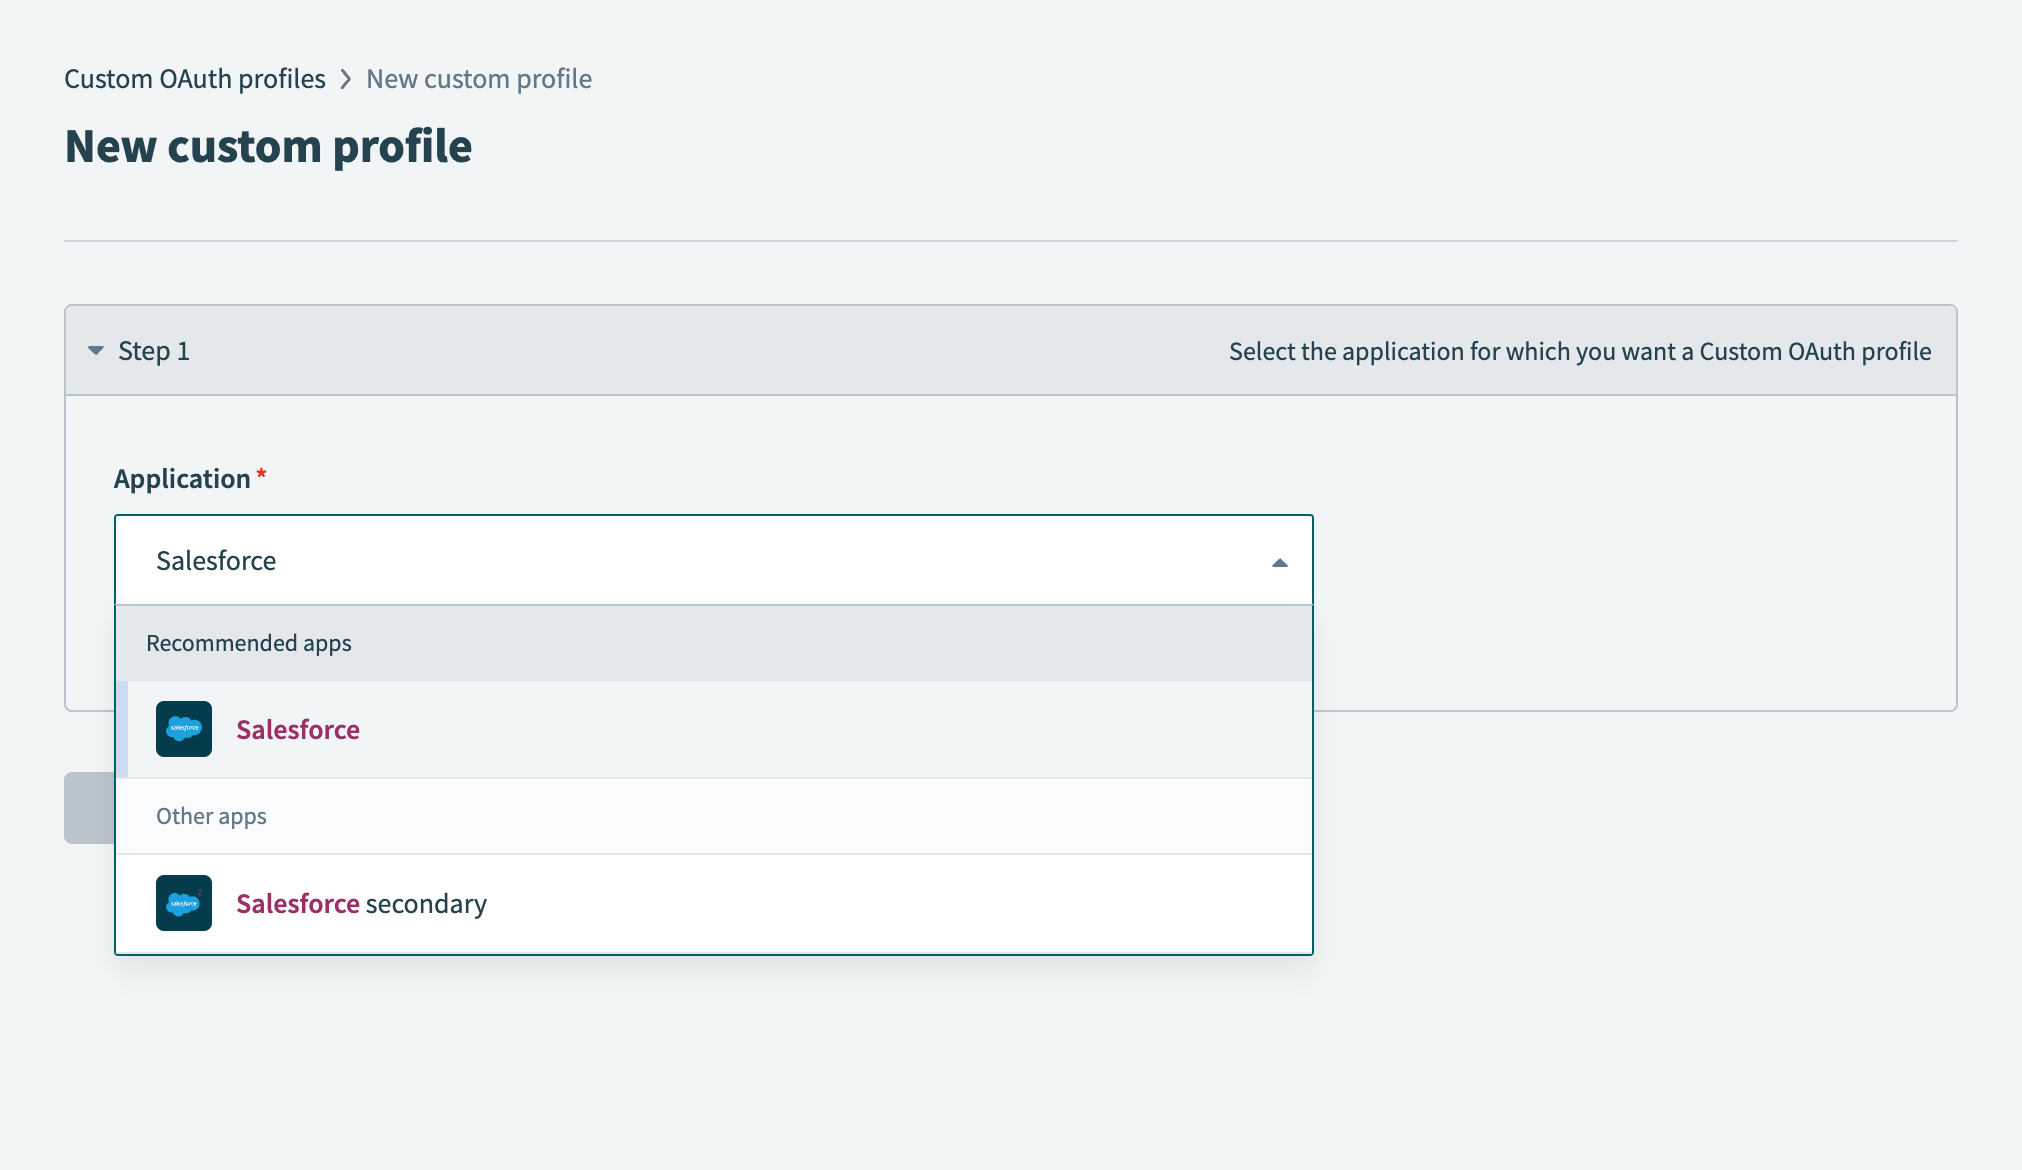 Select Salesforce
Enter a name for your custom OAuth profile in the Name field.
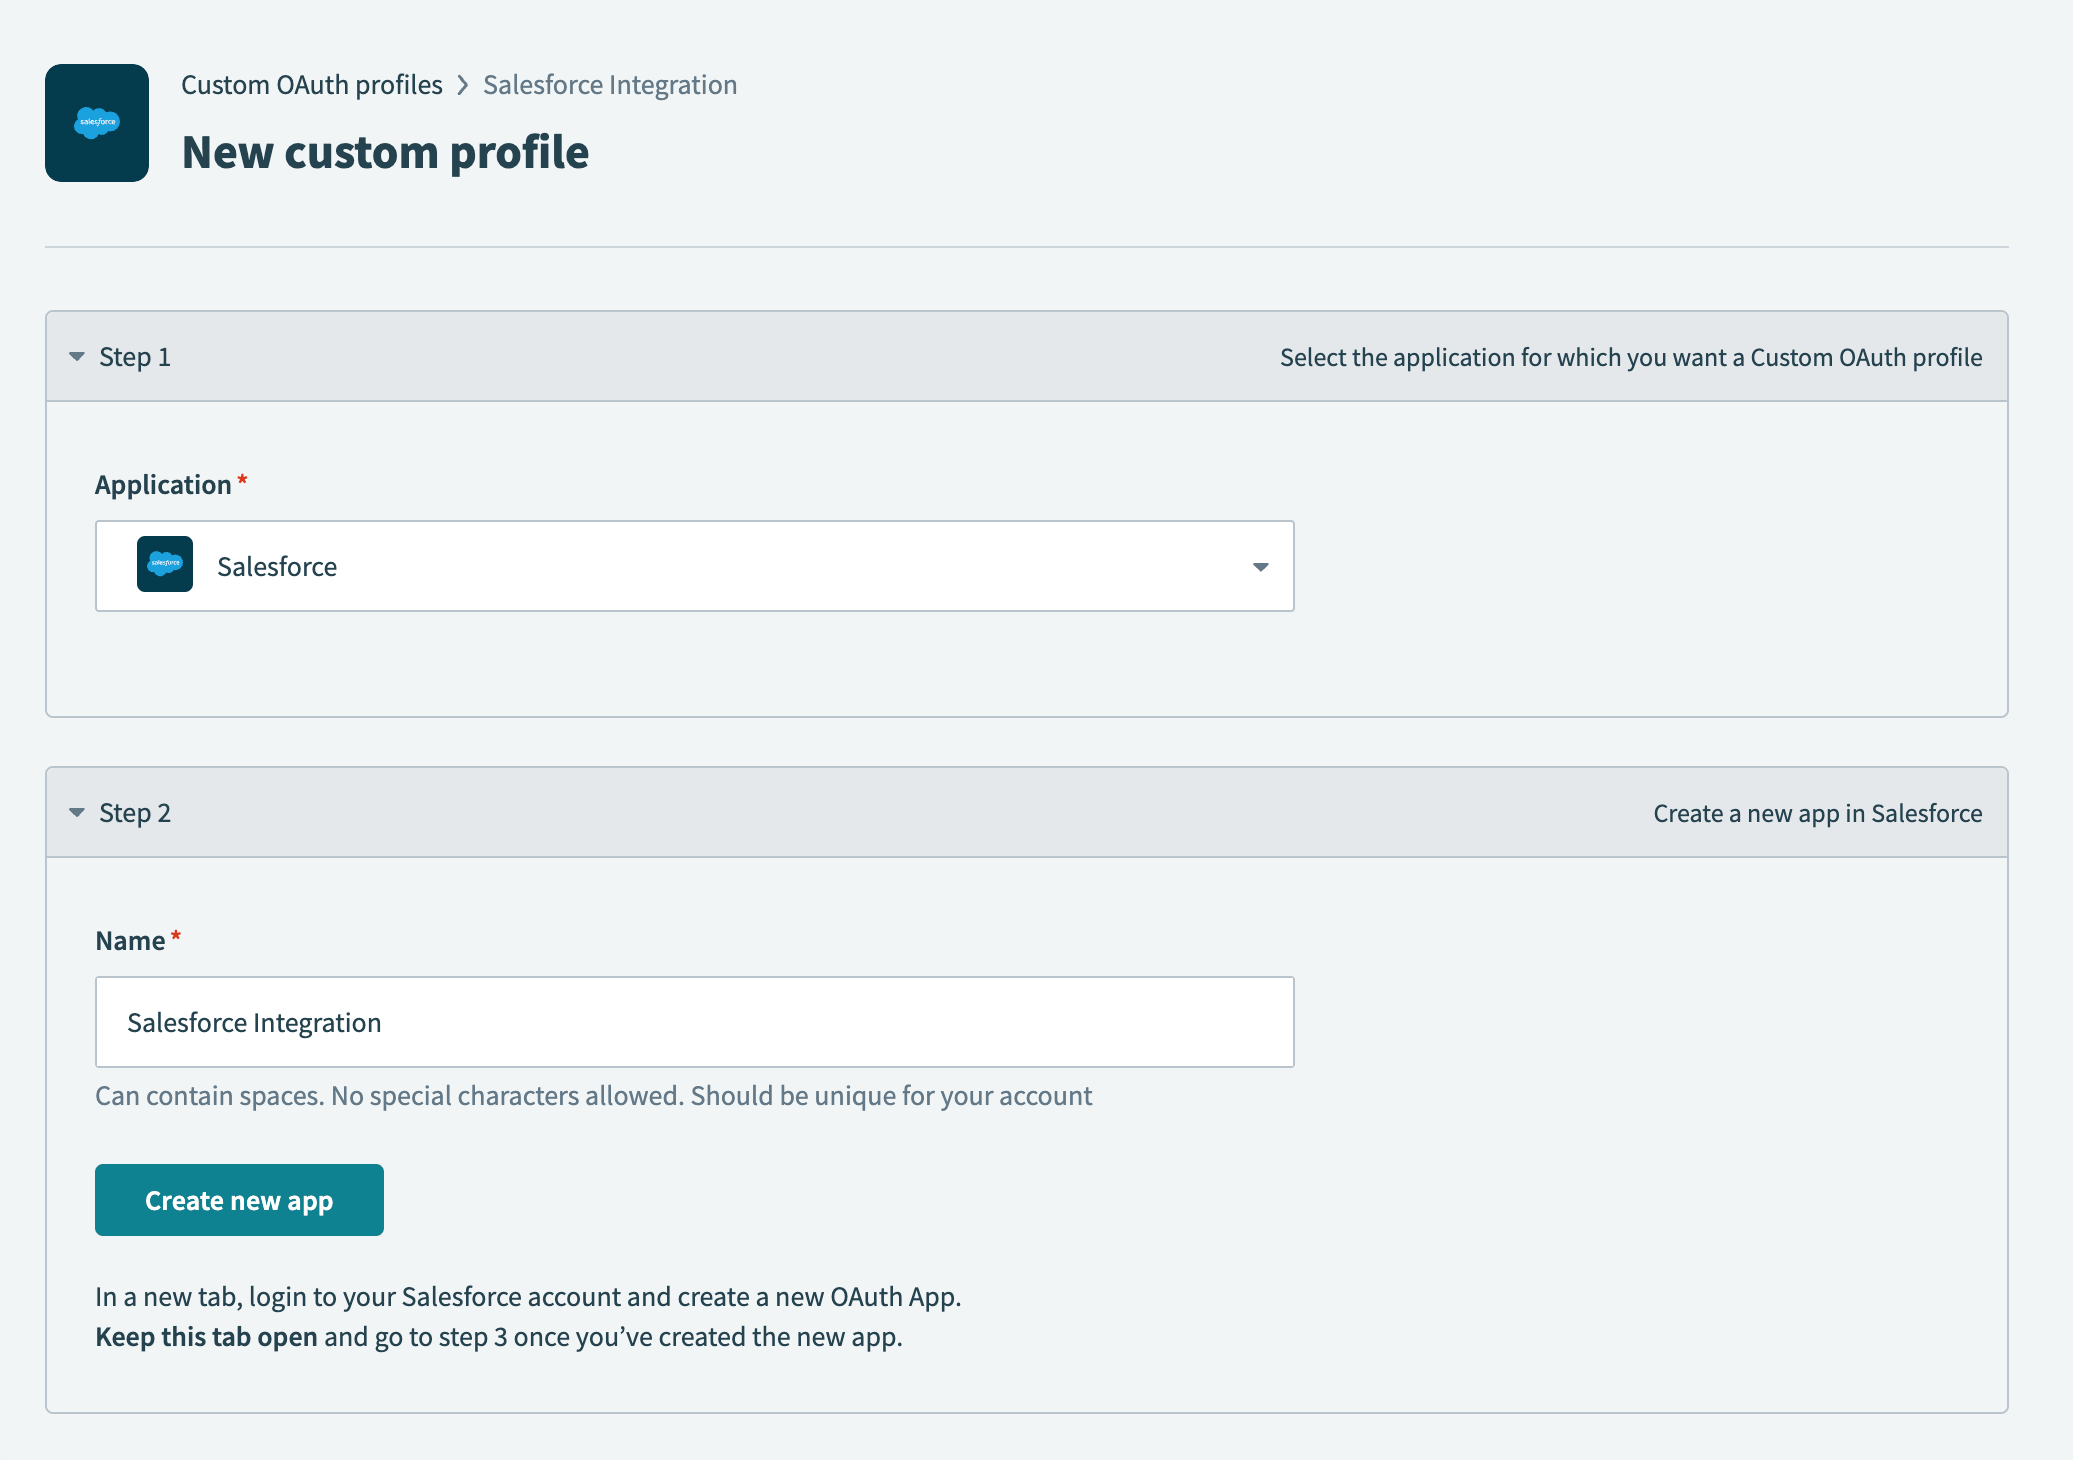 Name your custom OAuth profile
Click Create new app.
# Create an external client app in Salesforce
Complete the following steps to create an external client app in Salesforce:
Open a new tab and sign in to your Salesforce account.
Go to Setup > Apps > External Client Apps > External Client App Manager.
Click New External Client App.
Enter a name for your external client app in the External Client App Name field.
In the API Name field, enter a name that meets the following requirements:
- Contains only underscores and alphanumeric characters.
- Is unique.
- Starts with a letter.
- Doesn't include spaces.
- Doesn't end with an underscore.
- Doesn't contain consecutive underscores.
Enter the contact email address for your app in the Contact Email field.
Use the Distribution State drop-down menu to select either Local or Packaged.
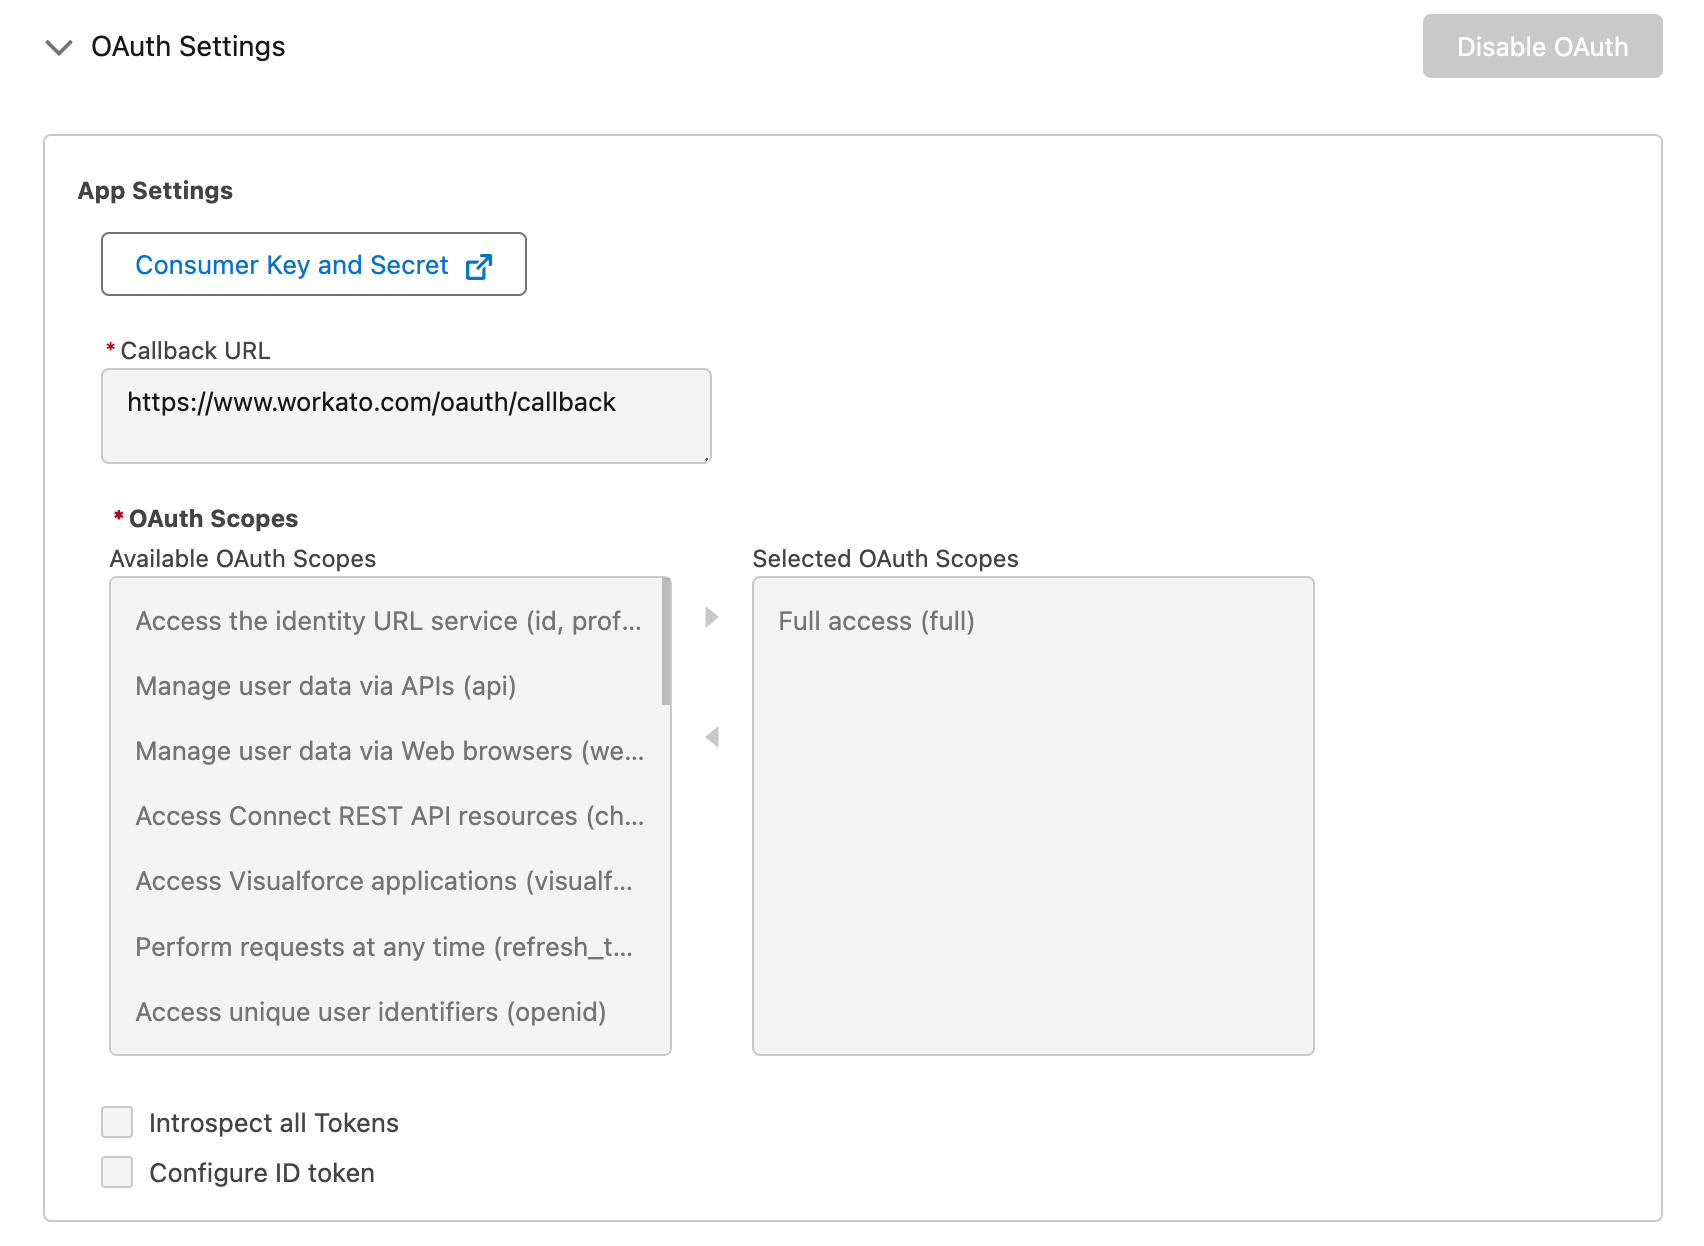
Expand the API (Enable OAuth Settings) section and select the Enable OAuth checkbox.
Enter the following URL in the Callback URL field:
https://www.workato.com/oauth/callback
Select the OAuth scopes for the external client app in the OAuth Scopes field. Then, click the Move selection to Selected OAuth Scopes arrow to apply the scopes.
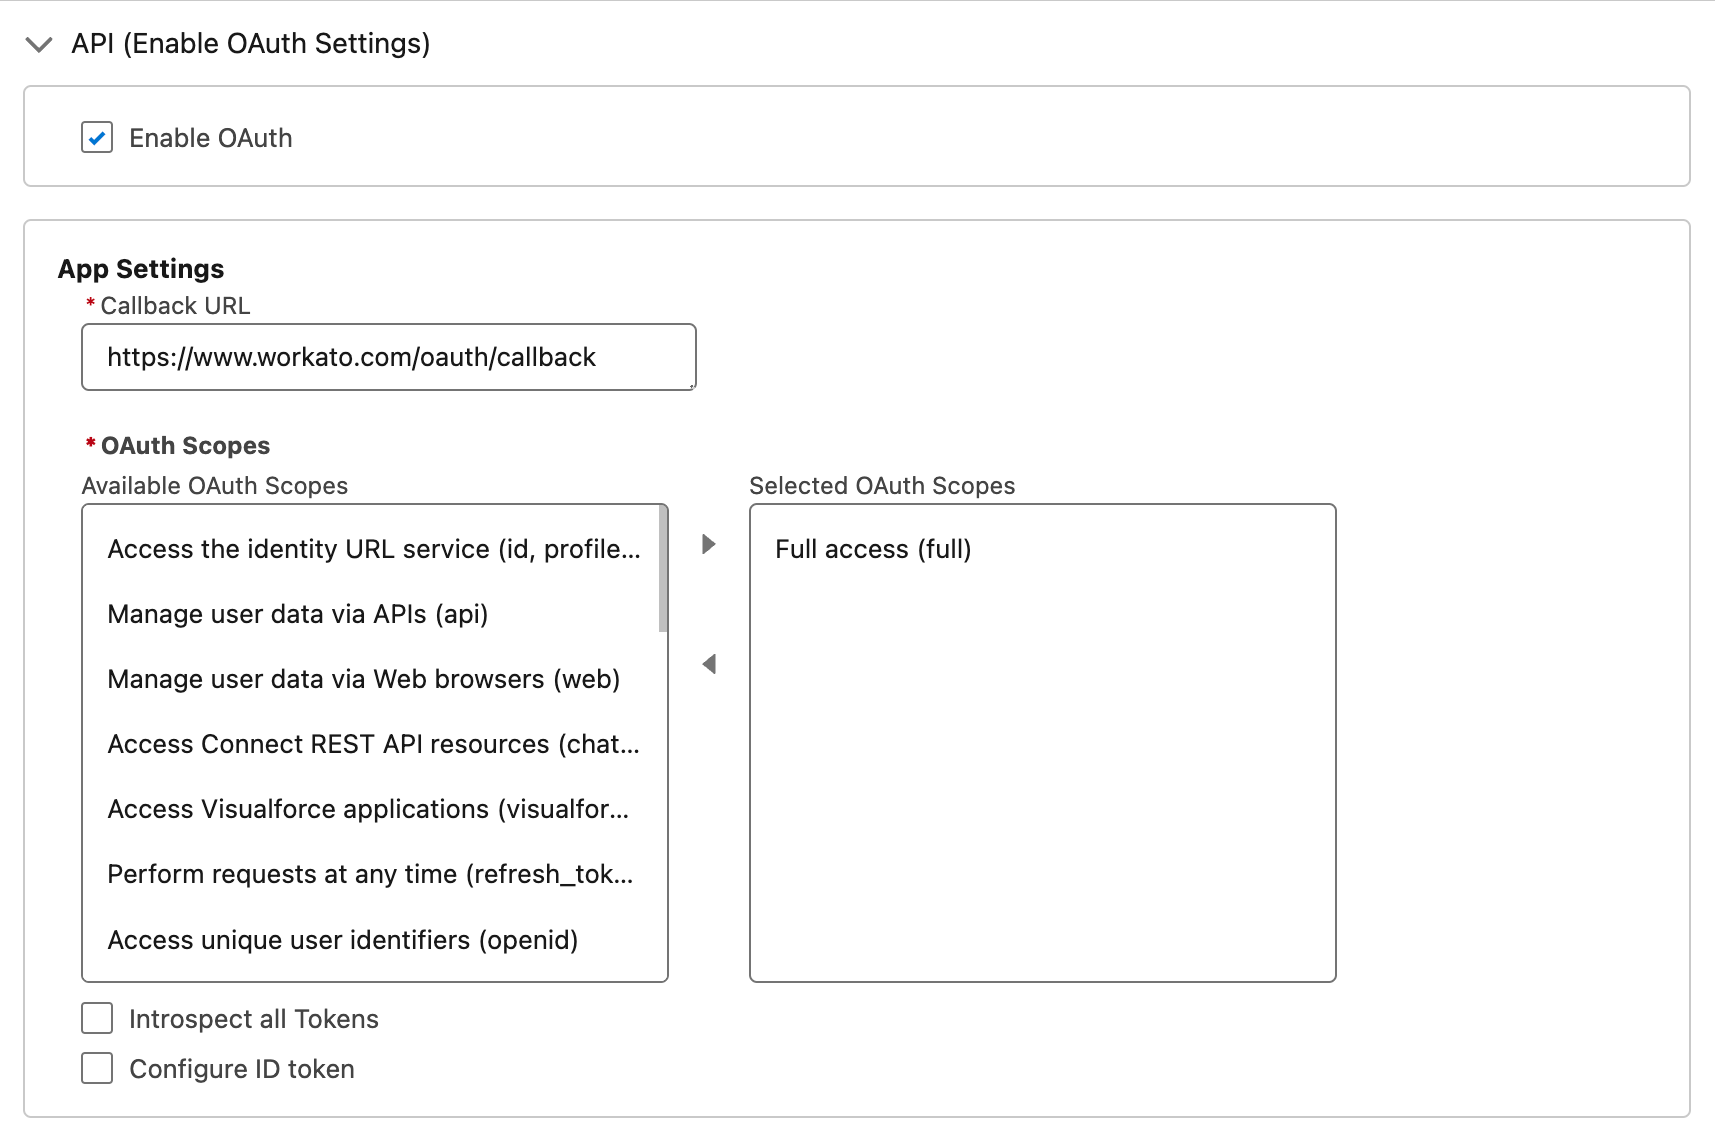 Configure scopes for your external client app
SCOPES
When you create a Salesforce connection with this custom OAuth profile, Workato requests the Full access (full) scope by default. You can limit the requested scopes when configuring advanced settings for an OAuth 2.0 connection.
Ensure the scopes configured in the Workato connection's advanced settings are a subset of those added in Salesforce. Keep in mind that Workato also automatically requests the following scopes:
- basic info
- manage data
- make requests at any time
Configure the following settings:
- In the Flow Enablement section, select only the Enable Authorization Code and Credentials Flow checkbox.
- In the Security section, select only the Require secret for Web Server Flow and Require secret for Refresh Token Flow checkboxes.
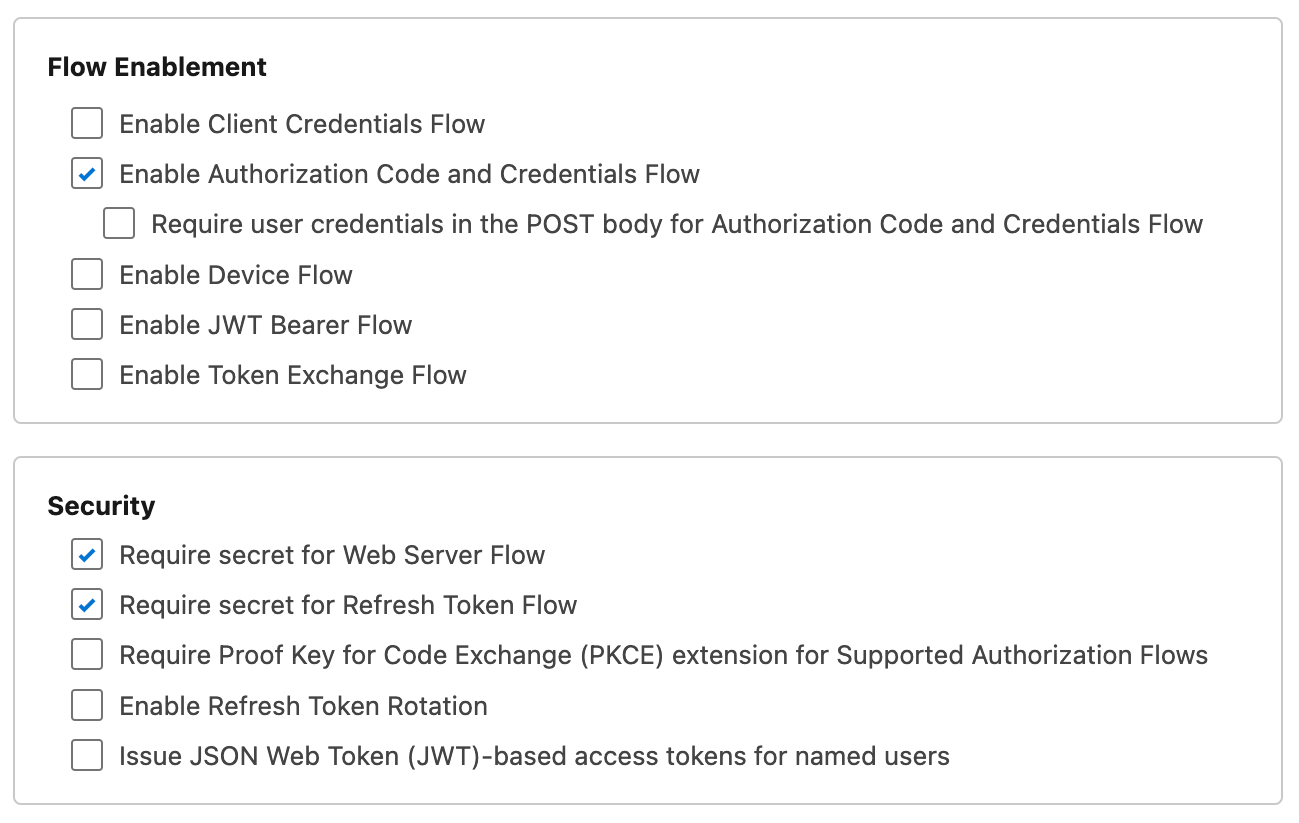 Configure the Flow Enablement and Security fields
Click Create to create the external client app.
Refer to Salesforce's Configure the External Client App OAuth Settings (opens new window) documentation for more information.
# Retrieve the client ID and secret
Complete the following steps to retrieve the client ID and client secret for your app:
Click the Settings tab for your external client app.
Expand the OAuth Settings section.
Click Consumer Key and Secret.
 Click Consumer Key and Secret
Enter your credentials and provide the one-time password (OTP) if prompted.
Copy the Consumer Key and Consumer Secret. These values are required to configure Workato to communicate with your app.
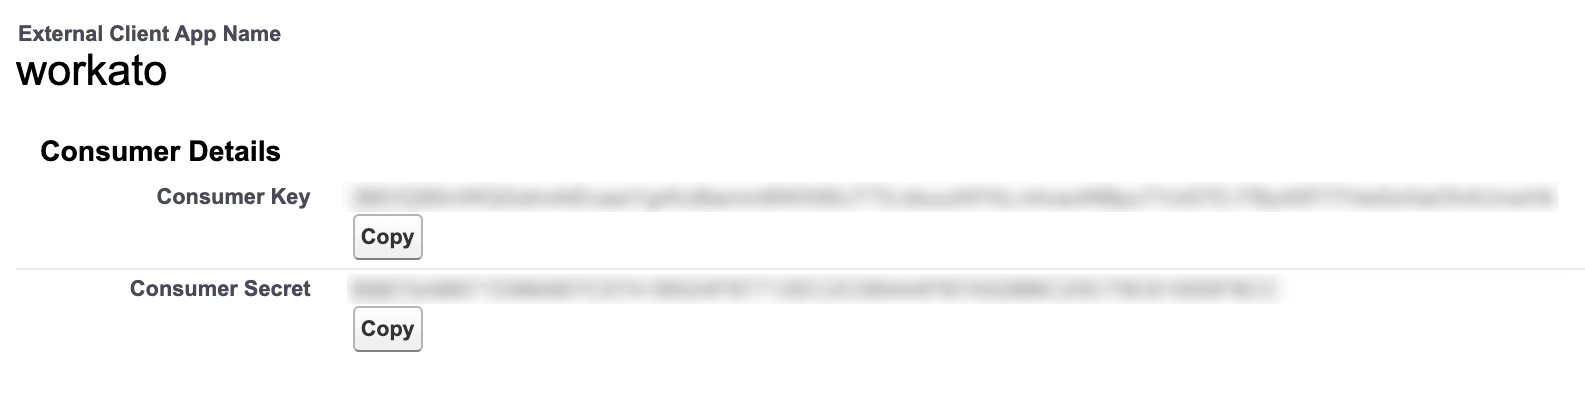 Retrieve the consumer key and consumer secret
# Complete setup in Workato
Complete the following steps to finish setting up your custom OAuth profile:
Return to the Workato tab.
Paste the consumer key from Salesforce into the Client ID field.
Paste the consumer secret from Salesforce into the Client secret field.
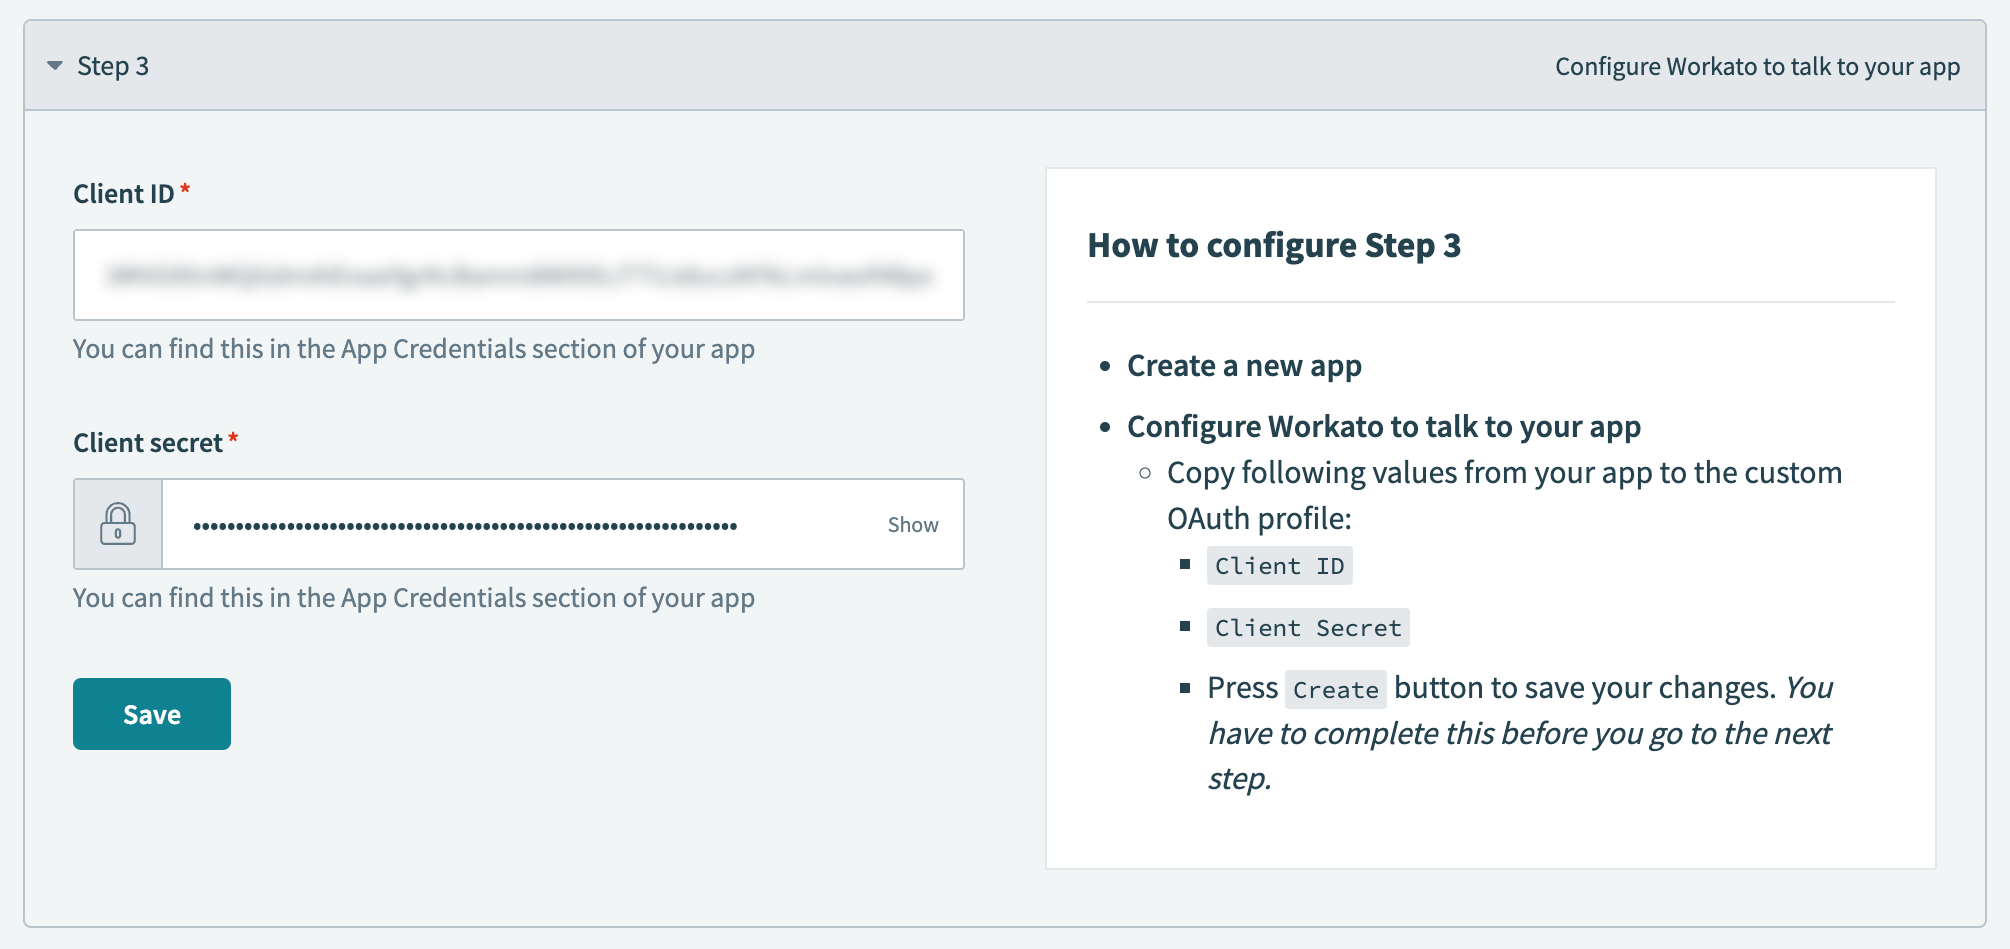 Fill in the client ID and client secret fields
Click Save, then click Done.
You can now use this custom OAuth profile when creating a new Salesforce connection.
Last updated: 5/21/2025, 5:22:32 AM