Connector building - Building triggers
Building triggers follow almost the same format as actions. To make them object based, we'll be making use of configuration fields as well as the schema methods we defined earlier. Below, we go through an example of a polling trigger. Do take note there are some differences in the blocks expected when creating a polling trigger, dynamic webhook trigger and a static webhook trigger.
Defining config fields
When dealing with object-based triggers, we first need to define something called a configuration fields. Configuration fields are special input fields that you can define whose answers can dynamically generate other input fields. Since triggers don't often need any additional input fields, this configuration field is used to dynamically generate the expected output of this trigger.
config_fields: [
  {
    name: 'object',
    optional: false,
    label: 'Object type',
    control_type: 'select',
    pick_list: 'object_list_new_updated_trigger',
    hint: 'Select the object type from picklist.'
  }
],
Selecting invoice causes invoice related data-pills to appear
Here we also introduce a picklist which we can easily add additional objects as we introduce support for them.
DYNAMIC INPUT FIELDS
You can also use configuration fields to dynamically generate input fields based on the user's selections. Refer to the Defining input fields section for scenarios where the selected object requires additional information before accurate input fields can be displayed.
Defining your title, subtitle, description, and help text
It is also highly recommended and really important to define helpful titles and descriptions for your actions. When dealing with object-based actions, this helps with the readability of recipes using your connector as well as improves user experience for those building recipes with your connector.
triggers: {

  new_updated_object: {

    title: "New/updated object",

    subtitle: "Triggers when an object is created or updated",

    description: lambda do |input, picklist_label|
      "New/updated <span class='provider'>" \
      "#{picklist_label['object'] || 'object'}</span> in " \
      "<span class='provider'>XYZ Accounting</span>"
    end,

    help: lambda do |input, picklist_label|
      {
        body:
        "Triggers when an #{picklist_label['object'] || 'object'} is created " \
        ' or updated in XYZ.'
      }
    end,

    config_fields: [
      {
        name: 'object',
        optional: false,
        label: 'Object type',
        control_type: 'select',
        pick_list: 'object_list_new_updated_trigger',
        hint: 'Select the object type from picklist.'
      }
    ],
  }
}
Over here we define title and subtitles to give users an idea of the action out of all the different actions in your connector. Remember to keep your title concise whilst using subtitles to provide a bit more information.
For descriptions, we allow you to use a lambda function (as shown in the example above) to dynamically change the description of the action when a user makes a selection in the config_field. The same can be done for help text as shown in the example above.
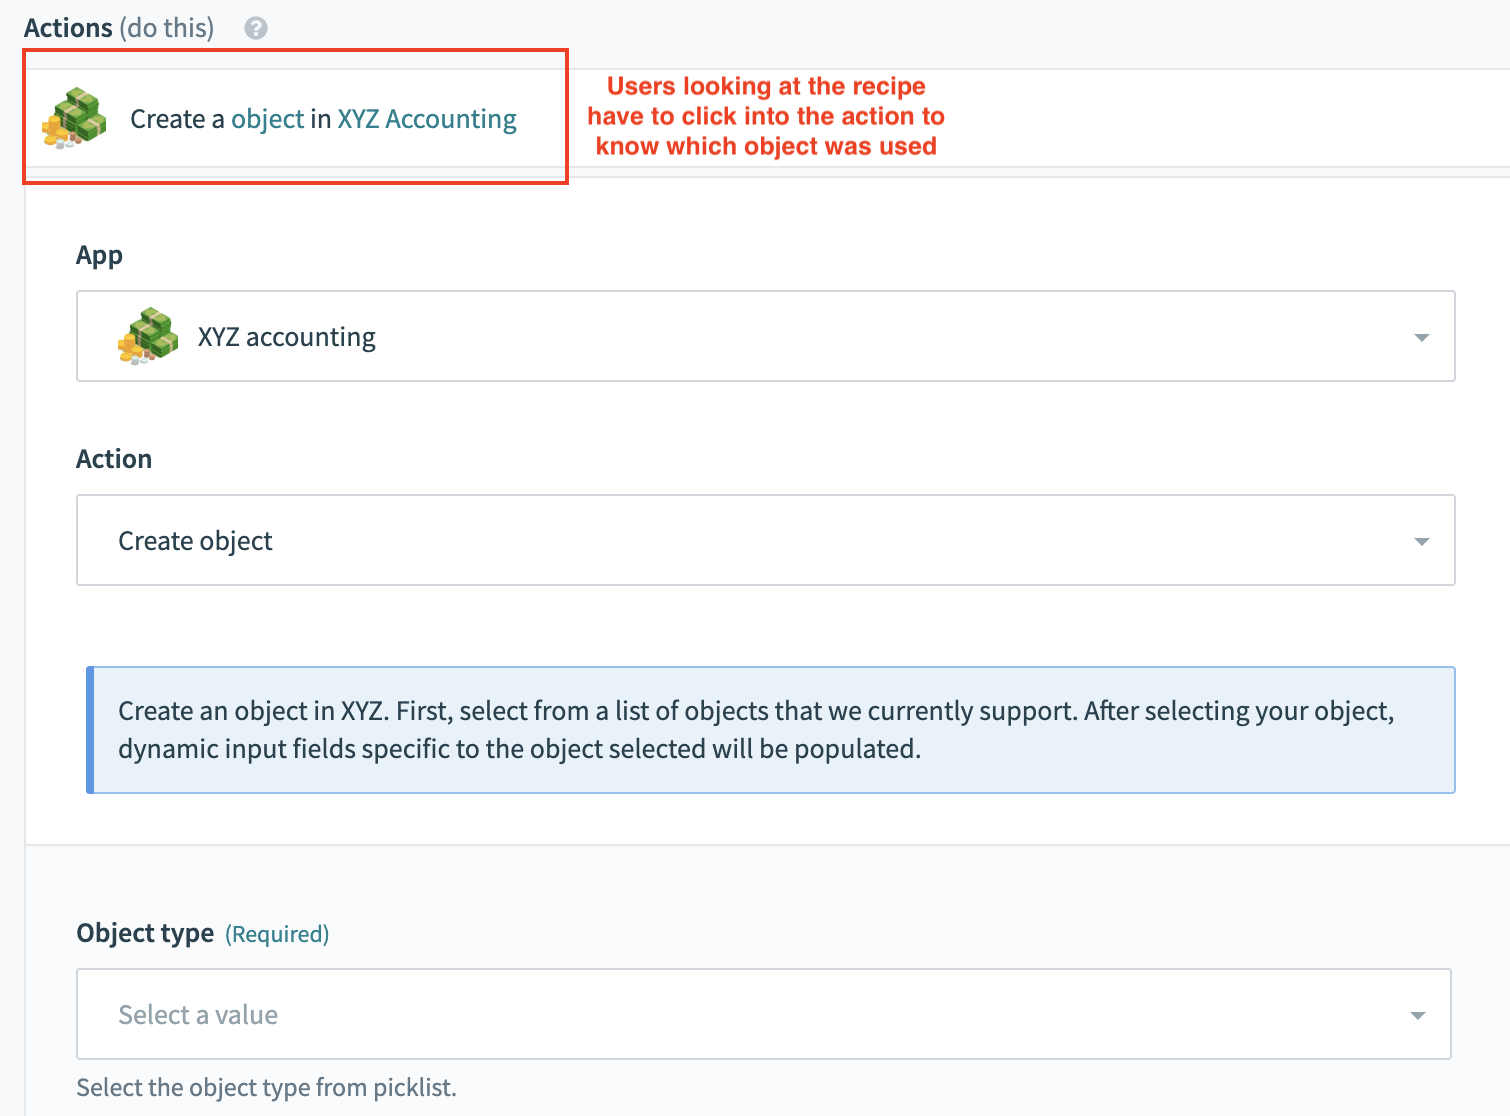 Bad example with no dynamic description
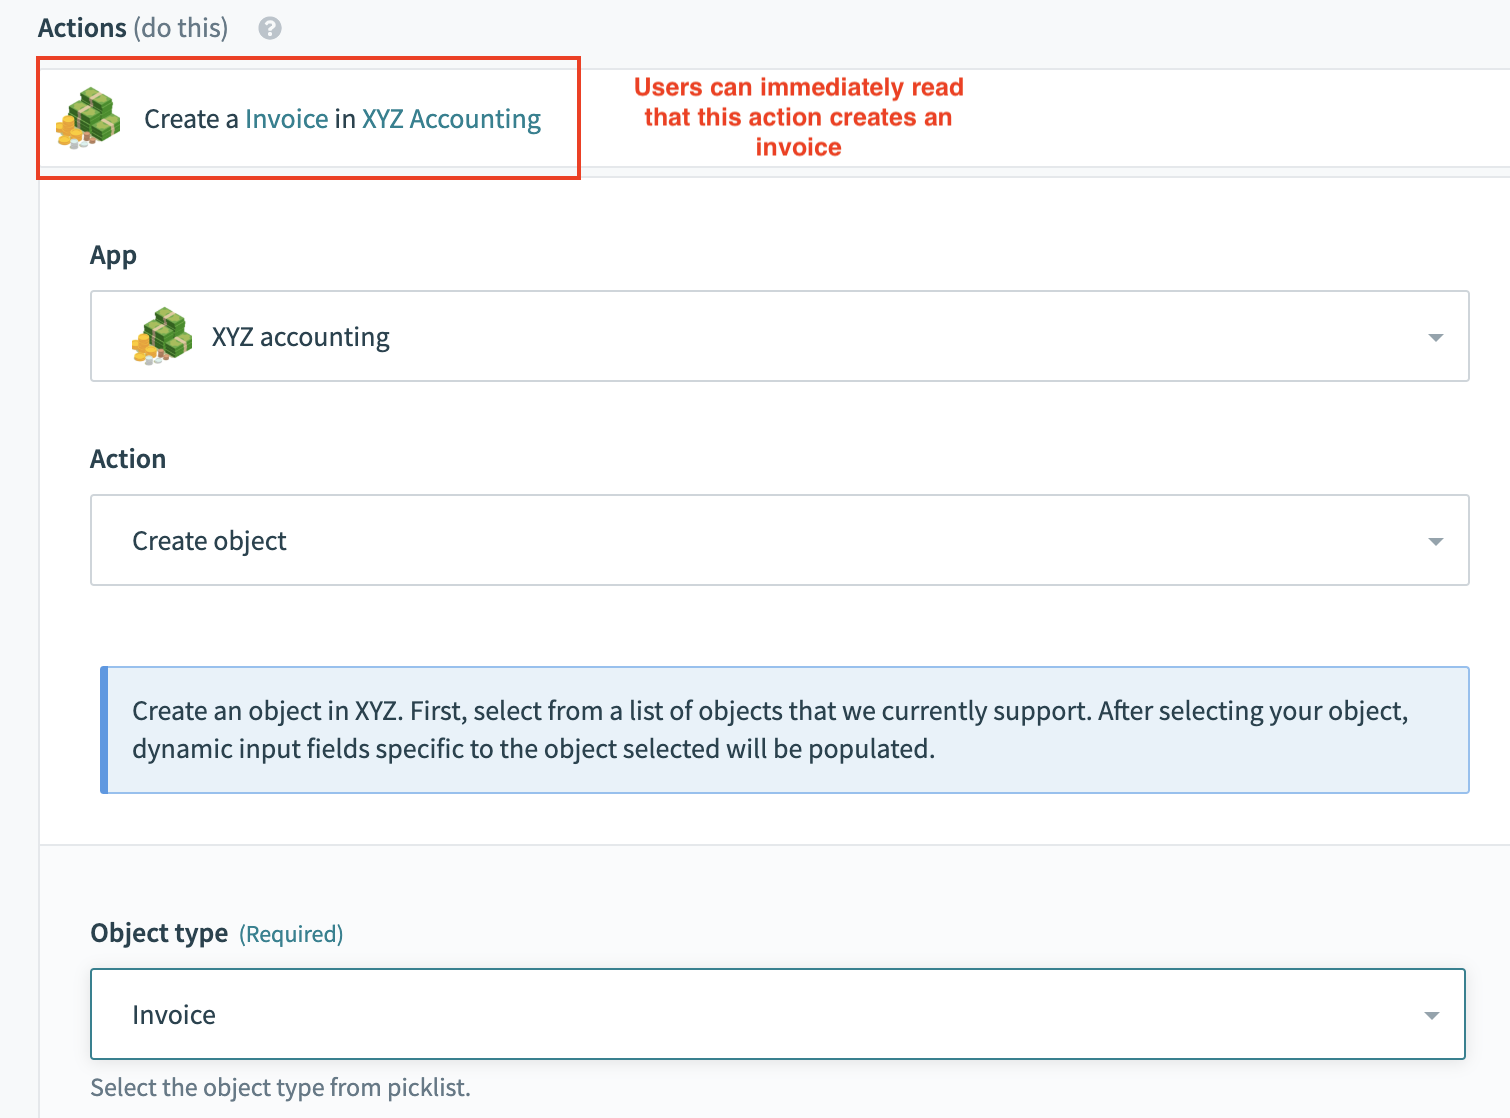 Good example with dynamic description
Defining input fields
Since triggers do not need much configuration from the user, there is no need for any object definitions to be called in our example here. One pattern that we do recommend in triggers whenever possible is to add an optional input field so users can retrospectively pull data when the trigger is first started. This input field will take in a timestamp value and use that to pull any data.
Input
input_fields: lambda do
  [
    {
      name: 'since',
      label: 'When first started, this recipe should pick up events from',
      type: 'timestamp',
      optional: true,
      hint: 'When you start recipe for the first time, it picks up Salesforce records ' \
      'from this specified date and time. Once recipe has been run or tested, ' \
      'value cannot be changed.'
    }
  ]
end,
Defining the poll block
For polling triggers, the poll block is where the code for each poll is executed. There are numerous arguments that can be used in the poll block including a closure argument which allows you to reference any data from a previous poll. This closure value is useful by allowing your trigger to store a cursor on where it last polled. Often, closure stores timestamp values of when the last record it saw as well as any offsets if it needs to poll immediately.
POLLING TRIGGER BEST PRACTICES
When building polling triggers, it's best to use endpoints that return a list of records and support query parameters for filtering records by timestamp. Refer to Greenhouse's Get list candidates API documentation as an example.
Expected JSON response from XYZ accounting
{
  "results": [
    {
      "TxnDate": "2019-09-19",
      "ID": "1",
      "TotalAmt": 362.07,
      "Line": [
        {
          "Description": "Rock Fountain",
          "SalesItemLineDetail": {
            "Qty": 1,
            "UnitPrice": 275,
          },
          "Line-Num": 1,
          "Amount": 275.0,
          "Id": "1"
        },
        {
          "Description": "Fountain Pump",
          "SalesItemLineDetail": {
            "Qty": 1,
            "UnitPrice": 12.75,
          },
          "LineNum": 2,
          "Amount": 12.75,
          "Id": "2"
        }
      ],
      "DueDate": "2019-10-19",
      "DocNumber": "1037",
      "Deposit": 0,
      "Balance": 362.07,
      "CustomerRef": {
        "name": "Sonnenschein Family Store",
        "value": "24"
      },
      "BillEmail": {
        "Address": "[email protected]"
      },
      "BillAddr": {
        "Line1": "Russ Sonnenschein",
        "Long": "-122.1141681",
        "Lat": "37.4238562",
        "Id": "95"
      },
      "MetaData": {
        "CreateTime": "2014-09-19T13:16:17-07:00",
        "LastUpdatedTime": "2014-09-19T13:16:17-07:00"
      }
    },
    // more results
  ],
  "more_results": true
}
poll block
poll: lambda do |connection, input, closure|
  limit = 100
  closure = closure || {}

  updated_since = (closure['last_updated_since'] || input['since']).to_time.utc.iso8601

  params = {
    "order_by" => "updated_at",
    "order_type" => "asc",
    "limit" => limit,
    "offset" => closure['offset'],
    "updated_since" => updated_since
  }

  response = call("trigger_#{input['object']}_poll", params)

  records = response['results']

  poll_again = response['more_results']

  if poll_again # If we can poll for more, update offset
    closure['offset'] =  closure['offset'] + limit
  else # If not, reset offset and last_updated_since
    closure['offset'] = 0
    closure['last_updated_since'] = records.last['MetaData']['LastUpdatedTime']
  end

  {
    events: records,
    next_poll: closure,
    can_poll_more: poll_again
  }
end,
In the poll block, we first prepare the payload with the appropriate parameters to query for only records after the last time we polled. This is done by referencing the closure values of the last poll.
The parameters are passed into an object-specific method to execute the poll and the response is expected to be the JSON response above. The closure values are reset based on response of the poll and the output of each poll block is a hash with 3 expected values - the records, the closure hash and "can_poll_more" - a boolean value which determines whether the trigger should poll again.
Refer to Polling triggers for more information.
Defining the dedup block
For each record in the array of records passed on from the poll block, Workato also checks to see if it has seen the record before. To do so, the dedup block should contain a string that combines various parts of a record to ensure that it is unique. In the example below, we've used the invoice id and invoice last updated timestamp to see if this updated record has been seen before.
dedup: lambda do |record|
  "#{record['results']['Id']}@#{record['results']['MetaData']['LastUpdatedTime']}"
end,
Defining the output fields
Output fields can be defined using the same schema method used earlier. When calling the schema method, remember to pass the parameter output so your method knows to return fields expected in the response. Often this includes metadata about the object that cannot be changed by users such as created_at or updated_at timestamps.
Output
    output_fields: lambda do |object_definitions, connection, config_fields|
      object = config_fields['object']

      input_schema = object_definitions[object]
    end,
Object definition
    invoice: {
      fields: lambda do |connection, config_fields, object_definitions|
        # same schema as above
      end
    },
Defining your sample output
Sample outputs are a great way to hint to give users context about the data-pills they are mapping in downstream actions. When labels might still leave room for confusion, sample outputs bridge the gap in understanding by allowing you to pull data in real time from the user's own application. In the example below, we construct a payload artificially before using a search object method to retrieve the first record found in the user's own instance of XYZ accounting.
Sample output
sample_output: lambda do |connection, input|
  payload = {
    "limit" => 1
  }
  call("search_#{input['object']}_execute", payload)
end
The output of this block is then passed to the output fields block and rendered to the right of every data-pill which is matched. This could significantly reduce the amount of time it takes for users whilst troubleshooting.
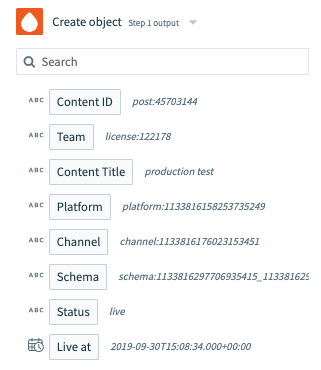 Sample output renders in grey text next to each data-pill
Common code patterns & limitations
Now that you've seen some examples of how to build object-based actions and triggers, we now go through some code patterns which can be reused in your connector.
Last updated: