How-to guides - Creating objects
In this segment, we will be going through the creation of actions that help create objects in our target application. Typically, The POST HTTP request method is used to send requests to create objects.
ACTION TIMEOUT
SDK actions have a 180 second timeout limit.
Sample connector - Zuora
{
title: 'My Zuora connector',
# More connector code here
actions: {
create_account: {
title: 'Create account',
subtitle: "Creates an account in Zuora",
description: lambda do |input, picklist_label|
"Create <span class='provider'>account</span> in " \
"<span class='provider'>Zuora</span>"
end,
help: "Creates a new account in Zuora",
input_fields: lambda do |object_definitions|
[
{
name: "AccountNumber",
label: "Account Number",
hint: "Unique account number assigned to the account. " \
"Leave null to auto-generate."
},
{
name: "AccountName",
label: "Account name",
hint: "The name of newly created account."
},
{
name: "Currency",
label: "Currency",
hint: "Currency that the customer is billed in.",
optional: false
}
]
end,
execute: lambda do |connection, input|
post("https://rest.zuora.com/v1/object/account", input).
after_error_response(/.*/) do |_, body, _, message|
error("#{message}: #{body}")
end
end,
output_fields: lambda do |object_definitions|
[
{ name: "Success", type: "boolean", control_type: "checkbox" },
{ name: "Id" },
{
name: "Errors",
type: "array",
of: "object",
properties: [{ name: "Code" }, { name: "Message" }]
}
]
end,
sample_output: lambda do |connection, input|
{
"success" => "true",
"Id" => "107bb8280175668b1f47e51710214497"
}
end
}
}
# More connector code here
}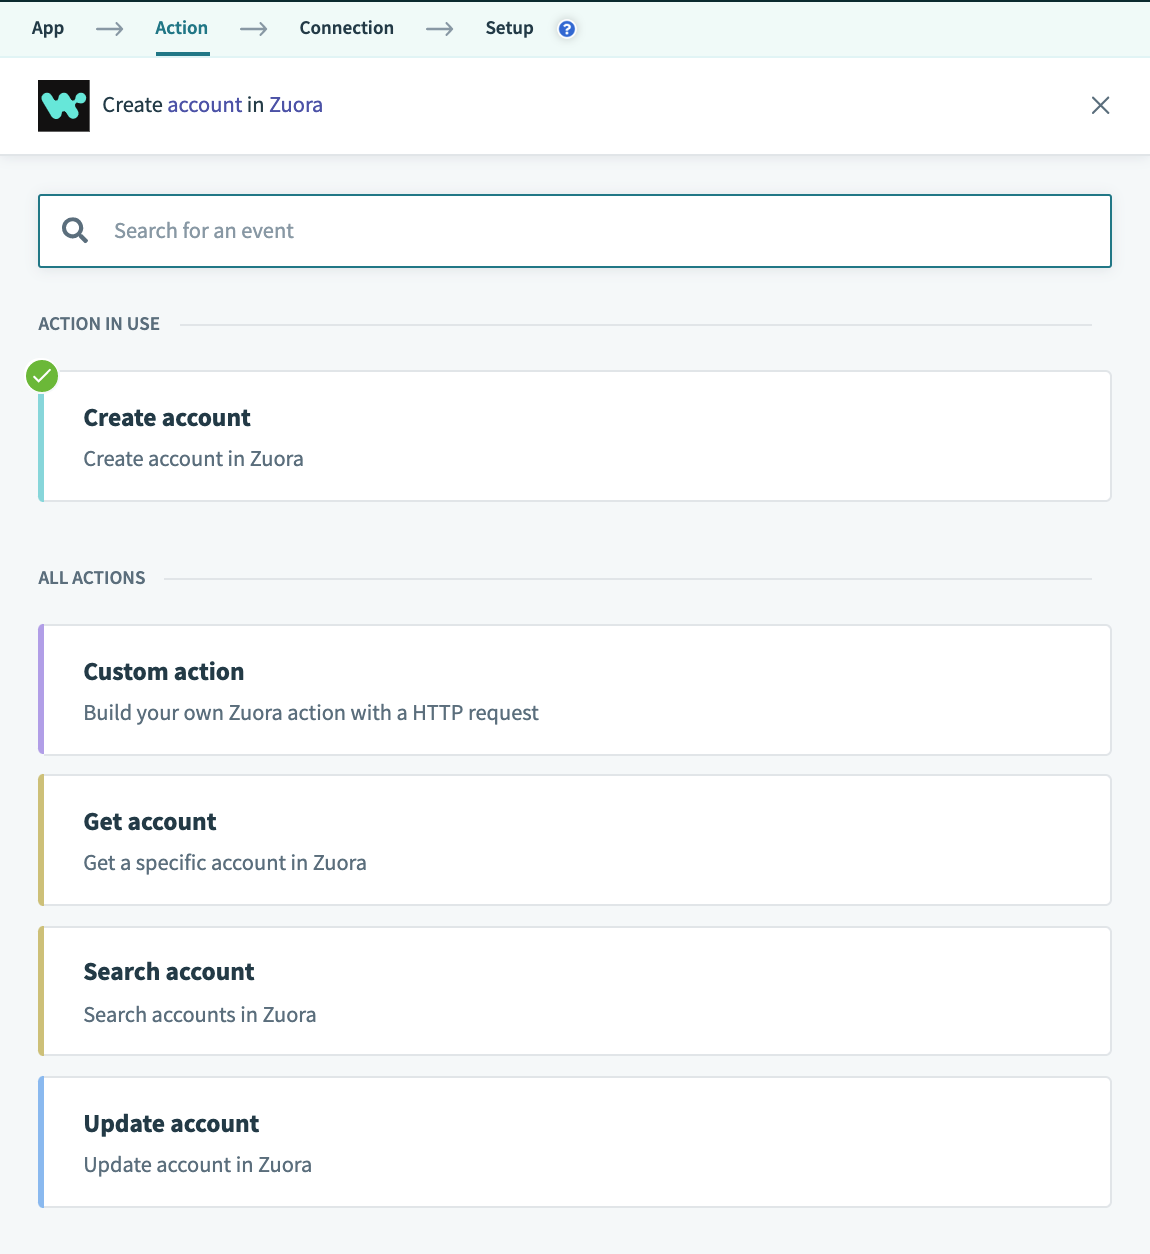 Selecting the create account action
Step 1 - Action title, subtitle, description, and help
The first step to making a good action is to properly communicate what the actions does, how it does it and to provide additional help to users. To do so, Workato allows you to define the title, description, and provide hints for an action. Quite simply, the title is the title of an action and the subtitle provides further details of the action. The description of the action then contains specifications and explanation on what the action accomplishes and in the context of the application it connects to. Finally, the help segment provides users any additional information required to make the action work.
To know more about this step, take a look at our SDK reference
Step 2 - Define input fields
input_fields: lambda do |object_definitions|
[
{
name: "AccountNumber",
label: "Account Number",
hint: "Unique account number assigned to the account. " \
"Leave null to auto-generate."
},
{
name: "AccountName",
label: "Account name",
hint: "The name of newly created account."
},
{
name: "Currency",
label: "Currency",
hint: "Currency that the customer is billed in.",
optional: false
}
]
end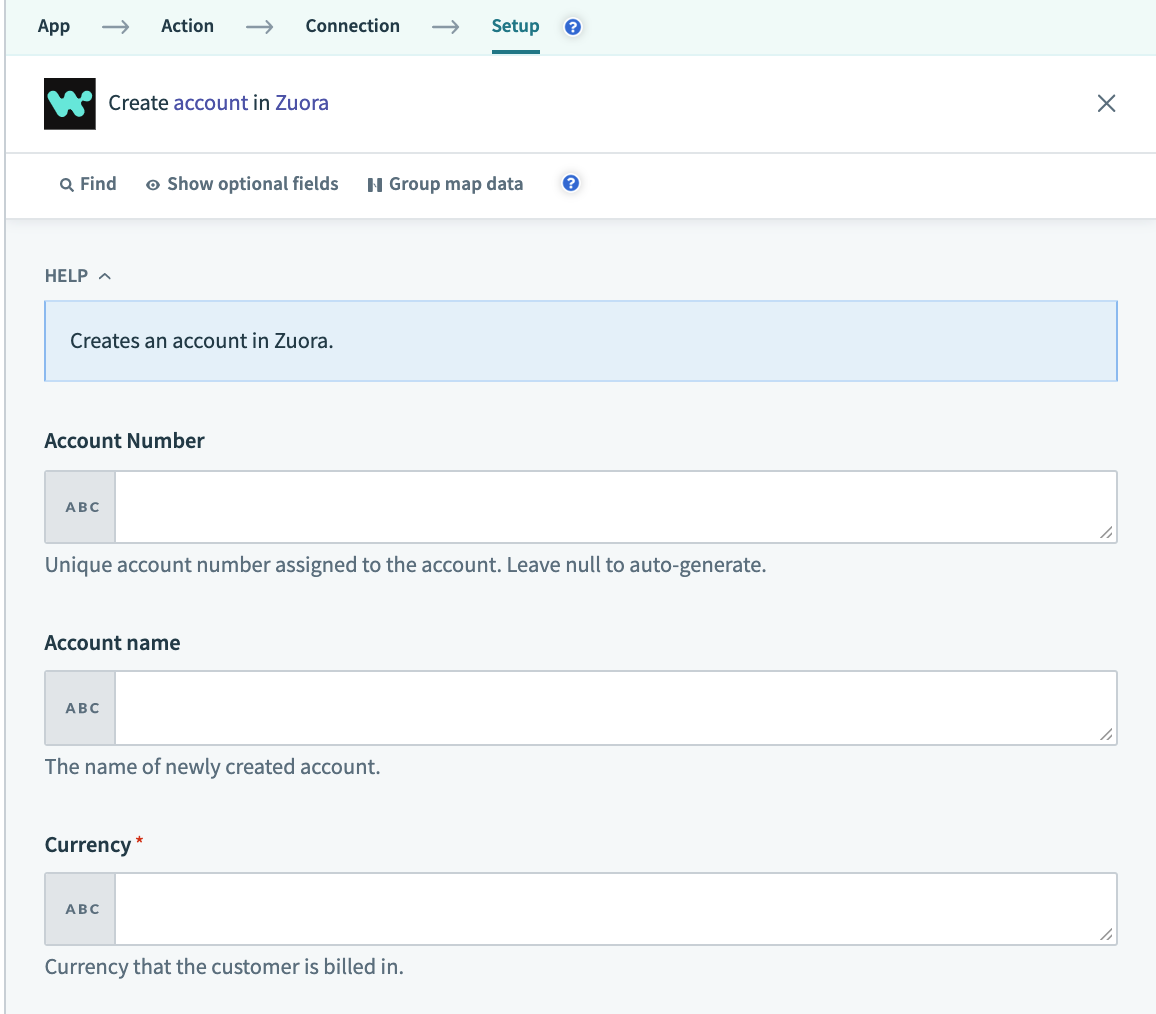 Create account input fields
This component tells Workato what fields to show to a user trying to create an object. In the case of creating an account in Zuora for example, the user has to input the AccountNumber, AccountName and Currency of the new account to be created. Do take note that for the Currency input field, the "optional" key is assigned the value "false", this means that users must provide a value of the currency that the customer is billed in, if not, the user cannot proceed in the building of the recipe.
Various other key value pairs exist for input/output fields other than the ones defined above. Refer to Input fields for more information.
Object definitions
Note that object_definitions is passed in as an argument. Workato allows connector builders to supply the definitions of an object separately in the "object_definitions" key. This key is used when the definitions of an object are large and/or can be dynamically obtained.
To know more about this, take a look at our SDK reference
Step 3 - Defining the execute key
The execute key tells Workato the endpoint to send the request to and using which HTTP request method. In this example, we send our request to https://rest.zuora.com/v1/object/account using the POST method. We also append the after_error_response method to the request to catch any errors and to display them to users to aid in the debugging during recipe building.
execute: lambda do |connection, input|
post("https://rest.zuora.com/v1/object/account", input).
after_error_response(/.*/) do |_, body, _, message|
error("#{message}: #{body}")
end
end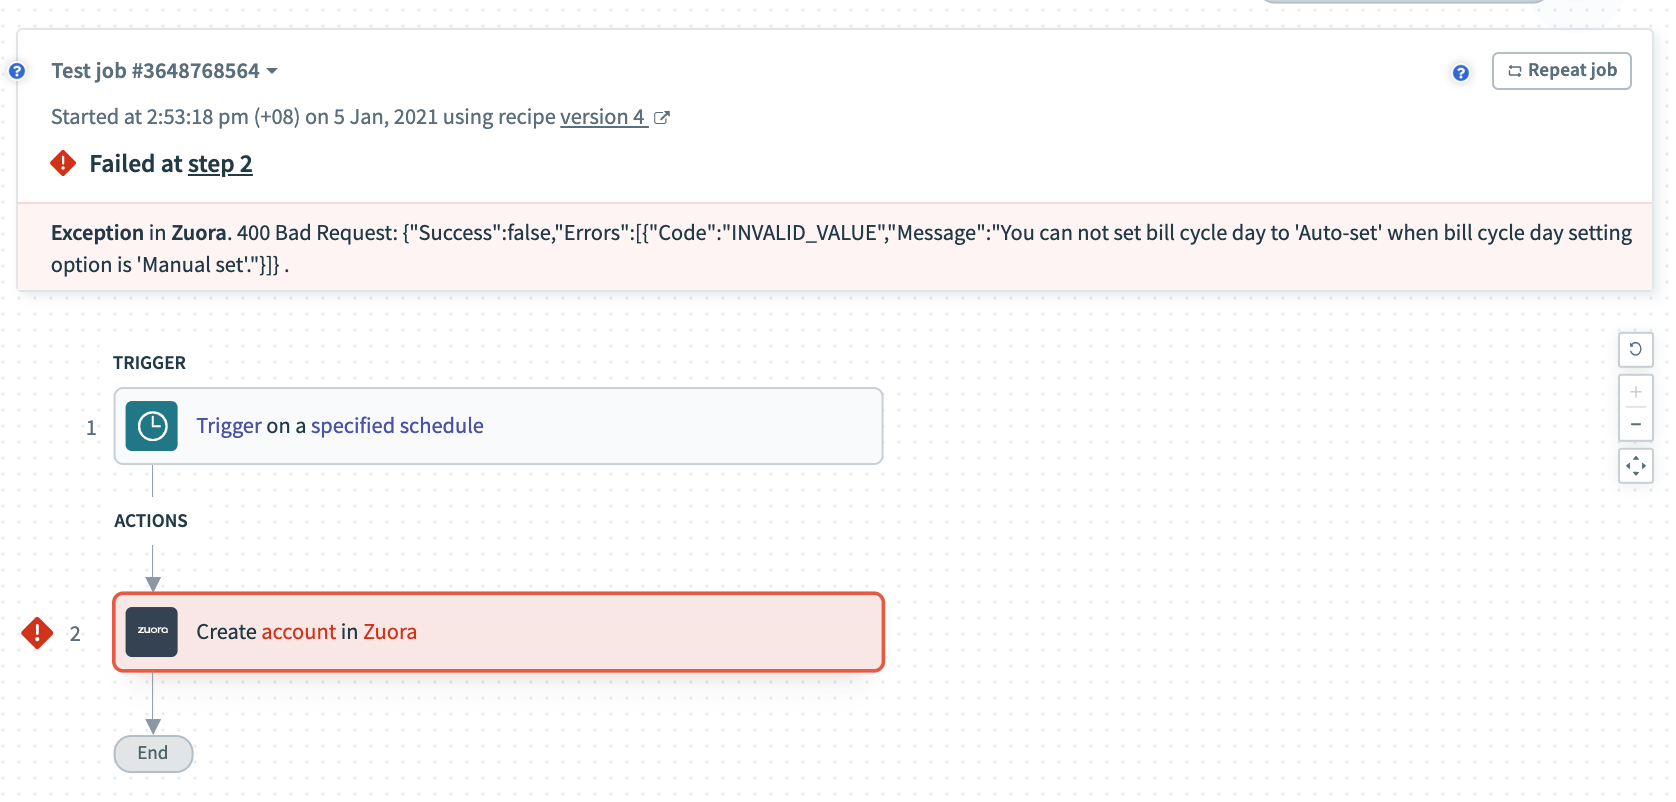 Error example
To know more about the execute key, take a look at our SDK reference
Step 4 - Defining output fields
This section tells us what datapills to show as the output of the trigger. The name attributes of each datapill should match the keys in the output of the execute key.
output_fields: lambda do |object_definitions|
[
{ name: "Success", type: "boolean", control_type: "checkbox" },
{ name: "Id" },
{
name: "Errors",
type: "array",
of: "object",
properties: [{ name: "Code" }, { name: "Message" }]
}
]
end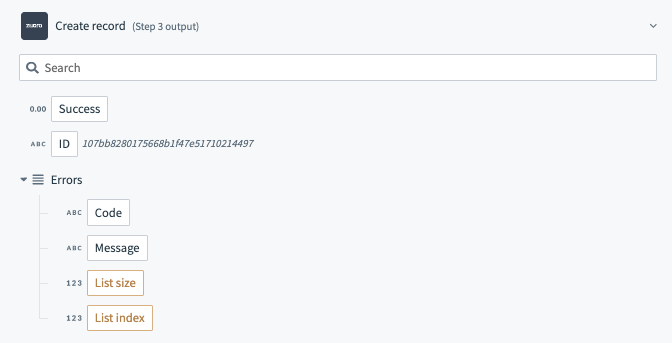 Create account output fields
To know more about the output fields key, take a look at our SDK reference
Object definitions
Note that object_definitions is passed in as an argument. Workato allows connector builders to supply the definitions of an object separately in the "object_definitions" key. This key is used when the definitions of an object are large and/or can be dynamically obtained.
To know more about this, take a look at our SDK reference
Step 5 - Defining sample output
A supplementary component to a connector, the sample output key nonetheless greatly improves a user's experience by telling users the general data type and format of output fields to expect. This allows users to build recipes more quickly.
  sample_output: lambda do |connection, input|
    {
      "success" => "true",
      "Id" => "107bb8280175668b1f47e51710214497"
    }
  end
To know more about the sample output key, take a look at our SDK reference
Last updated: