# How-to guides - Enabling custom actions
In this segment, we will be going through the enabling of custom actions effectively. Custom actions are a great way to implement a "Catch All" for users of your connector. Take note that all requests sent from your custom action will inherit your authorization details like tokens as well as authorization logic for token refresh.
ACTION TIMEOUT
SDK actions have a 180 second timeout limit.
You can use the checkpoint! method with file streaming actions to transfer files that exceed the timeout limit. The checkpoint! method checks the duration of an action's execution. If it exceeds 120 seconds, Workato refreshes the timeout with a slight delay to ensure fair processing.
# Sample connector code
{
  title: 'Acme',
  connection: {
    fields: [
      {
        name: 'client_id',
        control_type: 'text',
        label: 'OAuth App Client ID',
        optional: 'false'
      },
      {
        name: 'client_secret',
        control_type: 'password',
        label: 'OAuth App Client secret',
        optional: 'false'
      },
      {
        name: 'advanced_settings',
        type: 'object',
        properties: [
          {
            name: 'oauth_scopes',
            control_type: 'multiselect',
            delimiter: ' ',
            hint: 'By default, only scopes for Reading and writing contacts are requested',
            options: [
              [ 'Read contacts', 'contacts.read' ],
              [ 'Write contacts', 'contacts.write' ],
              [ 'Read Invoices', 'invoices.read' ],
              [ 'Write Invoices', 'invoices.read' ],
            ]
          }
        ]
      }
    ],

    authorization: {
      type: 'oauth2',

      client_id: lambda do |connection|
        connection['client_id']
      end,

      client_secret: lambda do |connection|
        connection['client_secret']
      end,

      authorization_url: lambda do |connection|
        scopes = connection.dig('advanced_settings', 'oauth_scopes') || ['contacts.read', 'contacts.write'].join(" ")
        "https://api.acme.com/oauth/authorize?scopes=#{scopes}"
      end,

      token_url: lambda do |connection|
        "https://api.acme.com/oauth/token"
      end,

      apply: lambda { |connection, access_token|
        headers(Authorization: "Bearer #{access_token}")
      }
    },

    base_uri: lambda do |connection|
        "https://api.acme.com/"
    end
  },

  custom_action: true,

  custom_action_help: {
    learn_more_url: 'https://www.acme.com/api/reference',

    learn_more_text: 'Acme API documentation',

    body: 'Build your own Acme action with a HTTP request. The request will be authorized with your current connection.'
  }
}
# Step 1 - Configuring the connection
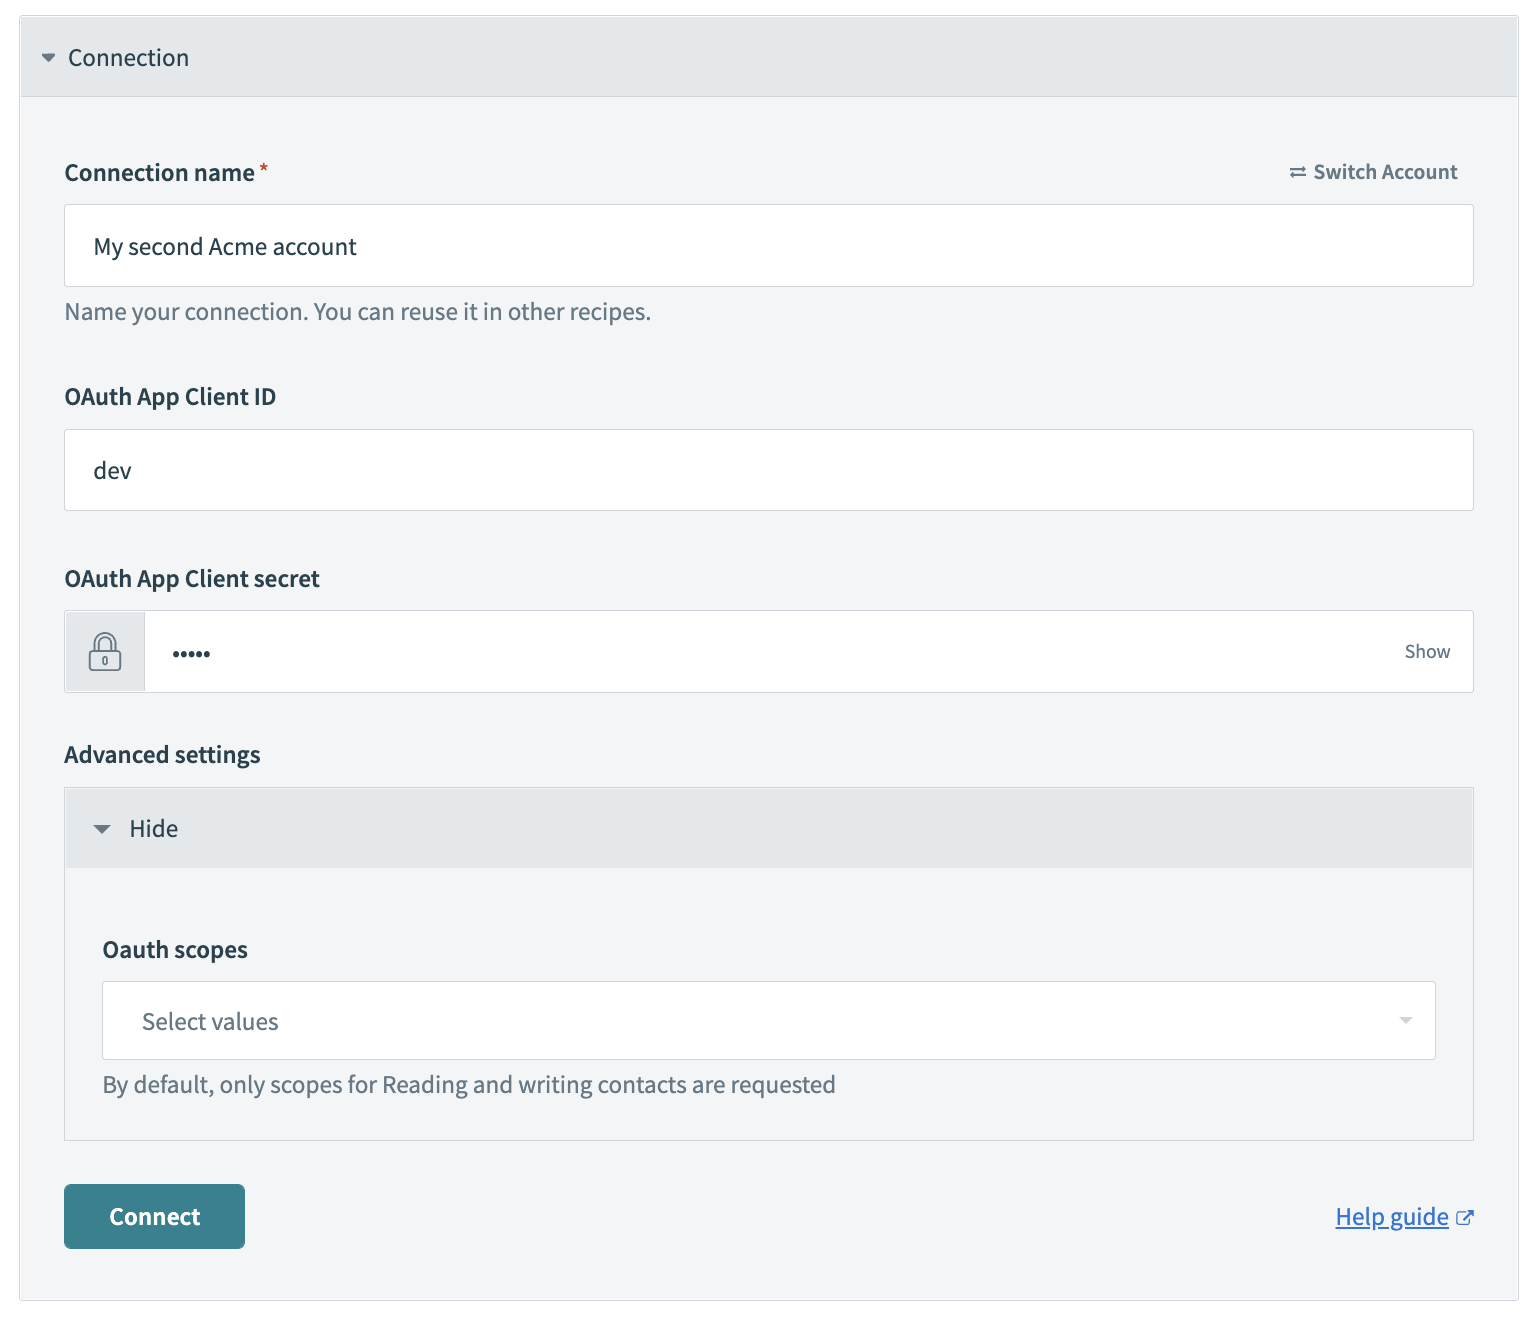
Since the authorization credentials dictate the scope and permission of the connection, it is important to consider what custom actions may be used for - some endpoints require different scopes and permissions. This may include additional scopes and permissions that are not necessary for default actions.
In the example above, we have included a simple example for OAuth2 where users may add additional OAuth scopes as needed for their custom actions in the future.

# Step 2 - Define the custom action
  custom_action: true,

  custom_action_help: {
    learn_more_url: 'https://www.acme.com/api/reference',

    learn_more_text: 'Acme API documentation',

    body: 'Build your own Acme action with a HTTP request. The request will be authorized with your current connection.'
  }
This component tells Workato that you want custom actions enabled for your connector as well as allows you to add additional guidance to users. In particular, you should add relevant help links to API documentation to make it easier for users to find a reference when configuring their custom actions.
# Security considerations
Because custom actions can allow inputs to the URL path, you must consider how custom actions will be used by users in your organization. Path traversal attacks are possible if you allow user provided inputs such as datapills in your path.
Learn more about path traversal attacks here (opens new window).
Enhance your security posture by using the following mitigation strategies:
- Within your organization, enforce that user-defined inputs (such as datapills representing data written by users) should not be supplied to URL path inputs or any other inputs that represent a path to a file
- Inquire with your API vendor regarding their inputs about path traversal attacks. Understand how they mitigate such attacks and enforce further validations as needed in your recipes before allowing user inputs to be placed in sensitive fields.
Last updated: 5/22/2025, 4:42:29 AM