Using the Workato Connector SDK
Workato's Connector SDK has many features that enable you to build, test, develop, and share your custom connector. In this article, we will describe the basic functionalities of the platform, and how you can leverage different Workato features to simplify your connector development process.
Before you begin
Navigating to the SDK platform homepage
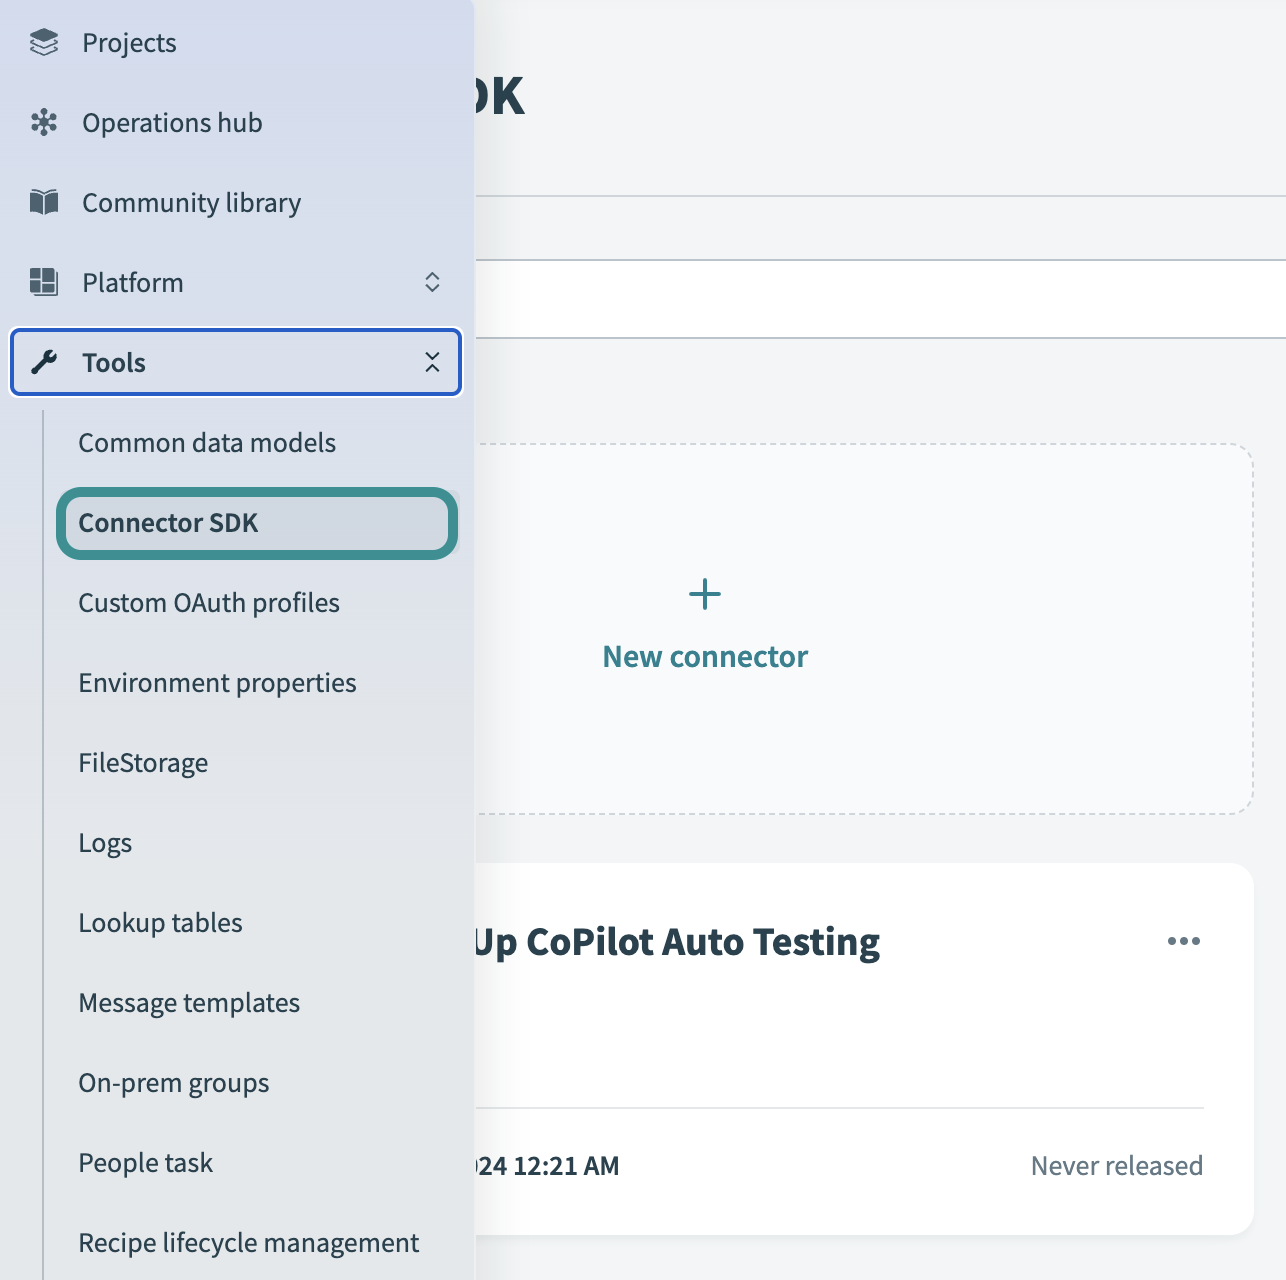
Go to Tools > Connector SDK. Your custom connectors registry appears, and you can now see all custom connectors that you built yourself, or cloned from your colleagues. Visit the Connector SDK page if you're signed in.
 Located in the top navigation bar in Workato. This may appear differently on your screen, depending on your subscription plan.
Creating a new custom connector
Start creating a new connector on the main SDK tool home page. All your connectors appear in your workspace, including the connectors you built yourself and the connectors you installed from the community.
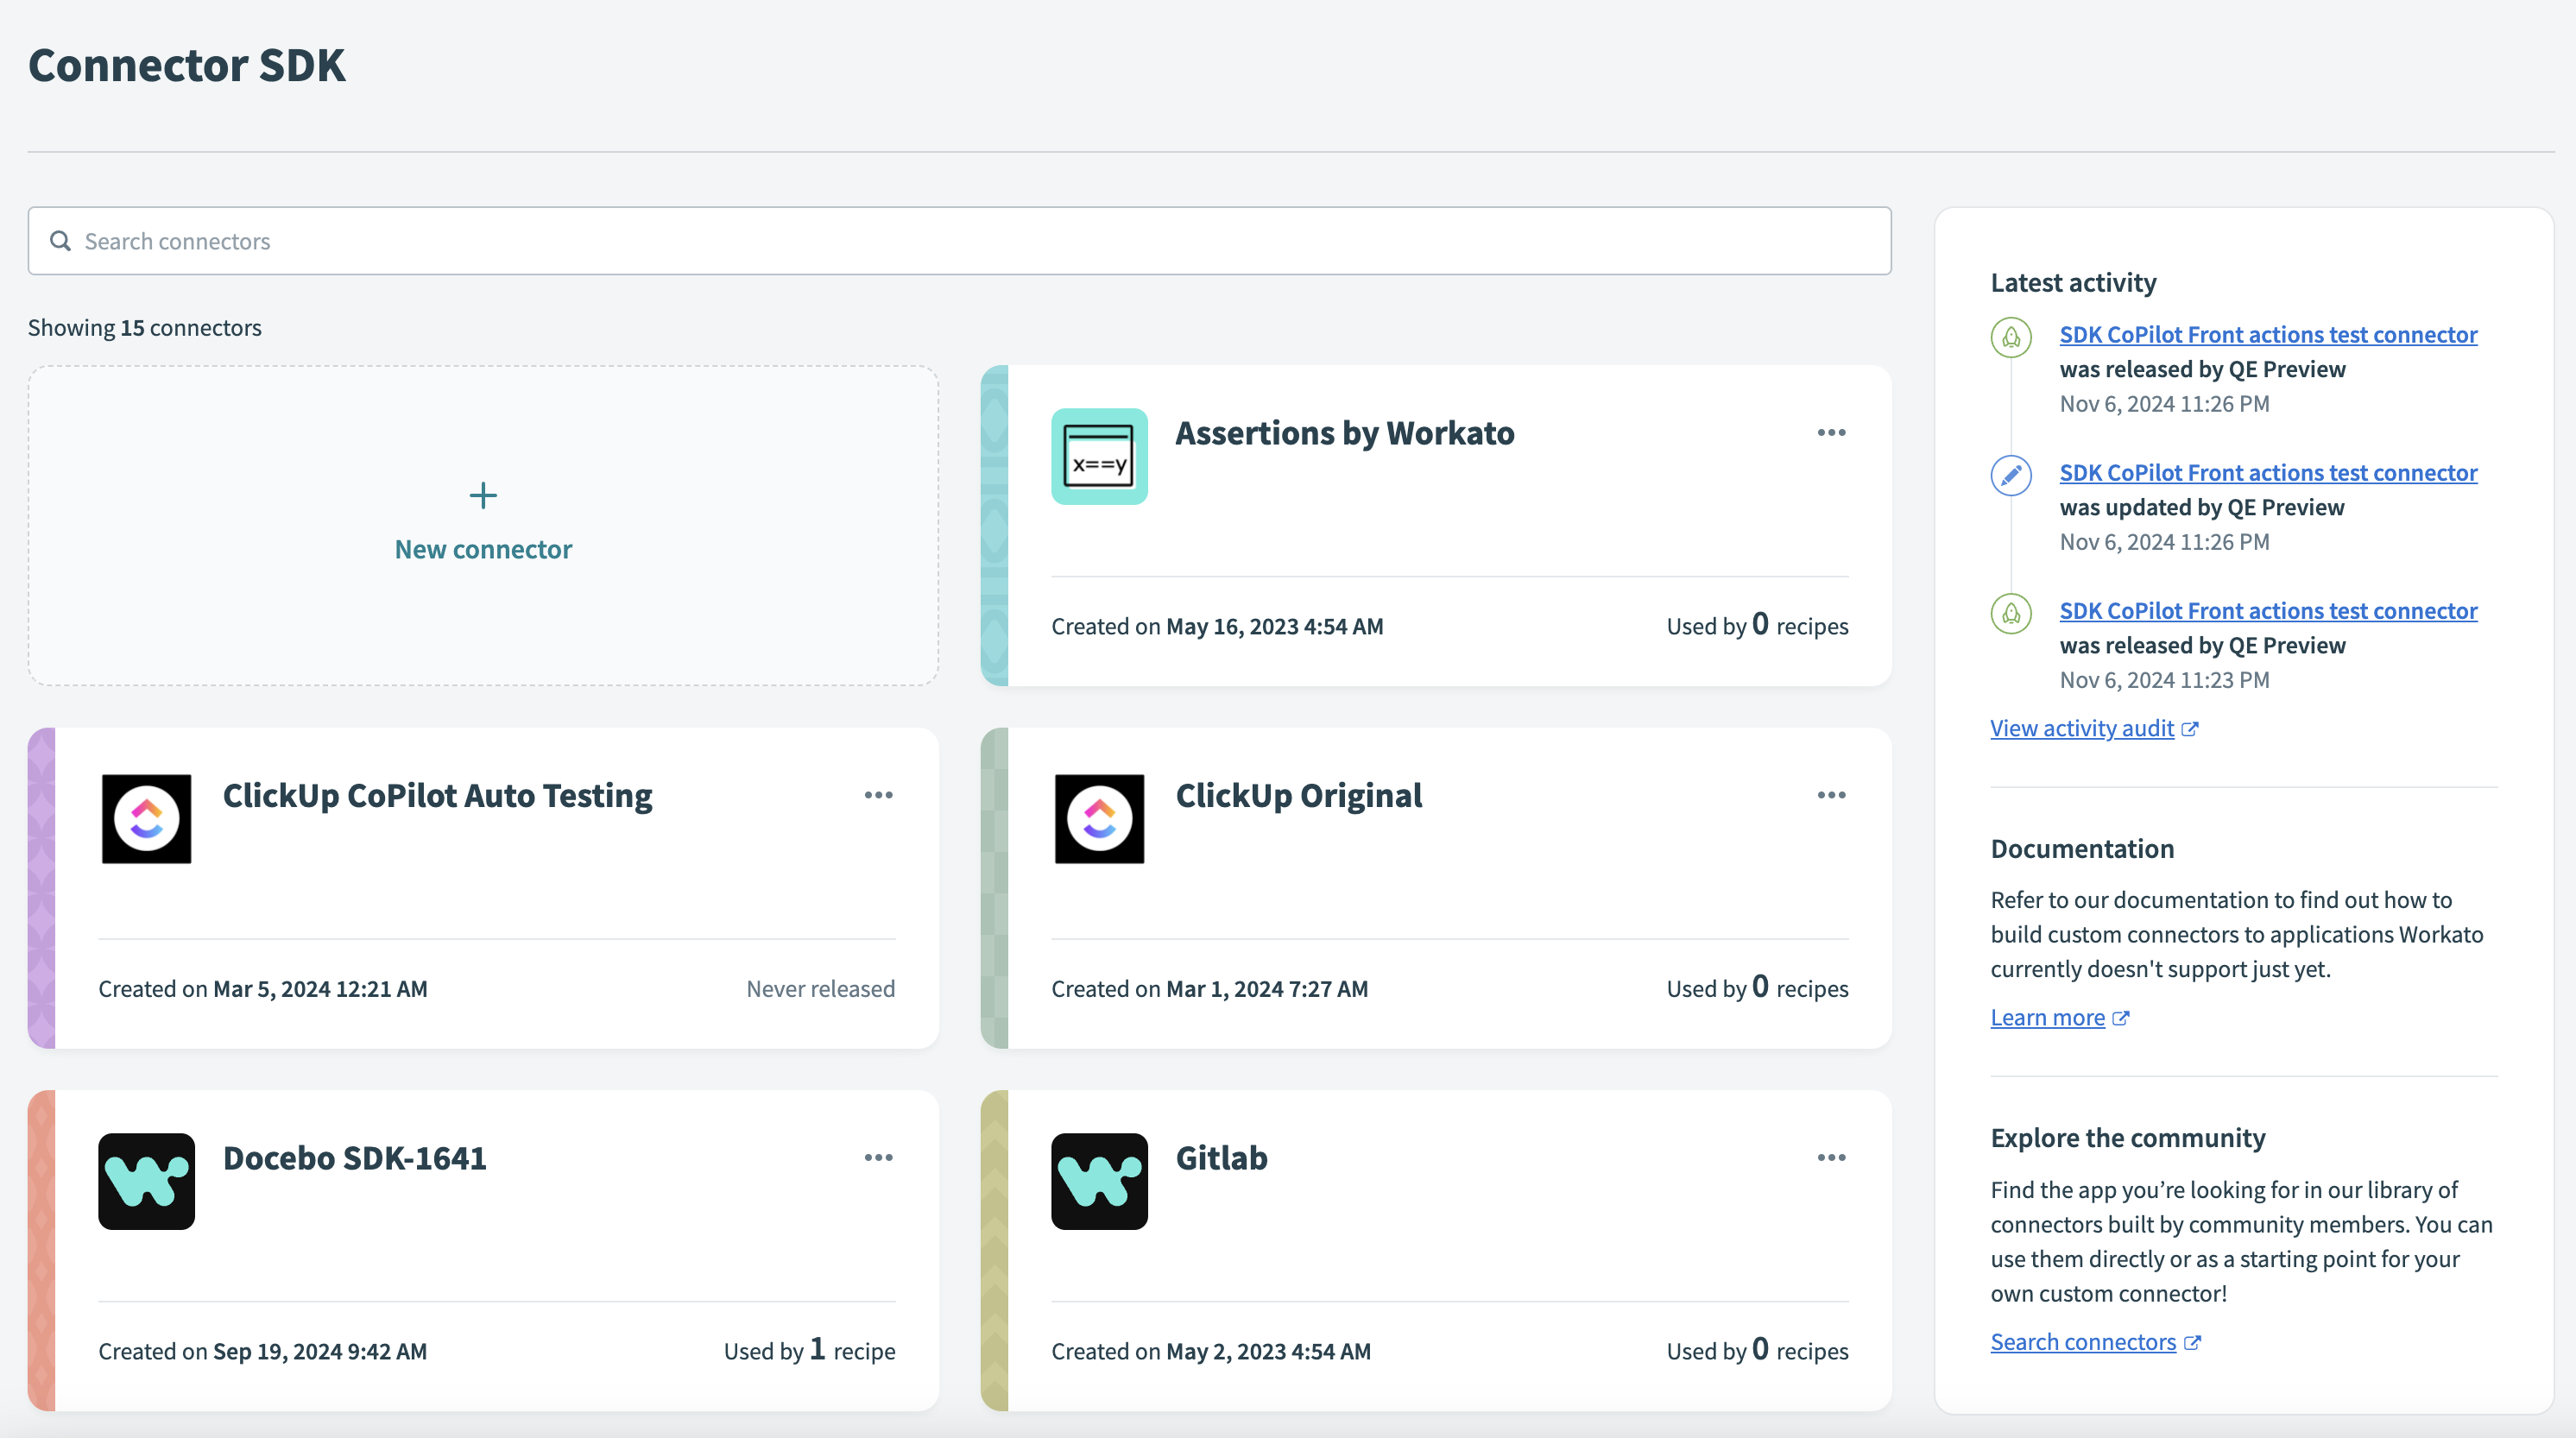
Creating a new connector starts clicking on the New connector button which will bring up a wizard that allows you to either create a connector from two starting points:
Creating a connector using sample code
Provide a suitable name for your connector. This is often the name of the application you are connecting to. You can also provide a logo for your connector. Ensure that this logo corresponds to the logo of the application you are connecting. We recommend that you populate these fields to make it easier to search your personal registry for the custom connector.
Workato then supplies a sample connector for Calendly. Calendly is a free scheduling software that you can use on a trial basis, to begin developing and using the connector. Notice the comments in the connector code that direct you further on how to build authentication, actions, and triggers.
Creating a connector by importing an OpenAPI specification
This option allows you to generate a ready-to-use connector from an existing OpenAPI specification. Learn more
Changing your connector title, description, and logo
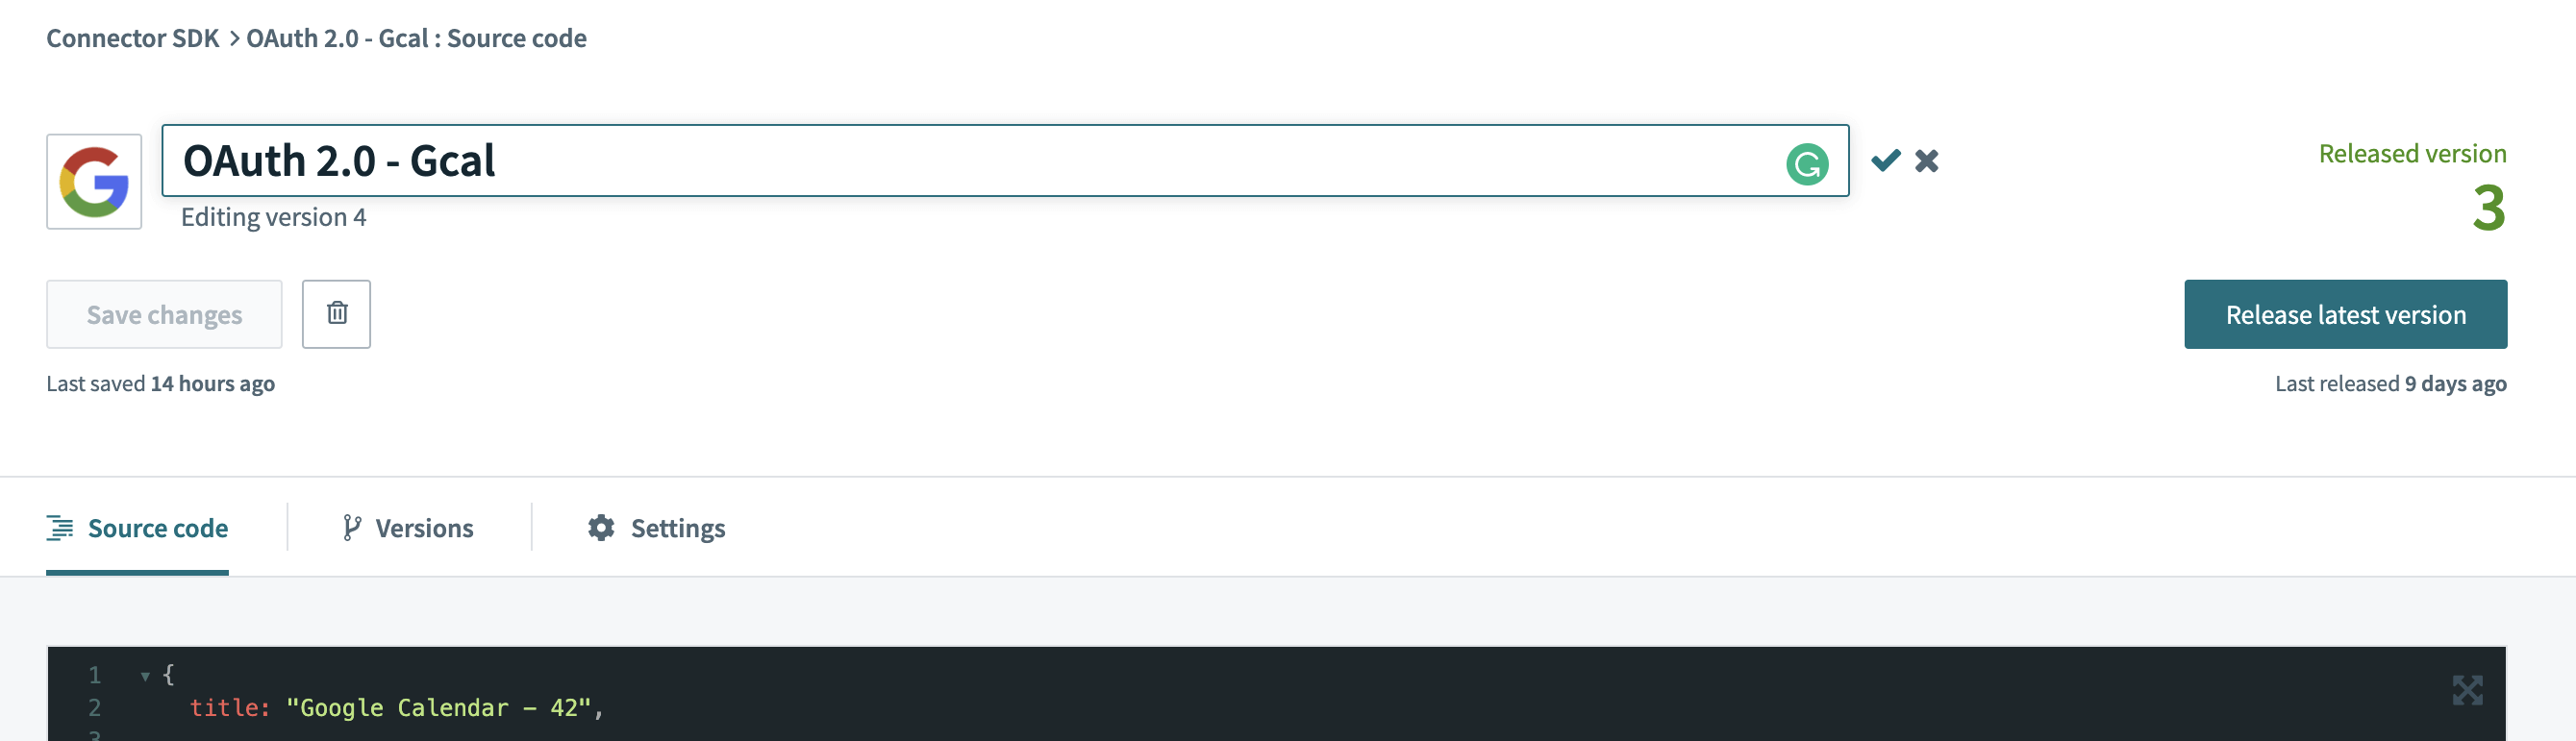
You can change the custom connector title by clicking the pencil (edit) icon next to the custom connector, and changing the name. You can then save your changes by clicking the green tick icon (confirmation).
 Select the green tick or blur out of the field to save
To change the logo of the custom connector, click the logo image. This prompts your browser to open a system upload window so you can select a new logo to upload. This logo represents your custom connector in your registry, and appears when you use this custom connector in recipes.
![]() Select the icon logo to upload an icon from your local machine
Select the icon logo to upload an icon from your local machine
Change your connector description by navigating to the Settings tab in the custom connector home page. This tab contains information that includes a text input field for the description of your connector. The description lets other users know more about your connector when they see it in the community library.
 Use the Settings tab to change your description
Using the Workato Code editor
The Workato SDK platform uses the Code Mirror for editing your connector code. When writing your connector code, you can see all syntax or code errors in real time. Workato has a set of allowed ruby methods that we allow for use in the code editor. This means that any ruby method not on our allowed list results in highlighted errors if called by the code inside your connector.
Note that the code editor has a set of basic hotkeys that make your experience easier.
- Persistent Search
- PC: Ctrl-F
- MacOS: Cmd-F
- Replace
- PC: Shift-Ctrl-F
- MacOS: Cmd-Option-F
- Replace all
- PC: Shift-Ctrl-R
- MacOS: Shift-Cmd-Option-F
Deleting a custom connector
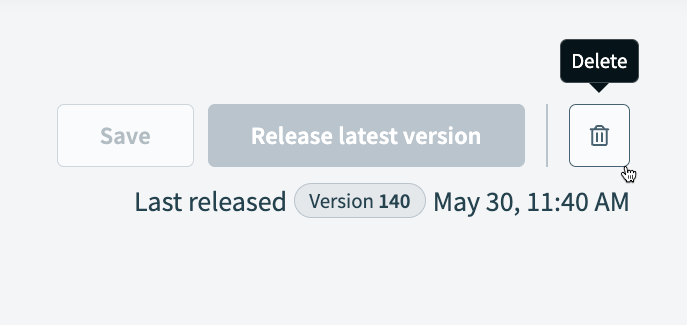
Click Delete to delete a custom connector.
 Delete a custom connector
You can't delete a custom connector that’s used by an active recipe. If the connector is in use, Workato displays the associated active recipes when you click Delete. You must stop the listed recipes before deleting the connector.
 Stop or edit these recipes to delete a custom connector
Workato shows any stopped recipes that will be affected by the deletion. Deleting a custom connector doesn't delete its clones. Clones are independent copies.
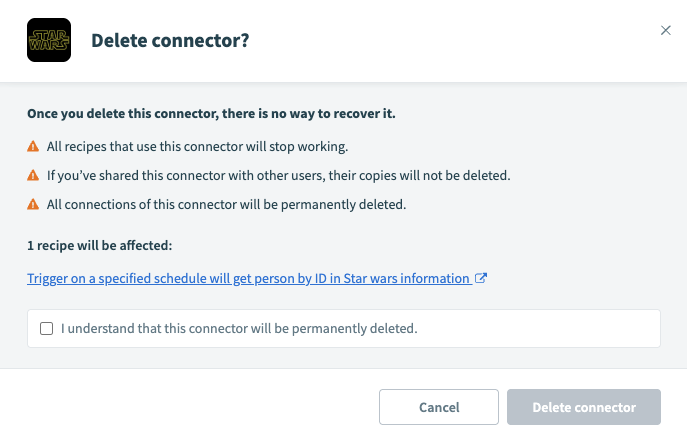 When you delete a custom connector, you cannot recover it
Last updated: