Configure SAP Concur as a data pipeline source
Set up SAP Concur as a data pipeline source to extract and sync expense reports, invoices, users, lists, and related travel and expense records from the SAP Concur APIs to your destination.
Use this guide to review the features and prerequisites, generate SAP Concur credentials, connect SAP Concur as a data pipeline source, configure the pipeline, and understand the supported objects, sync modes, schema handling, sensitive data handling, and limitations.
Features supported
The following features are supported when you use SAP Concur as a pipeline source:
- Cloud connectivity: Connects to the SAP Concur APIs over https. SAP Concur is a cloud-hosted platform, so an on-prem agent isn't required. The connector routes each request to your assigned SAP Concur data center automatically.
- Production and sandbox support: Connect to a production instance or to an implementation (sandbox) instance through the Implementation instance setting.
- Object-level selection: Choose the supported objects you plan to sync when you configure the pipeline.
- Sync modes: The
report,payment_request, andtravel_requestobjects sync incrementally. All other objects use full sync. - Delete tracking: A subset of objects carries a source-driven soft-delete signal. Full-sync objects reflect deletions through destination-side snapshot comparison.
- Schema drift handling: Choose to auto-sync or block newly added fields in the source.
- Field-level data protection: Replicate field values as is or hash sensitive values before they reach your destination.
- Configurable sync frequency: Schedule syncs with time-based or cron-based schedules. The minimum interval is 15 minutes.
Prerequisites
Complete the following requirements before you configure SAP Concur as a data pipeline source:
- A SAP Concur account with the modules you plan to sync licensed. SAP Concur licenses Expense, Invoice, Travel, and Request as separate modules. Refer to Module licensing for more information.
- An OAuth 2.0 application in SAP Concur, with a client ID and client secret and at minimum the
EXPRPTscope. Refer to Create an OAuth 2.0 application for setup steps. - Credentials for your chosen authentication method:
- Authorization code grant: A SAP Concur user who can authorize the connection through the browser sign-in flow, plus a custom OAuth profile in Workato that stores your client ID and client secret.
- Password grant: Your SAP Concur username and password, plus the client ID and client secret from your OAuth application.
- Refresh token grant: A refresh token generated from a company request token, plus the client ID and client secret from your OAuth application.
CONNECTION TYPE DETERMINES OBJECT AVAILABILITY
The authentication type you choose determines which objects a connection can sync, because it sets whether the connection is user-typed or company-typed. A user-typed connection can't sync the user object, and a company-typed connection can't sync the payment_type object. Refer to Connection type determines object availability for more information.
Supported connection types
SAP Concur data pipelines support OAuth 2.0 authentication through the following grant types:
- Authorization code grant: Authorizes the connection through the SAP Concur browser sign-in flow. Select this method to authenticate as the signing-in user without storing a username and password in Workato.
- Password grant: Authenticates with your SAP Concur username and password, plus your OAuth application's client ID and client secret. A password grant connection is user-typed. Use this method to sync the
payment_typeobject. - Refresh token grant: Authenticates with a refresh token generated from a company request token, plus your OAuth application's client ID and client secret. A refresh token grant connection is company-typed. Use this method to sync the
userobject.
The connection's token type determines which objects it can sync. No single connection syncs both user and payment_type. Refer to Connection type determines object availability for more information.
Connect to SAP Concur
Complete the following steps to connect to SAP Concur:
Connect to SAP Concur
The SAP Concur connector supports the following OAuth 2.0 authentication types:
REQUIRED SCOPE
You must add the EXPRPT scope when connecting to SAP Concur. SAP Concur returns a Forbidden Request error without this scope.
Create an OAuth 2.0 application
All authentication methods require an OAuth 2.0 application in your SAP Concur instance. Complete the following steps to create a OAuth 2.0 application, or refer to the OAuth 2.0 Application Management Tool documentation:
Sign in to your SAP Concur instance with administrator credentials.
Go to Administration > Company > Authentication Admin.
Select OAuth 2.0 Application Management from the menu.
Click Create new app.
Enter a descriptive name for your application in the App Name field, such as Workato Integration.
Enter a description for your application in the App Description field.
Select your environment in the App Stage field. Choose Development, Test, or Production.
Select your application type in the Application Type field. Choose Web Services (WS) Client or Integration with Concur Solutions (ICS) Client.
Select the grants your integration requires in the Allowed Grants field. Select password and refresh_token for password grant or refresh token grant authentication, or authorization_code for authorization code grant authentication.
Enter https://www.workato.com/oauth/callback in the Redirect URIs field for authorization code grant authentication. This field appears only when you select authorization_code.
Configure the allowed scopes for your integration. You must include EXPRPT at minimum. Refer to the Required scopes by trigger and action section to identify additional scopes required by the triggers and actions you plan to use.
Alternatively, you can click Enter Manually and copy and paste the following scopes to enable full connector functionality:
ATTEND
CONFIG
expense.report.read
expense.report.readwrite
EXPRPT
identity.user.core.read
identity.user.coreenterprise.writeonly
identity.user.coresensitive.read
identity.user.enterprise.read
identity.user.externalID.writeonly
identity.user.ids.read
identity.user.sap.read
IMAGE
INVPMT
INVVEN
LIST
openid
spend.list.read
spend.list.write
spend.listitem.delete
spend.listitem.read
spend.listitem.write
spend.user.general.read
spend.user.general.writeonly
travel.user.general.read
travel.user.private.read
user.provision.read
user.provision.write
user.read
user.writeClick Submit.
Record your Client ID and Client Secret in a secure location. These values are required to establish the connection in Workato.
SAVE YOUR CREDENTIALS
The client secret is only displayed once. You must regenerate the client secret or create a new application if you lose it.
Refresh token grant
Use the refresh token grant authentication method for production instances. Contact your Concur account manager to receive refresh token credentials.
Generate a company request token
A company request token is a temporary, one-time authentication password used by administrators to connect external apps to the SAP Concur.
Complete the following steps to generate a company request token:
Go to the SAP Concur admin panel, and click Administration > Company > Authentication Admin.
Select Company Request Token from the menu.
Enter your App ID (Client ID) from the OAuth application you created in the previous section.
Click Submit.
Record the following information displayed in the success dialog:
- Company UUID: Your company's unique identifier.
- Company Request Token: A temporary token that expires in 24 hours.
TOKEN EXPIRATION
The company request token expires after 24 hours. You must regenerate the token if you don't complete the next steps within 24 hours.
Click OK to close the dialog.
Obtain a refresh token
Complete the following steps to obtain a refresh token using your company request token:
Open an API client of your choice, such as Postman or cURL.
Create a POST request to the SAP Concur OAuth2 token resource using the endpoint that matches your SAP Concur environment:
- Production:
https://us.api.concursolutions.com/oauth2/v0/token - Implementation (Test):
https://us-impl.api.concursolutions.com/oauth2/v0/token
Configure the request body with the following parameters in x-www-form-urlencoded format:
- client_id: Your Client ID from the OAuth application
- client_secret: Your Client Secret from the OAuth application
- username: Your Company UUID from the Company Request Token step
- password: Your Company Request Token from the Company Request Token step
- grant_type:
password - credtype:
authtoken
Example Postman configuration:
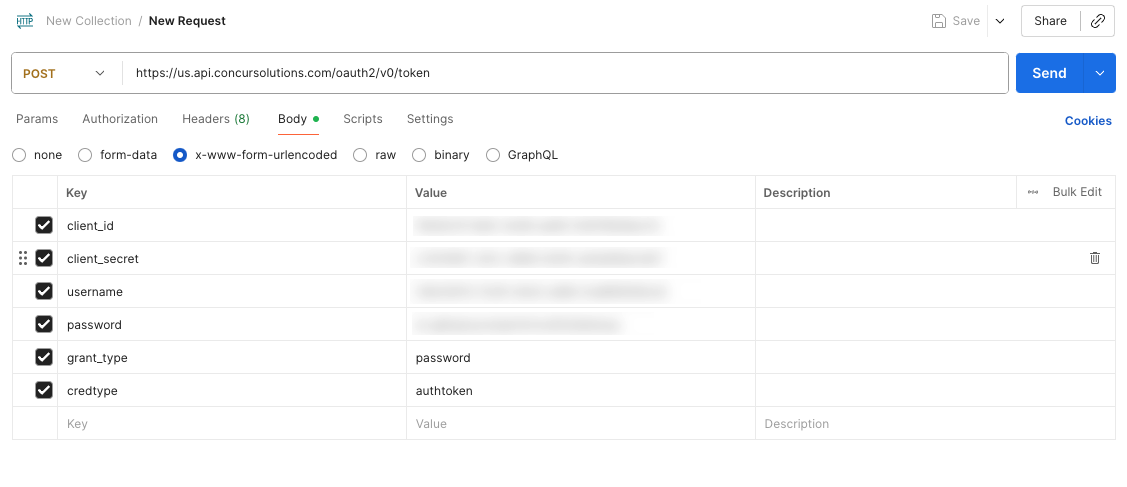 Postman configuration
Send the request.
Record the refresh_token value in a secure location. This value is required to establish the SAP Concur connection in Workato.
Connect to SAP Concur using refresh token grant
Complete the following steps to connect to SAP Concur using refresh token grant authentication:
Click Create > Connection or press C twice.
Search for SAP Concur and select it as your app.
Enter a name for your connection in the Connection name field. Give this connection a unique name that identifies which SAP Concur instance it's connected to.
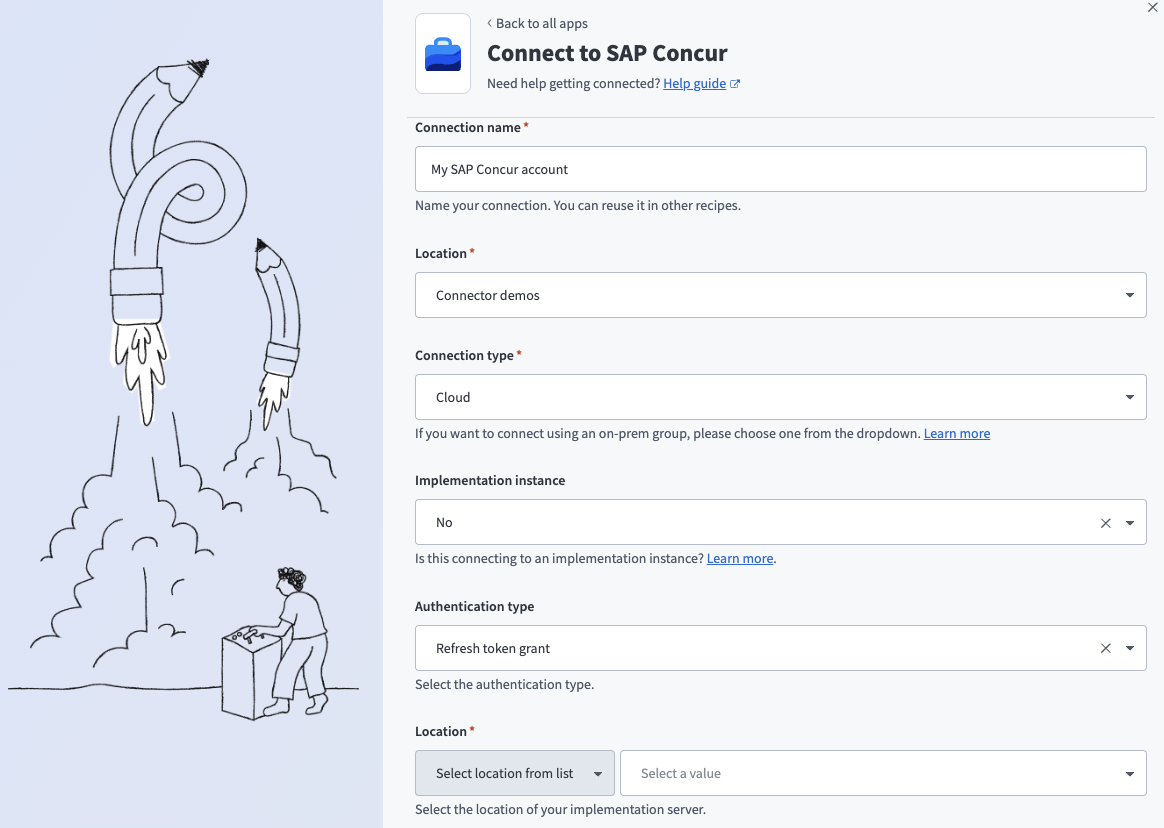 Connect to SAP Concur
Use the first Location drop-down menu to select the project or folder to store your connection.
Use the Implementation instance drop-down menu to select whether you're connecting to a Concur implementation server. Select Yes if connecting to an implementation server. Defaults to No for existing connections.
Use the Authentication type drop-down menu to select Refresh token grant.
Use the second Location drop-down menu to select the location of your Concur implementation server.
Enter the client ID from your application in the Client ID field.
Enter the client secret from your application in the Client secret field.
Enter the refresh token from your application in the Refresh token field.
Click Connect.
Password grant
Use the password grant authentication method for sandbox instances.
Connect to SAP Concur using password grant
Complete the following steps to connect to SAP Concur using password grant authentication:
Click Create > Connection or press C twice.
Search for SAP Concur and select it as your app.
Enter a name for your connection in the Connection name field. Give this connection a unique name that identifies which SAP Concur instance it's connected to.
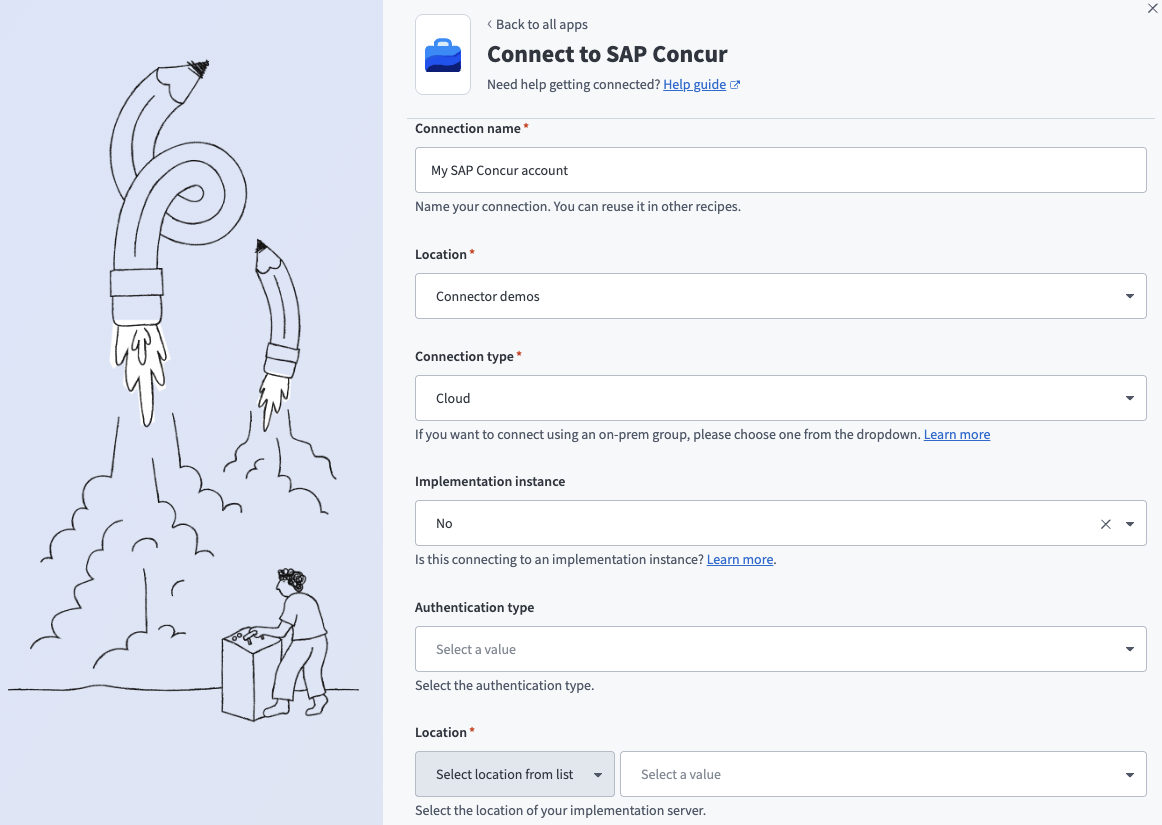 Connect to SAP Concur
Use the first Location drop-down menu to select the project or folder to store your connection.
Use the Implementation instance drop-down menu to select whether you're connecting to a Concur implementation server. Select Yes if connecting to an implementation server. Defaults to No for existing connections.
Use the Authentication type drop-down menu to select Password grant.
Enter your SAP Concur Username.
Enter your SAP Concur Password.
Use the second Location drop-down menu to select the location of your Concur implementation server.
Enter the Client ID from your application.
Enter the Client secret from your application.
Click Connect.
Authorization code grant
Use the authorization code grant authentication method to authenticate with SAP Concur using an interactive OAuth login flow.
Authorization code grant authentication is required if you plan to use Verified User Access (VUA). VUA isn't compatible with other grant types, including API keys, basic auth, and other OAuth 2.0 flows.
This option requires a custom OAuth profile configured with your SAP Concur client credentials.
Set up a custom OAuth profile
Authorization code grant authentication requires a custom OAuth profile in Workato. The profile stores your SAP Concur client credentials and is required to complete the connection. Workato returns an error if you select authorization code grant without a custom OAuth profile, or if the profile is missing a client ID or client secret.
Complete the following steps to create a custom OAuth profile:
Go to Tools > Custom OAuth profiles.
Click + New custom profile.
Search for SAP Concur and select it as your app.
Enter a name for the profile.
Enter the Client ID and Client secret from the OAuth application you created.
Click Save.
Minimum and default scopes
Ensure your SAP Concur OAuth app has every scope you request in the connection settings. The connection fails with a 400 Bad Request error if a requested scope isn't enabled in your OAuth app.
The minimum required scopes are openid, user.read, and EXPRPT. Ensure your OAuth app has these minimum scopes configured. Workato requests the following default scopes if you leave the Scopes field blank:
openiduser.readuser.writeEXPRPTexpense.report.readexpense.report.readwriteLISTspend.list.readspend.list.writespend.listitem.readspend.listitem.writespend.listitem.deleteIMAGEATTENDCONFIGINVPMTINVVENidentity.user.core.readidentity.user.coresensitive.readidentity.user.enterprise.readidentity.user.coreenterprise.writeonlyidentity.user.externalID.writeonlyidentity.user.ids.readuser.provision.readuser.provision.writespend.user.general.readspend.user.general.writeonlytravel.user.general.read
Connect to SAP Concur using authorization code grant
Complete the following steps to connect to SAP Concur using authorization code grant:
Click Create > Connection or press C twice.
Search for SAP Concur and select it as your app.
Enter a name for your connection in the Connection name field.
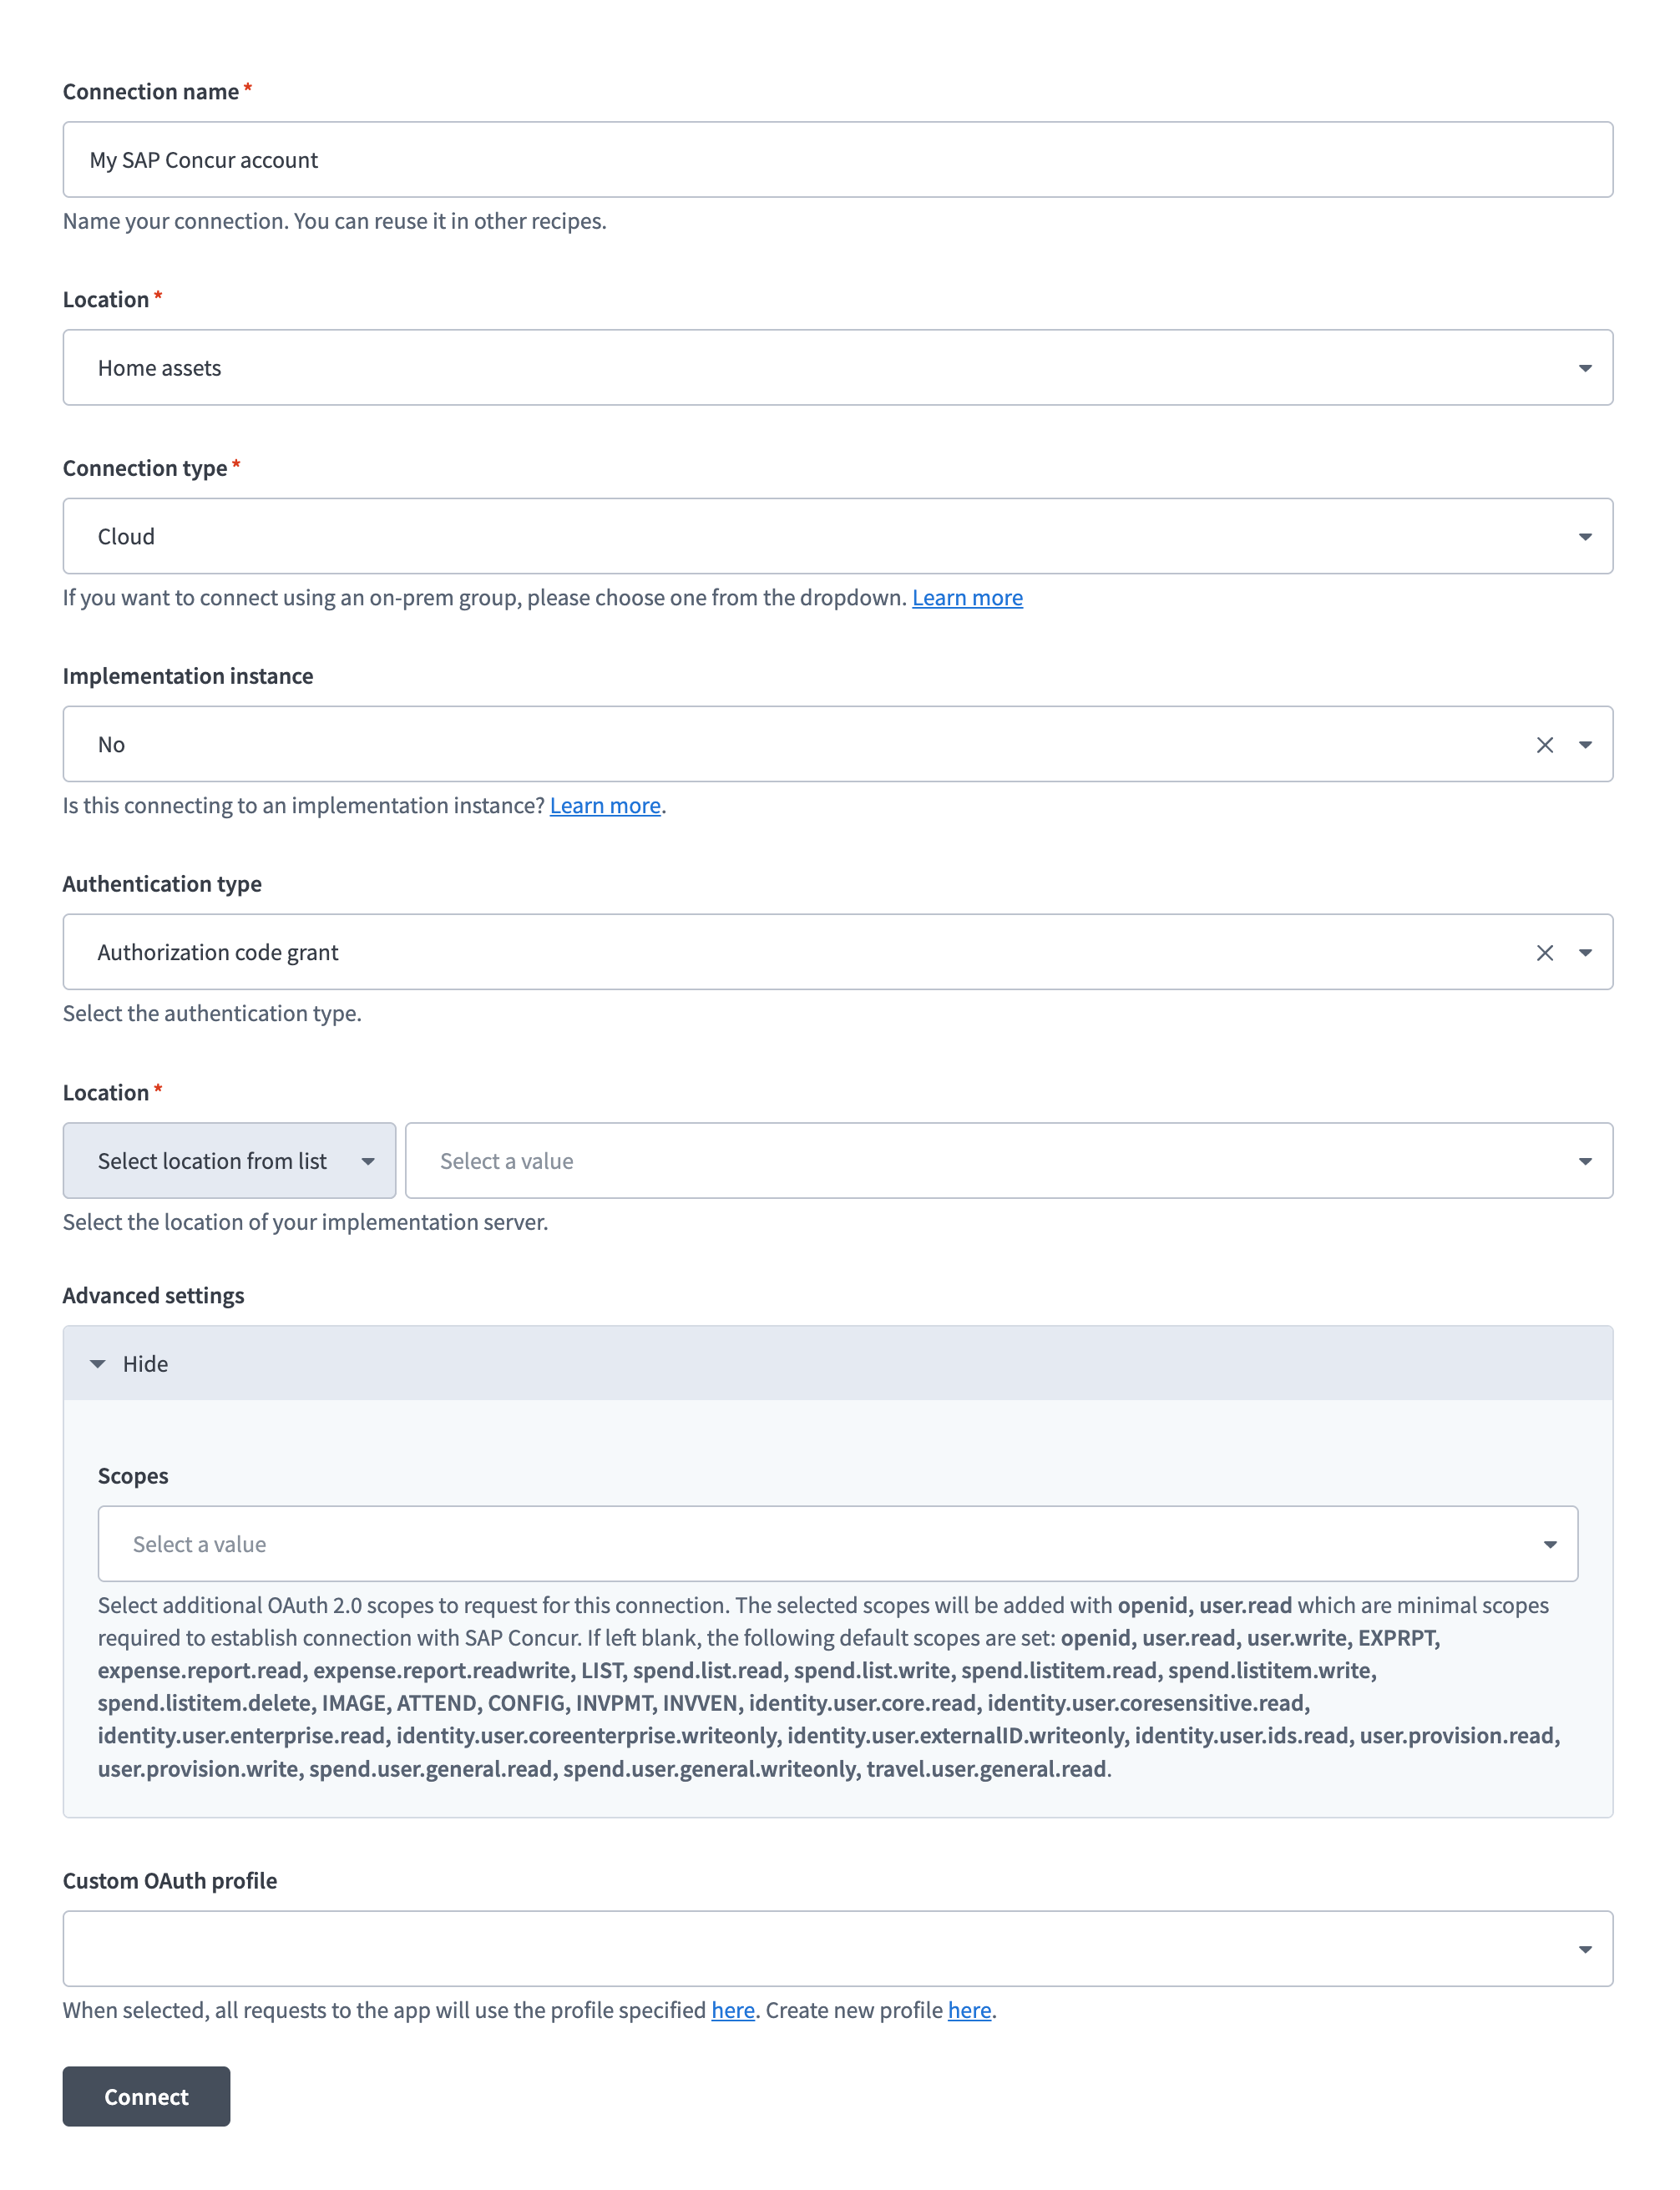 Connect to SAP Concur
Use the first Location drop-down menu to select the project or folder to store your connection.
Use the Connection type drop-down menu to specify whether this is a cloud or on-prem connection.
Use the Implementation instance drop-down menu to specify whether you're connecting to a Concur implementation server. Select Yes if connecting to an implementation server. Defaults to No.
Use the Authentication type drop-down menu to select Authorization code grant.
Use the second Location drop-down menu to select the location of your Concur implementation server.
Optional. Expand Advanced settings and use the Scopes drop-down menu to select OAuth 2.0 scopes. Refer to Minimum and default scopes for requirements.
Use the Custom OAuth profile drop-down menu to select the custom OAuth profile configured with your SAP Concur client credentials.
Click Connect. You are redirected to SAP Concur to sign in and authorize access.
Configure the pipeline
Complete the following steps to configure SAP Concur as your data pipeline source:
Select Create > Data pipeline or press C+I.
Enter a name for the data pipeline in the Data pipeline name field.
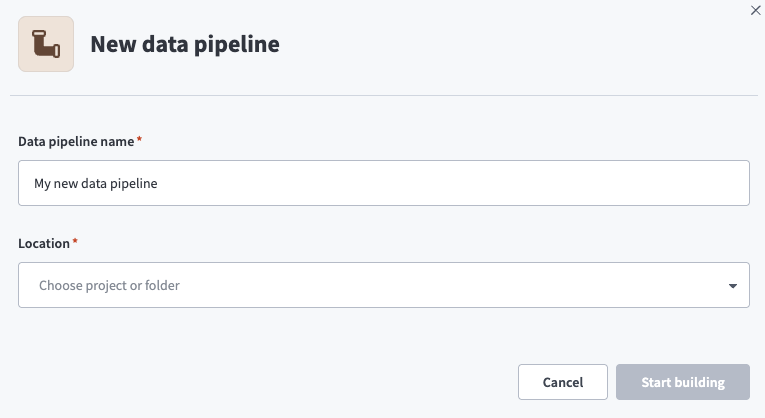 Data pipeline setup
Use the Location drop-down menu to select the project where you plan to store the data pipeline.
Click Start building.
Click the Extract new/updated records from source app trigger. This trigger defines how the pipeline retrieves data from SAP Concur.
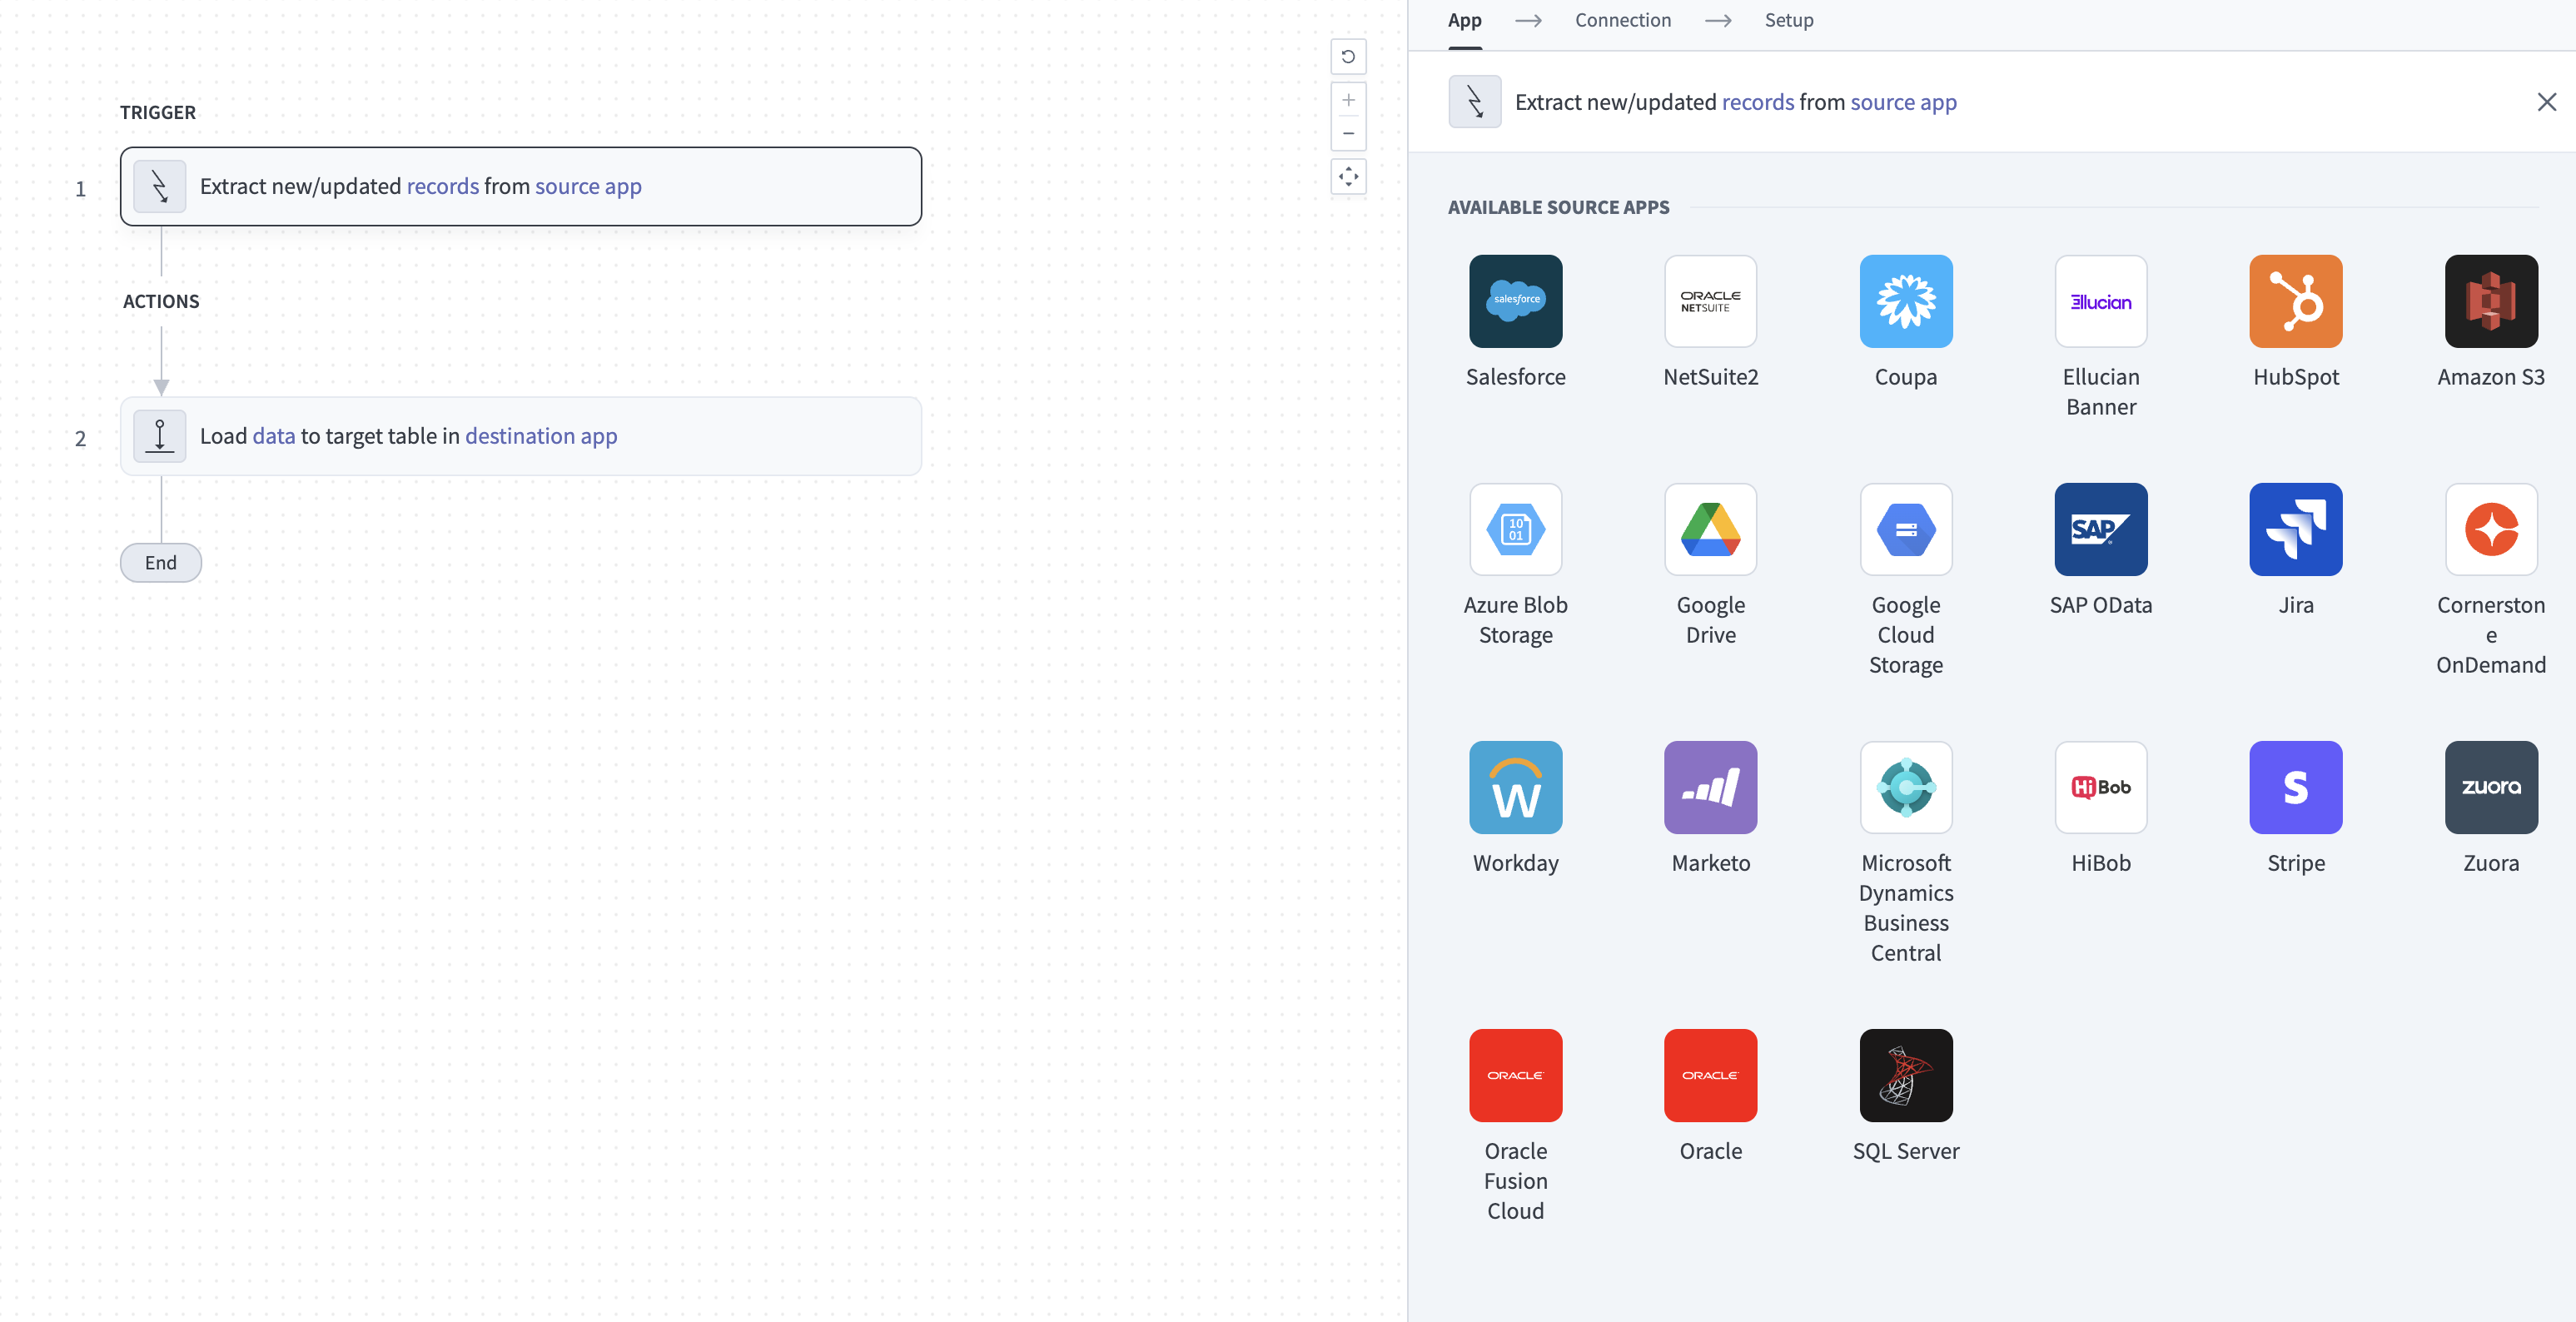 Configure the Extract new/updated records from source app trigger
Use the Your Connected Source Apps drop-down menu to select SAP Concur.
Choose the SAP Concur connection you plan to use for this pipeline. Alternatively, click + New connection to create a new connection.
Click Add object to open the Add new objects panel.
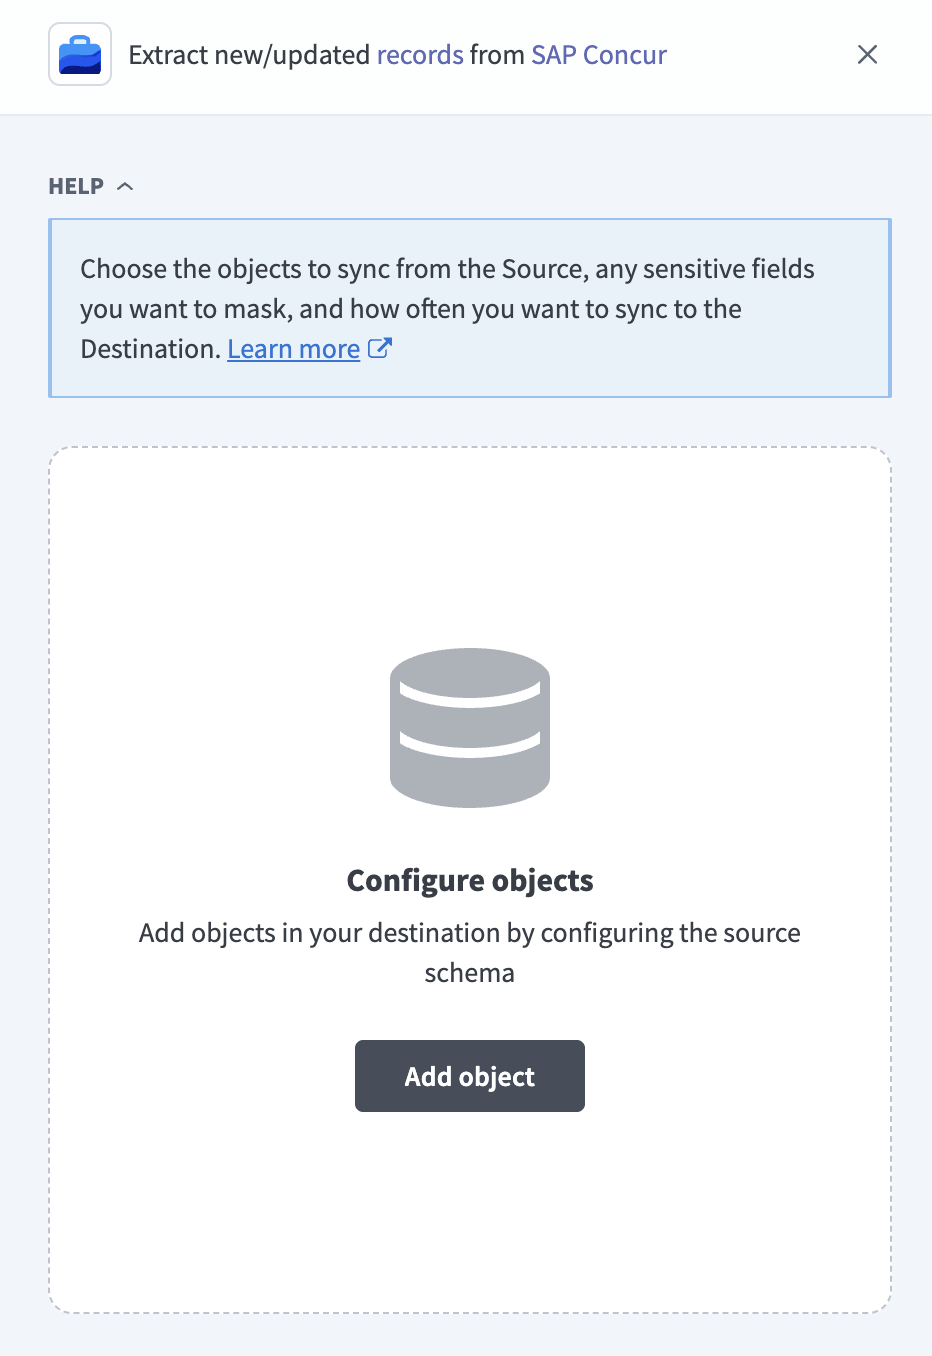 Add objects
Search or browse the list of available SAP Concur objects, select the objects you plan to sync, and click Add.
OBJECT AVAILABILITY DEPENDS ON YOUR CONNECTION
The objects available to select depend on the token type of your connection. A user-typed connection doesn't list the user object, and a company-typed connection doesn't list the payment_type object. Refer to Connection type determines object availability for more information.
Review and customize the schema for each selected object. The pipeline automatically fetches an object's schema when you select it. This ensures the destination matches the source.
Expand an object to view associated fields. Keep all fields selected to extract all available data, or deselect specific fields to exclude them from data extraction and schema replication.
Optional. Configure field-level data protection by expanding an object and choosing how to handle each field:
- Replicate as is: Data values at the source replicate identically to the destination.
- Hash: Hash sensitive data values in the field before syncing to your destination.
Workato recommends hashing personally identifiable information (PII) and other sensitive fields. Refer to Sensitive data handling for a list of fields that commonly contain PII.
Click Add object again to add more objects. Repeat this step to include additional SAP Concur objects in your pipeline.
Use the Choose how to handle schema changes drop-down menu to select a schema drift handling option:
- Auto-sync new fields: Automatically detects and syncs new fields added in the source.
- Block new fields: Keeps the schema fixed after the pipeline starts. You must add new fields manually. This option may cause the destination to fall out of sync if the source schema updates.
Refer to Schema replication and schema drift management for more information.
Workato recommends Auto-sync new fields for SAP Concur, because custom field configuration varies per tenant and customers add custom fields over time.
Choose either a standard time-based schedule or define a custom cron expression in the Frequency field. This determines how often the pipeline syncs data from SAP Concur to the destination.
This start date applies only to objects that support incremental sync. Full-sync objects always reload their complete record set regardless of this value.
Supported objects
SAP Concur data pipelines sync data from the SAP Concur Expense, Invoice, Request, Identity, Lists, and Common Locations APIs. Each object syncs as a separate table in your destination. Child objects sync as separate normalized tables. Each child table uses a single-column id primary key and carries a parent-reference column, such as payment_request_id on payment_request_line or list_id on list_item. Join on the parent-reference column to relate a child table back to its parent.
The following tables list the supported objects, grouped by category:
Expense reports and expenses
The following objects describe expense reports and the expense entries, allocations, itemizations, and attendees attached to them. The expense_entry, allocation, itemization, and entry_attendee_association objects are child records of the expense report structure, extracted at tenant scope and synced as separate tables. These objects require the Expense module.
| Object | Sync mode | Delete tracking | Notes |
|---|---|---|---|
report | Incremental | No | Expense report headers. Contains PII in owner and approver fields. |
expense_entry | Full sync | Yes (destination-inferred) | Individual expense line entries. Contains PII in description fields. Carries structured custom fields. |
allocation | Full sync | Yes (destination-inferred) | Cost allocations for expense entries. |
itemization | Full sync | Yes (destination-inferred) | Itemized detail for expense entries. |
attendee | Full sync | Yes (destination-inferred) | Attendees associated with expenses. Contains PII. |
attendee_type | Full sync | Yes (soft) | Attendee type reference data. |
entry_attendee_association | Full sync | Yes (destination-inferred) | Junction records linking expense entries to attendees. |
Expense configuration
The following objects describe the expense configuration reference data for your SAP Concur tenant:
| Object | Sync mode | Delete tracking | Notes |
|---|---|---|---|
payment_type | Full sync | Yes (soft) | Payment type reference data. Requires a password grant (user-typed) connection. |
expense_group_configuration | Full sync | Yes (destination-inferred) | Expense group configuration reference data. |
Invoices and vendors
The following objects describe payment requests (invoices) and vendor master data. These objects require the Invoice module. The vendor bank, group, and status objects are extracted through the vendor response. The payment_request object syncs incrementally, but payment_request_line reloads in full on each run.
| Object | Sync mode | Delete tracking | Notes |
|---|---|---|---|
vendor | Full sync | Yes (destination-inferred) | Vendor master records. Contains sensitive financial data. |
vendor_bank | Full sync | Yes (destination-inferred) | Vendor bank details. Contains masked bank account and routing numbers. Extracted through the vendor response. |
vendor_group | Full sync | Yes (destination-inferred) | Vendor group assignments. Extracted through the vendor response. |
vendor_status | Full sync | Yes (destination-inferred) | Vendor status records. Extracted through the vendor response. |
vendor_bank_status | Full sync | Yes (destination-inferred) | Vendor bank status records. Extracted through the vendor response. |
payment_request | Incremental | Yes (soft) | Invoice payment requests. Carries native deletion fields. |
payment_request_line | Full sync | Yes (destination-inferred) | Line-item detail for each payment request. Extracted through the parent payment_request object; it doesn't inherit the parent's source-side deletion field. |
Travel requests
The following object describes travel requests. It requires the Request module.
| Object | Sync mode | Delete tracking | Notes |
|---|---|---|---|
travel_request | Incremental | No | Travel request records. |
Lists
The following objects describe custom lists and their items:
| Object | Sync mode | Delete tracking | Notes |
|---|---|---|---|
list | Full sync | Yes (soft) | Custom list definitions. |
list_item | Full sync | Yes (soft) | Items within each custom list. Extracted through the list response. |
Users
The users object describes user identity records from the SAP Concur Identity (SCIM) API:
| Object | Sync mode | Delete tracking | Notes |
|---|---|---|---|
user | Full sync | Yes (soft) | User identity records. Contains significant PII. Requires a refresh token grant (company-typed) connection. Deletion is derived from the inverted active status. |
Locations
The locations object describes location reference data:
| Object | Sync mode | Delete tracking | Notes |
|---|---|---|---|
location | Full sync | Yes (destination-inferred) | Location reference data. |
Sync modes
SAP Concur data pipelines support full sync and incremental sync. The sync mode is fixed per object based on whether the SAP Concur API exposes a usable modification-time filter for that object.
Full sync
Full sync re-extracts the complete record set for an object on each run and overwrites the destination table. Most SAP Concur objects use full sync, because the SAP Concur APIs for those objects don't expose a modification-time filter. This includes the user object, because the SAP Concur Identity API can't filter by last-modified date.
Incremental sync
Incremental sync extracts only records created or updated since the previous run, using each object's last-modified timestamp as the cursor. Three objects sync incrementally:
| Object | Cursor column |
|---|---|
report | last_modified_date |
payment_request | last_modified_date |
travel_request | last_modified |
All other objects use full sync, because the SAP Concur APIs for those objects don't expose a usable modification-time filter. Refer to the Supported objects tables to see the sync mode for each object.
Delete tracking
SAP Concur data pipelines track soft deletes for objects that expose a deletion signal in the source. When a record enters a deleted state, the pipeline sets the _workato_is_deleted column to true in the destination on the next sync. These objects are marked Yes (soft) in the Supported objects tables.
| Object | Deleted when |
|---|---|
payment_request | The payment request is marked deleted in SAP Concur |
user | The user is deactivated in SAP Concur |
attendee_type, payment_type, list, list_item | The record is marked deleted in SAP Concur |
These objects also include SAP Concur deletion fields, which you can query directly: is_deleted on attendee_type, payment_type, list, and list_item; and is_payment_request_deleted, deleted_date, and payment_request_deleted_by on payment_request.
SAP Concur doesn't expose a deletion signal for the remaining objects. Because these objects use full sync, the destination detects deletions by comparing each run against the previous run, and sets _workato_is_deleted to true for records that no longer appear at the source.
The report and travel_request objects are an exception to this process. Both the report and travel_request objects sync incrementally without SAP Concur exposing a deletion signal, which means that the _workato_is_deleted column isn't included and the pipeline can't detect deletions for these objects.
The payment_request_line object doesn't have a source-side deletion signal of its own. Full sync still detects lines that disappear between runs. You can identify lines belonging to a payment request that SAP Concur marks as deleted while its lines remain present by joining payment_request_line to payment_request on payment_request_id and filtering on the parent's deletion state.
Schema and data type handling
The SAP Concur connector applies specific handling to certain SAP Concur field types when it replicates data to your destination.
Custom fields
SAP Concur objects include custom field slots. The number of slots and the shape of each slot vary by object:
- On
report,expense_entry,itemization,allocation, andtravel_request, custom fields are structured objects. The connector stores each slot as a JSON-string column. - On
attendee,entry_attendee_association,payment_request,payment_request_line, andvendor, custom fields are flat strings.
The number of slots per object is:
| Object | Custom field slots |
|---|---|
entry_attendee_association | custom1 to custom5 |
report, expense_entry, allocation, vendor, travel_request, payment_request_line | custom1 to custom20 |
payment_request | custom1 to custom24 |
attendee | custom1 to custom25 |
itemization | custom1 to custom40 |
Custom field labels are defined per tenant in SAP Concur. The connector emits the canonical custom1 through customN column names rather than the tenant-specific labels.
Nested and child objects
The SAP Concur connector emits child records as separate tables rather than inlining them into the parent record. Each child table uses a single-column id primary key and includes a parent-reference column. Deeply nested arrays that remain within a record are serialized as JSON-string columns.
Per-tenant schema variability
Object availability and custom field labels vary per tenant, because SAP Concur licenses the Expense, Invoice, and Request modules separately and each tenant defines its own custom fields. Core object schemas are consistent across tenants.
Synthetic columns
Workato adds the following synthetic columns to destination tables:
| Column | Type | Purpose |
|---|---|---|
_workato_is_deleted | Boolean | Marks a record that no longer exists or is deleted at the source. Added to every object you sync in full sync mode. Added to incrementally synced objects only when SAP Concur exposes a deletion signal for them. |
_workato_run_id | String | Identifies the pipeline run that last wrote the row. The destination uses this to detect rows that no longer exist in SAP Concur. |
_workato_synced_at | Timestamp | When the pipeline last wrote the row to your destination. |
Column name casing in your destination
Your destination adjusts column name casing when it creates tables. Snowflake stores column names in uppercase, most destinations store them in lowercase, and BigQuery and SQL Server keep them as the connector emits them.
Sensitive data handling
SAP Concur objects can contain personally identifiable information (PII) and sensitive financial data. The following objects commonly contain sensitive fields:
| Object | Sensitive fields |
|---|---|
user | user_name, name_given_name, name_family_name, name_formatted, name_legal_name, date_of_birth, emails, phone_numbers, addresses, emergency_contacts, enterprise_employee_number, sap_user_uuid |
report | owner_name, owner_login_id, approver_name, approver_login_id |
expense_entry | vendor_description, location_name, description |
attendee | first_name, last_name, company, title |
vendor | vendor_name, tax_id, provincial_tax_id, address1, address2, address3, contact_email, contact_first_name, contact_last_name, contact_phone_number |
vendor_bank | bank_name, account_number, routing_number, name_on_account |
SAP Concur returns the user object's email addresses and phone numbers as arrays, which the connector stores as JSON-string column, for example, emails and phone_numbers. There is no single primary-email column.
Use the Hash option in field-level data protection during pipeline configuration to protect PII before it reaches your destination. Refer to the Configure the pipeline steps for more information.
Limitations
The following limitations apply when you use SAP Concur as a data pipeline source:
Module licensing
SAP Concur licenses Expense, Invoice, Travel, and Request as separate modules. Your account can sync objects only from the modules it licenses. The pipeline returns a permissions error if you select an object from a module your account doesn't license. Confirm your module licensing before you add objects from the Invoice, Travel, or Request categories.
Connection type determines object availability
A SAP Concur connection uses a single token type, which determines the objects the connection can use sync data:
- A user-typed connection can sync the
payment_typeobject but not theuserobject. Password grant produces a user-typed connection. - A company-typed connection can sync the
userobject but not thepayment_typeobject. Refresh token grant produces a company-typed connection.
A single connection can't sync both user and payment_type. You must create a separate connections for user and payment_type and use these connections in separate pipelines to sync both objects.
Minimum sync frequency
The minimum supported sync interval is 15 minutes. You can't trigger syncs more frequently than this.
Last updated: