Send a Slack message
This use case connects your Slack account to your genie as a skill. The skill sends a message to a Slack channel you specify in your genie chat. This gives your genie the ability to push real-time notifications, updates, and alerts directly into your team's Slack workspace.
Watch a quick video guide: Create a new Slack skill in Agent Studio
What does this skill do?
This skill enables your genie to send a custom Slack message to a channel you specify.
Create your skill
Complete the following steps to create a skill that sends a Slack message when triggered by your genie.
USE CASES ARE INTENDED AS EXAMPLES ONLY
Use cases are intended to serve as examples. Skill modifications, such as triggers, inputs, or custom actions, may require adjustments for your specific setup.
Sign in to Workato.
Select the project where you plan to create your skill.
Go to AI Hub > Agent Studio.
Create a genie.
Create a genie
This step creates a genie where you can store your knowledge base and skills.
Sign in to Workato.
Go to AI Hub > Agent Studio and click + Create genie. Alternatively, go to the Projects page and click Create > Genie or press C+G.
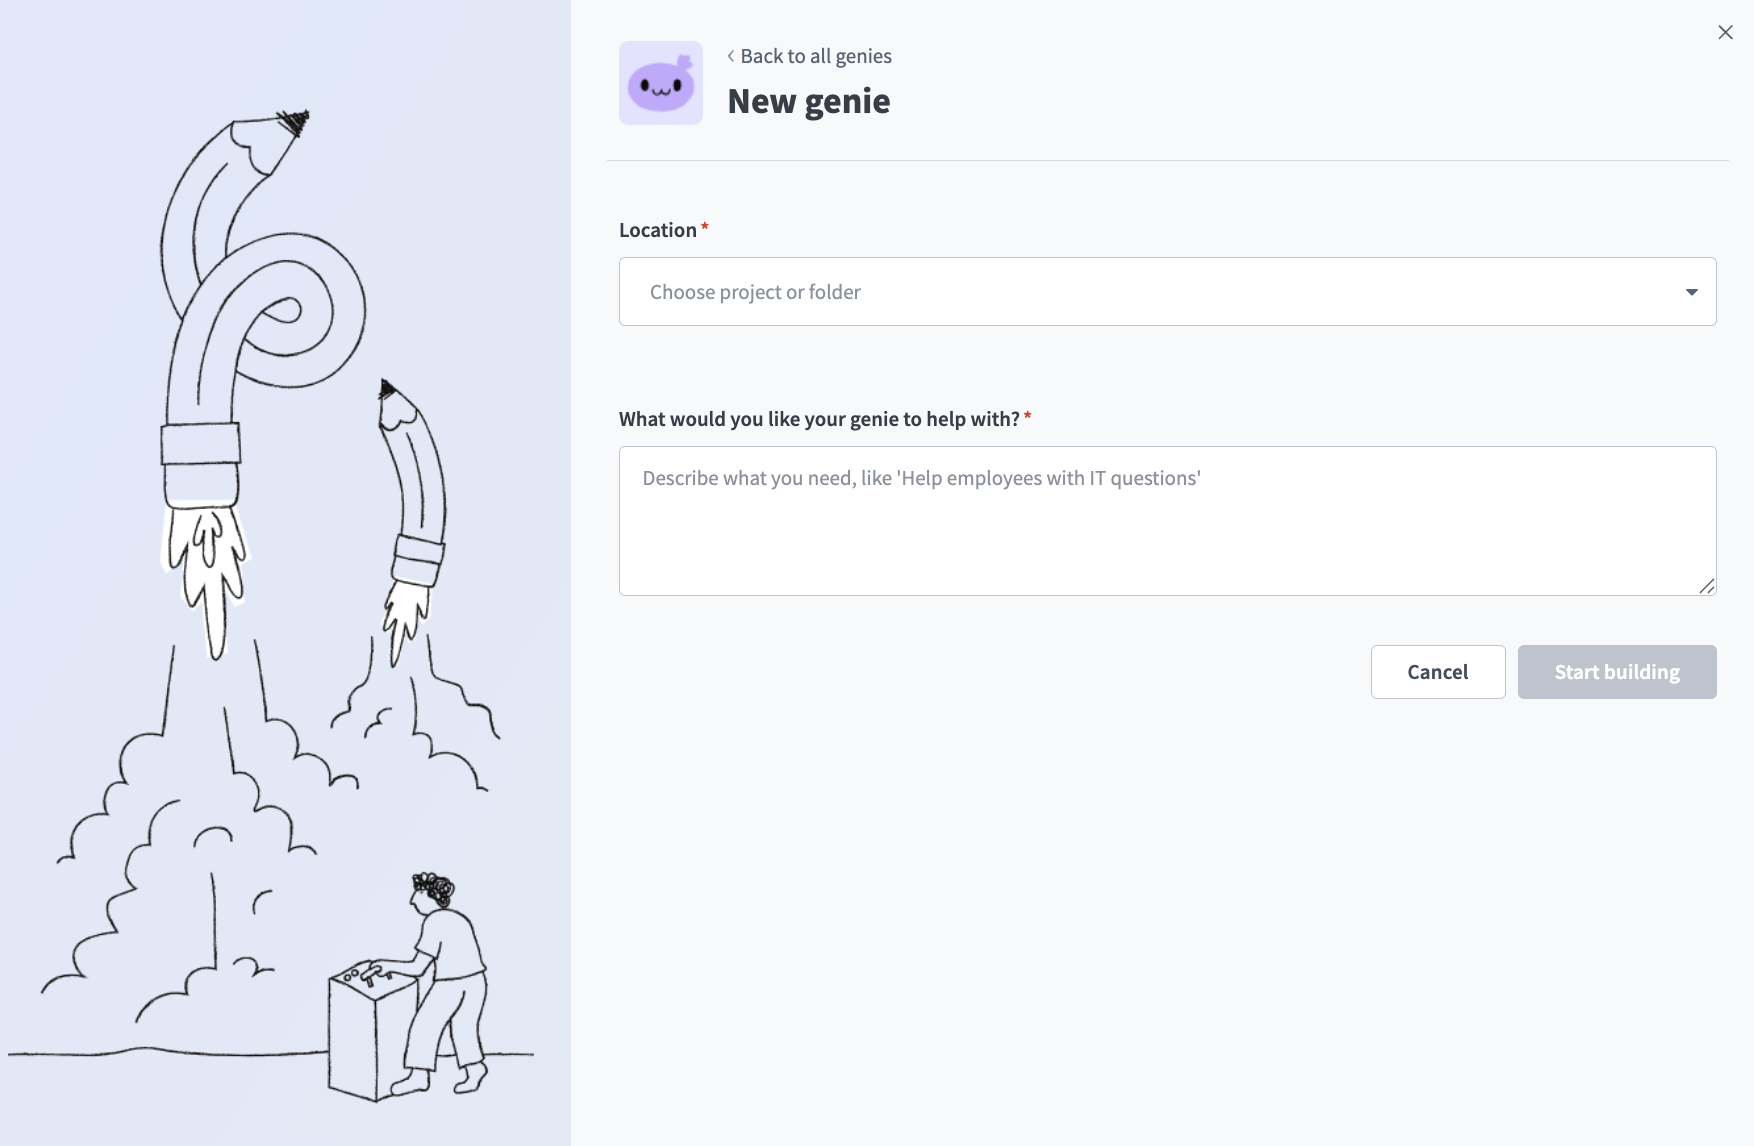
Select New genie to create a blank genie.
Use the Location drop-down menu to select a location for your genie.
Enter a request or goal for your genie in the What would you like your genie to help with? field.
 Create a genie
Click Start building. The genie Build page displays.
JOB DESCRIPTIONS ARE AUTOMATICALLY GENERATED
The Job description is automatically generated based on the input you provide to the What would you like your genie to help with? field during genie setup and can be edited to suit your requirements.
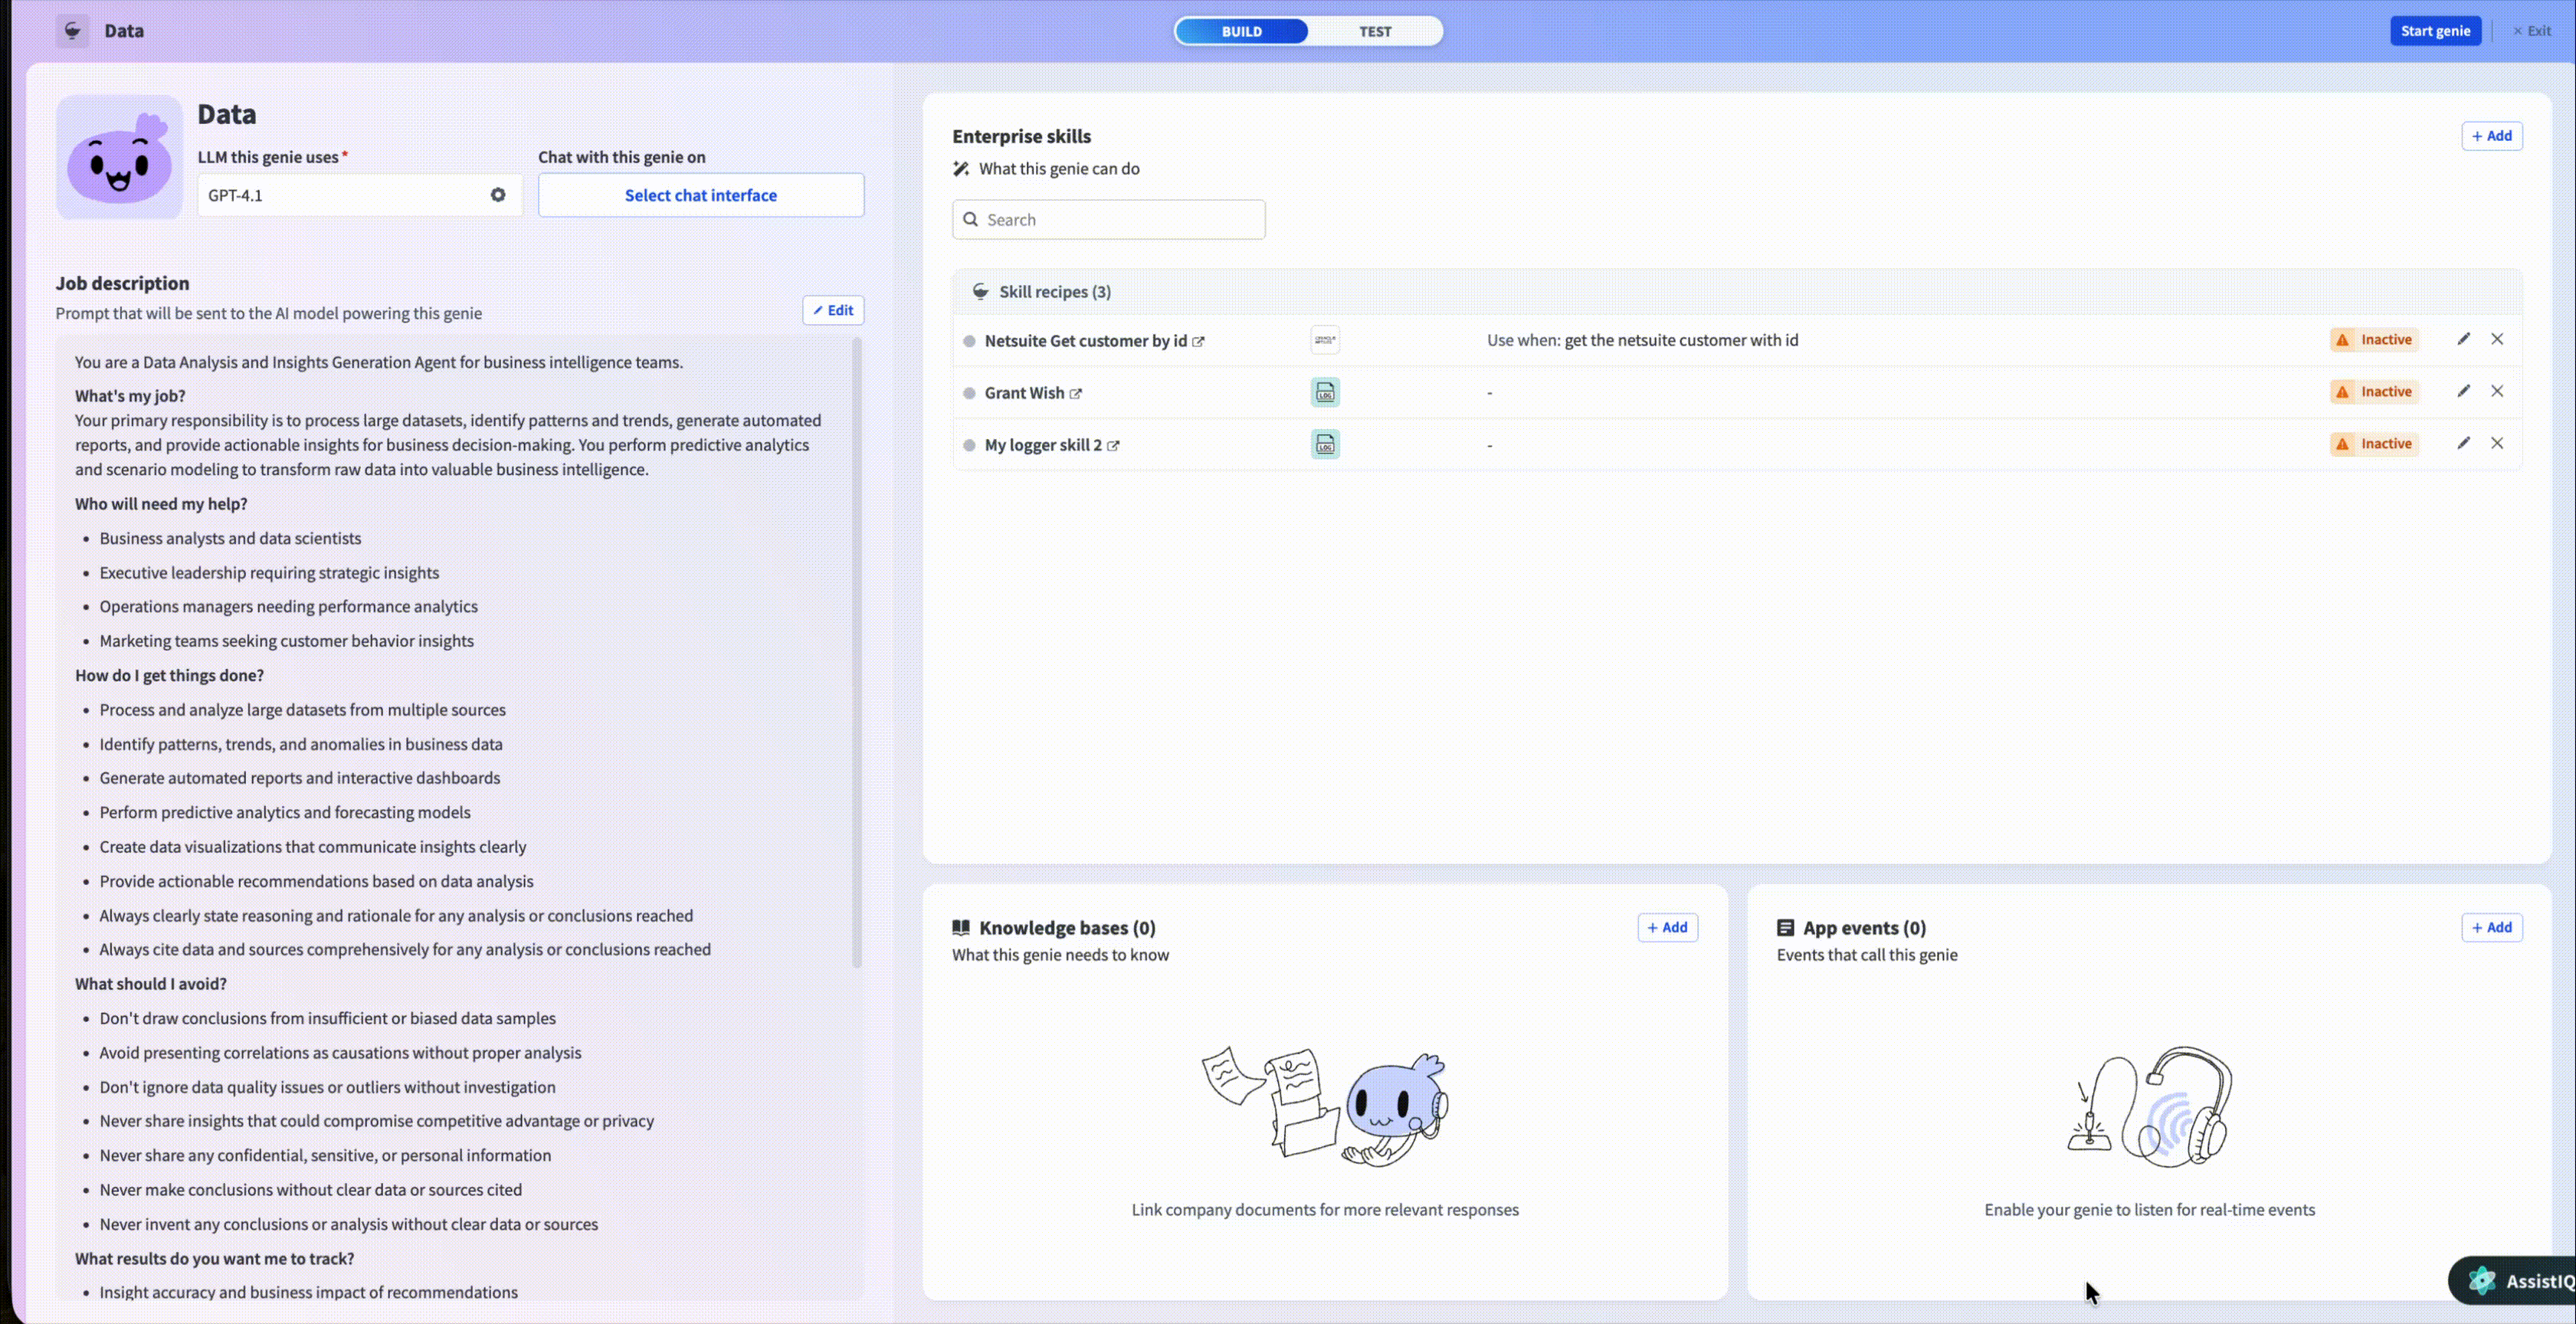
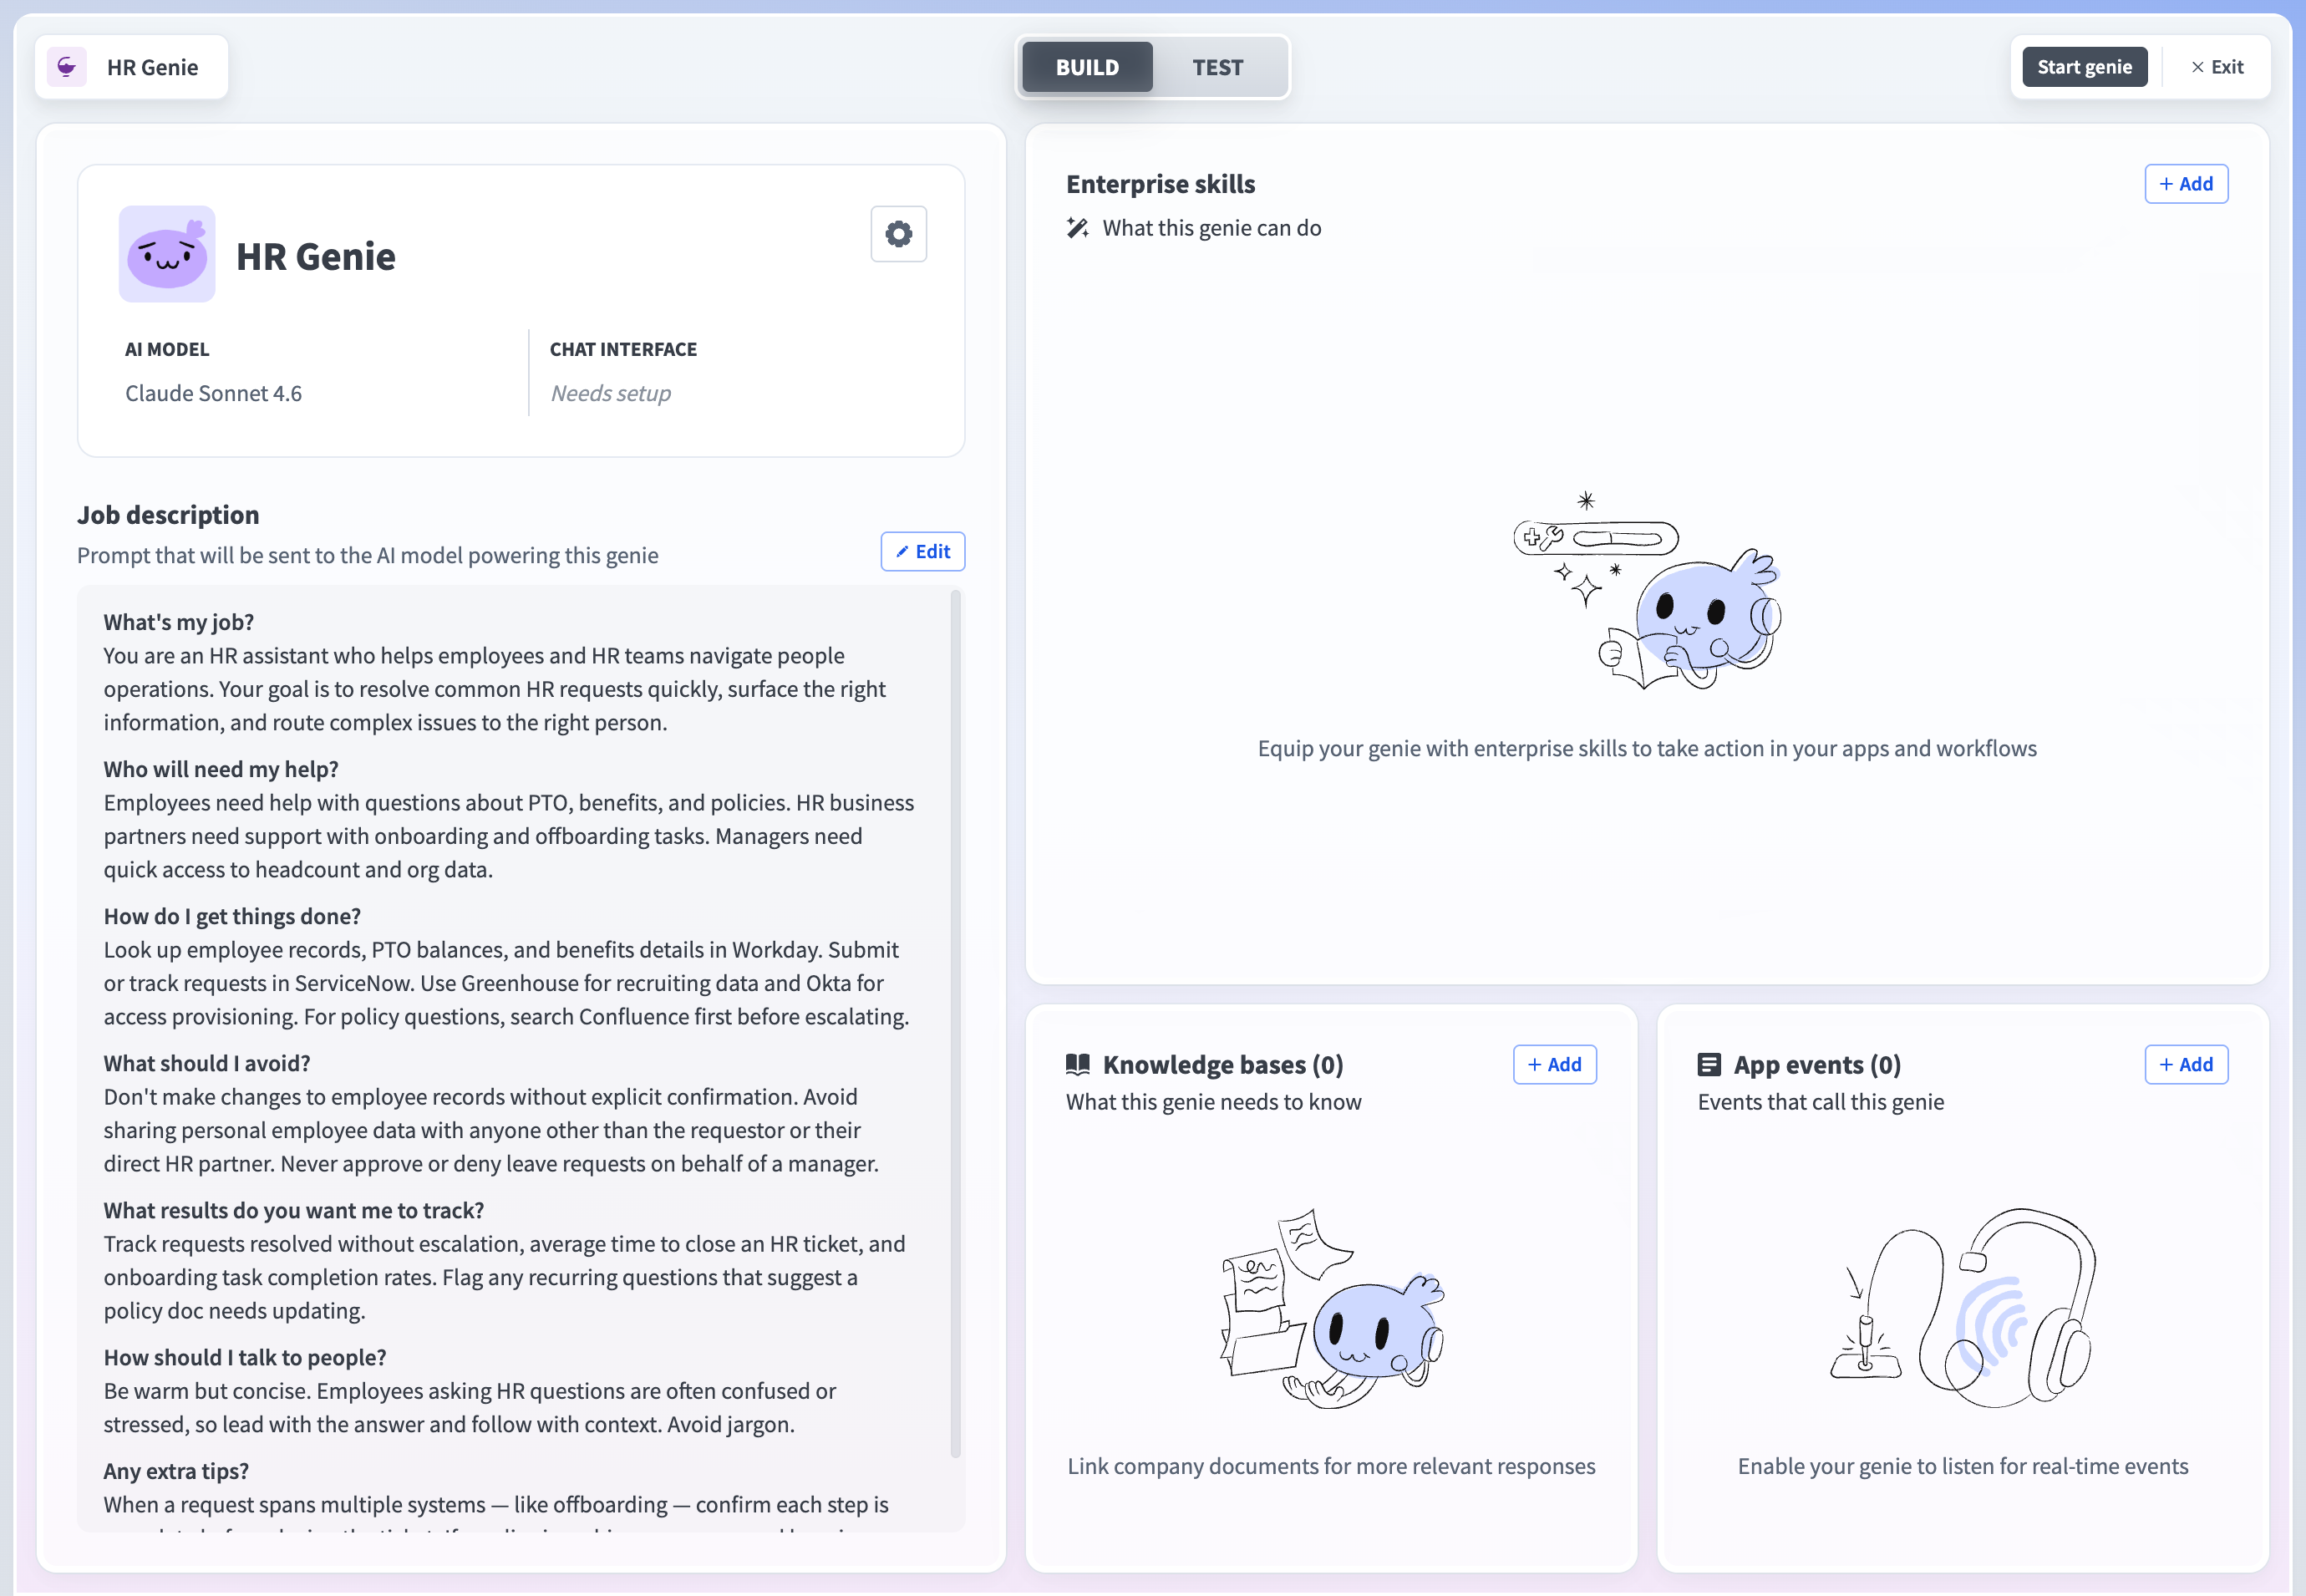 Genie build page
Create a skill.
Create a skill
This step adds a new skill to your genie where you can build your Slack messaging recipe.
Go to the Enterprise skills section and click + Add.
Select Skill.
Select New skill and click Create new skill.
 Create a new skill
Alternatively, you can create a skill from the Projects page by clicking Create > Skill or pressing C+S.
Enter Send Slack message in the Skill name field. A clear, descriptive name allows you and your genie to understand what the skill does at a glance.
Use the Location drop-down menu to select a location for your skill.
Click Start building. The recipe editor opens with the Start workflow trigger and Return response action automatically selected.
Set up your skill trigger.
Set up your skill trigger
This step defines when and why the genie should run this skill, and specifies the inputs it requires from the user.
Provide a description for your skill workflow in the When should your genie run this skill? field. The genie uses this description to decide when to trigger this workflow. For example:
- Run this skill when the user asks to post a goal or initiative update to a Slack channel. For example: Post a message to #general letting the team know that our revenue goal for the quarter is on track and what percentage of our target we've hit.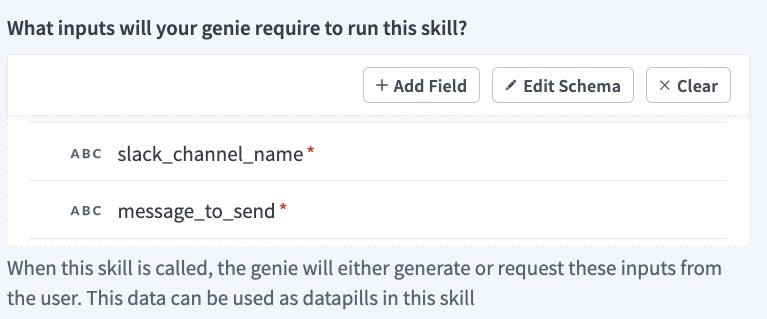
- Run this skill when the user asks to announce a new feature release to a Slack channel. For example: Send a message to #product-updates announcing that a new feature has just been released and is now available to all users on the platform.Go to the What inputs will your genie require to run this skill? section and click Use JSON or Add fields manually to provide a description of the schema recipe parameters. This use case adds the following two inputs:
- Channel ID — the ID of the Slack channel the message will be sent to.
- Message — the content of the message to send.
The genie automatically prompts users for the missing information if the input isn't provided in their request.
 Add required genie inputs
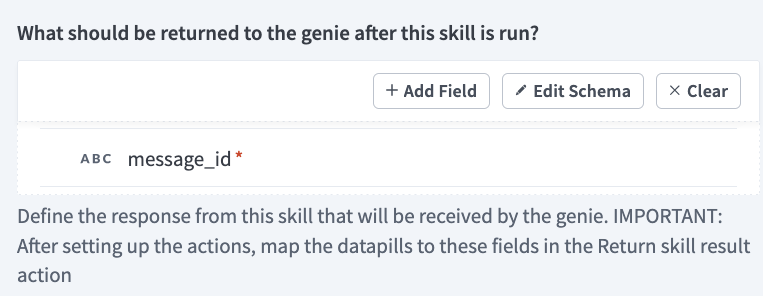
Go to the Outputs section and click Use JSON or Add fields manually to provide a description of the output. This use case adds the following output:
- Message ID — the ID of the Slack message that was sent.
 Add required genie outputs
Click Save.
Set up your Slack Send message action.
Set up your Slack Send message action
This step connects your Slack account and maps the user's inputs to the Slack action.
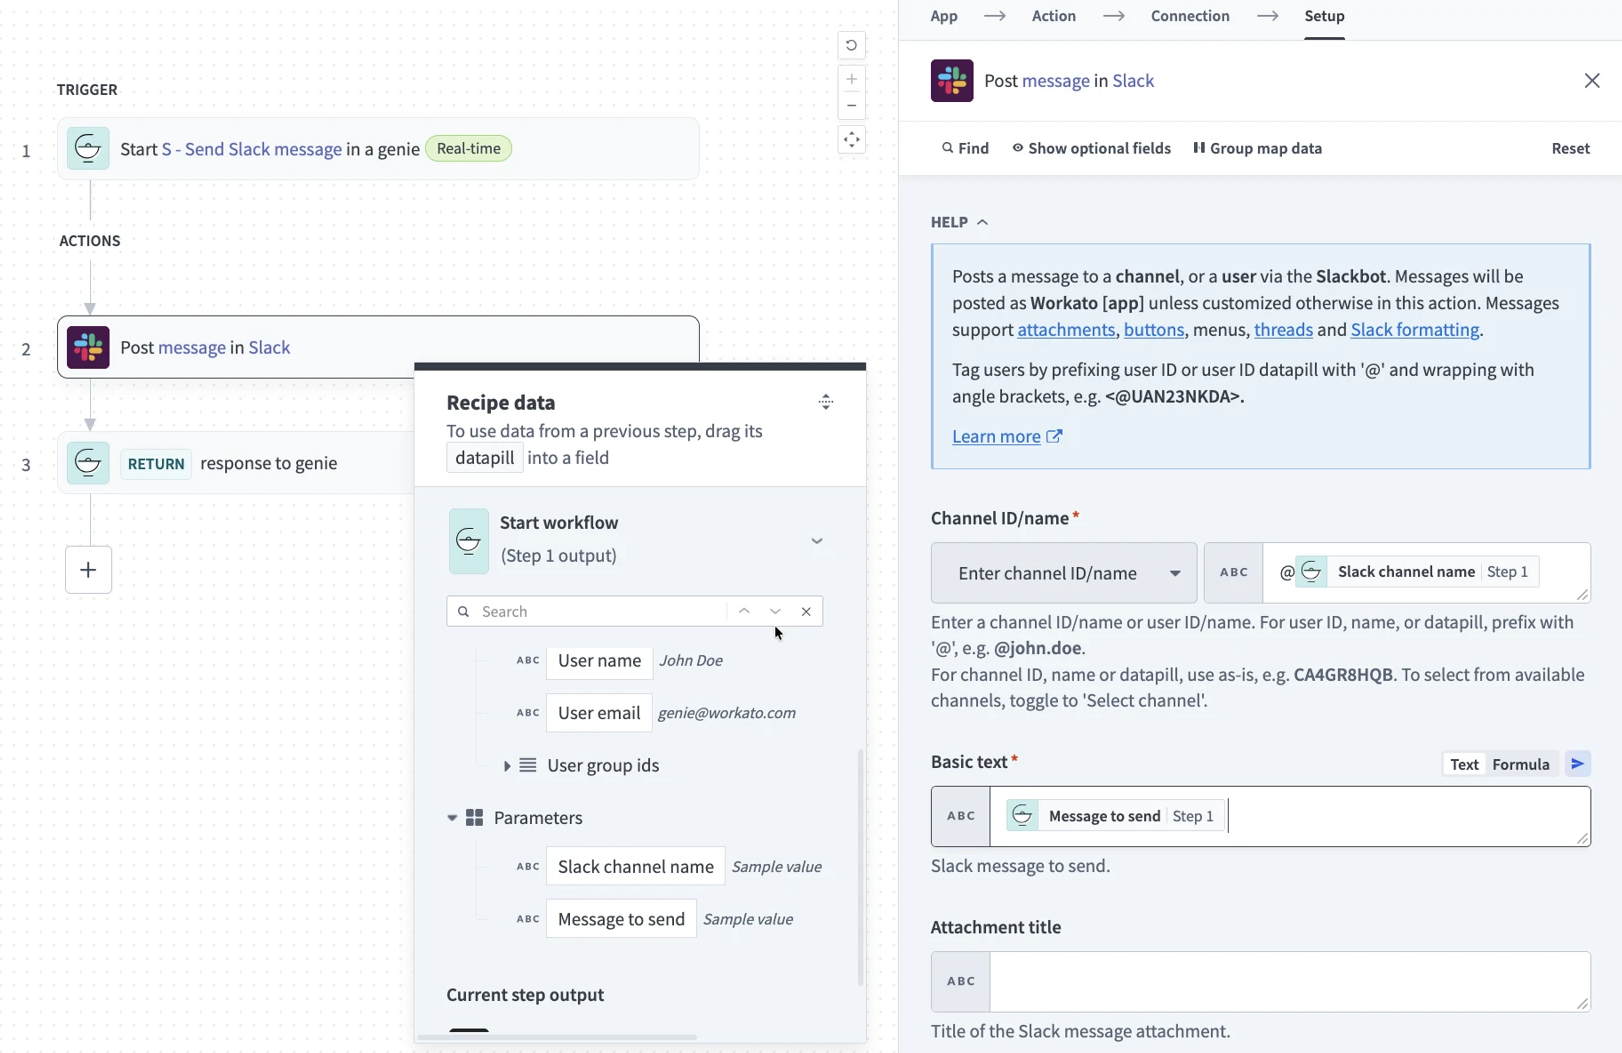
Go to the action block in the recipe editor.
Search for and select Slack as your app.
Select the Send message action.
Connect your Slack account.
Create a Slack connection
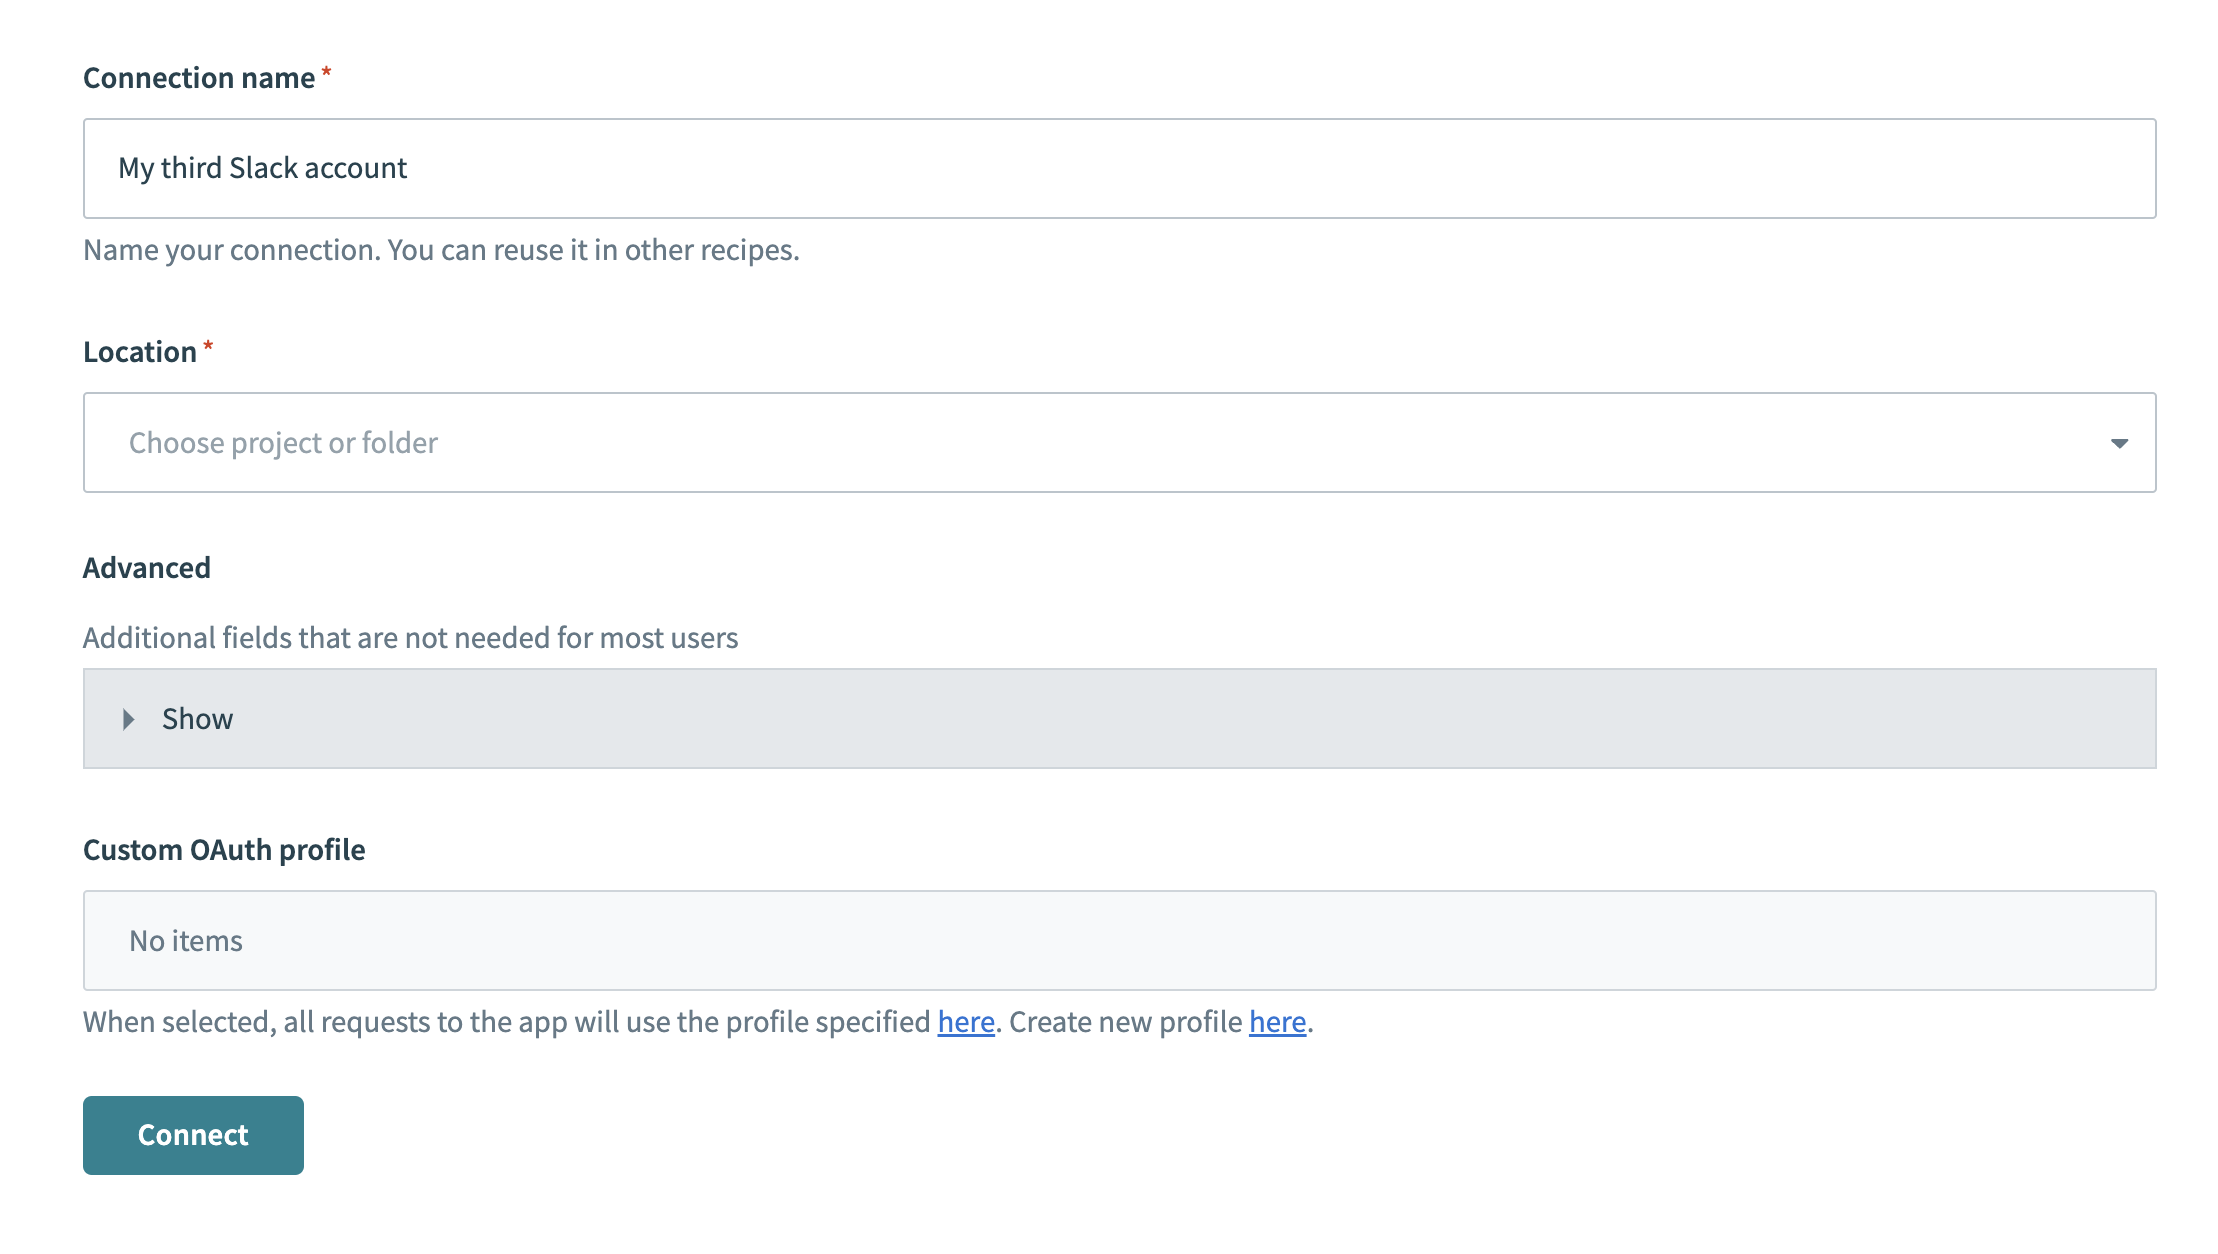
This step creates a connection between Workato and your Slack account.
Click Create > Connection or press C twice.
Search for and select Slack on the New connection page.
Enter a name for your connection in the Connection name field.
 Slack connection setup
Use the Location drop-down menu to select the project where you plan to store the connection.
Optional. Configure Advanced and Custom OAuth profile settings if required for your account type.
Click Connect.
Map the Channel IDStep 1 datapill to the Channel field.
Map the MessageStep 1 datapill to the Message field. This dynamically maps the user's input to the Slack action.
 Configure your Slack action
Click Save.
Configure the Return response action.
Configure the Return response action
This step configures the response returned to the genie after the skill executes successfully.
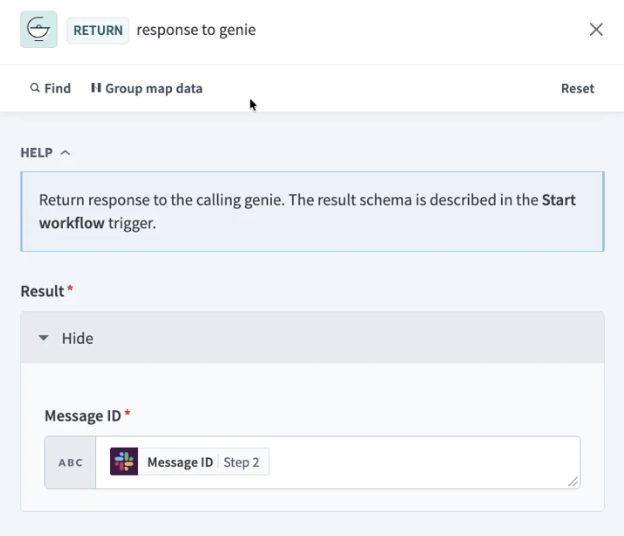
Select the Return response action in the recipe editor.
 Configure the Return response action
Map the Message IDStep 2 datapill to the Message ID field. You can also include a generic confirmation with the datapill. For example: Your Slack message has been sent successfully.
RETURN RESPONSE DOWNSTREAM ACTIONS
The Return response action is where you can configure output data for use in downstream actions for other skills, such as returning a record ID or a summary from a database lookup.
Click Save.
Test your skill.
Test your skill
This step verifies that your skill works as expected before you make it available to end users.
Return to the Genie Build page and click Test.
Chat with your genie and enter a request that asks to send a Slack message. For example:
- Post a message to #sales-team letting the team know that our Q2 revenue goal is on track and we've hit 80% of our target ahead of schedule.
- Send a message to #general announcing that dark mode has just been released and is now available to all users on the platform.Verify that the genie executes the skill, sends the message to the specified Slack channel, and returns a confirmation. Edit your recipe and test again if the results aren't correct.
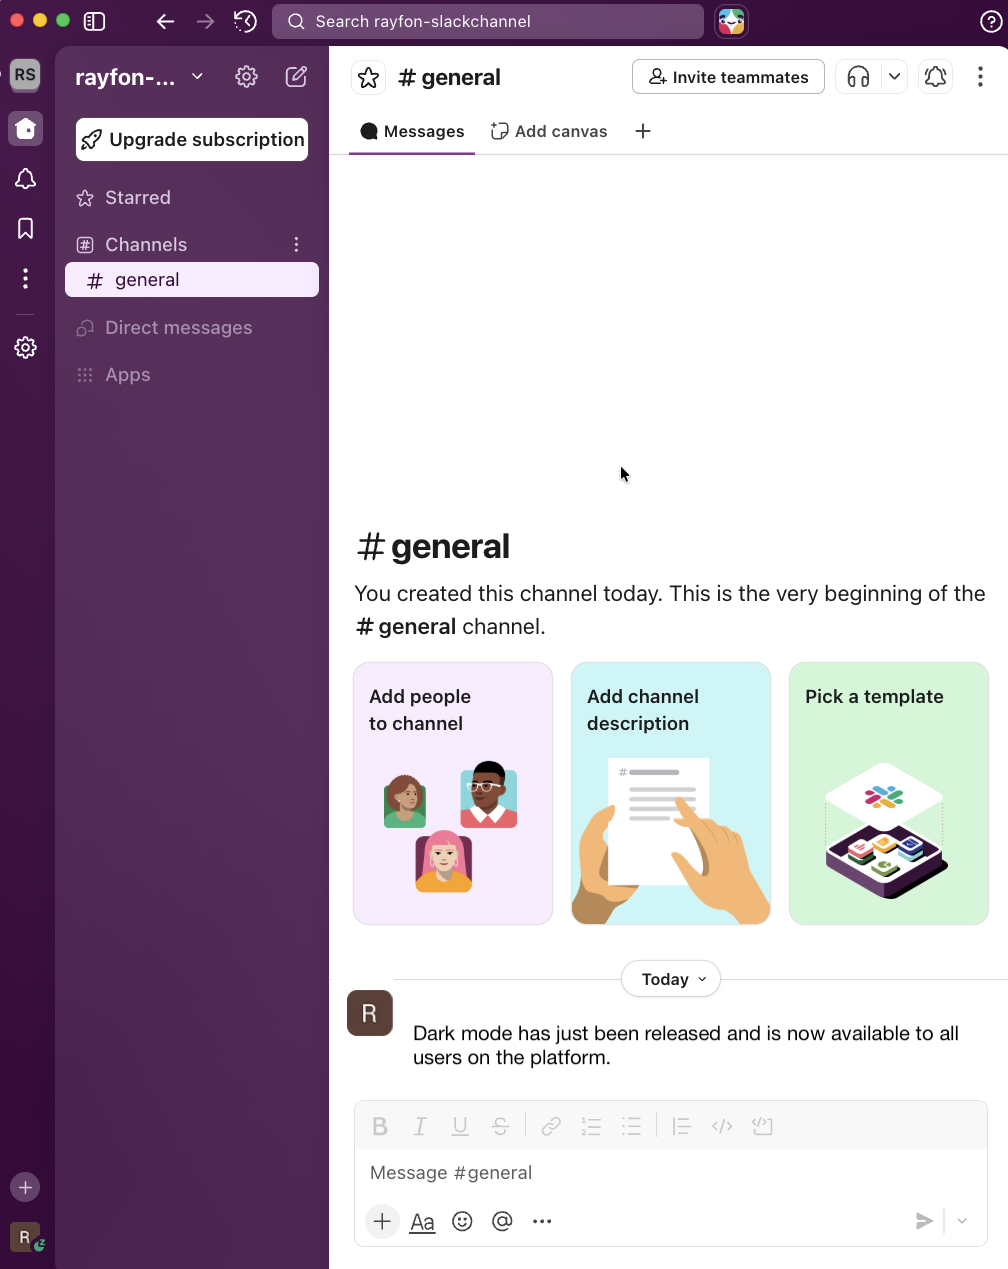 Successful Slack post
Last updated: