Microsoft Dynamics 365 CRM MCP server
The Microsoft Dynamics 365 CRM MCP server lets LLMs work with Microsoft Dynamics 365 for core sales and service CRM workflows. It provides tools to search, create, update, and transition accounts, contacts, leads, opportunities, and cases without requiring direct interaction with the Microsoft Dynamics 365 interface.
Uses
Use the Microsoft Dynamics 365 CRM MCP server to perform the following actions:
- Find accounts, contacts, leads, opportunities, and cases by name, email, phone, or other identifying details
- Create new records or update fields on existing accounts, contacts, leads, opportunities, and cases
- Qualify a lead, and optionally create related account, contact, and opportunity records
- Resolve, reassign, or move a case to a different queue
- Record a win or loss outcome on an opportunity
- Log tasks, calls, appointments, and notes against a record
- Retrieve records related to an account, contact, lead, opportunity, or case
- Look up field definitions and choice values before creating or updating a record
Example prompts
Use the following example prompts to invoke Microsoft Dynamics 365 CRM MCP server tools:
Find the lead for Alex Patel at Acme Corp.Qualify this lead and create the related opportunity.Update the estimated close date on this opportunity.Log the call I just had with Acme Corp.Resolve this case with a note explaining the fix.Reassign this case to Kai Lee.Move this case to the escalations queue.Mark this opportunity as won.What fields can I set on a case?Find the queue ID for the billing team.
Microsoft Dynamics 365 CRM MCP server tools
The Microsoft Dynamics 365 CRM MCP server provides the following tools:
| Tool | Description |
|---|---|
| get_record | Retrieves a single CRM record by ID or alternate key. |
| search_records | Searches for CRM records by field values you supply, or by identity attributes, such as name, email, or phone. |
| describe_schema | Describes the fields, types, and choice values of a supported CRM object. |
| create_record | Creates a new CRM record on a supported object. |
| update_record | Updates selected fields on an existing CRM record. |
| upsert_record | Creates or updates a CRM record using a declared alternate key. |
| create_activity | Logs a task, phone call, or appointment against an existing CRM record. |
| create_note | Adds a note to an existing CRM record. |
| list_related_records | Retrieves records related to a given parent record through a supported relationship. |
| qualify_lead | Runs the standard lead qualification transition. |
| resolve_case | Resolves an open case. |
| close_opportunity | Records a win or loss outcome on an open opportunity. |
| reassign_case | Reassigns ownership of a case to a different user or team. |
| move_case_to_queue | Moves a case from its current queue into a specified destination queue. |
Install the Microsoft Dynamics 365 CRM MCP server
Complete the following steps to install a prebuilt MCP server to your project:
Sign in to your Workato account.
Go to AI Hub > Enterprise MCP > Custom servers.
Click + Create MCP server.
Go to the Start with pre-built MCP Servers using your connected apps section and select the prebuilt MCP server you plan to use.
Click Use this server.
Provide a name for your MCP server in the Server name field.
Use the Location drop-down menu to select the project for the MCP server.
Go to the Connections section and connect to your app account.
Select the connection type you plan to use for the MCP server template.
- User's connection: MCP server tools perform actions based on the identity and permissions of the user who connects to the application. Users authenticate with their own credentials to execute the skill.
- Your connection: This option uses the connection established by the recipe builder and follows the same principles as normal app connections.
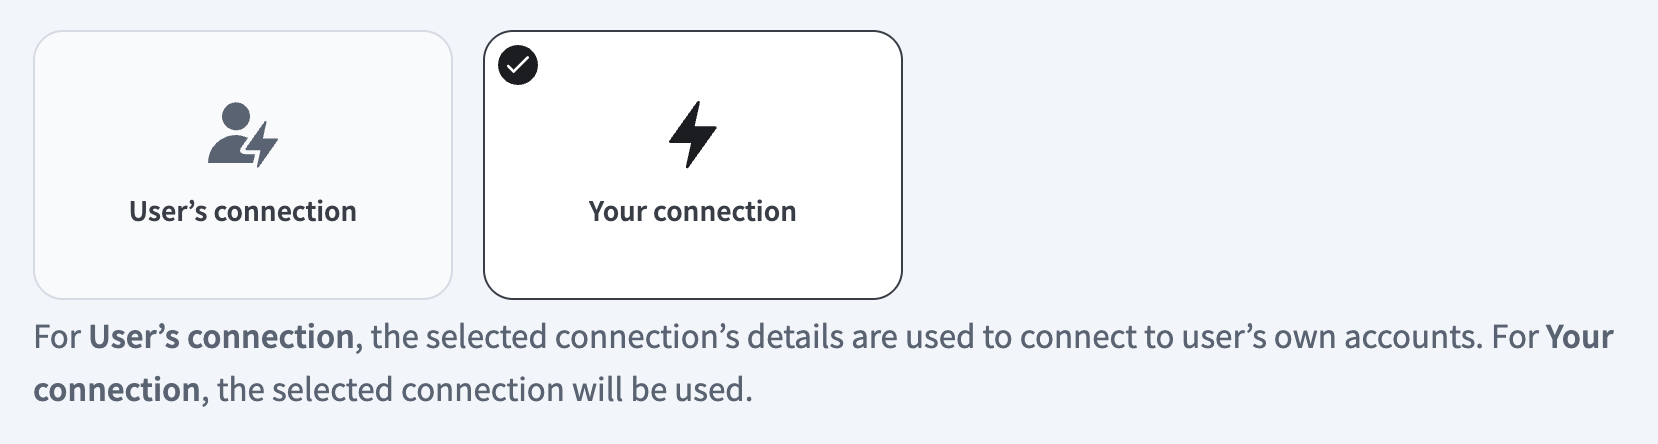 Select your connection type
VERIFIED USER ACCESS AUTHENTICATION REQUIREMENTS
Only app connections that use OAuth 2.0 authorization code grant are available for user's connection. Refer to Verified user access for more information.
Complete the app-specific connection setup steps in the following section.
Microsoft Dynamics 365 CRM connection setup
View Microsoft Dynamics 365 CRM connection setup steps
API version
The Microsoft Dynamics 365 connector uses the Microsoft Dynamics 365 API v8.0 and v9.0.
Register the Workato app in the Azure Portal
The Microsoft Dynamics 365 CRM MCP server requires an authorization code grant connection to Microsoft Dynamics 365.
Complete the following steps to register the Workato app and assign it permissions for authorization code grant connections.
Register the Workato app in the Azure Portal
Complete the following steps to register the Workato app in the Azure portal:
Sign in to the Azure portal.
Select App registrations > + New registration.
Enter a unique name for the application.
Use the Supported account types drop-down menu to select an account type.
Select Web from the Select a platform drop-down menu.
Use the following URI for the Redirect URI:
https://www.workato.com/oauth/callbackSelect Register.
Assign permissions to your app
In the navigation sidebar, select Manage > API permissions.
Click + Add a permission and select Dynamics CRM.
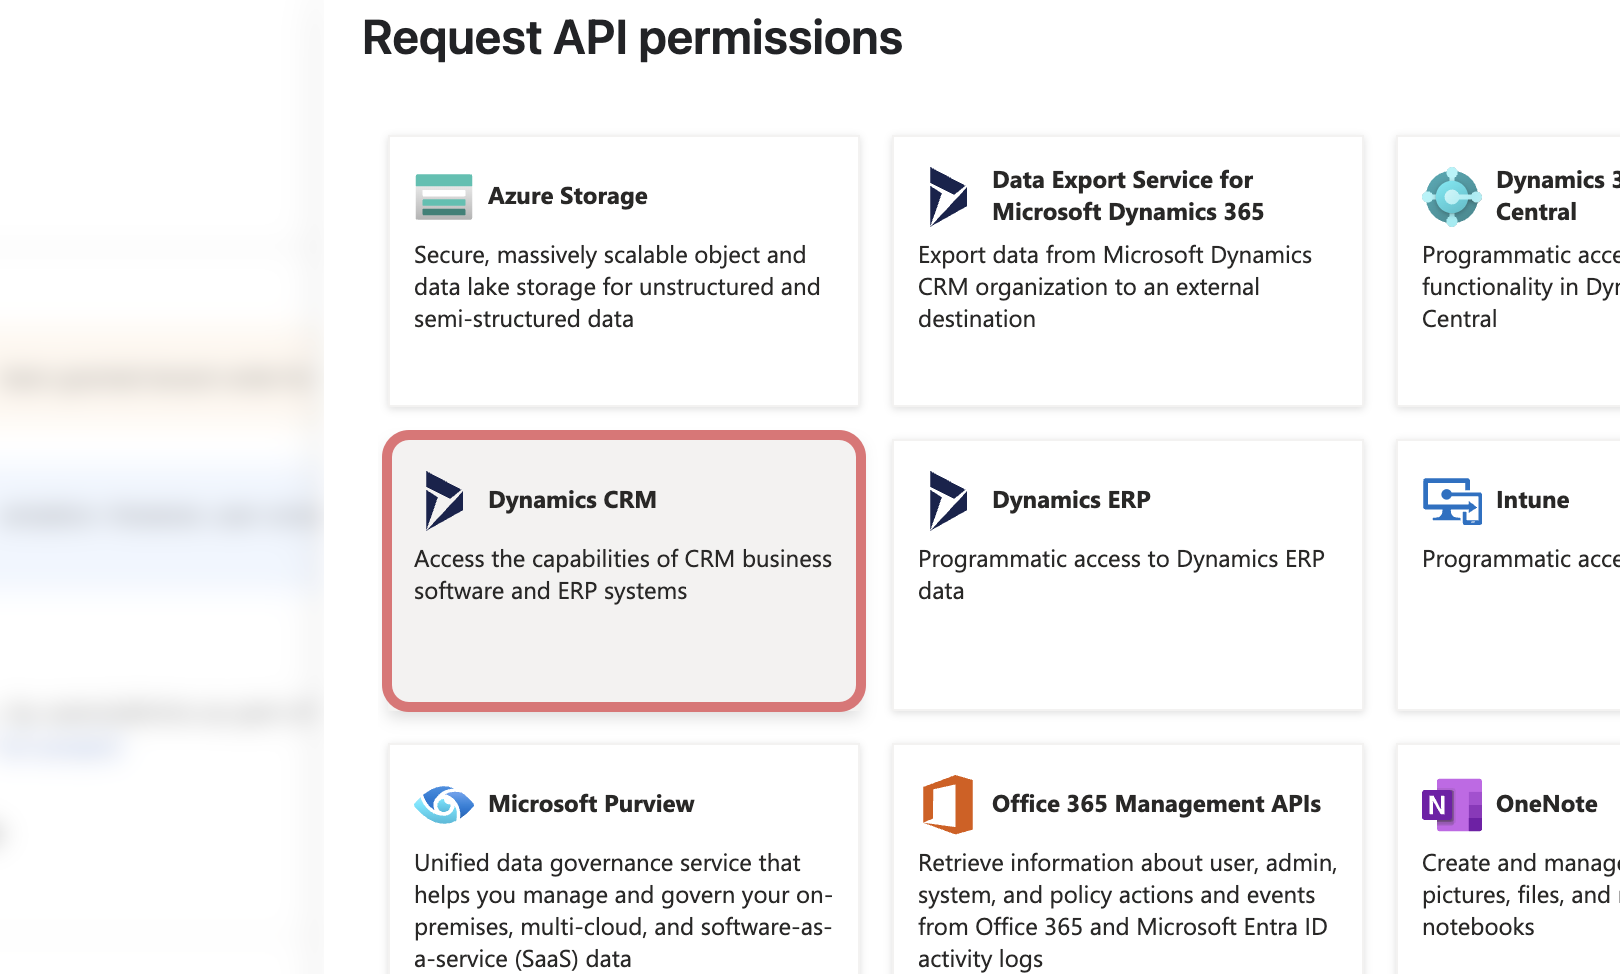 Select Dynamics CRM
Select Delegated permissions, then select the user_impersonation checkbox.
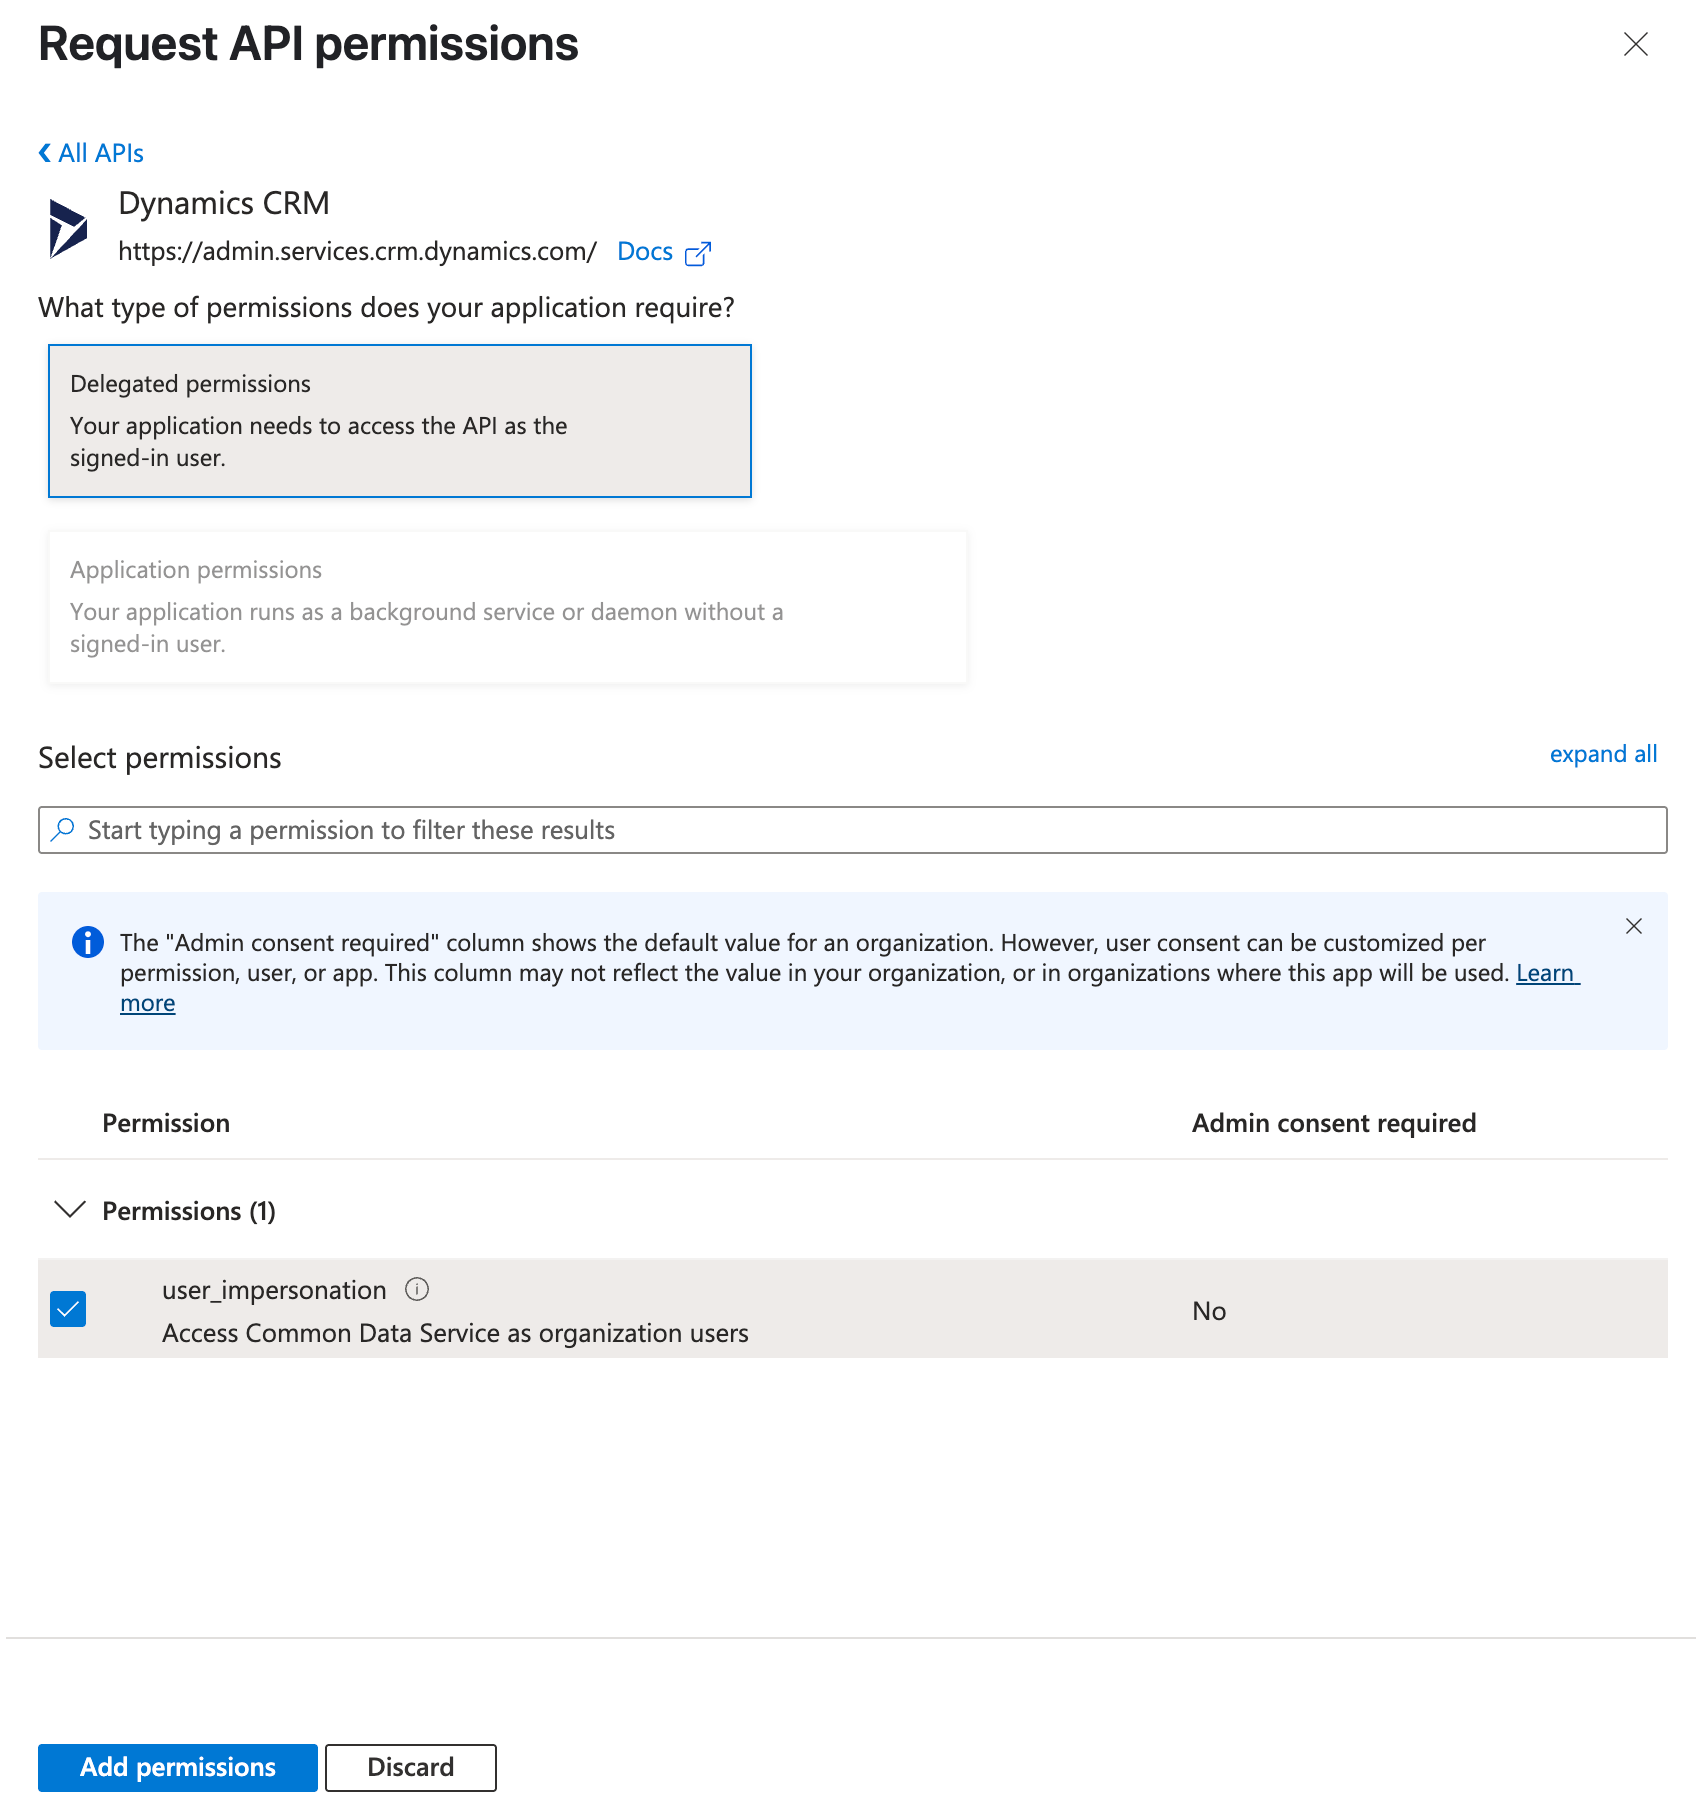 Select permissions
Click Add permissions.
Note: Admin consent is required for specific permissions. Refer to the Granting admin consent section to learn more.
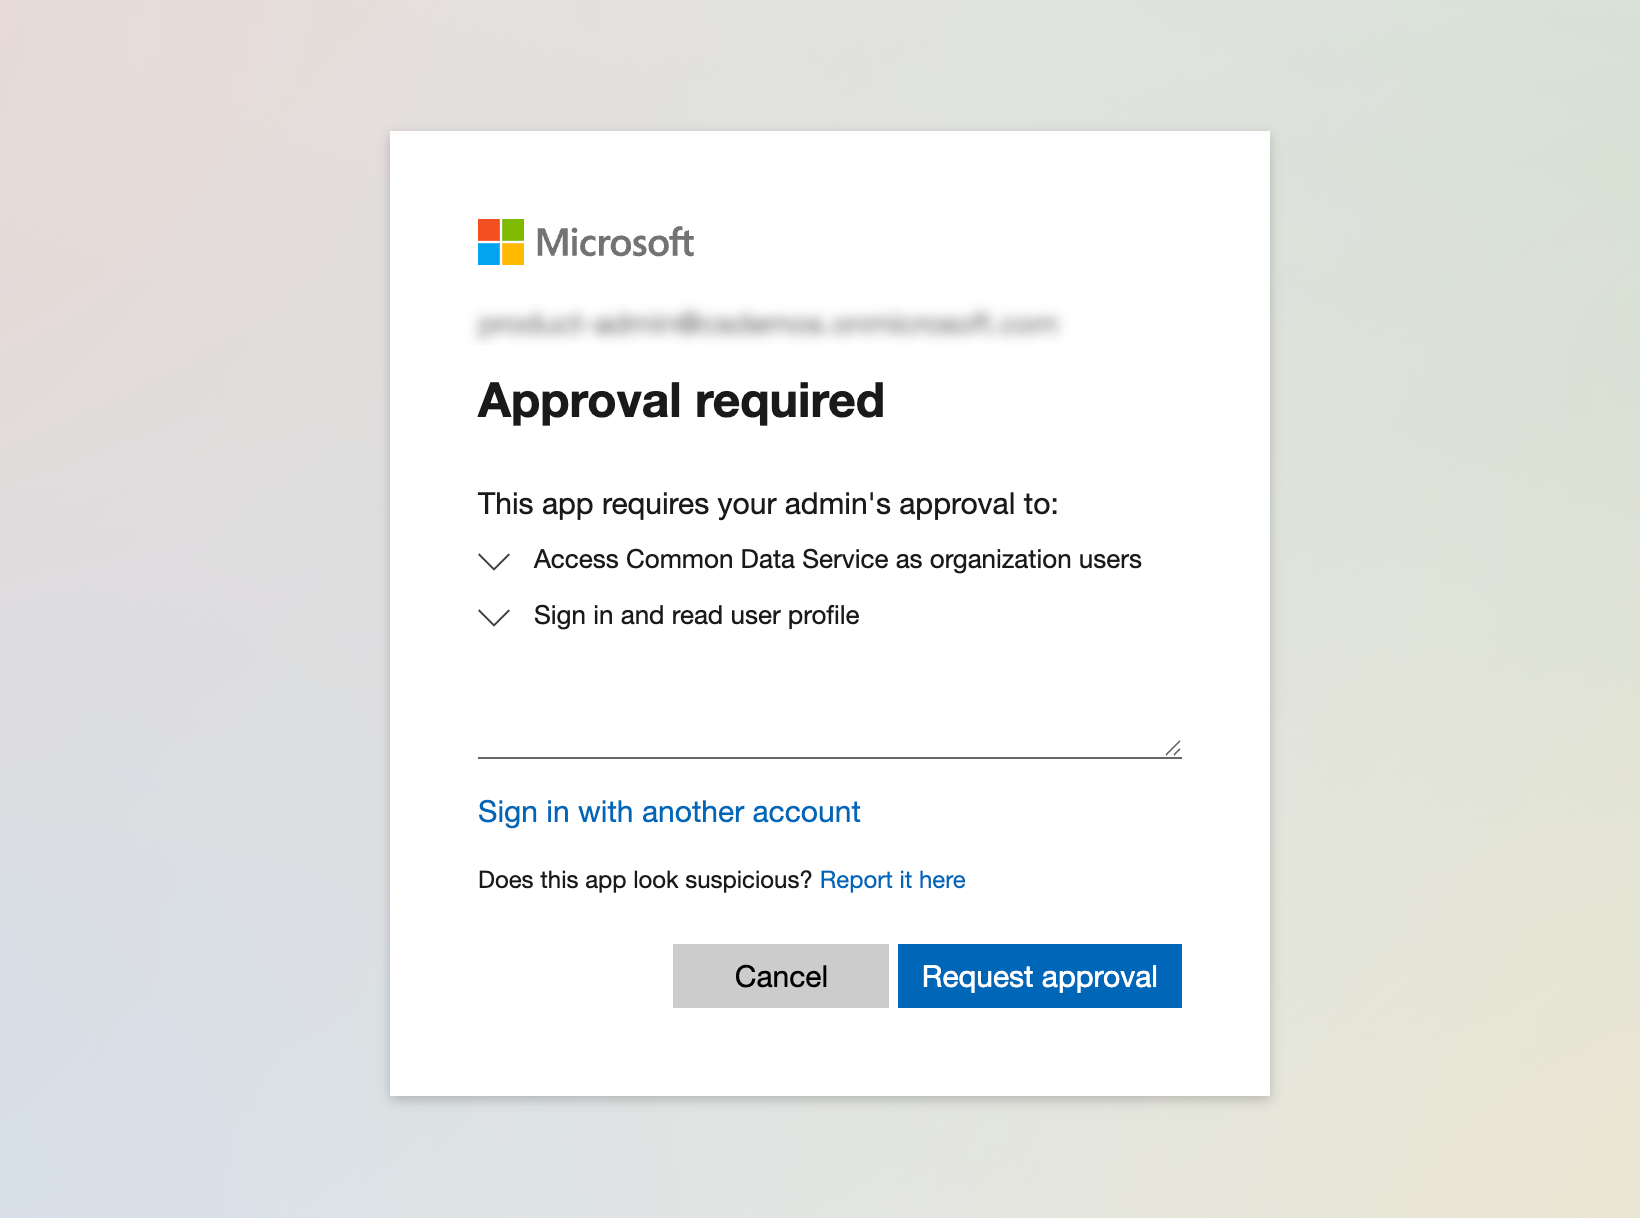 Admin consent screen
Obtain the Application (client) ID from the Azure Portal
Go to the Overview > Essentials section.
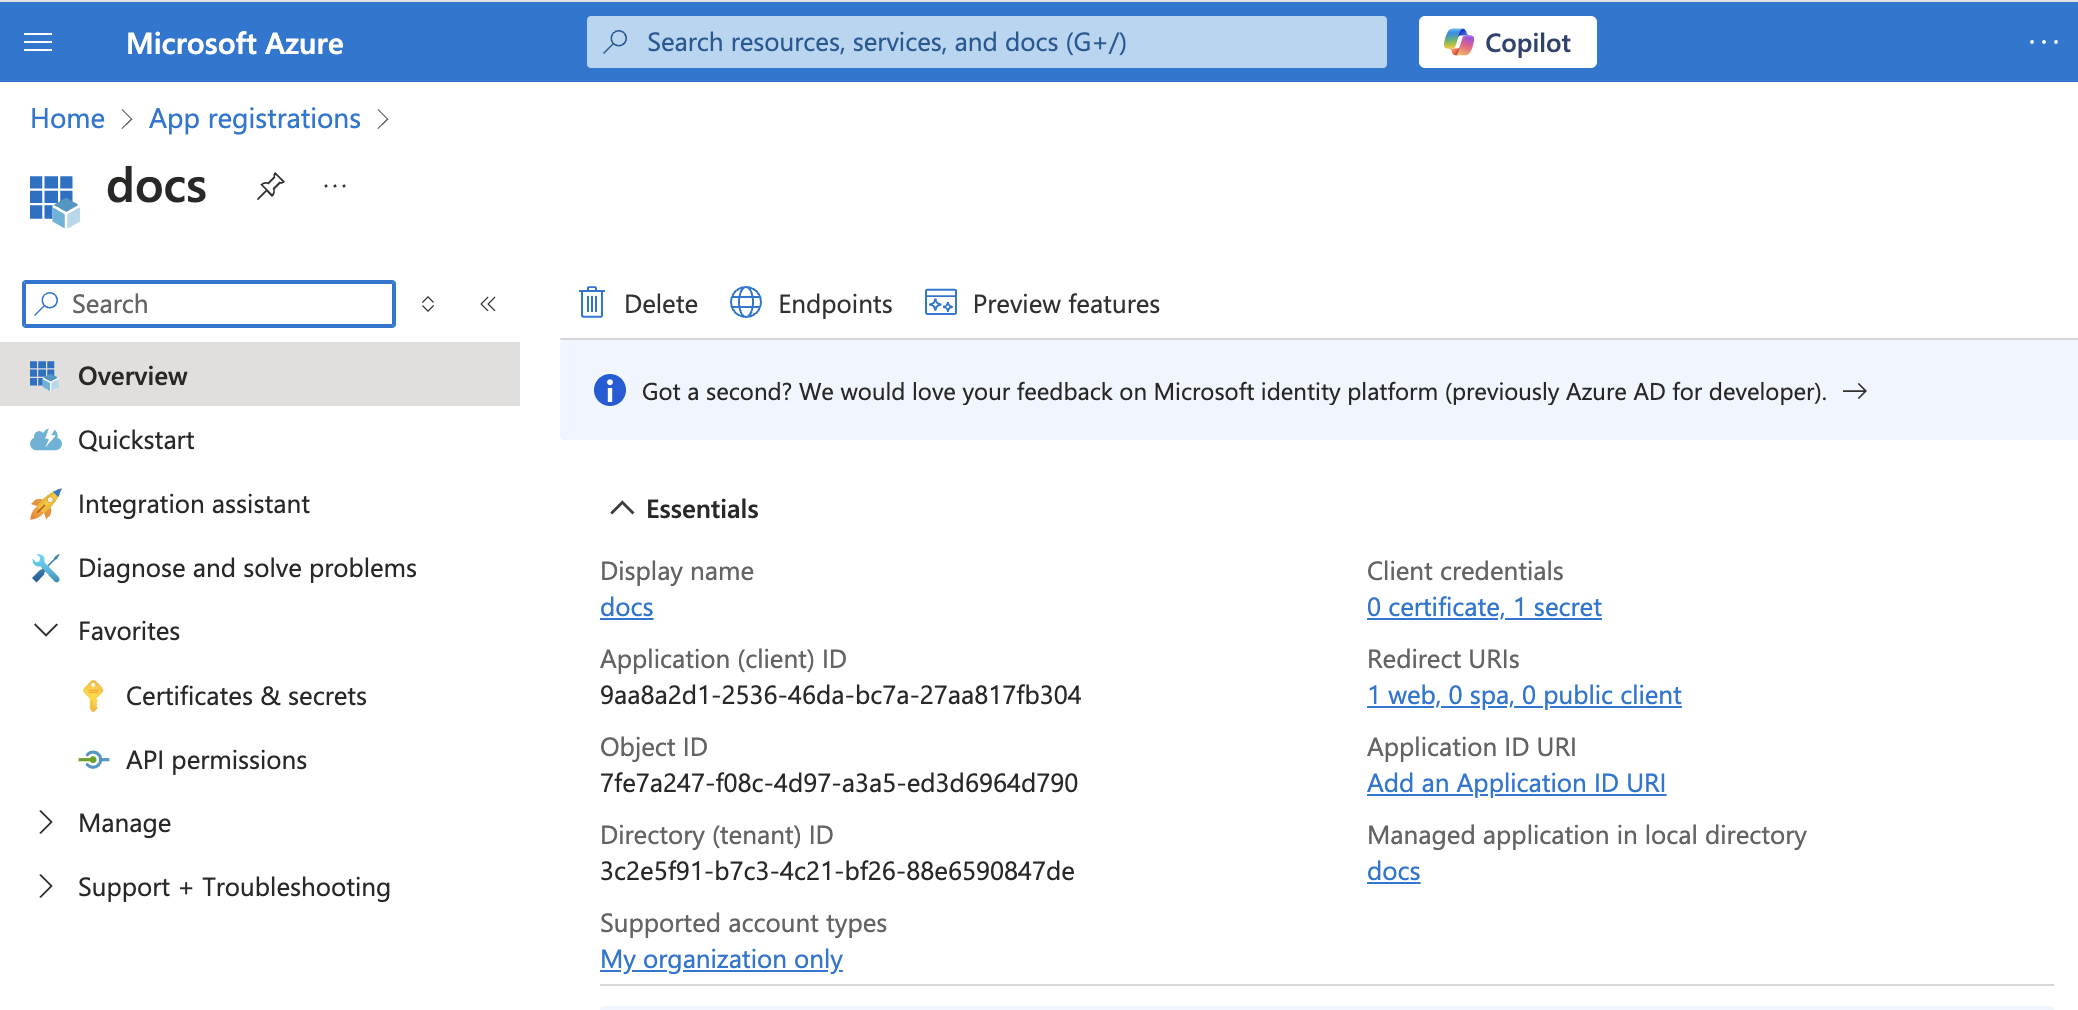 App details
Copy the Application (client) ID for use in Workato.
Generate a client secret
Complete the following steps to generate a client secret:
Go to Manage > Certificates & Secrets > Client secrets.
Click + New client secret.
Provide a Description for the client secret and specify an Expires date.
Click Add.
Copy and save the client secret Value—not the Secret ID—for use in Workato.
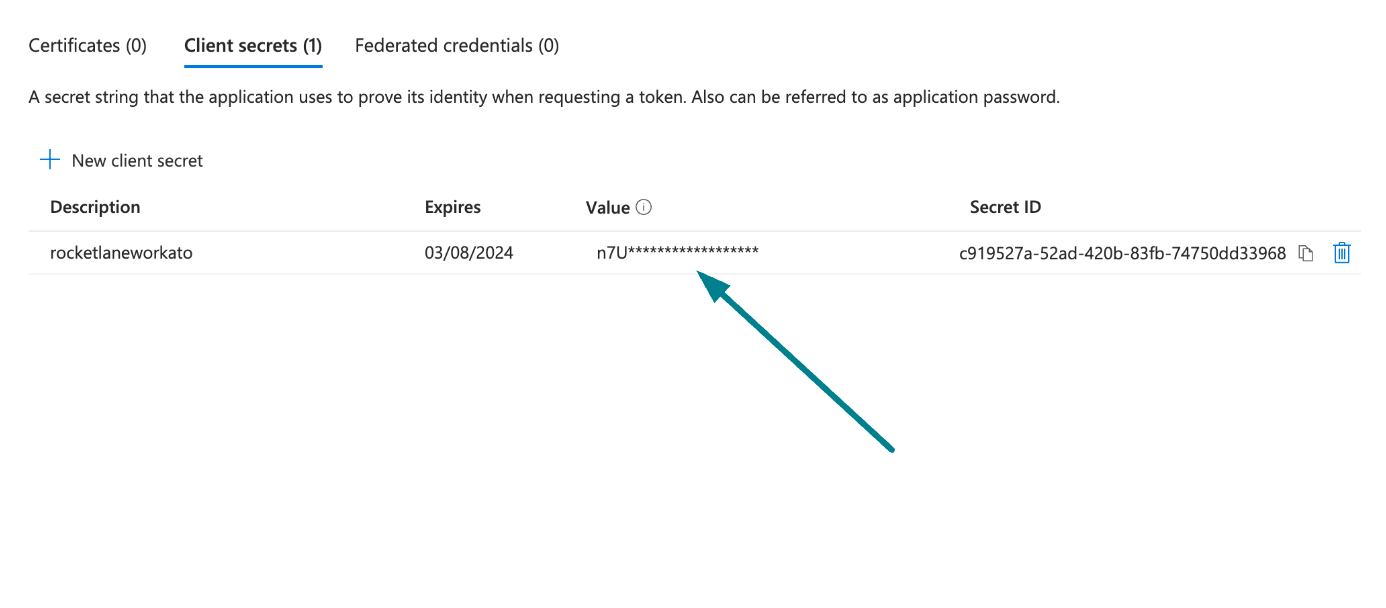 Copy and save the client secret value
Return to Workato to finish setting up your connection.
Complete setup in Workato
Complete the following steps to establish a Microsoft Dynamics 365 connection using authorization code grant authentication:
Click Create > Connection or press C twice.
Search for and select Microsoft Dynamics 365 as your connection on the New connection page.
Enter a name for your connection in the Connection name field.
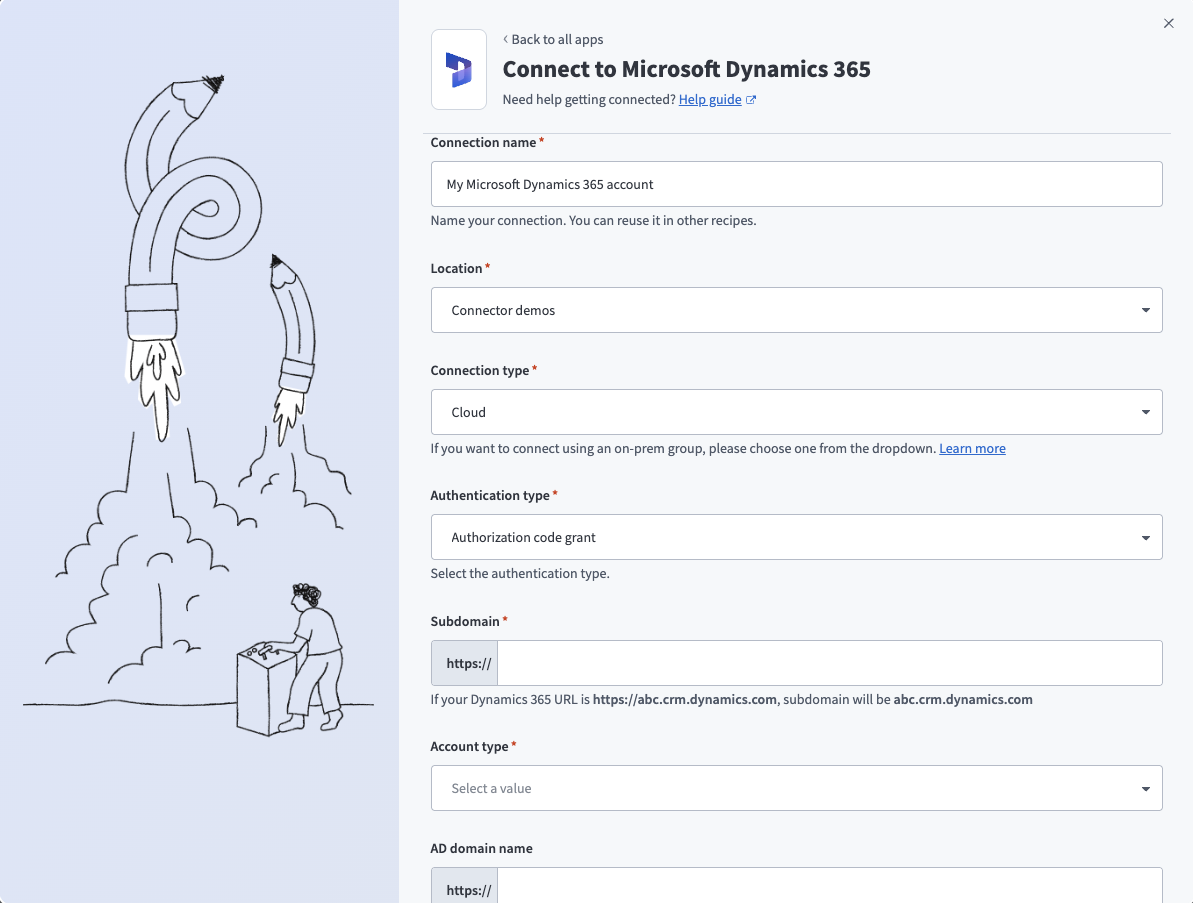 Connect to Microsoft Dynamics 365
Use the Location drop-down menu to select the project where you plan to store the connection.
Use the Connection type to specify a cloud connection or select an on-prem group for the connection.
ON-PREM CONNECTIONS
If using an on-prem connection, you must obtain a client ID by registering your Microsoft Dynamics 365 app with the Active Directory Federation Service. Learn more.
Select Authorization code grant as the Authentication type.
Enter your Microsoft Dynamics 365 environment’s full domain, such as abc.crm.dynamics.com, in the Subdomain field.
Use the Account type drop-down menu to specify whether the account you're connecting to is hosted in the cloud or on-prem.
Fill in the AD domain name field. This field is required if you select On-premise as the Account type. For example, if your AD server is https://abc.adfs.dynamics.com/adfs, the AD domain name is abc.adfs.dynamics.com.
Enter your client ID in the Client ID field.
Enter your client secret in the Client secret field.
Optional. Use the Version drop-down menu to specify the API version you plan to use in your connection. Options include:
- Version 8
- Version 9
Optional. Expand the Advanced settings section to configure the Resource URI for which connection should be authorized. If left empty, all resources in the subdomain will be authorized. For example, https://abc.crm.dynamics.com/api/data/v9.0/.
Optional. Select a custom OAuth profile to use for the connection from the Custom OAuth profile drop-down menu.
Click Sign in with Microsoft.
Microsoft Dynamics 365 role requirements
Every tool call runs under the Dataverse security role and row-level permissions of the connected account, not a separate service account. Read tools only return records and related data that the connected account's security role and row-level access permit. A request that calls for a privilege the connected account doesn't have fails rather than returning a partial result. Refer to Create or edit a security role to manage access for the complete list of role capabilities.
How to use Microsoft Dynamics 365 CRM MCP server tools
Refer to the following sections for detailed information on available tools:
get_record tool
The get_record tool retrieves a single CRM record by ID or alternate key. Your LLM uses this tool to inspect a record's current fields before acting on it, or to confirm a write it just made.
Try asking:
Show me the full details for this lead.What are the current fields on this opportunity?Confirm the case status after I just resolved it.Get the details for this account.
search_records tool
The search_records tool searches for CRM records by field values or by identity attributes, such as name, email, or phone. Your LLM uses this tool to find accounts, contacts, leads, opportunities, or cases before reading, updating, or transitioning them, or to look up a queue ID before moving a case.
Try asking:
Find the lead for Alex Patel at Acme Corp.Search for open cases assigned to Jade Chen.Find the contact with the email [email protected].Find the queue ID for the billing team.
describe_schema tool
The describe_schema tool describes the fields, types, and choice values of a supported CRM object. Your LLM uses this tool to discover writable fields and valid choice values on an account, contact, lead, opportunity, or case before creating or updating a record.
Try asking:
What fields can I set on a case?List the valid status reasons for an opportunity.What fields are available on the lead object?Show me the choice values for case priority.
create_record tool
The create_record tool creates a new CRM record on a supported object. Your LLM uses this tool to add a new account, contact, lead, opportunity, or case after a conversation or inbound request.
Try asking:
Create a new lead for Dana Lopez at Acme Corp.Add a contact for Kiran Nguyen.Create a case for this support request.Add a new opportunity for the Acme Corp renewal.
update_record tool
The update_record tool updates selected fields on an existing CRM record. Your LLM uses this tool to change fields you specify on an account, contact, lead, opportunity, or case.
Try asking:
Update the phone number on this contact.Change the estimated close date on this opportunity.Update the priority on this case to high.Set the industry field on this account.
upsert_record tool
The upsert_record tool creates or updates a CRM record using a declared alternate key. Your LLM uses this tool to write a record without first checking whether it already exists, such as when syncing records from another system.
Try asking:
Create or update the contact with the email [email protected].Upsert this account using its external ID.Sync this lead using its source system key.Create or update this record without creating a duplicate.
create_activity tool
The create_activity tool logs a task, phone call, or appointment against an existing CRM record. Your LLM uses this tool to record an interaction on an account, contact, lead, or opportunity after a call, meeting, or follow-up.
Try asking:
Log the call I just had with Acme Corp.Schedule a follow-up task on this lead for next week.Log an appointment with Kiran Patel for tomorrow.Record a phone call on this opportunity.
create_note tool
The create_note tool adds a note to an existing CRM record. Your LLM uses this tool to capture context on a record that doesn't fit a structured field.
Try asking:
Add a note to this case explaining how it was fixed.Note that this opportunity is waiting on legal review.Add a note to this account about the renewal discussion.Leave a note on this lead with the qualification details.
list_related_records tool
The list_related_records tool retrieves records related to a parent record through a supported relationship. Your LLM uses this tool to review an account's contacts, a contact's opportunities, or a case's activities before acting on the parent record.
Try asking:
What contacts are linked to this account?Show me the opportunities associated with this account.List the activities logged on this case.What cases are related to this account?
qualify_lead tool
The qualify_lead tool runs the standard lead qualification transition. Your LLM uses this tool to mark a lead as qualified. It creates the related account, contact, or opportunity records only when you ask for them.
Try asking:
Qualify this lead and create the related opportunity.Convert this lead now that it's qualified.Qualify this lead for Acme Corp in USD.Promote this lead to an opportunity.
resolve_case tool
The resolve_case tool resolves an open case. Your LLM uses this tool to resolve a case with a resolution reason and an optional note after the issue is fixed.
Try asking:
Resolve this case with a note explaining the fix.Close this case as resolved.Mark this support case resolved.Resolve this case with the reason "Information provided."
close_opportunity tool
The close_opportunity tool records a win or loss outcome on an open opportunity. Your LLM uses this tool to mark an opportunity won or lost and capture the outcome details.
Try asking:
Mark this opportunity as won.Close this opportunity as lost and note the reason.Record a win on the Acme Corp opportunity.Close this deal with a loss reason of "price."
reassign_case tool
The reassign_case tool reassigns ownership of a case to a different user or team. Your LLM uses this tool to hand off a case without changing its queue.
Try asking:
Reassign this case to Kai Lee.Hand this case off to the escalations team.Change the owner of this case to Kiran Patel.Reassign this ticket to another agent.
move_case_to_queue tool
The move_case_to_queue tool moves a case from its current queue into a destination queue you specify. Your LLM uses this tool to route a case to a different team without changing who owns it.
Try asking:
Move this case to the escalations queue.Route this case to the billing queue.Move this ticket into the Tier 2 queue.Send this case to the on-call queue.
Getting started
View and manage your MCP server tools in the Details tab Tools section. Tool management provides the following capabilities:
TOOLS MUST BE STARTED
Your LLM can only access active tools in your MCP server connector.
Last updated: