Microsoft Entra ID SAML role sync configuration
Workato supports role and group synchronization through Microsoft Entra ID using SAML attribute mapping:
- Environment roles are passed through SAML attributes such as
workato_role,workato_role_test, andworkato_role_prod. - Collaborator groups are passed through the
workato_user_groupsattribute.
Roles and group memberships update the next time the user signs in with SAML SSO.
This page walks through configuring Microsoft Entra ID to sync Workato roles for common environments, such as DEV (default), PROD, and TEST.
MIGRATION TO THE NEW PERMISSIONS MODEL
If your organization is migrating from the legacy permissions model to the new permissions model, update your SAML configurations in Microsoft Entra ID. Workato doesn't automatically translate existing assignments. Update the following:
- Create Entra groups that represent Workato environment roles (for example,
WKT-DEV-ADMIN,WKT-PROD-MEMBER) and map them to SAML attributes such asworkato_role,workato_role_prod, andworkato_role_test. - Configure a SAML group claim to send group display names in the
workato_user_groupsattribute. Use a consistent naming convention (for example,WKT | Admin | Finance) to align Entra groups with Workato collaborator groups.
You can test by assigning an Entra group to the Workato application and reviewing the Activity audit log to confirm the correct role and group claims.
Prerequisites
- Configure the SAML SSO for your Microsoft Entra ID organization.
- Enable just-in-time provisioning in the Workato UI.
- Use SAML SSO enforcement for your team or organization.
Set up role sync
GROUP REQUIREMENT
Before you configure role claims, create Microsoft Entra groups that represent your Workato environment roles. Use a consistent naming convention, such as the following:
- WKT-DEV-ADMIN
- WKT-DEV-MEMBER
- WKT-TEST-ADMIN
- WKT-TEST-MEMBER
- WKT-PROD-ADMIN
- WKT-PROD-MEMBER
Your organization can choose different names, but you'll reference these groups later when you define claim conditions.
Complete the following steps to set up role sync:
Go to Enterprise Applications > Workato > Single Sign On > Attributes & Claims > + Add a new claim in Microsoft Entra ID.
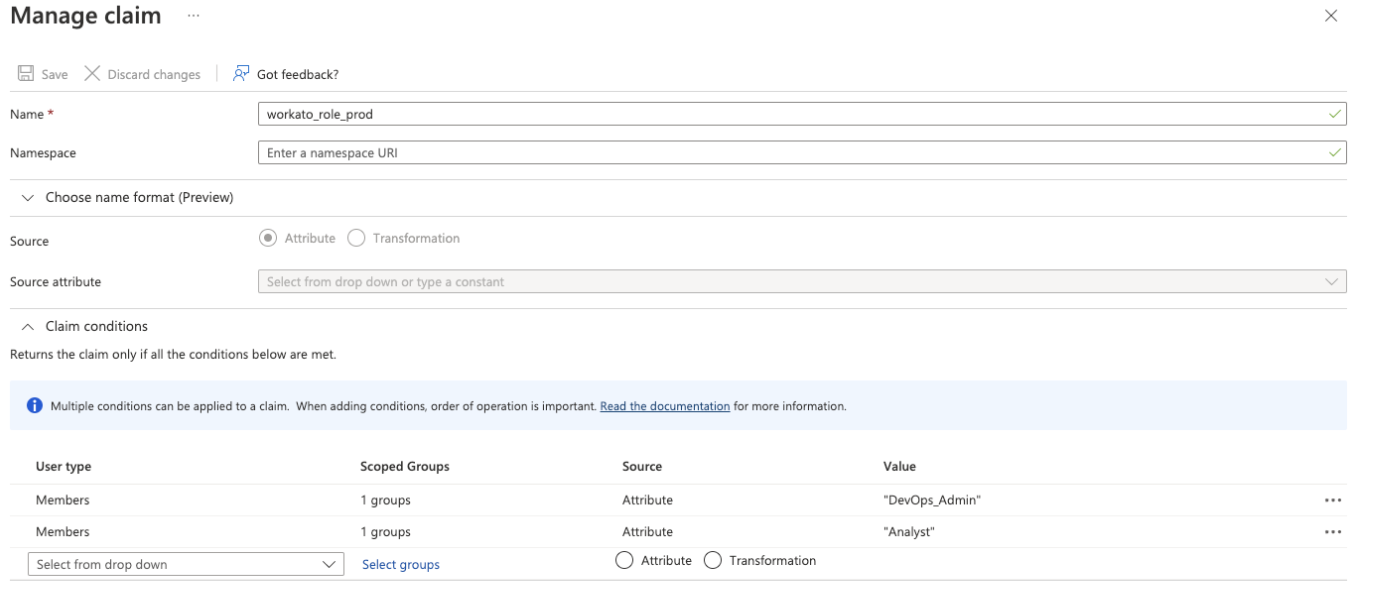
Enter workato_role_prod in the Name field.
 Setting SAML claims on Microsoft Entra ID
Optional. Enter a Namespace URL.
Select Attribute for the Source field.
Define Claim conditions that must be true to generate a claim. Use these fields to control how members of your groups inherit the Value.
Select a User type from the drop-down menu. For example, select Members.
Select the Microsoft Entra group you created earlier that corresponds to the Workato role in the Scoped Groups field. For example, WKT-DEV-ADMIN or WKT-PROD-MEMBER.
MULTIPLE GROUPS
For users who belong to multiple groups, Microsoft Entra ID assigns roles based on the order of specified conditions. See Emitting claims based on conditions.
Select Attribute in the Source field.
Enter a Value. This is the role Workato assigns when the condition is true. For example, set DevOps_Admin or Environment admin.
Optional. Configure additional conditions to control how group membership maps to roles.
Click Save.
Configure environment-specific Workato roles in Microsoft Entra ID
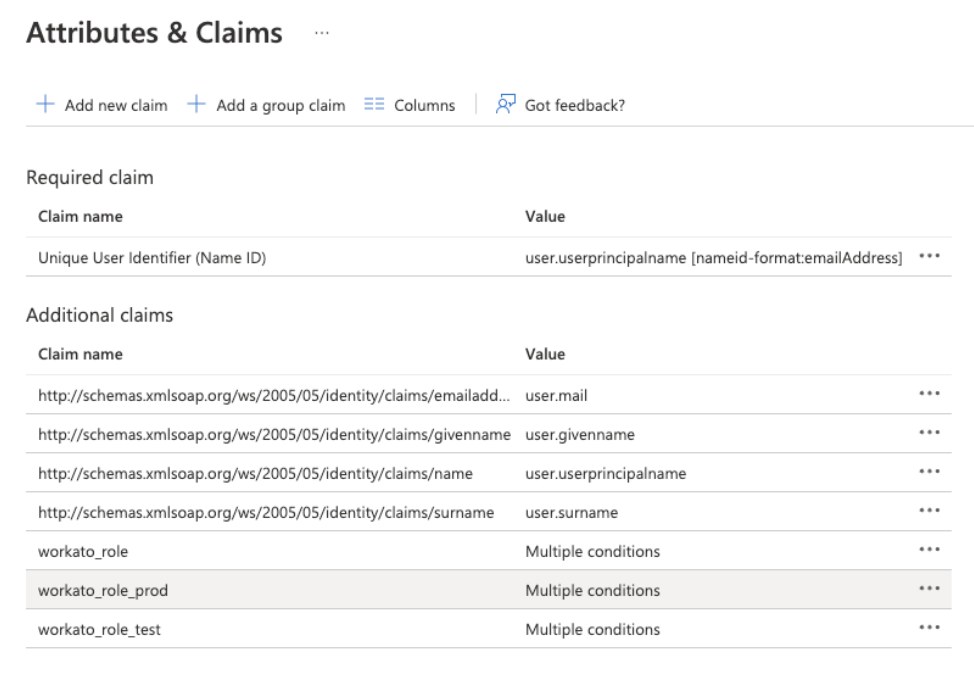
You can add additional role claims for each environment in your Workato workspace.
 Attribute Statements for workato_role in Microsoft Entra ID
In our example, we use multiple claims to specify the roles in Workato's different environments. For example, in addition to the generic workato_role, we define workato_role_prod for the production environment, and workato_role_test for the test environment. Note also that the Value field for these roles contains multiple conditions, depending on the group membership.
Configure collaborator groups in Microsoft Entra ID
Workato collaborator groups are passed from Entra ID to Workato as a group claim. Group claims allow you to decide what values to send in the SAML assertion, such as the group ID or the group display name.
We recommend sending group display names. This ensures Entra groups remain consistent with your Workato collaborator groups. These names must exactly match existing collaborator groups in Workato. For example:
WKT | Admin | Reusable Assets
WKT | Admin | Sensitive Projects
WKT | Builder | Finance
WKT | Viewer | Reusable Assets
You can define a group claim that passes these display names in the workato_user_groups attribute. Any user assigned to those Entra groups automatically passes the corresponding collaborator group values to Workato during SAML SSO:
Go to Enterprise Applications > Workato > Single Sign On > Attributes & Claims > + Add a group claim in Microsoft Entra ID.
 Configure group claims
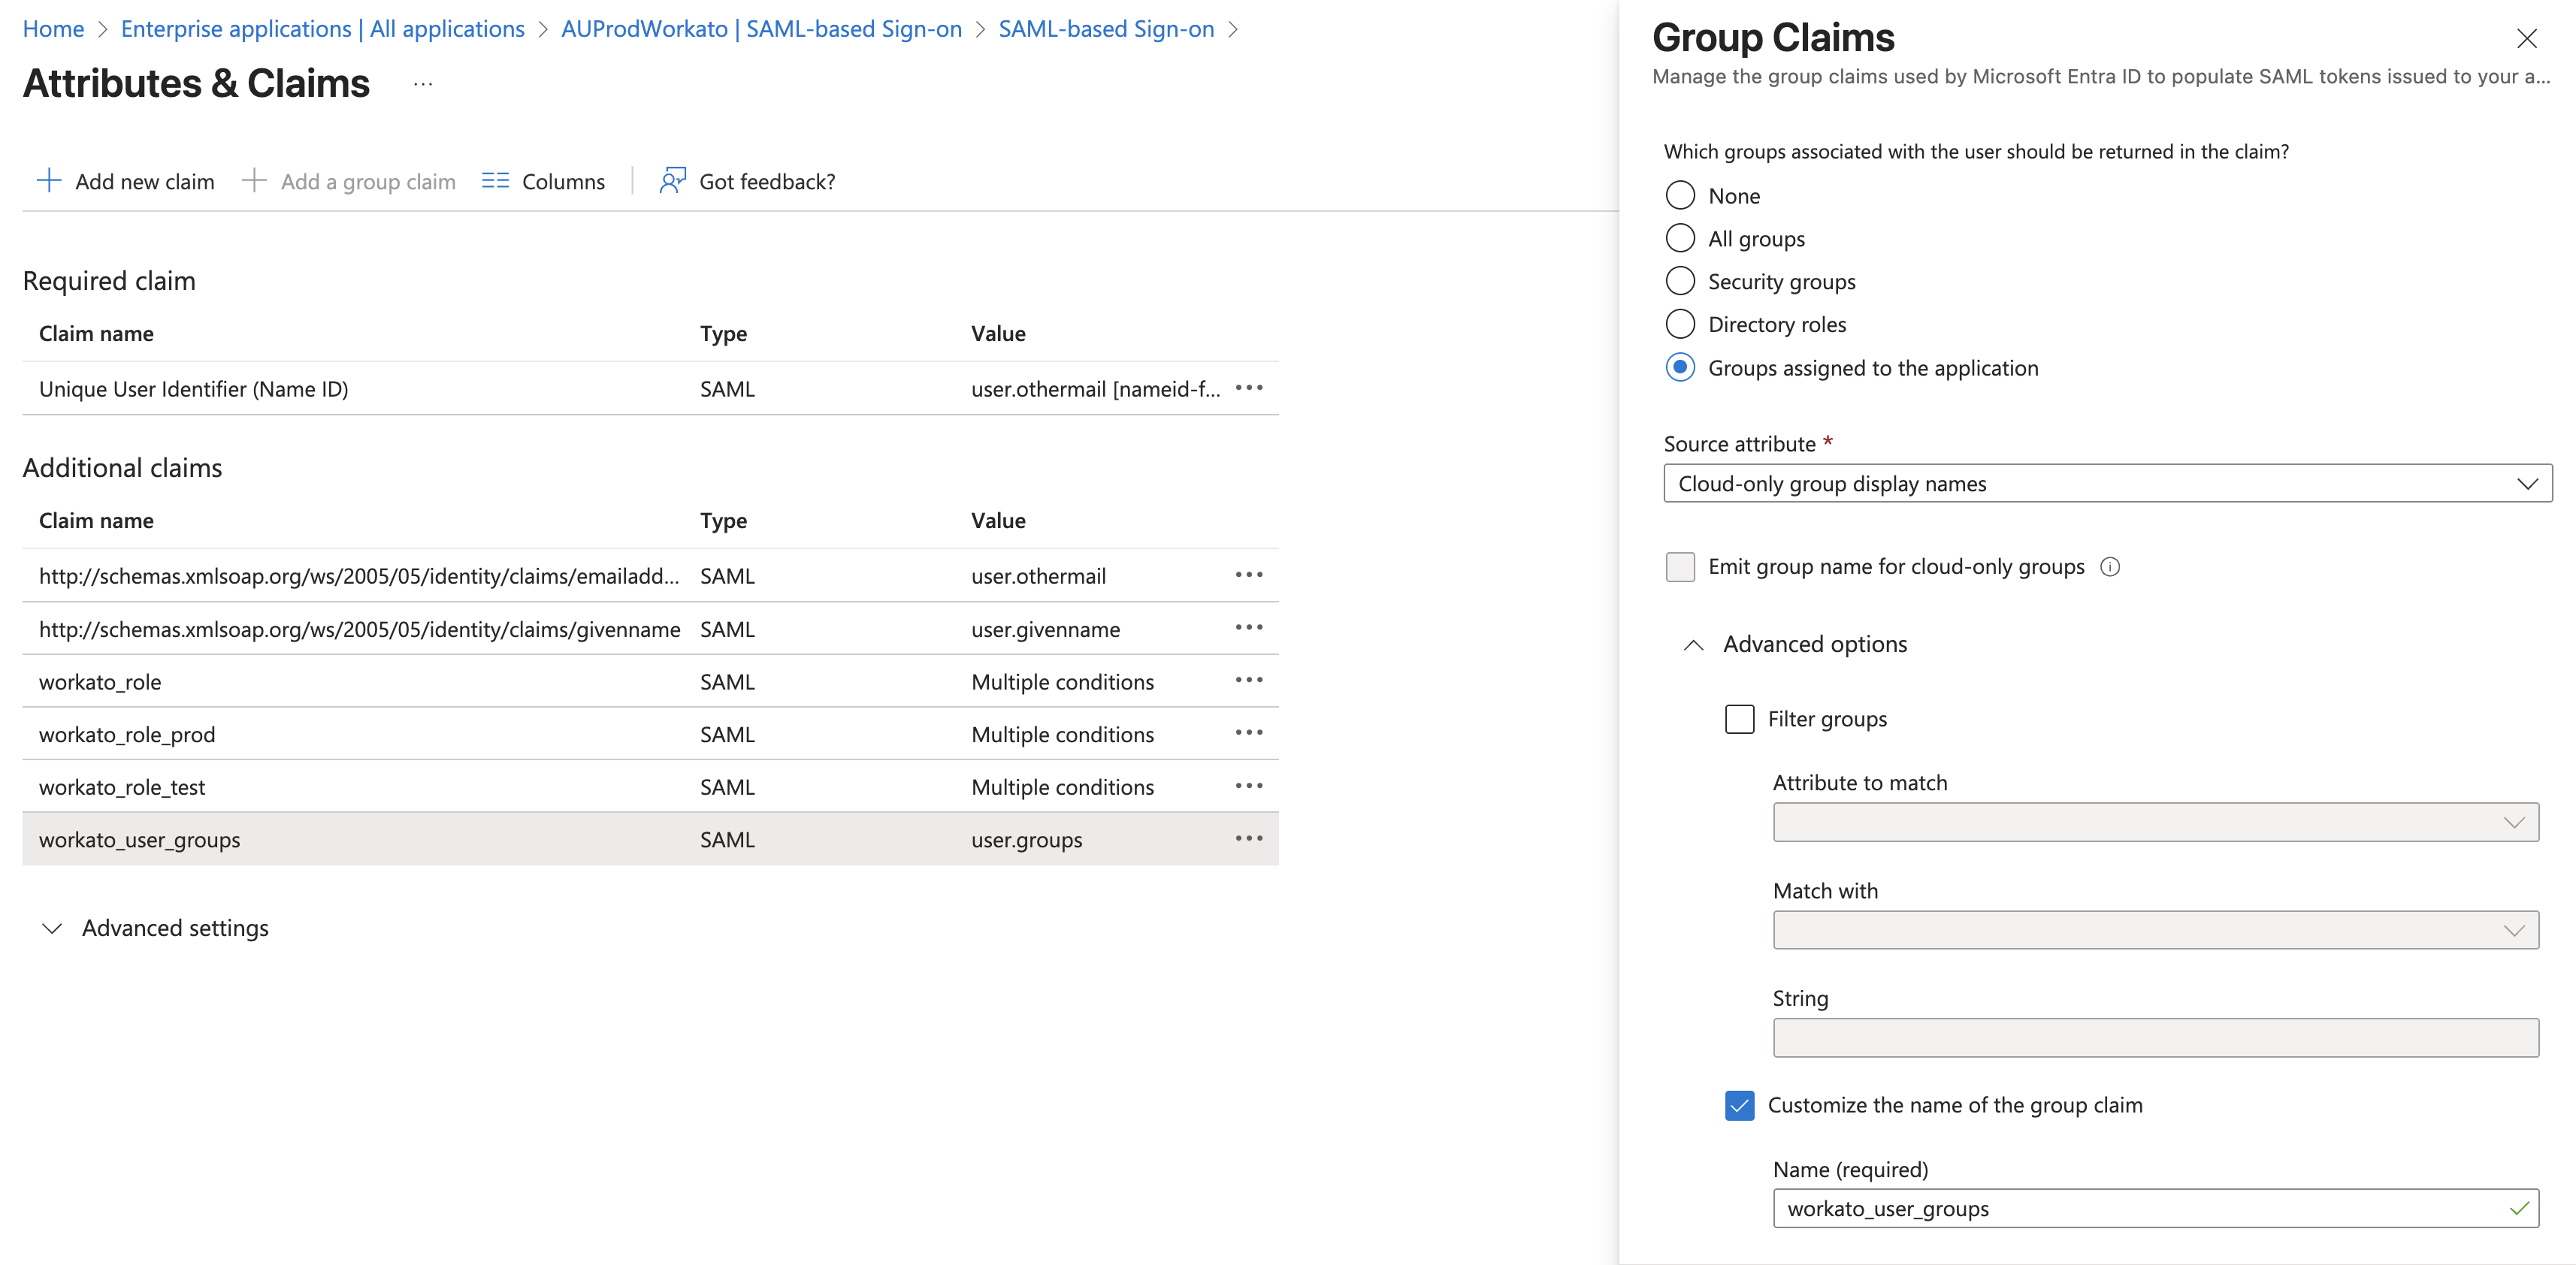
Select Groups assigned to the application in the Which groups associated with the user should be returned in the claim? field.
Set the Source attribute to Cloud-only group display names.
Enable the Customize the name of the group claim checkbox.
Enter workato_user_groups in the Name field. The value sent is the display name of the Entra group. For example, WKT | Admin | Finance.
Save the configuration.
Next, assign the Entra groups you created to the Workato application. When a user signs in, Workato assigns them to any collaborator groups that match the values in the workato_user_groups claim. If no claim is passed, the user signs in without collaborator groups.
Assign groups to the Workato app
After you define claims, assign groups in Microsoft Entra ID to the Workato app:
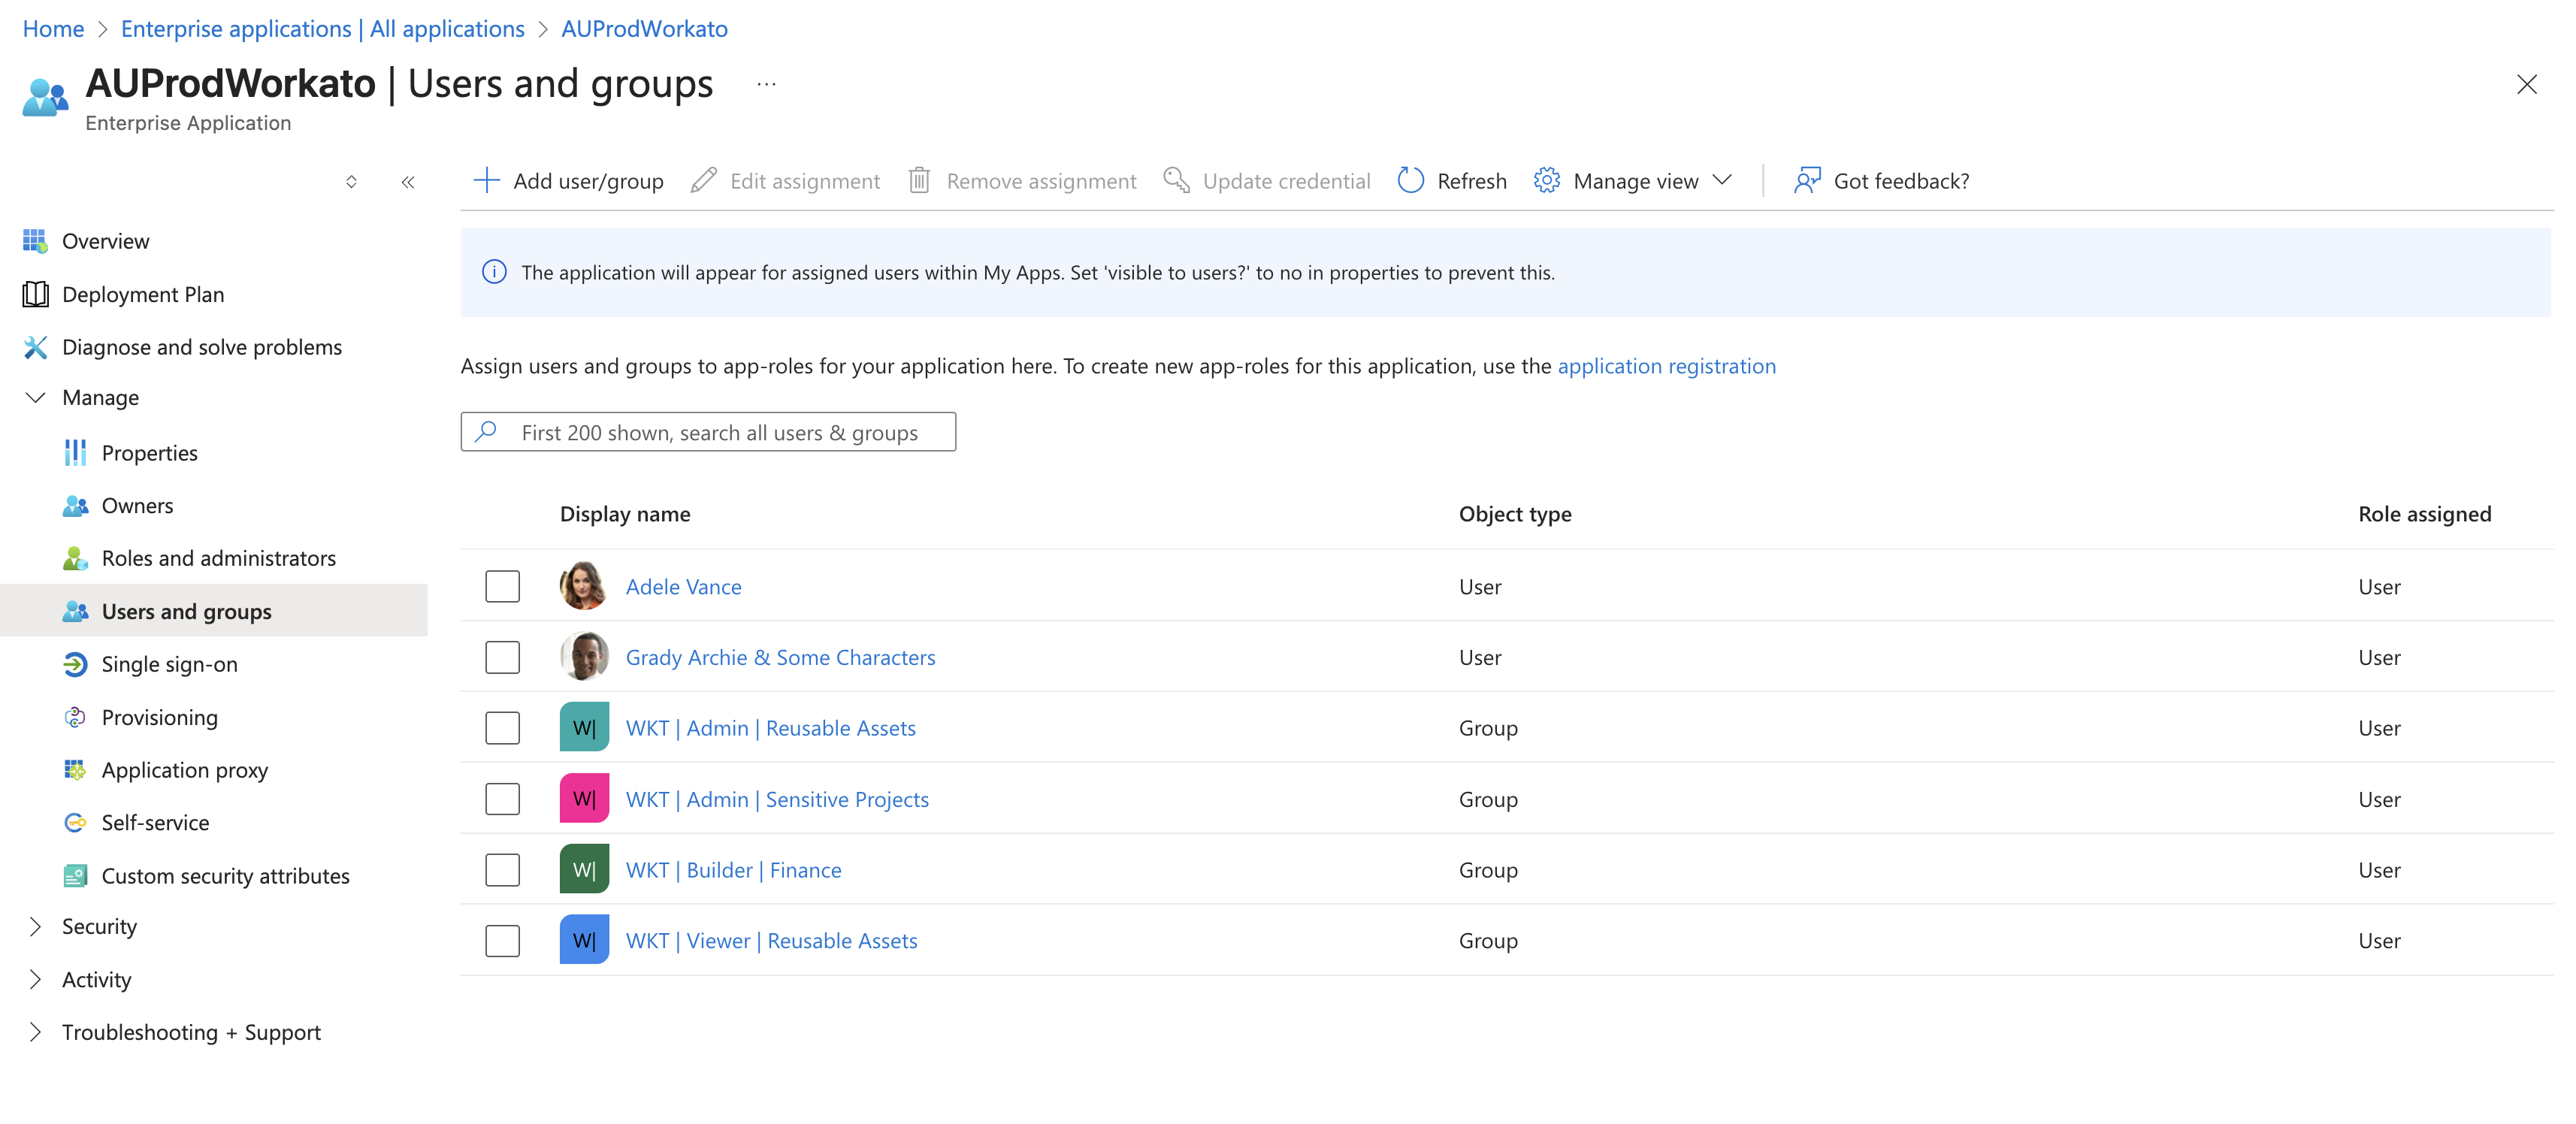
Go to Enterprise Applications > Workato > Users and groups in Microsoft Entra ID.
Select Add user/group.
 Assign groups to the Workato app
Choose the environment groups and collaborator groups you created earlier.
Assign the groups. You don't need to assign an application role. Workato applies access entirely through SAML claims.
Update the user role in Microsoft Entra ID
To update a user’s role, you can change the user’s group membership, or change the claim attribute role value.
Verify role changes
If your organization uses Workato's Activity Audit Logs feature, you can verify the automatic role sync when the user logs in through SAML SSO.
Role changes triggered by SAML assertions appear under the Source attribute, with the value saml_auto_sync.
Manual role changes made in Workato UI appear use the source user.
You can also see the New Role and Previous Role values.
Last updated: