# SOAP connection setup
After you install the SOAP connector and its dependencies, you can set up the connection.
# Step 1: Configure the connection in Workato
 Setting up a SOAP connection
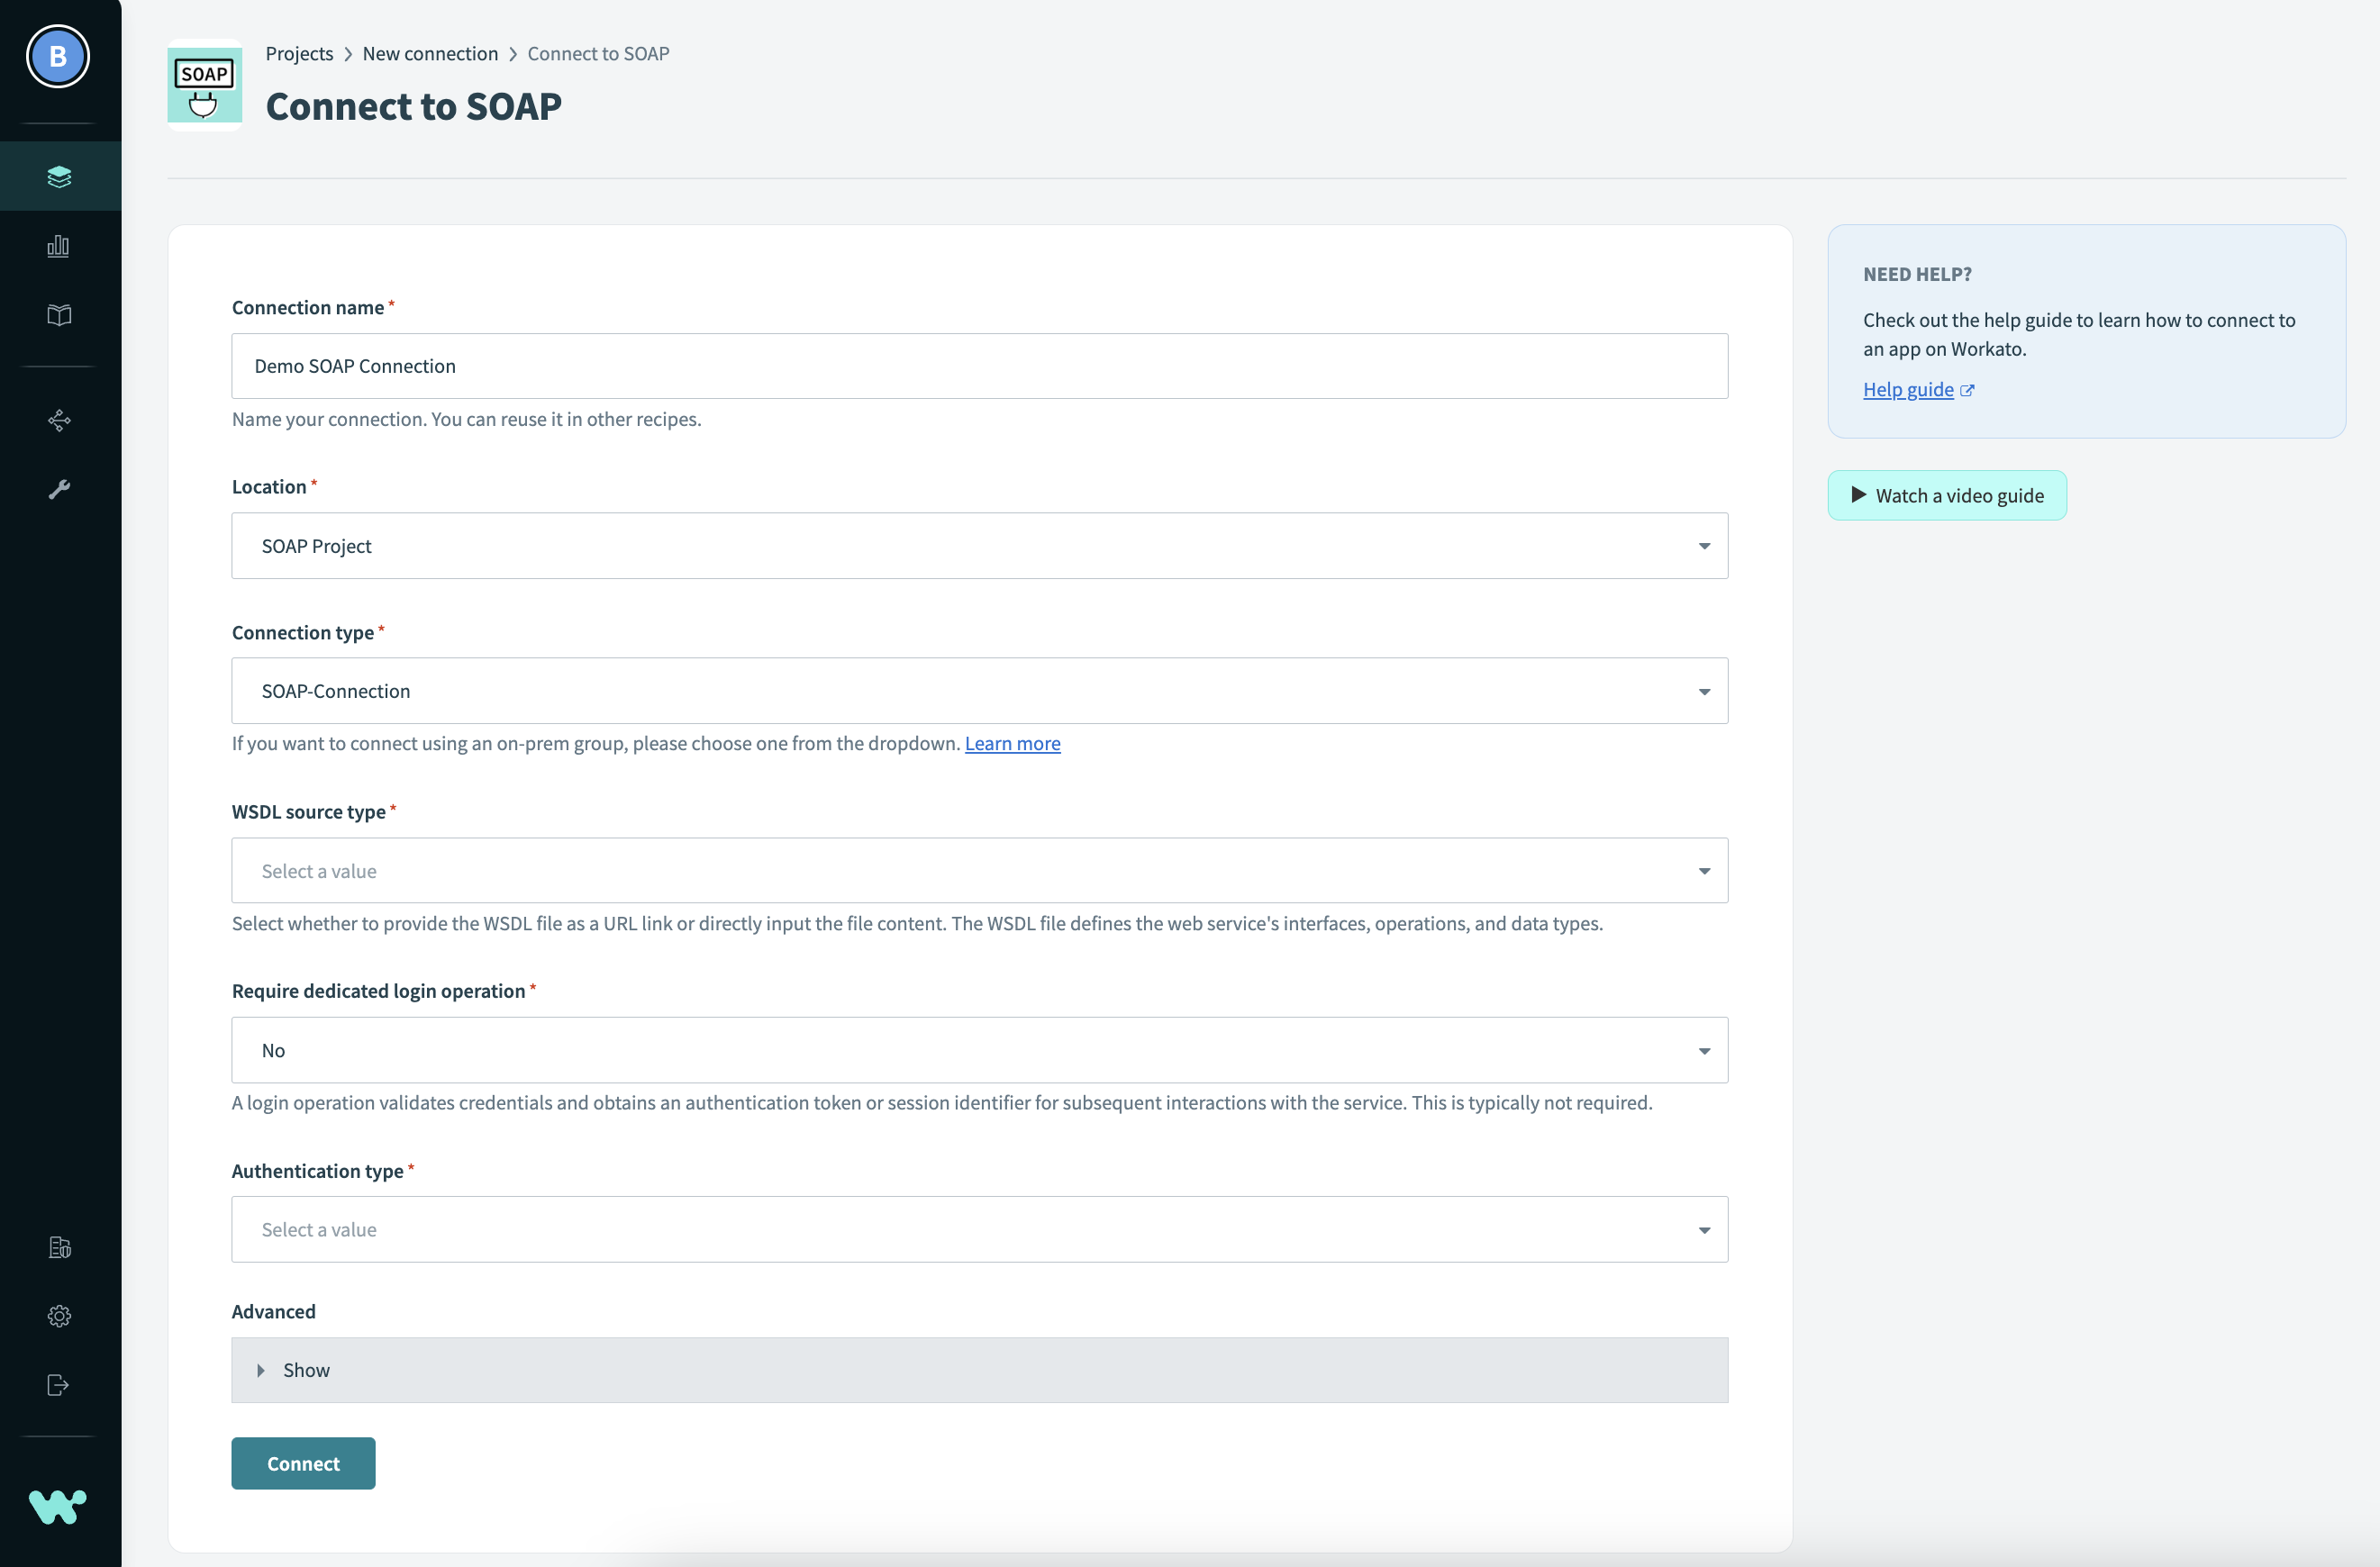
Create a new connection and select the SOAP connector you installed. Then, fill in the following fields:
Connection name
Give this SOAP connection a unique name that identifies the application it is connected to.
Location
Select an existing project for this connection or create a new one.
Connection type
You must select the on-prem group with the OPA where you installed the SOAP extension. Do not select Cloud.
WSDL source type
Select whether to provide the WSDL file as a URL link or directly input the file content. The WSDL file defines the web service's interfaces, operations, and data types.
WSDL URL
The WSDL file will be loaded from the on-prem agent (OPA). Typically, the URL is the SOAP web service with
WSDLas a query string. For example:https://<hostname>/<path>?WSDLFile content
Enter the content of the WSDL file directly. This should be a valid XML document that defines the SOAP web service. Ensure the content is correctly formatted and valid.
File path
Enter the absolute or relative path of the WSDL file on the OPA. If it is relative, you must specify the absolute path of the directory containing the WSDL file in the
extensions.soap.wsdlBasesection of theconfig.ymlOPA configuration file. For example:extensions: soap: wsdlBase: /opt/workato/ext/wsdl
Require dedicated login operation
A login operation validates credentials and obtains an authentication token or session identifier for subsequent interactions with the service. This is typically not required. For more information, see Dedicated login operation.
Authentication type
Select the authentication type.
Advanced options
Select Show to display optional advanced fields.
Web service address
In case the WSDL file does not define the service address, or you want to override it, specify the service address here. SOAP messages will be sent to this address.
Max schema depth
Maximum depth of input and output fields. This determines how deep the connector should traverse the schema tree. If the actual depth exceeds this value, some fields may not be shown. This prevent exploding schema structures. Default value is 15.
Max type recursion
Maximum number of recursions for a particular type within the schema structure. This prevents potential infinite loops when a type is nested within itself. Default value is 3.
Record SOAP envelopes
Enable recording request and response SOAP envelopes and make them available in the job logs. This is useful for debugging purposes.
Trust all certificates
If enabled, the connector will not verify the certificate presented by the server. In a production environment, it's usually recommended to not enable this.
Trust all hostnames
If enabled, the connector will not verify the hostname of the certificate presented by the server. In a production environment, it's usually recommended to not enable this.
Datetime format
Some services require a custom datetime format. Defaults to
yyyy-MM-dd'T'HH:mm:ss'Z'(ISO 8601 in UTC); for example,2023-07-04T22:00:00.000Z. See the Java (opens new window) documentation for more information and datetime pattern examples.Connect timeout
Timeout in seconds for establishing a connection to the server. Defaults to 10 seconds.
# Step 2: Test the connection
When you are finished configuring the connection, select Connect to save and test the connection.
Last updated: 10/10/2023, 2:13:38 PM