Marketo
Marketo is a marketing automation software that helps businesses manage and optimize their marketing efforts.
It provides tools for email marketing, lead management, consumer marketing, customer base marketing, and mobile marketing.
Watch a quick video
API version
The Marketo connector uses Marketo REST API v1.
Connection setup
The Marketo connector uses custom authentication.
CUSTOM SERVICE CLIENTS
Marketo exposes REST endpoints to enable integration platforms like Workato to remotely access and execute core functionalities. We recommend you create a custom service client specifically for Workato to facilitate this integration.
Key benefits of using a custom service client include:
- Isolated logging: All operations are logged under a dedicated custom service client for integration and workflow processes. This approach enhances tracking and troubleshooting by isolating issues related to specific integration platforms.
- Customized permissions: A custom service client allows for tailored permissions and security profiles, independent of individual employee user accounts.
Ensure that the custom service client is granted all necessary permissions to perform the required actions for your integration scenario. If a 403 error occurs during recipe execution, it indicates that the service client lacks the appropriate permissions for the action.
Minimum scopes
You must select the following minimum role scopes when you create a new API role. Refer to Create an API role for more information.
Read-Only ActivityRead-Write ActivityRead-Only LeadRead-Write LeadRead-Only AssetRead-Write Asset
Marketo setup for custom authentication
Complete the following steps to set up a custom authentication connection to Marketo in Workato:
- Retrieve the REST API endpoint
- Create an API role
- Create an API user
- Create a custom service for Workato
- Retrieve client credentials
Retrieve the REST API endpoint
Complete the following steps to retrieve the REST API Endpoint in Marketo:
Sign in to your Marketo instance as a user with administrator privileges.
Go to Admin > Web Services.
In the REST API section, copy and save the Endpoint for use in Workato.
Create an API role
Complete the following steps to create an API role in Marketo:
Go to Admin > Users & Roles and select the Roles tab.
Click New Role.
Provide a name for your new role in the Role Name field. Optionally, add a description in the Description field.
Select the Access API checkbox in the Permissions field.
Click Create to create the API role.
Create an API user
Complete the following steps to create an API user in Marketo:
Go to Admin > Users & Roles and select the Users tab.
Click Create API Only User.
Fill out the Email, First Name, and Last Name fields.
Select the checkbox for the API role you created in the previous step from the Roles menu.
Click CREATE API ONLY USER.
Create a custom service
Creating a custom service enables you to retrieve the client ID and client secret used to establish a connection in Workato. Refer to the Marketo Engage Developer Documentation for more information about custom services.
Complete the following steps to create a custom service in Marketo:
Go to Admin > LaunchPoint.
Click New > New Service.
Enter a descriptive Display name and select Custom from the Service drop-down menu.
Enter a description in the Description field.
Select the user you created in the previous step from the API Only User drop-down menu.
Click Create.
Retrieve client credentials
Complete the following steps to retrieve client credentials in Marketo:
Select View details for the new custom service you created in the previous step.
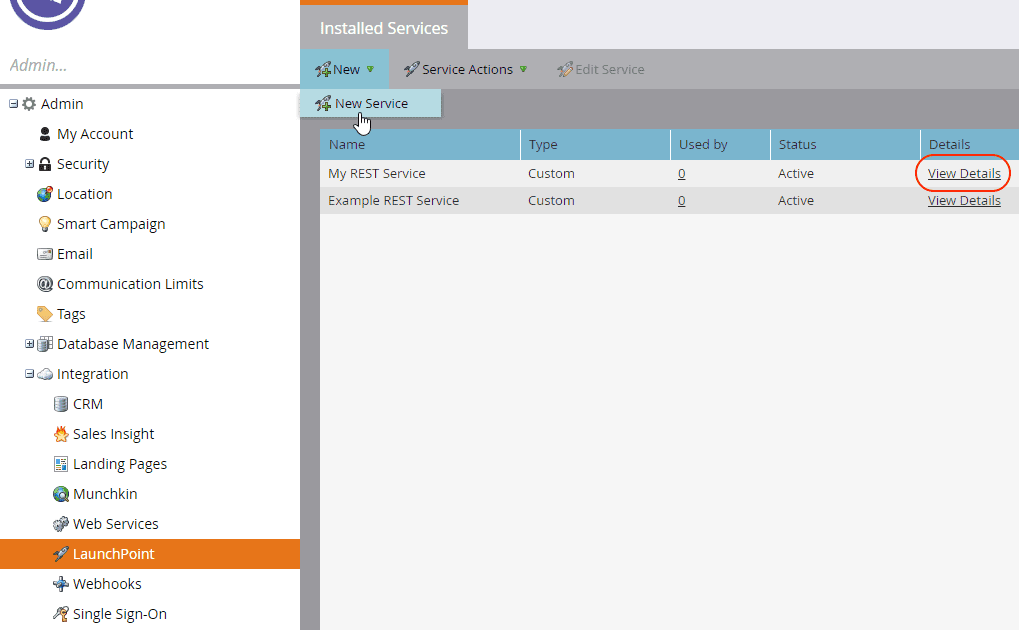 View custom service
Copy and save the Client Id and Client Secret for use in Workato.
Connect to Marketo with custom authentication
Complete the following steps to connect to Marketo in Workato:
Select Create > Connection or press C twice.
Search for Marketo and select it as your app.
Enter a name for your connection in the Connection name field.
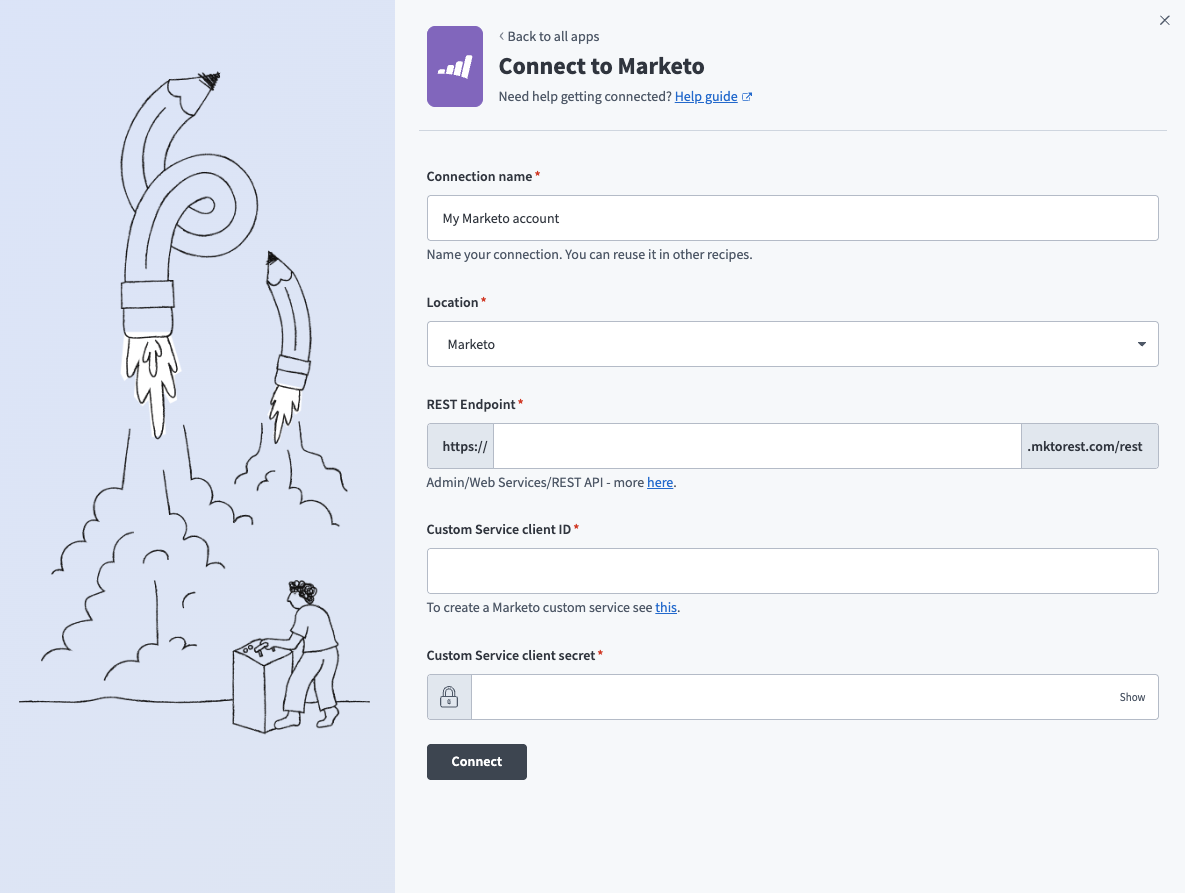 Name your connection
Use the Location drop-down menu to select the project where you plan to store the connection.
Enter the base URL of your Marketo instance in the REST Endpoint field. For example, if your REST endpoint is https://123-ABC-456.mktorest.com/rest, enter 123-ABC-456 in this field. Refer to Retrieve the REST API endpoint for more information.
Enter the Client Id from Marketo in the Custom Service client ID field. Refer to Retrieve client credentials for more information.
Enter the Client Secret from Marketo in the Custom Service client secret field. Refer to Retrieve client credentials for more information.
Click Connect.
Last updated: