Webhooks - Create a webhook with the wizard
The webhooks wizard enables you to test and configure a webhook trigger for your recipe. The guided setup takes you through:
- Setting up your unique webhook address
- Listening to a sample webhook event
When an event is received, the wizard automatically configures the trigger based on that event.
MANUAL TRIGGER CONFIGURATION
You can exit the setup wizard at any point to configure the trigger manually.
Complete the following steps to create a webhook trigger using the setup wizard:
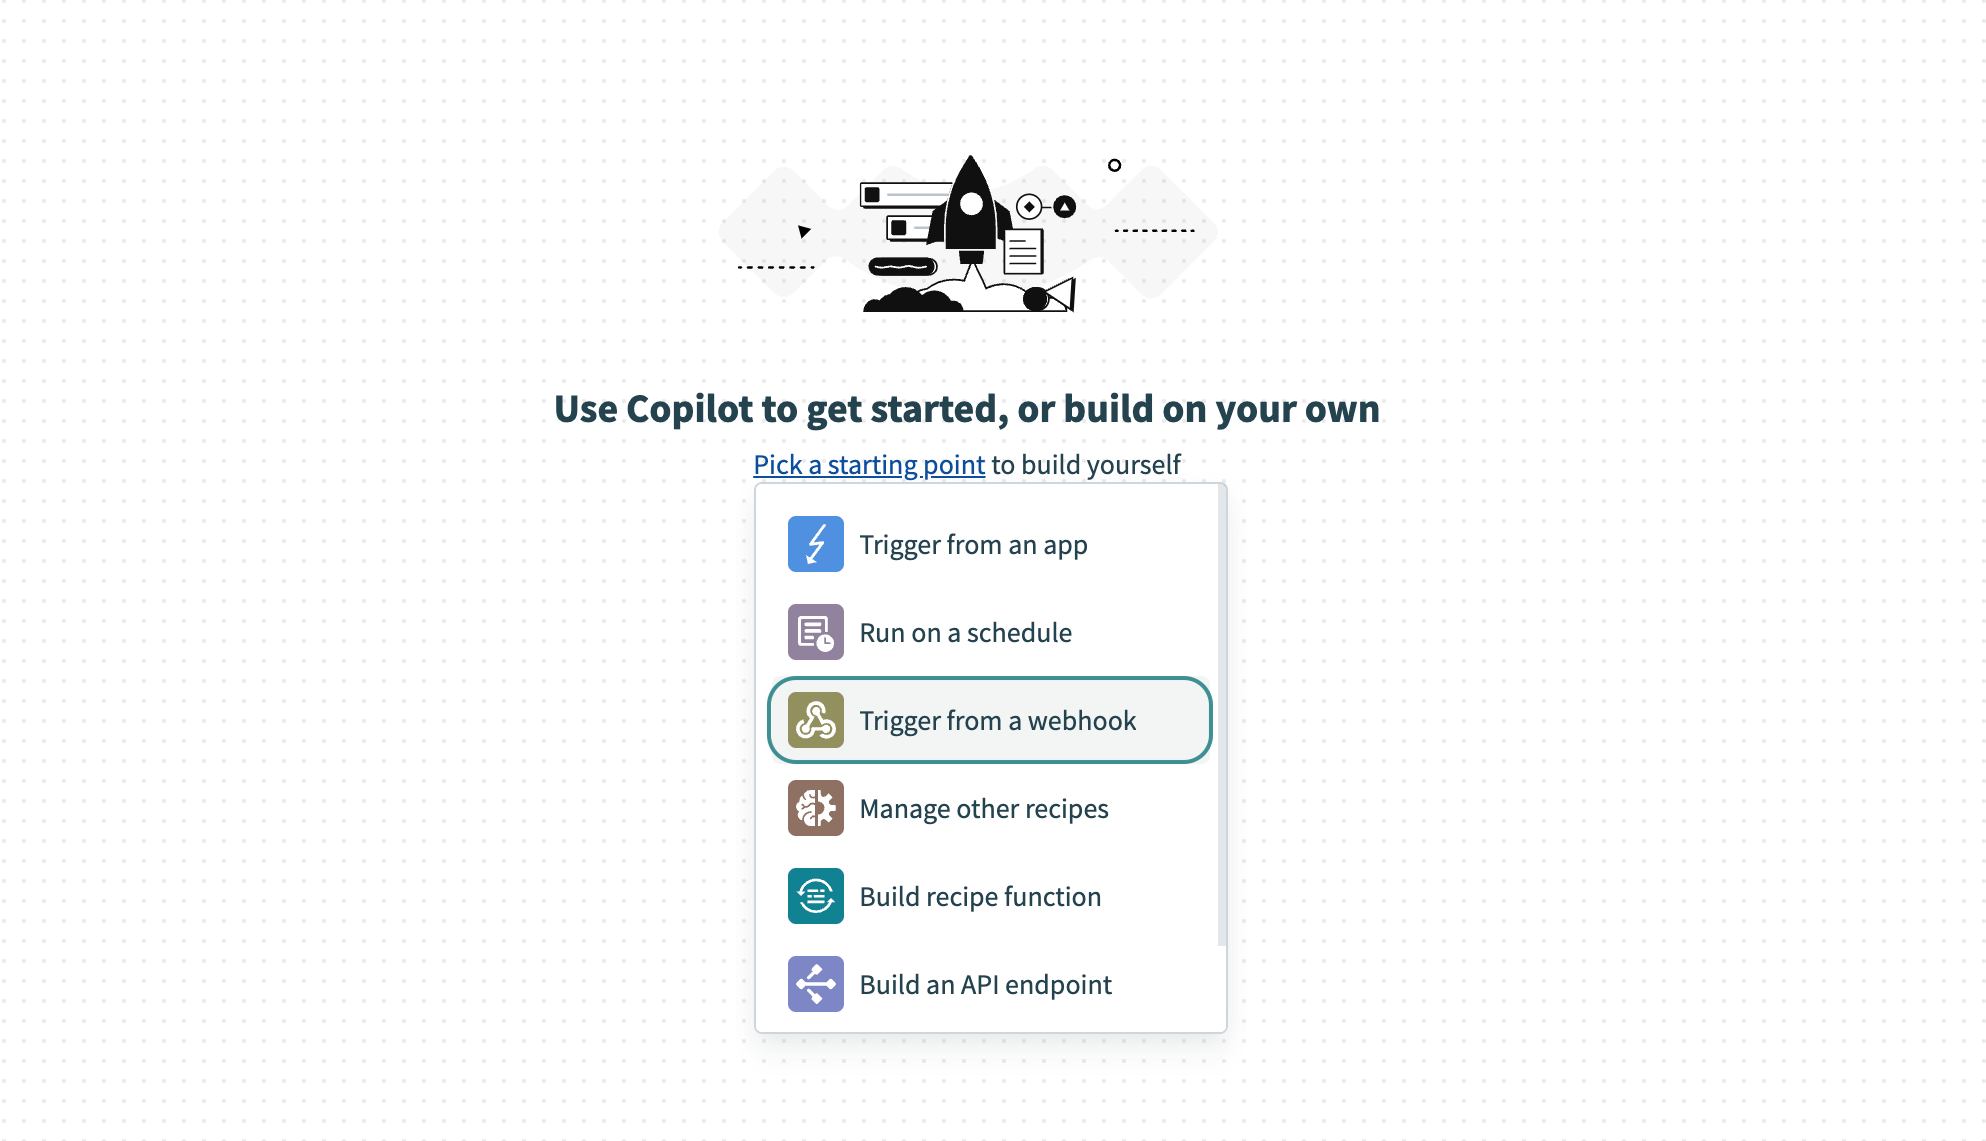
Create a new recipe by choosing the Trigger from a webhook option from the list of recipe starting points.
 Setup webhook
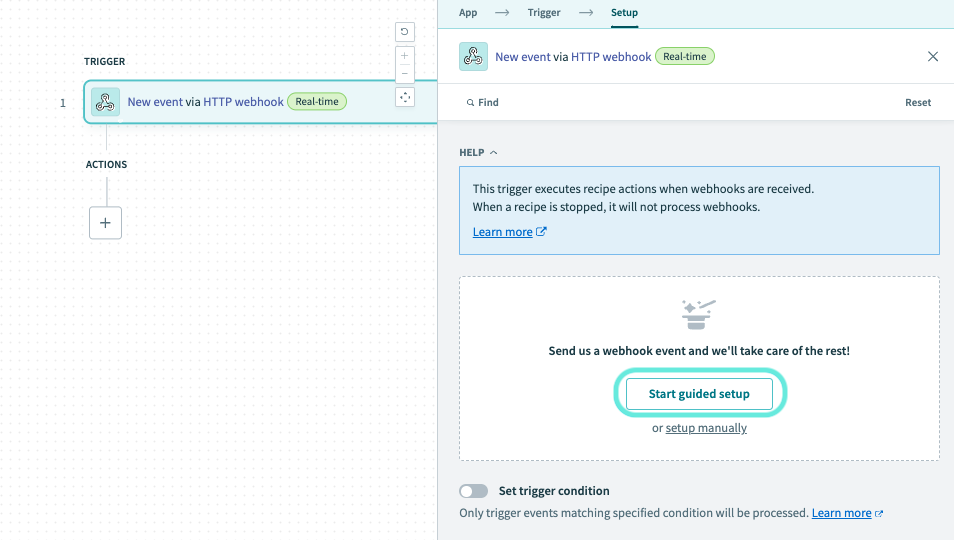
This creates a new recipe with the New event via HTTP webhook trigger.
Click Start guided setup to start the wizard.
 Start setup wizard
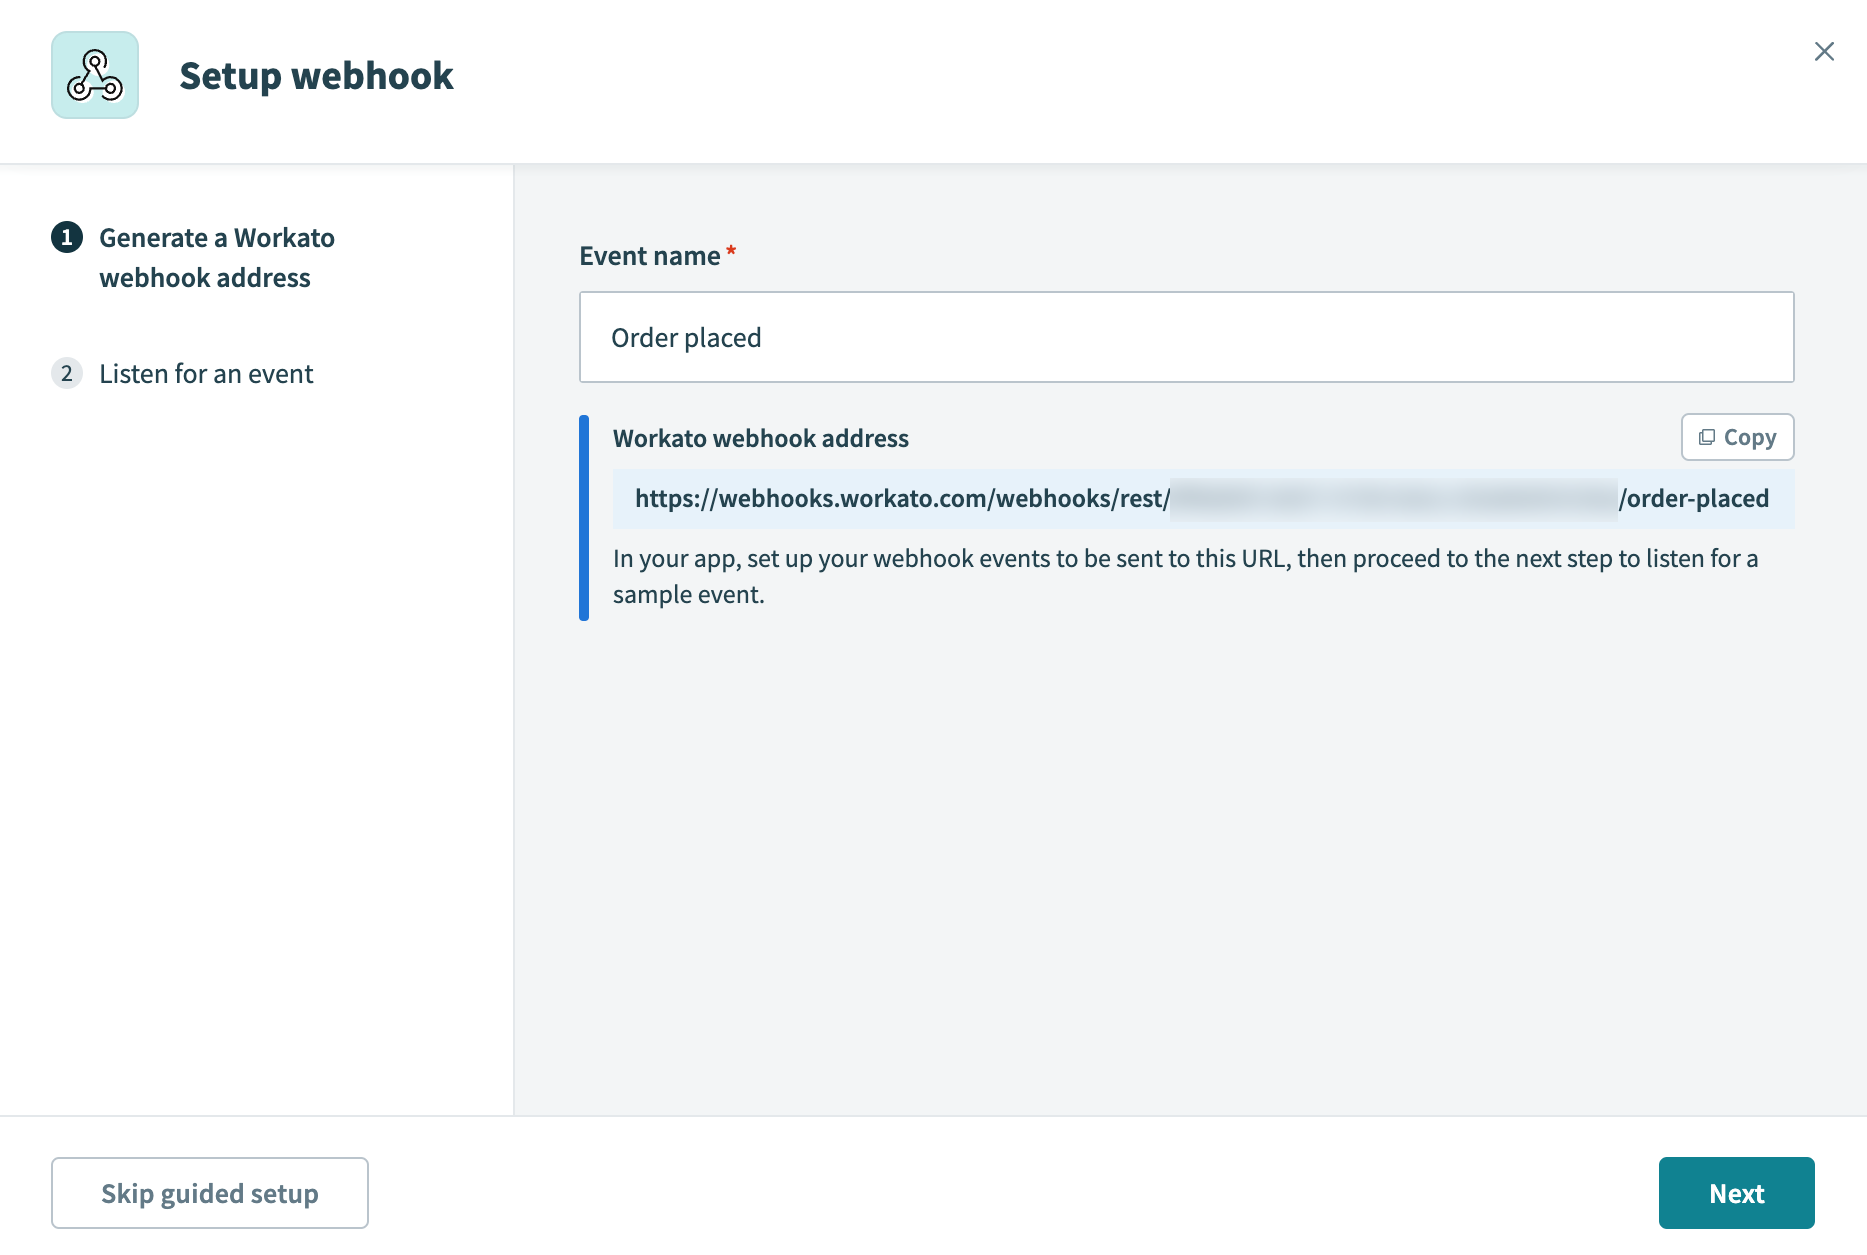
Provide a meaningful name in the Event name field. This name is used to generate a unique webhook address.
WARNING
To prevent your recipe from receiving webhook events from multiple sources, the event name must be unique across all your webhook recipes.
 Generate a unique webhook address
Click Next to start listening for webhook events from your app.
Click Copy to retrieve the unique webhook address. You'll use this URL to register the webhook in your app.
 The wizard is listening for webhook events from your app
For example, you can register this URL as the Payload URL when creating a webhook in Eventbrite:
 Add a webhook in Eventbrite to send data to the webhook trigger
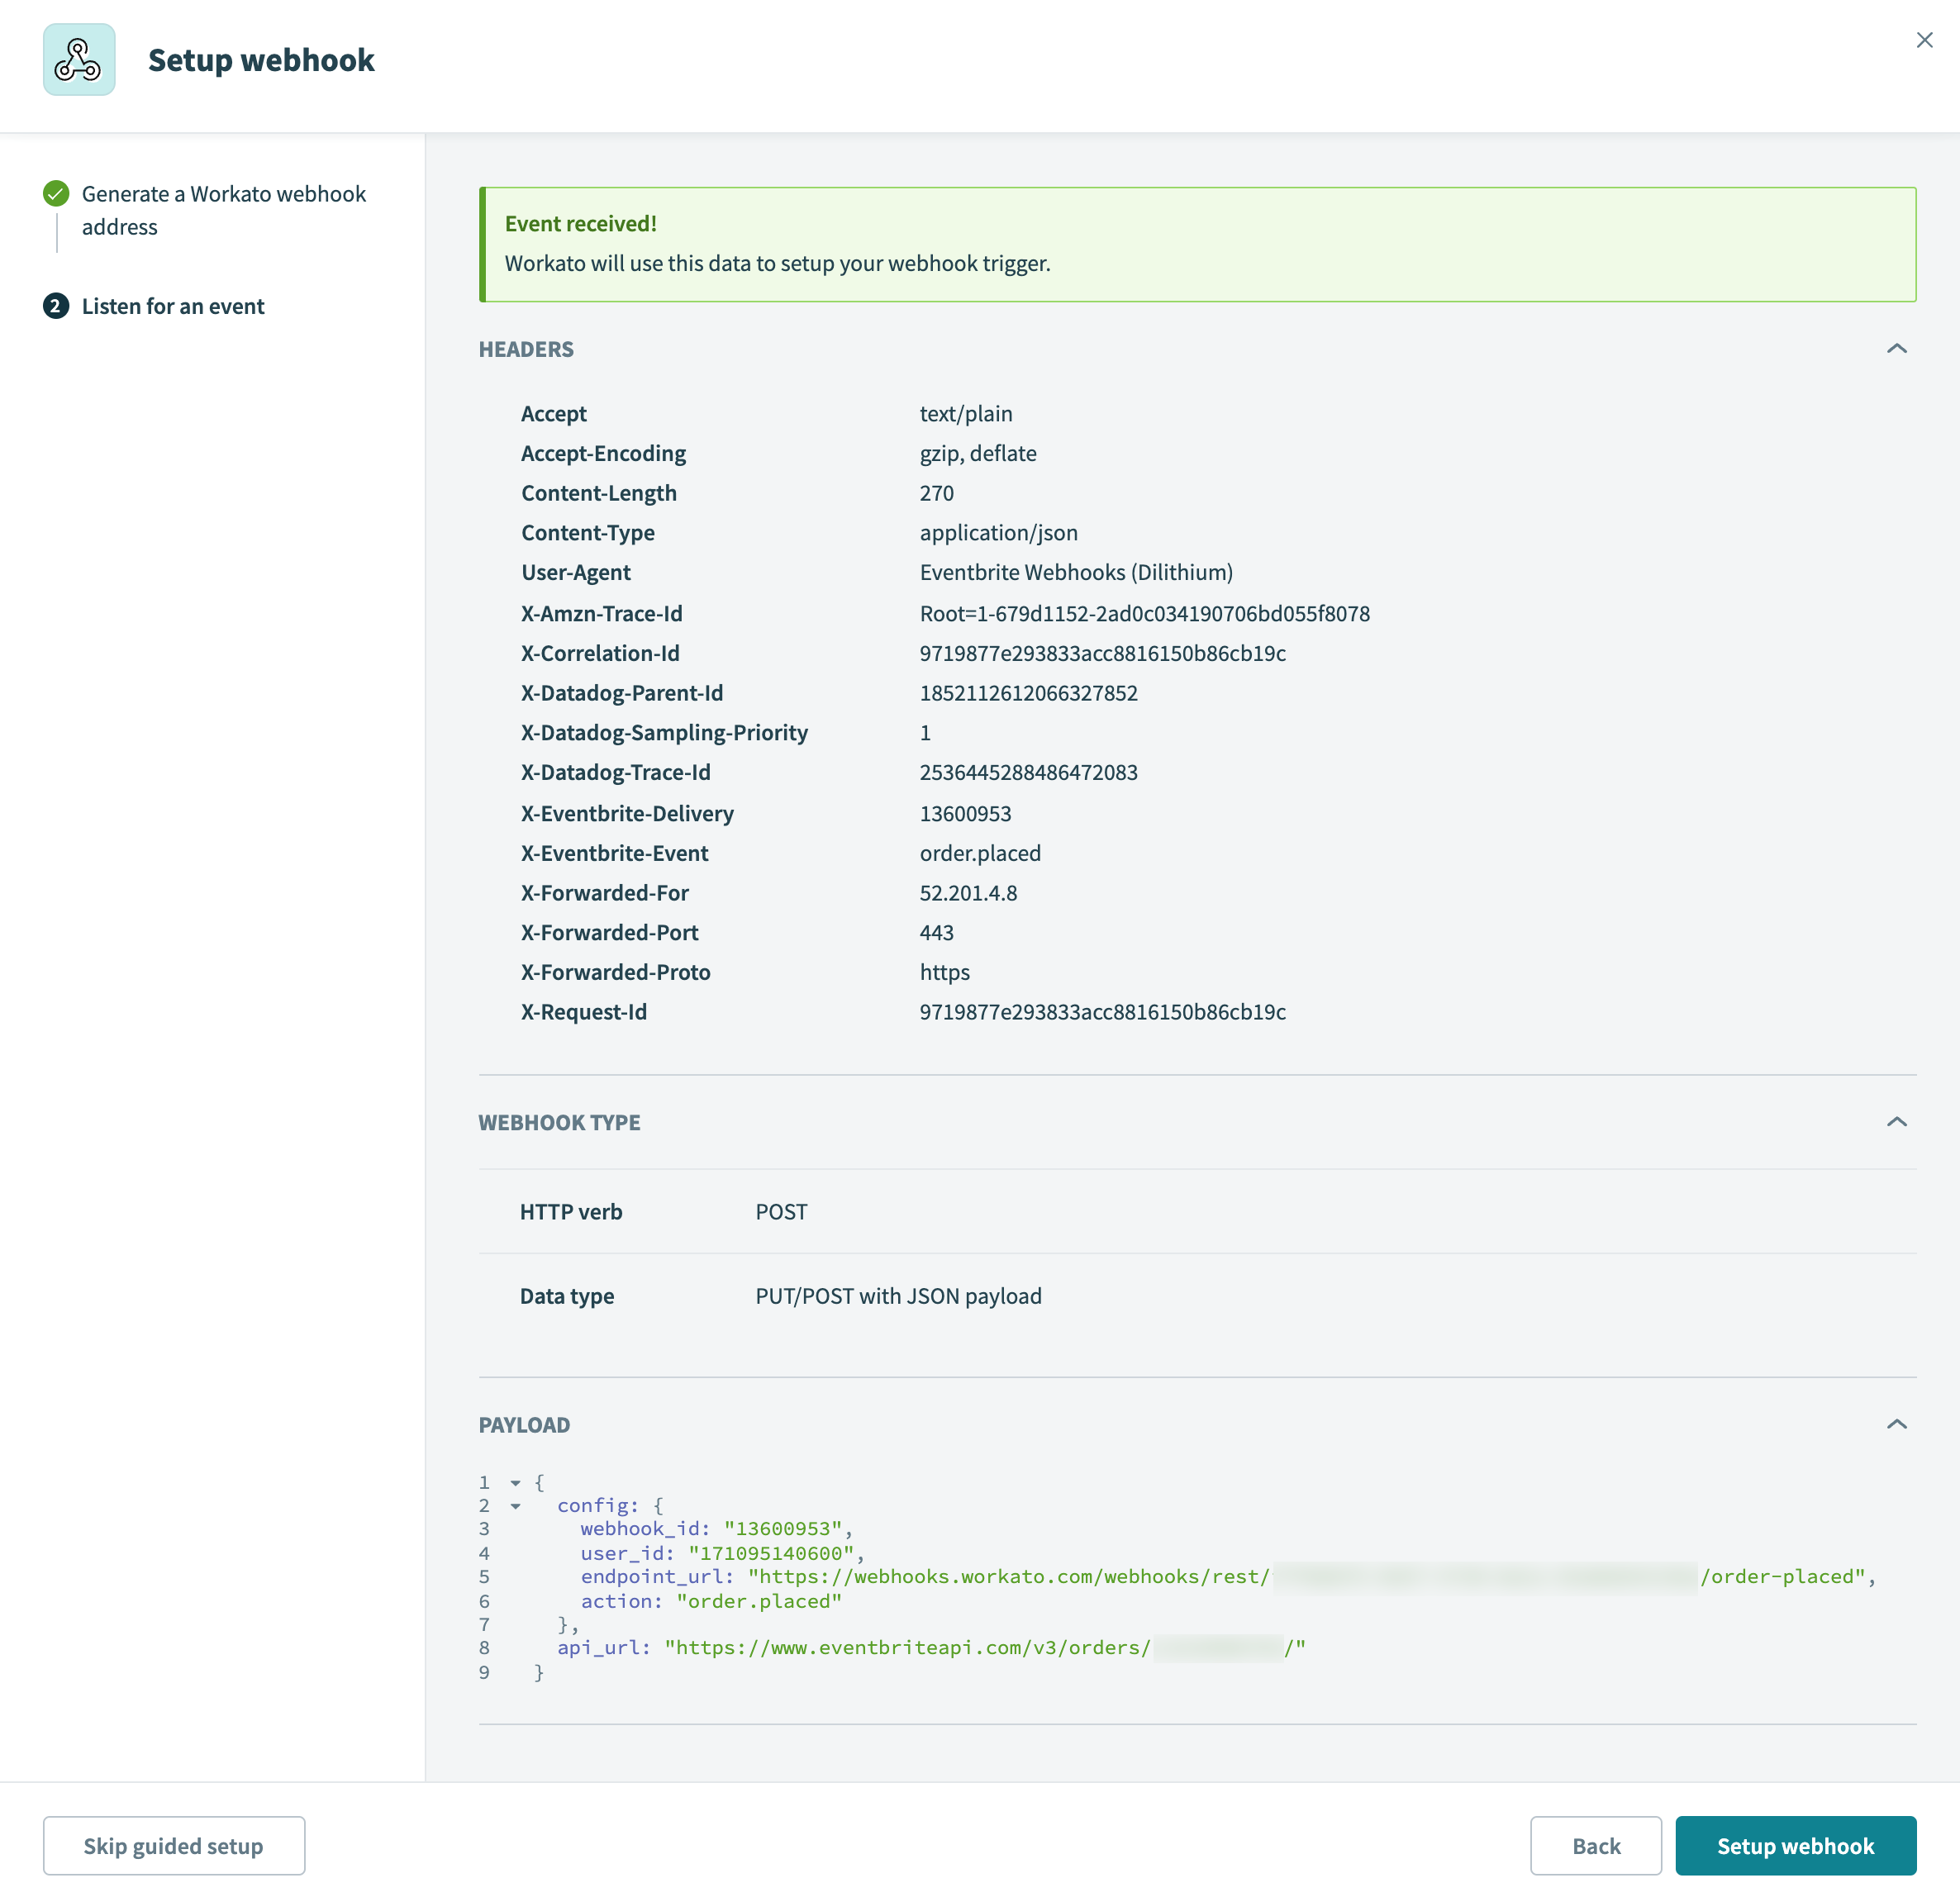
Inspect the webhook headers and payload to ensure that the event was received correctly. This sample webhook event serves as the template for all future events. Workato uses the payload and header data to configure the other parts of the trigger.
Alternatively, you can click Skip guided setup to configure the trigger manually.
Click Setup webhook to complete the setup.
 Webhook event received
The webhook is now configured. You can continue building the rest of the recipe.
Last updated: