Workato Connector Copilot
The Workato Connector Copilot uses Large Language Models (LLMs) to enhance and accelerate your connector-building experience. This enables you to develop connectors quickly, whether you're a seasoned SDK developer or new to the SDK with some familiarity with coding and web services. You can use the Workato Connector Copilot to learn more about the Workato SDK, build authentication logic, or build actions that are specific to your requirements.
FEATURE AVAILABILITY
Copilot is available for all direct customers in the US, EU, AU, JP, and SG data centers. All data is sent to OpenAI's servers in the US. Copilot isn't available to workspaces in the CN data center. This reflects local regulatory requirements and Workato's commitment to data sovereignty and applies to our multi-tenant and Virtual Private Workato (VPW) offerings.
You can opt in to this feature by agreeing to our AI feature addendum. Contact your Customer Success representative to learn more.
POWERED BY AI
Copilot's AI-powered suggestions may include inaccuracies or nonexistent patterns known as hallucinations. Review and verify AI-generated code before using it in your connectors.
Note that all conversations with the Workato Connector Copilot are stored to help us learn and improve. Learn more about our data usage.
Prerequisites
- Ensure that you have Copilot enabled for your workspace. Enabling Copilots requires the Environment admin role or the legacy Admin system role. If you aren't assigned one of these roles, contact your workspace administrator to enable this feature. For more information, refer to our Copilots documentation.
PERMISSIONS
Copilots do not have granular permission settings. When you enable it in your workspace, all collaborators within your workspace can access it, regardless of their role.
Standard workspaces
Navigate to Workspace admin > Settings > Workato AI.
Ensure that Copilot's terms of service comply with your company's policies.
Click Enable Copilot.
 Enable Copilot
IMPACT ON WORKSPACE ENVIRONMENTS
Enabling Copilot affects all environments within your workspace. Ensure you consider this impact before activation.
AHQ workspaces
Click Workspace admin > Settings > Workato AI.
Ensure that Copilot's terms of service comply with your company's policies.
Click Enable Copilot.
 Enable Copilot
IMPACT ON AHQ WORKSPACE
Enabling Copilot in the parent AHQ workspace automatically grants access to it across all associated child workspaces. Copilot usage can then be enabled or disabled independently in each workspace. It is disabled by default.
Enabling Copilot affects all environments in your workspace (and associated workspaces if enabled in a parent workspace), such as Development, Test, and Production. Ensure you consider this impact before activating Copilot.
How to use Connector Copilot
Ensure that the Connector Copilot is enabled on your workspace before using the following steps.
Click Tools > Connector SDK.
Create a new custom connector or select an existing custom connector.
- If creating a new connector, you can start by providing some basic information about the API, or you can directly interact with Connector Copilot to build your connector step by step.
- If modifying an existing connector, you can change the authentication logic or generate a new action as required.
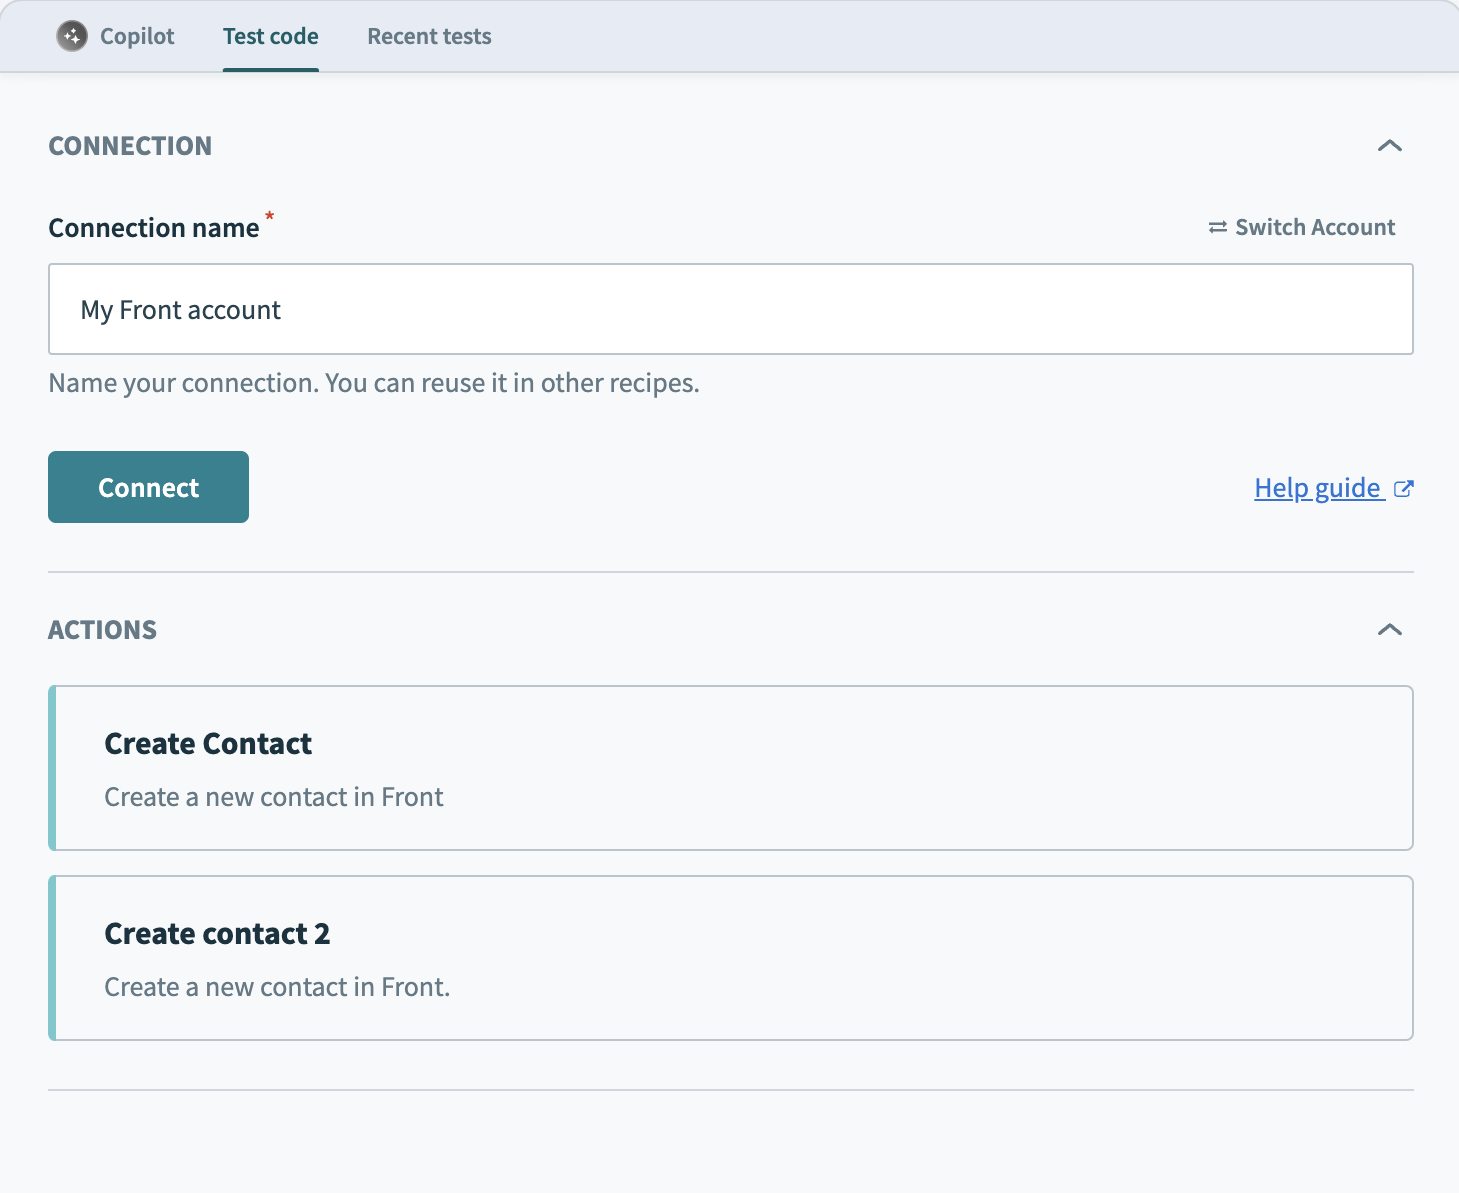
Connector Copilot appears in its own dedicated tab, next to the Test code and Recent tests tabs.
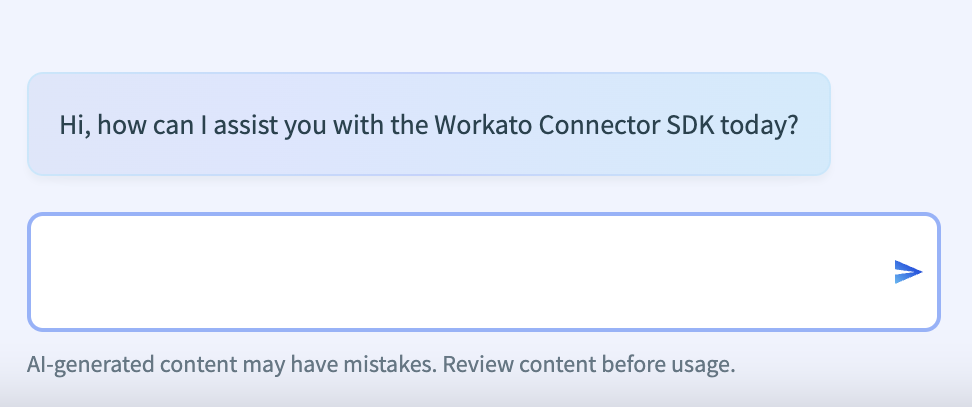
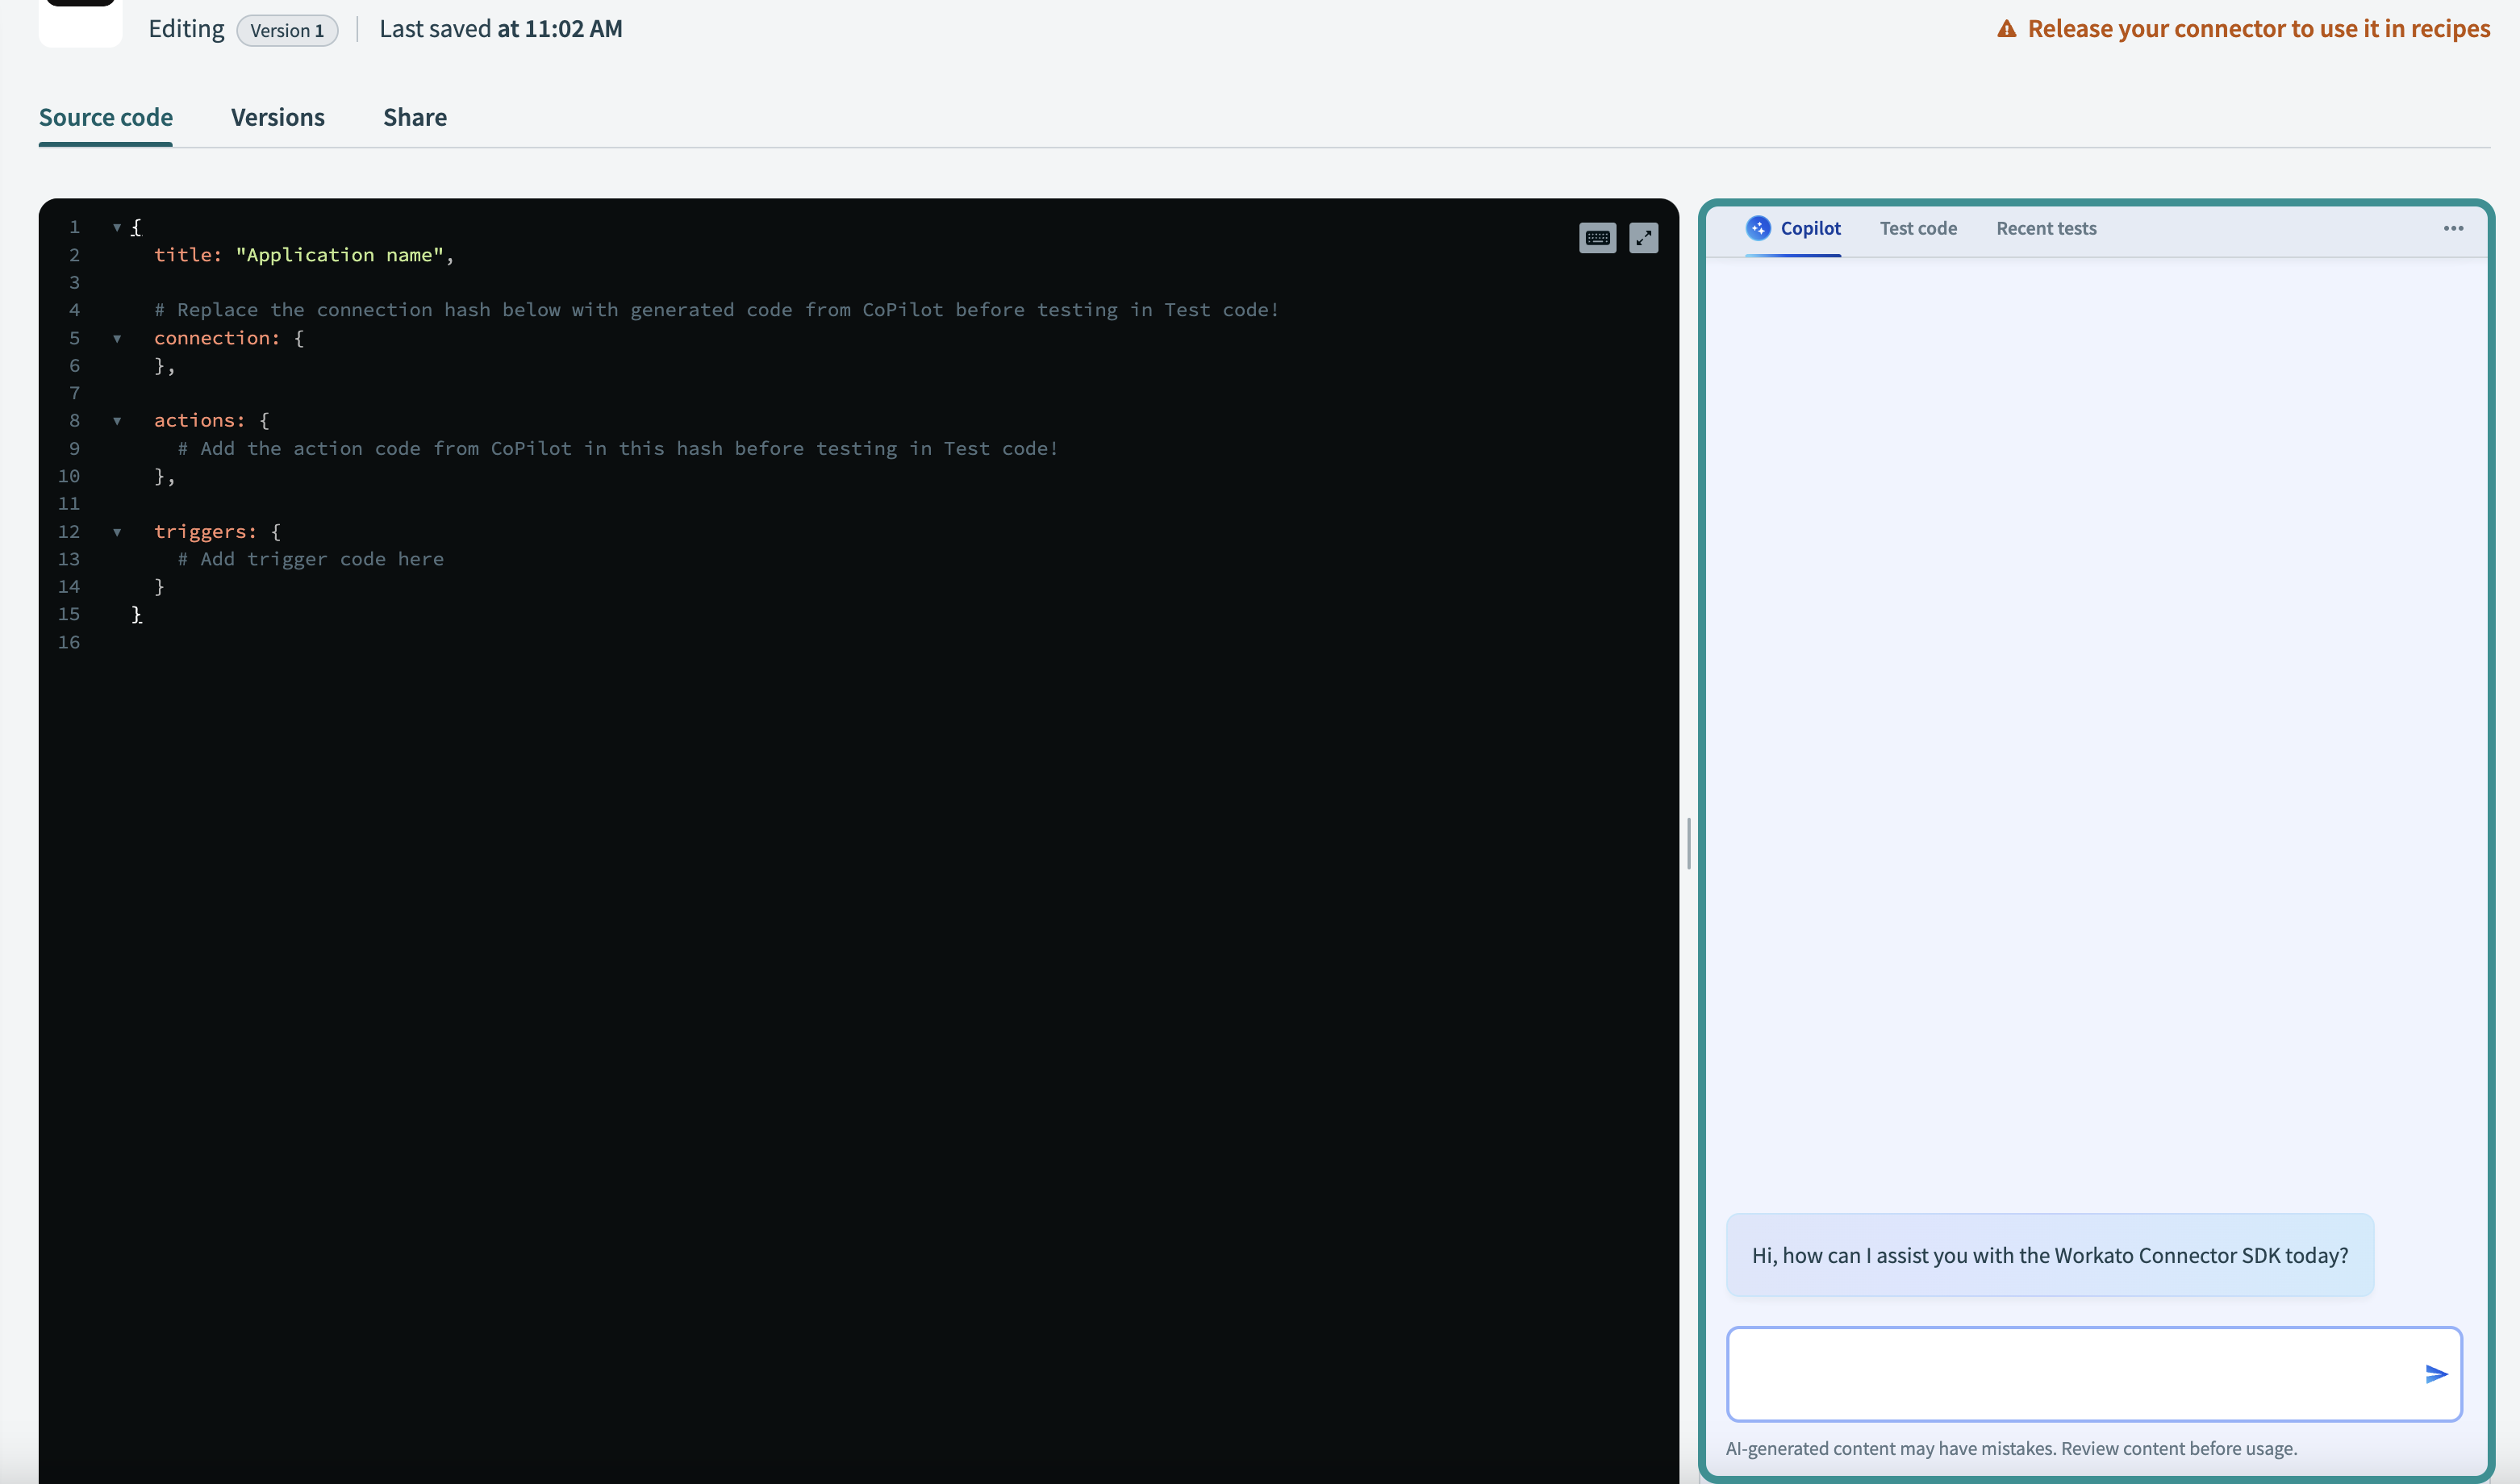 Copilot chat
Accelerate connector development
Connector Copilot allows you to build your connector quickly and efficiently. Describe your business objectives and connector needs, and Connector Copilot helps you get to production faster.
 Connector Copilot interface
When you first enter the Connector Copilot chat, you can ask questions about your connector, APIs, and Workato SDK documentation at any time, in any order. If you ask about Connector Copilot's capabilities, it provides a list of its current capabilities.
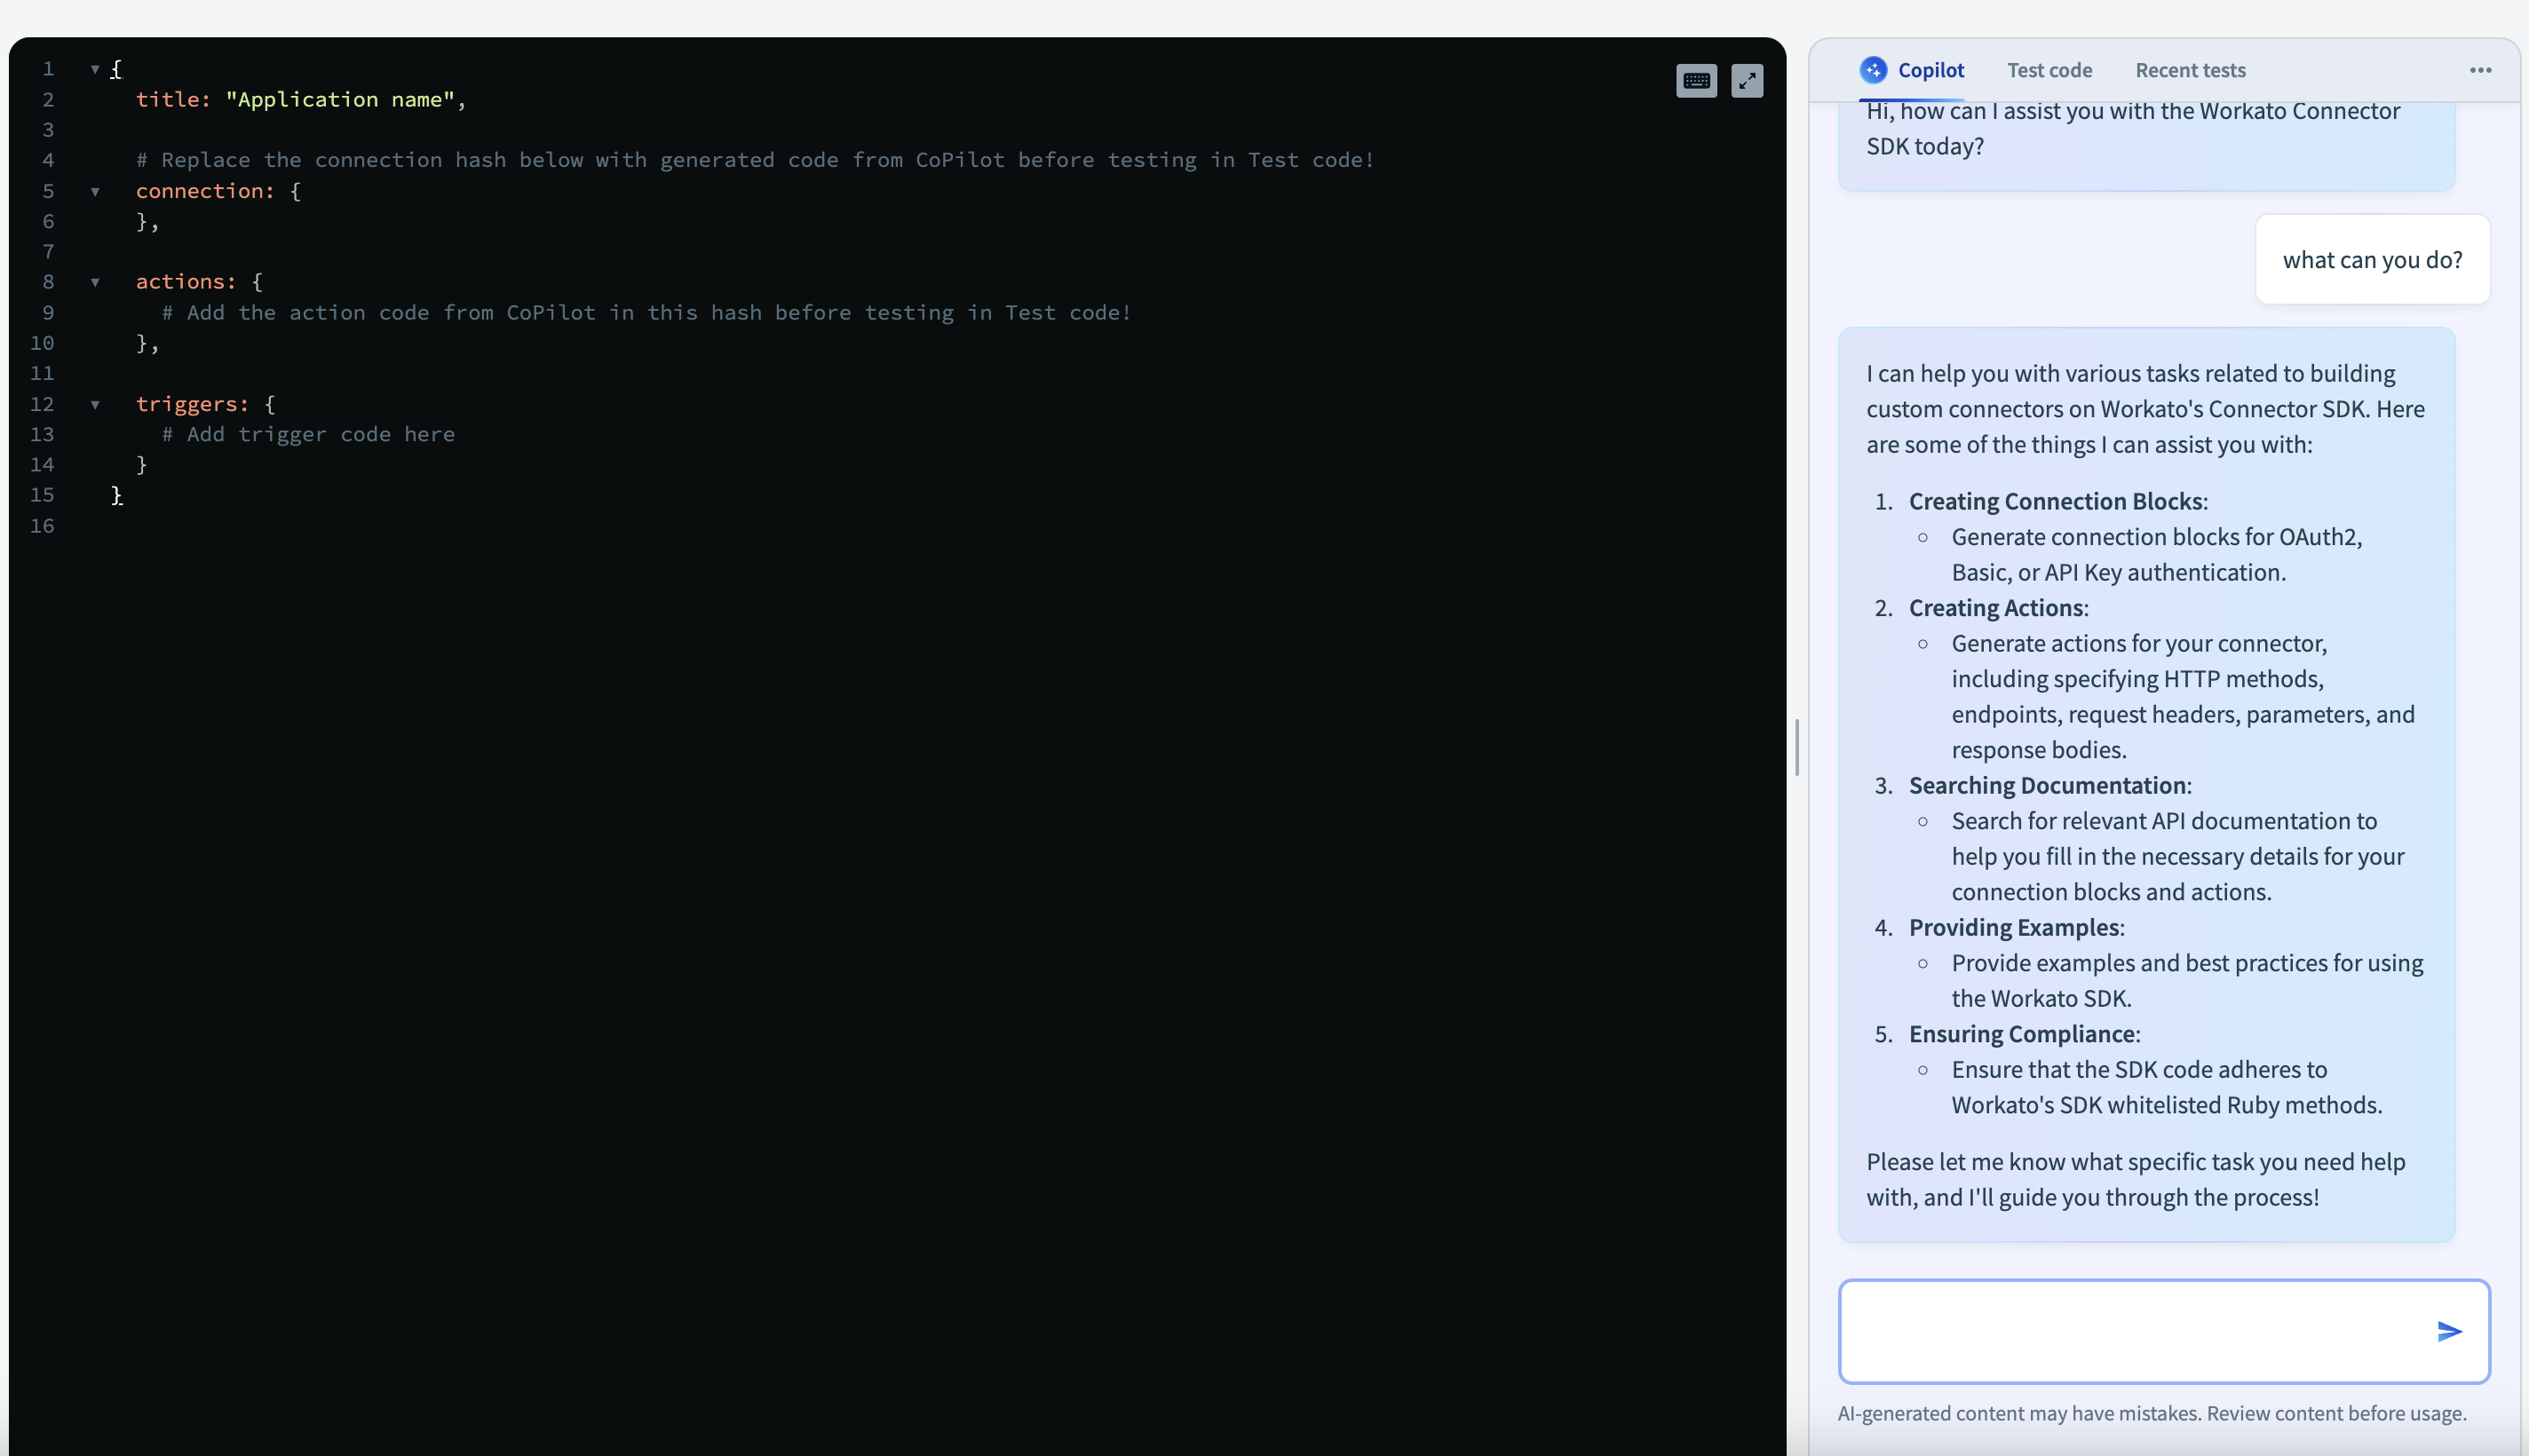 Connector Copilot capabilities
SUPPORTED APIS
Workato is continually expanding the number of APIs that Connector Copilot supports. Talk to our support team to request additional APIs.
Copilot capabilities
Connector Copilot can assist you with the following tasks:
- Create connection blocks using various authentication methods, such as OAuth 2.0, basic authentication, and API Key.
- Create actions for various API endpoints using different HTTP methods.
- Search for relevant API documentation to gather necessary information for building connections and actions.
- Access examples and references from the Workato SDK documentation to help you understand how to build connectors.
Create authentication logic
Connector Copilot can assist you with creating authentication logic for various APIs. You can share API documentation with Connector Copilot for specific authentication options or proceed without it in a free-form chat. The following sections offer guidance on configuring the authentication for your connector.
Provide API documentation
Connector Copilot searches for relevant API documentation by browsing the web. If it does not find the necessary information, you can provide the API documentation directly. Provide a URL or copy and paste the documentation. Note that URLs are limited to 10,000 characters. If the URL exceeds this limit, use copy and paste.
GET BETTER RESULTS WITH COPY AND PASTE
When using copy and paste, specify parts of the documentation that are most relevant for Connector Copilot to generate your authentication. For example, for OAuth 2.0 connections, copying and pasting a guide from the API for the entire flow provides better results.
Based on the provided documentation, Connector Copilot suggests authentication methods compatible with your API. If no suitable options are found, you can provide your own authentication method.
Build custom authentication
Alternatively, you can build the authentication step by step with Connector Copilot’s assistance. Connector Copilot prompts you for the necessary details, such as the type of authentication, endpoints, and any specific parameters required, helping you construct the method one step at a time.
General guidance for all authentication types
When setting up authentication, it is crucial to provide Connector Copilot with comprehensive information. This includes specifying the authentication type, the base URI of the external system, and a test endpoint to verify the connection. These commonalities ensure that Connector Copilot can accurately construct the necessary code.
Common authentication types
To ensure Connector Copilot can generate precise and effective authentication logic, provide as much relevant context as possible. Here are the details needed for specific authentication types:
OAuth 2.0 Authorization Code Grant
The OAuth 2.0 Authorization Code Grant is typically used for web server applications. This flow involves redirecting the user to an authorization server to obtain an authorization code, which is then exchanged for access tokens. For this method, provide Connector Copilot the following details:
Authorization URL
The endpoint where users are redirected to authenticate.
Token URL
The endpoint used to exchange the authorization code for access tokens.
Logic for acquiring access tokens
Provide logic for how to obtain access tokens after authorization.
Logic for refreshing access tokens
Provide logic for how to refresh access tokens when they expire.
OAuth 2.0 Client Credentials Grant
The OAuth 2.0 Client Credentials Grant is used for server-to-server communication, where no user interaction is involved. This flow involves using client credentials to obtain access tokens directly. For this method, provide Connector Copilot with the following details:
Token URL
The endpoint used to obtain access tokens using client credentials.
Logic for acquiring access tokens
Provide logic for how to obtain access tokens using client credentials.
Basic authentication
Basic authentication involves sending a username and password with each API request. These credentials are typically encoded in base64. Provide Connector Copilot logic for including the basic auth credentials in API requests, covering the encoding process and the exact HTTP header format required.
API key authentication
API key authentication involves sending an API key with each API request, either in the request headers or as a query parameter. Provide Connector Copilot logic for including the API key in the API requests, detailing whether the key should be in the header or a query parameter and the exact format expected by the API.
Additional authentication types
Connector Copilot is also capable of handling other types of authentication. When using these methods, provide as much relevant context as possible, such as specific endpoints, parameters, and logic required to authenticate effectively. By providing detailed and accurate information, you enable Connector Copilot to structure your code precisely and effectively.
Review and adjust your connection
After Connector Copilot generates the connection block code, complete the following steps to review, adjust, and test your connection:
Review the generated code and make any necessary adjustments. Connector Copilot uses the provided details to generate the connection block code.
Copy and paste the code Connector Copilot generated into the connector code interface. Remember to replace the existing connection: { }.
Switch to the Test code tab to test the generated connection. You must supply the relevant credentials to authenticate your connection.
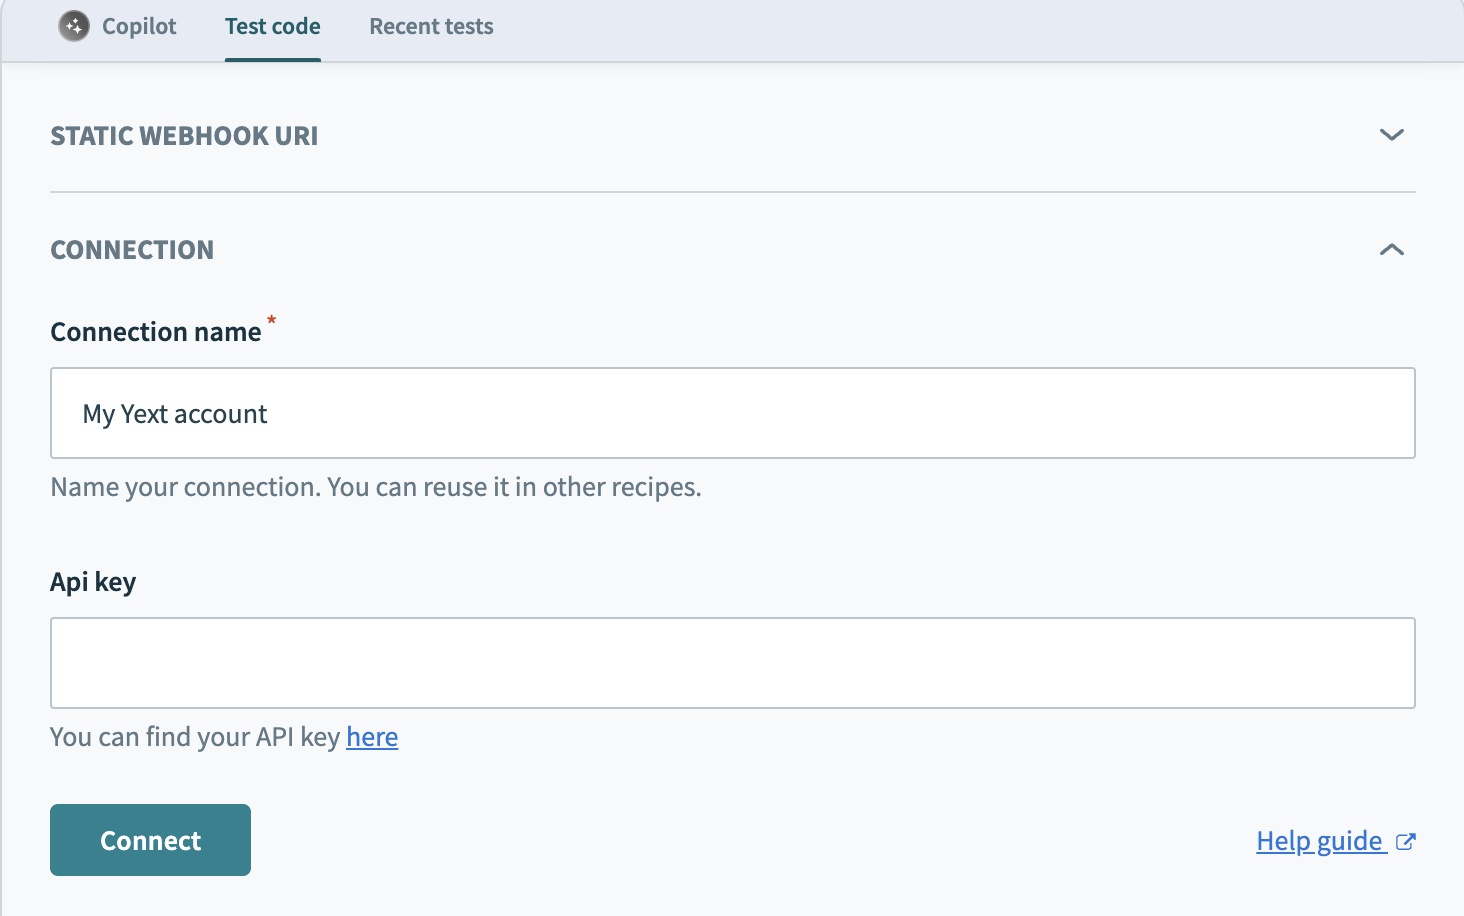 Test your connection
Review the authentication logic in the Recent tests tab. You can also review the input and output of the authentication and any API calls that were made in the process.
Generate an action
Creating an action involves defining how to interact with a specific API endpoint. After creating the connection, Connector Copilot may ask if you plan to create an action. Alternatively, you can type in the prompt saying you plan to create an action.
Provide API documentation
Connector Copilot searches for relevant API documentation by browsing the web. If it does not find the necessary information, you can provide the API documentation directly. Provide a URL or copy and paste the documentation. Note that URLs are limited to 10,000 characters. If the URL exceeds this limit, use copy and paste.
GET BETTER RESULTS WITH COPY AND PASTE
When copying and pasting API documentation, specify the parts that are most relevant for Connector Copilot to generate your action. For example, for a Create Invoice action, copying and pasting the documentation that includes the verb, endpoint, input and output parameters provides better results.
Based on the provided documentation, Connector Copilot suggests action components compatible with your API. If no suitable options are found, you can manually define the action components with Connector Copilot’s assistance.
Define action components
Connector Copilot assists you in defining the components of an action. While Connector Copilot gathers this information automatically, you can enhance the accuracy by providing the following details:
Action name
A unique identifier for the action, typically in the format
verb_object. For example,create_contact.Action title
A title for the action in verb-object format. For example,
Create contact.Action description
A detailed description of the action.
HTTP method
The HTTP method to use for the API request, such as GET, POST, PUT, PATCH, DELETE, or HEAD.
Execute URI
The API endpoint to call, with any path parameters denoted by curly braces. For example:
/v1/contacts/{id}.API content type
The content type expected by the API endpoint, such as JSON, XML, URL_FORM_ENCODED, or MULTIPART.
Request headers
Optional. Any required request headers except for those related to authentication and content type.
Request path parameters
Optional. Any path, query, or body parameters required by the API endpoint.
Review and adjust your action
After Connector Copilot generates the action code, complete the following steps to review, adjust, and test your action:
Review the code Connector Copilot generates for the action. Make any necessary adjustments to ensure it meets your requirements.
Copy and paste the code Connector Copilot generated into the connector code interface. Remember to replace the existing actions: { }.
Switch to the Test code tab to test the generated action. You must have a working connection to perform the test.
 Test your action
Review the action logic in the Recent tests tab. Examine the input and output of the action and any API calls made during the process.
Fix errors and explain the SDK
After generating your connection or action code, Connector Copilot offers additional options to help you refine and troubleshoot your code. You can paste errors and code snippets into Connector Copilot for explanations and solutions. This allows you to request edits, fix API errors, or prompt other queries. Being specific about your requirements helps Connector Copilot deliver better results.
How to use Connector Copilot for troubleshooting
Complete the following steps to identify and fix errors in your code with Connector Copilot's assistance:
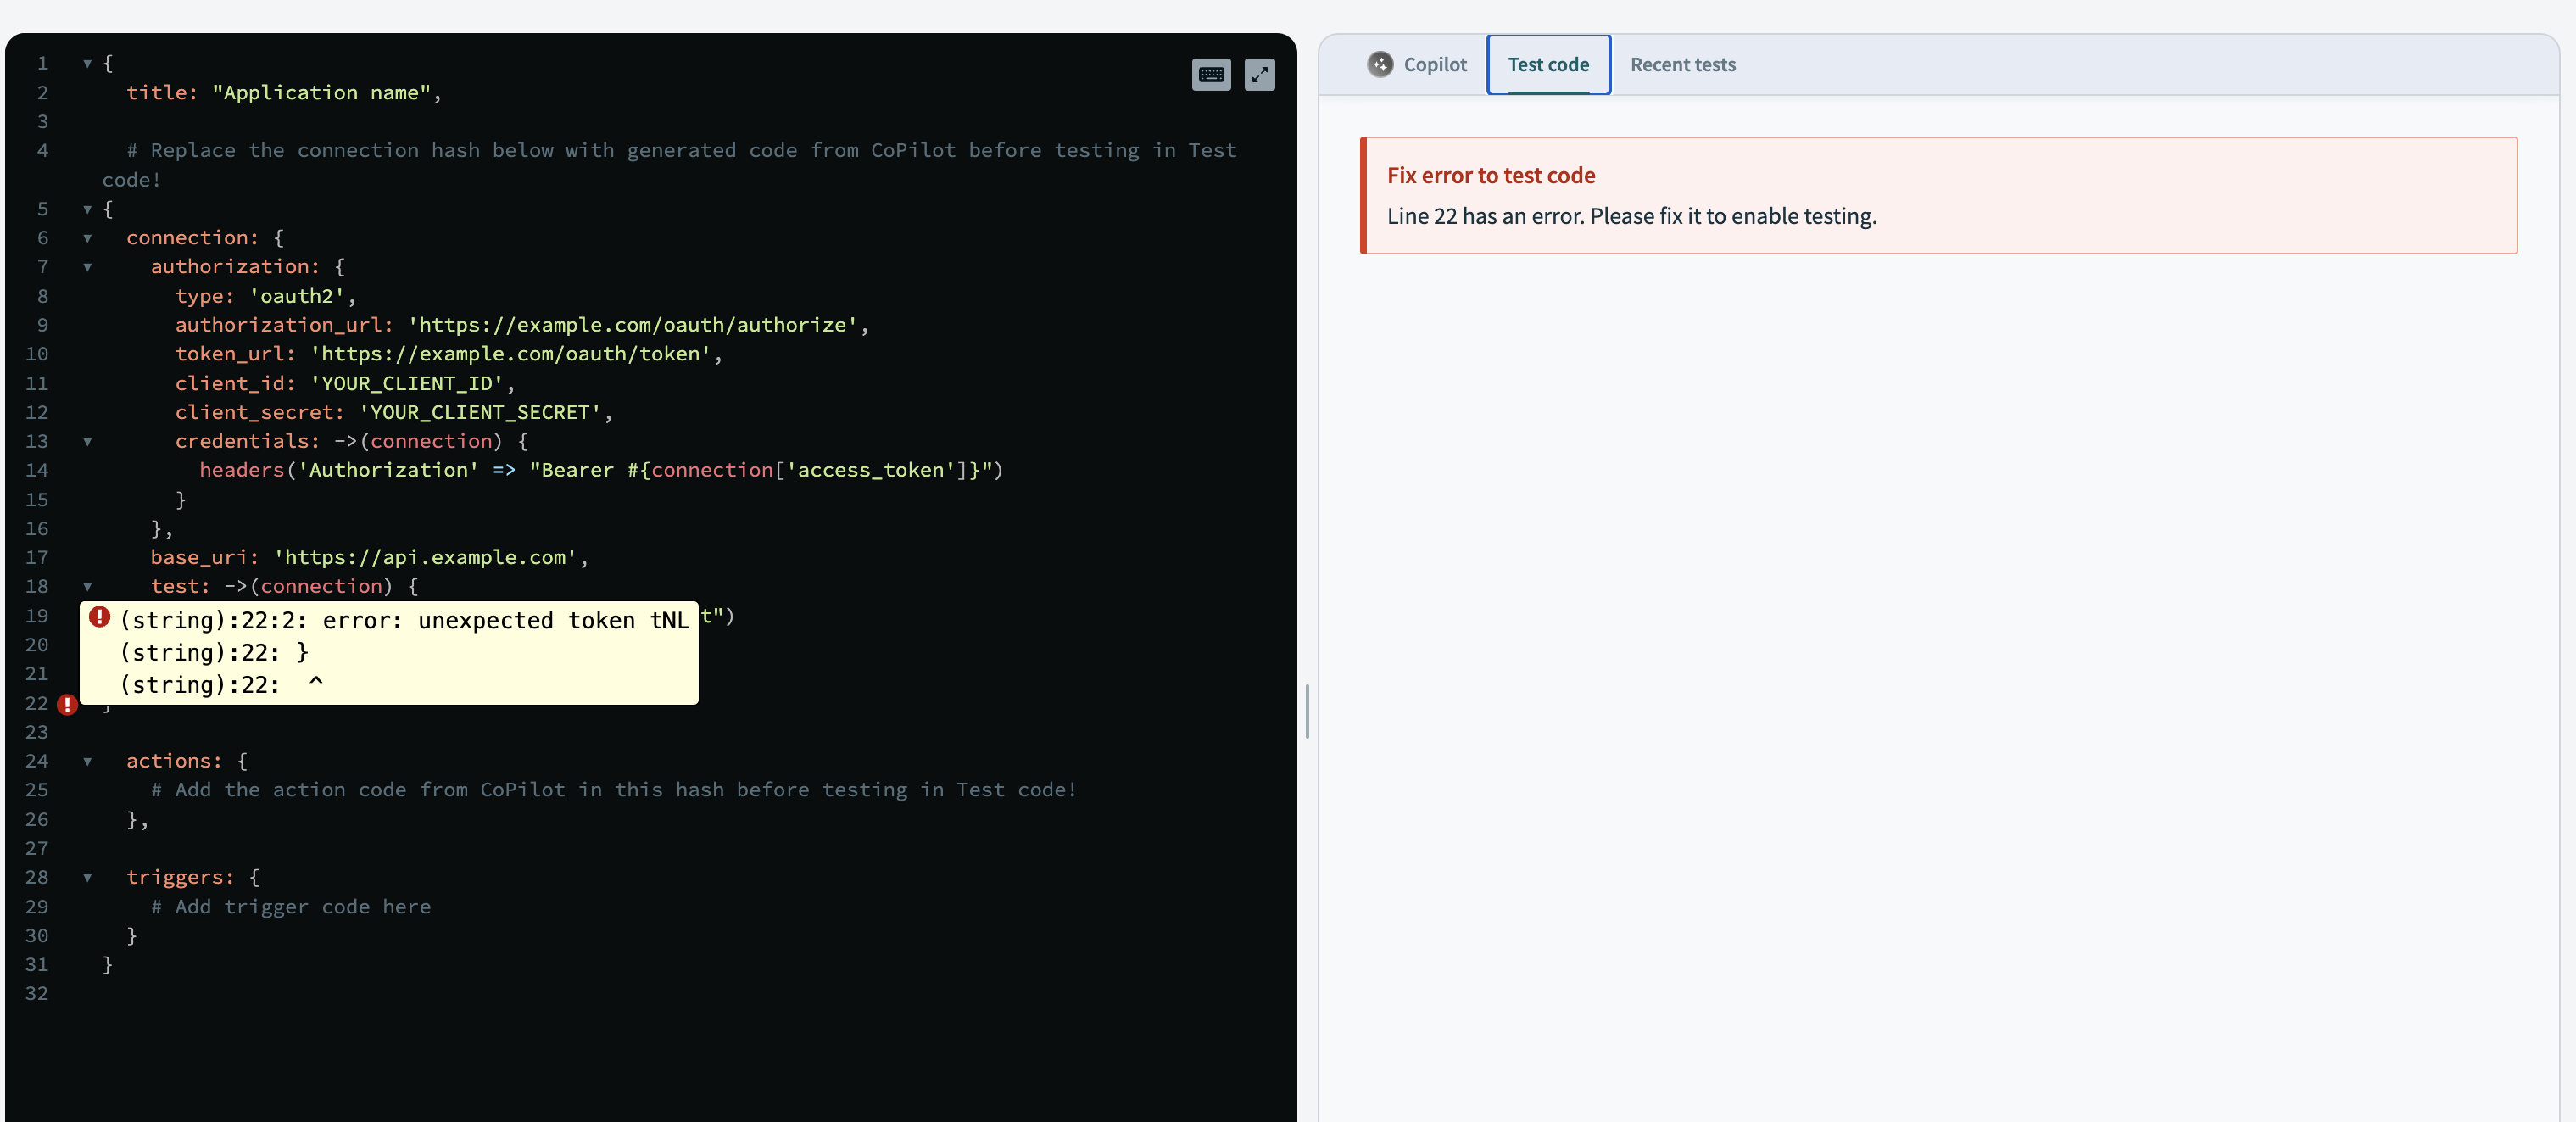
Switch to the Test code tab to run your generated connection or action. Observe any errors or issues that occur.
 Troubleshoot your code
Inspect the source code for any potential issues or errors.
Copy the error message or relevant code snippet from either the Test code tab or the source code.
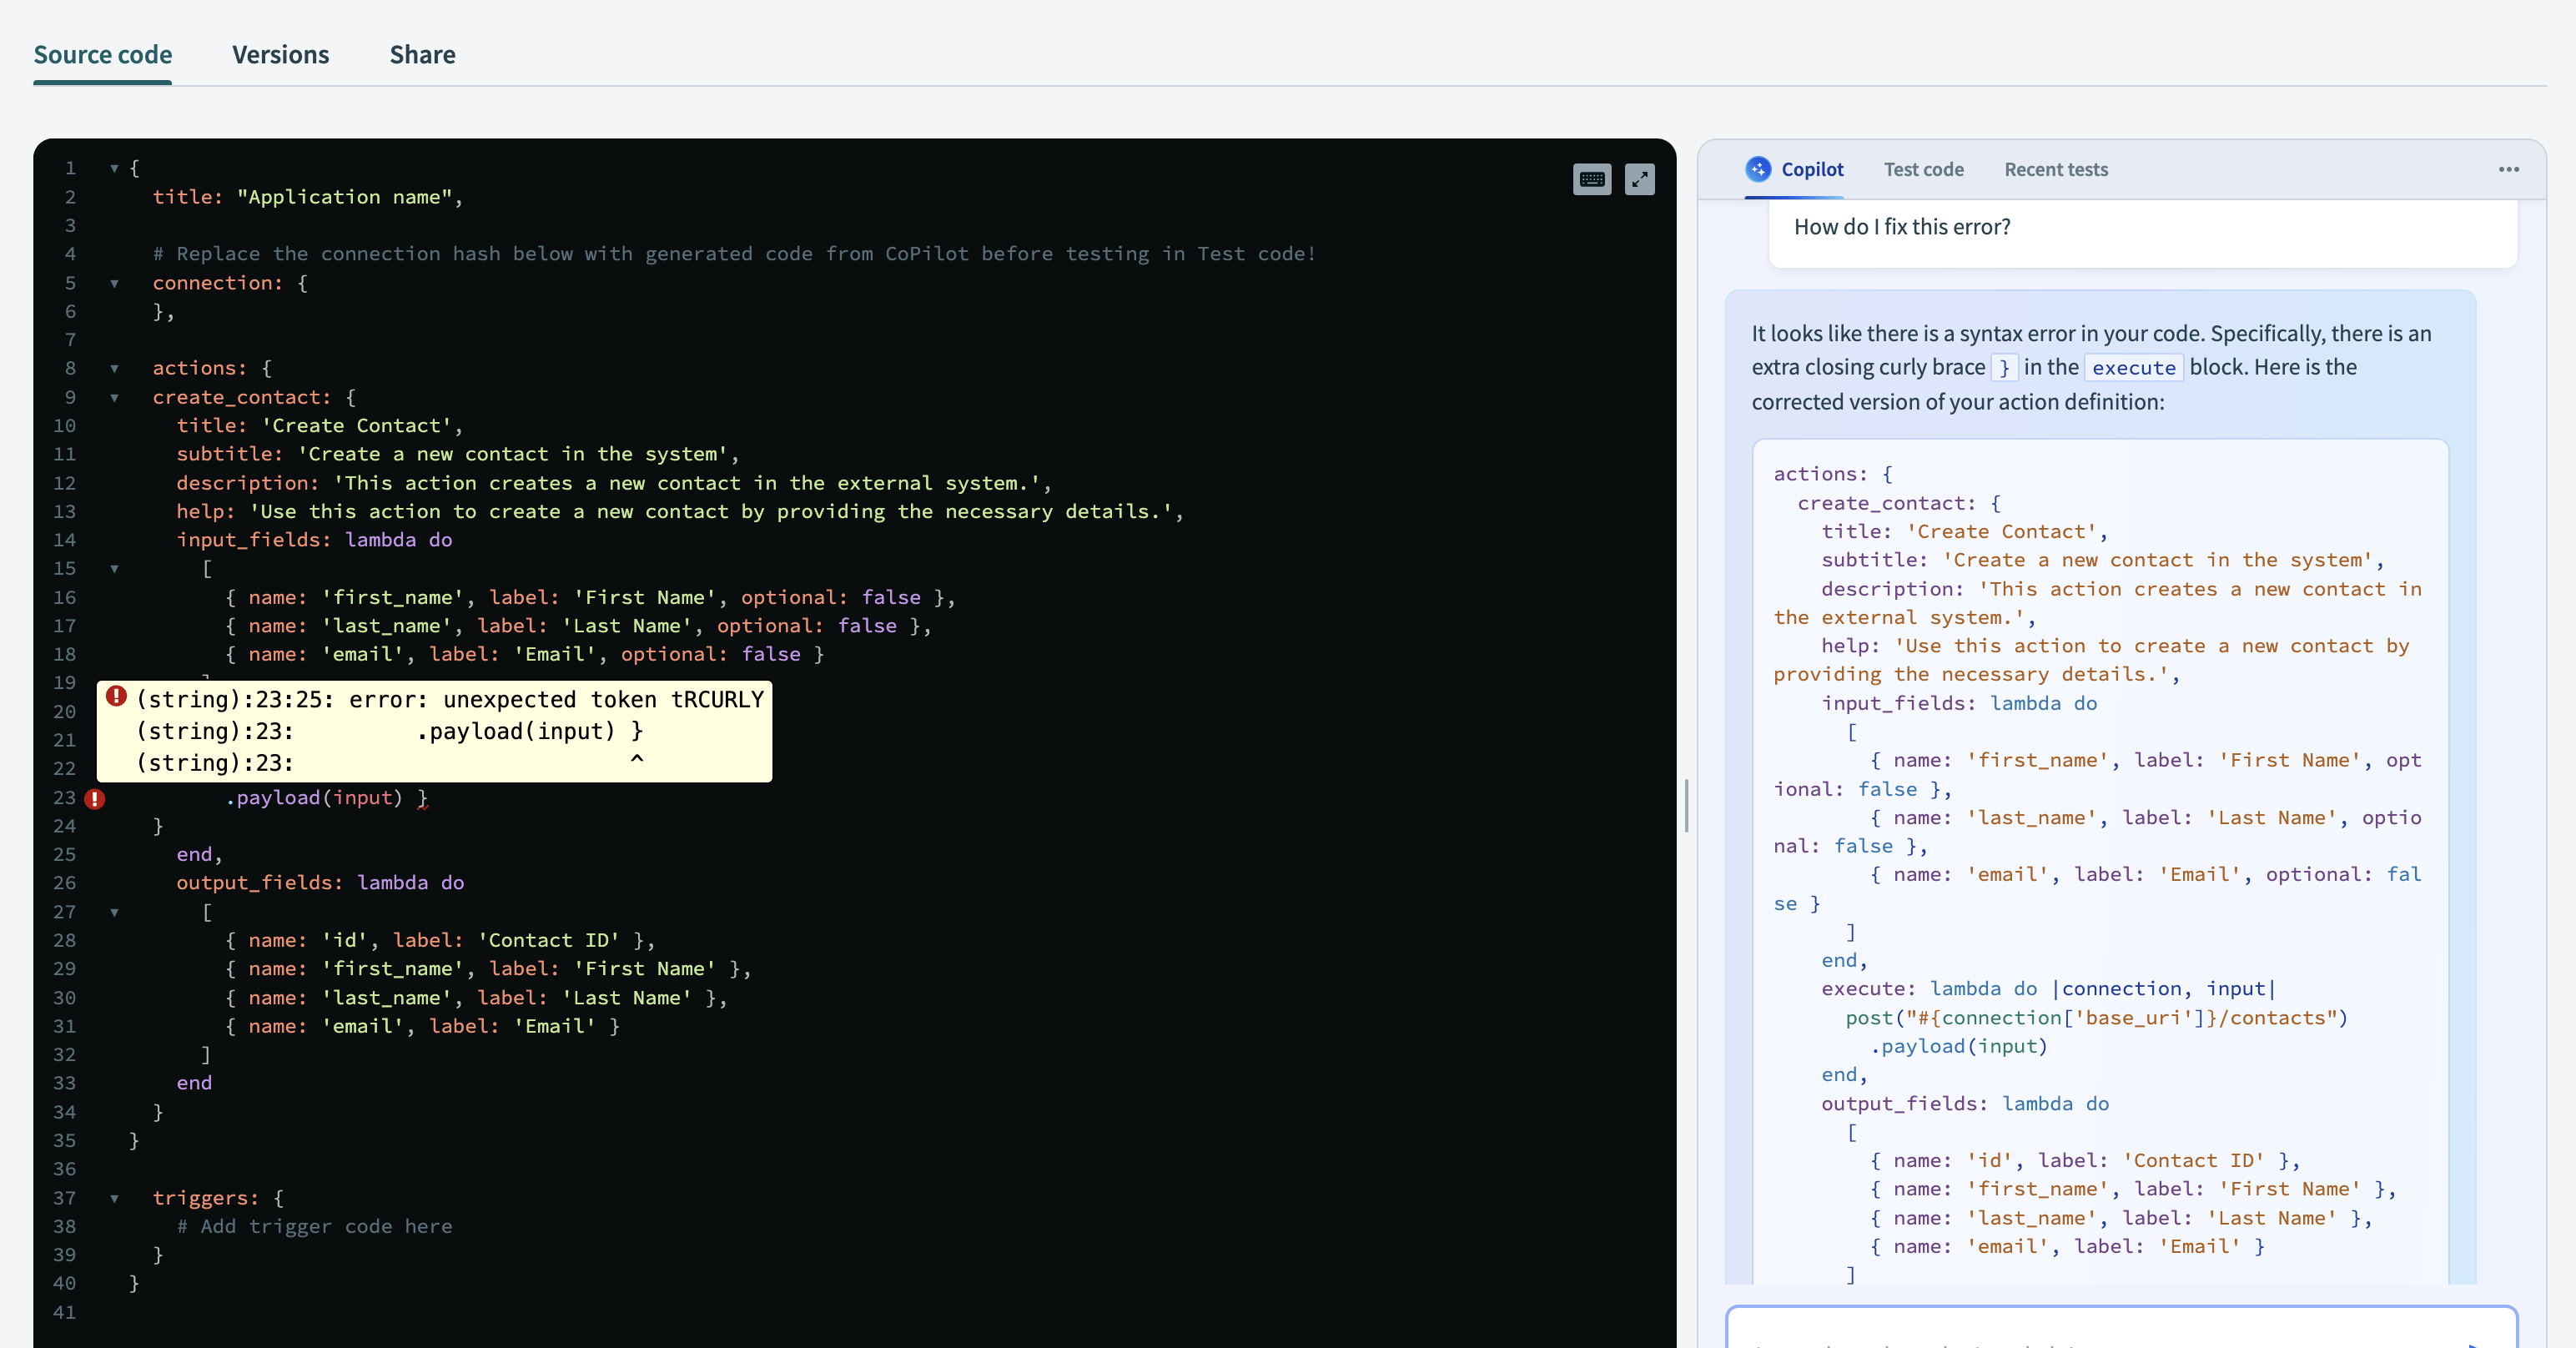
Paste the error message or code into the Connector Copilot chat and ask for help. For example:
- "How do I fix this error?"
- "Can you explain this part of the code?"
 Troubleshoot error message
Connector Copilot can provide explanations, suggest edits, and guide you through the troubleshooting process.
Search for relevant API documentation
Connector Copilot helps you search for both Workato and external API documentation, enabling you to gather information about API endpoints, authentication methods, and request/response formats. This ensures you have all the details needed to create effective connectors.
Provide your requirements to Connector Copilot, and it assists you in finding the relevant information. Including specific details such as keywords, base URLs, or documentation paths can enhance the accuracy of the results. Use the gathered documentation to build or refine your connections and actions.
Access examples and references from Workato SDK documentation
Connector Copilot can provide access to examples and references from the Workato SDK documentation. This feature helps you understand how to build connectors by offering practical examples and detailed explanations of various SDK components.
Best practices and examples for building custom connectors
Connector Copilot guides you through the following best practices for building custom connectors:
- Understanding the API
- Organizing your code
- Using secure authentication methods
- Documenting your connection parameters
- Optimizing for performance
If you need an example of a connection block or action, Connector Copilot provides snippets and references from the Workato SDK documentation. This includes examples of OAuth 2.0 connection blocks, error handling, and naming conventions.
Explain SDK components
Connector Copilot can explain specific SDK components, such as connection blocks, actions, triggers, and methods. By providing detailed explanations, Connector Copilot helps you understand how to implement these components effectively in your connector.
Reference documentation
If you are unsure about specific SDK methods or components, you can ask Connector Copilot to reference the Workato SDK documentation. This ensures that your code adheres to the supported methods and best practices outlined in the official documentation.
Clear the conversation
Clicking on the ellipsis (...) menu provides you with the option to clear your current conversation. This option clears the chat history with Connector Copilot, which is useful for resetting Connector Copilot to get better and more accurate answers. This action does not clear any code you have copied into your connector.
 Clear your conversation
Generate a trigger
Connector Copilot can assist in defining events that trigger recipes in Workato, such as the creation of a new record.
Refer to the building triggers documentation for detailed guidance on creating a trigger for your connector.
Last updated: