SDK Reference - Workato Schema
The following section defines how to define input and output fields in Workato - collectively called "Schema". You can apply this information anywhere in your connector code where input fields or output fields (datapills) are defined. This could be in places such as connection, actions, triggers, and object_definitions
Quick Overview
Getting the hang of Workato schema is essential for building user-friendly and intuitive connectors. You can give various attributes to your connector to make it easier to use. This schema is a simple array of hashes where each index in the array represents a single input field or output field.
These definitions are completely interchangeable for both input and output fields, making it easier to write the schema once and reuse it.
Structure
  [
    {
      name: String,
      label: String,
      optional: Boolean,
      type: String,
      hint: String,
      of: String,
      properties: Array,
      control_type: String,
      toggle_hint: String,
      toggle_field: Hash,
      default: String,
      pick_list: String,
      delimiter: String,
      sticky: Boolean,
      convert_input: String,
      convert_output: String,
      change_on_blur: Boolean,
      support_pills: Boolean,
      custom: Boolean,
      extends_schema: Boolean,
      list_mode: String,
      list_mode_toggle: Boolean,
      item_label: String,
      add_field_label: String,
      empty_schema_message: String,
      sample_data_type: String,
      ngIf: String
    },
    {
      # Another field definition
    }
  ]
Attribute description
| Key | Definition |
|---|---|
| name | Required. The name of this field. For example, id or created_at |
| optional | Optional. Default is false. Applies to input fields and ensures users provide input for this field before running the recipe. |
| label | Optional. All fields have default labels based on the field name. Use this to change the default value of the field label. |
| hint | Optional. This allows you to add some hints below the input field to guide the user. Links to documentation can be given using HTML syntax. |
| type | Optional. The data type of this field. Default value is "string". Possible values are: - "string" - "integer" - "number" - "date_time" - "date" - "timestamp" - "boolean" - "object" - Must be accompanied by properties - "array" - Must be accompanied by of |
| of | Optional except when type: "array". Used in conjunction with Arrays to define the data type of the Array. Possible values are: - "string" - "integer" - "number" - "date_time" - "date" - "timestamp" - "boolean" - "object" - Denotes an array of objects. Must be accompanied by the properties attribute. |
| properties | Optional except when type: "object" or when type: "array" and of: "object". Accepts an array of schema to denote the properties of the object. |
| control_type | Optional. This field relates only to input fields, and it dictates the input field type to expose in a recipe. Default is "string". When this schema is used as an output field, this attribute is ignored. Refer to the list of supported control types. |
| toggle_hint | Optional. This represents the label of the primary toggle. See toggle fields for more information. |
| toggle_field | Optional. Hash representing the secondary toggle for this input field. See toggle fields for more information. |
| default | Optional. Allows you to set a default value for that input field. |
| pick_list | Optional. If control_type is :select or :multiselect, this property is required. Allows you to reference a picklist defined in the pick_lists key or define one directly. If defining a picklist directly, provide the same 2D array described in Picklists |
| options | Synonymous with pick_list and used only for connection input fields. |
| delimiter: | Optional unless control_type: "multiselect". This delimiter is used between each input the user provides. |
| sticky | Optional. Use this property to make this field always visible as an input field. By default, inputs that are optional are hidden inside the optional fields drop-down. Use sticky: true so they show up beside required fields. |
| convert_input | Optional. When defining input fields, values passed into these fields are assumed to be strings regardless of their type defined. convert_input allows you to convert and transform these inputs even before they are passed to your execute block's input argument. Learn more |
| convert_output | Optional. When defining output fields, the name of each field is matched against the keys in the actual output of the execute lambda function. This does not, however, ensure that the value of the output matches the type declared for its matched field. convert_output allows you to convert and transform these inputs as well as correctly "cast" incoming values assigned to a specific output field. Learn more |
| change_on_blur | Optional. When true, config fields and dependent fields only evaluate the value when the user blurs out of the field instead of after every keystroke. This parameter often doesn't need to be configured. |
| support_pills | Optional. The default value is true. When false, this field doesn't allow datapills to be mapped to it. This parameter often doesn't need to be configured. |
| custom | Optional. When true, a special marker is introduced to indicate to the user that this field is custom. Normally used when dynamically generating object definitions which may contain custom fields. |
| extends_schema | Optional. Allows a field to behave like a config_field |
| list_mode | Optional. Used when type: "array" and of: "object". Workato defaults to dynamic lists but this parameter allows you to set this input field to a static array input field. Possible values are: - "static" - Users must define each index in this array. - "dynamic" - Users can dynamically define each index in this array using list datapills. |
| list_mode_toggle | Optional. Used when type: "array" and of: "object". Allows users to toggle between static and dynamic lists when working with arrays. Defaults to true. Set list_mode_toggle: false to disallow users to toggle list modes. |
| item_label | Optional. Only used with control_type: "schema-designer" or control_type: "key_value". This allows you to configure the item name stated in the modal popup. Setting item_label: "Item Label" results in the following: 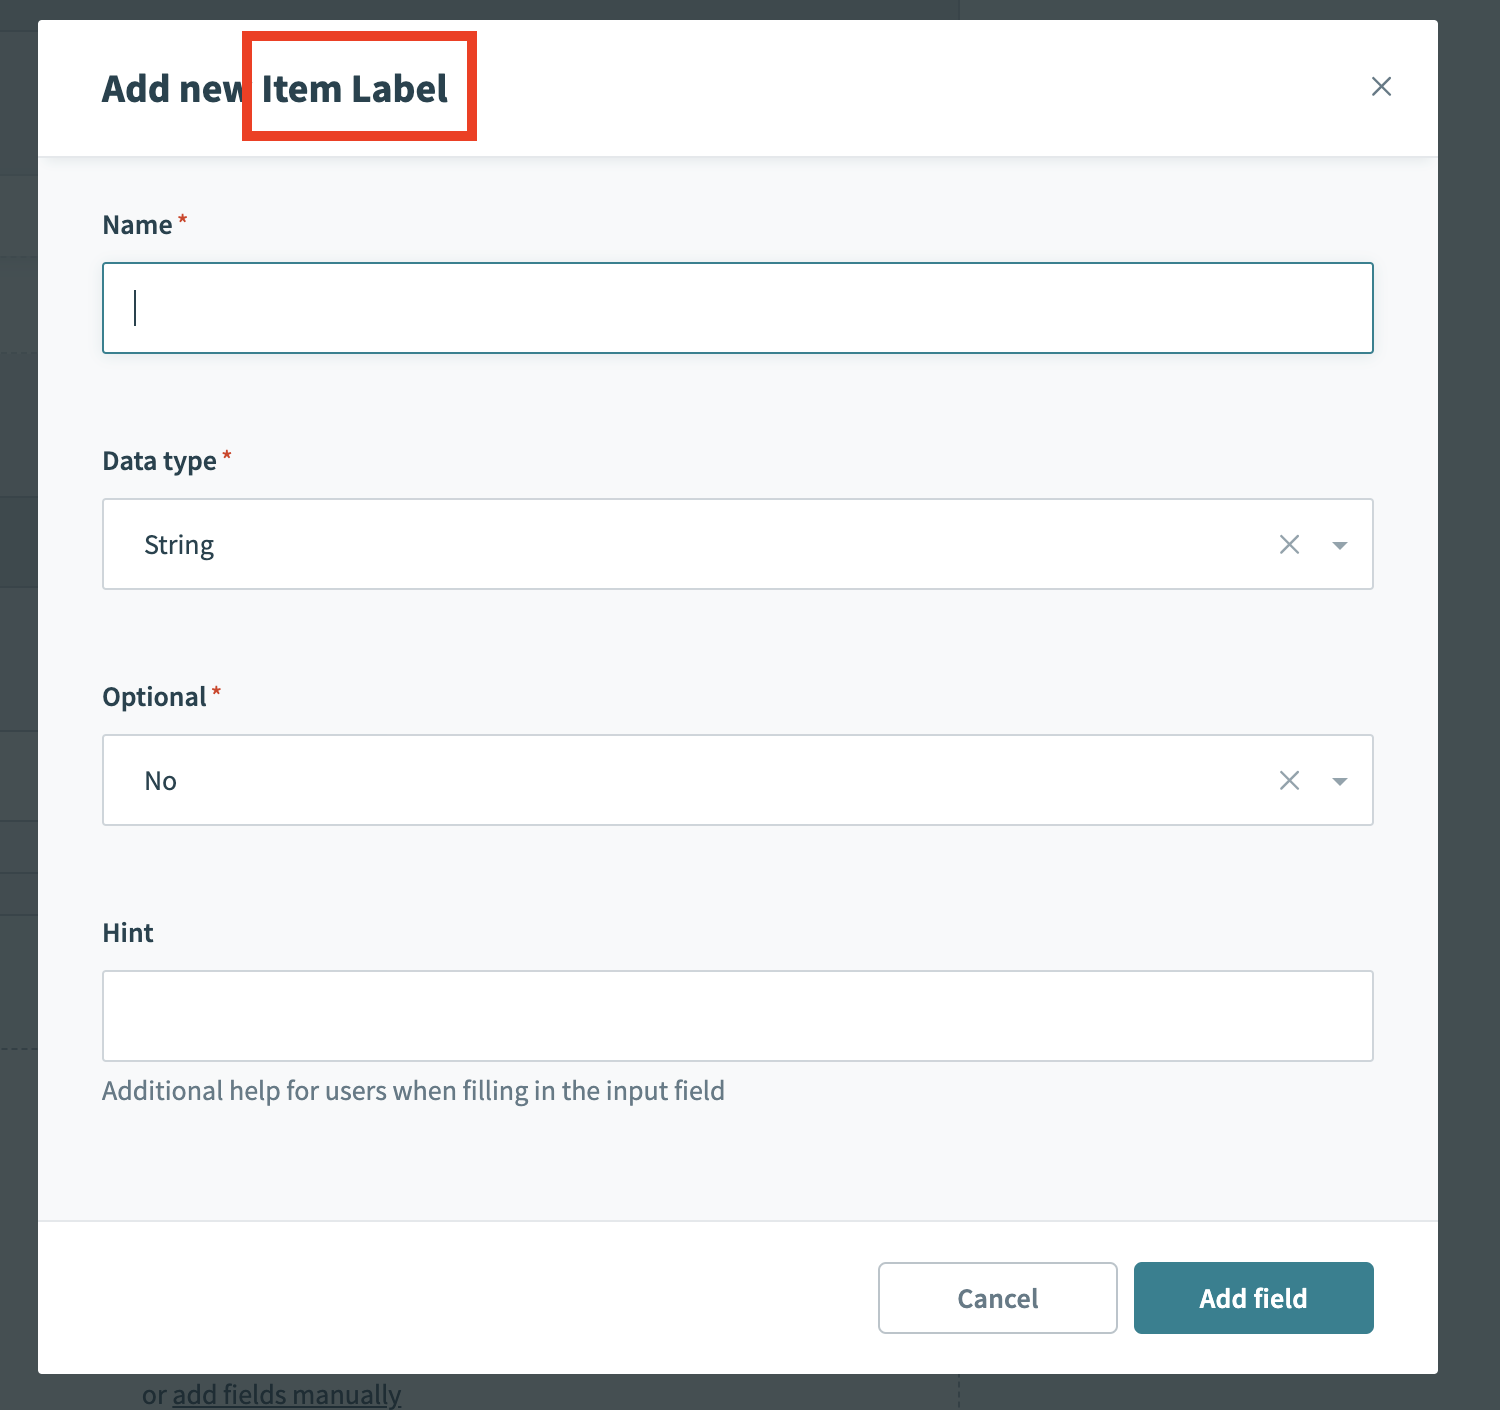 |
| add_field_label | Optional. Only used with control_type: "schema-designer" or control_type: "key_value". This allows you to configure the label of the add button. Setting add_field_label: "Custom Add Label" results in the following: 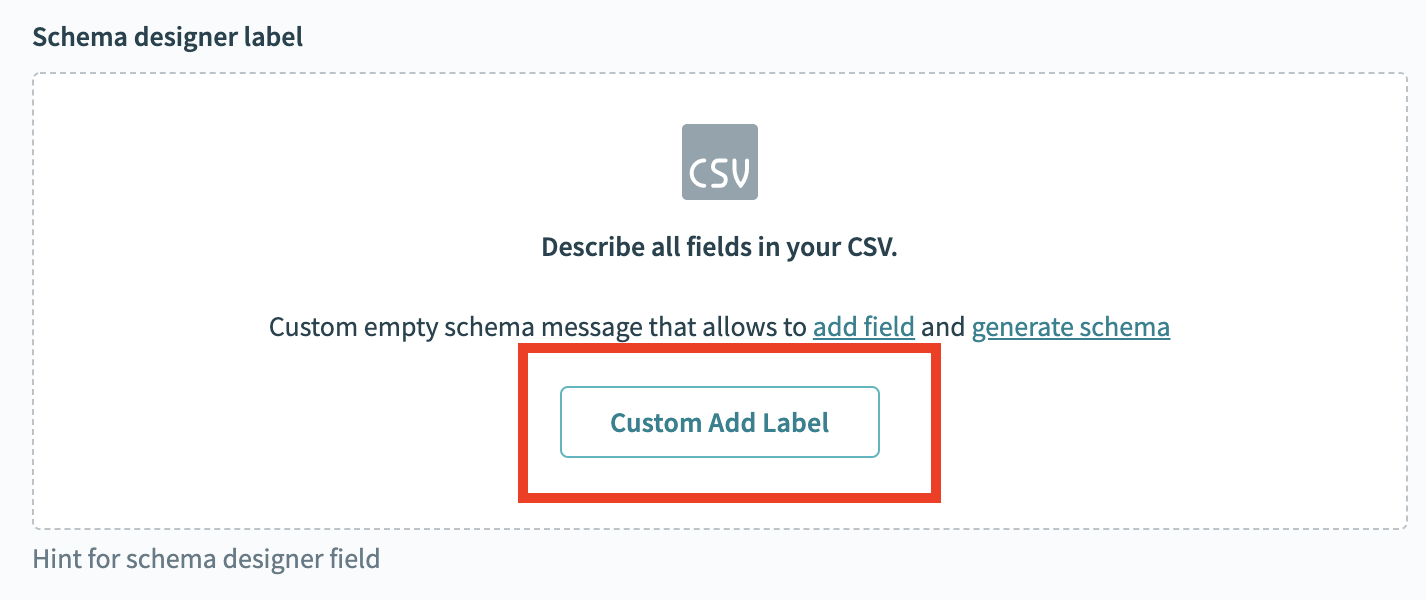 |
| empty_schema_message | Optional. Only used with control_type: "schema-designer" or control_type: "key_value". This allows you to configure the message when the input field is empty. Setting empty_schema_message: Custom empty schema message that allows you to add field and generate schema results in the following: |
| sample_data_type | Optional. Only used with control_type: "schema-designer". This allows you to configure the type of data the schema-designer input field accepts. Setting sample_data_type: csv results in the following: 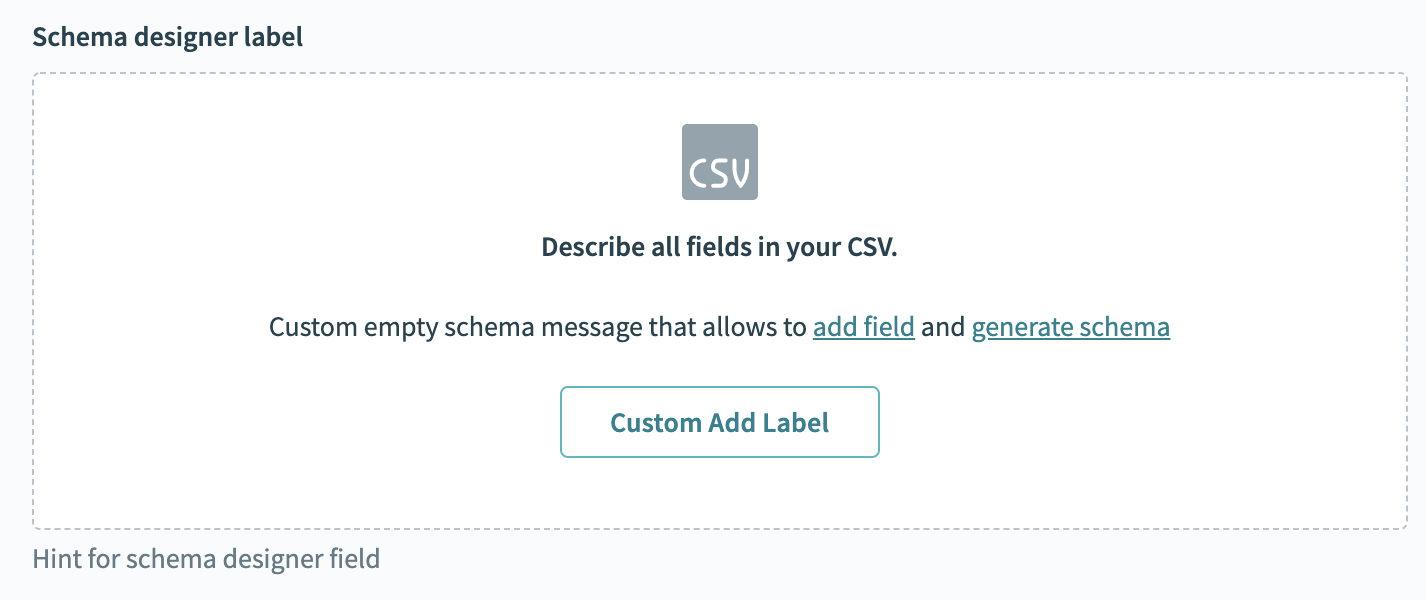 Other possible inputs are json_input and xml. The schema-designer defaults to json_input. Other possible inputs are json_input and xml. The schema-designer defaults to json_input. |
| ngIf | Optional. Allows you to define a boolean statement. If true, this field displays. The boolean statement can reference other inputs in the same schema. For example, ngIf: 'input.object_name != "approval"' where the root node is input and you can traverse to a specific field via dot notation. Refer to Using ngIf to conditionally hide or display fields for more details. |
| tree_options | Optional. Only used when control_type: 'tree'. This allows you to control the behavior of the tree picklist. This key expects a Hash which has three possible keys - selectable_folder,multi_select and force_selection_hierarchy. Refer to Picklists for more information. |
Control types
The control_type key affects how users configure the input fields you define. For each input field (index in the schema array), you can control its look by assigning one of the values to the control_type attribute:
| Control type | Description |
|---|---|
| text | Simple text input field with a formula mode option. |
| text-area | Long text input field with a formula mode option. |
| plain-text | Simple text input field without a formula mode option. |
| plain-text-area | Long text input field with formula mode option. This input field can be expanded using the adjust icon. |
| password | Text input field specifically designed for sensitive information, such as passwords. Text input in this control type is masked. |
| integer | Simple number field with icon to indicate an integer value. This control type has a formula mode option. |
| number | Decimal number field with icon to indicate a float value. This control type has a formula mode option. |
| url | Text field with icon to indicate a URL value. This control type has a formula mode option. |
| select | Control type to provide a predefined list of values to choose from. Make sure to include the pick_list property.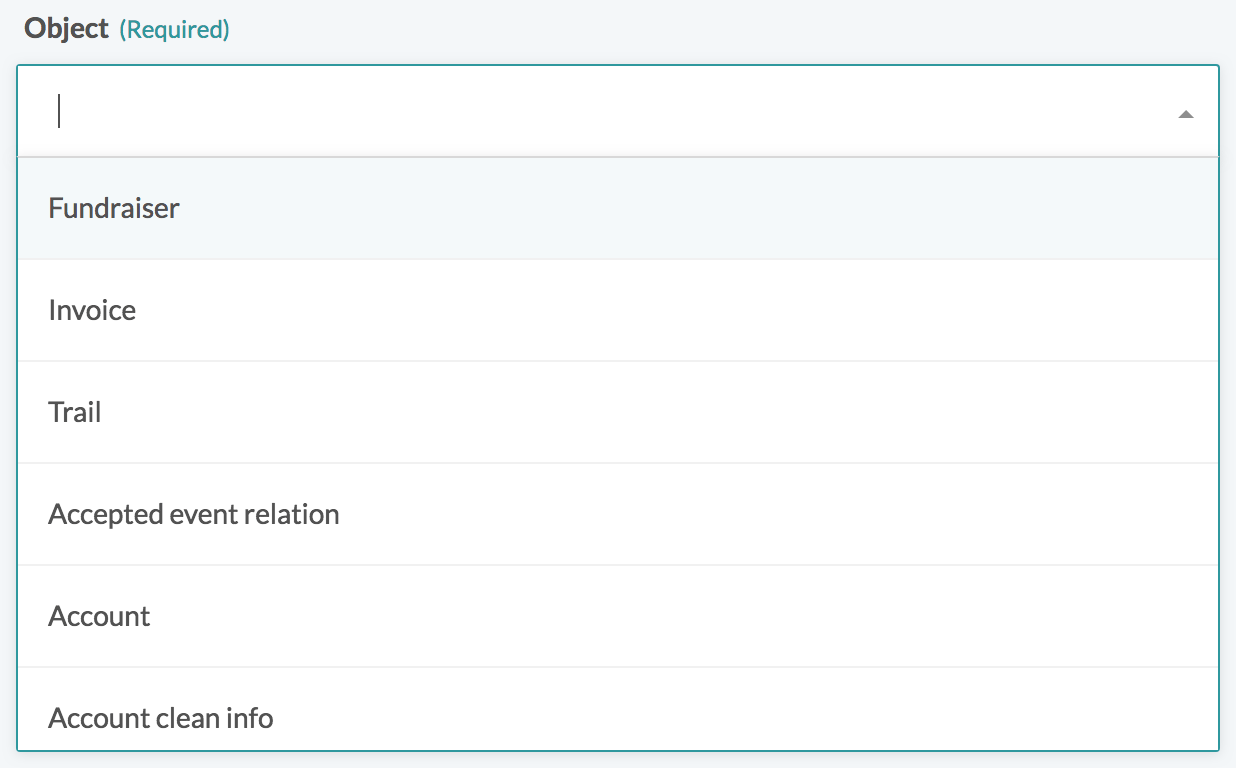 |
| checkbox | Simple Yes/No select interface. It is advisable to add a toggle field for dynamic mapping and formula mode option.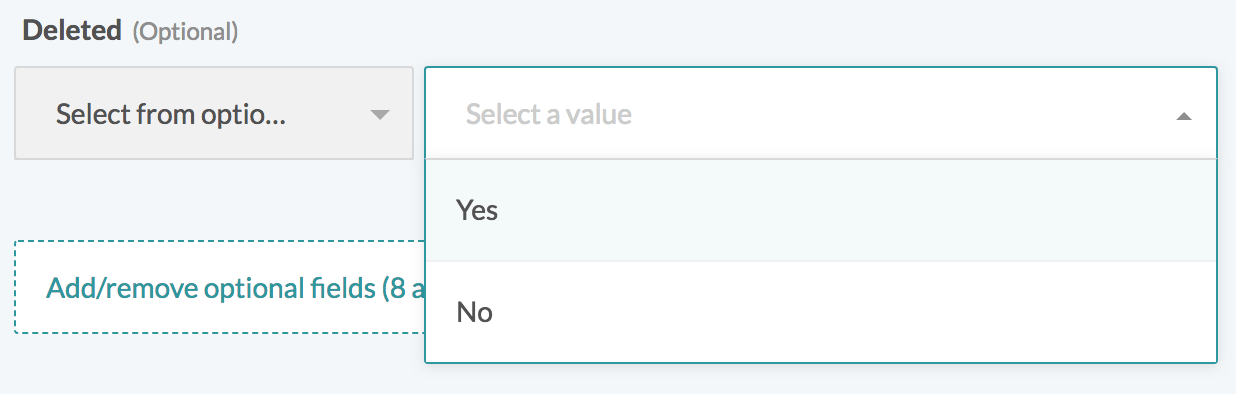 |
| multiselect | Control type similar to select with additional ability to select multiple values. This control type must be accompanied with pick_list and delimiter properties.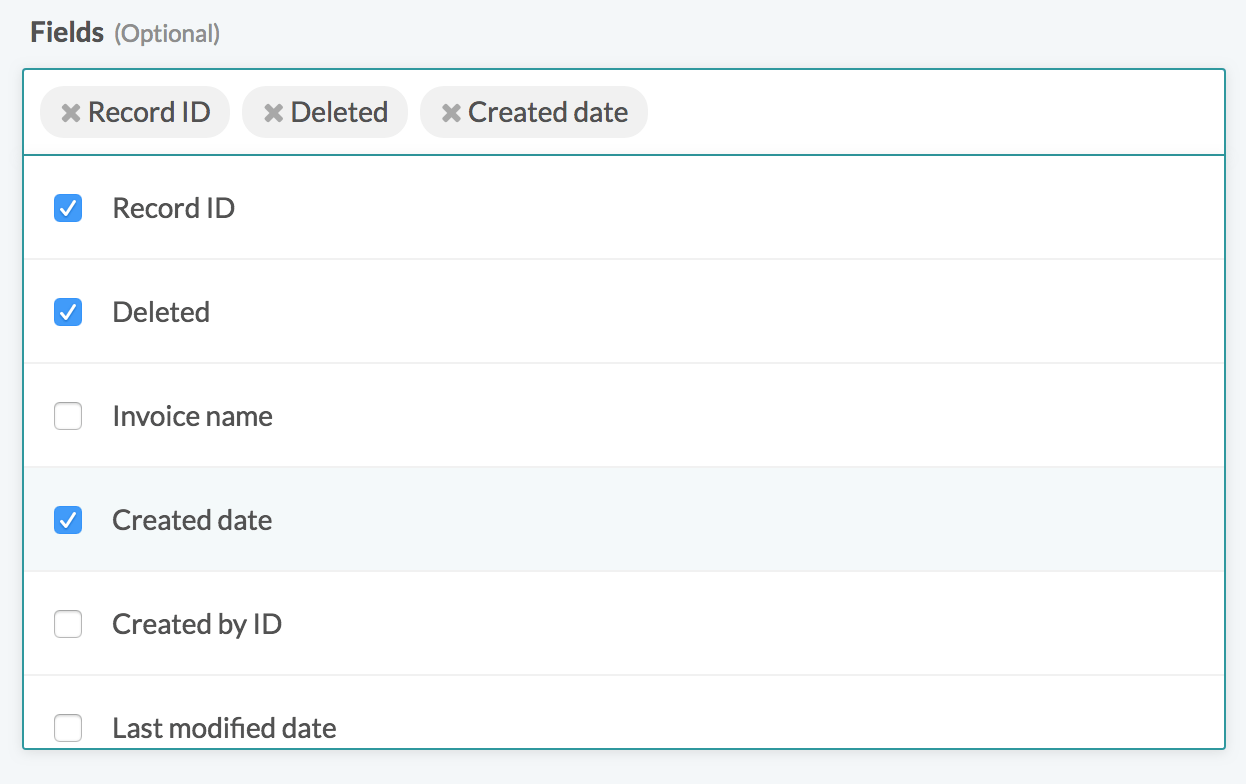 |
| date | Control type indicating date value. This control type has a formula mode option. 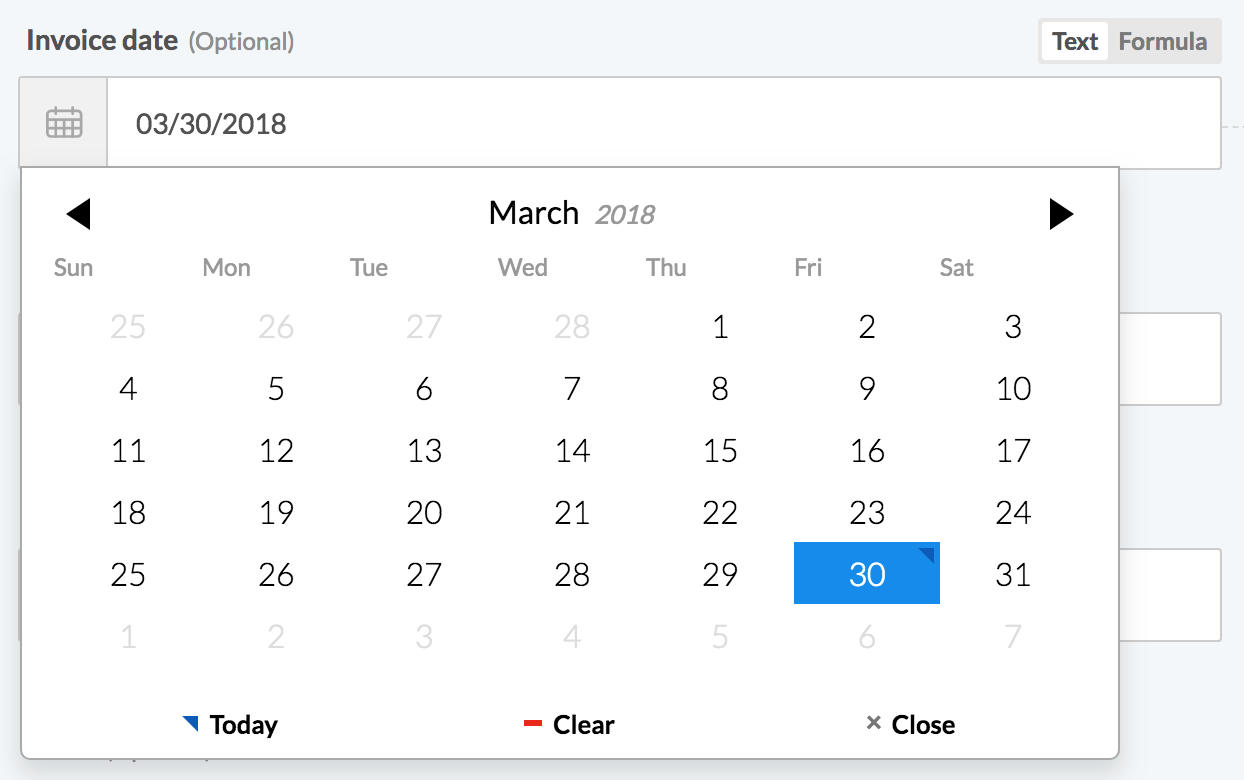 |
| date_time | Control type indicating date with time value. This control type has a formula mode option. 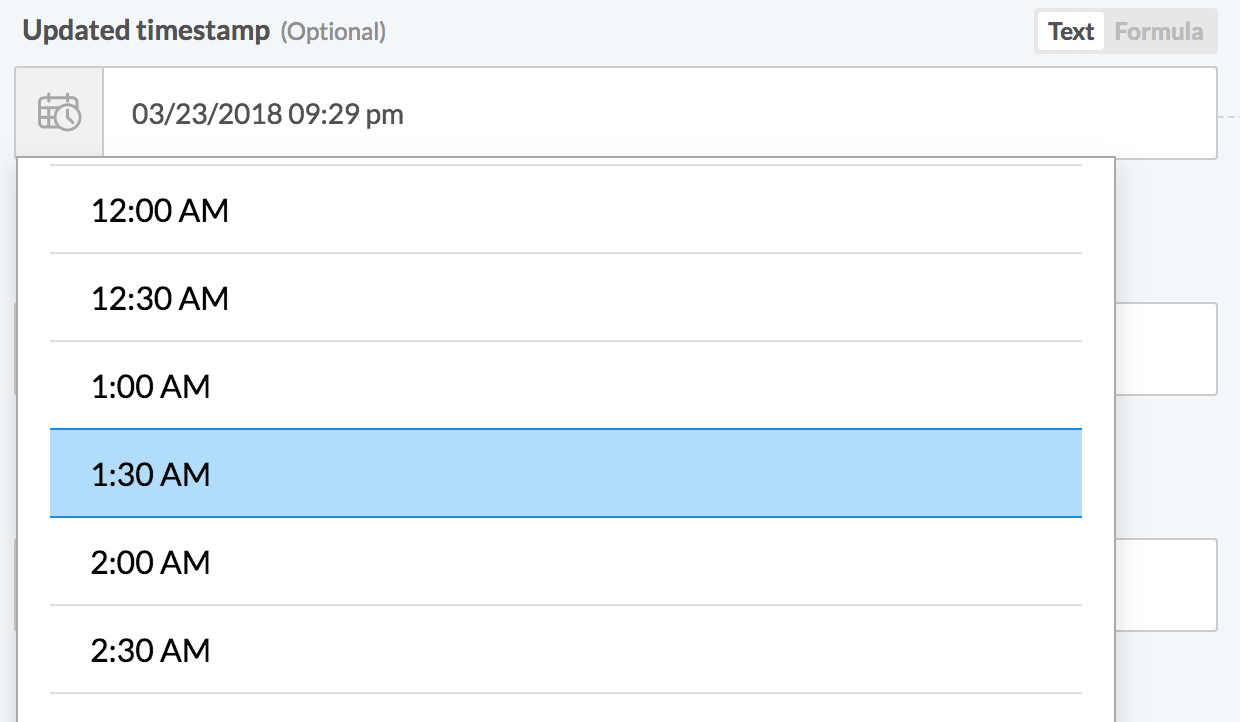 |
| phone | Control type indicating phone value. This control type has a formula mode option. |
Control type indicating email value. This control type has a formula mode option. | |
| subdomain | Control type to indicate a subdomain of a particular site. Typically used in connection fields. Make sure to include the url property. |
| schema-designer | Control type that allows you to collect schema information from users. This is useful when you need users to give your input during recipe design time to create input or output fields. This requires extends_schema: true to take effect. 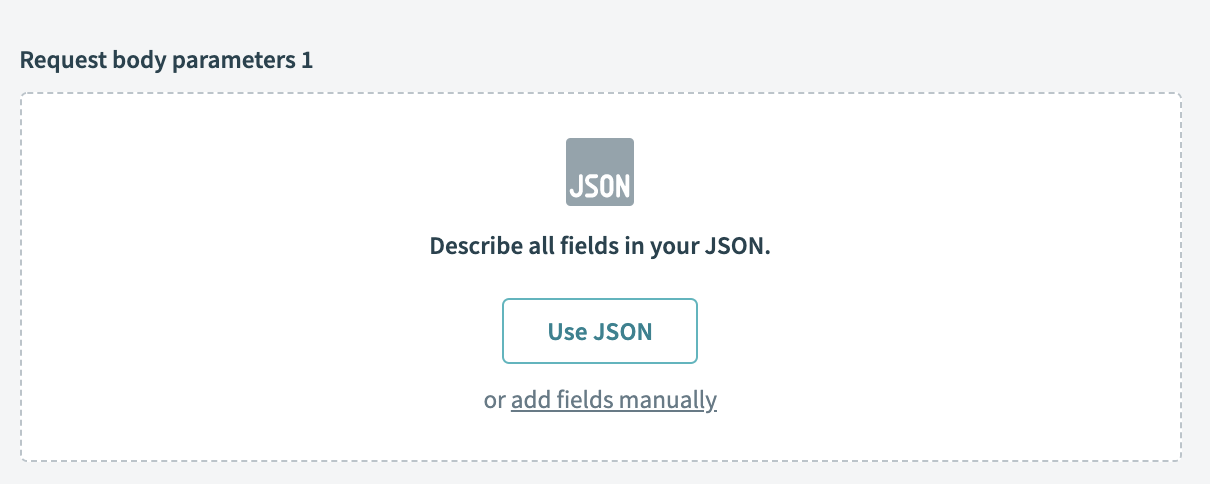 |
| key_value | Control type that allows you to collect key and value pairs from users. This is useful when you need users to give your input during recipe design time for URL query parameters. Must be accompanied with `properties` defined and two inputs given.  |
Nested objects
Often, data returned from API request is not a simple one-level JSON. More often than not, the returned JSON object is much more complex, with multiple levels of nesting. This section aims to illustrate how to define nested fields.
Sample code snippet
{
  "id": "00ub0oNGTSWTBKOLGLNR",
  "status": "STAGED",
  "created": "2013-07-02T21:36:25.344Z",
  "activated": null,
  "lastLogin": "2013-07-02T21:36:25.344Z",
  "profile": {
    "firstName": "Isaac",
    "lastName": "Brock",
    "email": "[email protected]",
    "login": "[email protected]",
    "mobilePhone": "555-415-1337"
  },
  "credentials": {
    "provider": {
      "type": "OKTA",
      "name": "OKTA"
    }
  },
  "_links": {
    "activate": {
      "href": "https://your-domain.okta.com/api/v1/users/00ub0oNGTSWTBKOLGLNR/lifecycle/activate"
    }
  }
}
Nested object field profile can be defined type: :object with fields nested inside using properties. Properties should be an array of fields objects (just like fields within the user object).
object_definitions: {
  user: {
    fields: lambda do
      [
        {
          name: "id"
        },
        {
          name: "status"
        },
        {
          name: "created",
          type: :timestamp
        },
        {
          name: "activated",
          type: :timestamp
        },
        {
          name: "lastLogin",
          type: :timestamp
        },
        {
          name: "profile",
          type: :object,
          properties: [
            {
              name: "firstName"
            },
            {
              name: "lastName"
            },
            {
              name: "email",
              control_type: :email
            },
            {
              name: "login",
              control_type: :email
            },
            {
              name: "mobilePhone",
              control_type: :phone
            }
          ]
        }
      ]
    end
  }
}
Nested Arrays
The other common type of nested field is an array of objects. This type of field contains a list of repeated objects of the same fields. The defining such fields is similar to defining objects. Take the following sample user object from Asana as an example.
Sample code snippet
{
  "data": {
    "id": 12149914544379,
    "email": "[email protected]",
    "name": "Ee Shan",
    "workspaces": [
      {
        "id": 1041269201604,
        "name": "Workato"
      },
      {
        "id": 498346130780,
        "name": "Product Documentation"
      }
    ]
  }
}
The workspaces array should be given type: :array as well as of: :object. This tells the object_definitions framework that the field contains an array of objects. Similar to nested objects, you must define properties, which is an array of fields corresponding to the fields of each object in the workspaces array.
object_definitions: {
  user: {
    fields: lambda do
      [
        {
          name: 'id',
          type: :integer
        },
        { name: 'name' },
        {
          name: 'email',
          control_type: :phone
        },
        {
          name: 'workspaces',
          type: :array,
          of: :object,
          properties: [
            {
              name: 'id',
              label: 'Workspace ID',
              type: :integer
            },
            { name: 'name' }
          ]
        }
      ]
    end
  }
}
Using toggle fields
Toggle fields are a special type of input fields that allow 2 input types. They are a great way to introduce greater flexibility and increase usability in your input fields. When used, toggle fields allow users to switch between two control types.
TIP
Toggle fields are often used in conjunction with pick lists. Since pick lists produce drop-downs, users are unable to map datapills which they normally would in recipes. Toggle fields fix that by allowing them to toggle to plain text fields which can accept datapills.
Sample code snippet
input_fields: lambda do |object_definition, connection, config_fields|
{
name: "parser_id",
label: "Document Parser",
hint: "The Document Parser the file gets imported to",
control_type: :select,
pick_list: "parsers",
optional: false,
toggle_hint: "Select from list",
toggle_field: {
name: "parser_id",
label: "Parser ID",
type: :string,
control_type: "text",
optional: false,
toggle_hint: "Use Parser ID",
hint: "Go to home page and select the required parser. If the URL is 'https://app.docparser.com/stack/ynrqkdxvaghs/overview', then 'ynrqkdxvaghs' is the ID"
}
},
end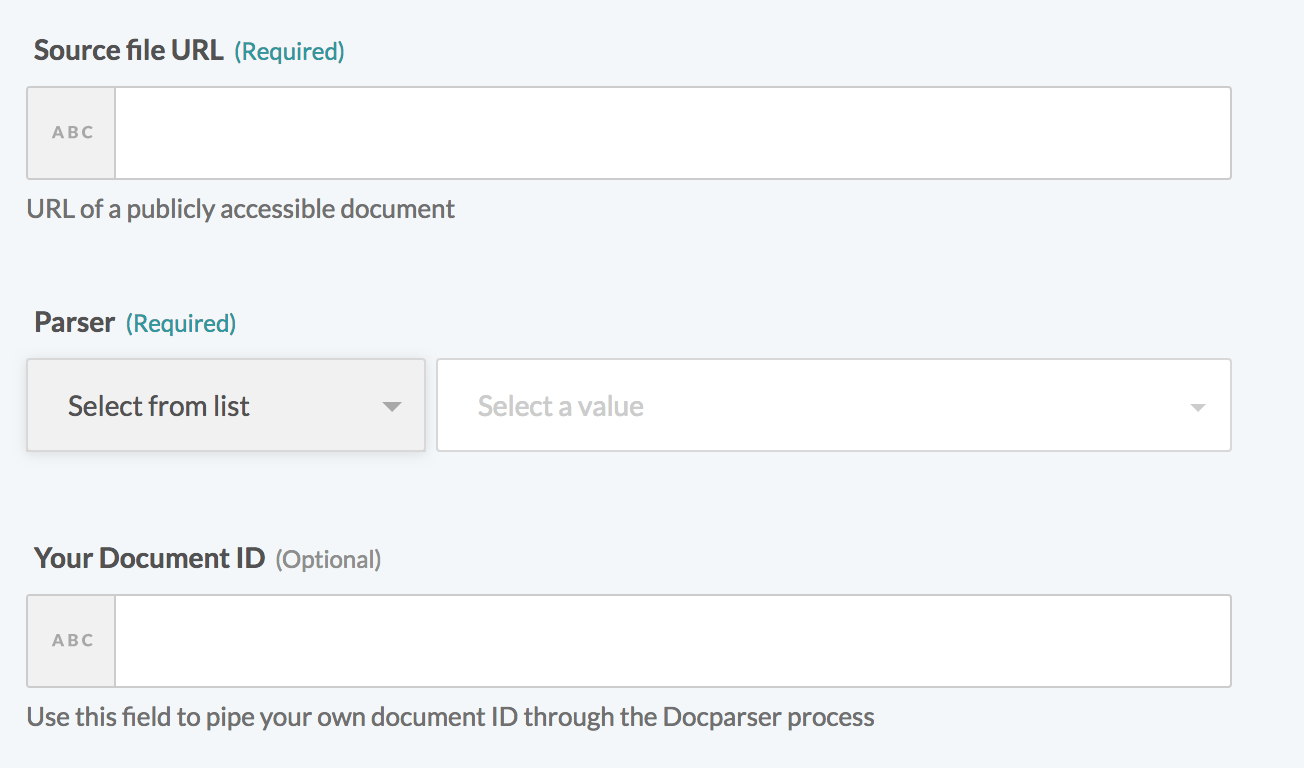 Primary toggle field
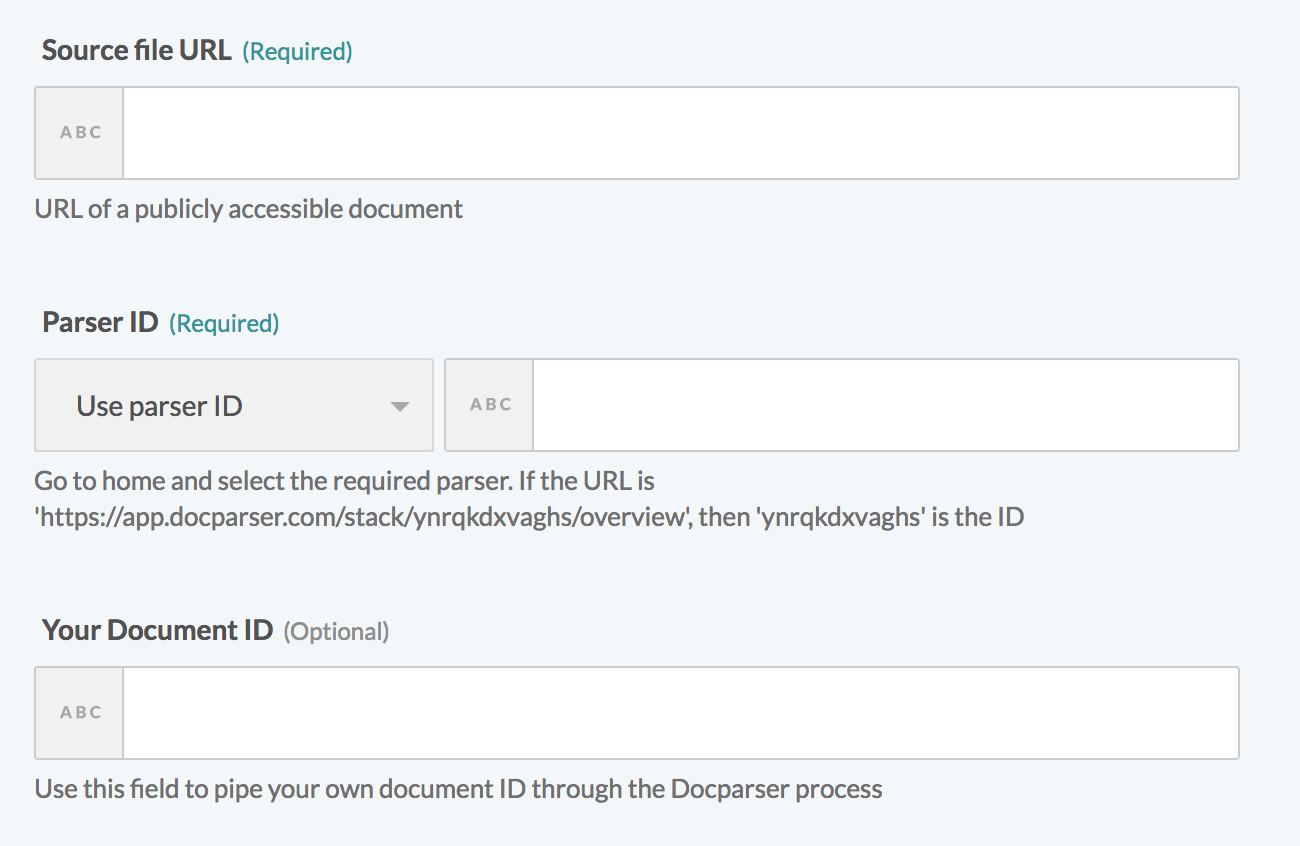 Secondary toggle field
You can use a picklist input type to create a customized user experience. However, this makes the action value mapping static. All recipe jobs executing this action use the single parser ID value you selected, because only one value can be selected from the picklist. You can avoid this limitation by using a text field. A text field allows you to dynamically map the input field value.
If both field types are preferred for your planned use case, you can use the toggle_field to provide both input options to users. The picklist type is set as the primary toggle and the text field is set as the secondary (nested toggle_field) because the most common scenario is for users to select one parser per action.
Using fields with extends_schema
In some cases, the input fields you plan to show in an action depend on the answer to an input field in the same action. The extends_schema feature enables you to add dynamic behavior to your actions without using configuration fields.
Sample code snippet
object_definitions:
  schema_input: {
    fields: lambda do |connection, config_fields, object_definitions|
      input_schema = parse_json(config_fields.dig('schema') || '[]')
      [
        {
          name: "schema",
          extends_schema: true,
          schema_neutral: false,
          control_type: 'schema-designer',
          label: 'Schema designer label',
          hint: 'Hint for schema designer field',
          item_label: 'button',
          add_field_label: 'Custom Add Label',
          empty_schema_message: 'Custom empty schema message that allows you to <button type="button" data-action="addField">add field</button> and <button type="button" data-action="generateSchema">generate schema</button>',
          sample_data_type: 'csv' # json_input / xml
        },
        if input_schema.present?
          { name: 'data', type: 'object', properties: input_schema }
        end
      ].compact
    end
  }
The preceding code sample demonstrates how to use an input field with control_type set to schema-designer. By setting extends_schema to true, user inputs trigger a re-evaluation of the object_definitions block. The inputs become config_fields for further processing. This setup allows inputs for the schema field to directly influence the creation of the data input field.
The schema_neutral parameter enables you to update titles or descriptions without modifying the schema's logic. This provides increased flexibility and control when changes impact the title or description but not the schema itself. schema_neutral allows you to return results of an extended schema even when the input is empty.
Arrays of primitive scalar data types
Arrays in Workato input and output schema currently only work with objects. In cases where you need to collect an array of primitive data types such as strings or integers, consider the code below. In this example, we plan to send an array of strings to a target API in the format ["column1","column2","column3"]. This can be done by declaring an array of objects with the declaration for the column names input field wrapped inside the object layer.
Sample code snippet
object_definitions: {
  columns: {
    fields: lambda do
      [
        {
          label: 'String Array',
          name: 'array_of_strings',
          type: "array",
          of: "string"
        }
      ]
    end
  }
}
Using ngIf to conditionally hide or display fields
Sometimes, you need to hide or display fields based on a user's input. This could be in the input_fields key or the config_fields key. For example, if you want to showcase an additional config_field based on a user's input to another config_field. Another use case would be to showcase a new input field based on a user's input for another input field. For example, if we have an action that creates a user - if one input field is assign_new_password, we would use ngIf to conditionally show new_password if the user gave true to that input.
Sample code snippet
object_definitions: {
  create_user: {
    fields: lambda do |_connection, config_fields|
      [
        {
          name: 'assign_new_password',
          label: 'Assign new password during creation',
          hint: "Select <b>yes</b> to provide a password for this newly created user. If set to <b>no</b>, an email is sent to user to define their own password.",
          control_type: 'checkbox',
          type: 'boolean',
          sticky: true,
        },
        {
          name: 'password_input',
          label: 'Custom password',
          control_type: 'password',
          ngIf: 'input.assign_new_password == "false"',
          sticky: true,
          hint: 'Required if <b>Assign new password during creation</b> is set to <b>yes</b>. ' \
                  'Provide a password of length 8 to 100 characters.'
        },
      ]
    end
  }
}
Using convert_input and convert_output for easy transformations
In most cases, when users map fields to your action's input fields, these values are assumed to be of the data type string regardless of the actual type or control_type you have configured for the input field.
For example, the schema below:
[
  {
    name: "account_id",
    control_type: "integer"
    type: "int"
  }
]
When the input is passed to the execute lambda, it would still arrive in the JSON object as
{
  "account_id": "123"
}
In these cases, you can use convert_input to transform the input into its expected data type even before it's passed to the execute lambda.
For example:
[
  {
    name: "account_id",
    control_type: "integer"
    type: "int",
    convert_input: "integer_conversion"
  }
]
With convert_input defined, the input argument passed to your execute lambda is:
{
  "account_id": 123
}
This allows you to configure the expected data formats when defining the schema and allows you to skip any unnecessary code in your execute for ensuring data is in the correct format. The same behavior is also seen in reverse when you use convert_output, where a value from the output of your execute lambda is transformed when its mapped to a output field which contains a convert_output attribute.
Predefined convert_input values
integer_conversionConverts input into data type integer
float_conversionConverts input into data type float
date_conversionConverts input into data type date
render_iso8601_timestampConverts input into date string that conforms to ISO8601 standards
boolean_conversionConverts input into data type boolean
Predefined convert_output values
integer_conversionConverts output into data type integer/number
float_conversionConverts output into data type float
date_conversionConverts output into data type date
date_time_conversionConverts output into a format that matches JavaScript's Date object's
toJSONmethodboolean_conversionConverts output into data type boolean
TIP
Sometimes the above transformations may not suite your needs. For example, when you need transformations to a specific time format or if you want to manipulate the structure of your data. In these cases, you can create your own custom convert_input and convert_output functions. Continue reading to learn how to do this.
Advanced transformations using methods in convert_input and convert_output
In some situations, APIs require you to send data in a specific format. For example, an API can require date times in epoch time. In many cases, we cannot assume that users in the recipe editor are comfortable with epoch time or that the upstream systems they are mapping data from provide date times in epoch format. In cases like these, we would use methods in conjunction with convert_input to cast their inputs to the proper format.
For example:
[
  {
    name: 'invoice_date',
    control_type: "date_time",
    convert_input: "epoch_time_conversion"
  }
]
and a matching method named epoch_time_conversion:
methods: {
  epoch_time_conversion: lambda do |val|
    val.to_time.to_i
  end
}
which would render inputs such as "2021-10-27T00:00:00-07:00" to 1635318000.
You can also use custom lambdas to perform custom transformations on nested structures. For example, when an API requires you to send a payload in the format:
{
  "data": {
    "name": {
      "value": "abc123"
    },
    "address": {
      "value": "def456"
    }
  }
}
The corresponding input_field representation might be overly nested, making it cumbersome for users.
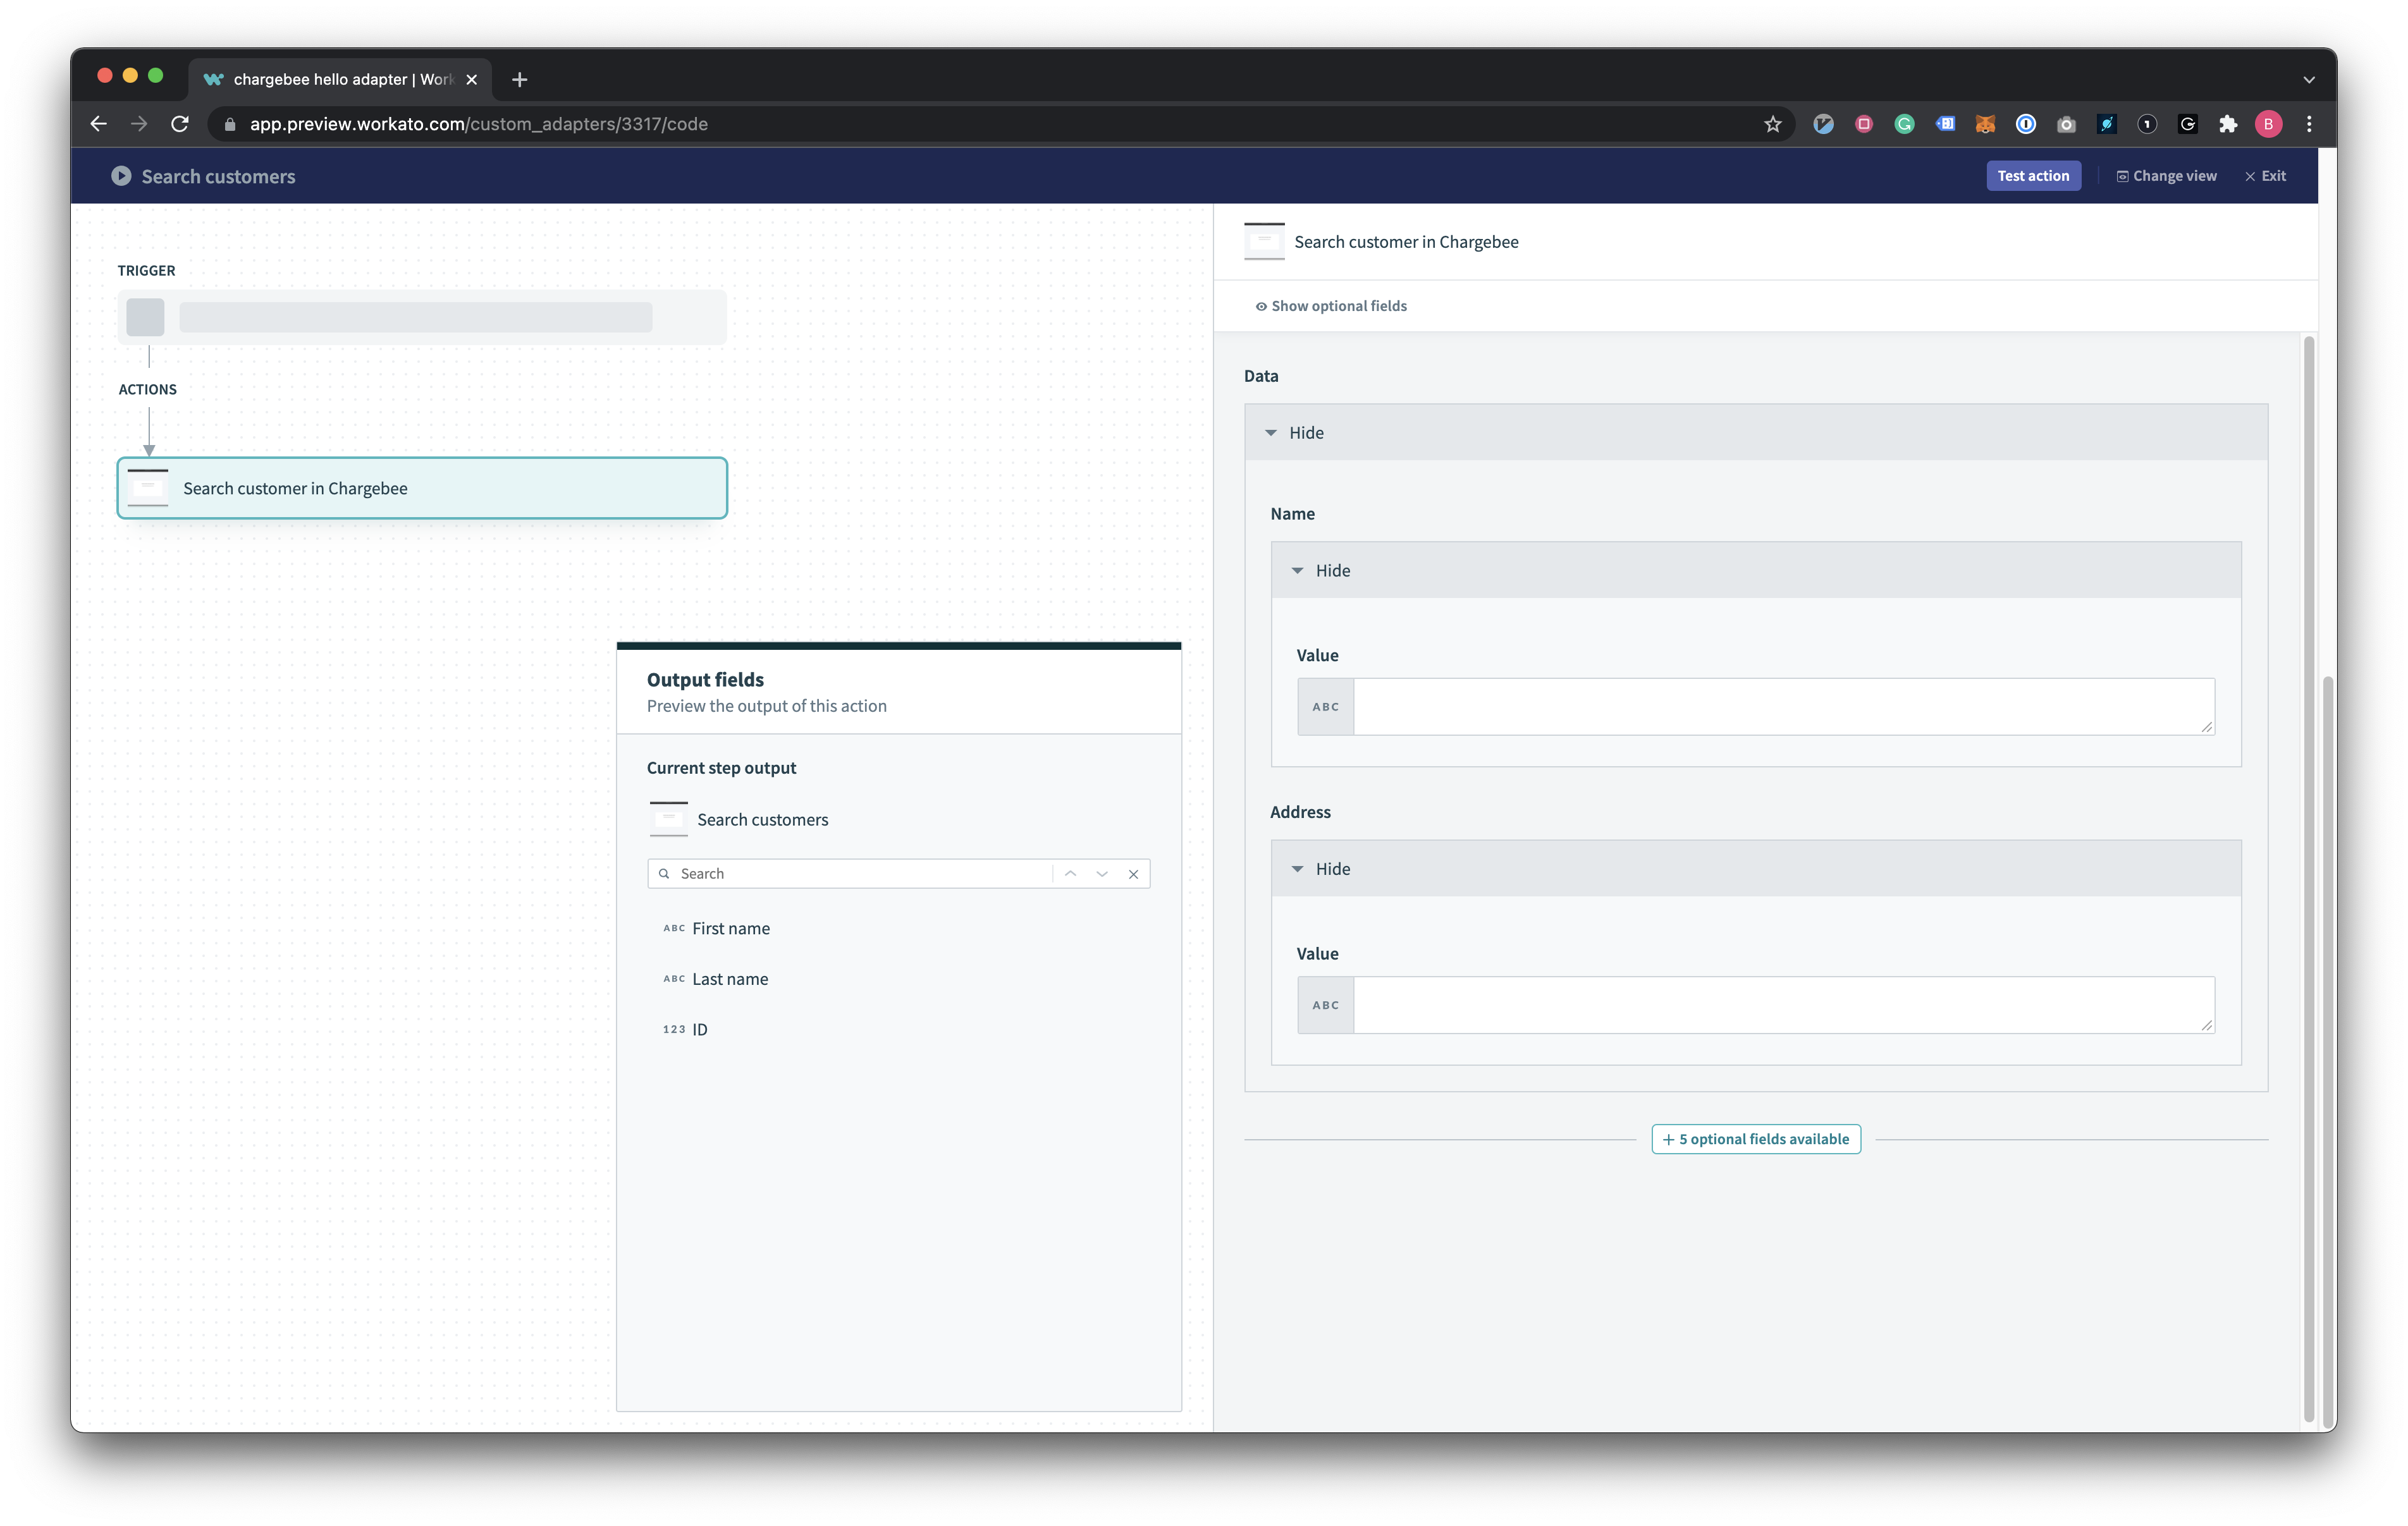 Input fields represented by the earlier example
Custom lambdas help you improve the UX of your connector by allowing you to present a relatively flat input field structure and performing the transformations afterwards.
For example:
[
  {
    name: 'data',
    type: 'object',
    properties: [
      {
        name: "name"
      },
      {
        name: "address"
      }
    ],
    convert_input: "key_value_conversion"
  }
]
and a matching method named key_value_conversion:
methods: {
  key_value_conversion: lambda do |val|
    # val in this case is the entire "data" object
    val.map do |key, value|
      {
        key => {
          "value" => value
        }
      }
    end.inject(:merge)
  end
}
Resultant JSON:
{
"data": {
"name": {
"value": "abc123"
},
"address": {
"value": "def456"
}
}
}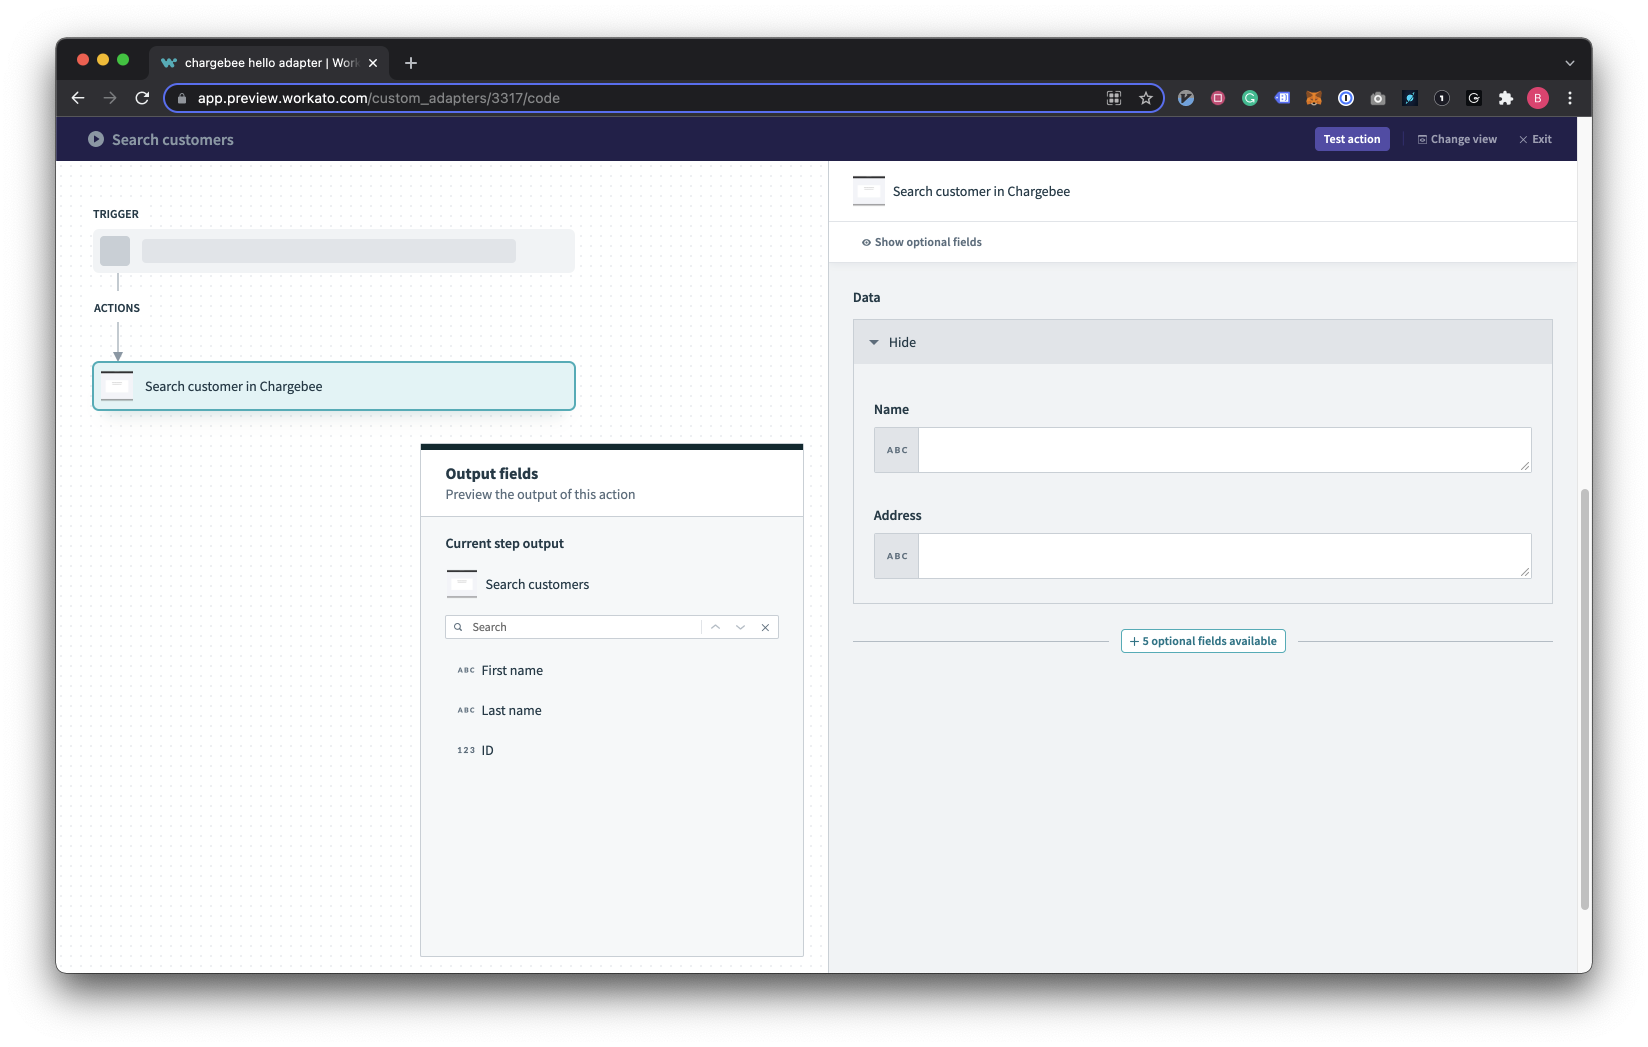 Input fields that produce the same output due to custom lambdas
Furthermore, you can call convert_input and convert_output on schema of type arrays. This allows you to perform transformations on the entire array of inputs.
For example:
[
  {
    name: 'products',
    type: 'array',
    of: 'object',
    convert_input: "product_conversion",
    properties: [
      {
        name: "name"
      },
      {
        name: "qty"
      }
    ]
  }
]
and a matching method named string_concat_conversion:
methods: {
  product_conversion: lambda do |val|
    # Render_input is called on each index of the array THEN the whole array
    if val.is_a?(Array)
      val
    else
      {
        val['name'] => val['qty']
      }
    end
  end,
}
The user's input would look something like this:
{
  "products": [
    {
      "name": "car",
      "qty": "100"
    },
    {
      "name": "wrench",
      "qty": "10"
    }
  ]
}
Resultant JSON:
{
  "products": [
    "car": "100"
    "wrench": "10"
  ]
}Last updated: