Set up EDI Genie
Use this guide to install and configure EDI Genie in your workspace.
Prerequisites
Complete the following before beginning setup:
- Confirm you have an active Orderful account with API access enabled.
- Confirm that trading partner data, transaction logs, and error records are accessible through Orderful APIs.
- Collect admin email addresses for alert notifications.
- Choose a notification channel: Slack, Microsoft Teams, or Workato GO. EDI Genie is preconfigured for Slack. You can use Microsoft Teams or Workato GO instead with additional configuration.
Install EDI Genie
Complete the following steps to install the required packages for EDI Genie:
ALREADY HAVE THE INSTALLER?
If your workspace already has the Genie Installer, skip to Step 5.
Download the Genie Installer package. Contact your Workato account team if you don't have it.
Create the following projects in your workspace:
- Agentic | All Genies
- Agentic | Installer
Go to Tools > Recipe lifecycle management and import the Genie Installer zip file into the Agentic | Installer project.
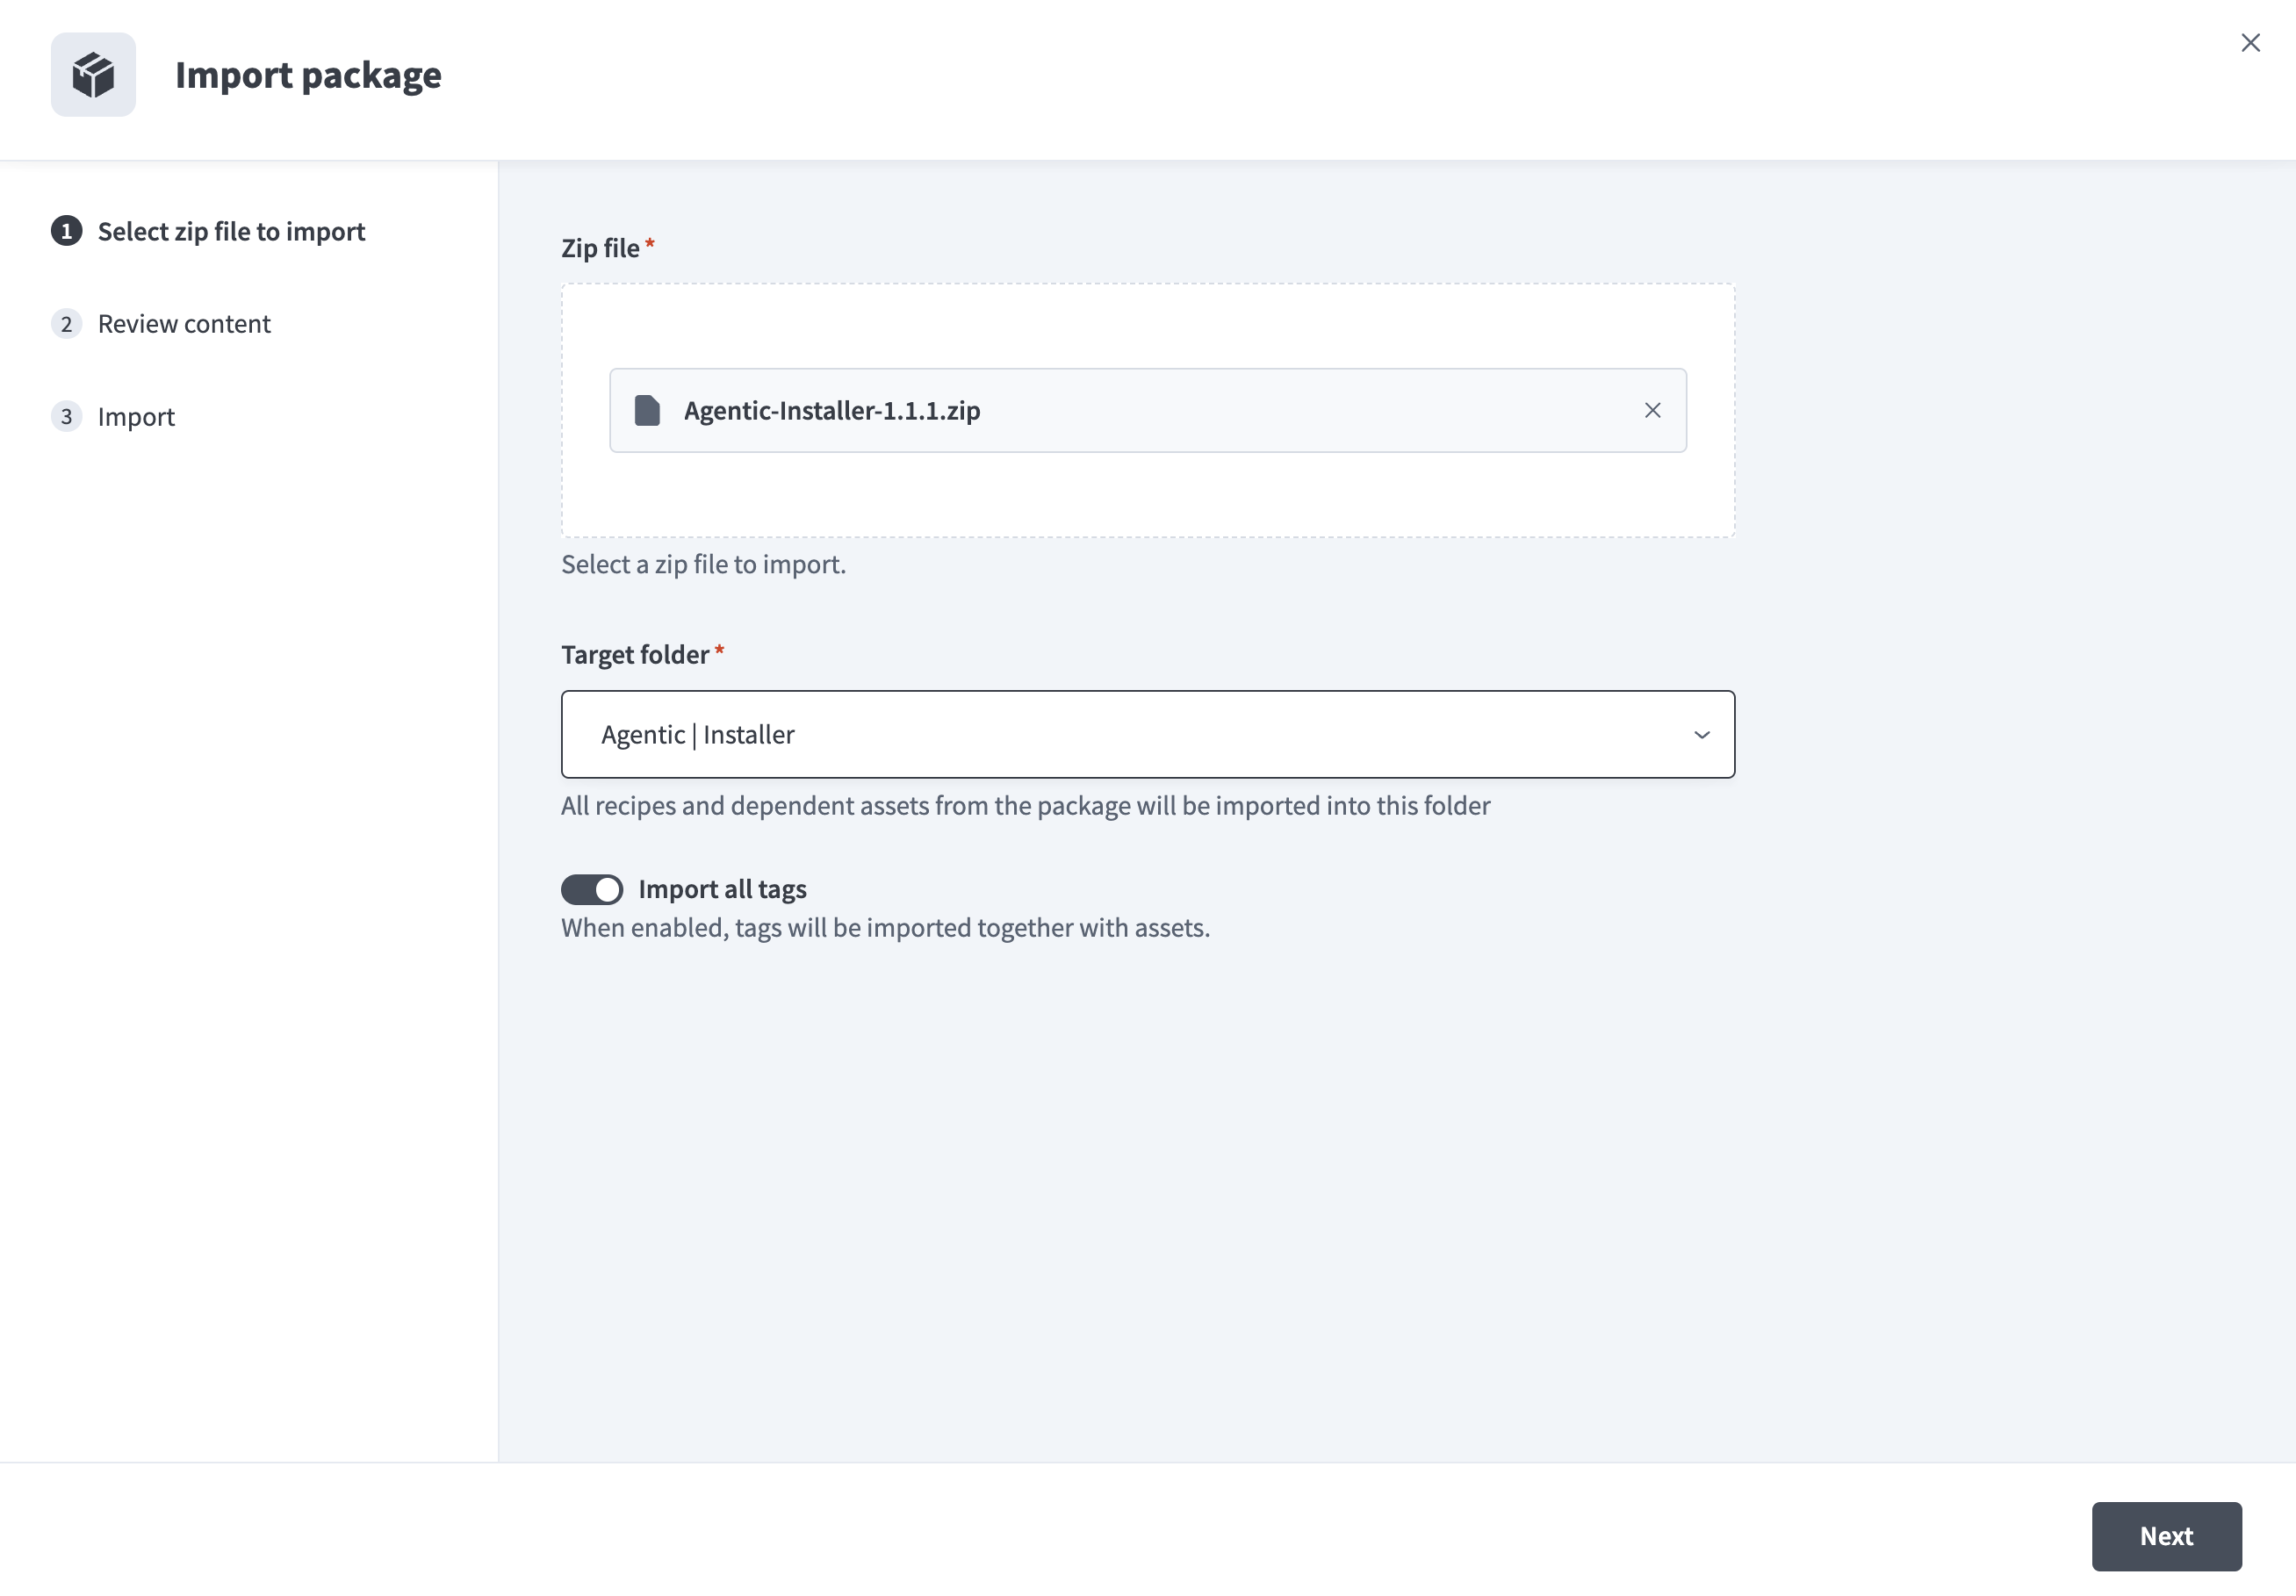 Import the Genie Installer package
Click Next to proceed through the import.
You should see the installer assets in Agentic | Installer after the import completes.
Go to Workspace admin > API clients > Client roles and click Create client role.
Assign the following permissions to the client role:
| Category | Sub-category | Permission | Endpoint |
|---|---|---|---|
| Project assets | Projects & folders | List folders | GET /api/folders |
| Project assets | Projects & folders | Create a project or folder | POST /api/folders |
| Project assets | Recipes | List | GET /api/recipes |
| Project assets | Recipes | Start | PUT /api/recipes/:id/start |
| Deployments & lifecycle | Recipe lifecycle management | Get package details | GET /api/packages/:id |
| Deployments & lifecycle | Recipe lifecycle management | Import package | POST /api/packages/import/:id |
| Workspace details | Workspace details | Get details | GET /api/users/me |
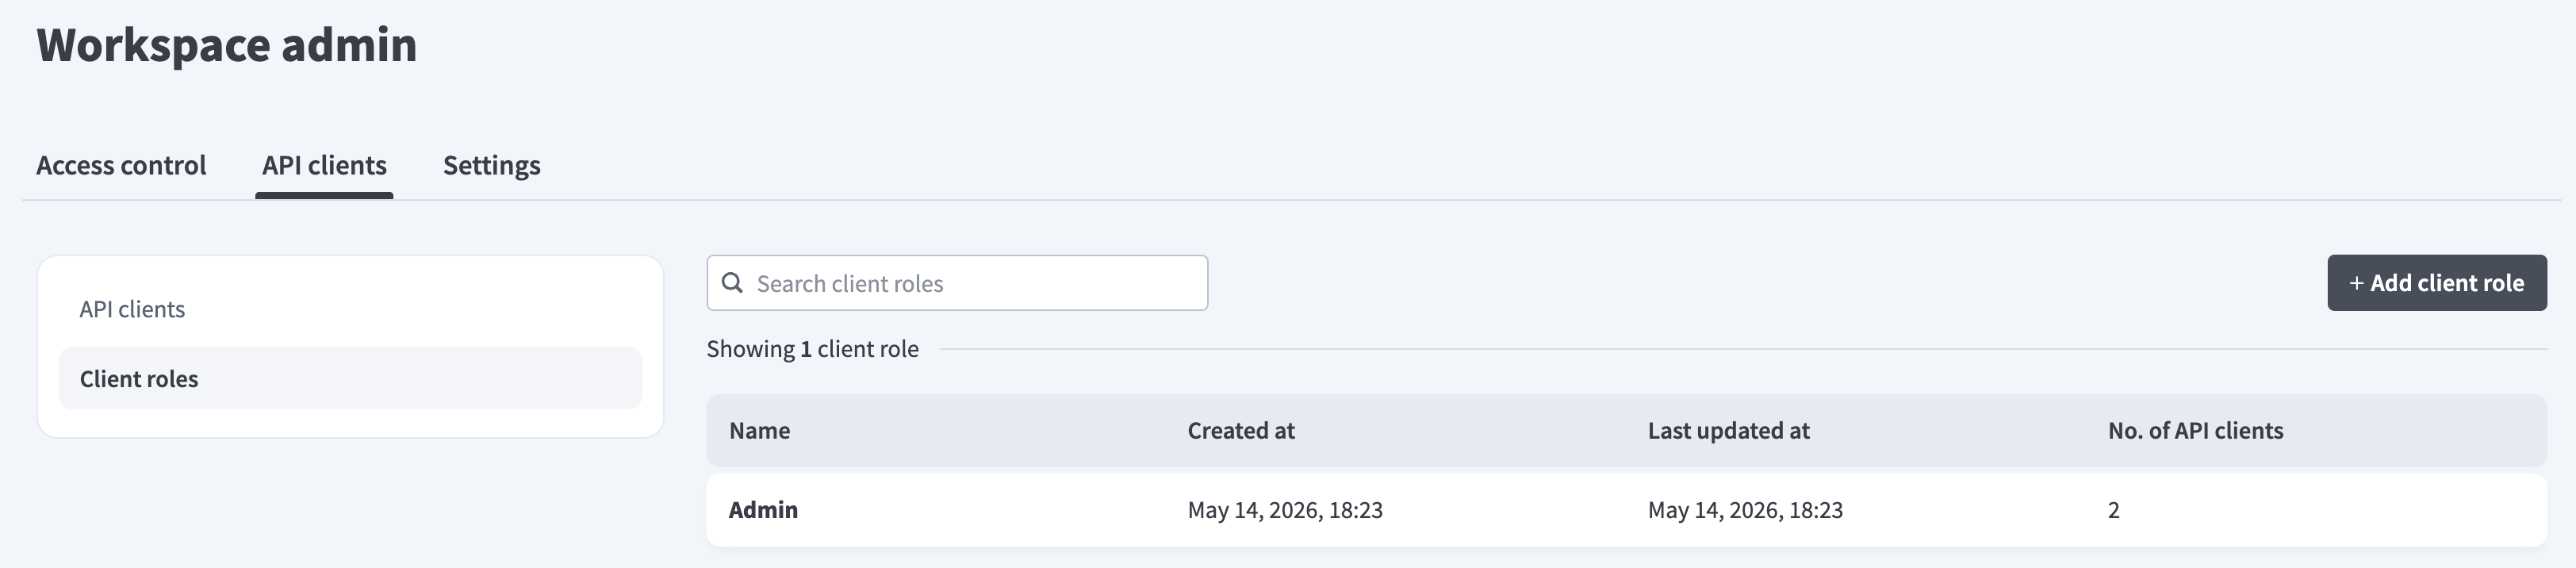 Create a client role with the required permissions
Create an API client. Assign the client role and project access to the new client, then copy and save the generated token.
 Copy and save the generated API client token
Contact your Workato account team to obtain your organization's Genie module installer token. Save this token in a secure location.
Go to Agentic | Installer > Connections > CON | Agentic Apps Installer and configure the following fields:
| Field | Description |
|---|---|
| Data center (Current Workato Workspace) | Select the data center for your Workato workspace. |
| API key (Current Workato Workspace) | Enter your workspace API client token from Step 7. |
| API key (Genie Module Installer) | Enter the installer token from your Workato account team. |
Click Connect.
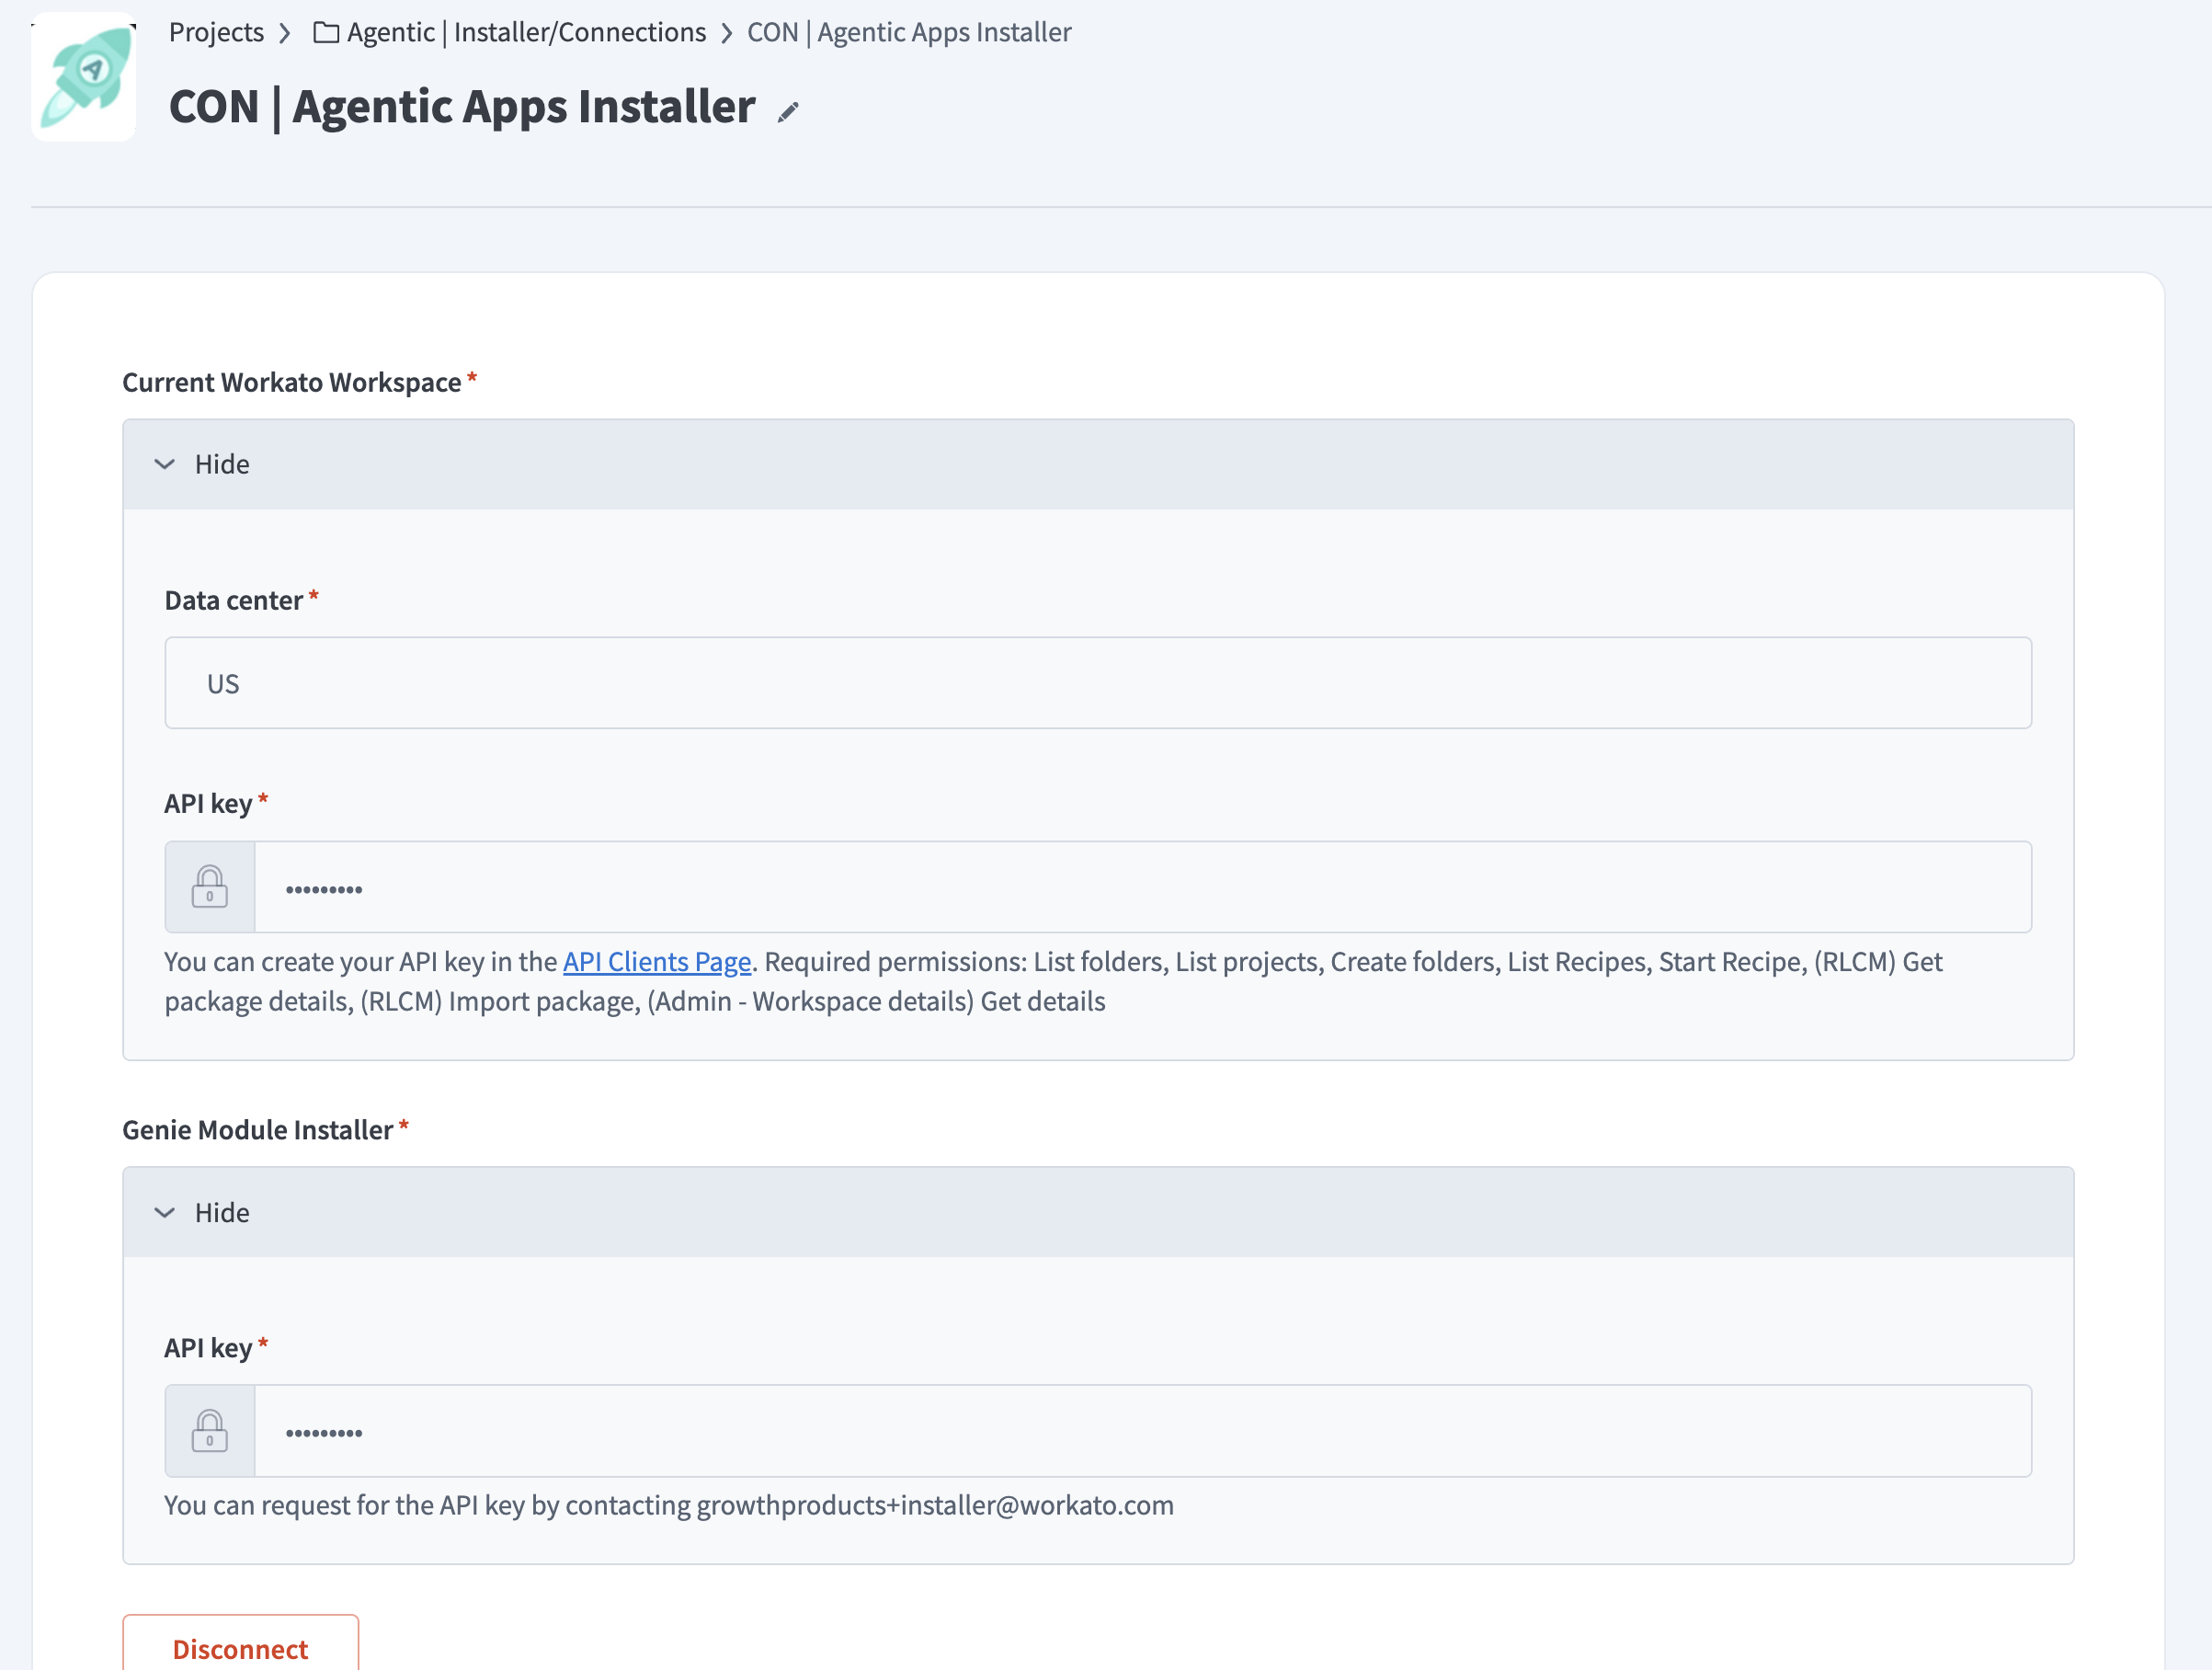 Configure the Agentic Apps Installer connection
Go to Agentic | Installer > Templates > FUNC | [SAMPLE] 3. Install Genie Module.
Click Edit recipe, then do the following:
Refresh the recipe to load the latest available packages.
In Step 2, select the latest version of Agentic | EDI Genie from the Genie Module drop-down menu. Set Get Dependencies to false.
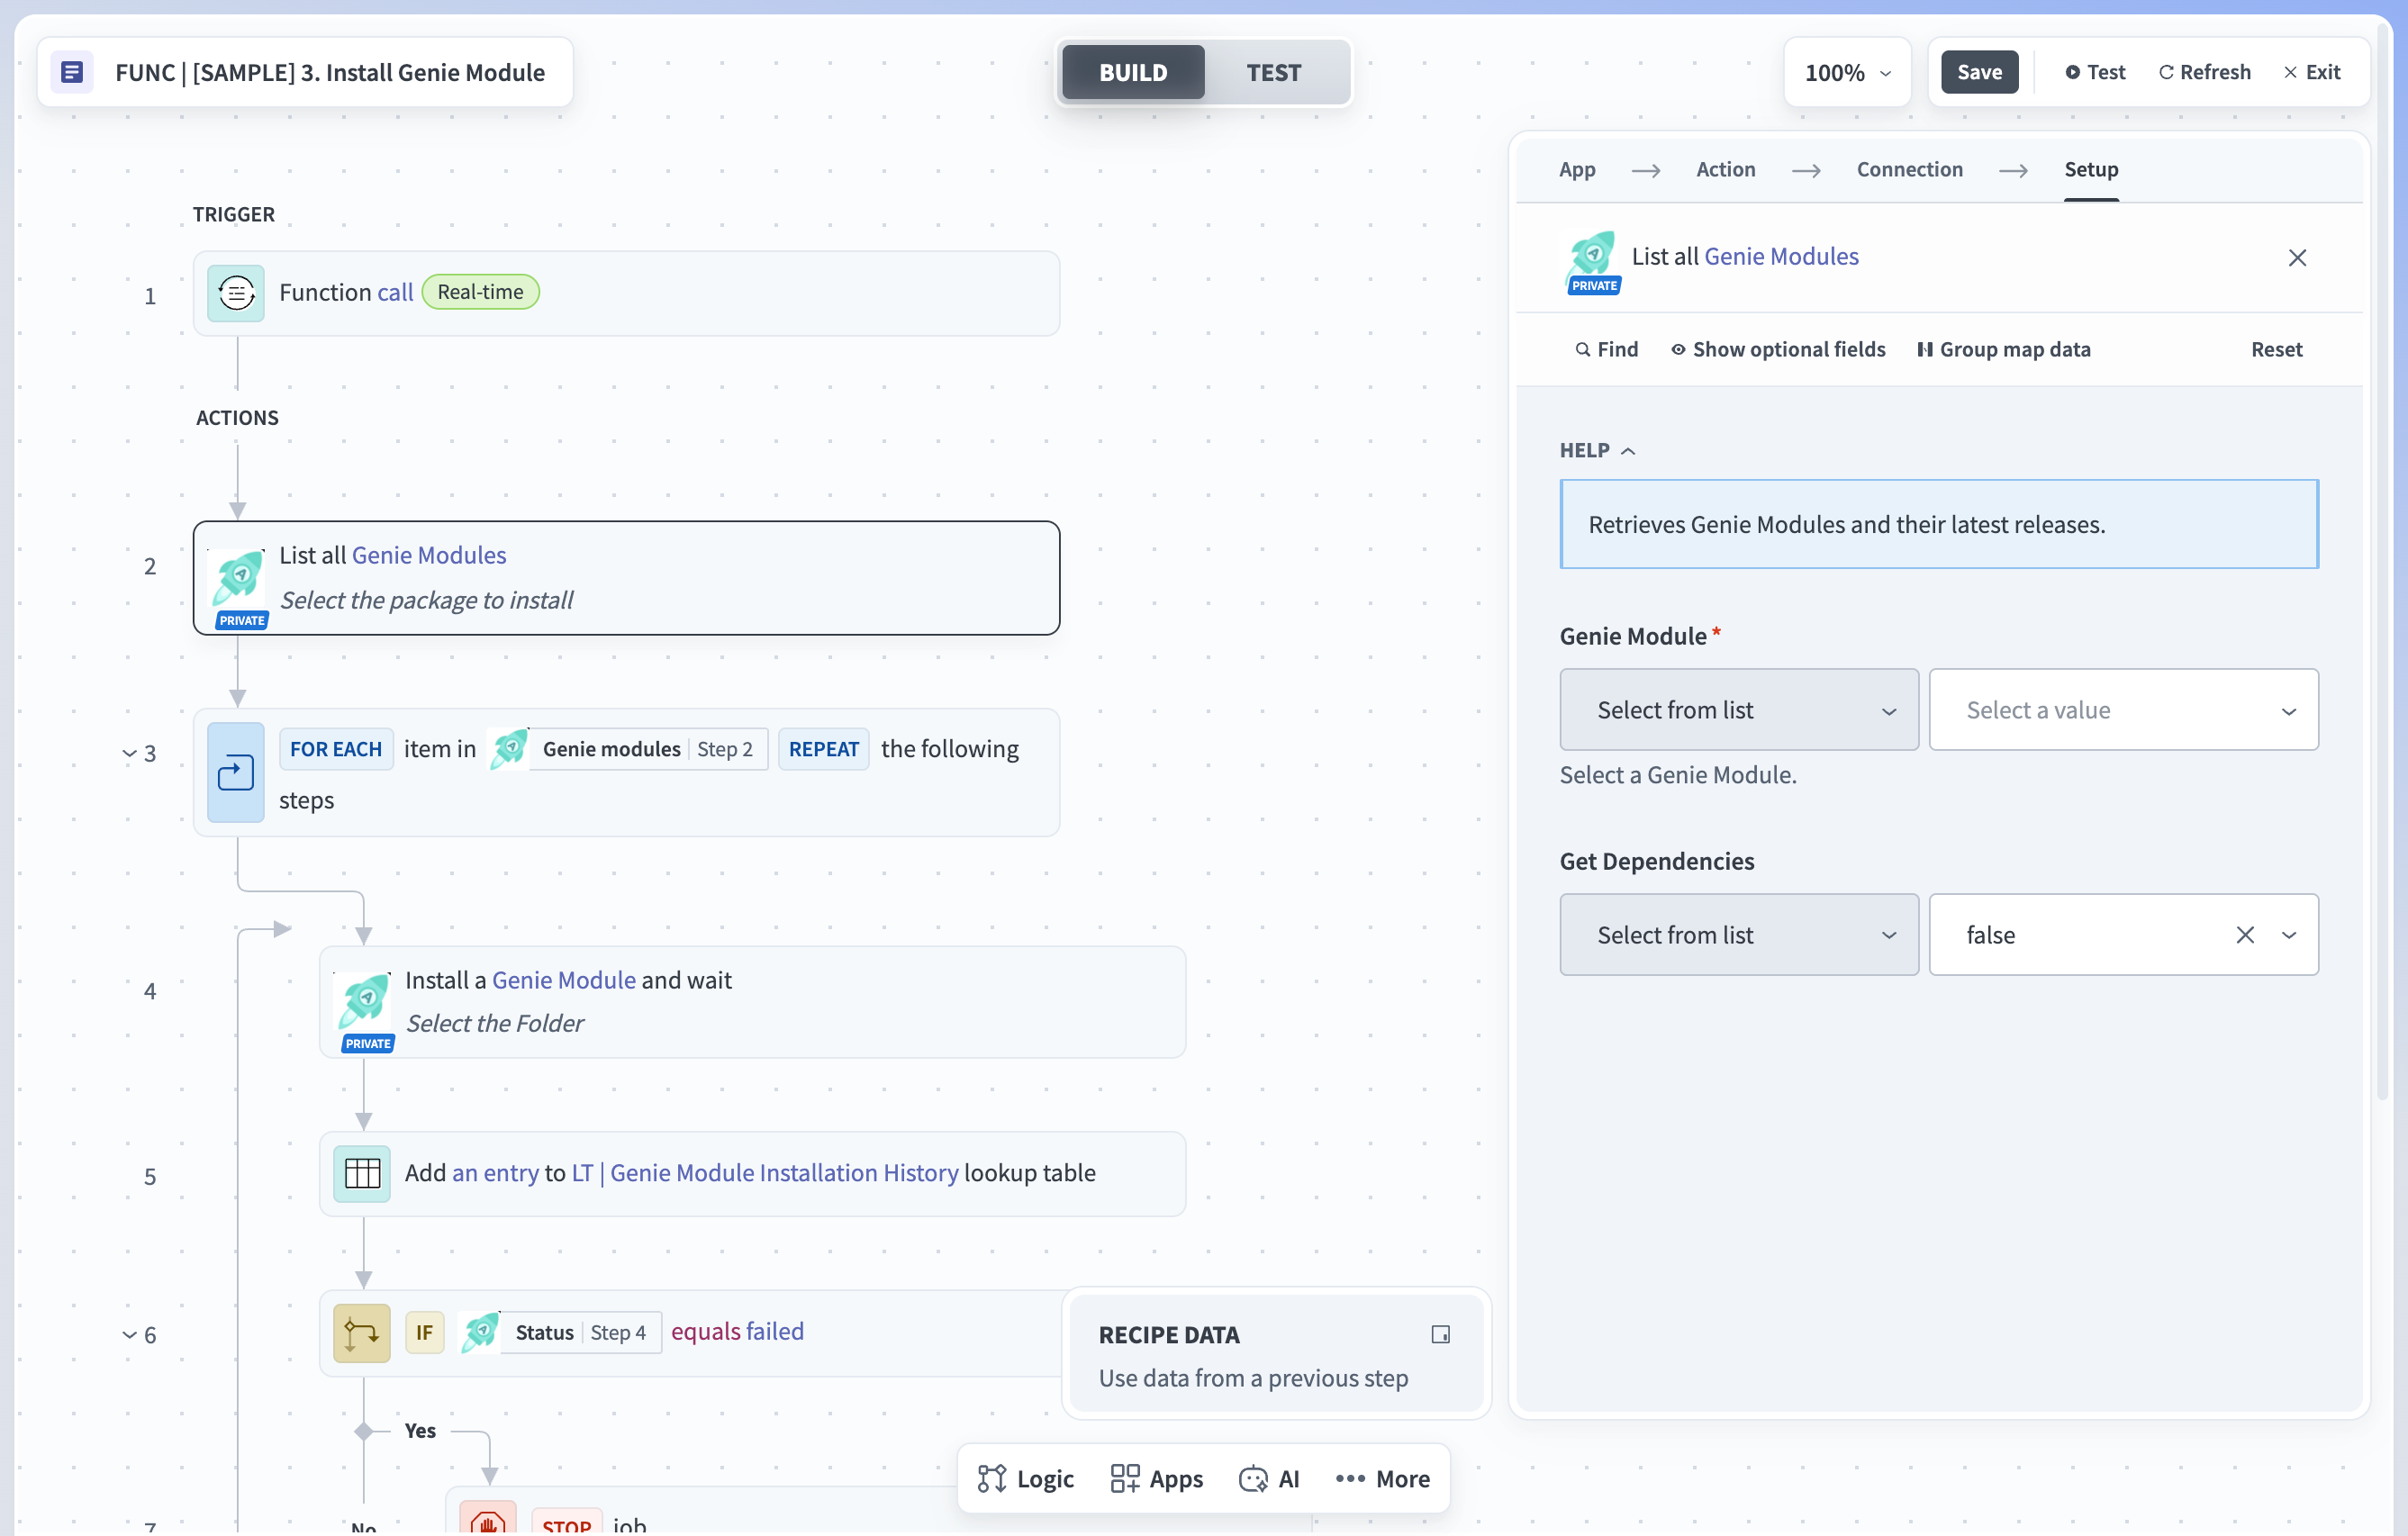 Select the latest version of the genie module
MODULE NOT VISIBLE
If Agentic | EDI Genie doesn't appear in the drop-down menu, your workspace may not have been granted access. Contact your Workato account team and repeat this step once access is confirmed.
In Step 4, set the Folder field based on your install type:
- Fresh install: Leave the field empty. If you see an x icon next to the Folder field, click it to clear the cached value before running the job.
- Upgrade: Select the existing Agentic | EDI Genie project. This preserves your existing configuration.
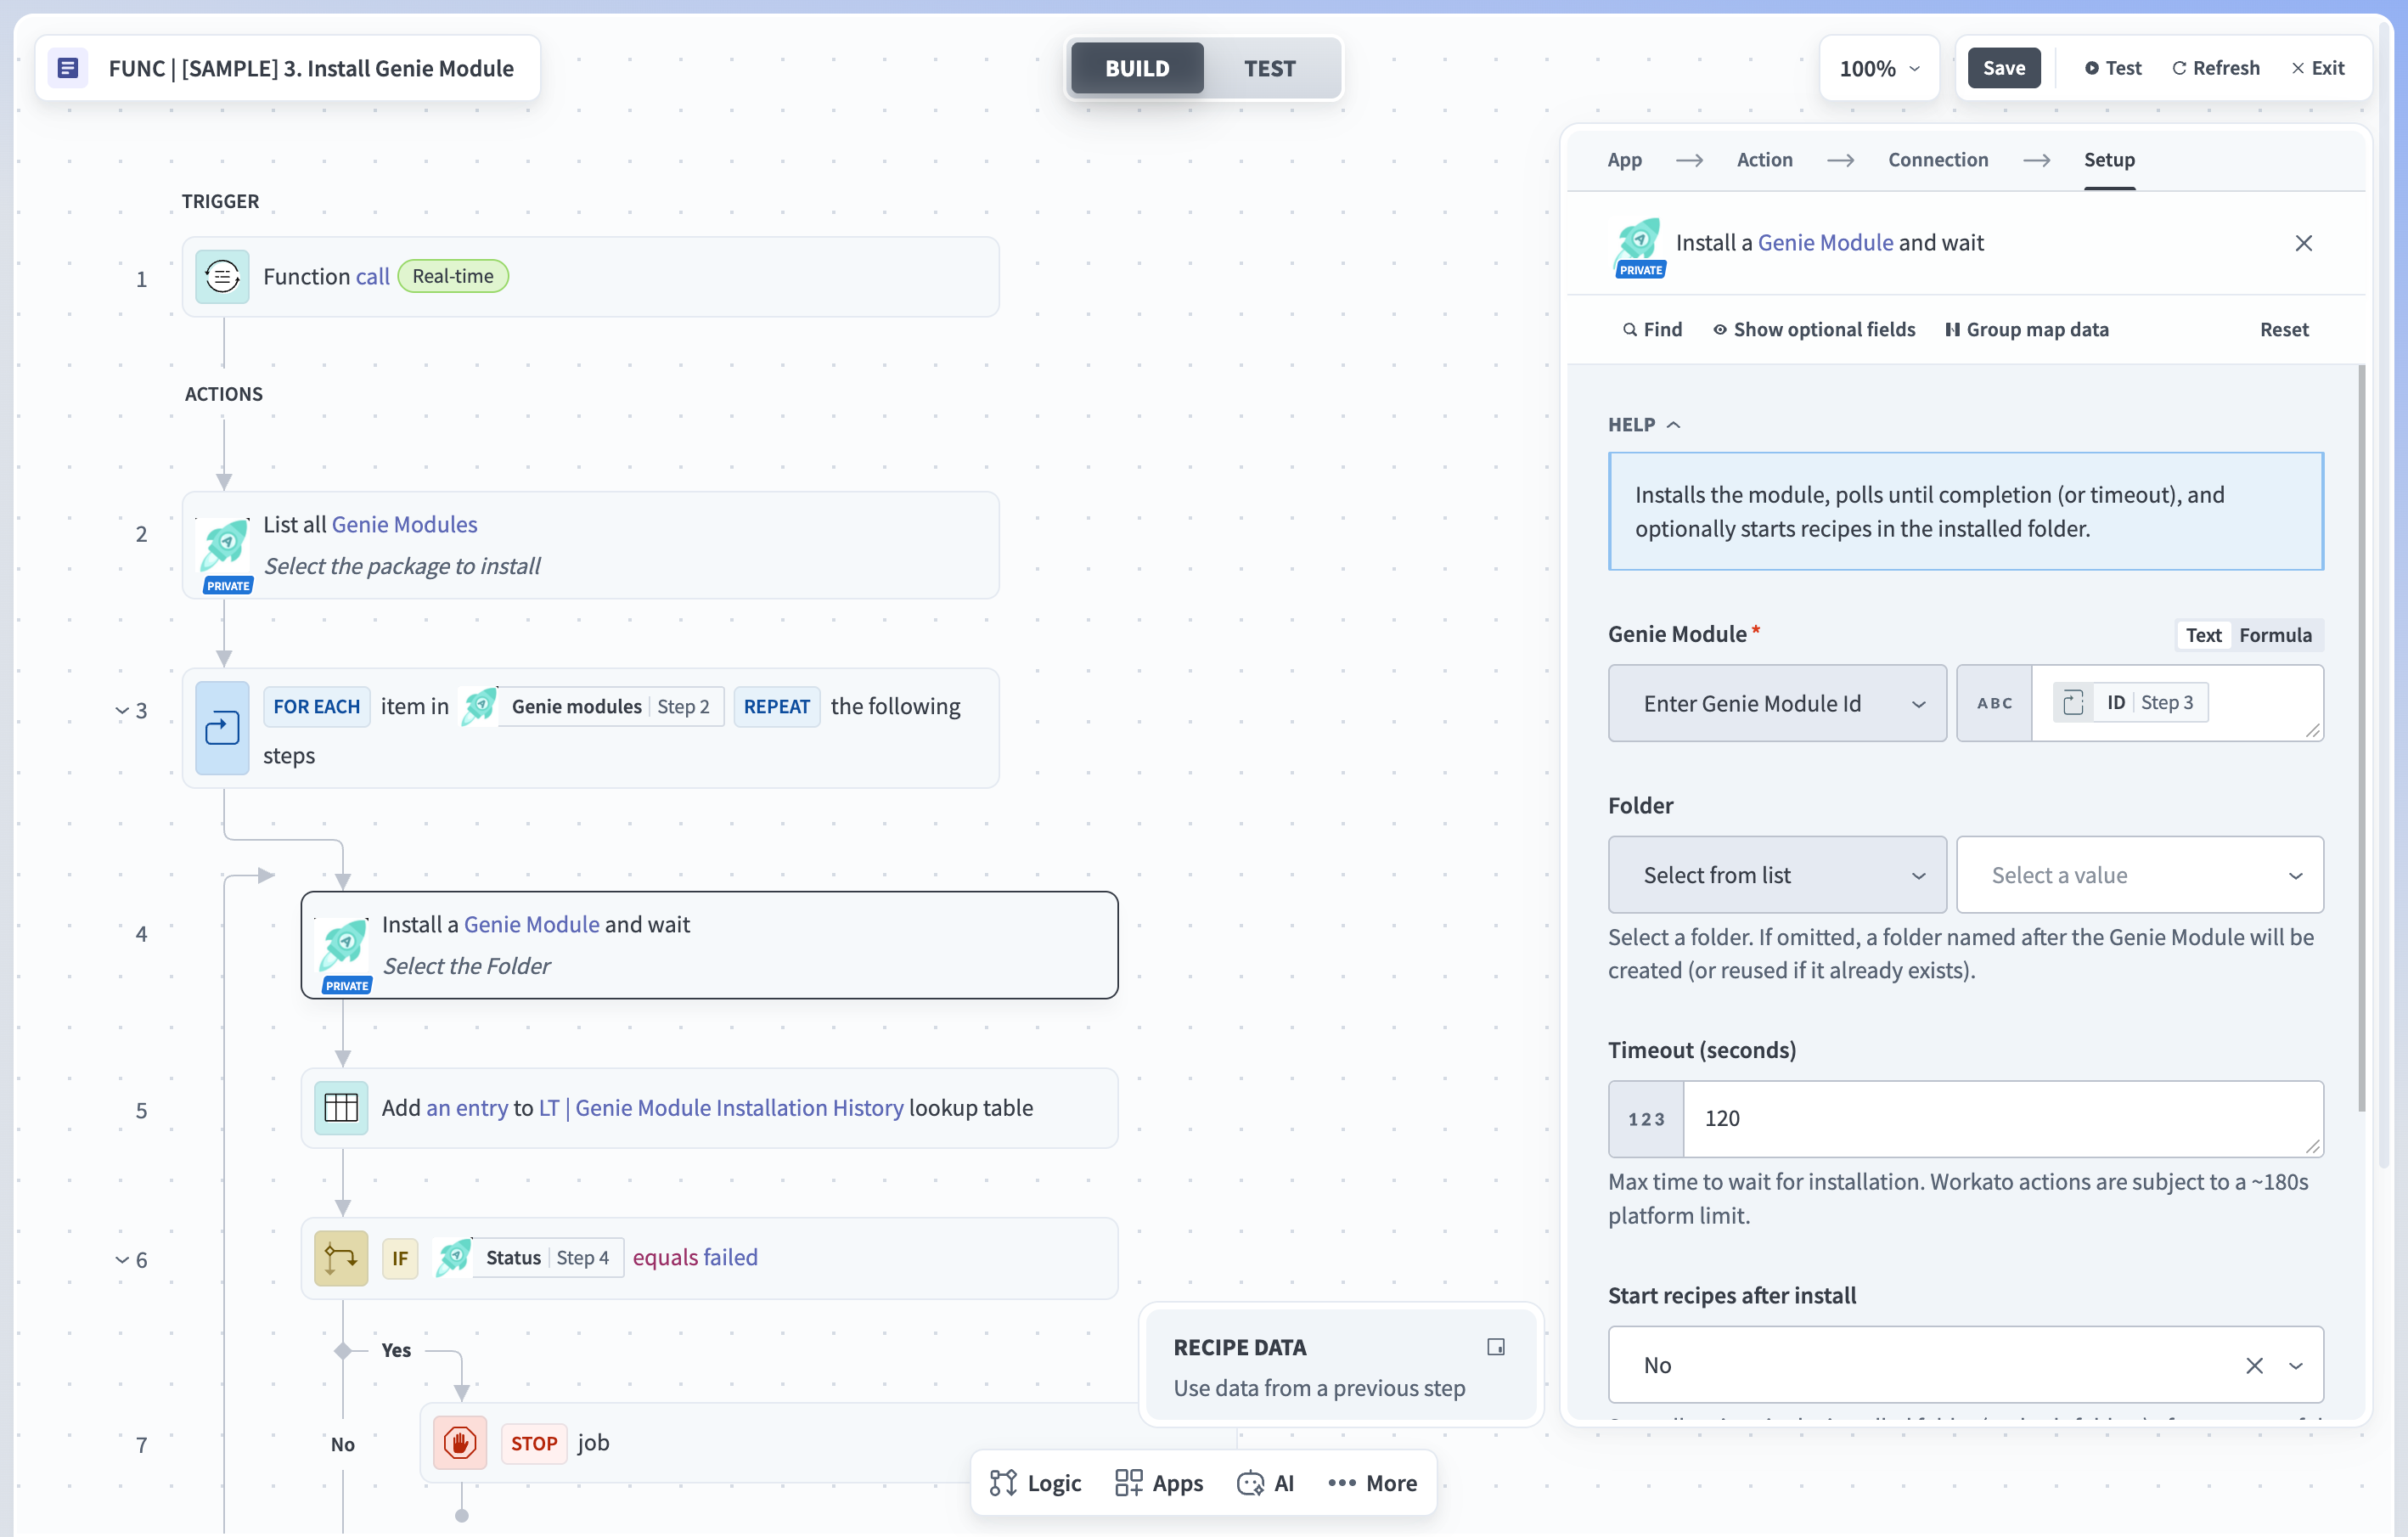 Select the folder to install EDI Genie
Click Test recipe and wait for it to complete. Confirm that the output of Step 5 in the recipe shows a success status.
Confirm that Agentic | EDI Genie now appears in your workspace's projects list.
Configure connections
Complete the following steps to configure connections:
Go to Agentic | EDI Genie > Config > Connections.
Locate CON | EDI and update the API key for the Orderful connection. Refer to Workato EDI connector for connection setup instructions.
Locate the Slack connection and connect it to your Slack workspace. This authorizes EDI Genie to send and receive messages through the preconfigured Slack chat interface.
Configure project properties
Complete the following steps to configure project properties:
Go to Agentic | EDI Genie > Settings > Project properties.
Edit the following project properties:
| Property | Description | Example |
|---|---|---|
| file_storage_directory_path | Enter the directory path for storing Orderful guides if you are using file storage. | Orderful Guides |
Configure EDI Genie
Complete the following steps to configure EDI Genie:
Go to Agentic | EDI Genie, select EDI Genie, and click Edit.
Select your AI model. EDI Genie is preconfigured to use Slack as its chat interface, so you don't need to configure one. Don't change the EDI Genie description.
To use Microsoft Teams or Workato GO instead, see Use Microsoft Teams or Workato GO.
Go to Agentic | EDI Genie > Extensions > App Events and open Error pattern recognition and proactive alert generation. In the Business event action step, select EDI Genie from the drop-down menu.
Go to Agentic | EDI Genie > Core > EDI Skills > Orderful and start all skills in the folder. For each skill, click the skill name, then click Start recipe.
Click Start genie.
SETUP COMPLETE
EDI Genie is now configured. Use Activate and test to confirm it's working, or Extend EDI Genie to add knowledge base content and custom skills.
Use Microsoft Teams or Workato GO
EDI Genie is preconfigured to use Slack as its chat interface. To use Microsoft Teams or Workato GO instead, create a new genie that replicates the EDI Genie configuration:
Create a new genie and give it a name and description similar to EDI Genie.
Copy the job description from EDI Genie and paste it into the new genie without changes.
Select your AI model and chat interface. Don't change the genie description.
Add the core skills you want to use, along with the knowledge base.
Extend EDI Genie
You can extend EDI Genie to add knowledge base content and build custom skills. All steps in this section are optional.
The Core folder holds the foundational logic for EDI Genie and can't be modified. You can extend EDI Genie through the Extensions and Custom Extensions folders without changing its default behavior.
Extensions
The Extensions folder contains the Knowledge Ingestion module, maintained by Workato. Complete the following steps to ingest Orderful guides into the EDI Genie knowledge base:
Go to Agentic | EDI Genie > Extensions > Knowledge Ingestion to ingest Orderful guides into the EDI Genie knowledge base. Download the knowledge ingestion module for Google Drive or the file storage app you plan to use.
Custom extensions
The Custom Extensions folder is where you build new skills or modify existing Extension skills. Clone assets from the Extensions folder into Custom Extensions before making changes. Assets in Core and Extensions are managed by Workato and can't be modified directly.
Complete the following steps to build a custom skill:
Go to Agentic | EDI Genie > Custom Extensions > [App Name]. Templates for new apps are already configured.
Rename the folder and skill to match the app name.
Add the skill to EDI Genie.
Activate and test
Complete the following steps to confirm your setup.
SLACK EXAMPLE
These steps use Slack, the preconfigured chat interface. If you created a separate genie for Microsoft Teams or Workato GO, access it through that interface instead. The verification step is the same: send a message and confirm the genie's reply.
Open Slack and go to the channel or direct message where you interact with EDI Genie.
Enter Who are you? and send the message. EDI Genie greets you by name, confirms its name, and describes its role.
Last updated: