Configure the developer portal
Use this guide to set up your developer portal, manage client access, and publish API collections.
Set up your portal
Complete the following steps to configure your client portal's branding, URL, and appearance:
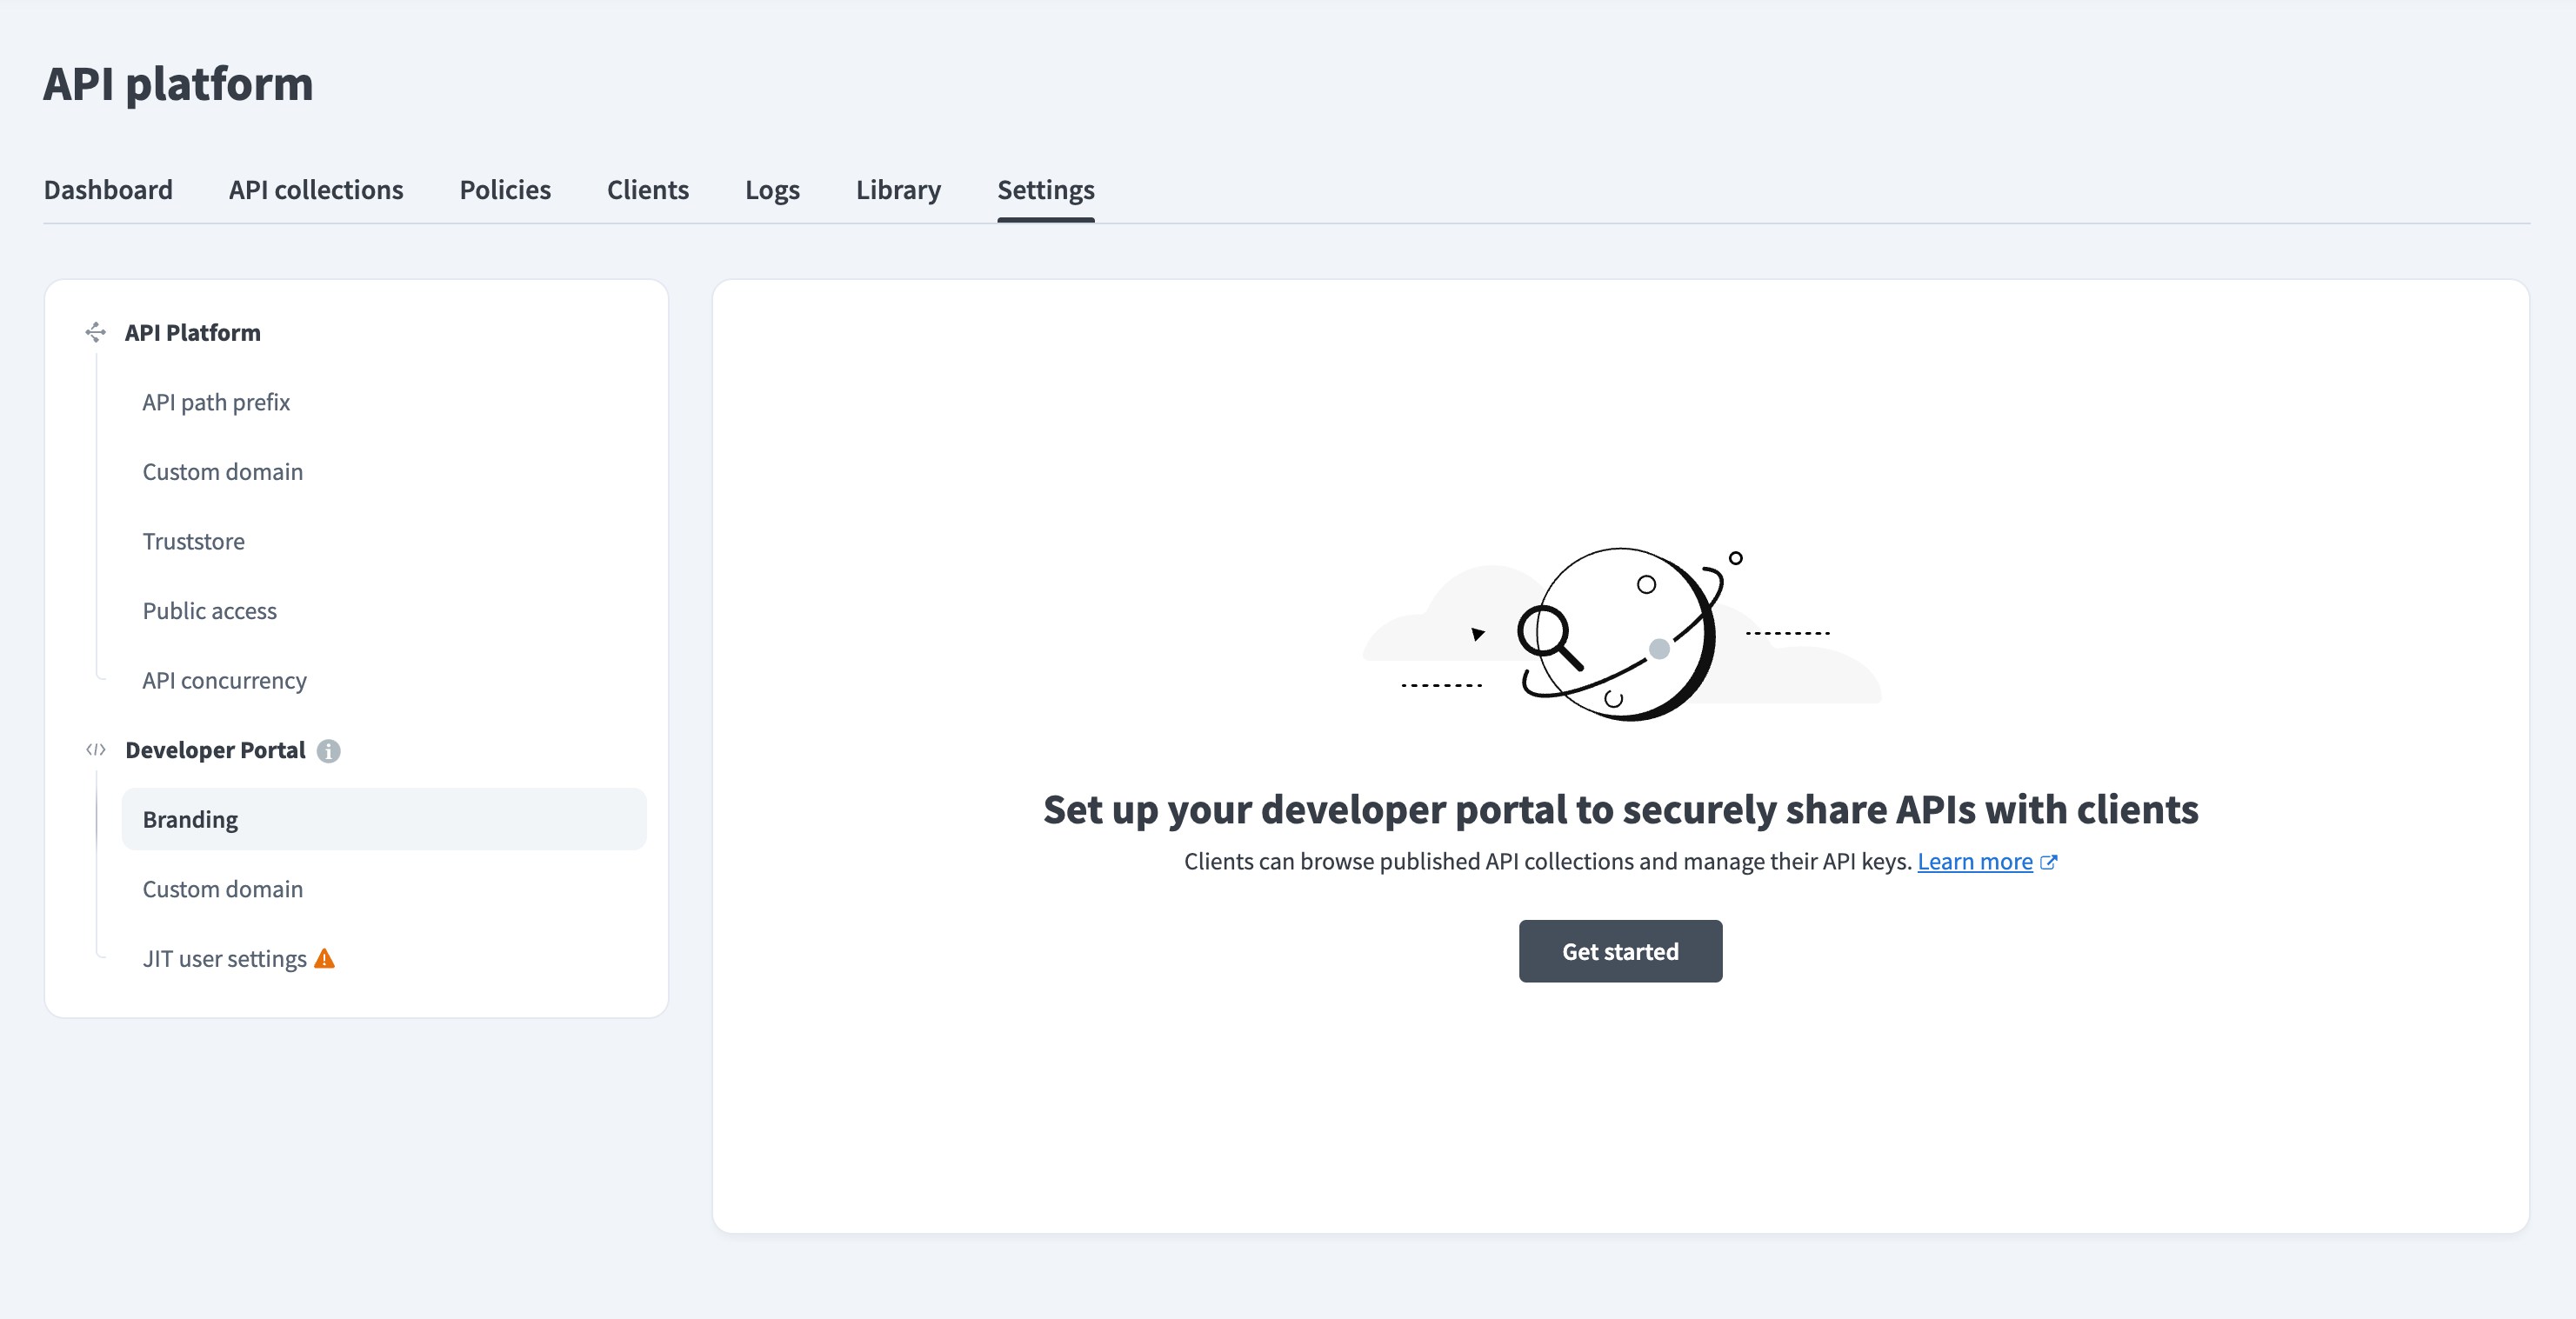
Go to Platform > API platform > Settings > Developer Portal > Branding.
Select Get started to open the portal setup wizard.
 Set up your developer portal
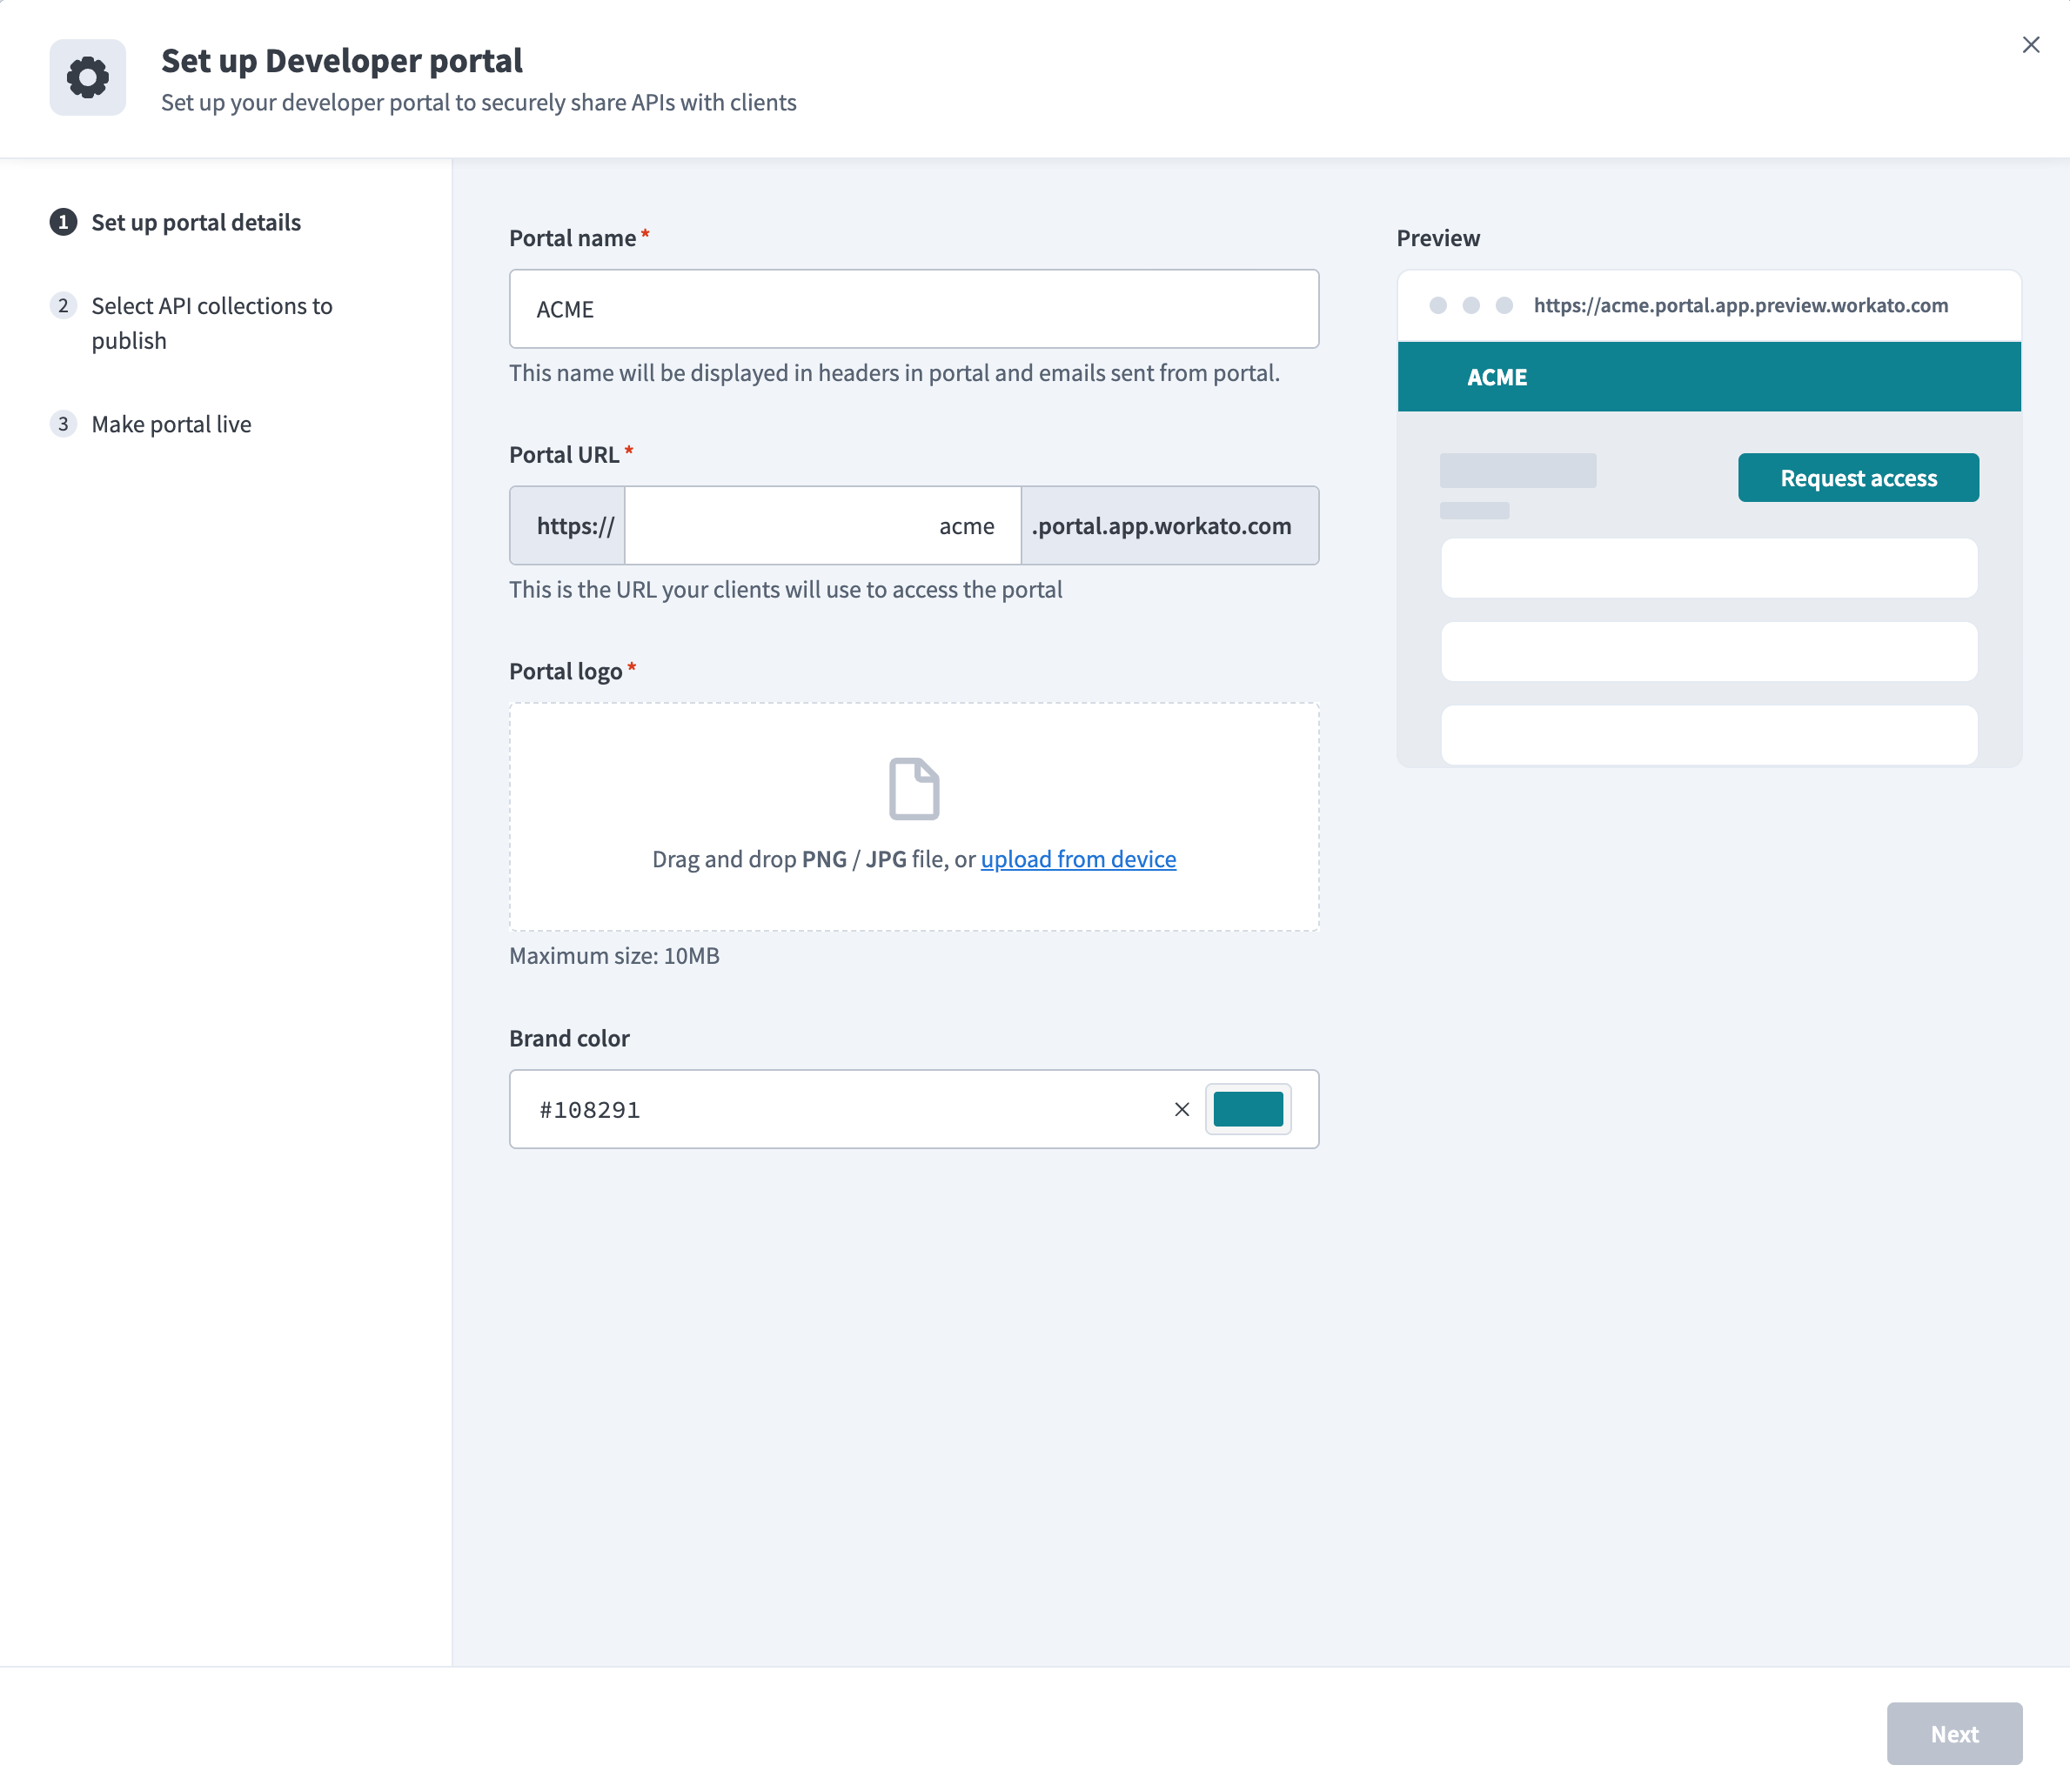
Enter a name in the Portal name field.
 Set up portal details
Enter a portal subdomain in the Portal URL field. This is the URL your clients use to access the portal. For example, enter acme to create the portal URL https://acme.portal.app.workato.com.
SUBDOMAIN REQUIREMENTS
Ensure your portal subdomain meets the following criteria:
- Contains only lowercase letters (
a-z), numbers (0-9), and hyphens (-). - Starts with a letter.
- Doesn't end with a hyphen (
-). - Is a maximum of 63 characters.
CUSTOM DOMAIN
Refer to Custom domain to use a branded domain instead of portal.app.workato.com.
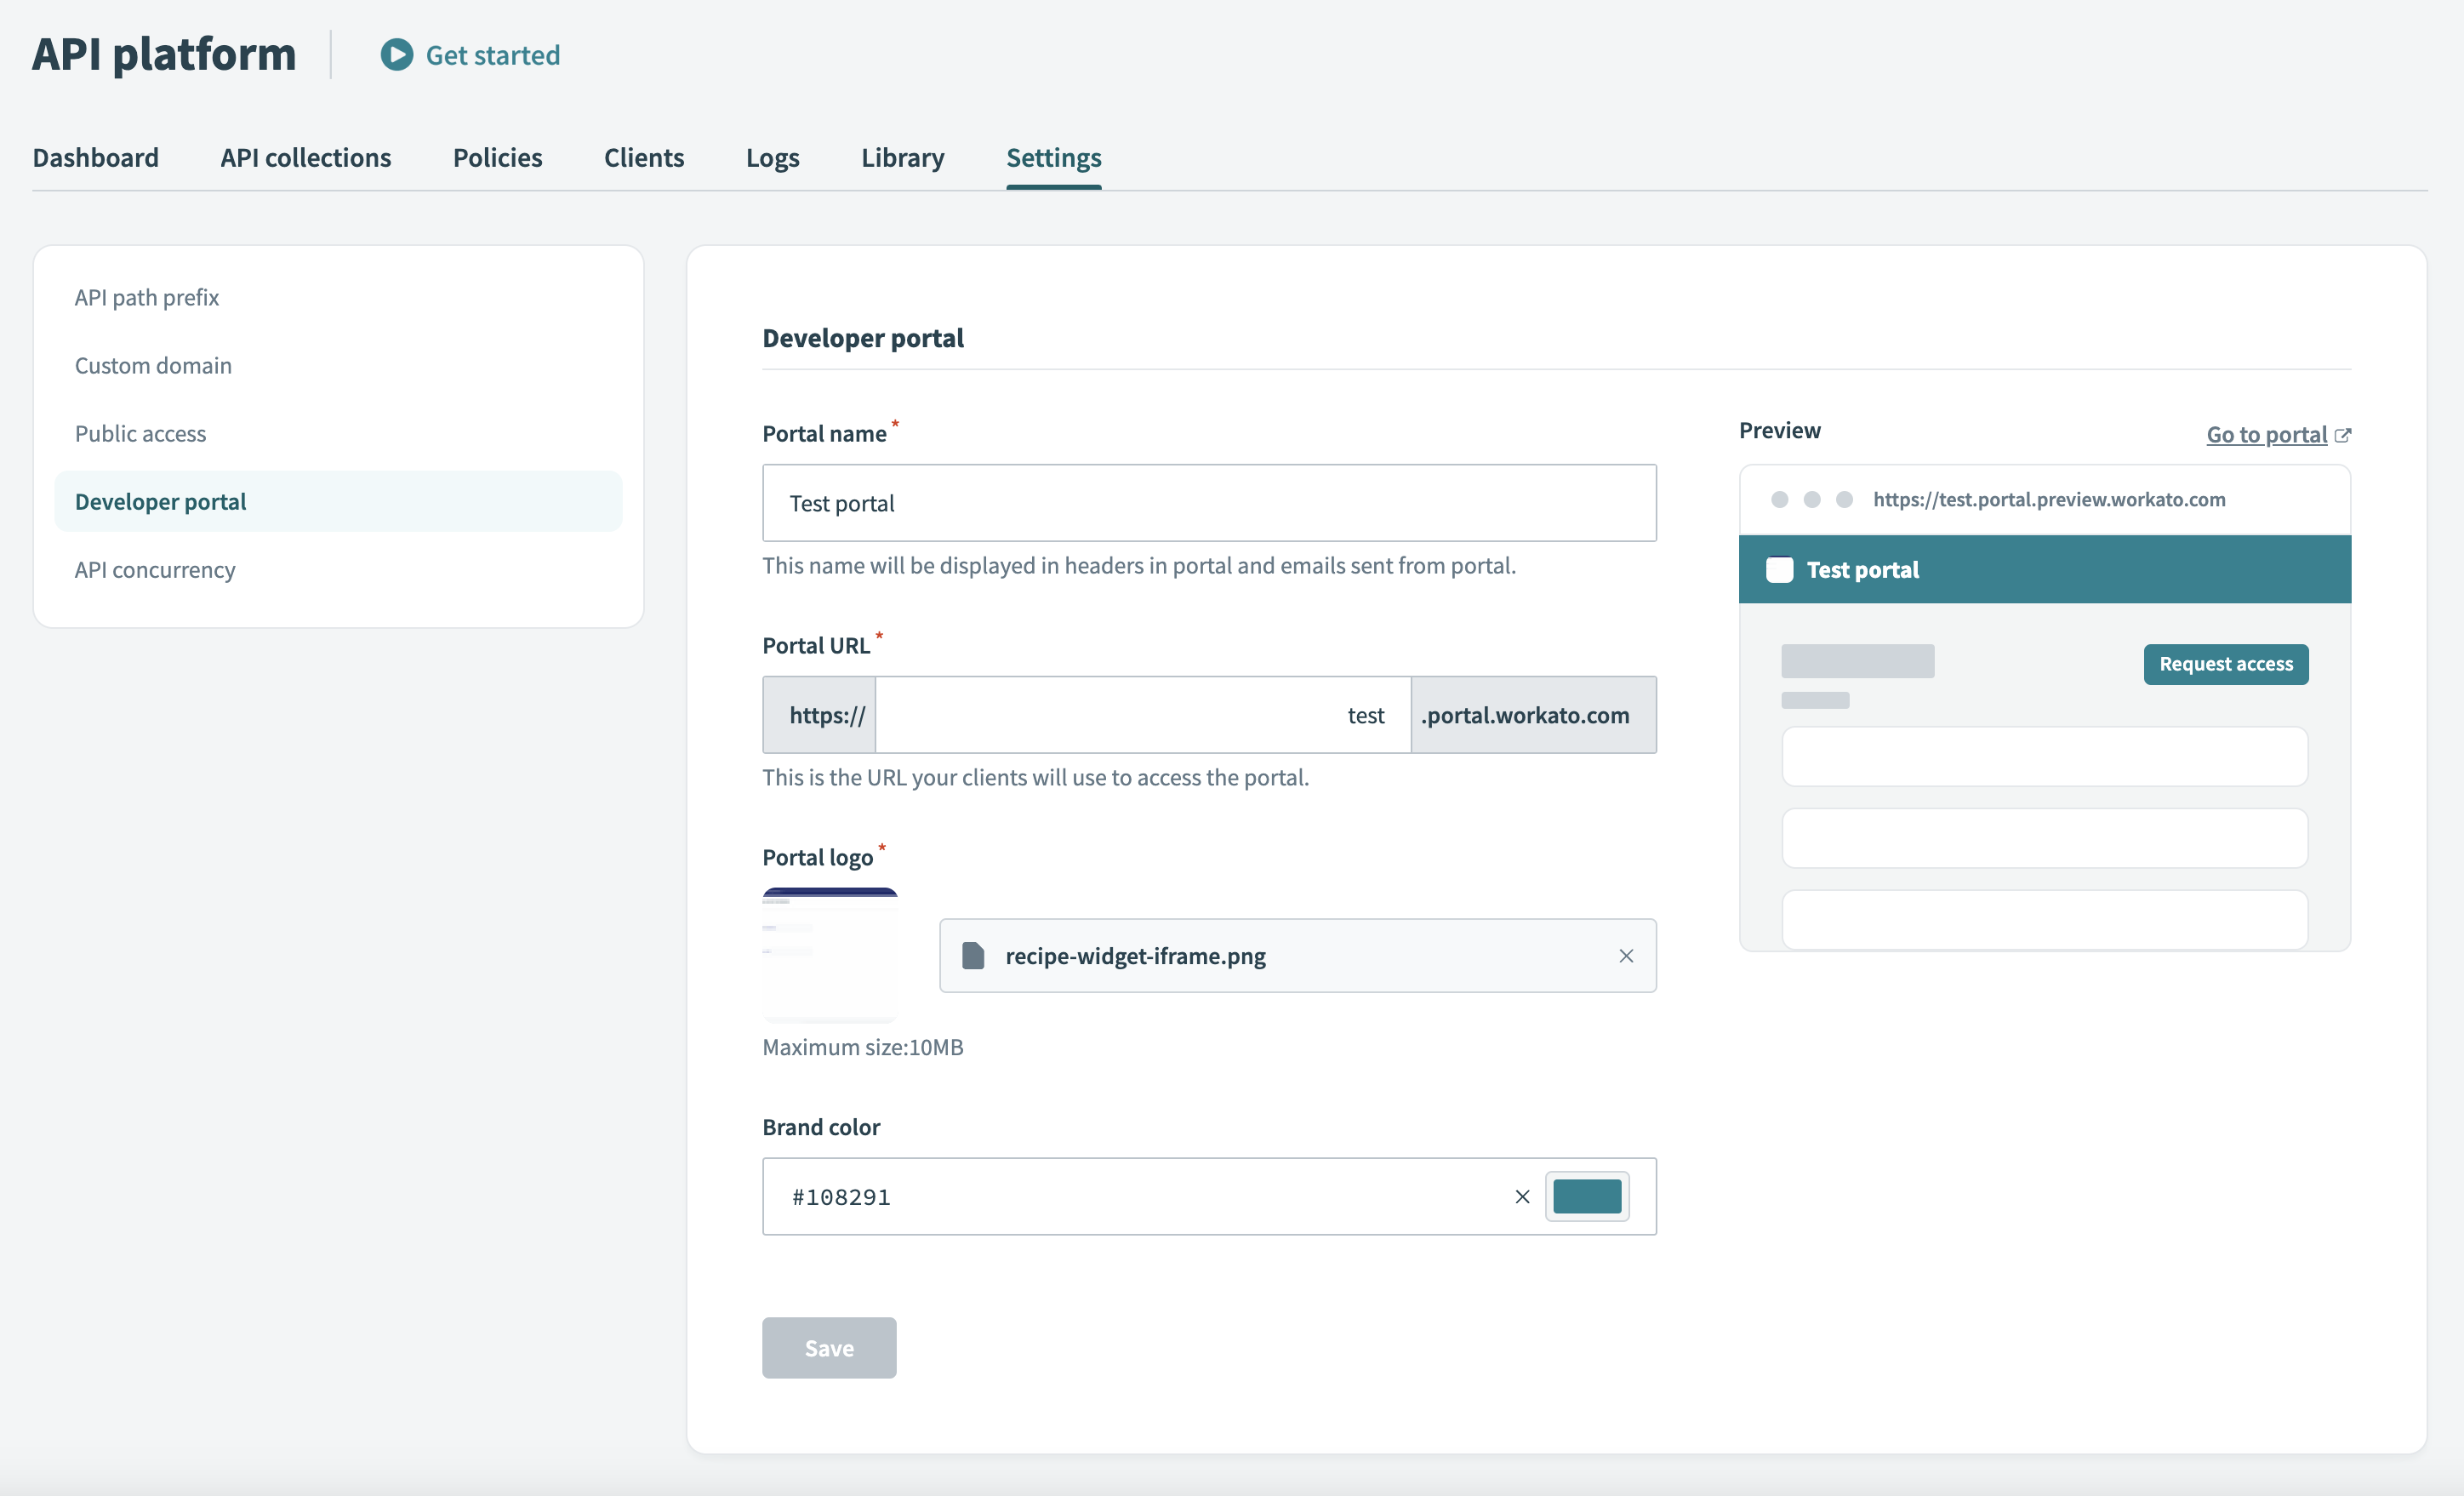
Upload an image in the Portal logo field by dragging and dropping or selecting a file from your device. Accepted formats are PNG/JPG, with a maximum size of 10 MB.
Set a color in the Brand color field. This color applies to headers, buttons, and other elements for consistent branding.
Review the Preview to see how your changes will appear to clients.
Click Next.
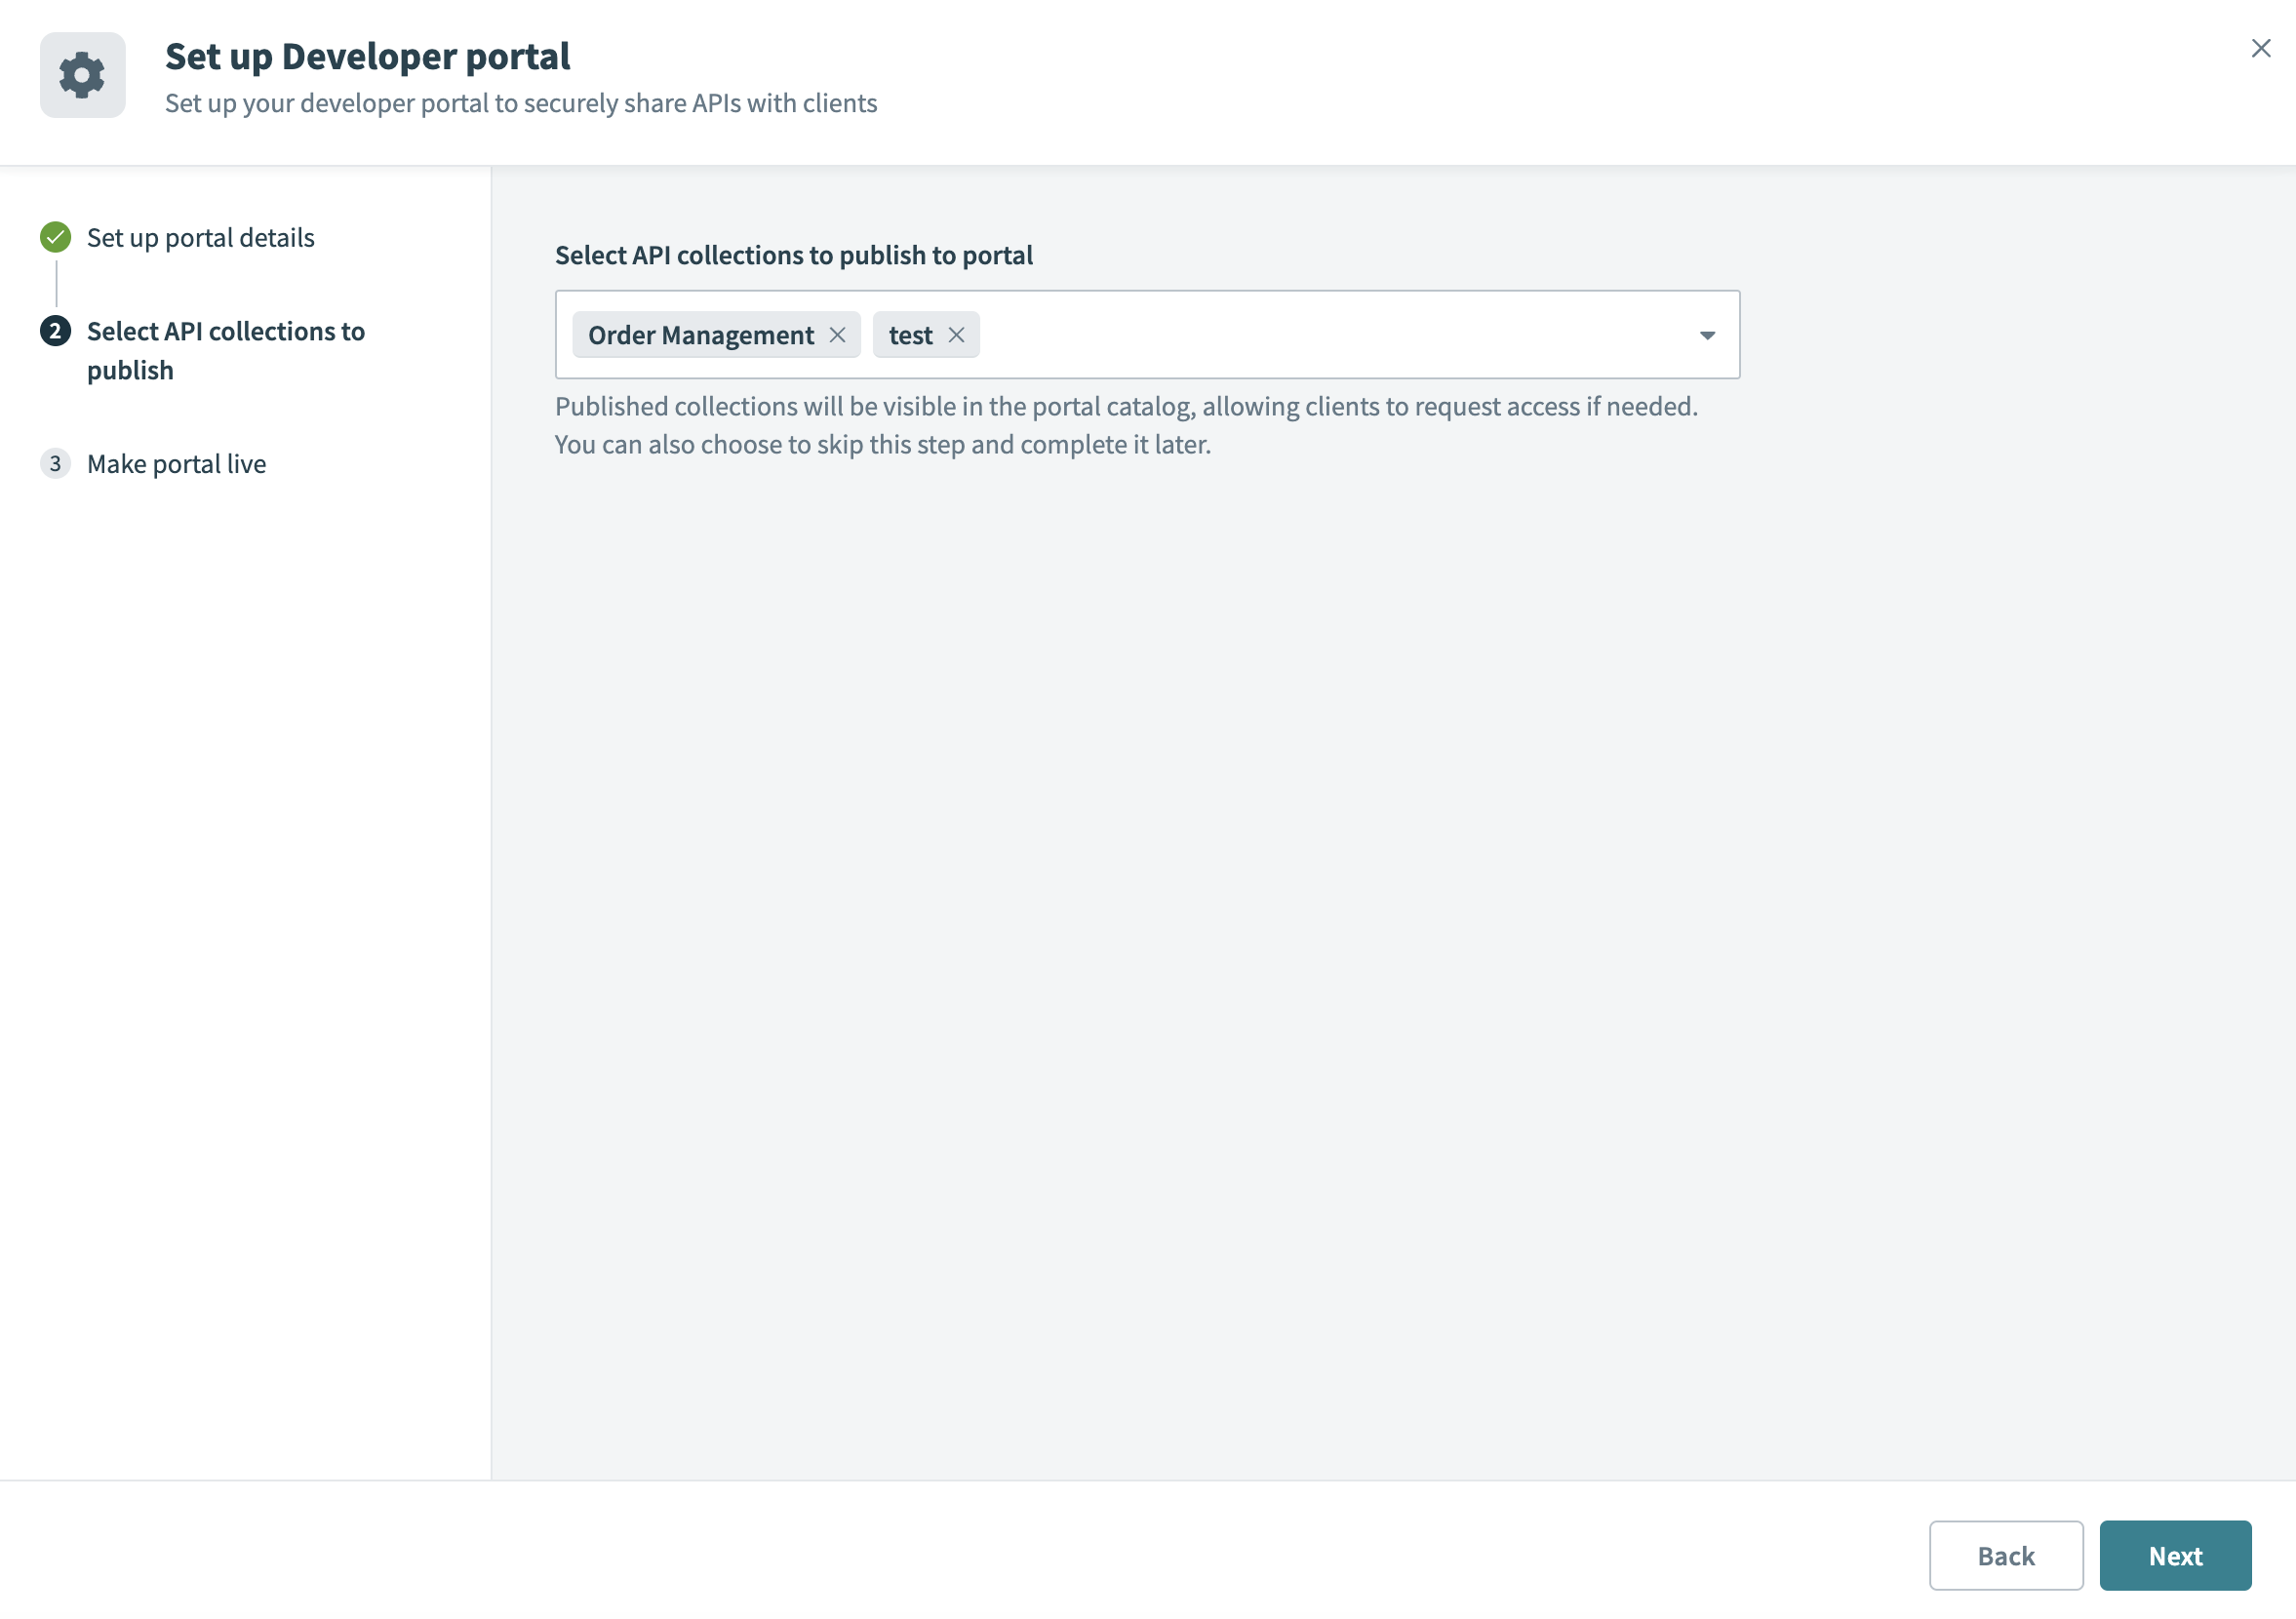
Use the Select API collections to publish to portal drop-down menu to choose which collections to publish. These appear in the Discover new APIs section, where clients can search for and request access.
 Select which API collections to publish
Click Next to publish your portal.
After publishing, the portal remains live and cannot be taken offline. You can update branding, collections, and client access at any time. Use the portal preview to see how it appears to your clients.
 Developer portal settings
Add and configure clients in the portal
You can add API clients to the portal and define the API collections they can access and their authentication method.
USING WORKATO IDENTITY?
End users must exist in Workato Identity before you can add them as API clients:
- Password authentication: Add end users manually.
- SAML SSO: Configure SAML-based authentication and set up IdP user access, then provision users manually or through JIT provisioning. If using JIT, also configure JIT user settings before directing users to the portal.
Complete the following steps to add and configure clients in the portal:
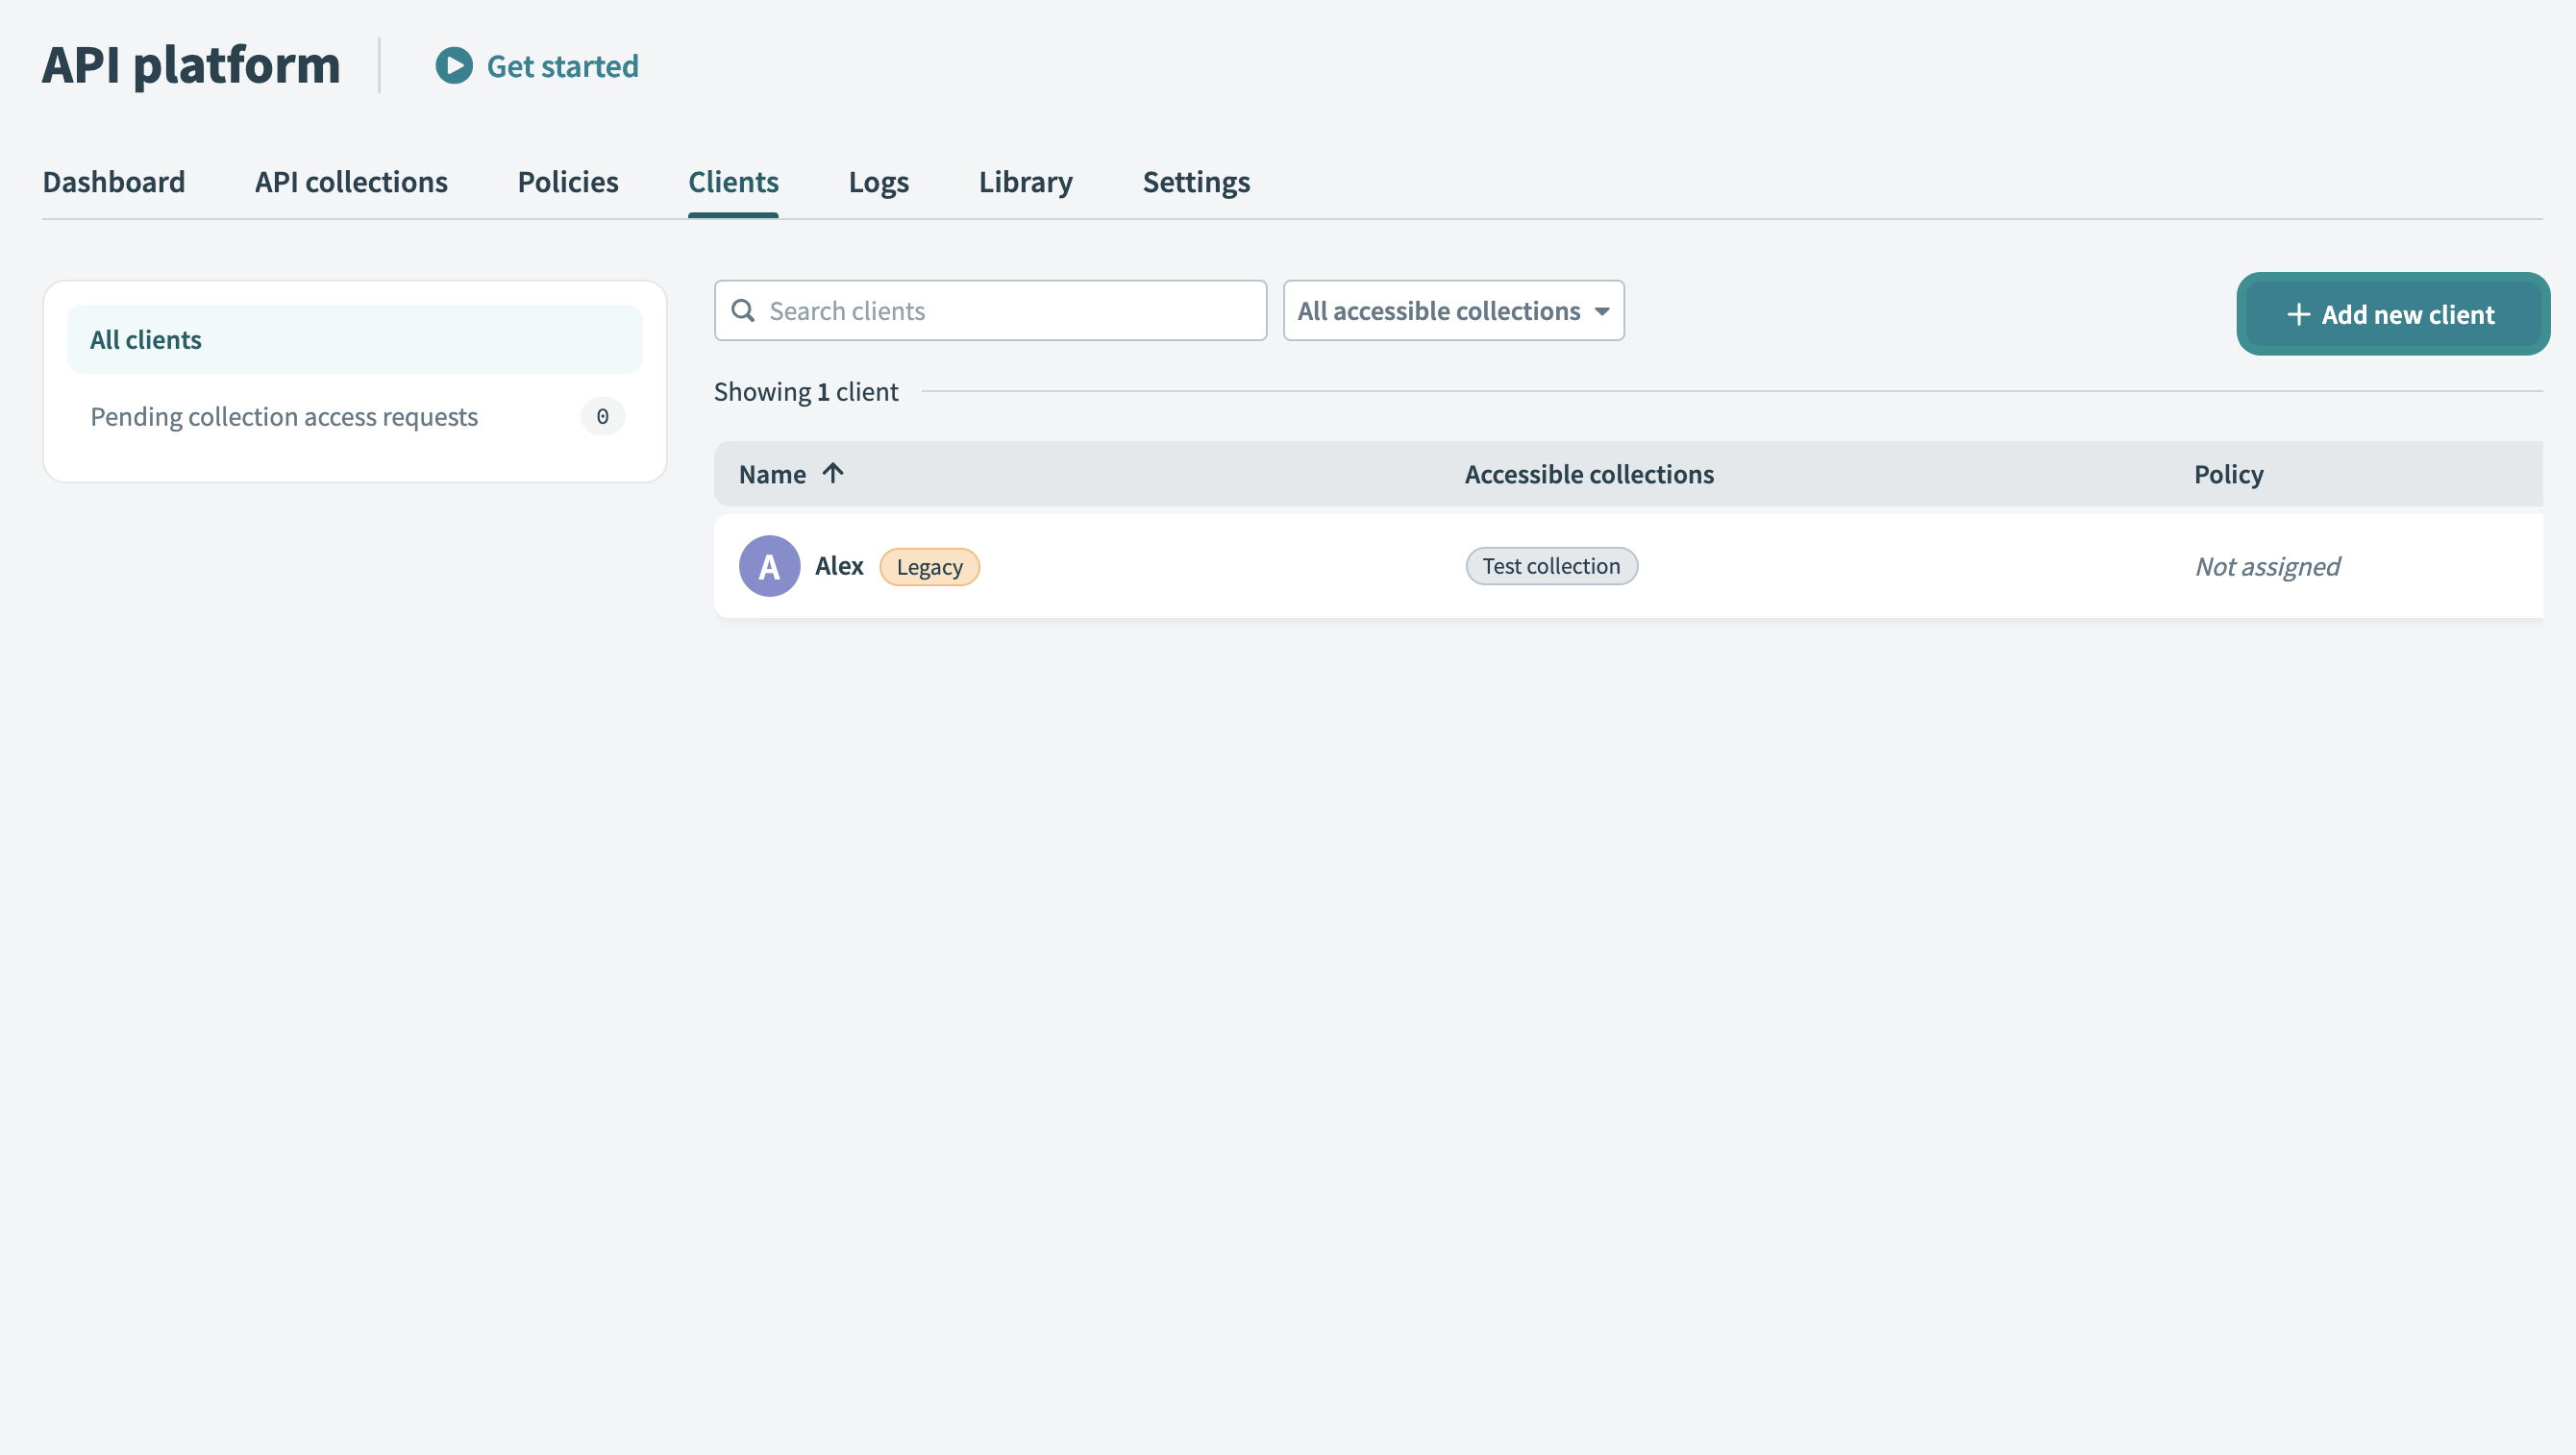
Go to Platform > API platform > Clients > All clients.
Click + Add new client.
 Add new client
Enter a name in the Name field. Use a descriptive identifier, such as the client's company or department name.
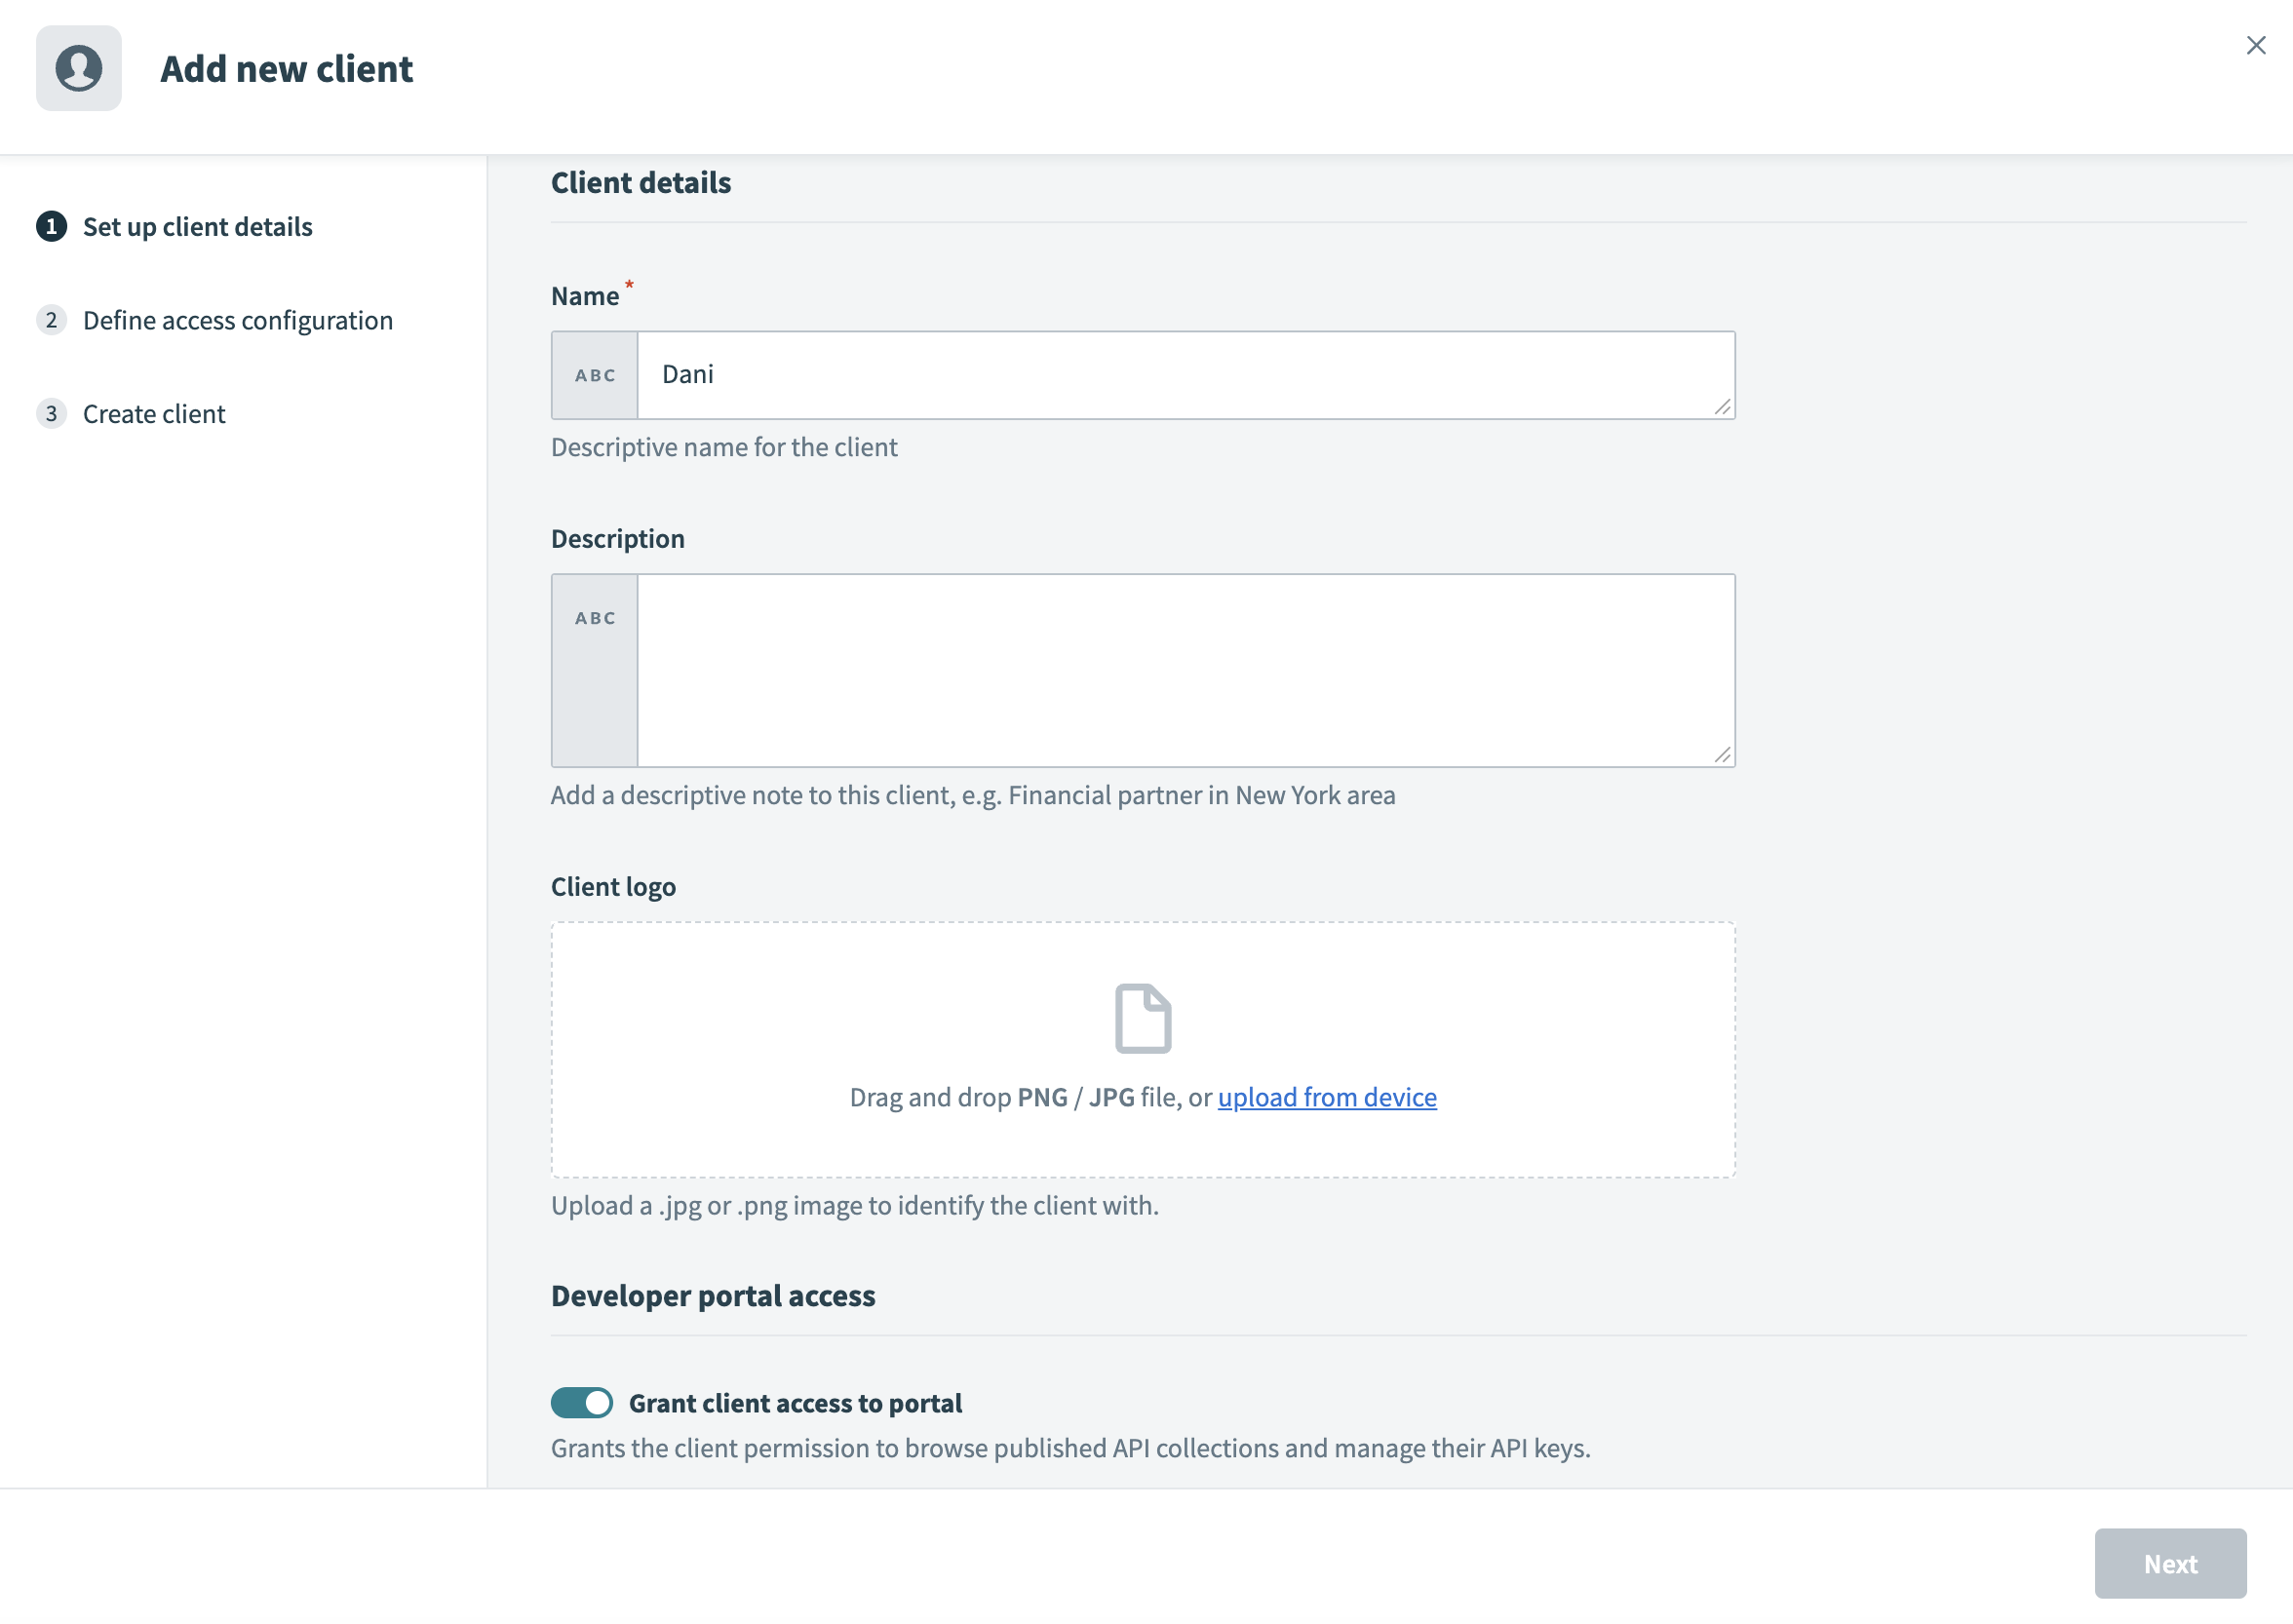 Set up client details
Enter a description in the Description field.
Upload an image in the Client logo field. Drag and drop a JPG/PNG image or click Upload from device to select a file. This logo visually identifies your client in the portal.
Enable the Grant client access to portal toggle to allow the client to log in and browse published API collections.
Click Next.
Choose an authentication method from the Authentication method drop-down menu. Refer to the available authentication methods for more information.
WARNING
You cannot change the authentication method after the client is created.
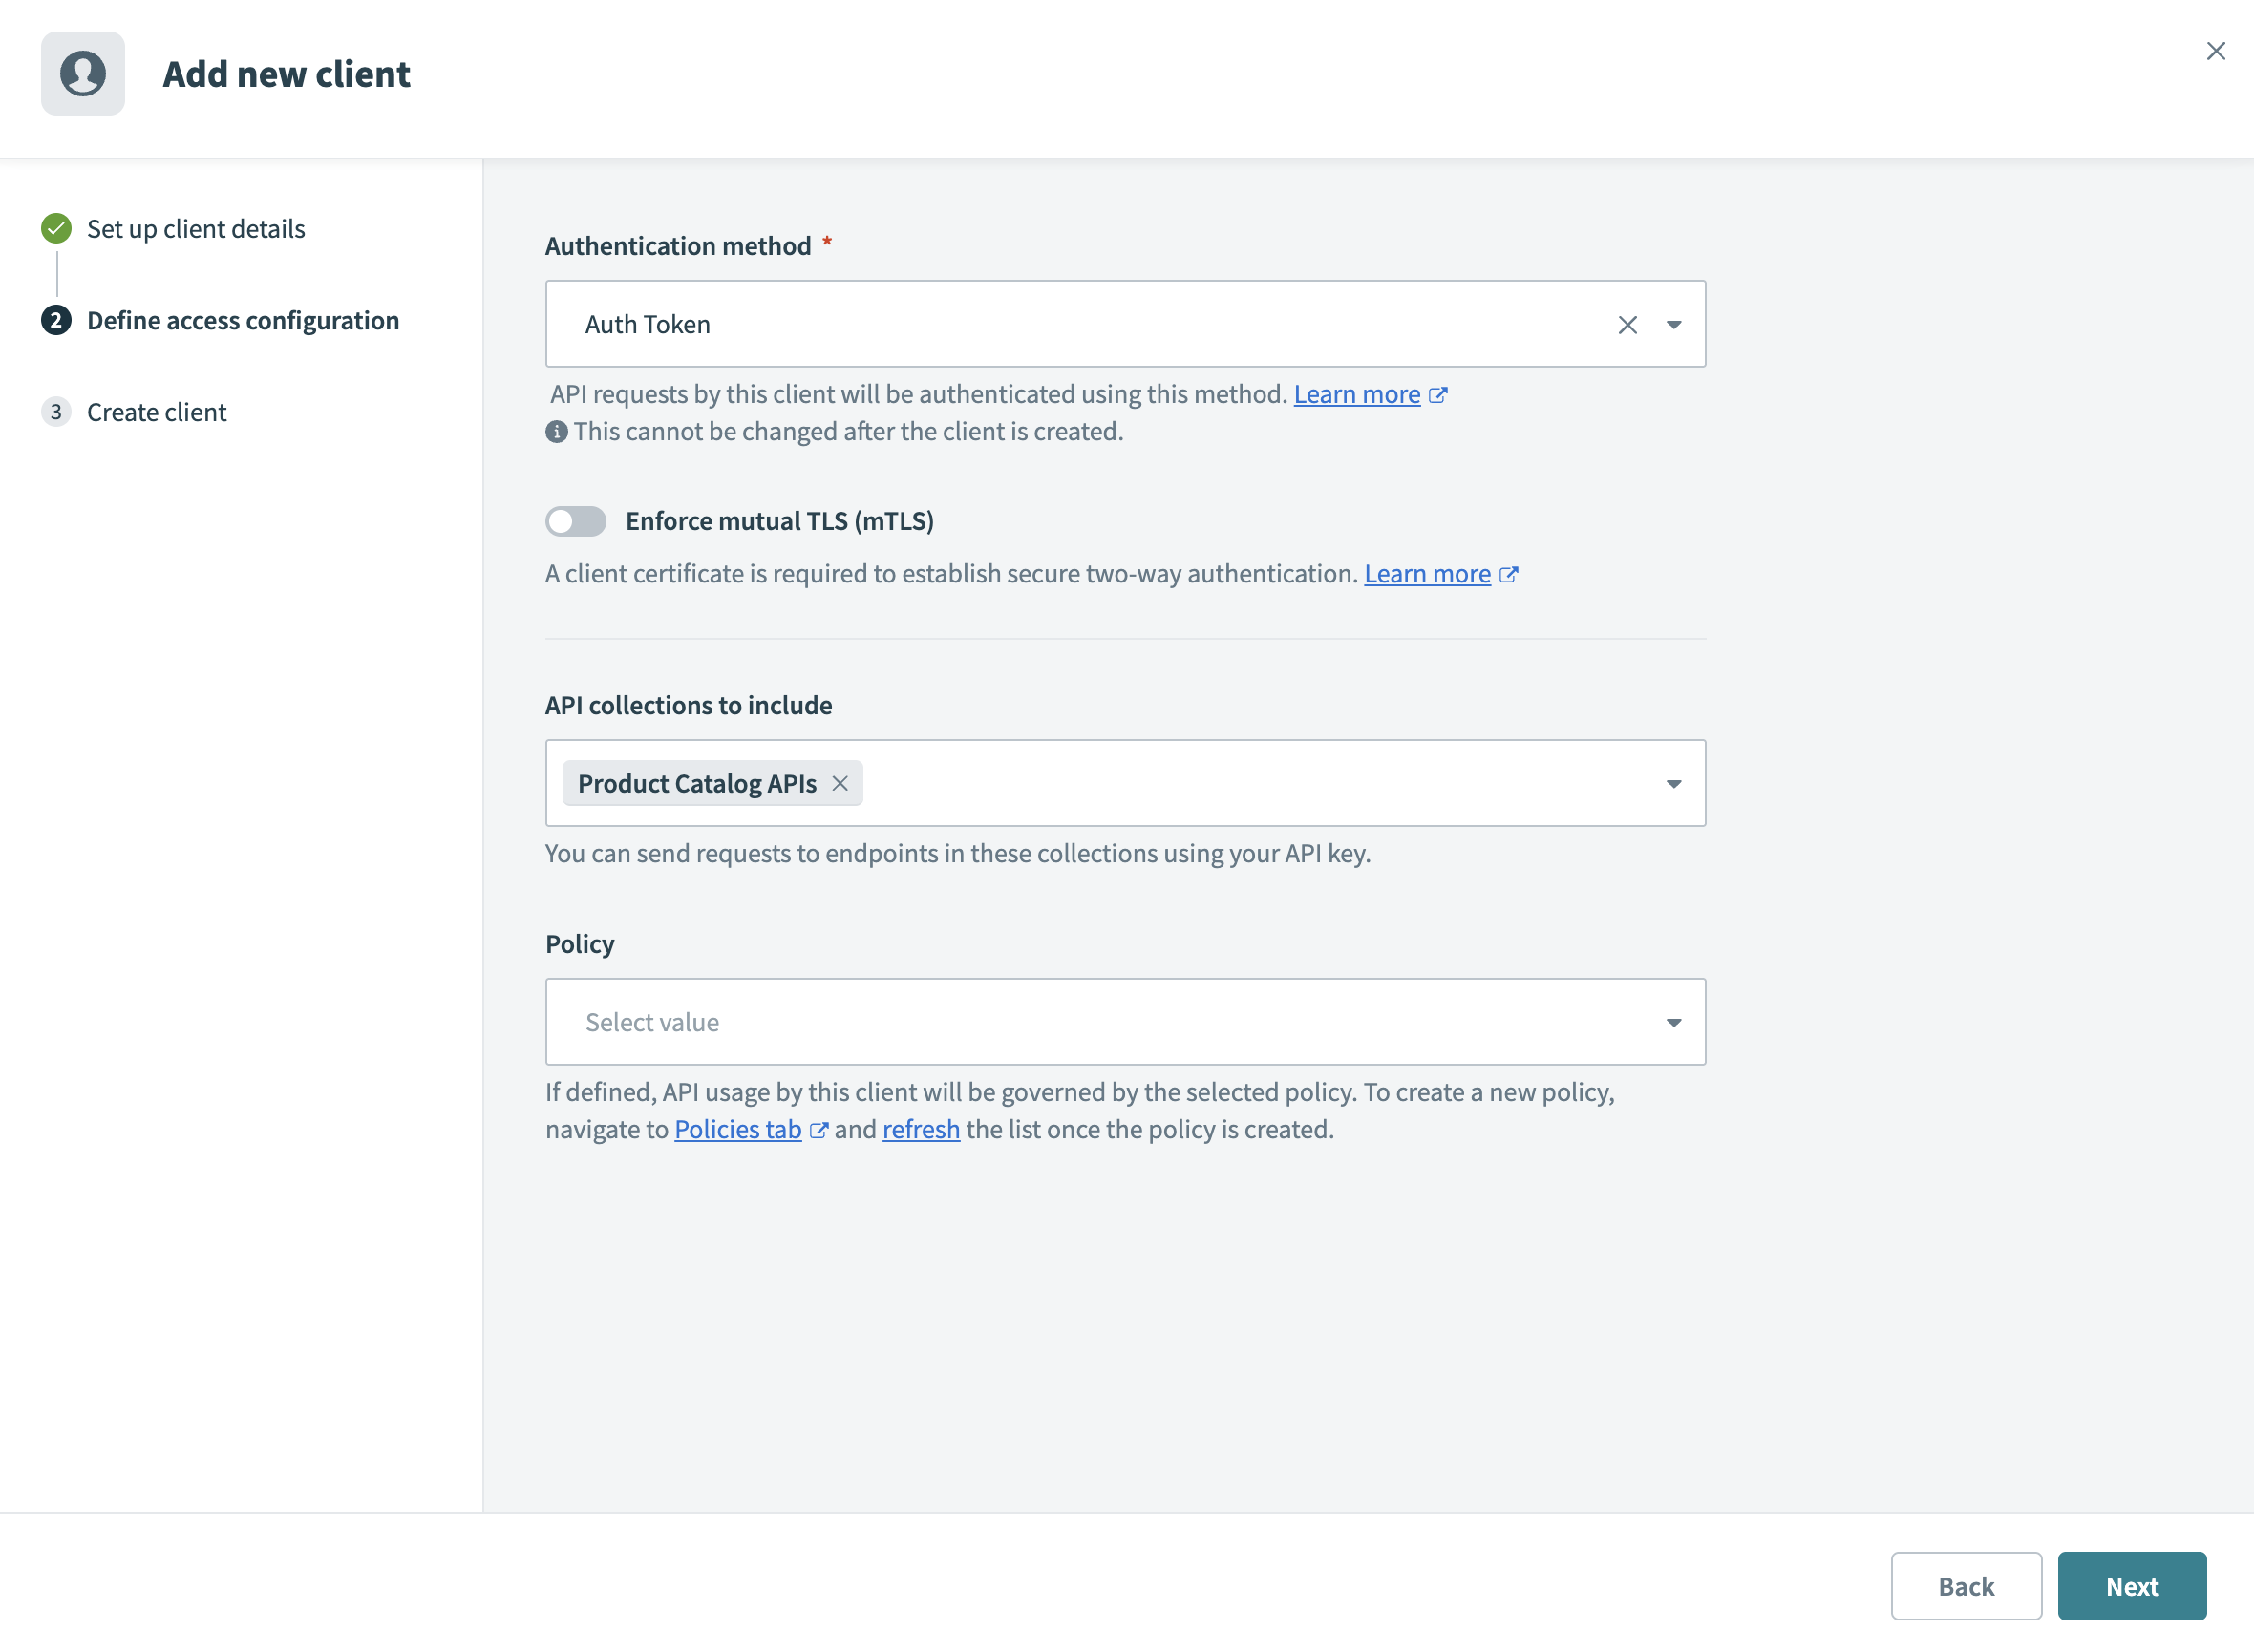 Define access configuration
Enable the Enforce mutual TLS (mTLS) toggle to require clients to present a valid certificate during the SSL handshake. This enforces two-way authentication. Refer to the mTLS authentication guide for more information.
CUSTOM DOMAIN REQUIRED
This setting appears only if you configure your workspace with a custom domain.
Use the API collections to include drop-down menu to select one or more API collections. You can also create a client without collections to let them explore APIs and request access as needed.
Optional. Select a policy from the Policy drop-down menu to control your client's API usage. Policies define rules such as rate limits or usage quotas. Refer to API access policies to create and manage API access policies.
Click Next. Workato sends the client a portal invitation email.
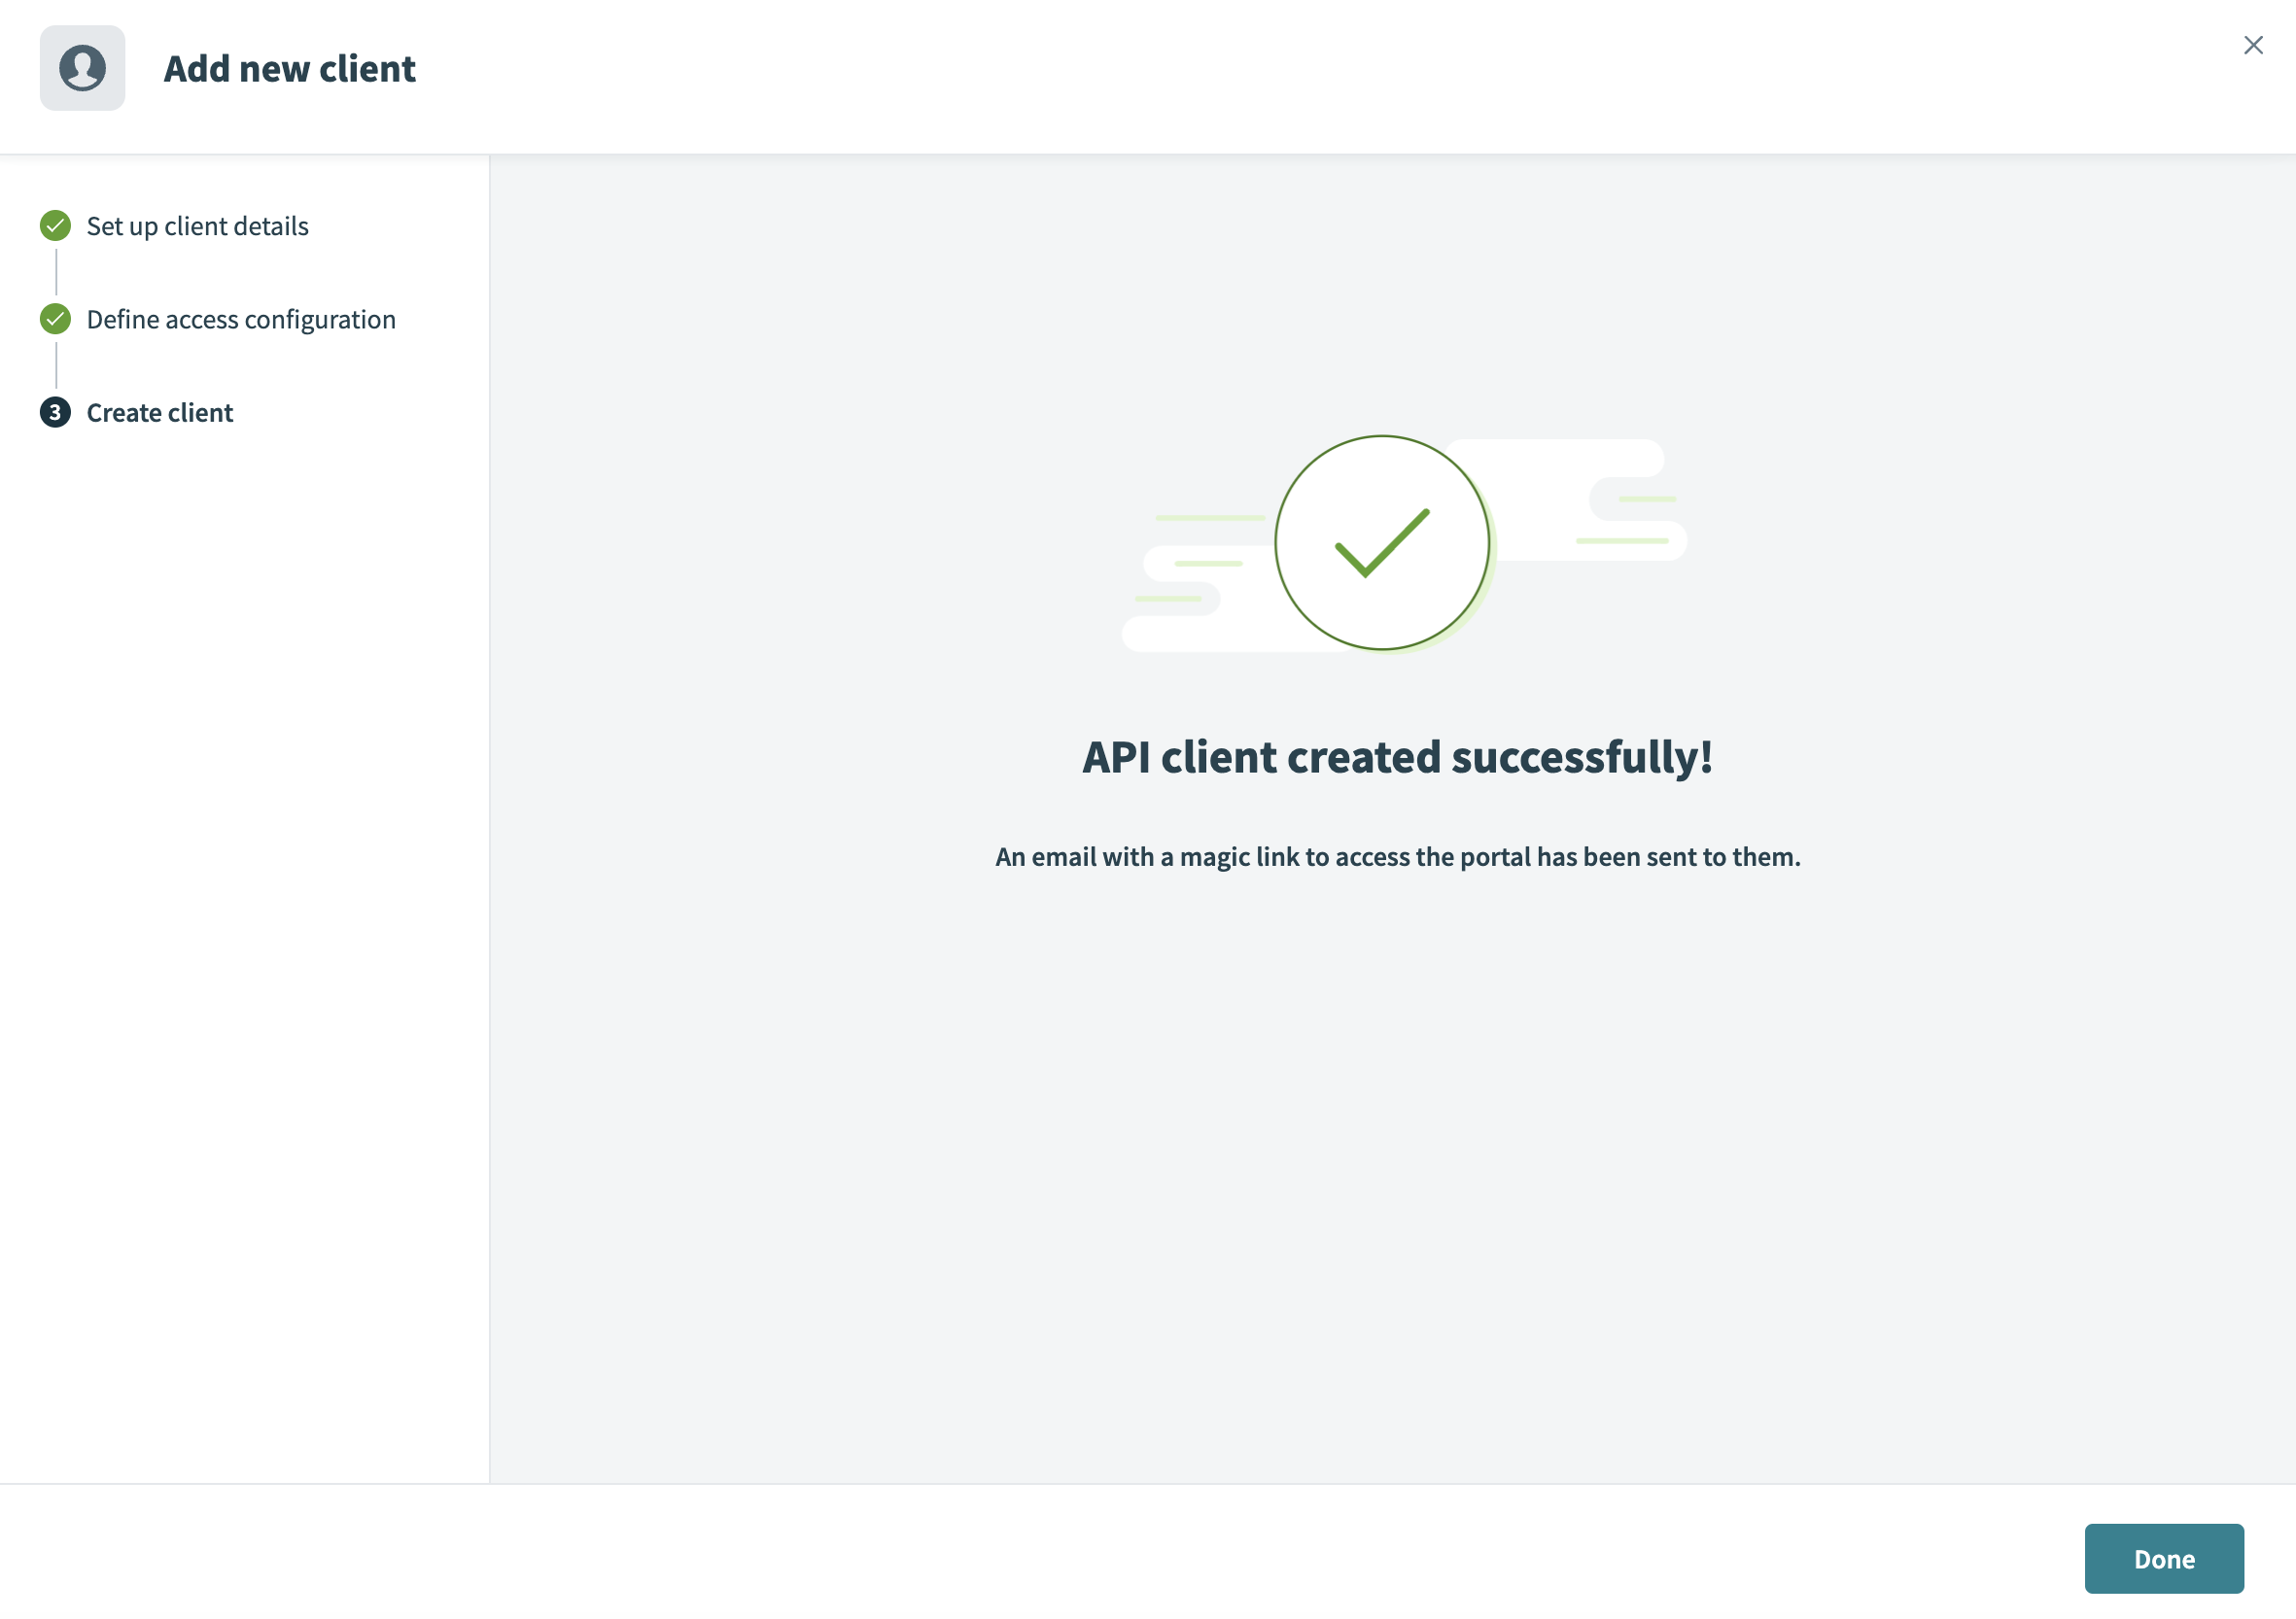 Create client
Clients can log in to the portal after receiving their access email and create up to 20 API keys to authenticate requests to their assigned collections.
Manage client access
The Clients tab provides access to the All clients page, where you can review and update client details, access configurations, and policy assignments.
 All clients page
To manage a specific client's access, click their name to open their details page. From here, you can configure the following settings:
Edit client details
Click Edit client to update basic client information, such as the client's name or email address, from the client details page.
 Edit client details
Access configuration
Use the Access configuration tab to manage your client's access to API collections and set usage policies.
View and adjust the Accessible collections assigned to the client. Add or remove collections to tailor access based on the client's specific requirements.
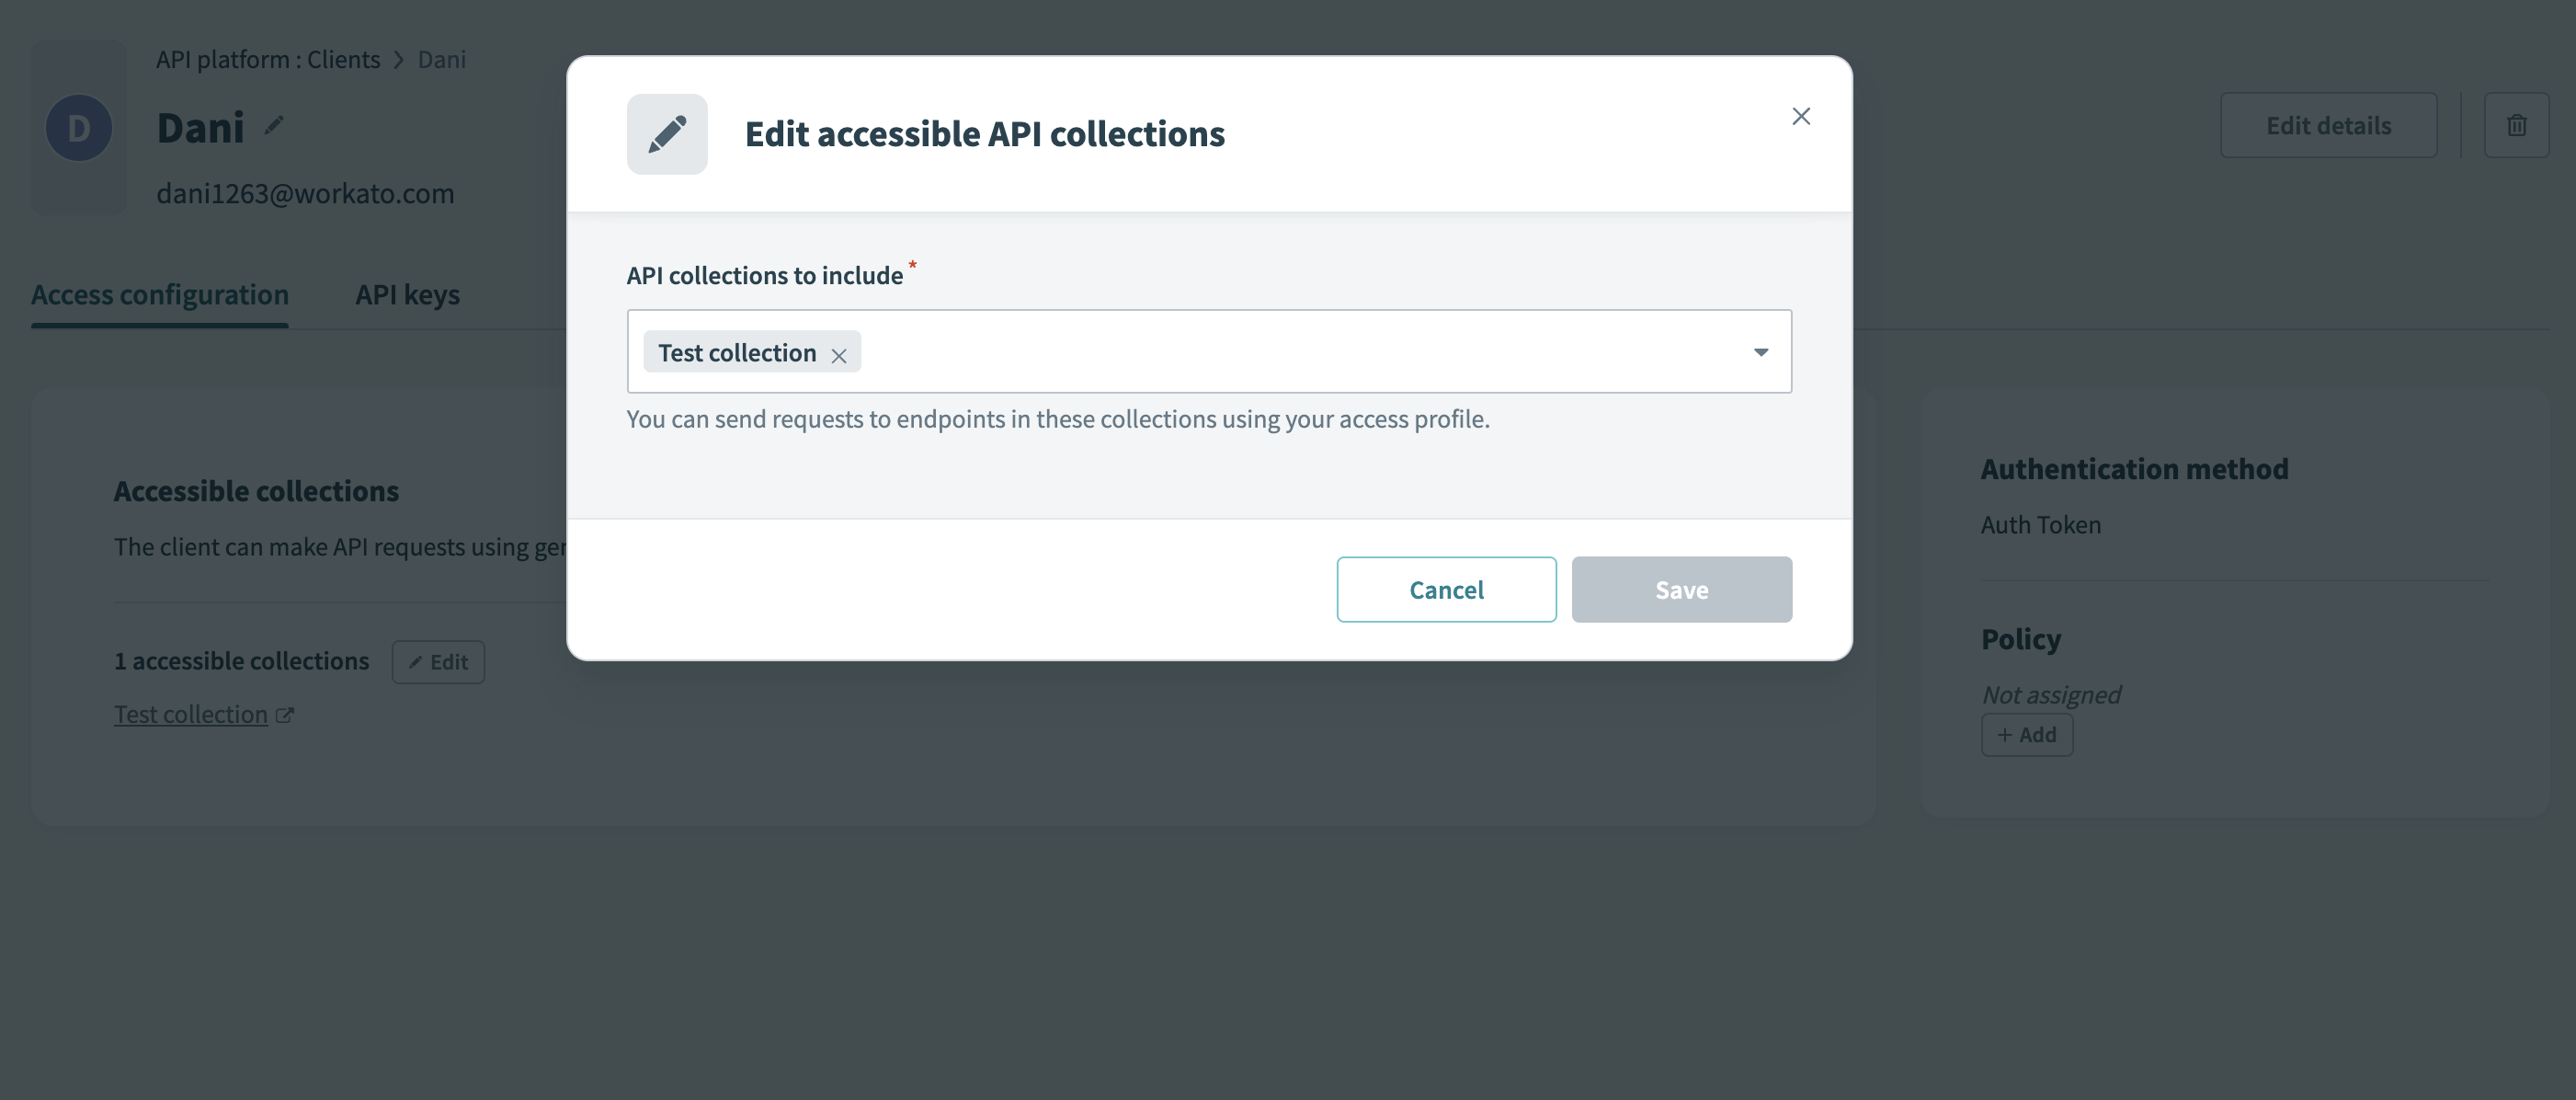 Edit accessible API collections
CLIENT ACCESS LIMITATION
Every client must have access to at least one API collection. You can't remove a client's last remaining accessible collection.
If you try to remove the last collection and click Save, the action fails, and Workato displays an error message explaining the limitation. Ensure the client retains access to at least one collection before saving your changes.
To enforce usage restrictions, add or edit a Policy that defines rules such as rate limits or usage quotas.
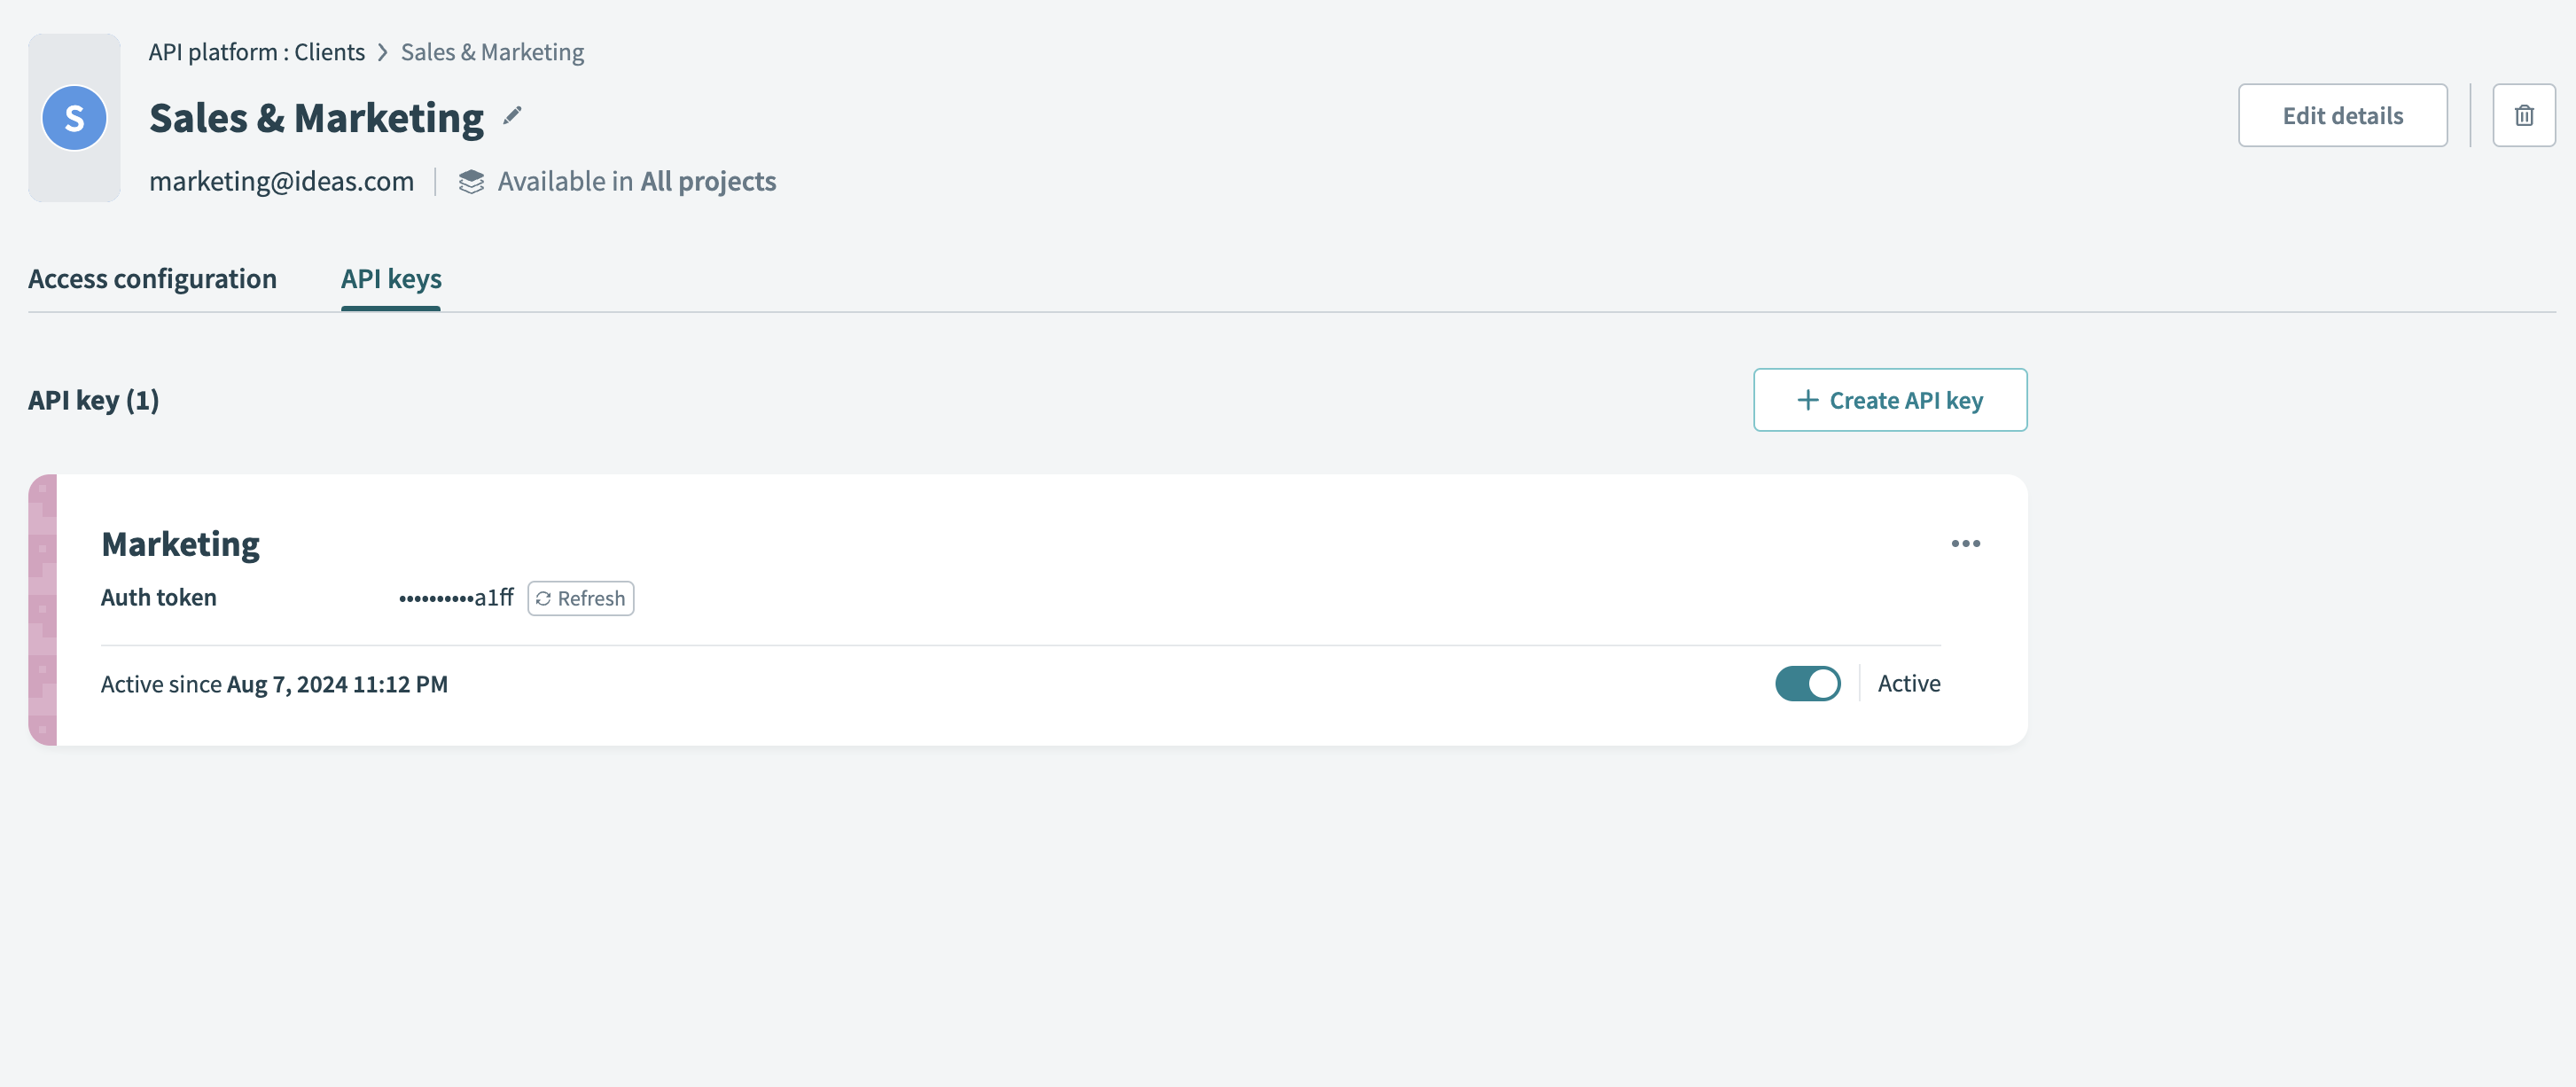
API keys
The API keys tab lets you create and manage authentication tokens. You can generate new keys with optional IP restrictions for enhanced security or manage existing keys by refreshing or deactivating them as needed.
 Manage API keys
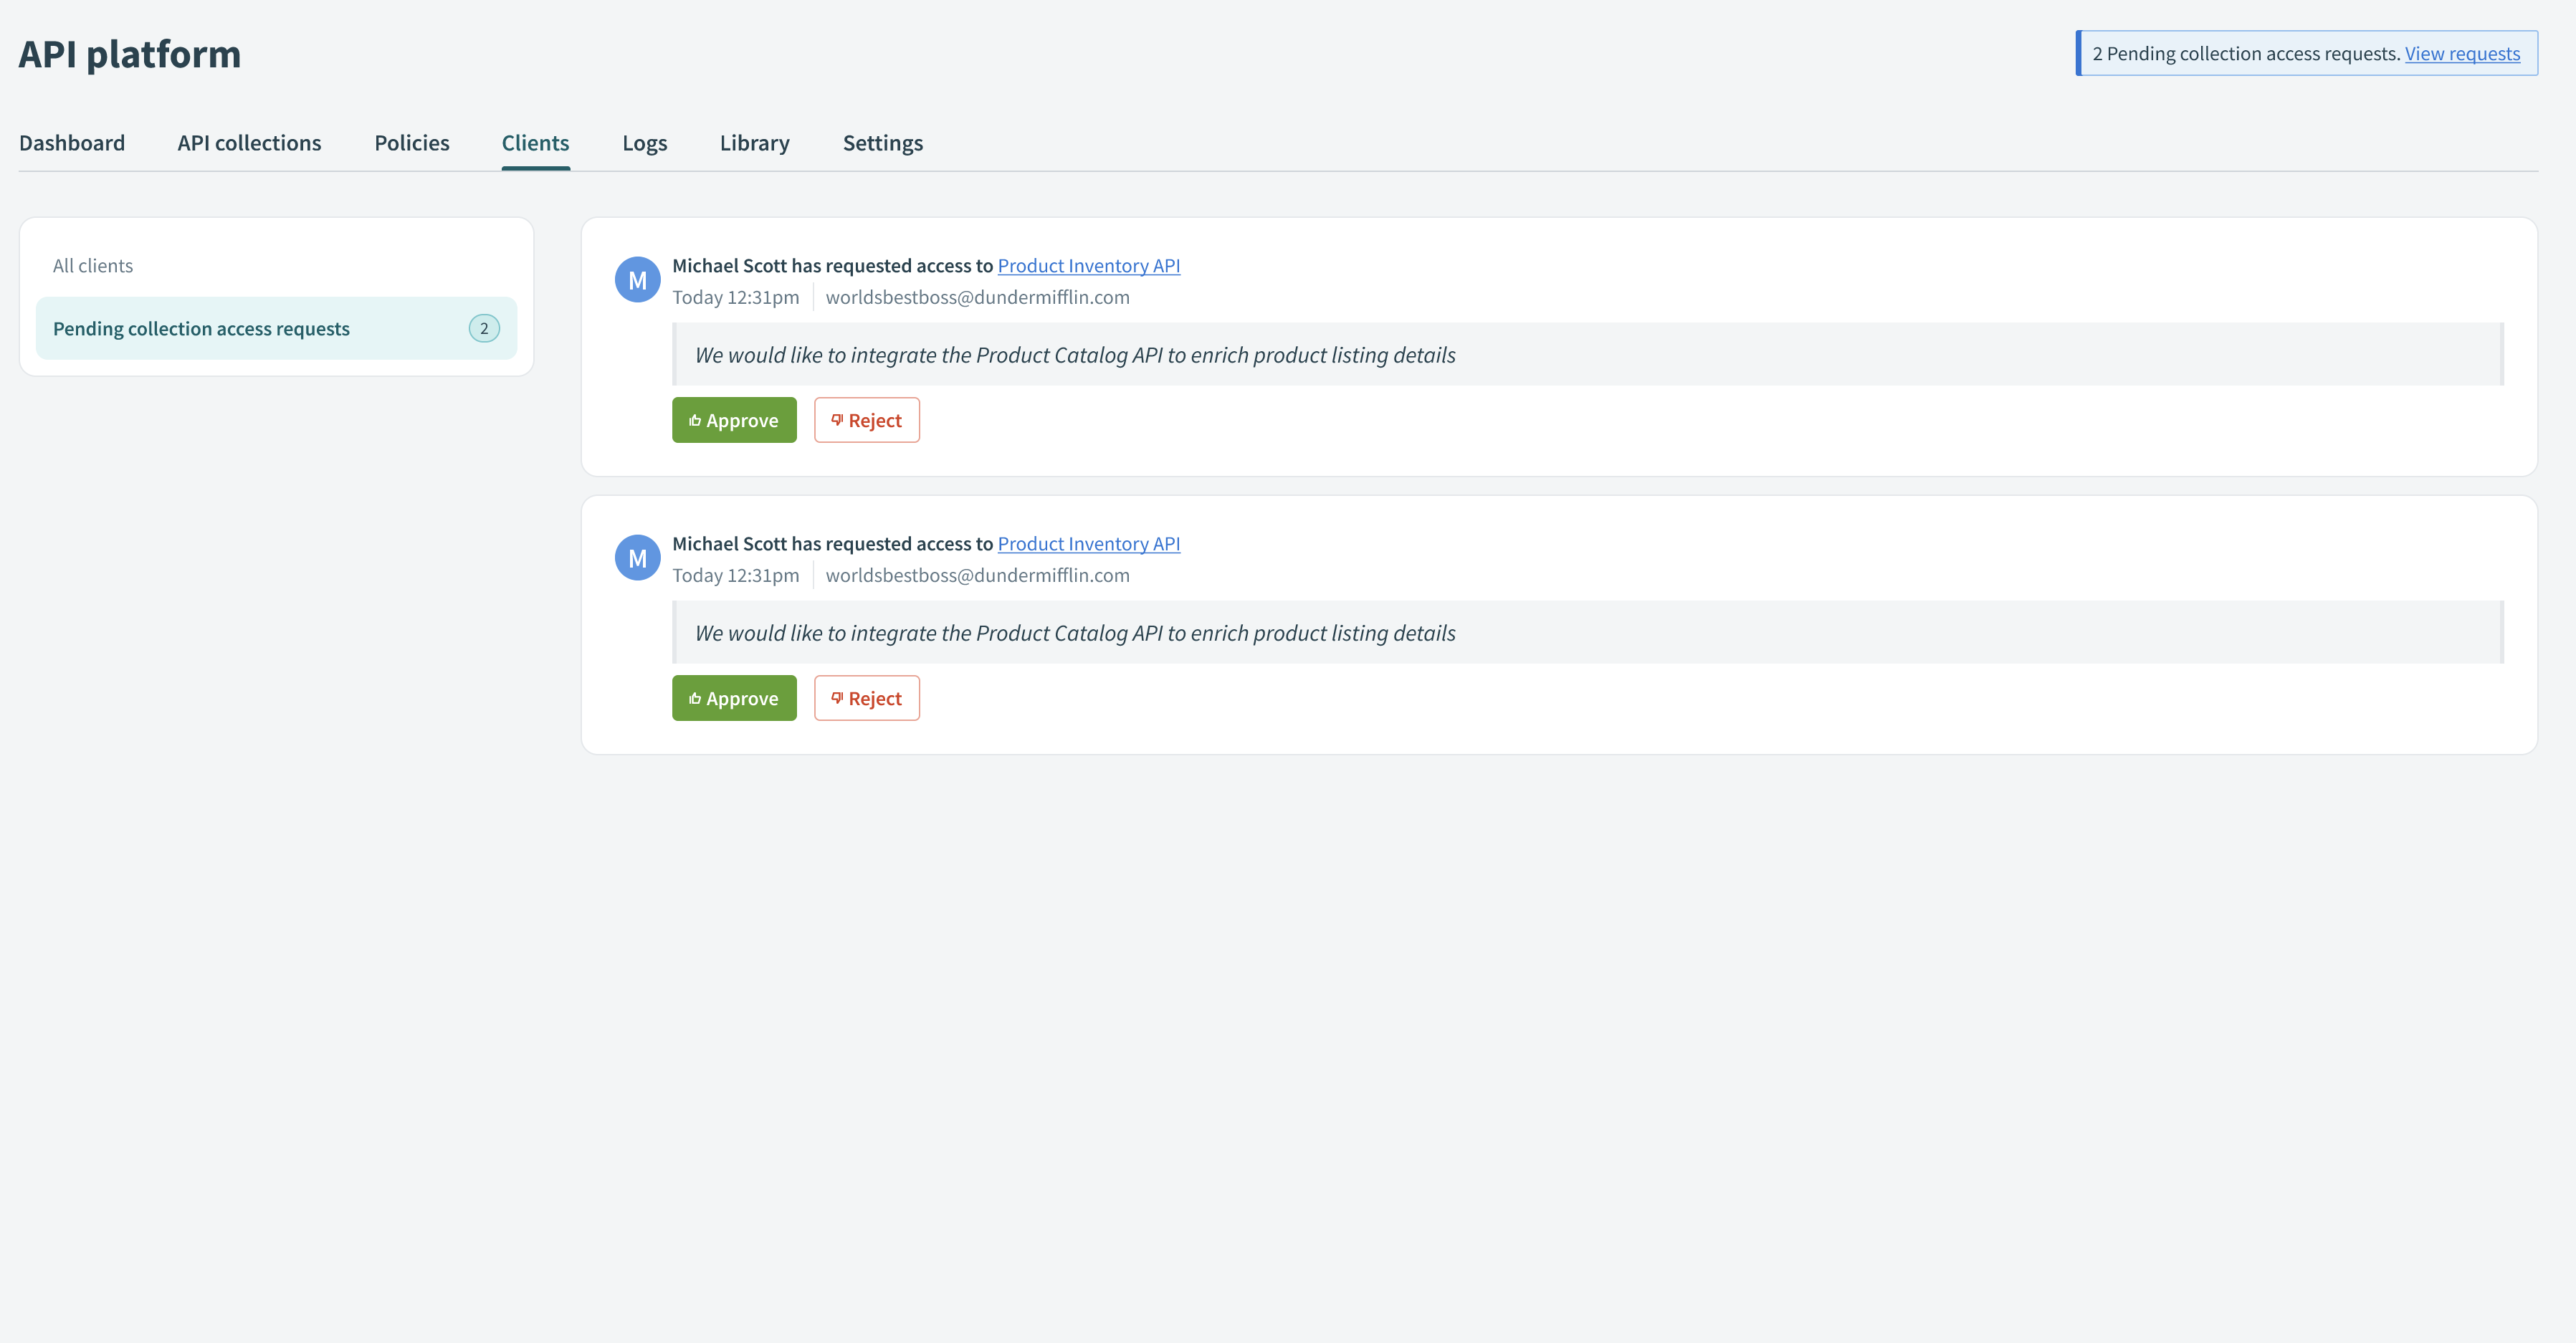
Review collection access requests
When a portal client requests access to an API collection, the request appears in the Pending collection access requests section within the Clients tab.
Review the requested API collections and the client's justification for needing access.
 Review requested API collections
Choose to Approve or Reject requests directly from this page. Approving grants the client access to the requested collections, while rejecting keeps the client's current permissions unchanged.
Publish API collections
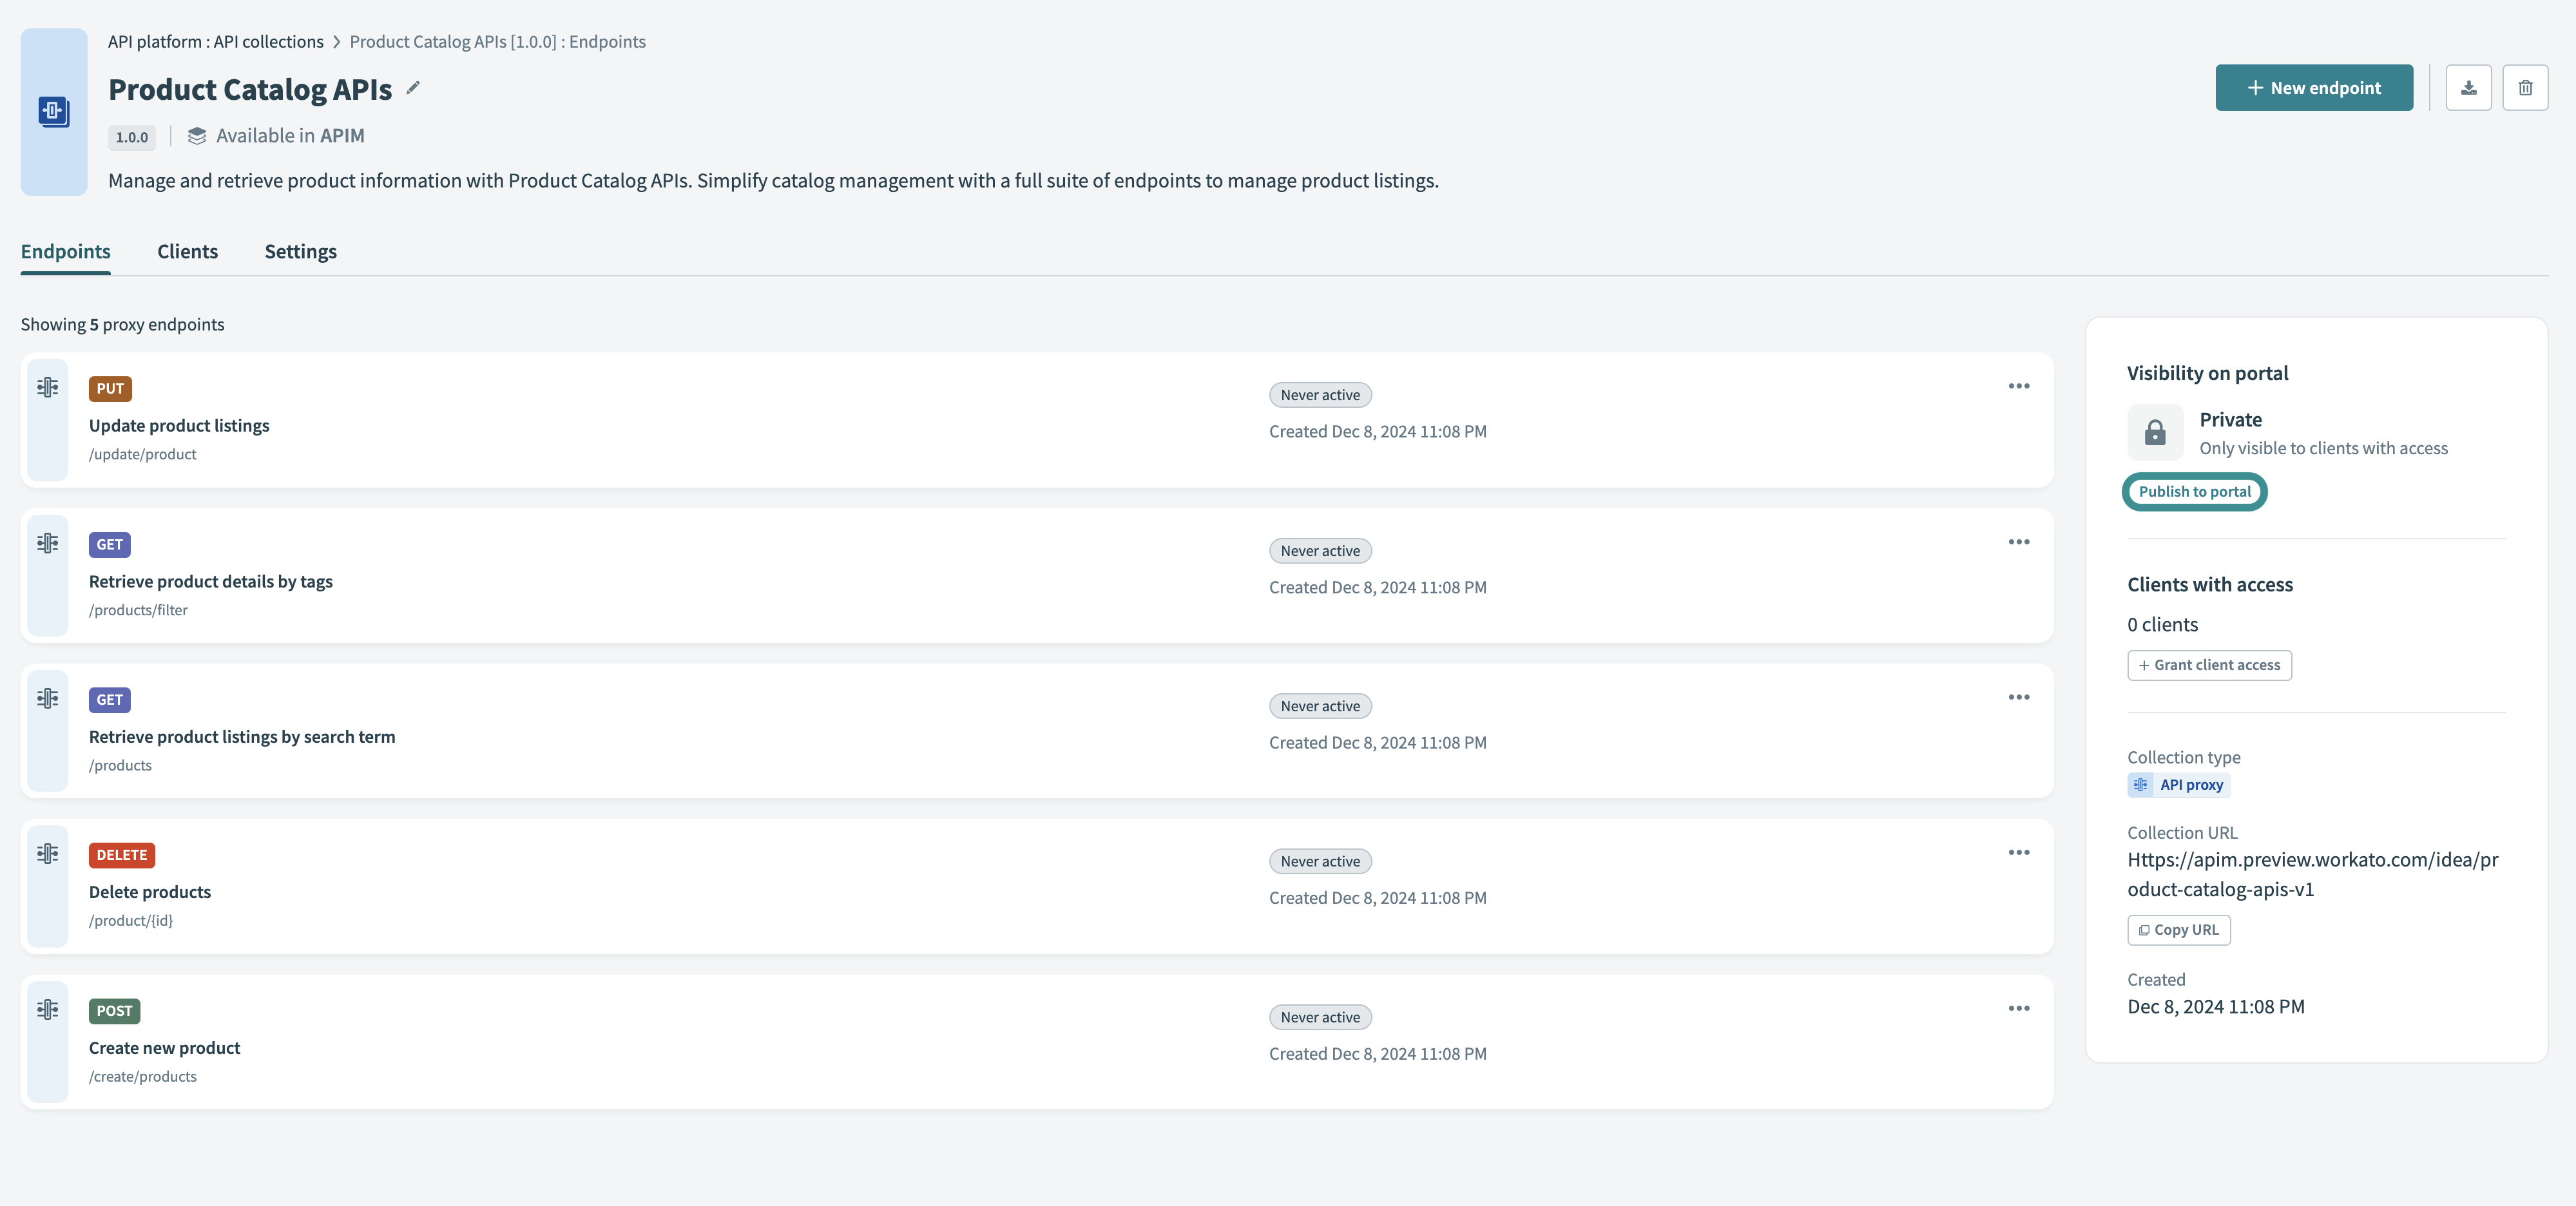
Only active collections appear in the portal catalog. A collection is active if it contains at least one active endpoint. Inactive collections with zero active endpoints don't appear in the Discover new APIs section, even if published.
Complete the following steps to publish an API collection in the developer portal:
Go to Platform > API platform > API collections page and select the collection you plan to publish.
Locate the Visibility on portal section on the collection's Endpoints page. Collections default to Private if they are not initially published to the portal.
Click Publish to portal to make the collection discoverable to your clients.
 Publish your API collection
You can also publish collections from the API collections tab. Click ••• (ellipsis) next to the collection and select Publish collection.
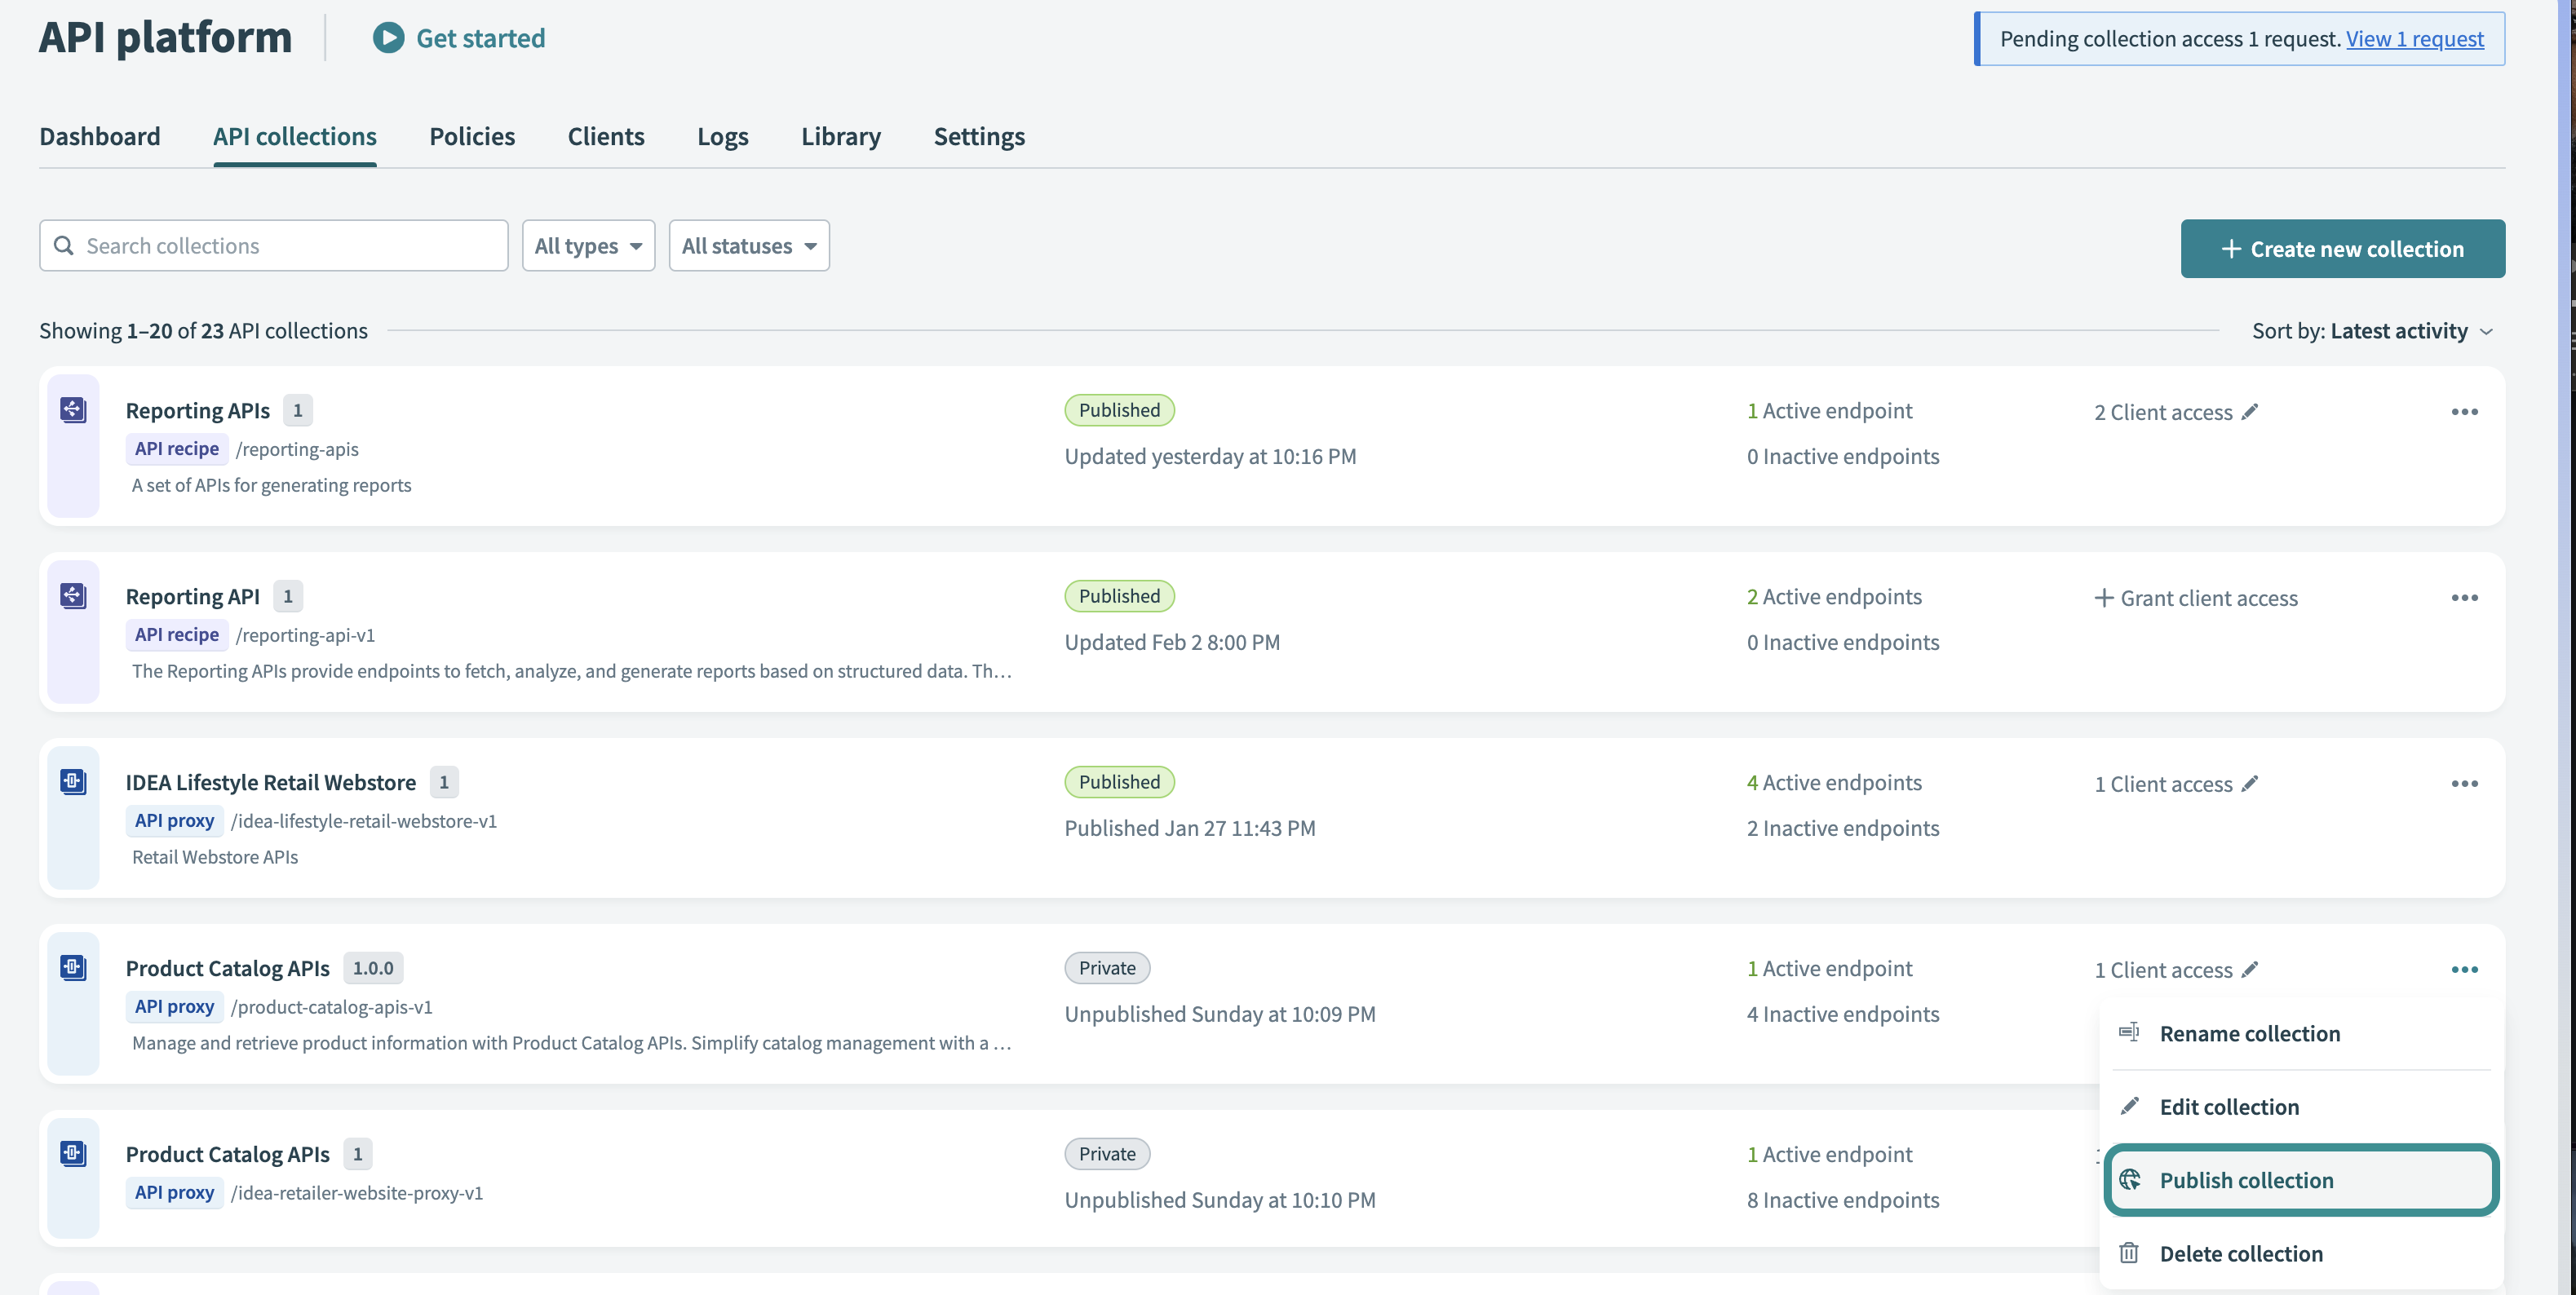 Publish your API collection from the API collections tab
Last updated: