Create an API client with DCR
You can create an API client that uses a dynamic client registration (DCR) provider for authentication. This enables API consumers to generate their own credentials in the Developer Portal instead of requiring manual provisioning by an API Platform Admin.
PREREQUISITES
Before you begin, ensure you have completed the following tasks:
- You have configured at least one DCR provider in your API platform settings.
- You have API Platform Admin privileges.
Set up client details
Complete the following steps to set up the client details. These steps are the same for all authentication methods.
Add an API client
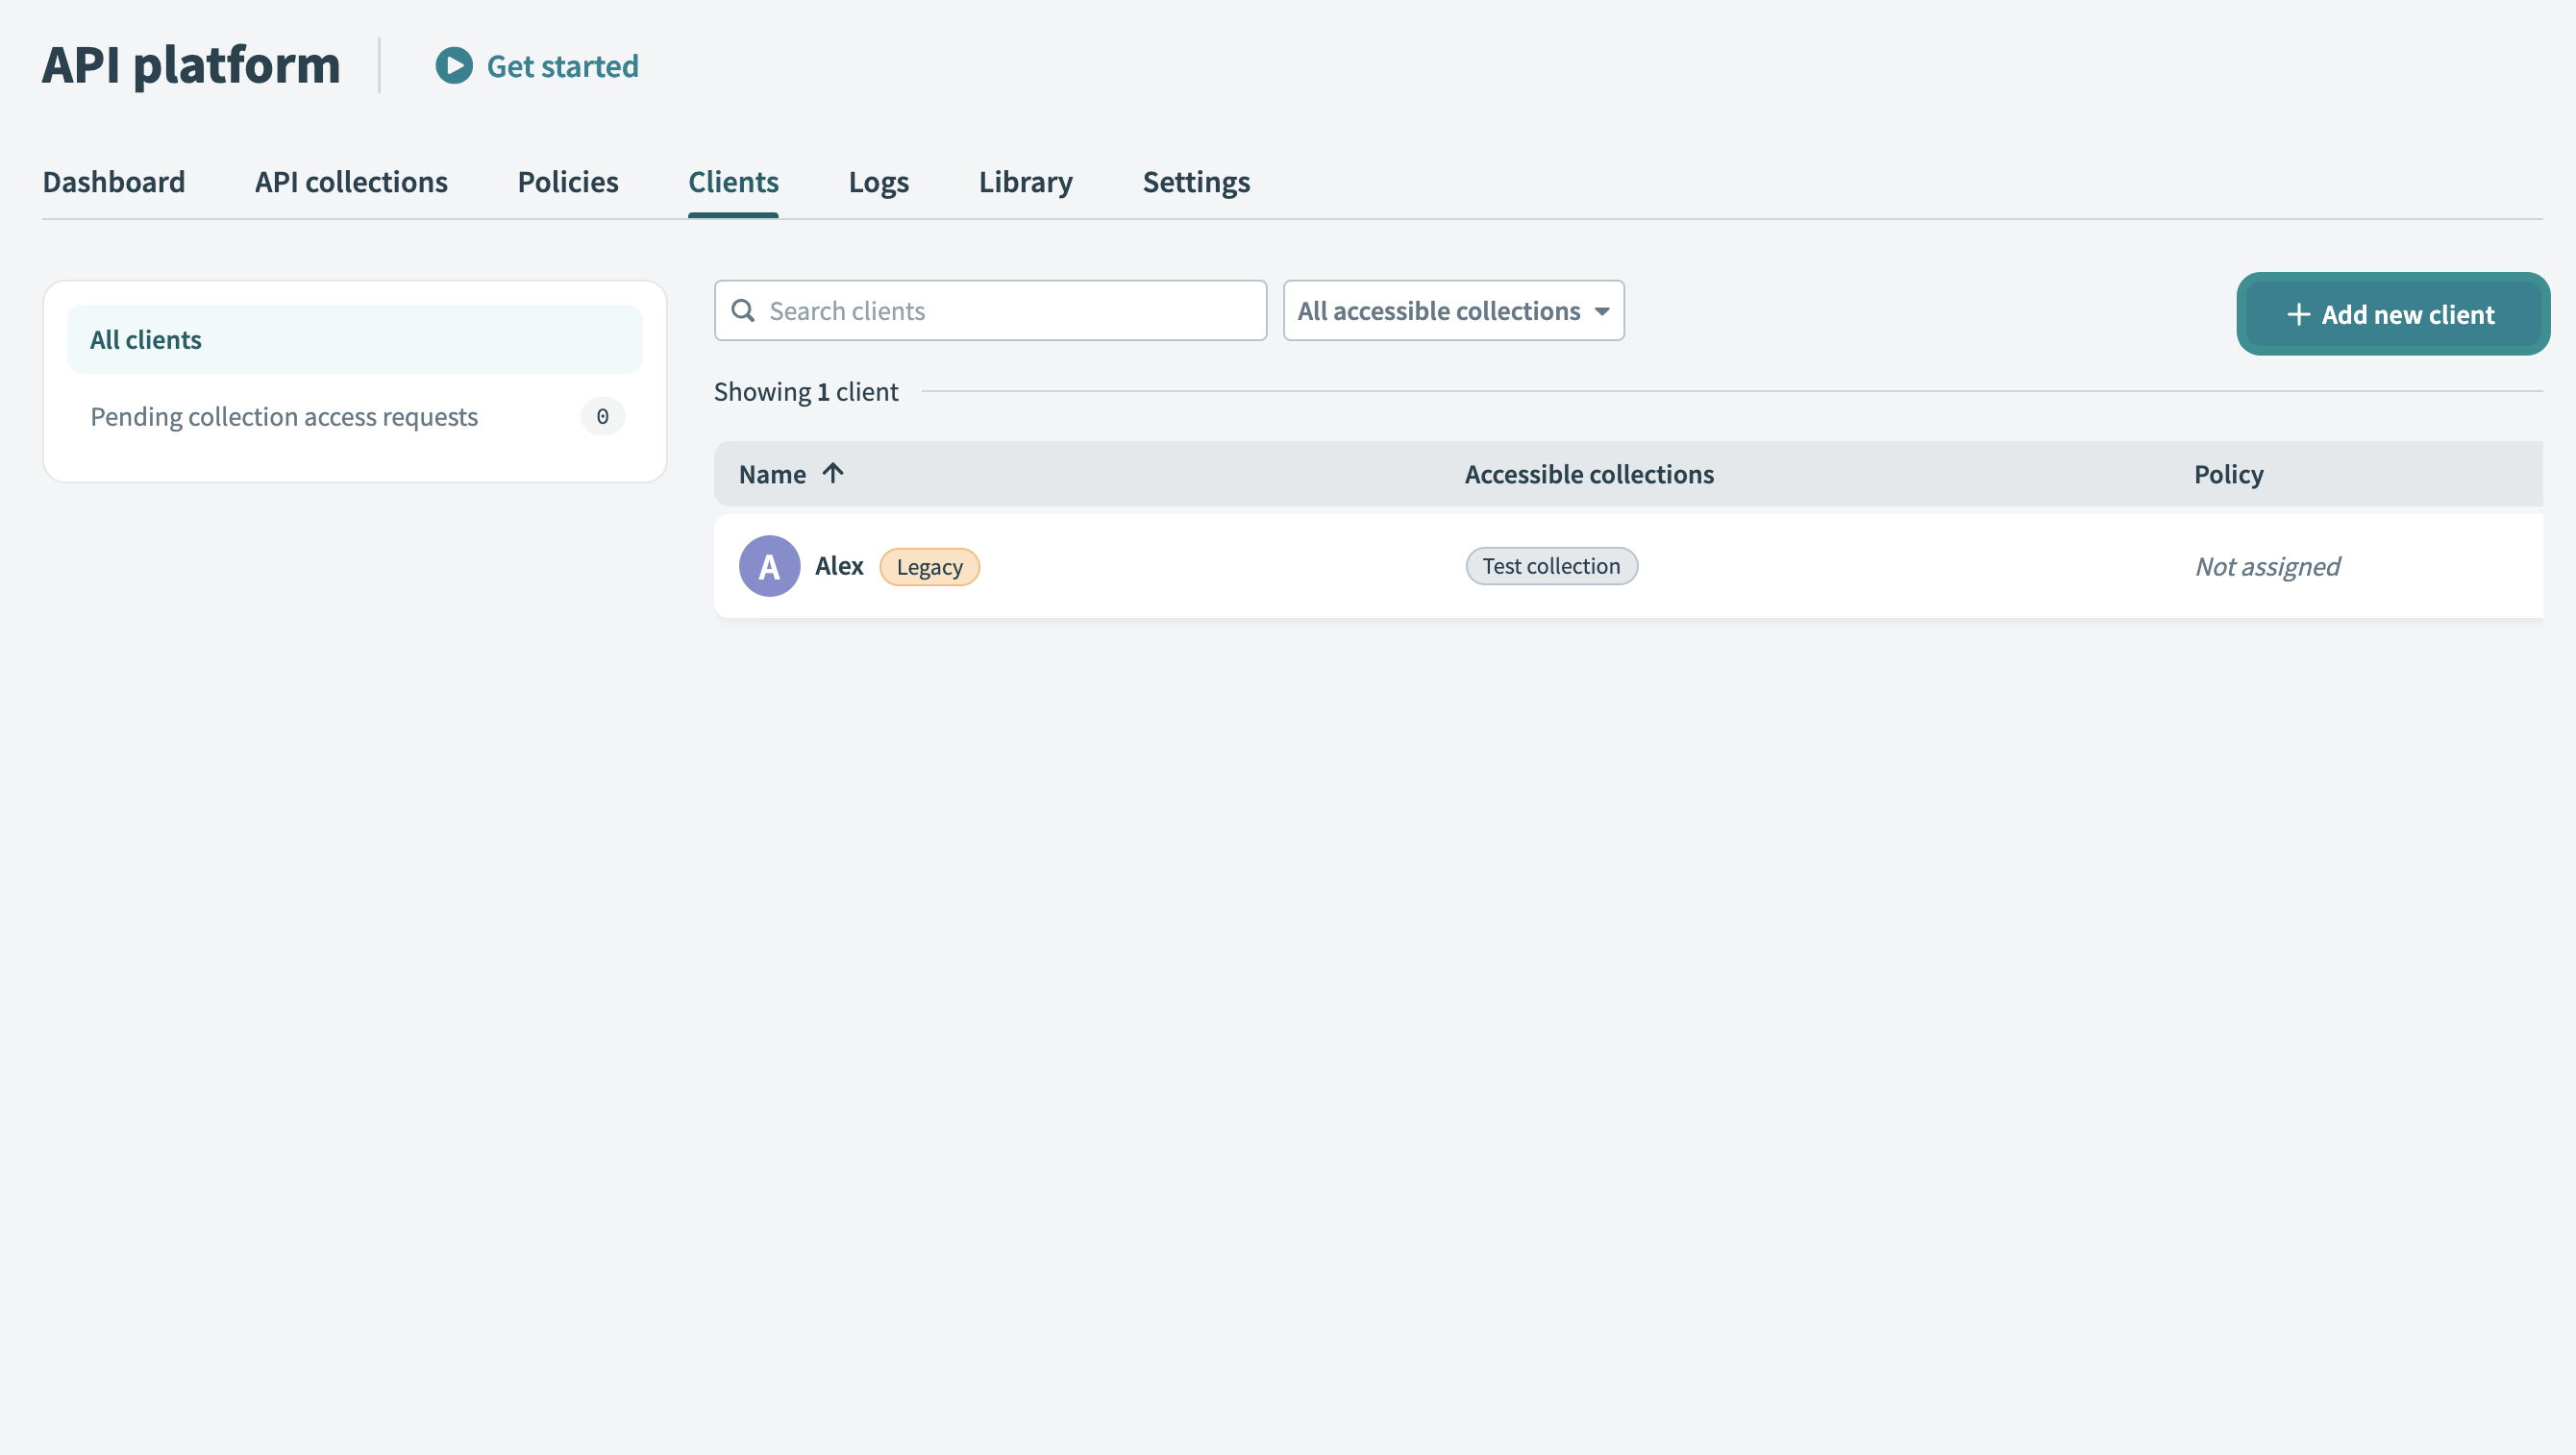
Go to Platform > API Platform.
Select the Clients tab.
Click + Add new client.
 Add new client
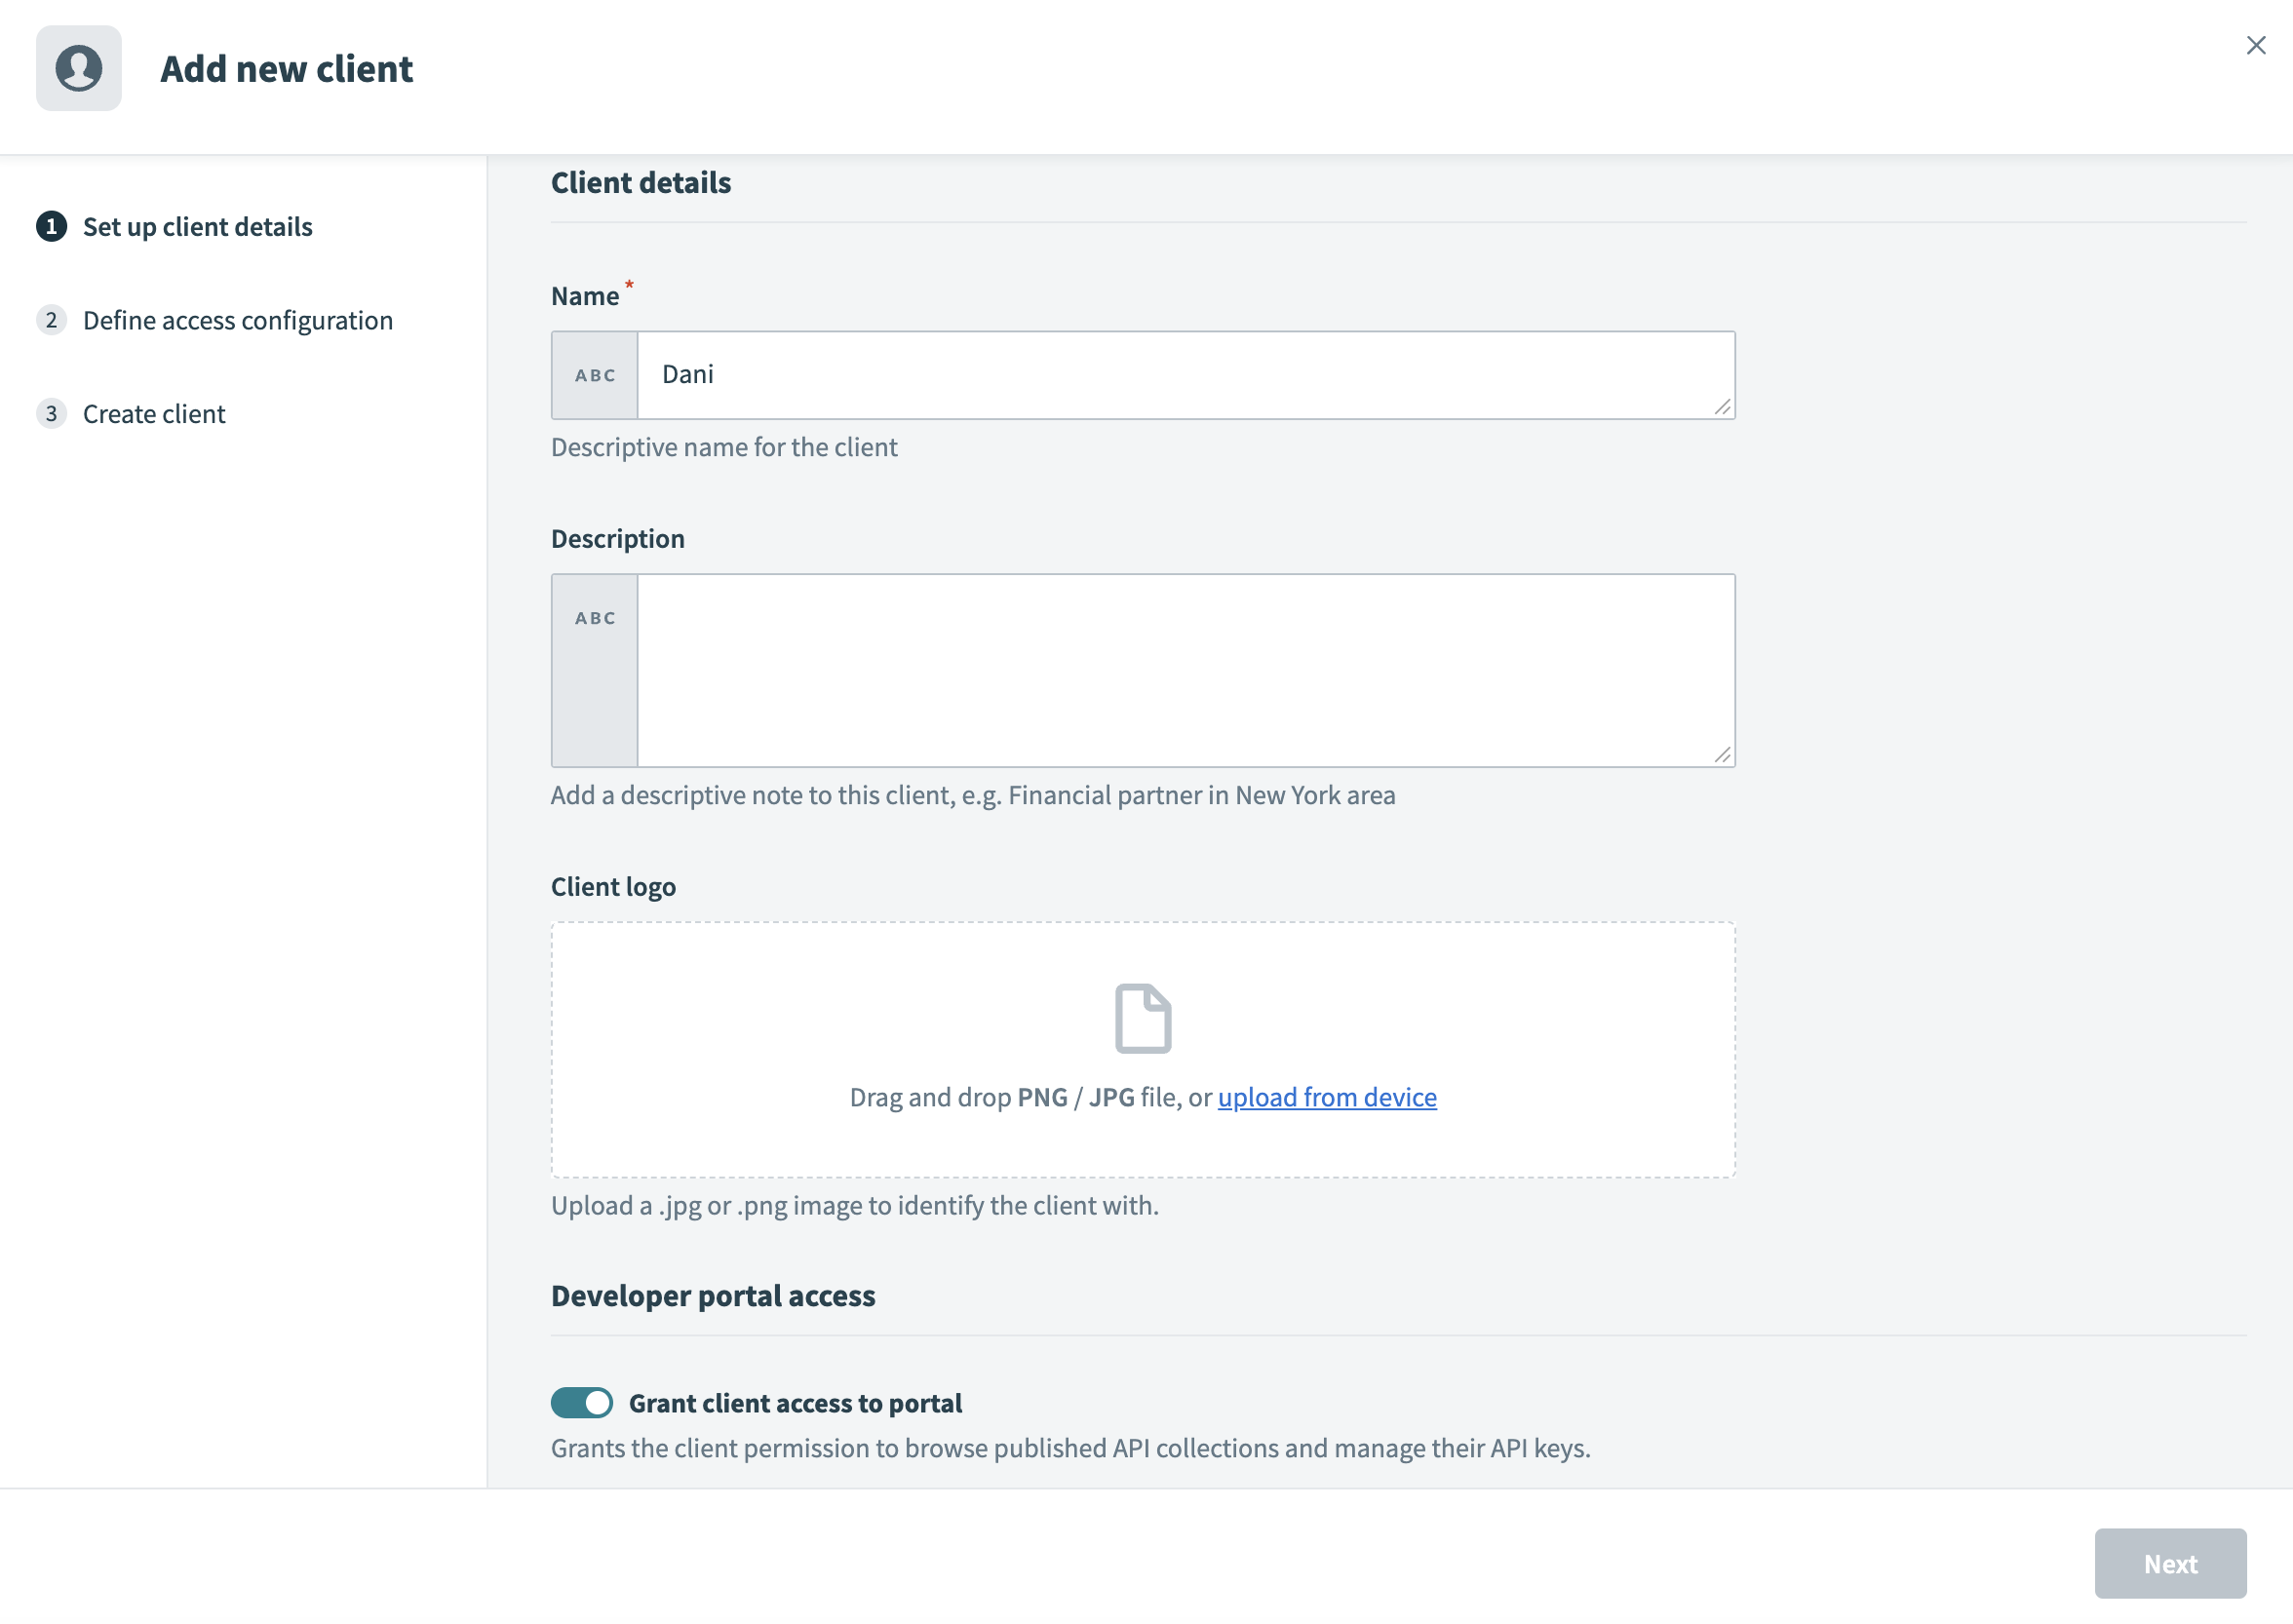
Set up client details
Enter a Name for your client. Use a descriptive identifier, such as the client's company or department name.
 Set up client details
Enter a Description for the client.
Upload a Client logo. Drag and drop a JPG/PNG image or click Upload from device to select a file. This logo visually identifies your client in the portal.
Enable the Grant client access to portal toggle to enable portal access. This grants your client permission to browse published API collections and manage their API keys. If your client only requires API tokens for testing or internal purposes, you can leave the toggle disabled.
Provide the client identity based on your portal's authentication method:
Click Next to proceed to the Define access configuration screen, where you can configure your client's API access.
Define access configuration
The access configuration step determines how the client authenticates with your APIs. Select an authentication method and configure the DCR-specific settings.
The following sections describe the DCR-enabled configuration for each supported authentication method:
OpenID Connect with DCR
Complete the following steps to configure an API client that uses OpenID Connect with a DCR provider.
Use the Authentication method drop-down menu to select OpenID Connect (DCR enabled).
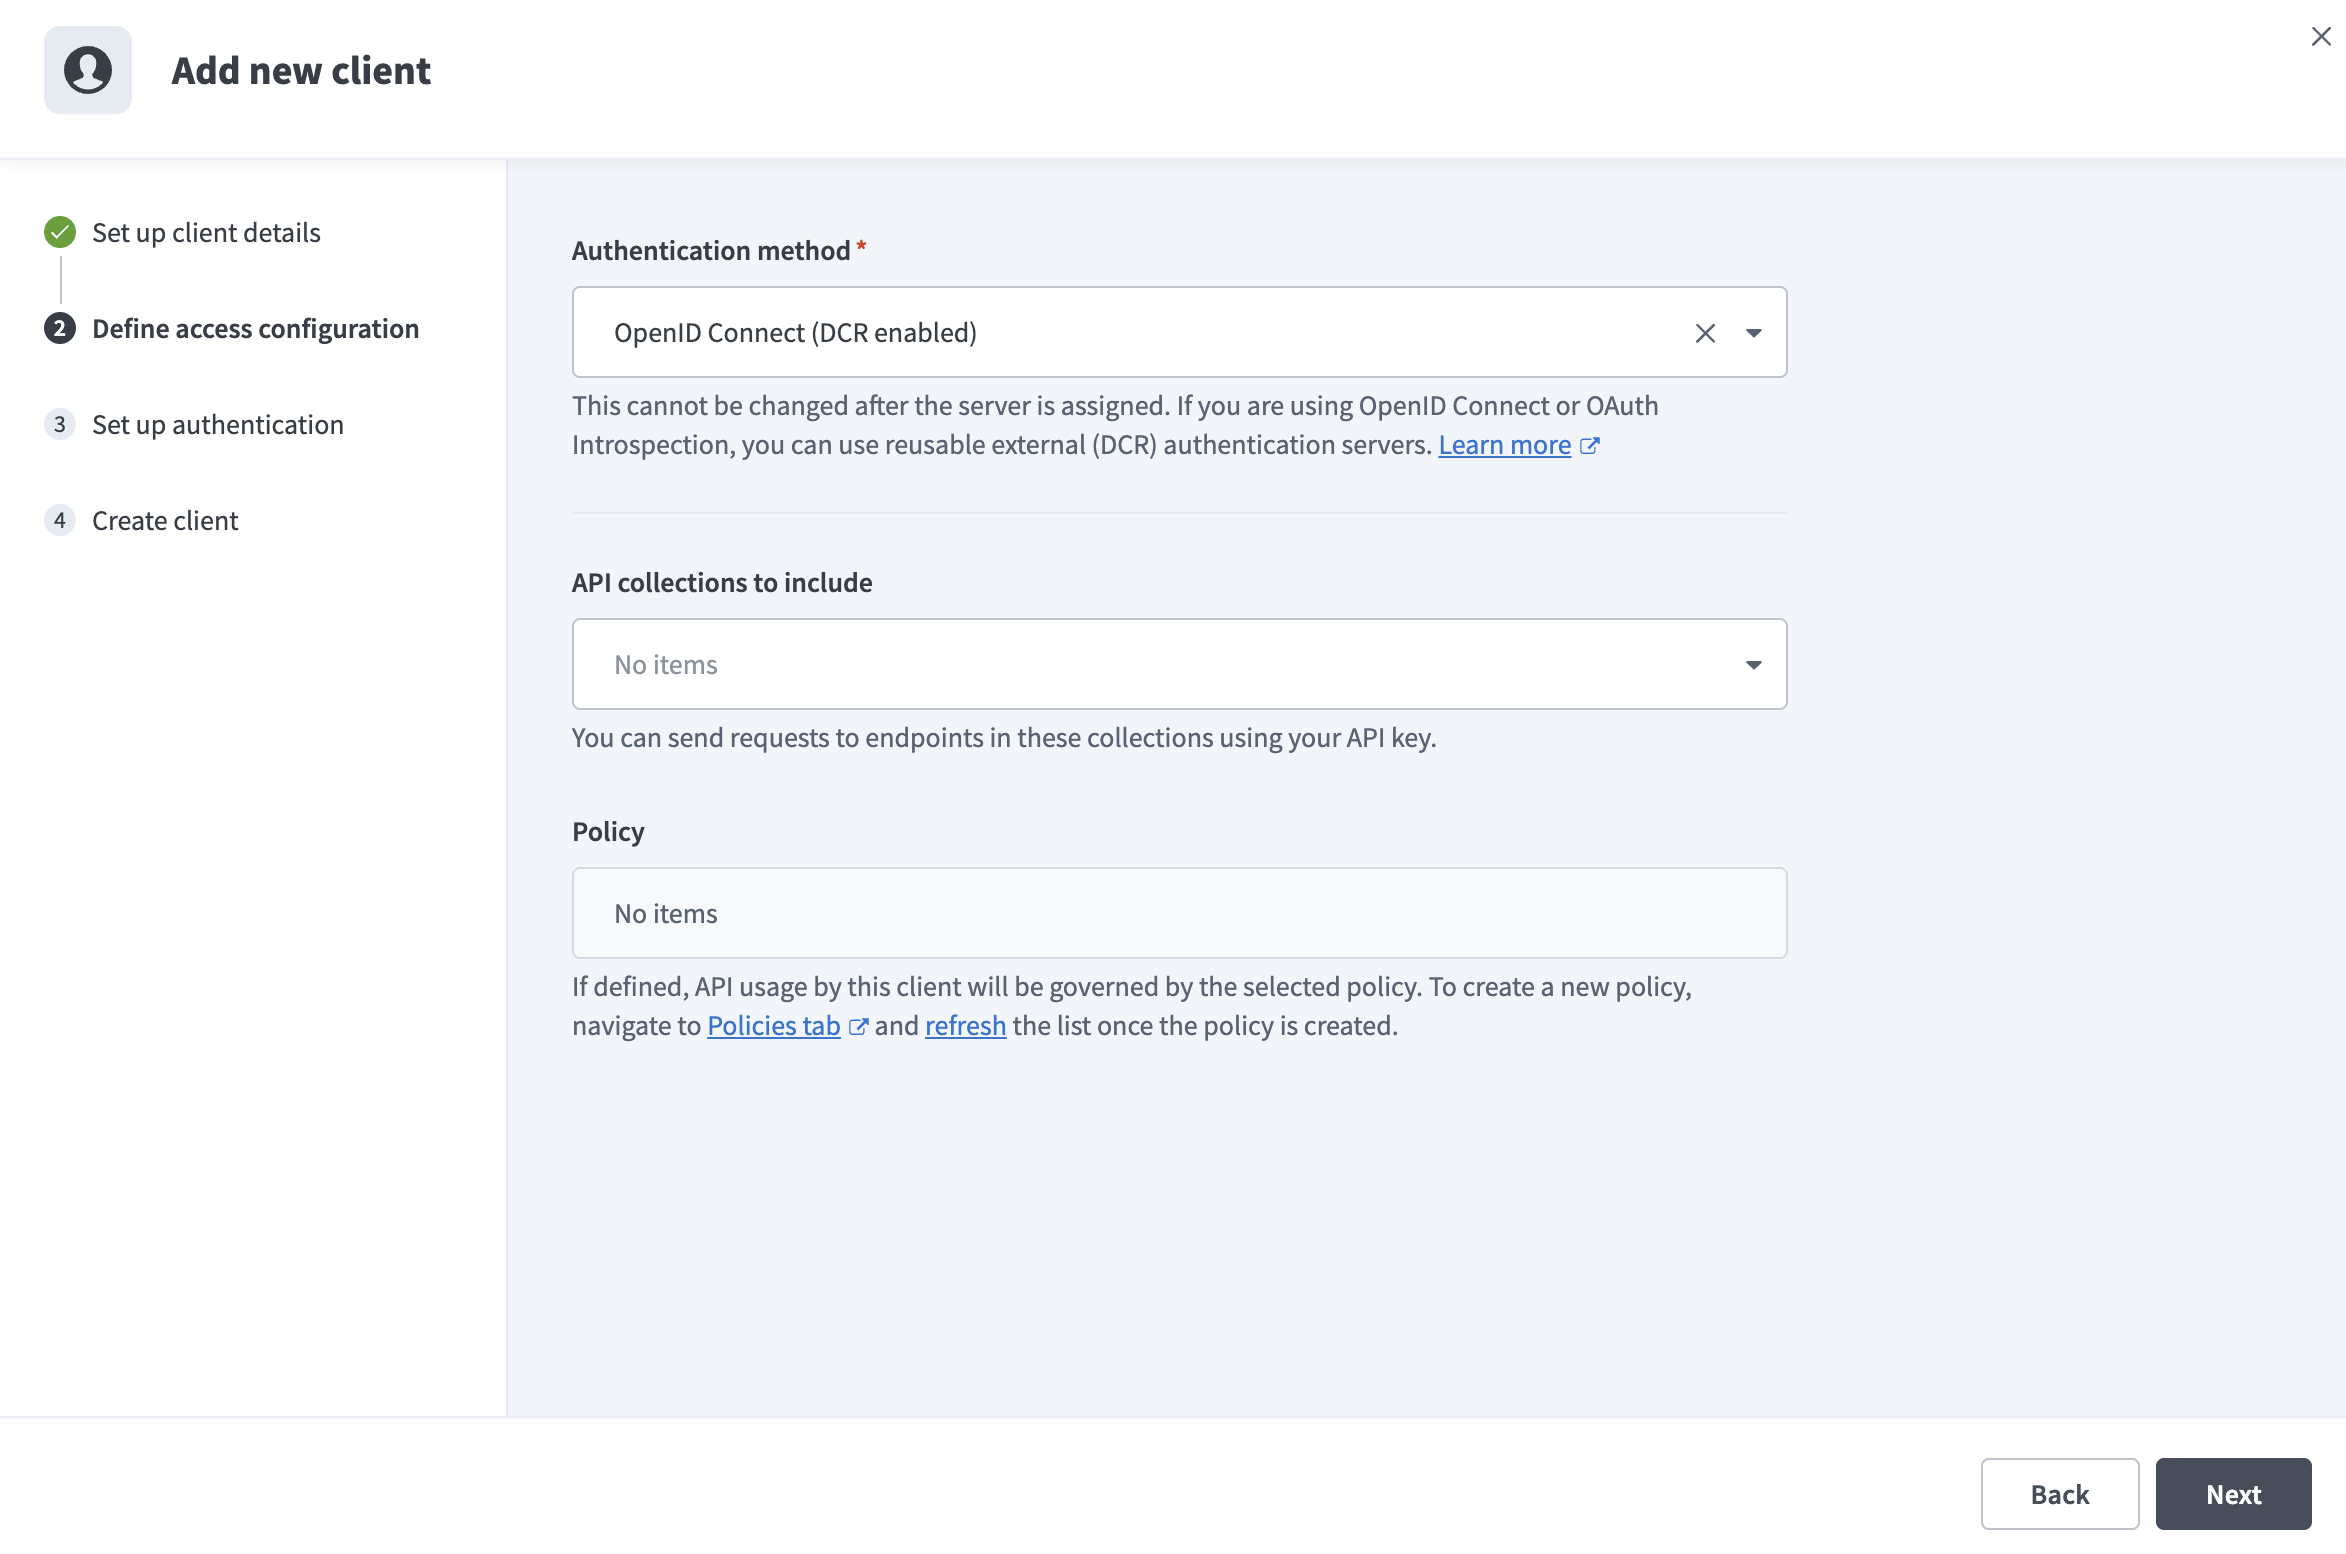 Select authentication method
Use the API collections to include drop-down menu to select one or more API collections. This defines the APIs your client can access and invoke in the portal. You can also create a client without collections to allow discovery before you grant API access.
Optional. Assign a Policy to control your client's API usage. Policies define rules such as rate limits or usage quotas.
Click Next.
Use the Discovery method drop-down menu to select DCR provider.
The DCR provider option appears in the Discovery method drop-down menu only after you configure at least one DCR provider in Settings > Developer Portal > Dynamic client registration. The other Discovery URL and JSON Web key set (JWKS) URL options follow the existing OpenID Connect configuration flow. Refer to OpenID Connect authentication for more information.
Use the DCR provider drop-down menu to select the provider you plan to use for this client. The drop-down lists all DCR providers you configured that use the OpenID Connect authentication method.
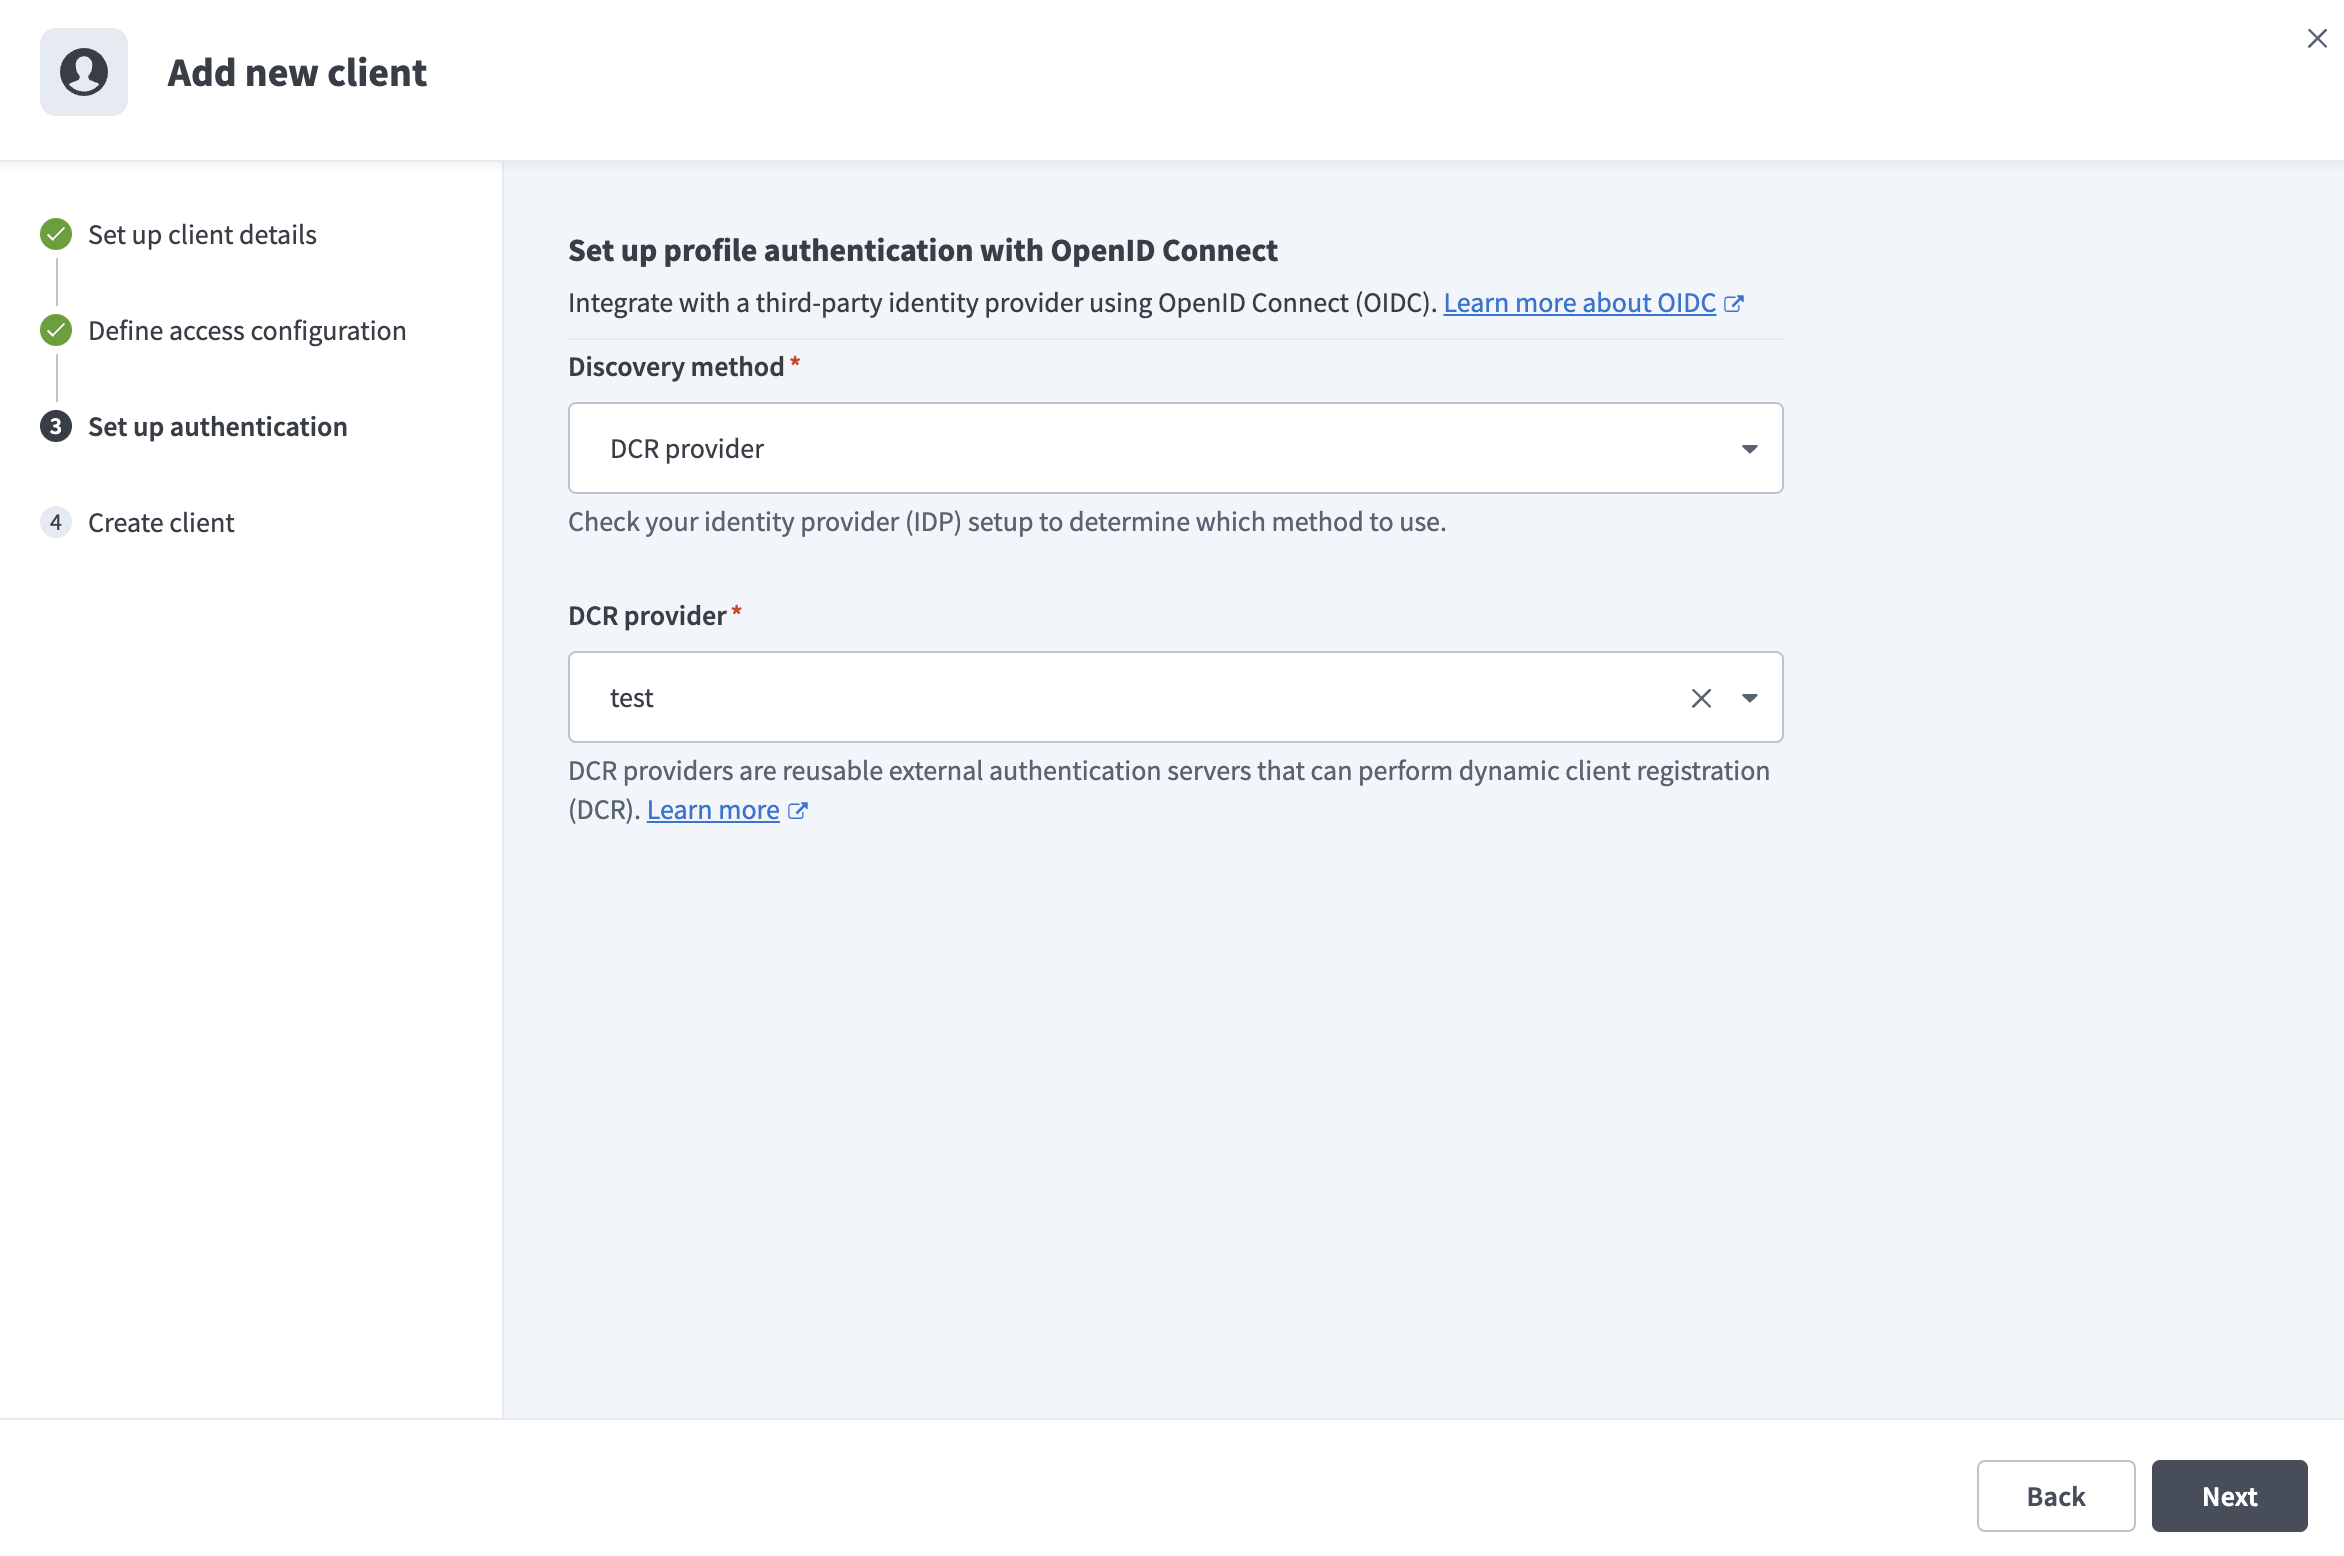 Select DCR provider
Click Next to proceed to the Set up authentication step and complete the remaining configuration.
After you complete the configuration, Workato creates the API client. The client appears on the Clients page with its authentication method and DCR provider details.
OAuth 2.0 Token Introspection with DCR
Complete the following steps to configure an API client that uses OAuth Token Introspection 2.0 with a DCR provider.
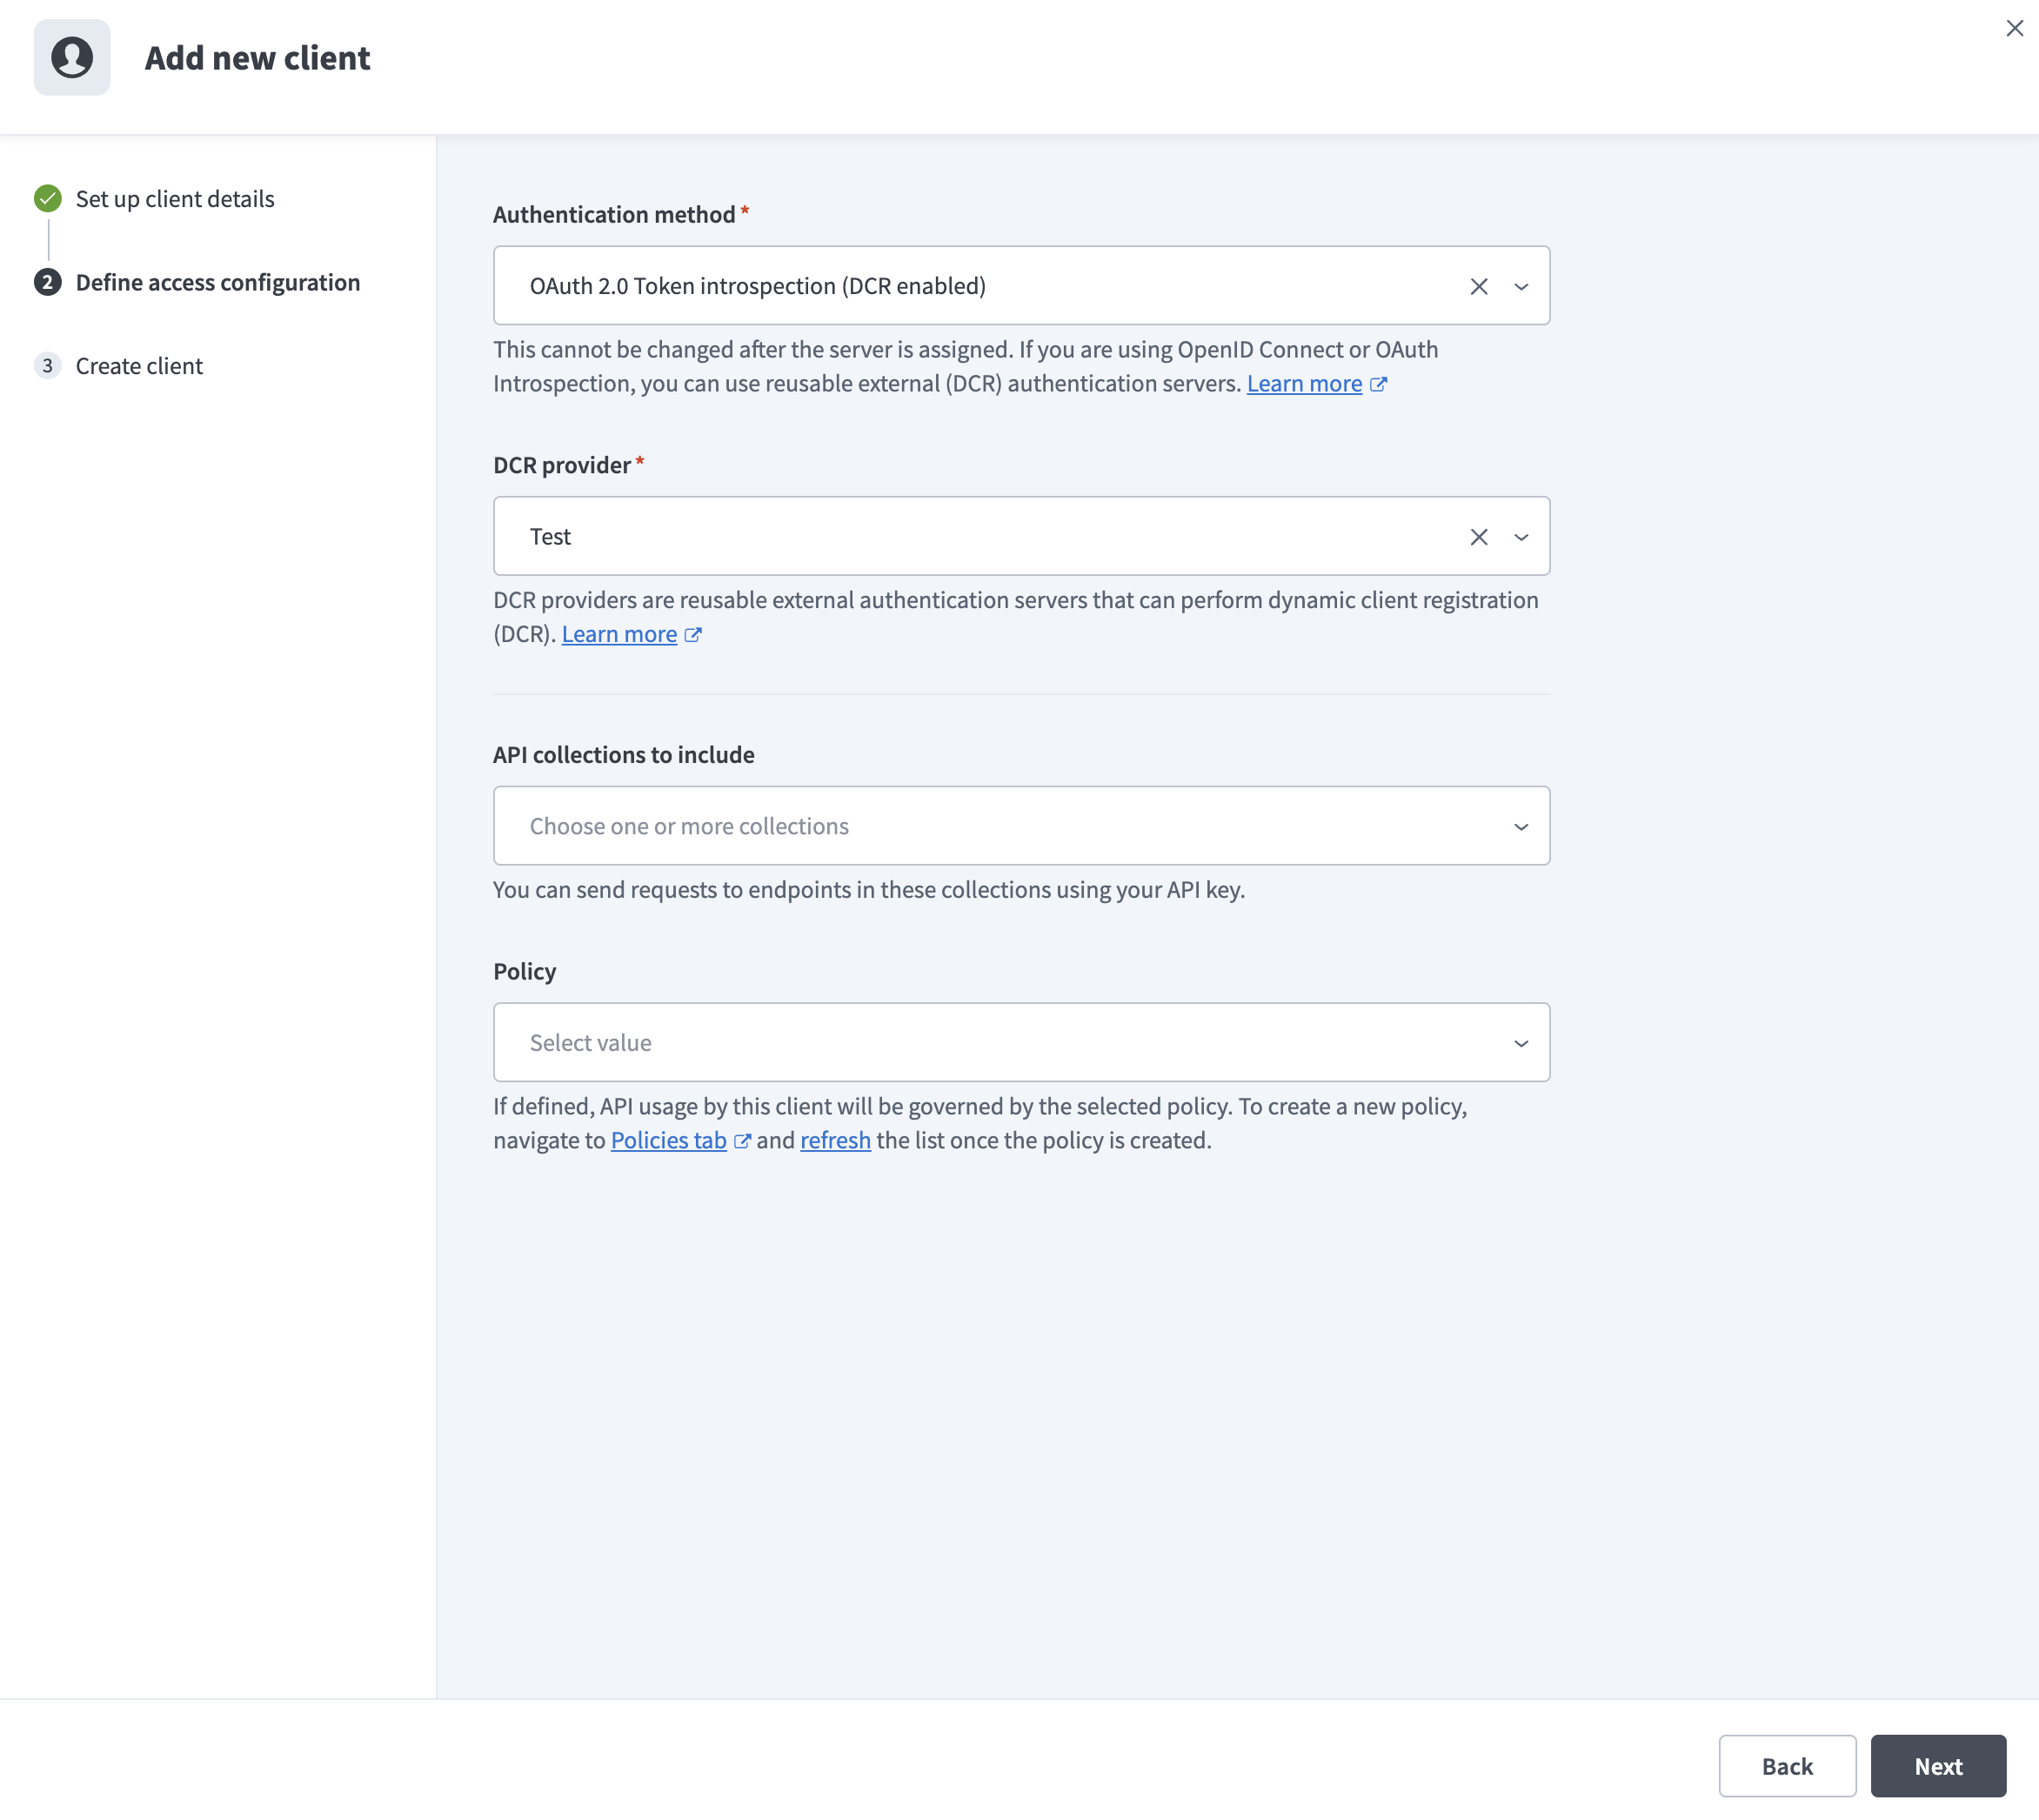
Use the Authentication method drop-down menu to select OAuth 2.0 Token introspection (DCR enabled).
 Select authentication method
Use the DCR provider drop-down menu to select the provider you plan to use for this client. The drop-down lists all DCR providers you configured that use the OAuth 2.0 Token Introspection authentication method.
Select No provider (Manual setup) to configure Token Introspection manually without a DCR provider. This requires you to configure the HTTP connection and introspection endpoint individually. Refer to OAuth 2.0 Token Introspection authentication for more information.
Use the API collections to include drop-down menu to select one or more API collections. This defines the APIs your client can access and invoke in the portal. You can also create a client without collections to allow discovery before you grant API access.
Optional. Assign a Policy to control your client's API usage. Policies define rules such as rate limits or usage quotas.
Click Next to create the client.
After you complete the configuration, Workato creates the API client. The client appears on the Clients page with its authentication method and DCR provider details.
Last updated: