Confluence
Confluence provides a comprehensive collaboration environment designed to enhance team interaction and knowledge exchange. With Confluence, you can create, share, and collaborate on projects all in one place.
API version
The Confluence connector uses the Confluence Cloud REST API. Refer to the Confluence REST API for more information.
Connection setup
The Confluence connector supports the following authentication types:
CLOUD EDITION REQUIRED
Confluence Data Center edition doesn't support Confluence v2 APIs. You must use a cloud connection for the Confluence MCP server and the following actions:
- Create page
- Create task
- Search labels
- Search spaces
- Get ancestors for page
- Get attachments for page
- Get children for page
- Get page by ID
- Update page
Use a Custom action if you need a feature the Data Center edition doesn't support.
Basic authentication
Use basic authentication with your Confluence username and password.
Complete the following steps to set up a basic authentication connection to Confluence in Workato:
Click Create > Connection.
Search for Confluence and select it as your app.
Enter a name for your connection in the Connection name field.
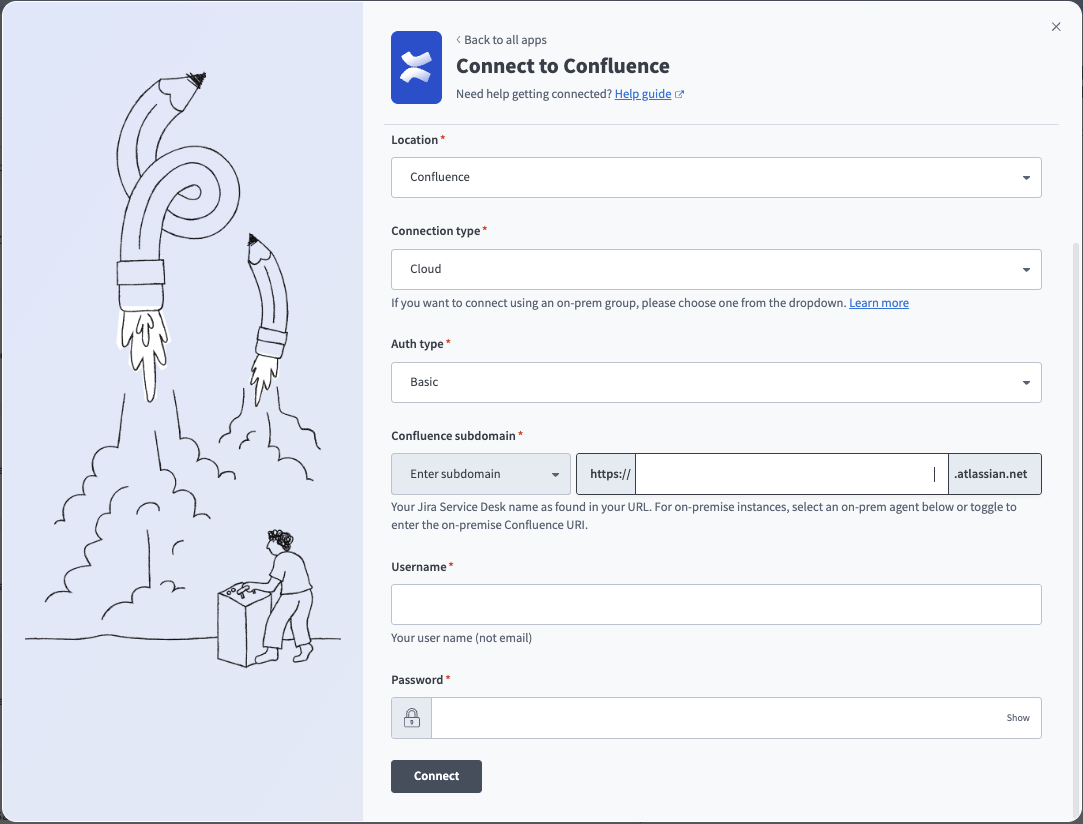 Basic connection
Use the Location drop-down menu to select the project where you plan to store the connection.
Use the Connection type drop-down menu to select Cloud for Confluence cloud instances or the corresponding option for on-prem connections. Refer to Connections using an on-prem agent for more information.
Use the Auth type drop-down menu to select Basic.
Enter your subdomain for cloud instances in the Confluence subdomain field. This is typically found in the Confluence URL. For example, your subdomain is acme if your URL is https://acme.atlassian.net.
Optionally, select Enter on-prem URI from the drop-down menu and enter your Confluence URI in the Confluence domain field. This is the root URI of your on-prem Confluence host. For example, https://confluence.intranet.acme.com:7654. You might need to add Workato's IP address to the allowlist to connect. Refer to IP allowlists for more information.
Enter your Confluence Username and Password.
Click Connect.
API token authentication
You must generate an API token to use API token authentication.
Confluence setup for API token authentication
Complete the following steps to generate an API token in Confluence:
Go to the Atlassian API Tokens page.
Click Create API token.
Enter a Name and select an Expires on date.
Click Create.
Copy and save the API token for use in Workato.
Connect to Confluence with API token authentication
Complete the following steps to set up an API token connection to Confluence in Workato:
Click Create > Connection.
Search for Confluence and select it as your app.
Enter a name for your connection in the Connection name field.
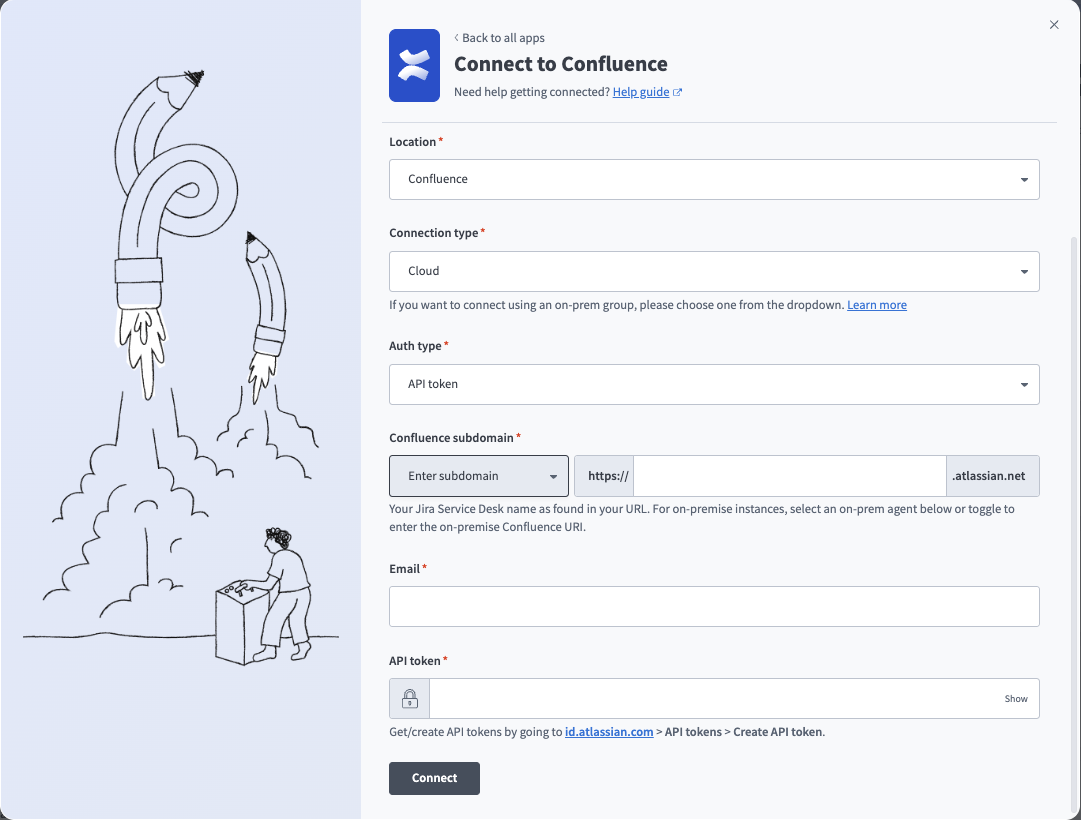 API token connection
Use the Location drop-down menu to select the project where you plan to store the connection.
Use the Connection type drop-down menu to select Cloud for Confluence cloud instances or the corresponding option for on-prem connections. Refer to Connections using an on-prem agent for more information.
Use the Auth type drop-down menu to select API token.
Enter your subdomain for cloud instances in the Confluence subdomain field. This is typically found in the Confluence URL. For example, your subdomain is acme if your URL is https://acme.atlassian.net.
Optionally, select Enter on-prem URI from the drop-down menu and enter your Confluence URI in the Confluence domain field. This is the root URI of your on-prem Confluence host. For example, https://confluence.intranet.acme.com:7654. You might need to add Workato's IP address to the allowlist to connect. Refer to IP allowlists for more information.
Enter your Email and API token.
Click Connect.
OAuth 2.0 authentication
You must generate a client ID and secret to use OAuth 2.0 authentication.
Confluence setup for OAuth 2.0 authentication
Complete the following steps to generate a client ID and secret in Confluence:
Log in to the Atlassian Developer Console.
Click Create > OAuth 2.0 integration.
Enter a Name.
Agree to the terms.
Click Create.
Click Authorization and then click Add.
Enter https://www.workato.com/oauth/callback in the Callback URL field and then click Save changes.
Click Permissions.
Click Add for the Confluence API.
Click Configure.
Click Edit Scopes under Classic scopes.
Select the following scopes:
manage:confluence-configurationread:confluence-groupsread:confluence-content.allread:confluence-content.permissionread:confluence-content.summaryread:confluence-propsread:confluence-space.summaryread:confluence-userread:page:confluencereadonly:content.attachment:confluencesearch:confluencewrite:confluence-contentwrite:confluence-filewrite:confluence-groupswrite:confluence-space
Click Save.
Select Settings.
Copy and save the Client ID and Secret for use in Workato.
Connect to Confluence with OAuth 2.0 authentication
Complete the following steps to set up an OAuth 2.0 connection to Confluence in Workato:
Click Create > Connection.
Search for Confluence and select it as your app.
Enter a name for your connection in the Connection name field.
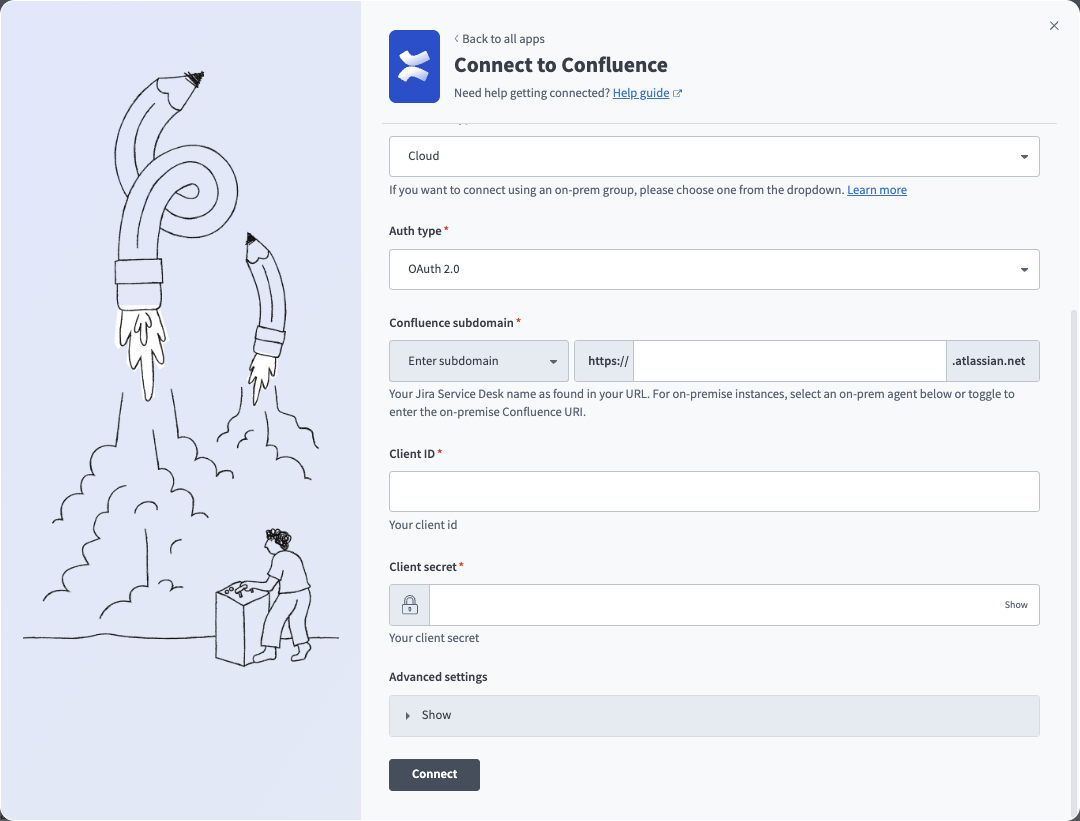 OAuth connection
Use the Location drop-down menu to select the project where you plan to store the connection.
Use the Connection type drop-down menu to select Cloud for Confluence cloud instances or the corresponding option for on-prem connections. Refer to Connections using an on-prem agent for more information.
Use the Auth type drop-down menu to select OAuth 2.0.
Enter your subdomain for cloud instances in the Confluence subdomain field. This is typically found in the Confluence URL. For example, your subdomain is acme if your URL is https://acme.atlassian.net.
Optionally, select Enter on-prem URI from the drop-down menu and enter your Confluence URI in the Confluence domain field. This is the root URI of your on-prem Confluence host. For example, https://confluence.intranet.acme.com:7654. You might need to add Workato's IP address to the allowlist to connect. Refer to IP allowlists for more information.
Enter the Client ID and Client secret.
Optionally, expand Advanced settings and select Classic scopes or Granular scopes.
Click Connect.
Choose a site from the Use app on drop-down menu. This is the Atlassian account your app accesses.
Click Accept.
Last updated: