Create a custom OAuth profile for Salesforce
This guide explains how to create a custom OAuth profile for Salesforce. The process includes the following steps:
- Create a custom OAuth profile in Workato
- Set up an external client app in Salesforce
- Retrieve the client ID and secret
- Complete setup in Workato
SALESFORCE APPEXCHANGE SECURITY REQUIREMENTS
Starting May 11, 2026, Salesforce requires AppExchange Partners to enable additional security settings on Connected Apps and External Client Apps. These settings include: PKCE extension, refresh token rotation (RTR), token TTL quotas, and IP allowlisting for token exchange.
No changes to your Workato configuration are required, but we recommend testing with a new custom OAuth profile in a non-production environment. Contact Workato Support if you experience any issues. If your app requires an IP allowlist in Salesforce, refer to Workato's IP addresses for the values to add.
Salesforce may grant deadline extensions for these requirements on a case-by-case basis. Contact your Salesforce Partner Account Manager for details specific to your account and timeline.
Create a custom OAuth profile in Workato
Complete the following steps to create a new custom OAuth profile:
Sign in to Workato.
Go to Tools > Custom OAuth profiles.
Click + New custom profile.
Select Salesforce from the Application drop-down menu.
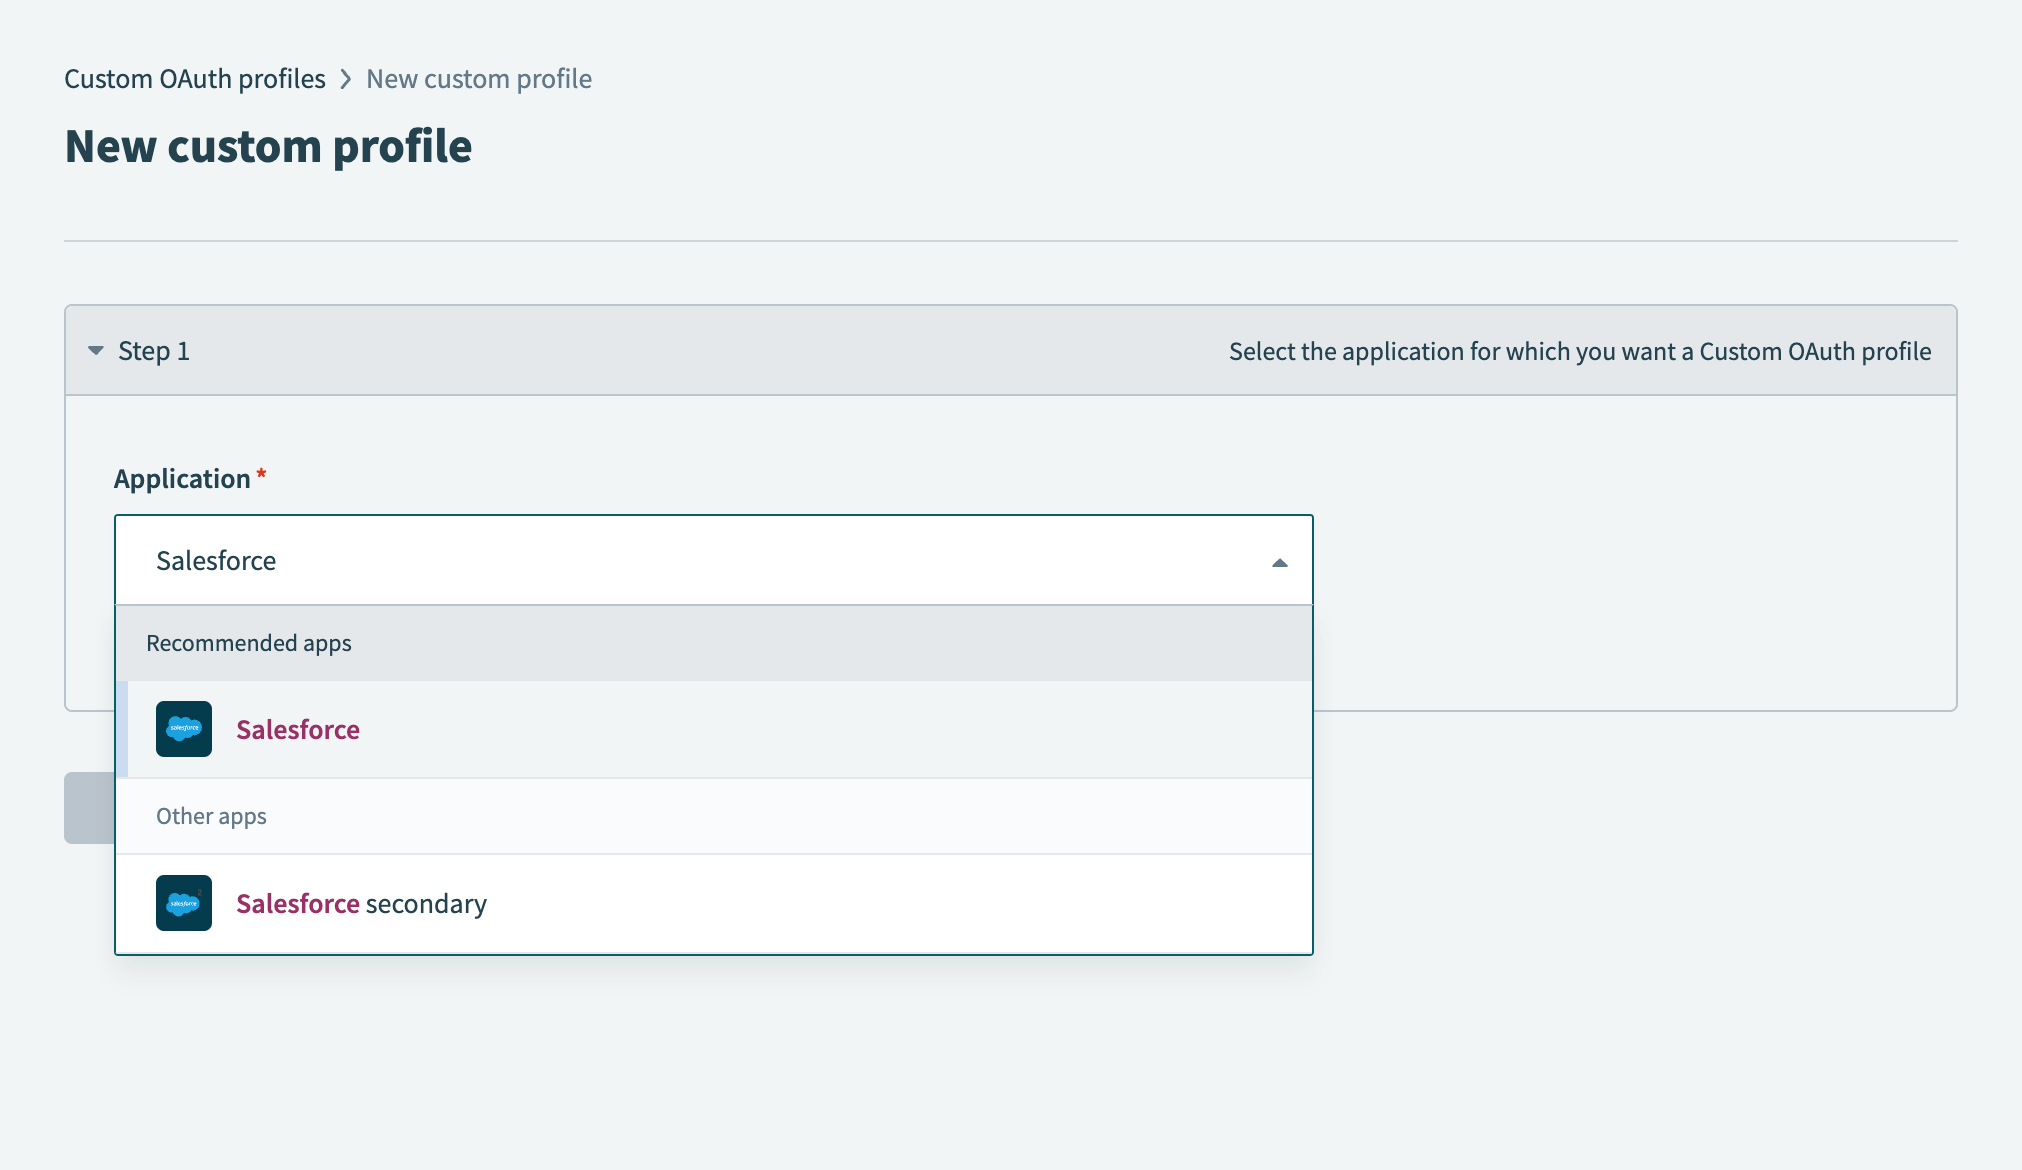 Select Salesforce
Enter a name for your custom OAuth profile in the Name field.
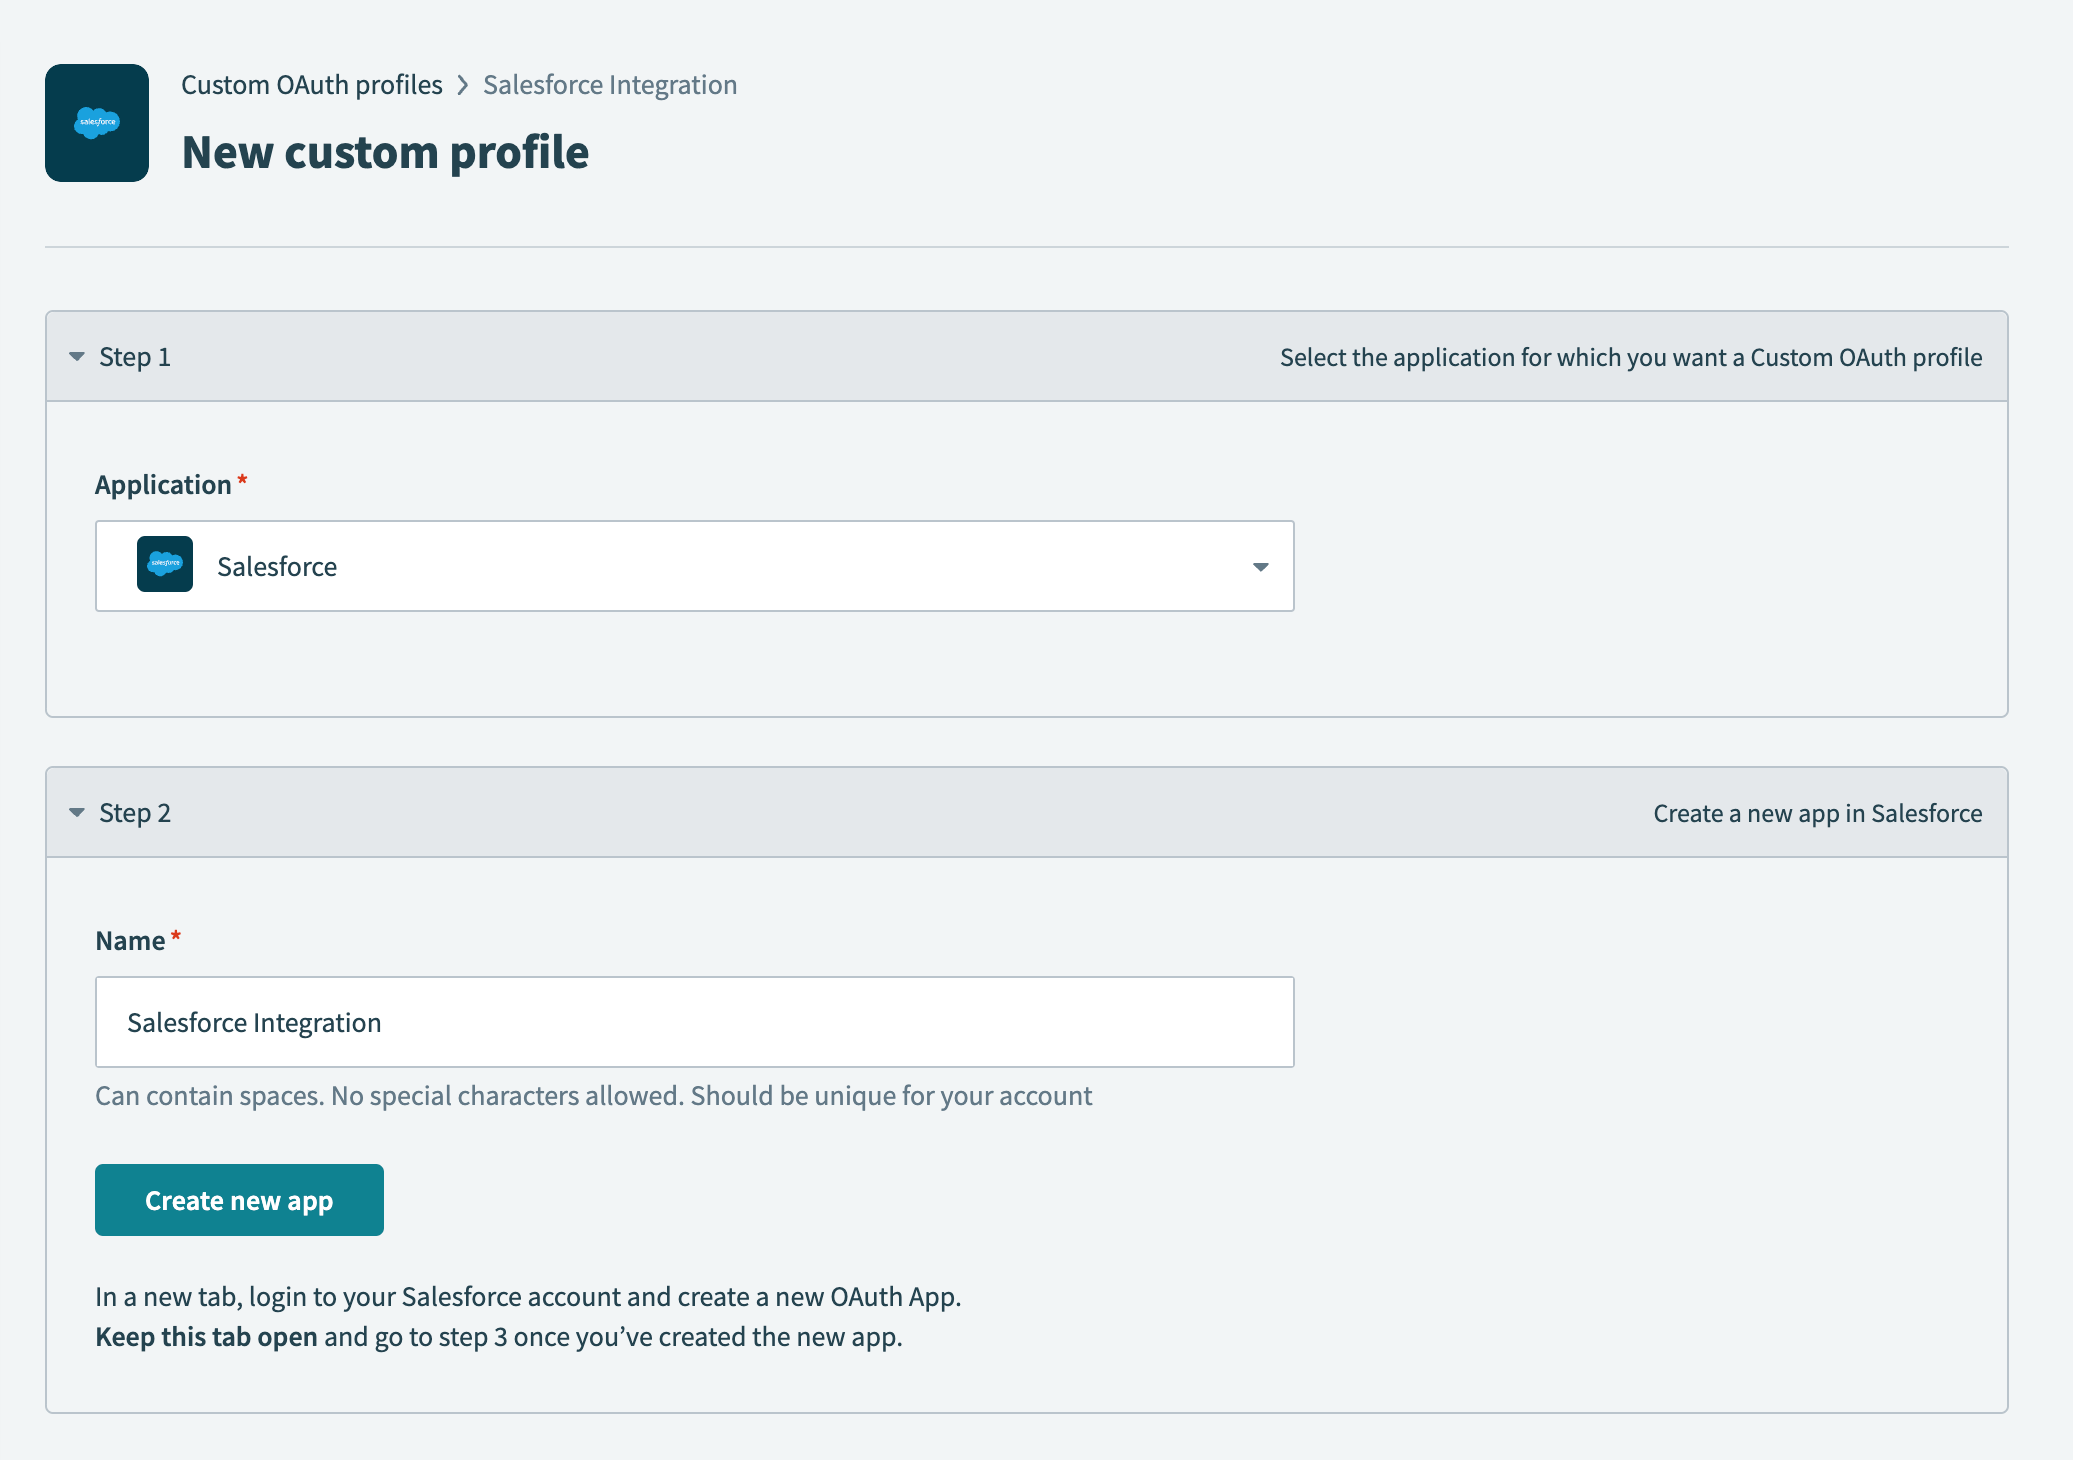 Name your custom OAuth profile
Click Create new app.
Create an external client app in Salesforce
Complete the following steps to create an external client app in Salesforce. Refer to Salesforce's Create an External Client App documentation for more information.
Open a new tab and sign in to your Salesforce account.
Go to Setup > Apps > External Client Apps > External Client App Manager.
Click New External Client App.
Enter a name in the External Client App Name field, such as Workato.
Enter a name in the API Name field that meets the following requirements:
- Contains only underscores and alphanumeric characters.
- Is unique.
- Starts with a letter.
- Doesn't include spaces.
- Doesn't end with an underscore.
- Doesn't contain consecutive underscores.
Enter the contact email address for your app in the Contact Email field.
Use the Distribution State drop-down menu to select either Local or Packaged.
Expand the API (Enable OAuth Settings) section and select the Enable OAuth checkbox.
Enter the following URL in the Callback URL field:
https://www.workato.com/oauth/callbackSelect your OAuth scopes in the OAuth Scopes field, then click the Move selection to Selected OAuth Scopes arrow to apply them.
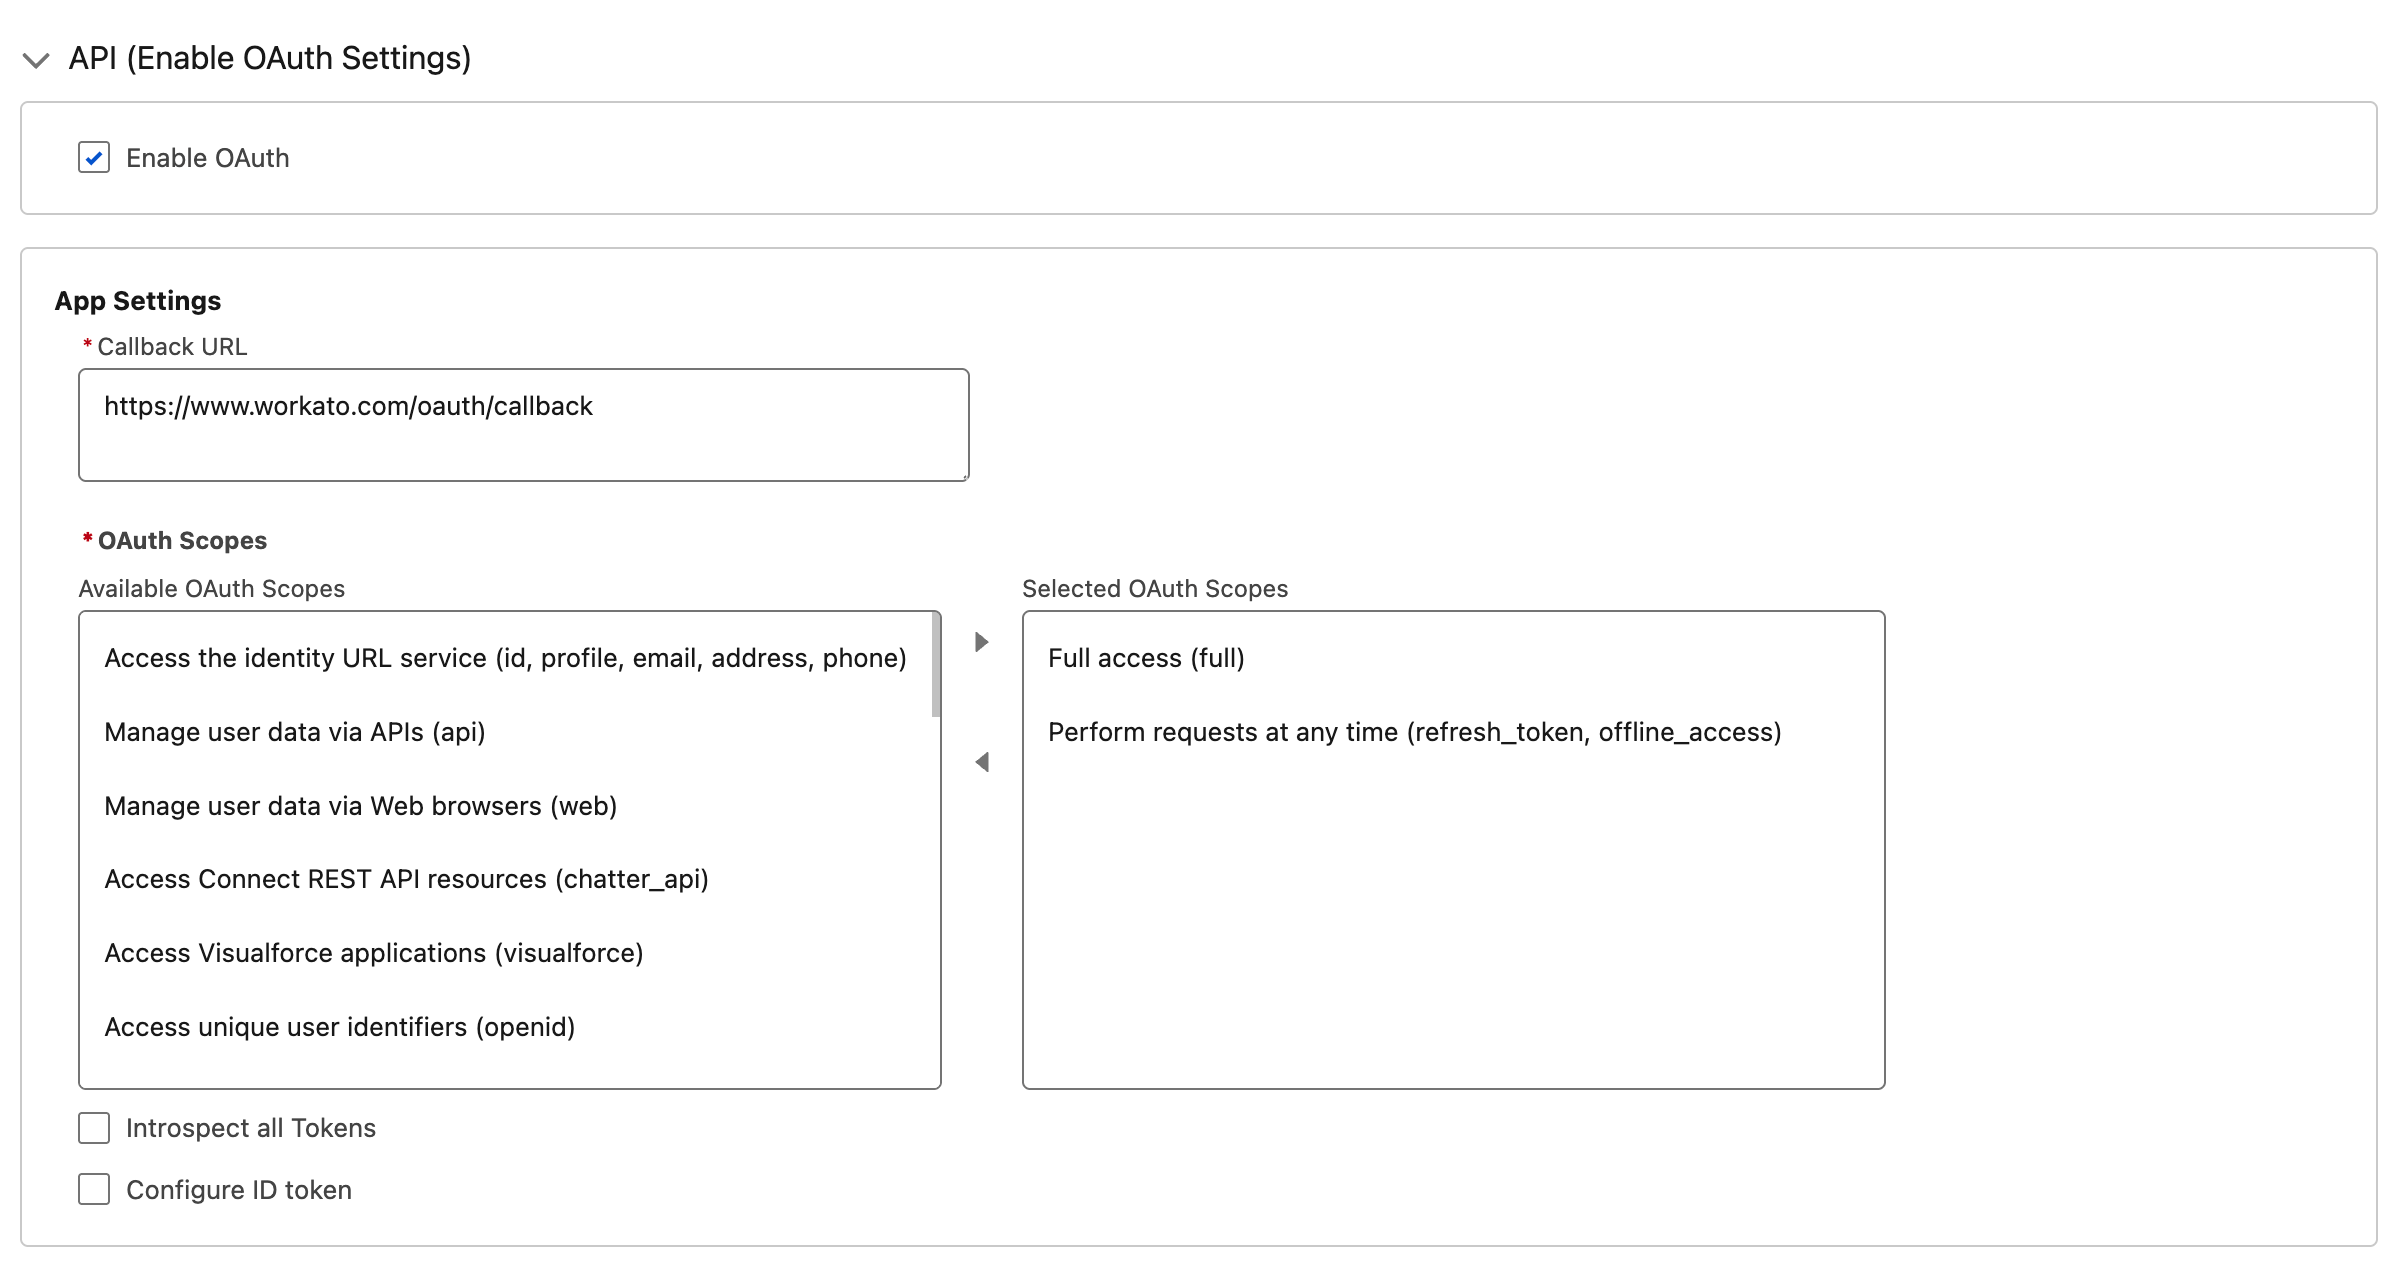 Configure scopes for your external client app
SCOPES
Workato requests Full access (full) by default. You can limit the requested scopes in the OAuth 2.0 connection's advanced settings. Every requested scope must also be added to Selected OAuth Scopes, because Salesforce only grants access to what's added there. Refer to Minimum and default scopes for the scopes Workato requests in addition to the scopes you configure.
Full access doesn't include Perform requests at any time (refresh_token, offline_access). Add this scope to Selected OAuth Scopes too, or Workato's refresh calls fail silently and the connection disconnects when the access token expires.
Configure the following settings:
- In the Flow Enablement section, select only the Enable Authorization Code and Credentials Flow checkbox.
- In the Security section, configure the following:
- Select the Require secret for Web Server Flow and Require secret for Refresh Token Flow checkboxes. These settings are required for the connection to work.
- Leave the Issue JSON Web Token (JWT)-based access tokens for named users checkbox unselected.
- The following settings are generally optional, but may be required depending on your AppExchange partnership status with Salesforce:
- Require Proof Key for Code Exchange (PKCE) extension for Supported Authorization Flows
- Enable Refresh Token Rotation
- Quota Idle Refresh Token Time-to-Live (TTL) to 30 Days. Test this setting in a non-production environment before enabling it broadly. This setting may cause connection instability in some configurations. If you experience issues after enabling it, disable it and contact Workato Support.
- Enforce Refresh Token IP Allowlist. If you enable this setting, refer to Workato's IP addresses for the values to add.
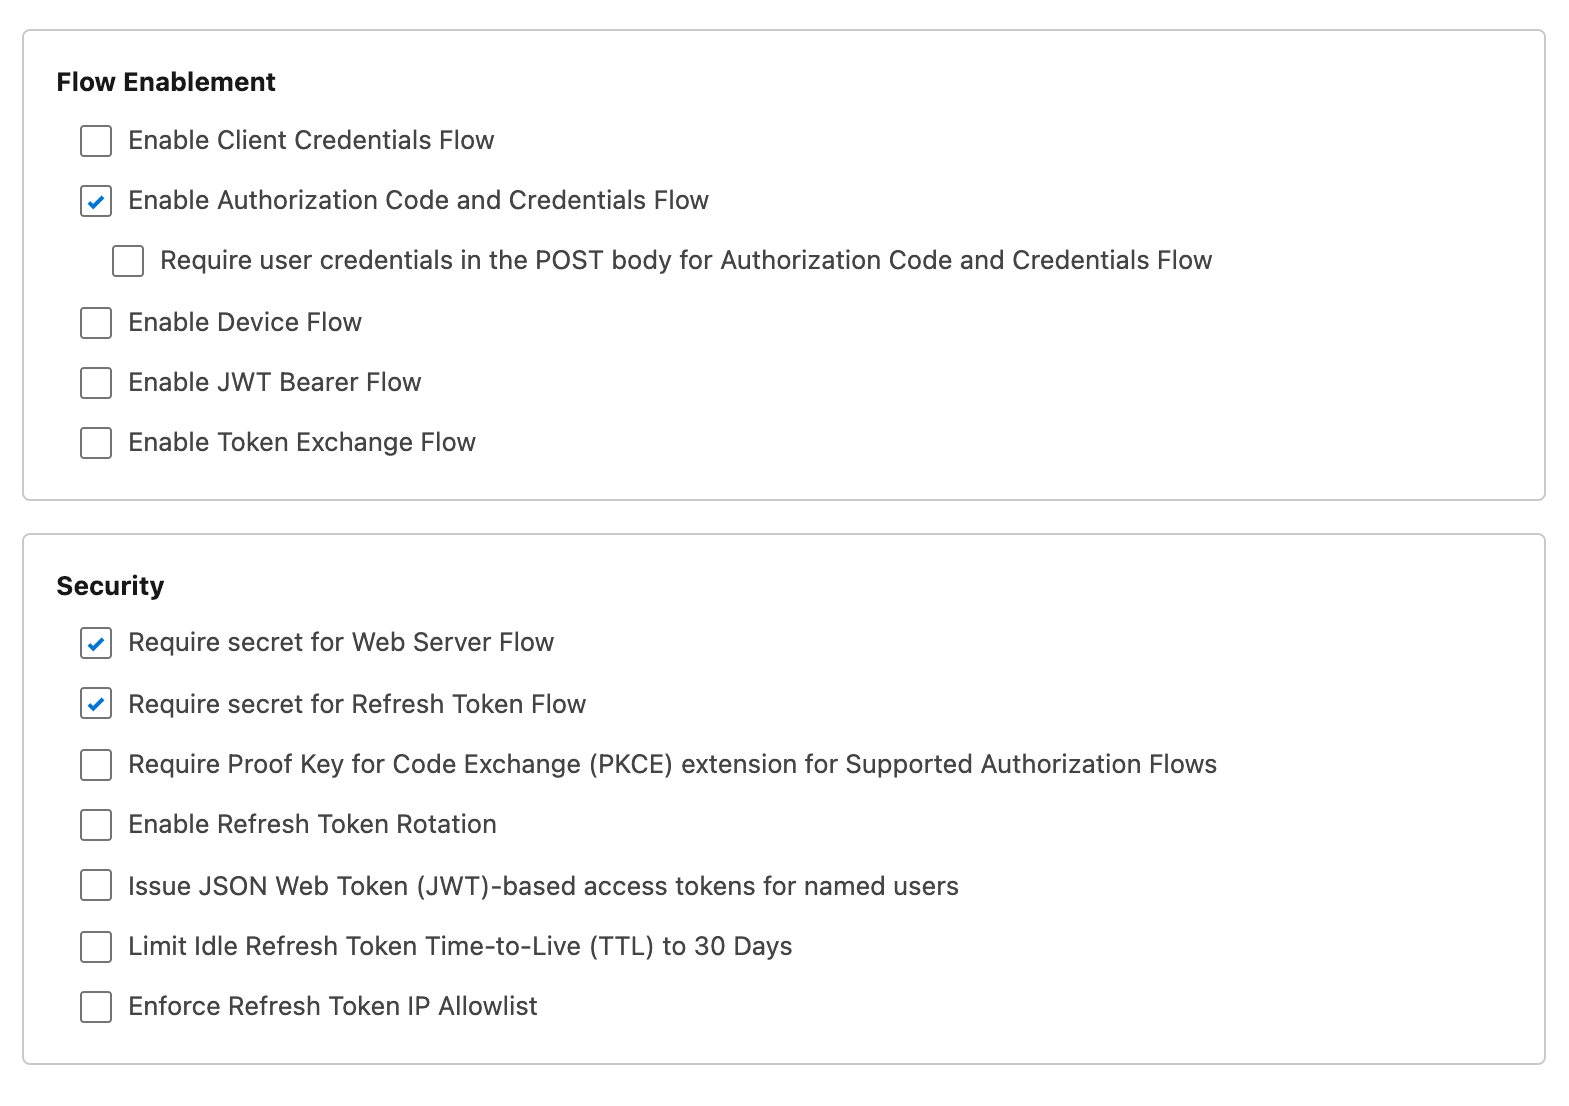 Configure the Flow Enablement and Security fields
Click Create to create the external client app.
Refer to Salesforce's Configure the External Client App OAuth Settings documentation for more information.
Retrieve the client ID and secret
Complete the following steps to retrieve the client ID and client secret for your app:
Click the Settings tab for your external client app.
Expand the OAuth Settings section.
Click Consumer Key and Secret.
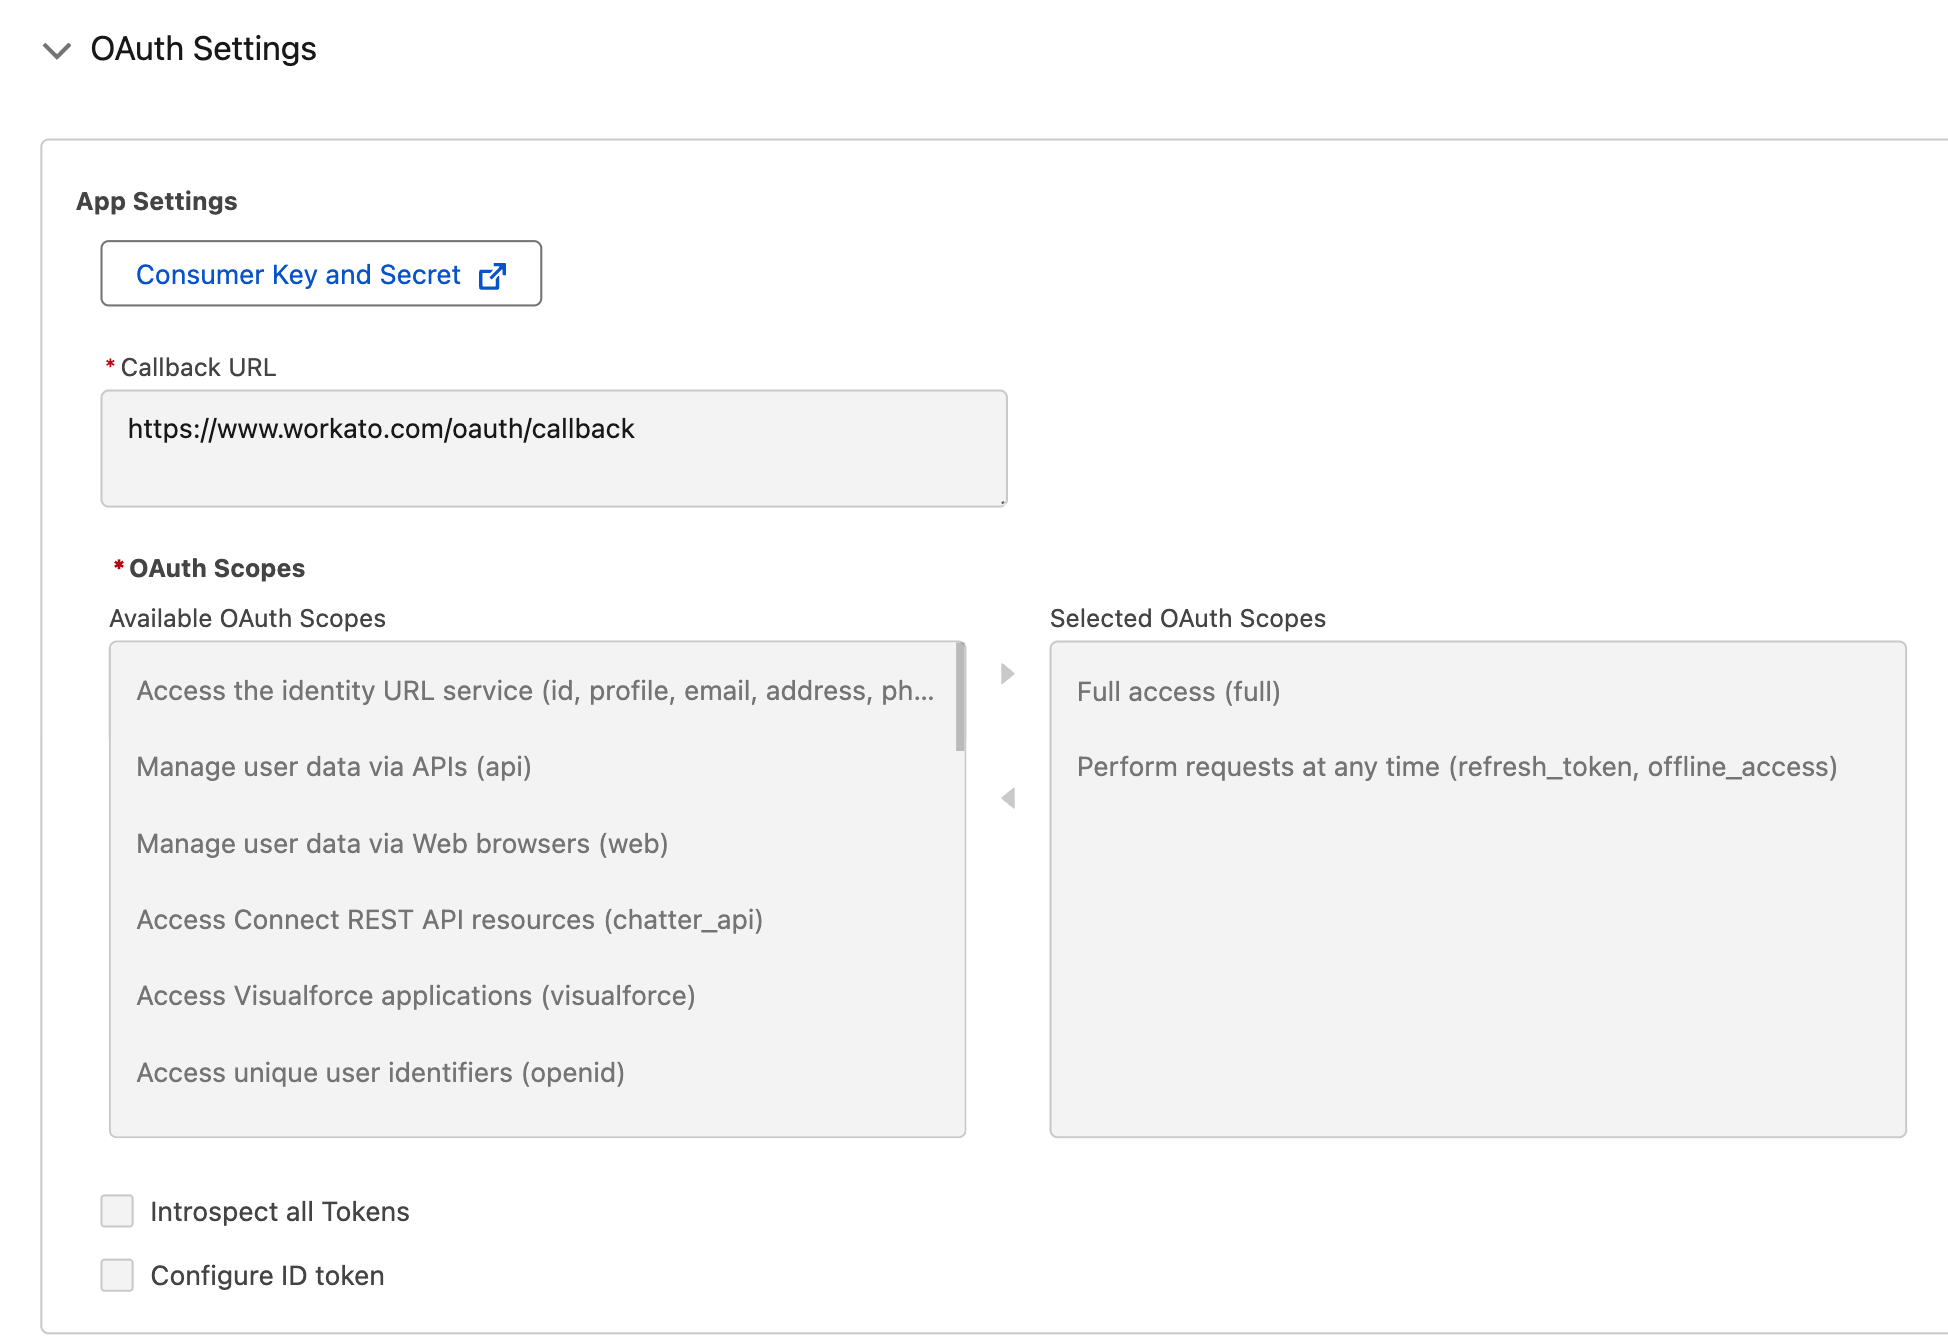 Click Consumer Key and Secret
Enter your credentials and provide the one-time password (OTP) if prompted.
Copy the Consumer Key and Consumer Secret. These values are required to configure Workato to communicate with your app.
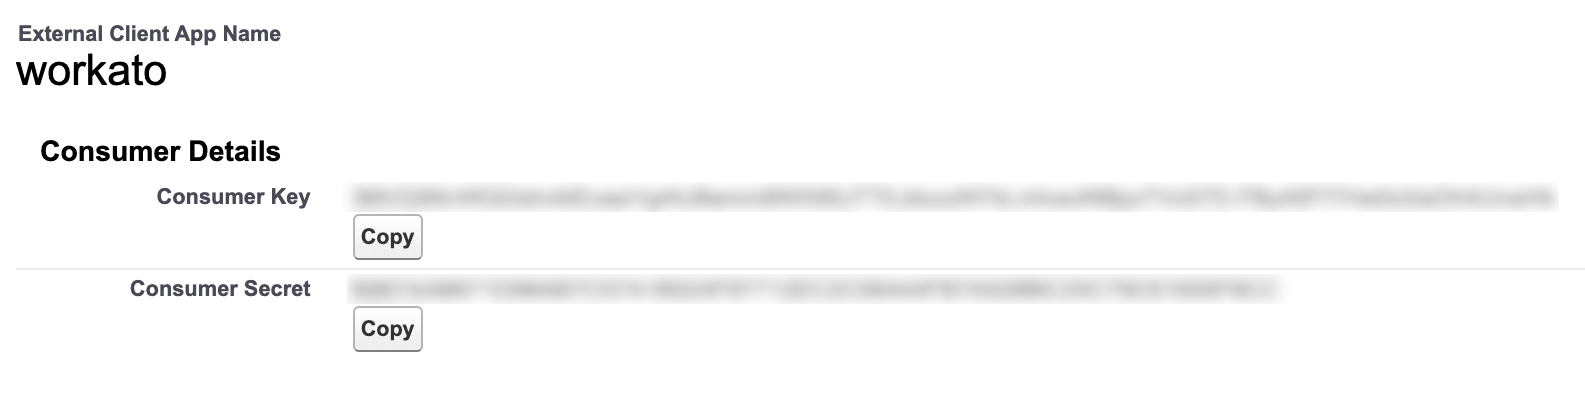 Retrieve the consumer key and consumer secret
Complete setup in Workato
Complete the following steps to finish setting up your custom OAuth profile:
Return to the Workato tab.
Paste the consumer key from Salesforce into the Client ID field.
Paste the consumer secret from Salesforce into the Client secret field.
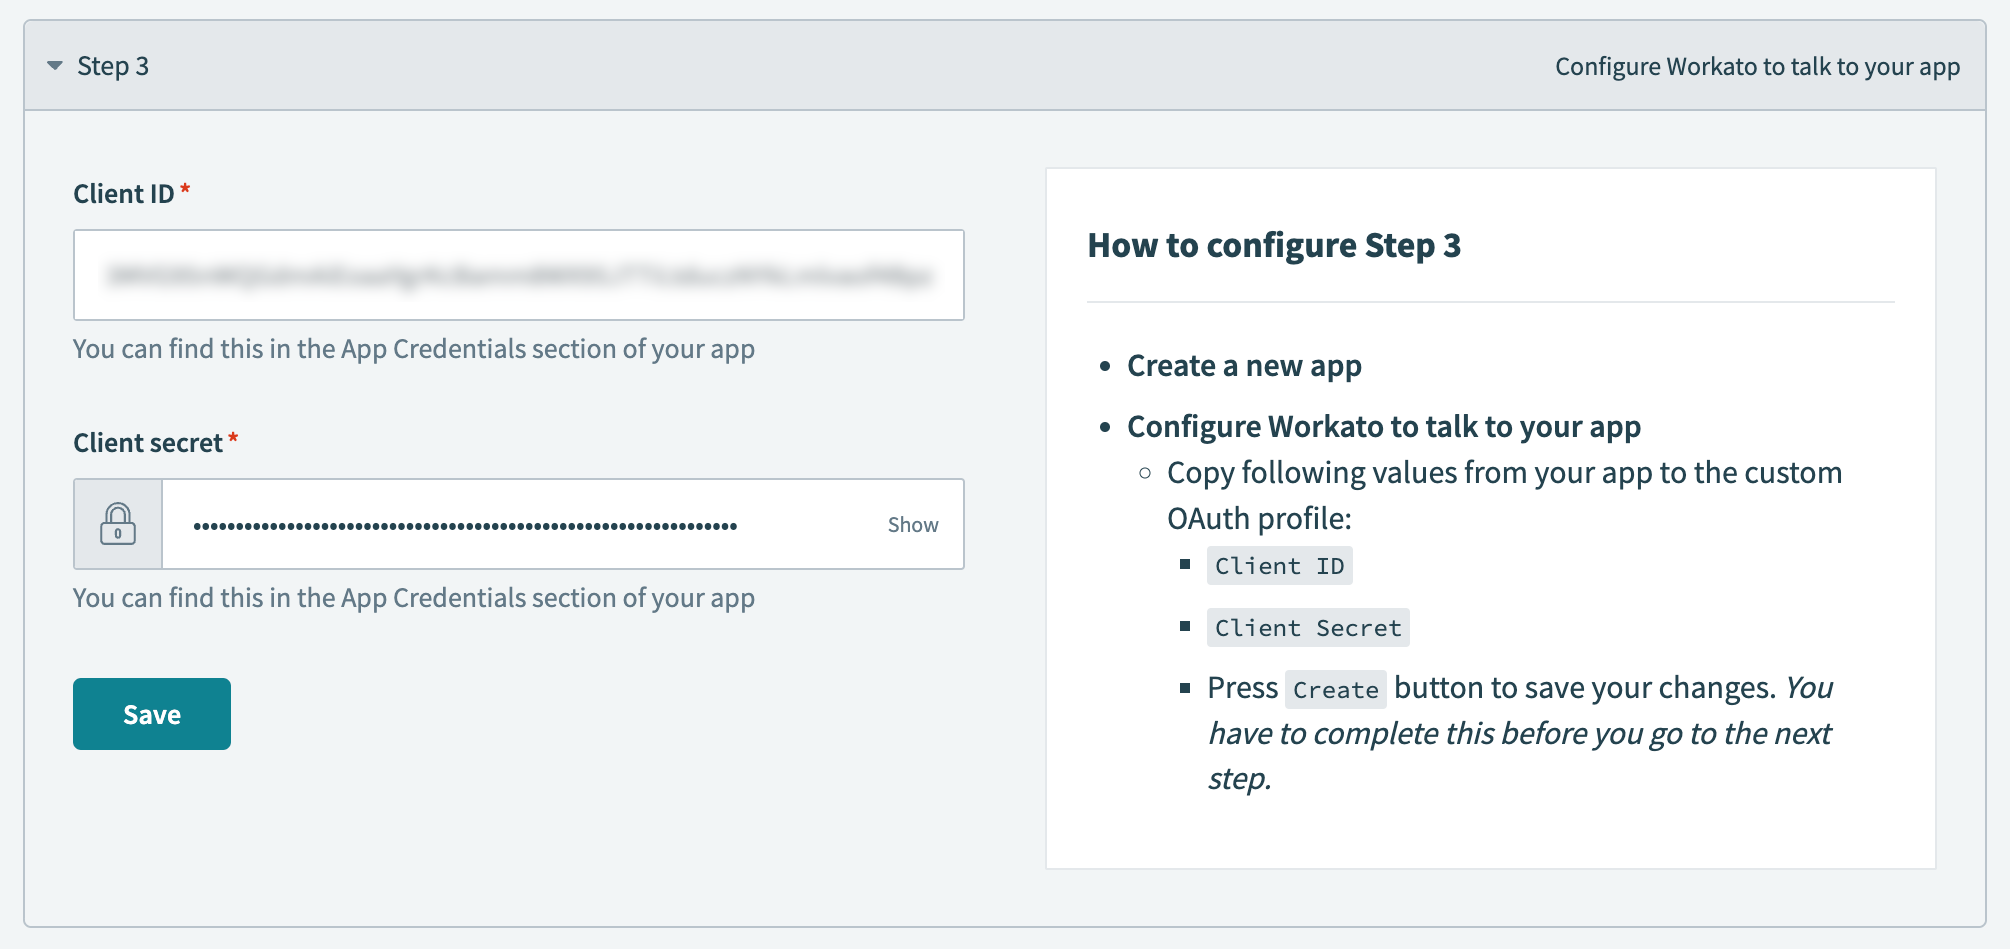 Fill in the client ID and client secret fields
Click Save, then click Done.
You can now use this custom OAuth profile when creating a new Salesforce connection.
Last updated: