Configure PostgreSQL as your data pipeline destination
Set up PostgreSQL as a destination for your data pipeline. This connection enables Workato to replicate data from source applications into your PostgreSQL database using the source schema.
Features supported
The following features are supported when using PostgreSQL as a pipeline destination:
- Automatic creation of destination tables based on source schema
- Support for full and incremental data loads
- Field-level data replication without explicit field mapping
- Schema drift handling and update operations
- On-prem connectivity through an on-prem group. Cloud connections aren't supported yet for PostgreSQL as a data pipeline destination.
Prerequisites
Ensure you have the following requirements to connect PostgreSQL as a data pipeline destination:
- A PostgreSQL instance reachable from an on-prem agent host
- An active on-prem agent. Refer to the on-prem agent documentation for setup steps.
- A user with privileges to create tables and write data
- An existing schema in the target database where destination tables are created
Supported connection types
PostgreSQL pipelines currently support connections through an on-prem group only.
CLOUD CONNECTIONS NOT SUPPORTED
Cloud connections aren't supported as a data pipeline destination for PostgreSQL yet. You must select an on-prem group in the Connection type field.
Connect to PostgreSQL
Complete the following steps to connect to PostgreSQL:
Connect to PostgreSQL
Select Create > Connection or press C twice.
Search for and select PostgreSQL on the New connection page.
Enter a name for your connection in the Connection name field.
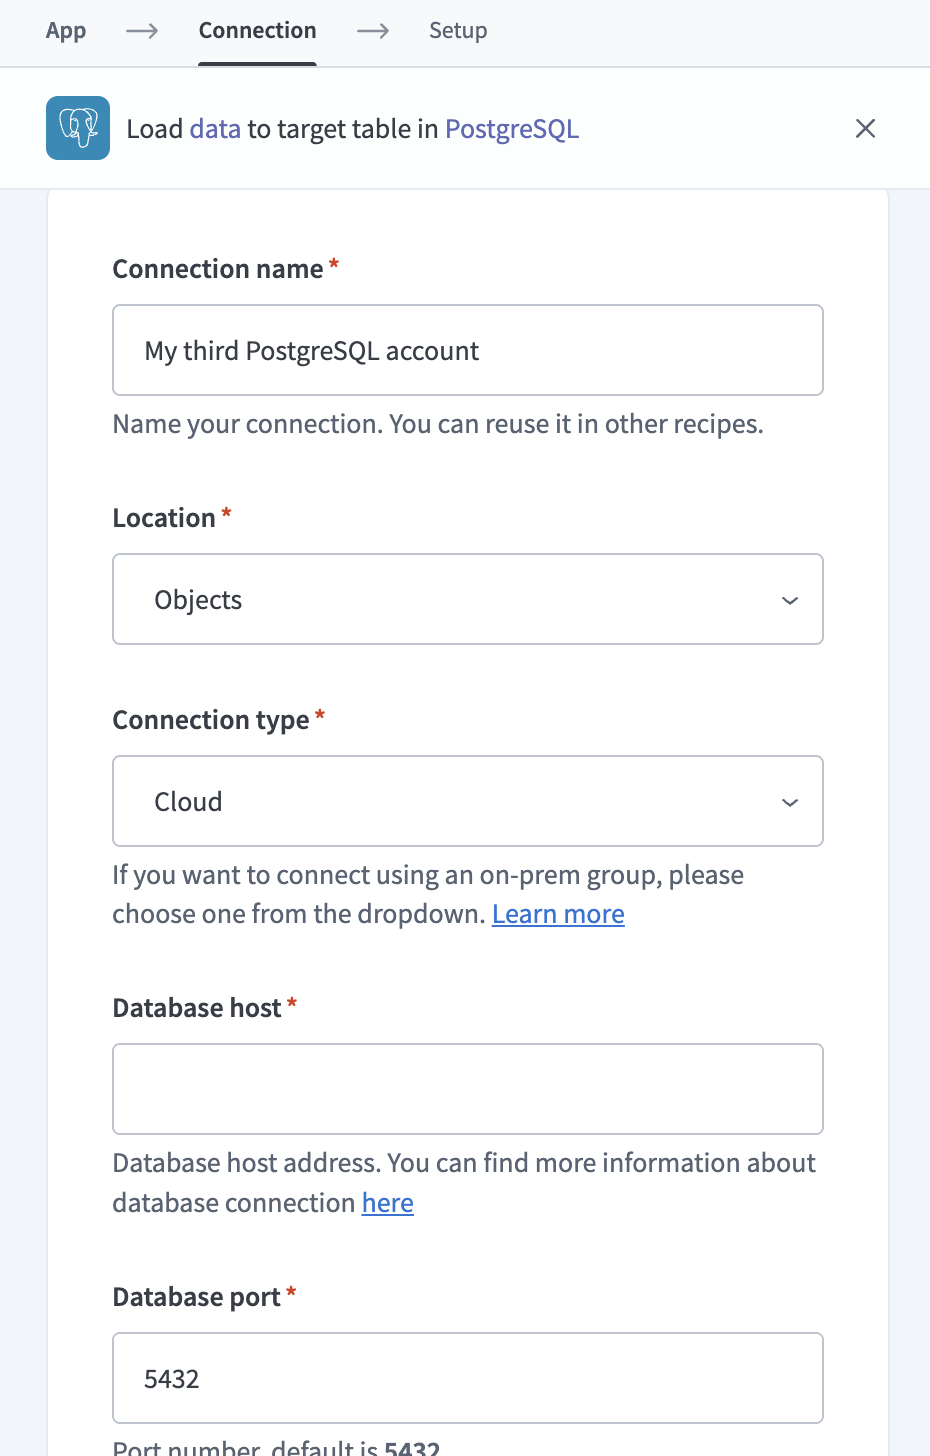 PostgreSQL connection setup
Use the Location drop-down menu to select the project where you plan to store the connection.
Select an on-prem group in the Connection type field. Don't select Cloud. Cloud connections aren't supported for PostgreSQL as a data pipeline destination yet. Refer to on-prem groups for more information.
Enter the hostname of your PostgreSQL instance in the Database host field.
Enter the port number in the Database port field. The default port is 5432.
Enter your PostgreSQL username in the User name field.
Optional. Enter your PostgreSQL password in the Password field.
Enter the name of the database you plan to sync in the Database name field.
Optional. Expand SSL settings to configure an encrypted connection to your PostgreSQL instance.
Optional. Enter the schema that contains the tables you plan to sync in the Schema field. Workato uses the public schema if you leave this field blank.
Select Connect to verify and save the connection.
Configure the destination action
Ensure the schema in PostgreSQL is newly created and empty before you start the pipeline. This prevents errors during the initial sync and allows the pipeline to create destination tables without conflicts.
Click the Load data to target table in destination app action. This action defines how the pipeline replicates data in the destination.
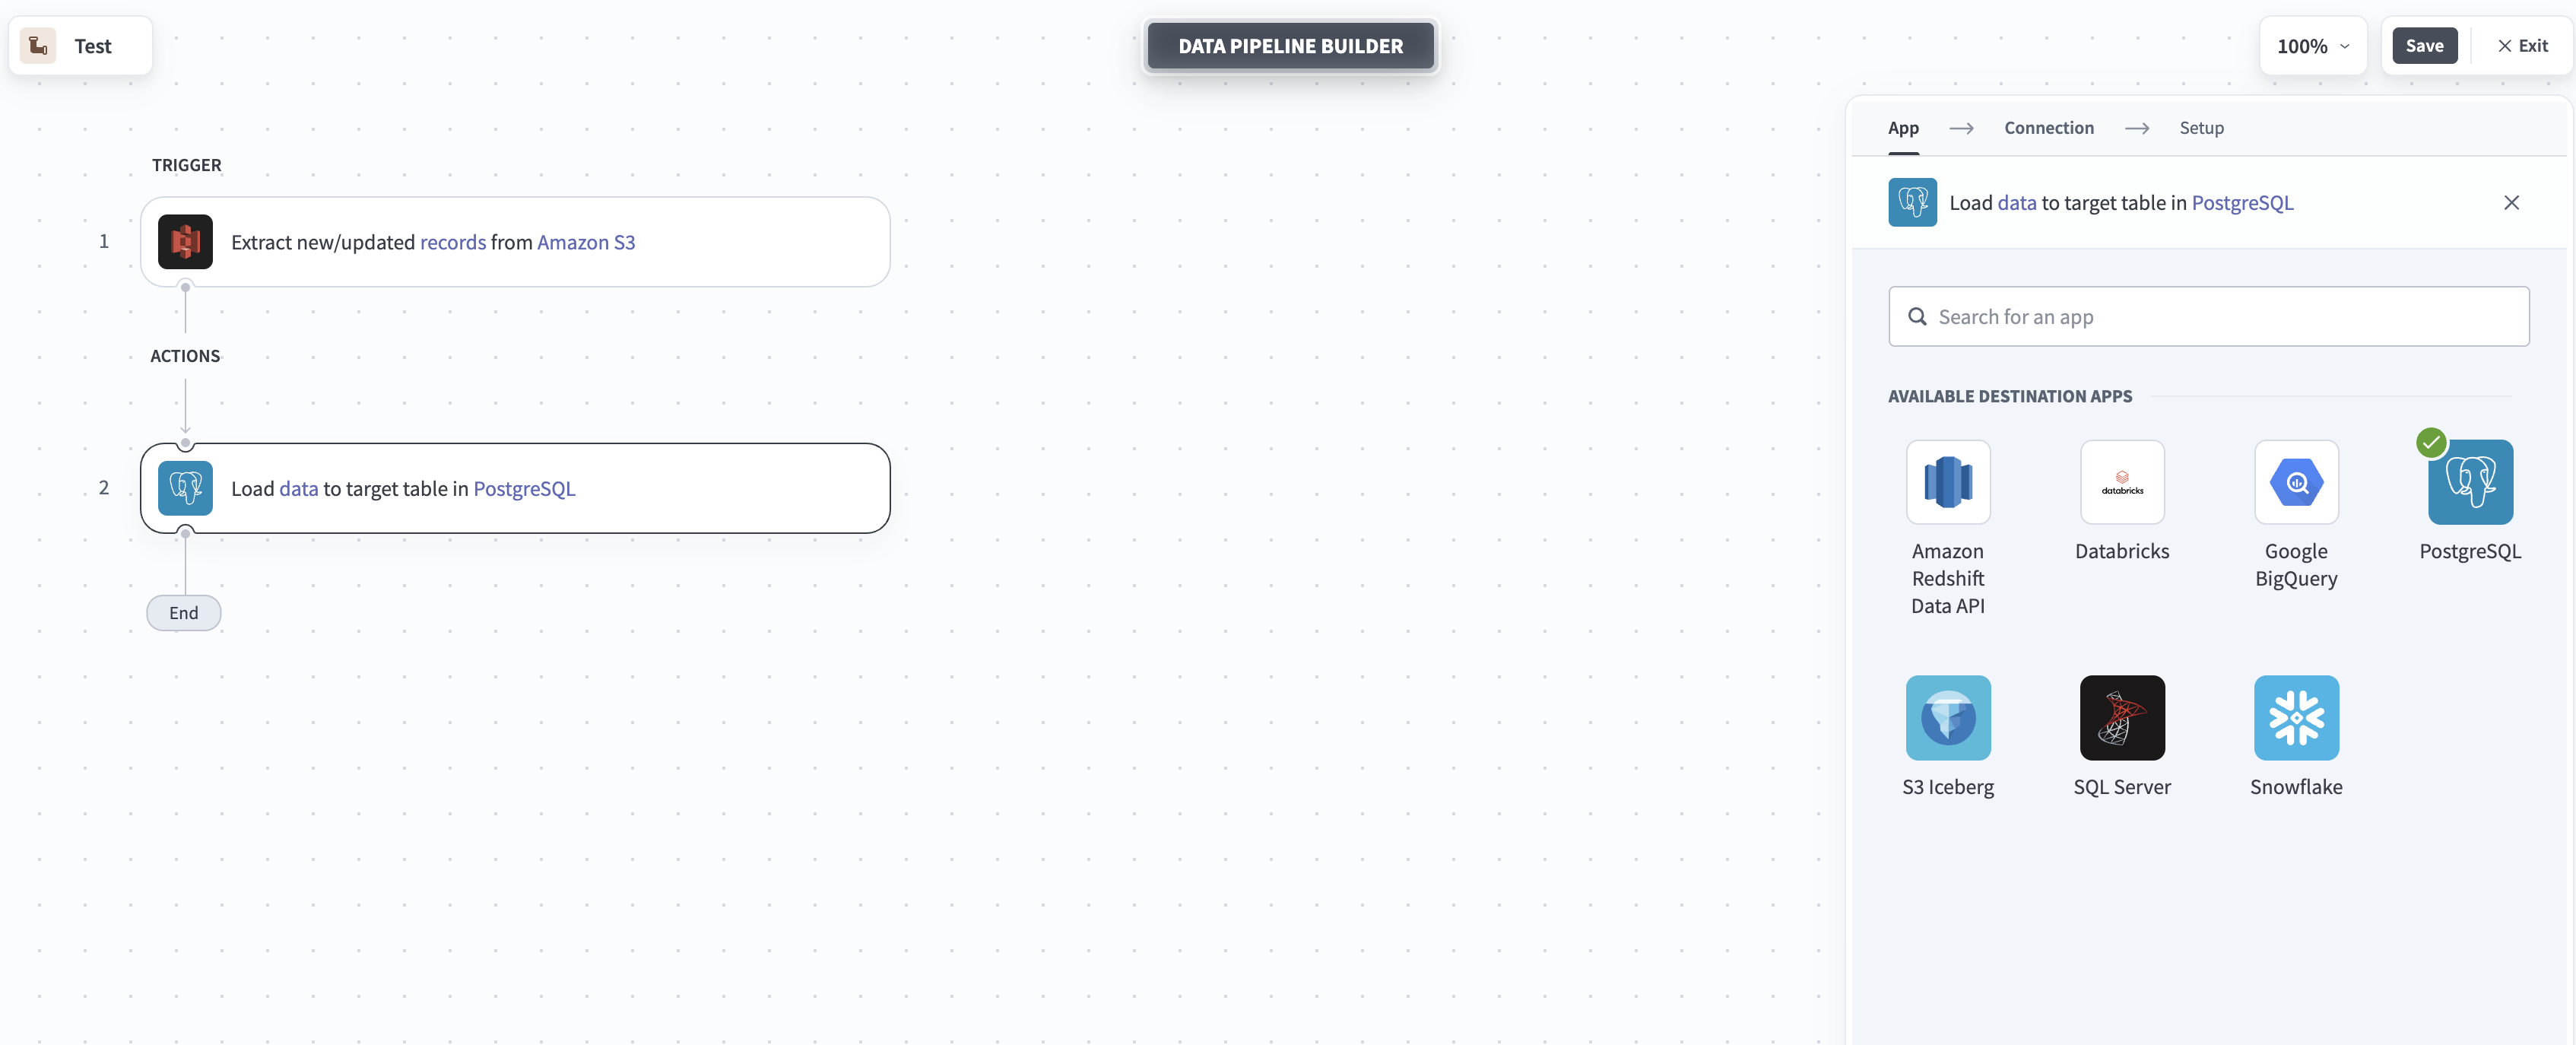 Configure the Load data to target table in destination app action
Select PostgreSQL from the list of available destination apps.
Choose the PostgreSQL connection you plan to use for this pipeline. Alternatively, click + New connection to create a new connection.
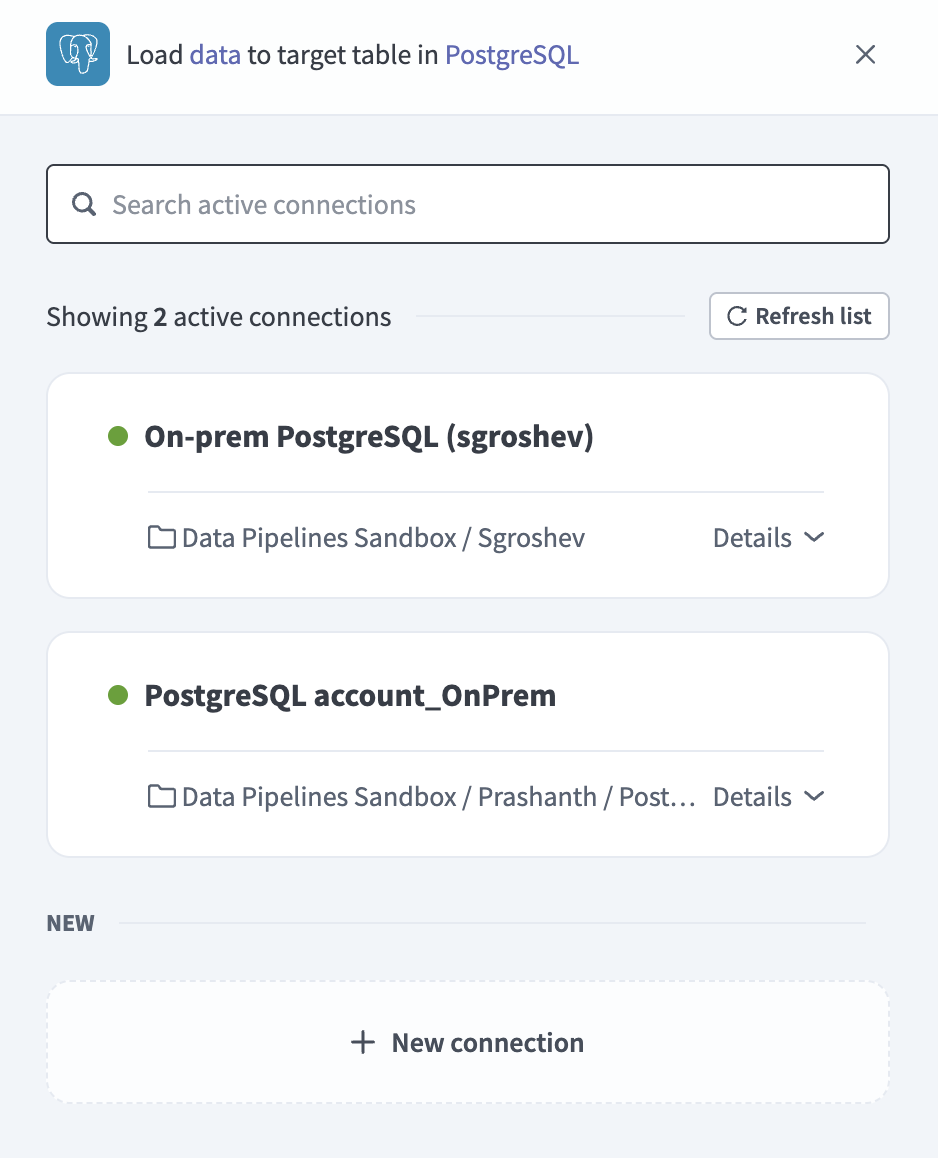 Choose a PostgreSQL connection
The Load data to target table in destination app action automatically replicates the object schema from the source to PostgreSQL. Explicit field mapping isn't required.
Workato pipelines create destination tables based on the source schema. The pipeline also creates a stage and temporary tables to support data replication and update operations, so the connection requires permissions to create these resources.
Enter a schema in the Schema field. Workato creates destination tables in this schema. Only existing schemas are supported. This field overrides the schema set on the connection.
Select Save to save the pipeline.
Last updated: