Connect your knowledge base to Confluence
This use case connects your Confluence account to your genie knowledge base. The knowledge base recipe scans for pages periodically and automatically syncs updates from Confluence to your knowledge base. This gives your genie contextualized information about your company’s policies, practices, and other relevant information.
What does this knowledge base recipe do?
This knowledge base recipe enables you to connect your knowledge base to your Confluence account and empower your genie with company-specific knowledge.
Create your knowledge base recipe
Complete the following steps to create a knowledge base recipe that scans for pages periodically and automatically syncs updates from Confluence to your knowledge base.
USE CASES ARE INTENDED AS EXAMPLES ONLY
Use cases are intended to serve as examples. Knowledge base recipe modifications, such as triggers or custom actions may require adjustments for your specific setup.
Sign in to Workato.
Select the project where you plan to create your knowledge base recipe.
Create a Confluence connection.
Create a Confluence connection
This step creates a connection between Workato and your Confluence account.
Click Create > Connection or press C twice.
Search for and select Confluence on the New connection page.
Provide a name for your connection in the Connection name field.
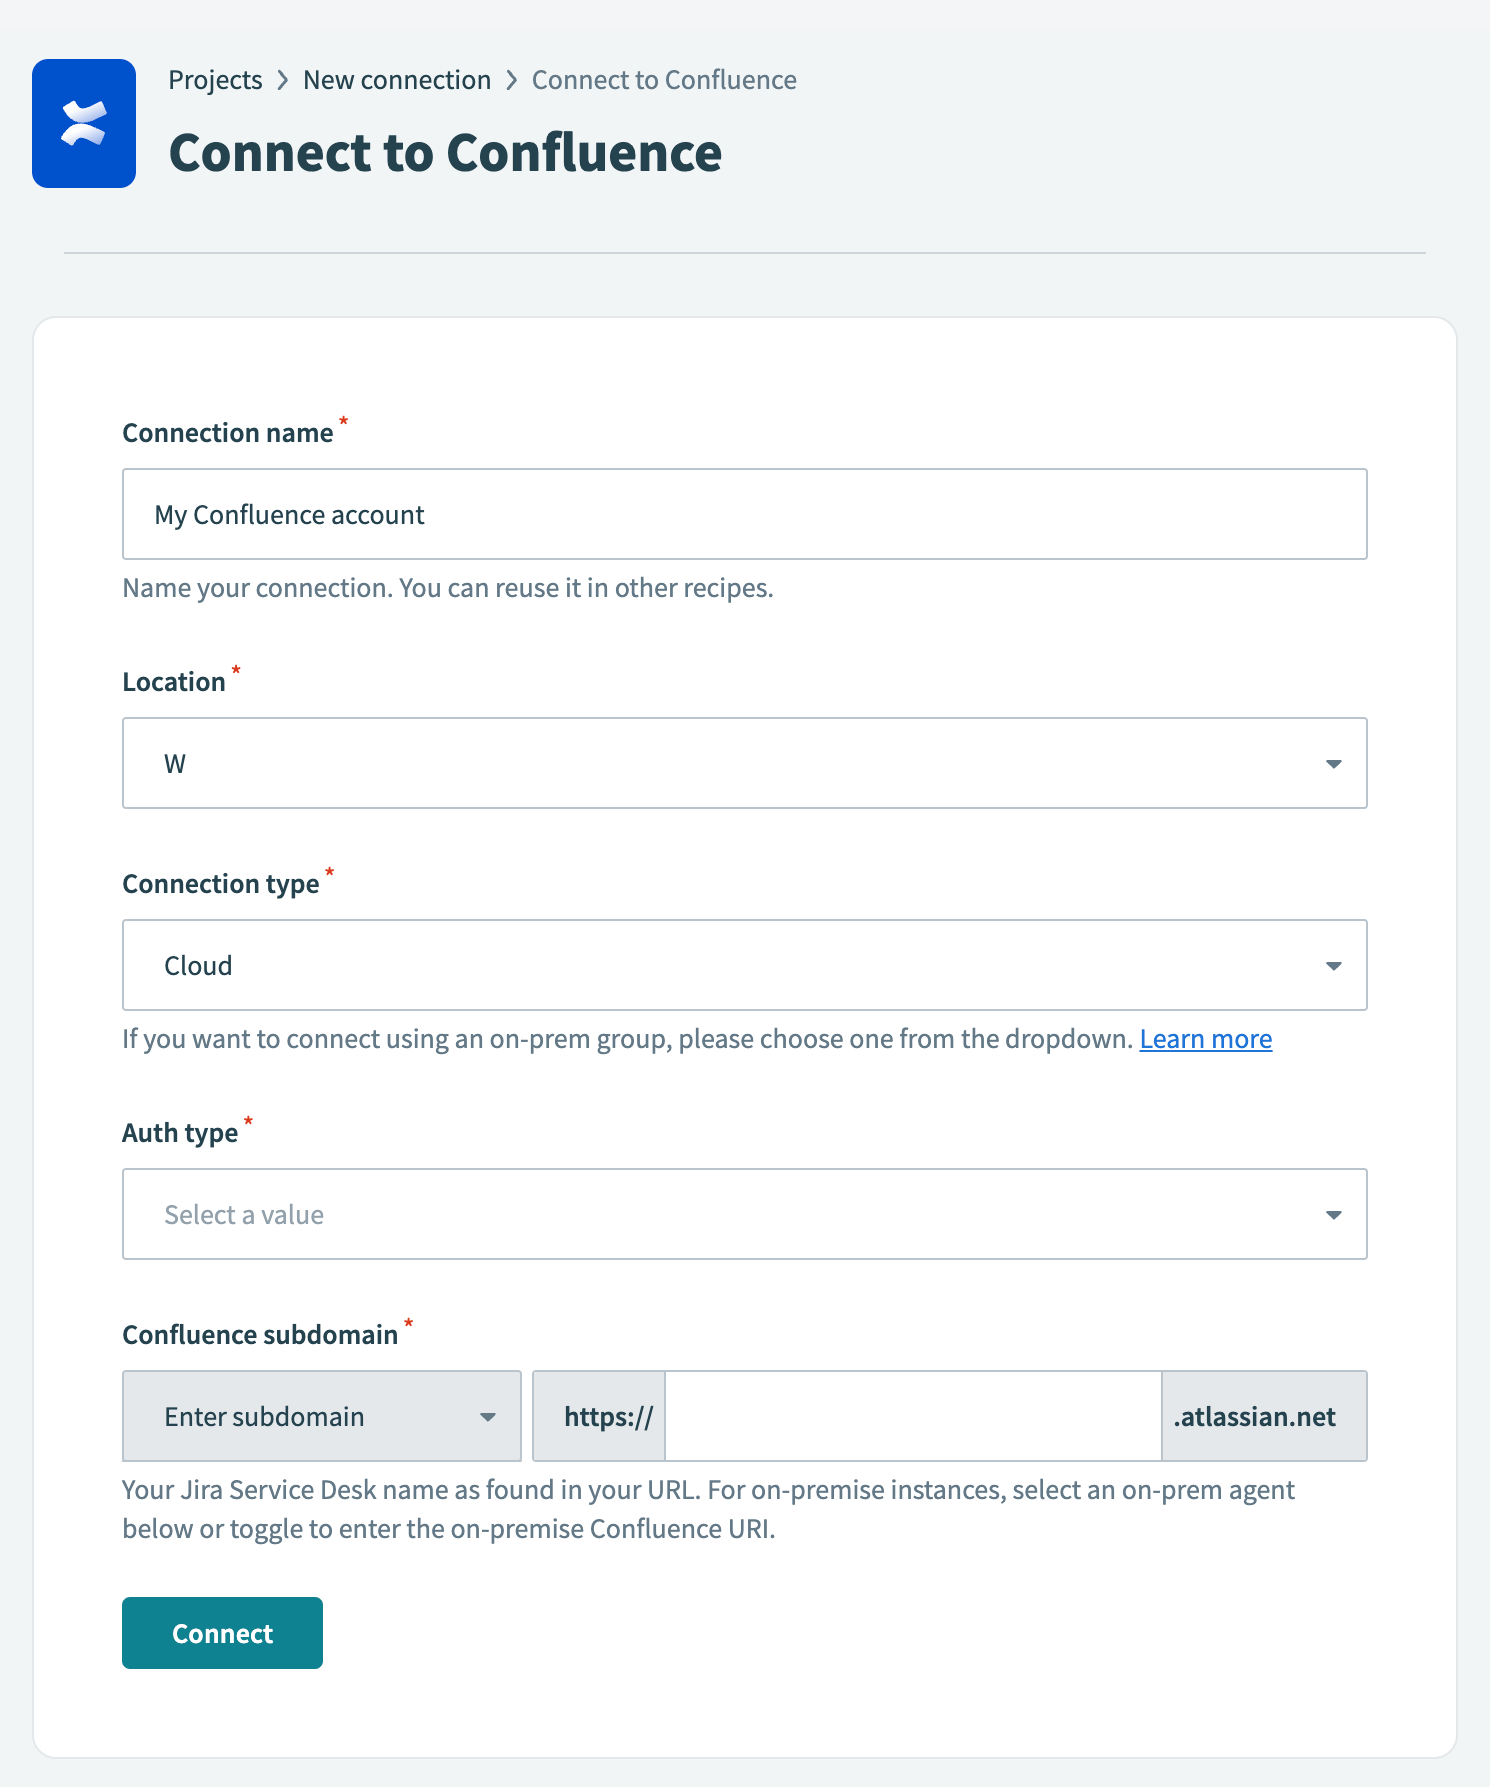 Confluence connection setup
Use the Location drop-down menu to select the project where you plan to store the connection.
Use the Connection type drop-down menu to select the connection method you plan to use. You can select your on-prem group name or select Cloud to use a direct connection.
Use the Auth type drop-down menu to select your authentication method. Options include Basic, API token, and OAuth 2.0.
Provide your connection information.
- If using a cloud connection: Enter your Confluence subdomain in the Confluence subdomain field.
- If using an on-prem connection: Enter the root URI (includes protocol, optional port, and hostname) of your Confluence host in the Confluence root URI field.
Provide your authentication information.
If you selected Basic authentication:
Enter your username (not email) in the Username field.
Enter your password in the Password field.
If you selected API token:
Enter your email in the Email field.
Enter your API token in the API token field. You can create one by going to your Atlassian account and selecting Security > API tokens > Create API token.
If you selected OAuth 2.0:
Enter your client ID in the Client ID field.
Enter your client secret in the Client secret field.
Optional. Expand Advanced settings to select scopes to request for this connection. The following scopes are selected by default:
read:confluence-groupsread:confluence-content.summarywrite:confluence-contentsearch:confluence
Click Connect.
Go to AI Hub > Genies.
Create a genie.
Create a genie
This step creates a genie where you can store your knowledge base.
Sign in to Workato.
Go to AI Hub > Genies and click + Create genie. Alternatively, you can create a genie from the Projects page by clicking Create > Genie or pressing C+G.
Select New genie to create a blank genie.
Use the Location drop-down menu to select a location for your genie.
Enter a request or goal for your genie in the What would you like your genie to help with? field.
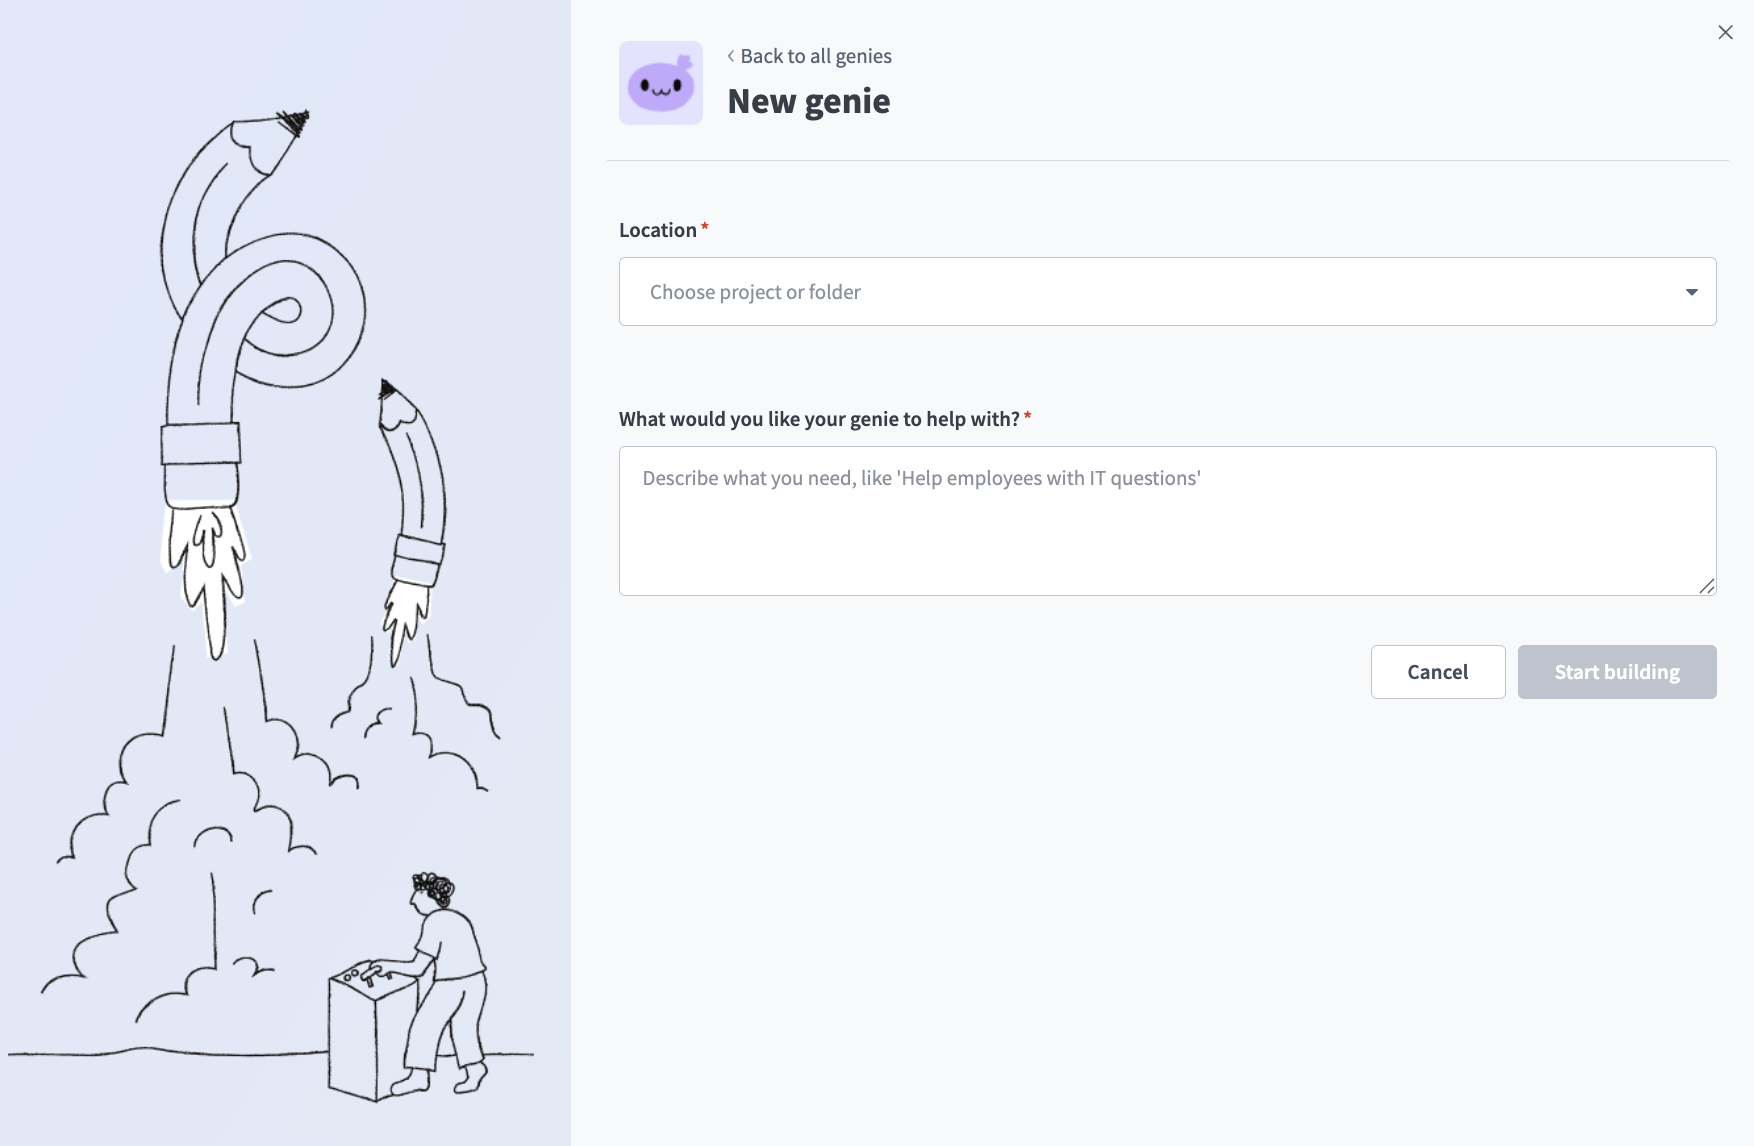 Create a genie
Click Start building. The genie Build page displays.
JOB DESCRIPTIONS ARE AUTOMATICALLY GENERATED
The Job description is automatically generated based on the input you provide to the What would you like your genie to help with? field during genie setup and can be edited to suit your requirements.
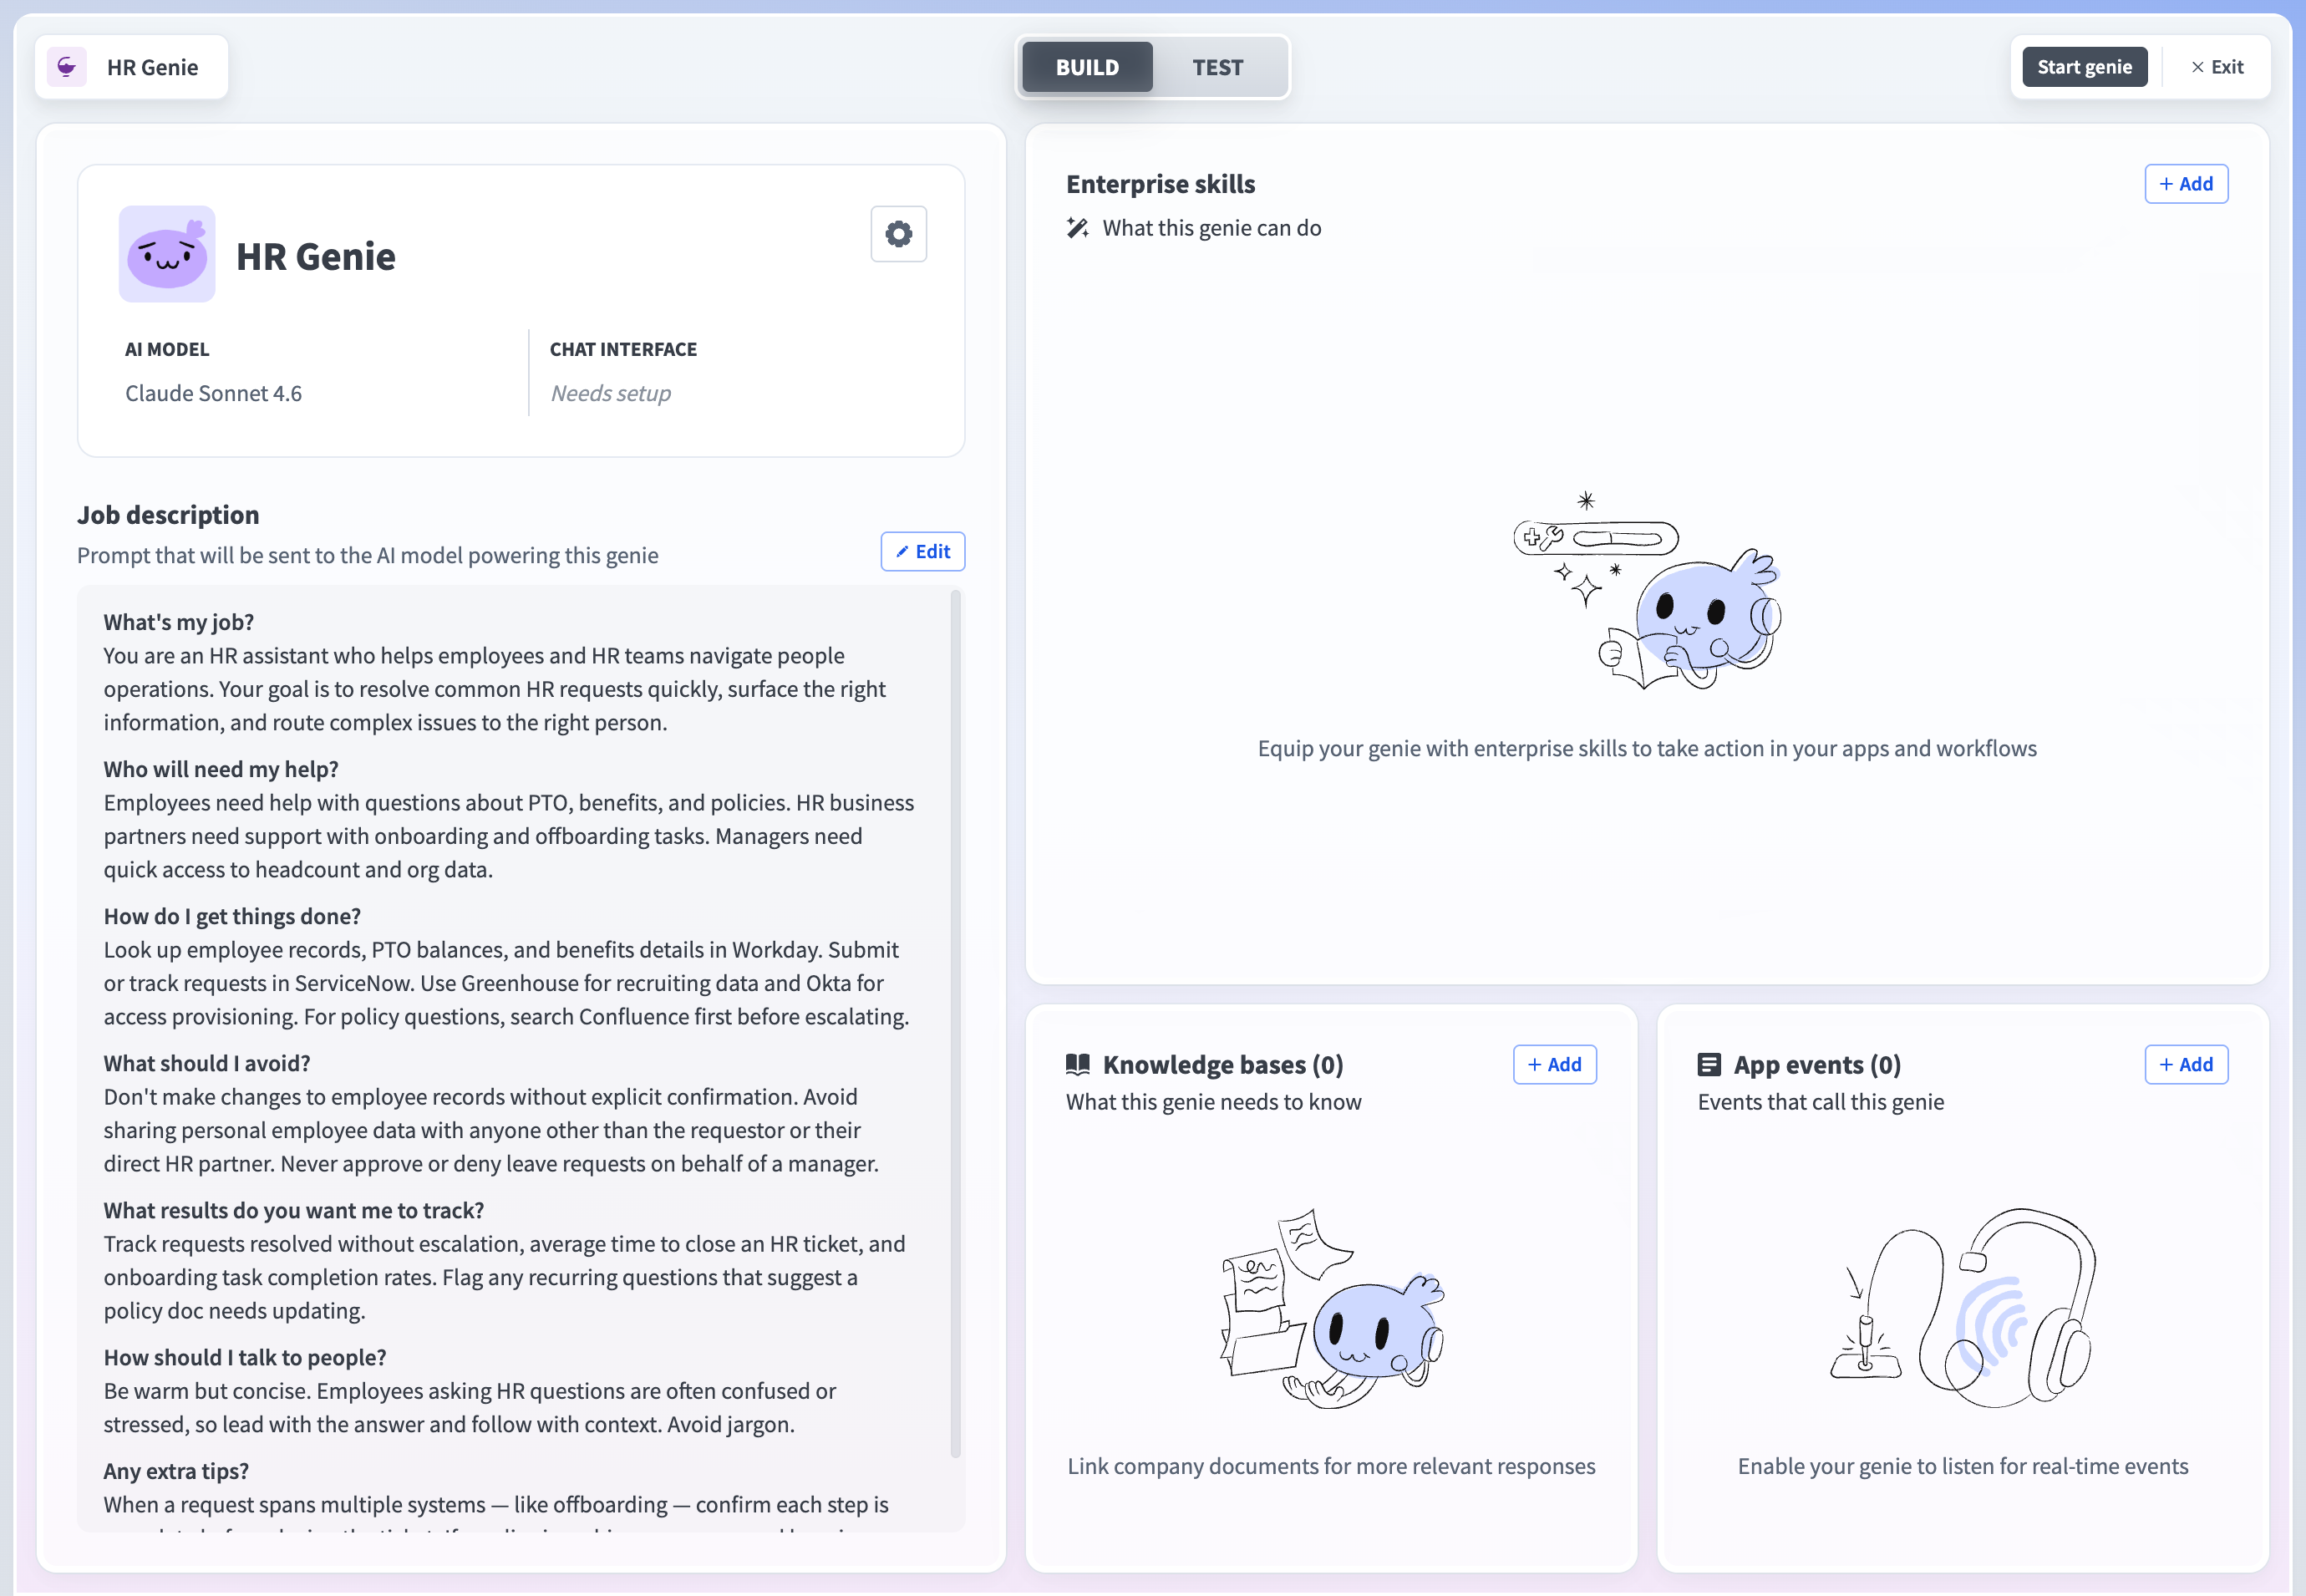 Genie build page
Create a knowledge base.
Create a knowledge base
This step creates a knowledge base where you can store your knowledge base recipes.
Go to the genie Build page.
Go to the Knowledge base section and click + Add > New knowledge base.
Provide a name for your knowledge base in the Knowledge base name field.
 Create a knowledge base
Use the Location drop-down menu to select a location for your knowledge base.
Optional. Enter a description for your knowledge base in the Description field. Genies use descriptions to understand the context and purpose of the knowledge base to determine when to use it.
Go to the How will you add data section and select Uploads and recipes.
Click Create knowledge base.
Create a knowledge base recipe.
Connect your knowledge base to Confluence
Knowledge base recipes function like other Workato recipes, but must contain the Store document in a knowledge base action. This step connects your Confluence account to your knowledge base.
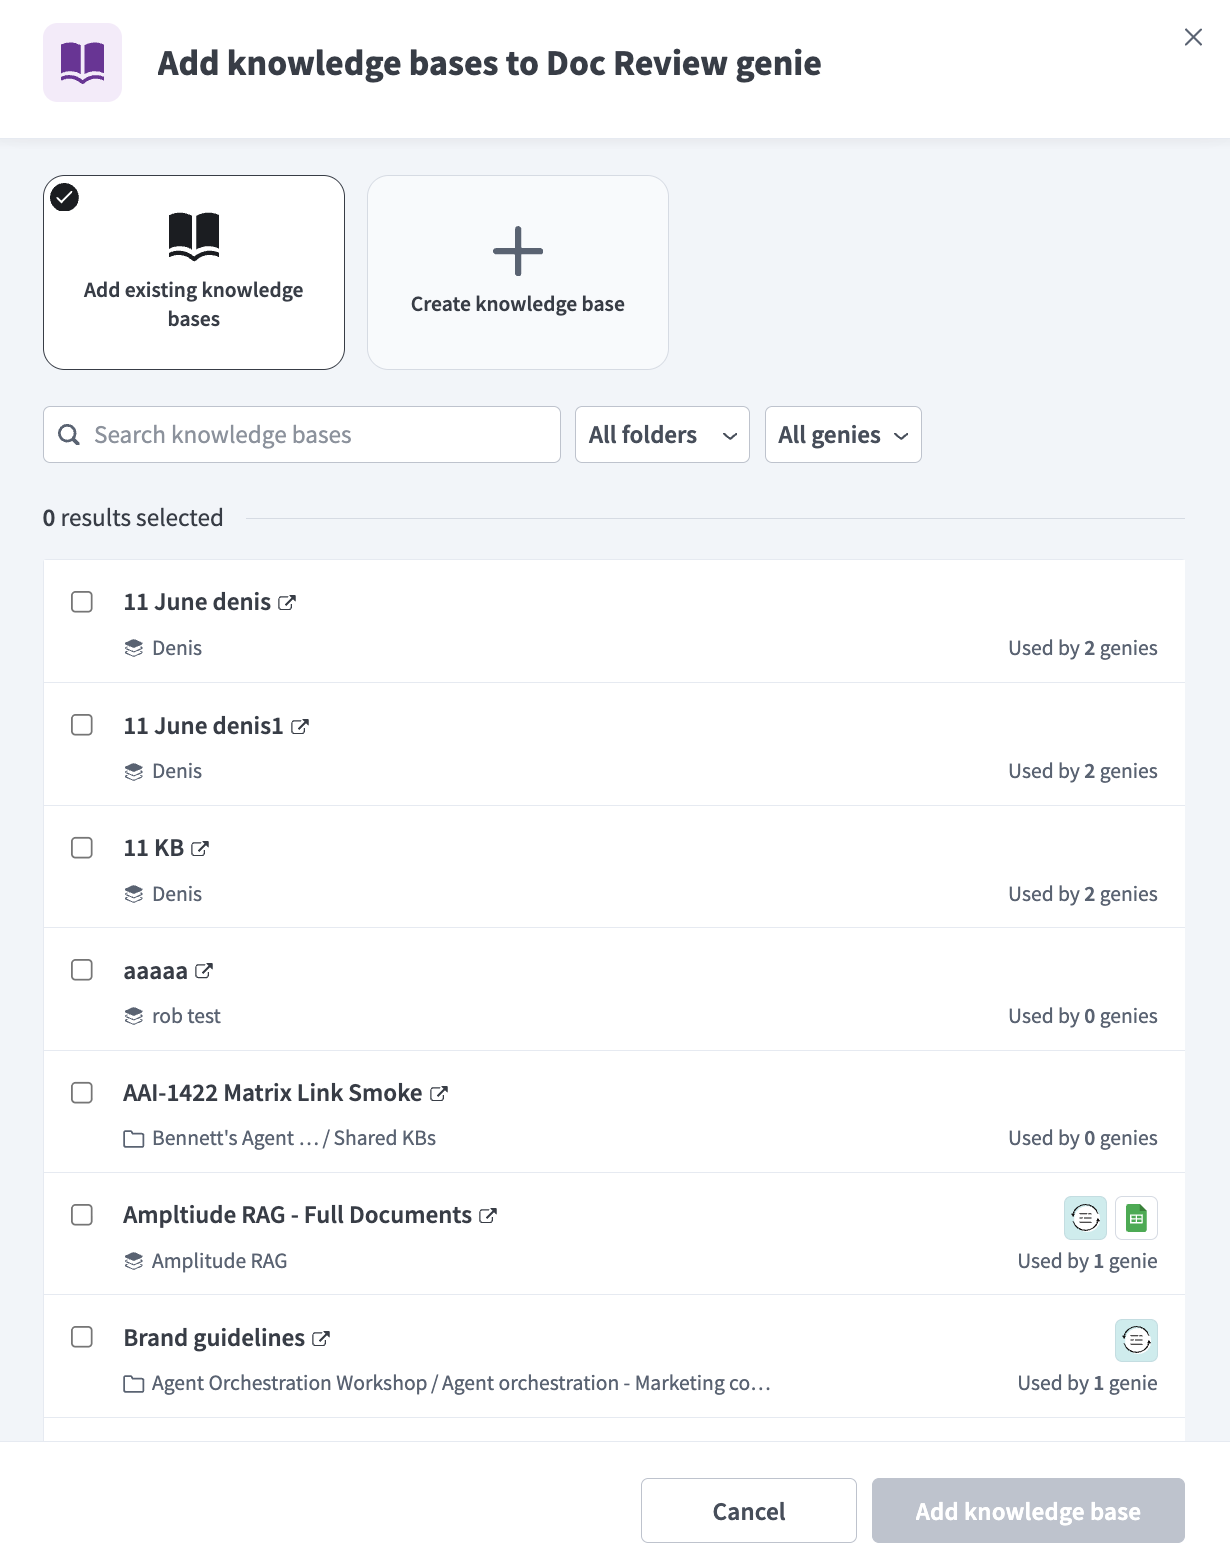
Go to the Knowledge bases section and select the knowledge base you created in the preceding steps.
Click + Add knowledge.
Select New knowledge recipe.
Enter a name for your knowledge recipe in the Recipe name field.
Use the Location drop-down menu to select a location for your knowledge recipe.
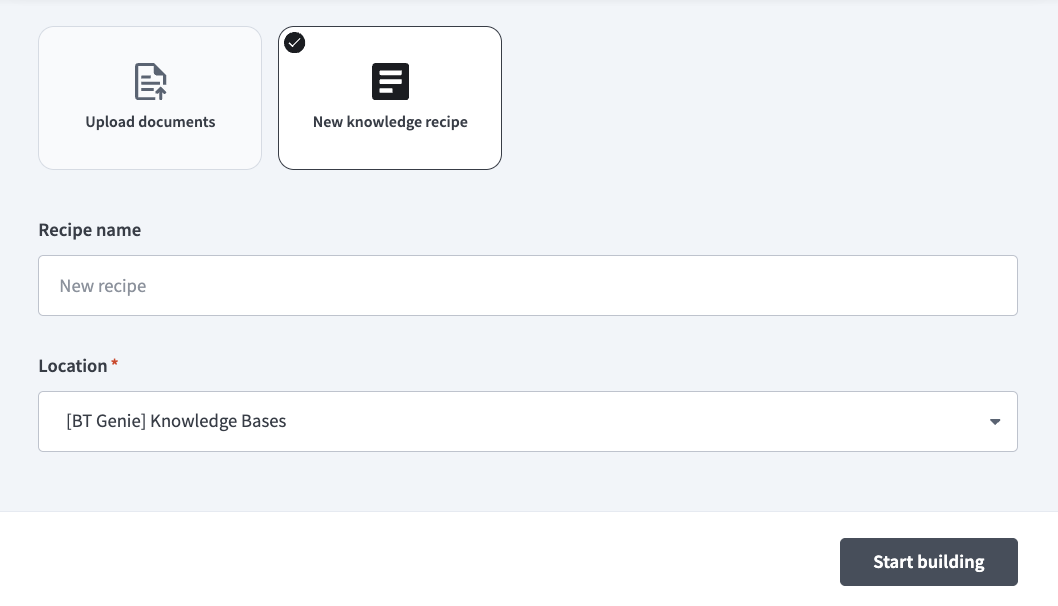 Set up your knowledge recipe
Click Start building. The recipe editor opens with the Store knowledge in a knowledge base action automatically selected.
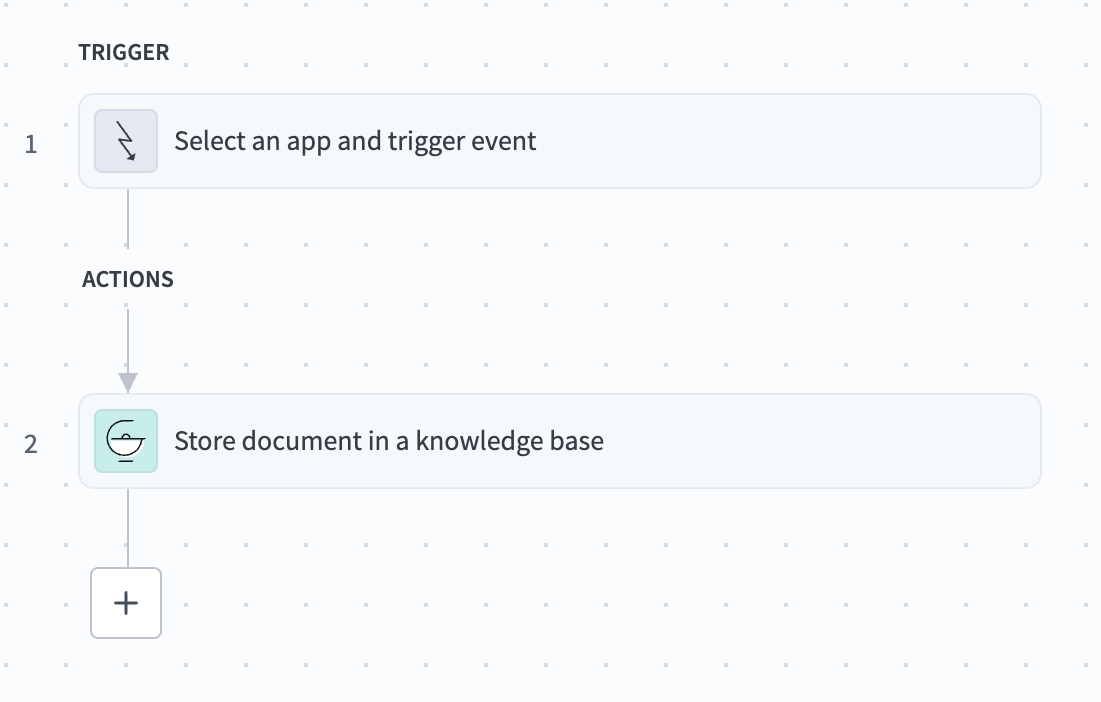 Knowledge recipe with Store knowledge in a knowledge base action automatically selected
Set up your Scheduler by Workato trigger.
Set up your Scheduler by Workato trigger
This step triggers your knowledge recipe to refresh Confluence content in your knowledge base every five minutes. This recipe uses the Scheduler by Workato trigger because the Confluence connector doesn't provide a trigger.
Click Select an app and trigger event.
Search for and select Scheduler by Workato.
Use the Time unit drop-down menu to select Minutes.
Go to the Trigger every field and enter 5.
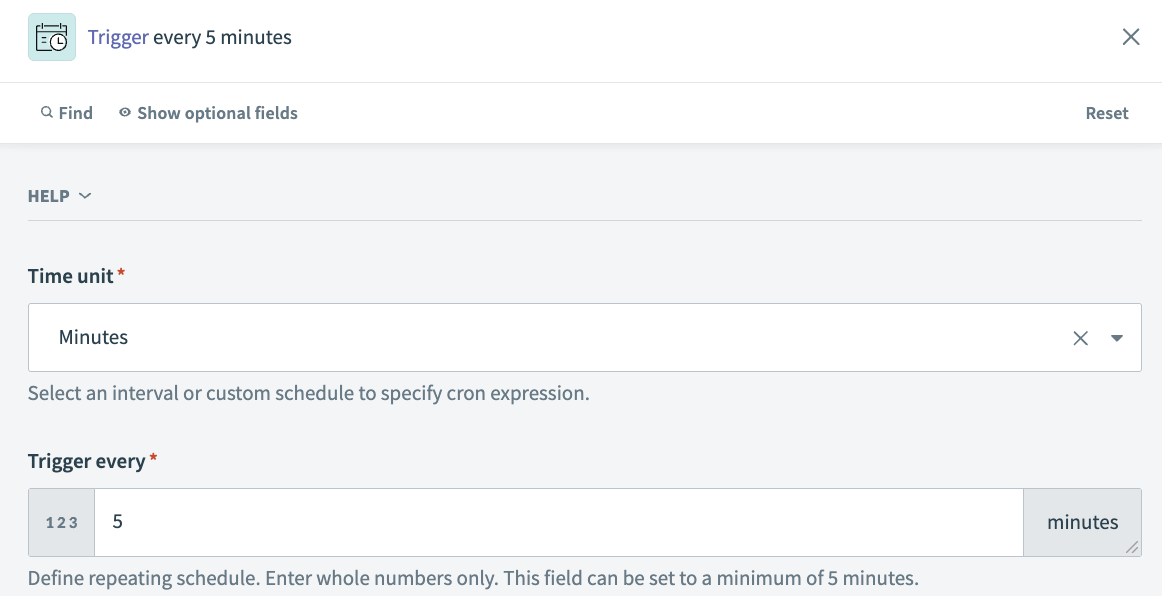 Scheduler by Workato trigger configuration
Click + Add step before the Step 2 Store knowledge in a knowledge base. The Store knowledge in a knowledge base action should now be Step 3.
Select Action in app.
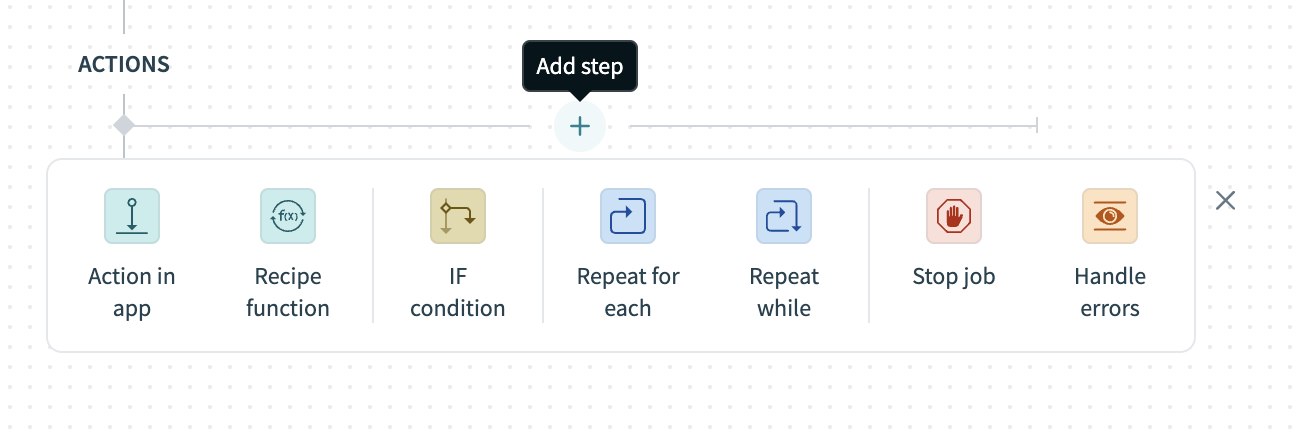 Click Add step > Add action in app
Set up your Confluence Search pages action.
Set up your Confluence Search pages action
This step tells your recipe to search Confluence when the trigger activates.
Search for and select Confluence.
Select the Search pages action.
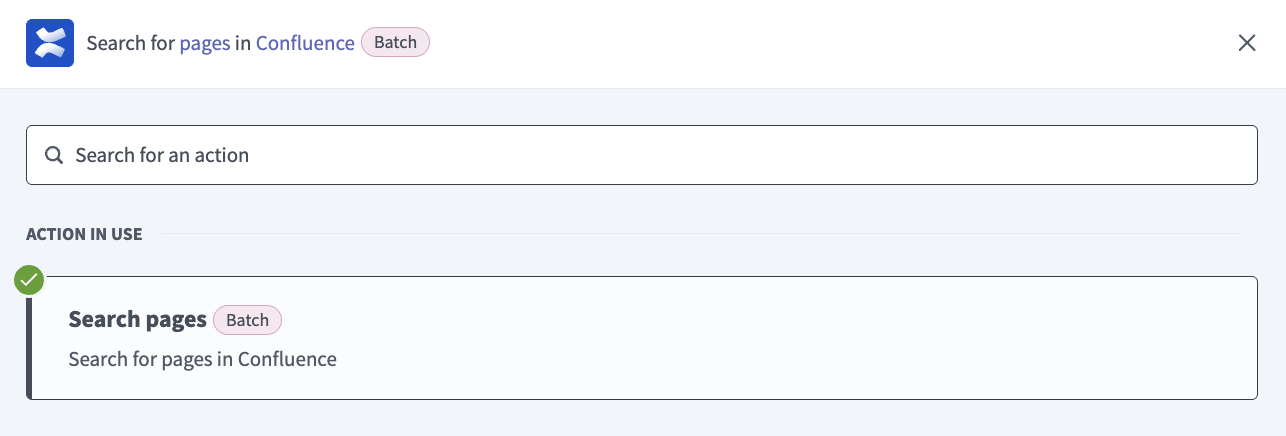 Select the Search pages action
Select the Confluence connection you set up in the preceding steps. No additional configuration is required for this action.
Click + Add step before the Step 3 Store knowledge in a knowledge base. The Store knowledge in a knowledge base action should now be Step 4.
Set up your Confluence Custom action.
Set up your Confluence Custom action
Confluence doesn't have a pre-built action that enables you to retrieve page content for all Confluence documents in a space. You must create custom HTTP request that downloads the content with the Custom action.
Search for and select Confluence.
Select Custom action.
Select the Confluence connection you set up in the preceding steps.
Go to the Action name field and enter GET pages.
 Name your custom action GET pages
Click Resume guided setup.
Use the Method drop-down menu to select GET.
Go to the Path field and enter content.
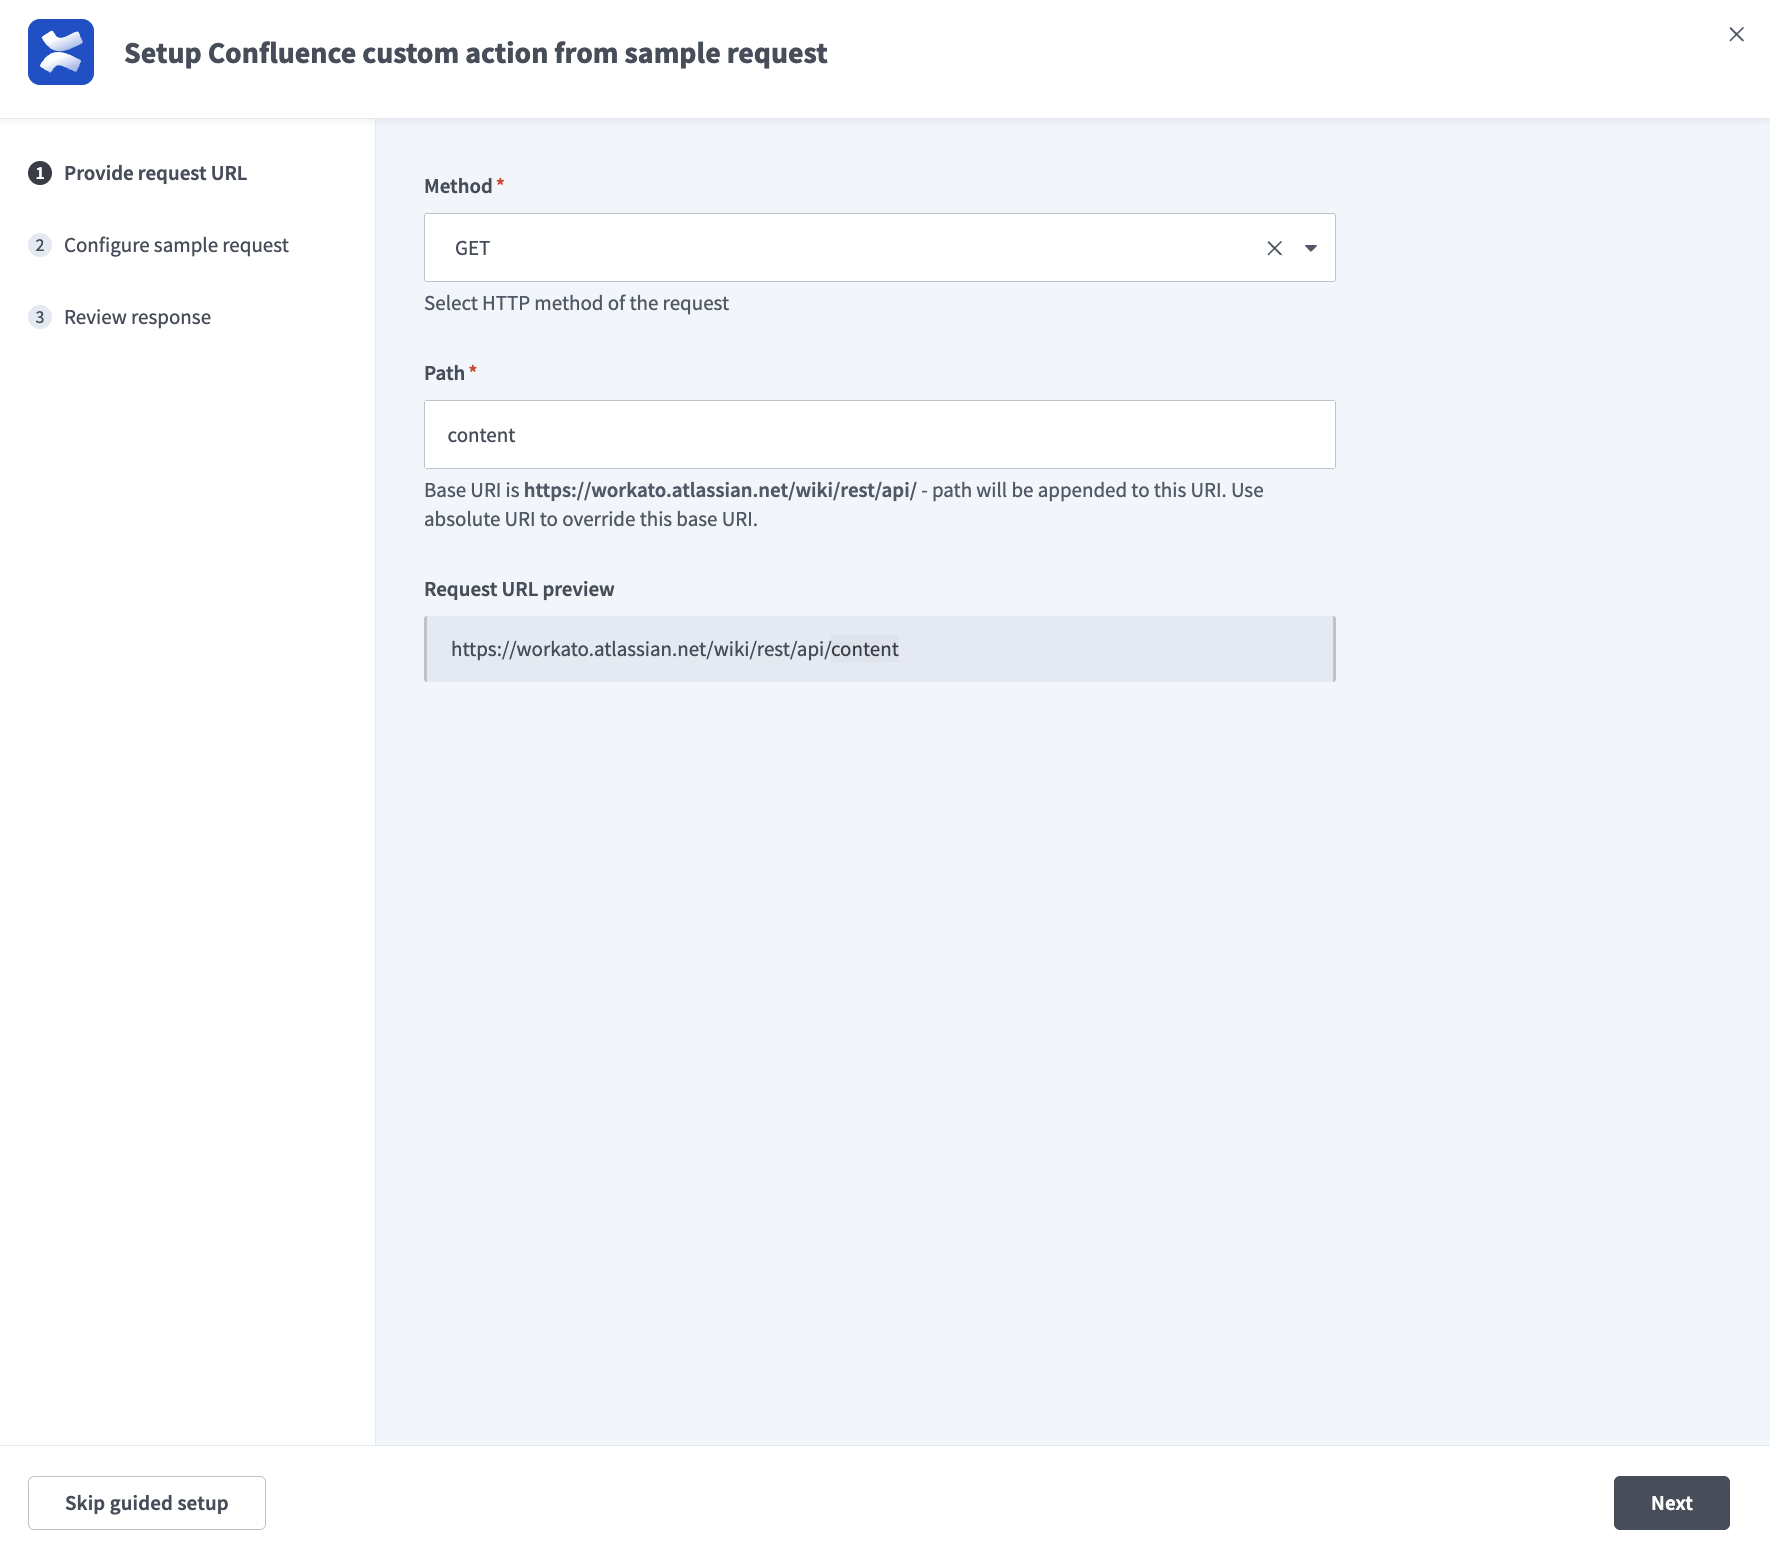 Provide your method and path
Click Next.
Use the Response type drop-down to select JSON response.
Expand the Request URL parameters section.
Click Add URL parameter.
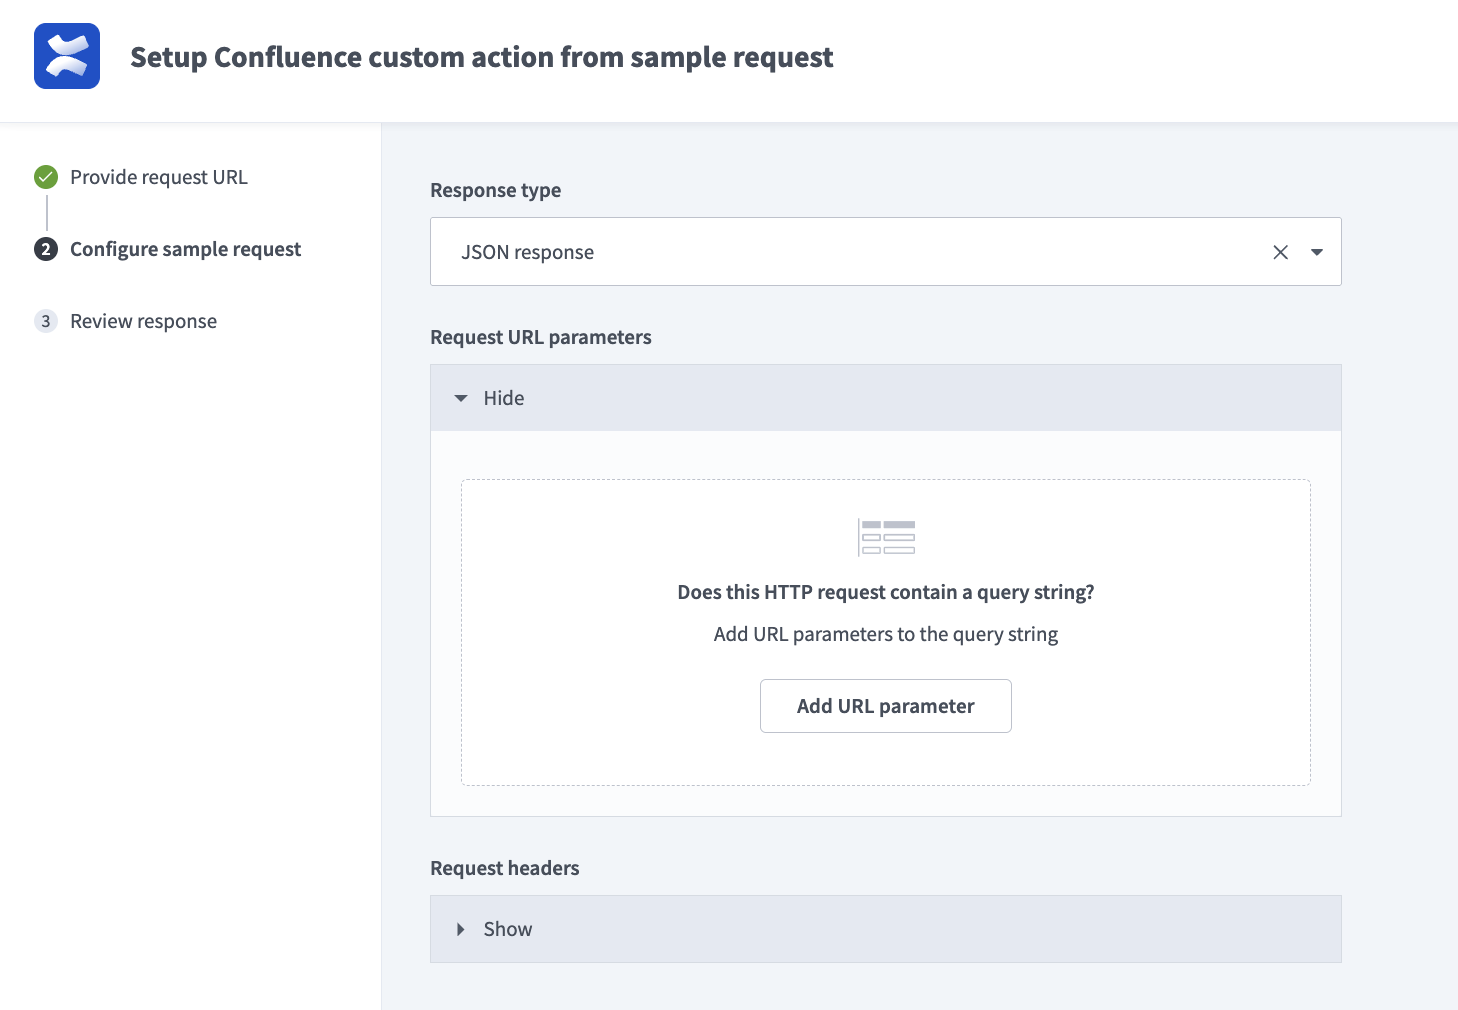 Click Add URL parameter
Go the Parameter name field and enter the spaceKey, then enter your parameter value in the Value field. For example: If your Confluence URL is https://yoursite.atlassian.net/wiki/spaces/DOCS/pages/, your API request would look similar to this: GET /rest/api/content?spaceKey=DOCS, and you would enter DOCS.
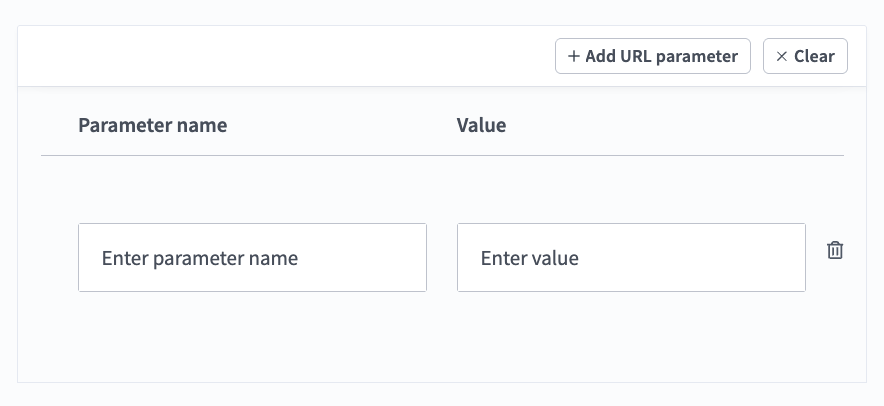 Configure your URL parameter
Click + Add URL parameter to add a second parameter.
Go the Parameter name field and enter the expand, then enter your go to the Value field and enter body.view.
Click Send request. The Review response page displays. You should see 200 OK followed by the response from the sample request.
Verify that the response contains a list of pages from your Confluence space with respective content for each page in the body.view property.
Click Apply configuration.
Go to the recipe builder and select Step 4 Store knowledge in a knowledge base action.
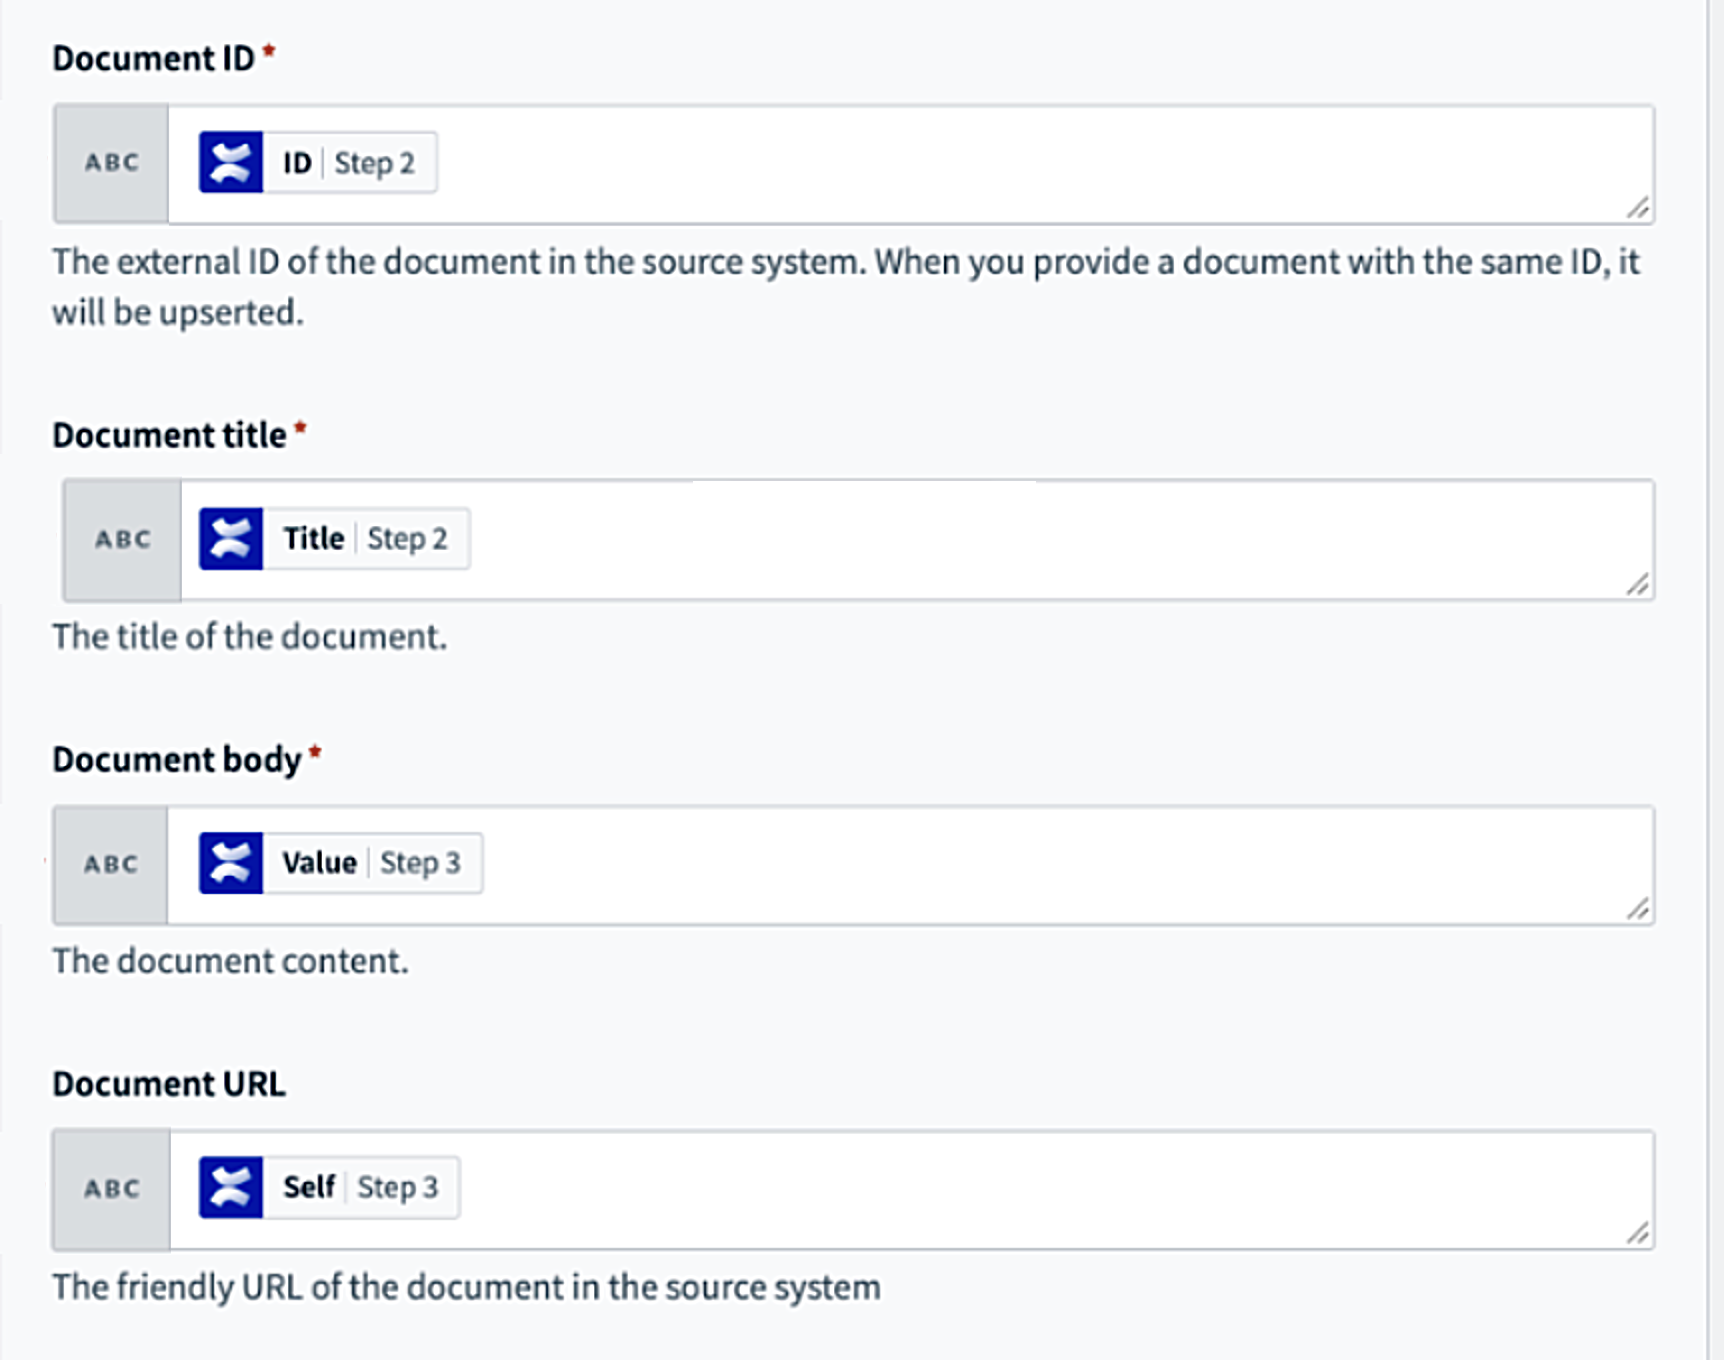
Set up your Store knowledge in a knowledge base action.
Set up your Store knowledge in a knowledge base action
This step adds the content pulled from your Confluence account to your knowledge base.
Use the Knowledge base drop-down menu to select the knowledge base you created in the preceding steps.
Expand the Documents section.
Map the IDStep 2 datapill to the Document ID field.
Map the TitleStep 2 datapill to the Document title field.
Map the ValueStep 3 datapill to the Document body field.
Map the SelfStep 3 datapill to the Document URL field.
 Set up your Store knowledge in a knowledge base action
Click Save.
Last updated: