Expense Reporting MCP server
The Expense Reporting MCP server enables LLMs to interact with Coupa for the receipt-to-submission expense reporting workflow through natural conversation. It provides a deterministic intake app that fully processes expense claims and tools to resolve the caller's Coupa profile, extract structured data from a receipt, build and confirm a draft expense report, and submit it through Coupa's own approval routing with a Slack notification to the resolved approver, without requiring direct interaction with the Coupa interface.
Uses
Use the Expense Reporting MCP server to perform the following actions:
- Open the Expense Reporting MCP app to attach receipts, review category-aware line items, and submit for approval
- Resolve the caller's Coupa profile, including department and cost center, as a standalone lookup
- Check Coupa's valid expense categories and flag which categories require attendees
- Amend or remove a specific line on a report you already have open, without reopening the full intake app
- Submit a completed draft through Coupa's own approval routing and notify the resolved approver over Slack
- Cross-check a receipt's business purpose against the caller's calendar
- List drafts and reports that were submitted but not approved
Example prompts
Use the following example prompts to invoke Expense Reporting MCP server tools:
File this receipt as an expense.I have receipts to file.What are the valid expense categories for travel?Change the amount on line 1 to $42.50.Remove line 2 from my draft.This receipt was actually in euros, not dollars.Does this report need attendees before I submit it?Check my calendar to confirm this dinner's business purpose.Submit my expense report.What expense reports am I still waiting on?
Expense Reporting MCP server tools
The Expense Reporting MCP server provides the following tools:
| Tool | Description |
|---|---|
| open_expense_intake | Opens the Expense Reporting MCP app for a full file-review-submit workflow. |
| get_employee_profile | Resolves the caller's Coupa profile, including department and cost center. |
| get_valid_categories | Returns valid expense categories and flags which categories require attendees. |
| extract_receipt_data | Extracts structured line-item data from an attached receipt. |
| create_expense_report | Creates a new draft expense report. |
| add_expense_line | Prepares an expense line from extracted or caller-supplied data, validates the category and currency, presents a preview for your approval, then adds it. |
| amend_expense_line | Looks up an existing expense line draft, presents a preview of the change for your approval, then updates it. |
| remove_expense_line | Looks up an existing expense line draft, presents a preview for your approval, then removes it. |
| check_calendar_context | Checks the caller's calendar to corroborate a business purpose. |
| submit_expense_report | Looks up the full draft, presents a preview for your approval, then submits it, resolves the assigned approver, and notifies them in Slack. |
| list_pending_reports | Lists drafts and reports that were submitted but not approved. |
Install the Expense Reporting MCP server
Complete the following steps to install a prebuilt MCP server to your project:
Sign in to your Workato account.
Go to AI Hub > Enterprise MCP > Custom servers.
Click + Create MCP server.
Go to the Start with pre-built MCP Servers using your connected apps section and select the prebuilt MCP server you plan to use.
Click Use this server.
Provide a name for your MCP server in the Server name field.
Use the Location drop-down menu to select the project for the MCP server.
Go to the Connections section and connect to your app account.
Select the connection type you plan to use for the MCP server template.
- User's connection: MCP server tools perform actions based on the identity and permissions of the user who connects to the application. Users authenticate with their own credentials to execute the skill.
- Your connection: This option uses the connection established by the recipe builder and follows the same principles as normal app connections.
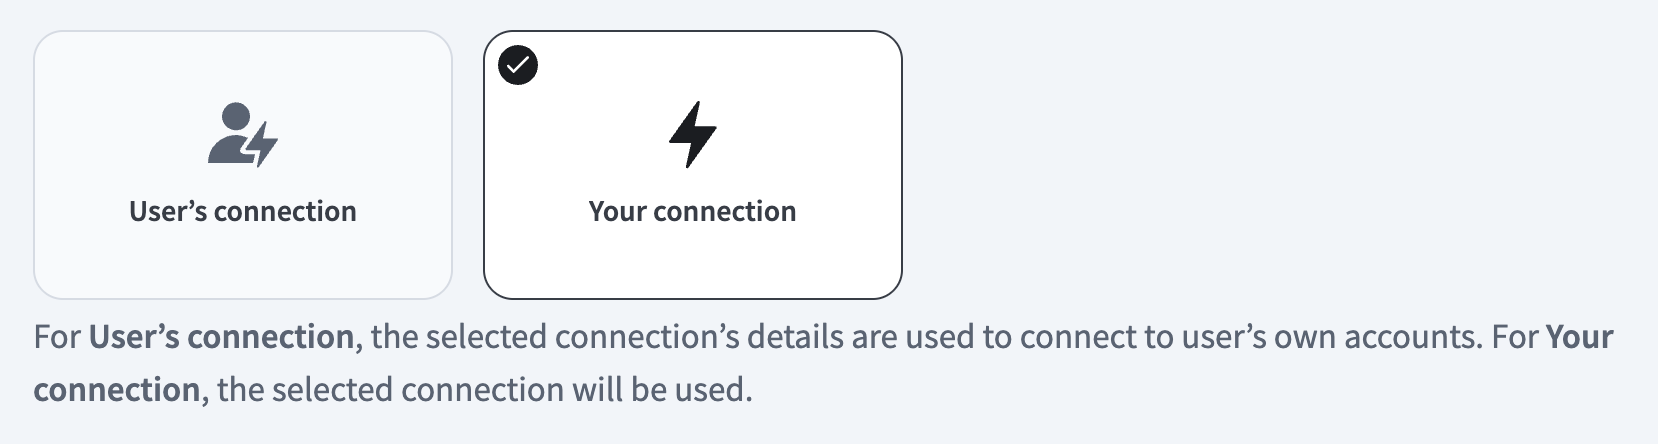 Select your connection type
VERIFIED USER ACCESS AUTHENTICATION REQUIREMENTS
Only app connections that use OAuth 2.0 authorization code grant are available for user's connection. Refer to Verified user access for more information.
Complete the app-specific connection setup steps in the following section.
Expense Reporting connection setup
View Expense Reporting connection setup steps
API version
The Coupa connector uses the Coupa Core REST API.
How to connect to Coupa with OAuth 2.0
The Coupa connector has supported OAuth 2.0-based connectivity since January 2022. OAuth connections are more secure than API key-based connections. OAuth lets you specify the exact scopes you plan to use in the Workato connection settings. The Coupa connector supports OAuth 2.0 Client Credentials and OAuth 2.0 Authorization Code Grant connections. Refer to OpenID Connect Clients for more information.
View OAuth connection setup steps
Sign in to your Coupa instance, for example https://[your-instance-name].coupacloud.com/oauth2/clients.
Click Create to create a new OAuth client.
Use the Grant type drop-down menu to select Authorization Code or Client Credentials. You must select the same option in Workato for the Authentication type.
Provide a name in the Name field. For example: Workato Coupa OAuth connection.
Enter the redirect URIs you plan to use in the Redirect URIs field. Add the link https://www.workato.com/oauth/callback if you plan to use Authorization code.
Select the scopes you plan to provide to Workato. Include all objects and features you plan to automate with the Coupa connector. The scopes you select must match the scopes you configure in Workato. You must include the core.common.read and offline_access scopes at a minimum to establish a connection.
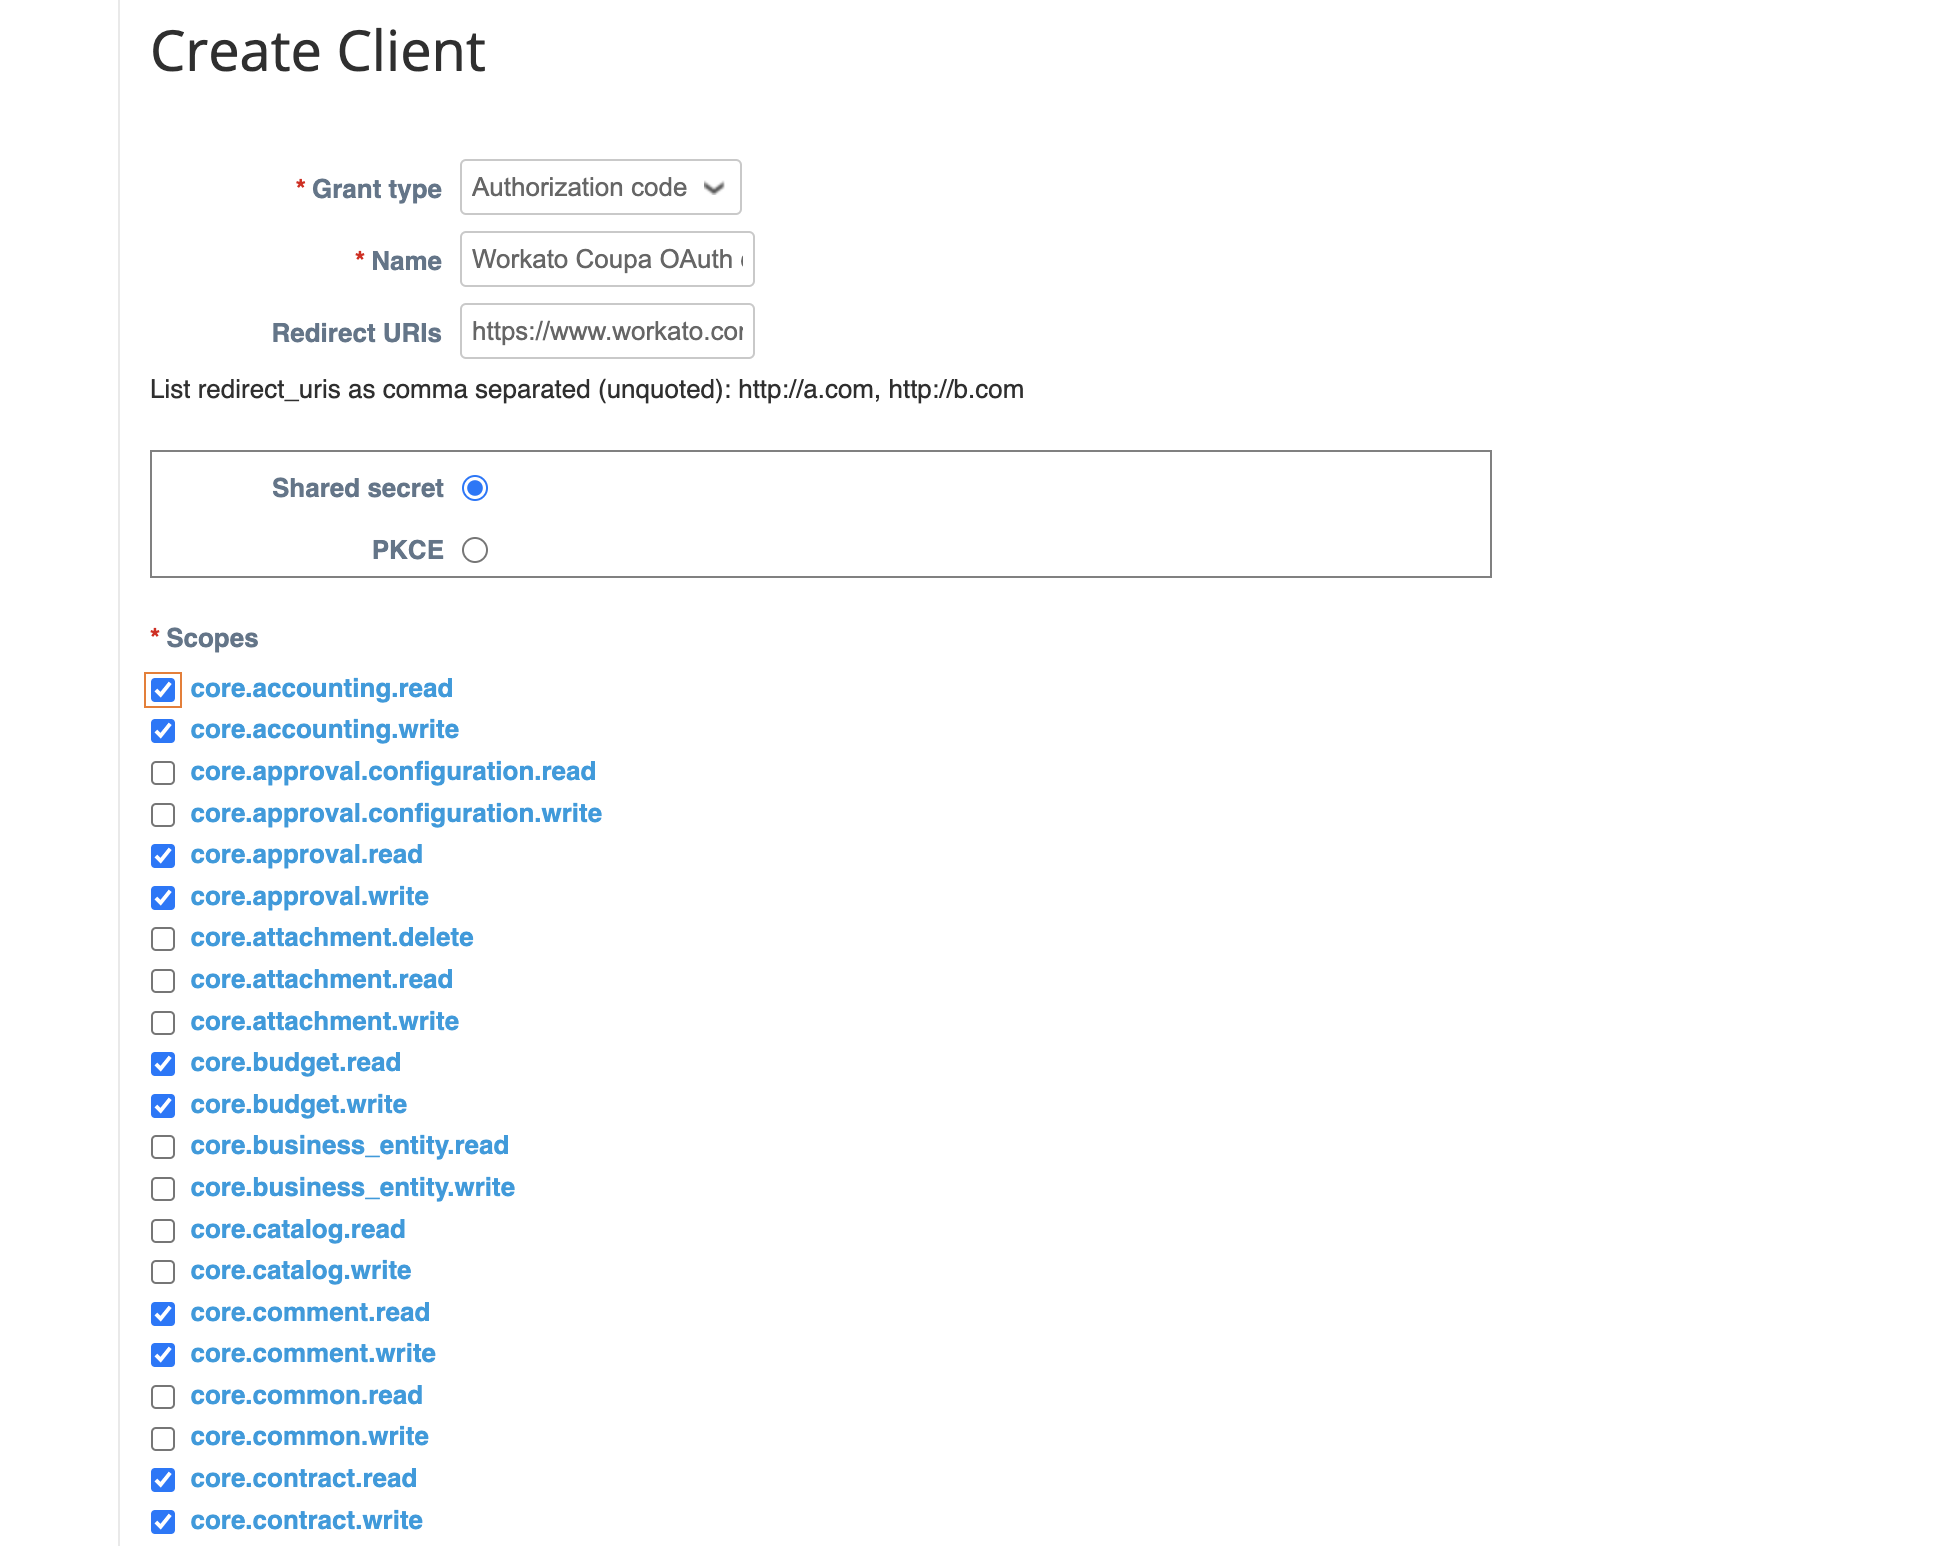 Create a new client
Click Save.
Copy and store the Identifier and the Secret for use in Workato.
Return to your Workato account and go to the project where you plan to add your connection.
Click Create > Connection or press C twice.
Search for and select Coupa as your connection on the New connection page.
Provide a unique name for the connection in the Connection name field.
Use the Location drop-down menu to select the project where you plan to store the connection.
Use the Authentication drop-down to select the Grant type provided in Coupa.
Enter the Client ID and Client secret.
Enter the Coupa URL for your instance in the Host field. For example, enter acme if your URL is http://acme.coupacloud.com.
Use the Scopes drop-down menu to select the same scopes you configured in Coupa. Include the required scopes core.common.read and offline_access to connect successfully.
Click Connect.
Coupa role requirements
Each tool's availability depends on the permissions granted to the connected account. Actions run with the authenticated caller's own Coupa permissions through Verified user access, using an OAuth 2.0 Authorization Code Grant connection instead of a shared service account. Ensure the connection has access to the User, Expense Report, Expense Report Line, and Approval objects. A request made without the required permission returns a permission_denied outcome rather than a partial result.
Server configuration
Edit the Server Configuration recipe function in the project's Functions folder to configure the server's behavior:
| Key | Description |
|---|---|
server_limits.max_lines_per_report | Specify the maximum number of lines to allow on a single expense report. Defaults to 50. |
View server configuration steps
Complete the following steps to configure the Expense Reporting MCP server:
Sign in to your Workato account and go to Projects.
Go to the project that contains your MCP server.
Open the Functions folder, then open the Server Configuration recipe.
Edit the value in the server_limits.max_lines_per_report step. For example, raise it from 50 to 100.
Save and start the recipe for the new value to take effect.
How to use Expense Reporting MCP server tools
Refer to the following sections for detailed information on available tools:
open_expense_intake tool
The open_expense_intake tool opens the Expense Reporting MCP app. Your LLM uses this tool to file, review, or submit an expense claim as a complete workflow.
Try asking:
File this receipt as an expense.I have receipts to file.Open expense intake.Submit my expense report.
get_employee_profile tool
The get_employee_profile tool resolves the caller's Coupa profile, including department and cost center. It accepts only the authenticated caller's own ID. Any other ID returns a permission_denied result. Your LLM uses this tool once per session before creating a report, or to get cost-center information for a line.
Try asking:
What's my department and cost center?Look up my Coupa profile before I start a report.Is my department and cost center on file?
get_valid_categories tool
The get_valid_categories tool returns valid expense categories and flags which categories require attendees. It doesn't return numeric per-diem or spend-limit data. Your LLM uses this tool before creating or amending an expense line with an uncertain category.
Try asking:
What are the valid expense categories for travel?Is "Client Dinner" a valid category?Which categories need an attendee list?What category should this hotel bill fall under?
extract_receipt_data tool
The extract_receipt_data tool extracts structured line-item data, including vendor, date, amount, and currency, from an attached receipt image or PDF, with a confidence score on each field. Your LLM uses this tool before creating or amending an expense line.
Try asking:
Pull the vendor and amount off this receipt.This receipt was actually in euros, not dollars.I already have report 2367 open. Extract this additional receipt for it.
create_expense_report tool
The create_expense_report tool creates a new draft expense report. Your LLM uses this tool to start a report, typically right after extracting the first receipt.
Try asking:
I already extracted a receipt. Open a draft report for it with the purpose "Client trip to Chicago."Create a second, separate draft report for a different trip.
add_expense_line tool
The add_expense_line tool prepares an expense line from extracted or caller-supplied data, validates the category and currency against Coupa, presents a preview for your approval, including whether the line needs attendees added, then adds it and attaches the receipt when one is available. Your LLM uses this tool as part of the Expense Reporting MCP app's intake flow, or directly when you ask to add a line to a report you already have open.
Try asking:
Add another line to report 2367 for the hotel charge, category Lodging.Add a $35 meal line for yesterday to my already-open draft.Show me what this line will look like before you add it.
amend_expense_line tool
The amend_expense_line tool looks up an existing expense line draft, presents a preview of the change for your approval, then updates it. Your LLM uses this tool to correct a specific line.
Try asking:
Change the amount on line 1 to $42.50.Update the category on line 2 to Ground Transportation.Fix the date on my hotel line, it was the 14th.
remove_expense_line tool
The remove_expense_line tool looks up an existing expense line draft, presents a preview for your approval, then permanently removes it. The line can't be recovered after you remove it. Your LLM uses this tool to remove a specific line.
Try asking:
Remove line 2 from my draft.Take the taxi charge off this report.Delete the duplicate hotel line.
check_calendar_context tool
The check_calendar_context tool checks the caller's calendar to corroborate a business purpose. This tool isn't called automatically as part of creating or submitting a report. Your LLM uses this tool when you ask to corroborate a business purpose against your calendar.
Try asking:
Check my calendar to confirm this dinner's business purpose.Did I actually have a meeting that day?Match this expense to a calendar event around the same time.
submit_expense_report tool
The submit_expense_report tool looks up the full draft, presents a preview for your approval, including any lines that still need attendees added, then submits it, resolves the assigned approver through Coupa's own routing, and notifies them in Slack after it's resolved. Your LLM uses this tool when you ask to submit a report.
Try asking:
Go ahead and submit this draft.Does this report need attendees before I submit it?Yes, submit it.Submit it, and tell me who it's routed to for approval.
list_pending_reports tool
The list_pending_reports tool lists this server's own drafts and reports that were submitted but not approved. It reads its own records rather than searching Coupa directly, so a report created outside this server doesn't appear. Your LLM uses this tool to find your outstanding items.
Try asking:
What expense reports am I still waiting on?Show me my draft reports.What have I submitted that's still pending approval?
Expense Reporting MCP app
The Expense Reporting MCP app opens when your LLM calls open_expense_intake. It provides a form for you to attach a receipt, confirm the extracted details and category, and build the draft report. Your LLM doesn't act on the in-app workflow while the app is open. Submitting the finished draft happens separately, through submit_expense_report, after you review and approve the draft.
Getting started
View and manage your MCP server tools in the Details tab Tools section. Tool management provides the following capabilities:
TOOLS MUST BE STARTED
Your LLM can only access active tools in your MCP server connector.
Last updated: