Marketing Event Program Orchestration MCP server
The Marketing Event Program Orchestration MCP server enables LLMs to interact with Marketo, Google Calendar, Slack, and ZoomInfo for managing event programs and registrant lists through natural conversation. It provides tools to resolve an event's type and region to the correct template, folder, and channel, create or clone a program, book a calendar hold, look up existing programs, and validate and import a lead list.
Uses
Use the Marketing Event Program Orchestration MCP server to perform the following actions:
- Create a new Marketo event program from a pre-configured template, folder, and channel
- Book a calendar hold on Google Calendar or Outlook for a newly created event program
- Look up an existing Marketo event program by name or ID before importing members into it
- Import a registrant or lead list into an existing Marketo event program
- Review row counts and a create-versus-update breakdown before an import commits
- Approve a preview before creating a program or importing members
- Fill blank lead fields with ZoomInfo firmographic data during import
- Check the status of an in-progress program creation or lead import
- Recover an interrupted import or program creation session without repeating earlier steps
- Receive a Slack notification for newly created programs and completed imports
Additionally, use the server's built-in Event360 MCP app to fill in an event's details or review a lead file's column mapping before either one commits.
Example prompts
Use the following example prompts to invoke Marketing Event Program Orchestration MCP server tools:
Set up a new webinar program for APJ next month.Get this registrant CSV into the Q2 webinar program.Did my lead import finish?What's the URL for the trade show program I created last week?I navigated away. What was I uploading?Create a field event in NORAM and book the calendar for it.Open Event Ops.Set up a new live event for Japan on March 3rd.Show me my recent event and import operations.Import these leads into the program I just created.
Marketing Event Program Orchestration MCP server tools
The Marketing Event Program Orchestration MCP server provides the following tools:
| Tool | Description |
|---|---|
| open_event_intake | Opens the companion app to create an event program or import a lead list. |
| provision_event_program | Looks up the details for a Marketo event, presents a preview for your approval, then creates the program and books a calendar hold. |
| get_lead_field_map | Returns the deployment's Marketo lead field catalog for mapping a lead import file. |
| search_event_programs | Finds existing Marketo event programs by name prefix on the recent-program list, or by numeric ID. |
| import_program_members | Receives a lead CSV from the Event360 app, checks the file's row counts and validity, presents the results for your approval, then imports into Marketo. |
| get_operation_status | Lists recent operations, or polls a specific operation's status when you provide an ID. |
Install the Marketing Event Program Orchestration MCP server
Complete the following steps to install a prebuilt MCP server to your project:
Sign in to your Workato account.
Go to AI Hub > Enterprise MCP.
Click + Create MCP server.
Go to the Start with pre-built MCP Servers using your connected apps section and select the prebuilt MCP server you plan to use.
Click Use this server.
Provide a name for your MCP server in the Server name field.
Use the Location drop-down menu to select the project for the MCP server.
Go to the Connections section and connect to your app account.
Select the connection type you plan to use for the MCP server template.
- User's connection: MCP server tools perform actions based on the identity and permissions of the user who connects to the application. Users authenticate with their own credentials to execute the skill.
- Your connection: This option uses the connection established by the recipe builder and follows the same principles as normal app connections.
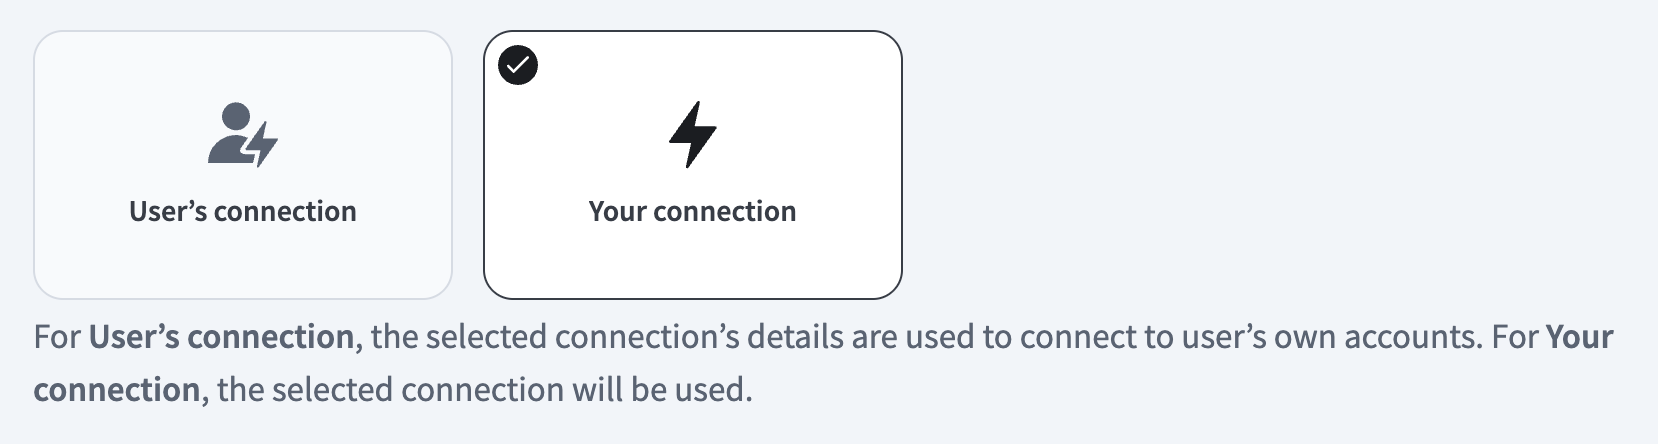 Select your connection type
VERIFIED USER ACCESS AUTHENTICATION REQUIREMENTS
Only app connections that use OAuth 2.0 authorization code grant are available for user's connection. Refer to Verified user access for more information.
Complete the app-specific connection setup steps in the following section.
Marketing Event Program Orchestration connection setup
View Marketing Event Program Orchestration connection setup steps
Configure the following connections to set up the Marketing Event Program Orchestration MCP server:
- Marketo: Required.
- Google Calendar: Required.
- Slack: Optional. Connect to Slack to receive a notification when a new program is created or a lead import finishes.
- ZoomInfo: Optional. Connect to ZoomInfo to automatically fill blank lead fields during import.
Role requirements
Each tool's availability depends on the permissions granted to connected accounts. Missing scopes for these connections block the corresponding tool with a permission_denied outcome rather than a partial result. Required connections must have the following access:
- Marketo: Requires read and write access to
Lead,Asset, andActivity - Google Calendar: Requires access to create events on the target calendar
Missing scopes on the optional Slack and ZoomInfo connections result in non-blocking outcomes: Slack notifications report as partial_success and lead enrichment is silently skipped for the affected rows.
Marketo connection
View Marketo connection setup steps
The Marketo connector uses custom authentication.
CUSTOM SERVICE CLIENTS
Marketo exposes REST endpoints to enable integration platforms like Workato to remotely access and execute core functionalities. We recommend you create a custom service client specifically for Workato to facilitate this integration.
Key benefits of using a custom service client include:
- Isolated logging: All operations are logged under a dedicated custom service client for integration and workflow processes. This approach enhances tracking and troubleshooting by isolating issues related to specific integration platforms.
- Customized permissions: A custom service client allows for tailored permissions and security profiles, independent of individual employee user accounts.
Ensure that the custom service client is granted all necessary permissions to perform the required actions for your integration scenario. If a 403 error occurs during recipe execution, it indicates that the service client lacks the appropriate permissions for the action.
Minimum scopes
View minimum scopes
You must select the following minimum role scopes when you create a new API role. Refer to Create an API role for more information.
Read-Only ActivityRead-Write ActivityRead-Only LeadRead-Write LeadRead-Only AssetRead-Write Asset
Marketo setup for custom authentication
Complete the following steps to set up a custom authentication connection to Marketo in Workato:
- Retrieve the REST API endpoint
- Create an API role
- Create an API user
- Create a custom service for Workato
- Retrieve client credentials
Retrieve the REST API endpoint
View retrieve the REST API endpoint steps
Complete the following steps to retrieve the REST API Endpoint in Marketo:
Sign in to your Marketo instance as a user with administrator privileges.
Go to Admin > Web Services.
In the REST API section, copy and save the Endpoint for use in Workato.
Create an API role
View create an API role steps
Complete the following steps to create an API role in Marketo:
Go to Admin > Users & Roles and select the Roles tab.
Click New Role.
Provide a name for your new role in the Role Name field. Optionally, add a description in the Description field.
Select the Access API checkbox in the Permissions field.
Click Create to create the API role.
Create an API user
View create an API user steps
Complete the following steps to create an API user in Marketo:
Go to Admin > Users & Roles and select the Users tab.
Click Create API Only User.
Fill out the Email, First Name, and Last Name fields.
Select the checkbox for the API role you created in the previous step from the Roles menu.
Click CREATE API ONLY USER.
Create a custom service
View create a custom service steps
Creating a custom service enables you to retrieve the client ID and client secret used to establish a connection in Workato. Refer to the Marketo Engage Developer Documentation for more information about custom services.
Complete the following steps to create a custom service in Marketo:
Go to Admin > LaunchPoint.
Click New > New Service.
Enter a descriptive Display name and select Custom from the Service drop-down menu.
Enter a description in the Description field.
Select the user you created in the previous step from the API Only User drop-down menu.
Click Create.
Retrieve client credentials
View retrieve client credentials steps
Complete the following steps to retrieve client credentials in Marketo:
Select View details for the new custom service you created in the previous step.
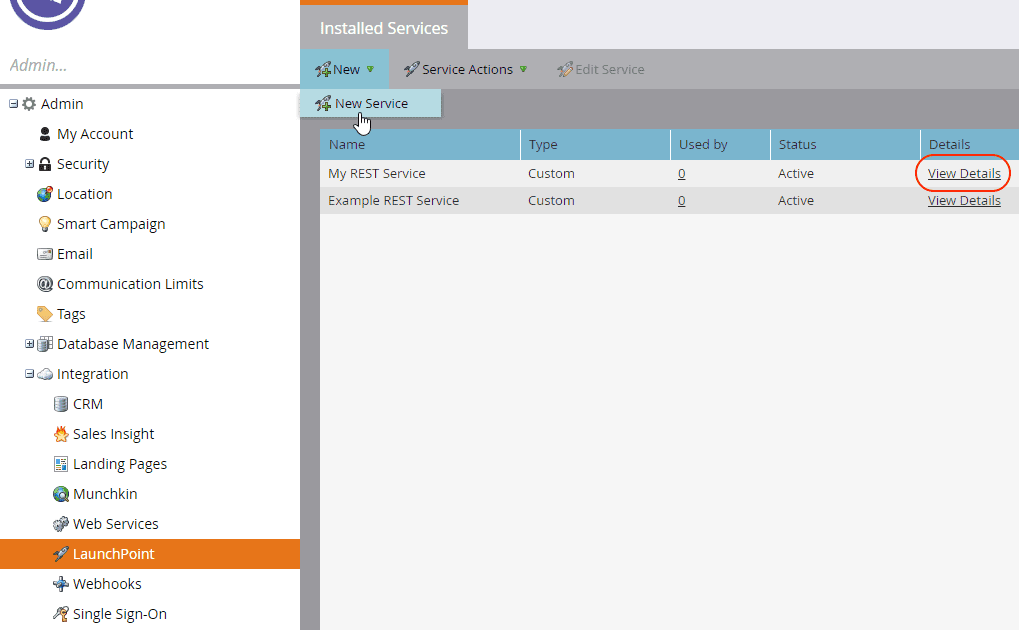 View custom service
Copy and save the Client Id and Client Secret for use in Workato.
Connect to Marketo with custom authentication
View connect to Marketo with custom authentication steps
Complete the following steps to connect to Marketo in Workato:
Select Create > Connection or press C twice.
Search for Marketo and select it as your app.
Enter a name for your connection in the Connection name field.
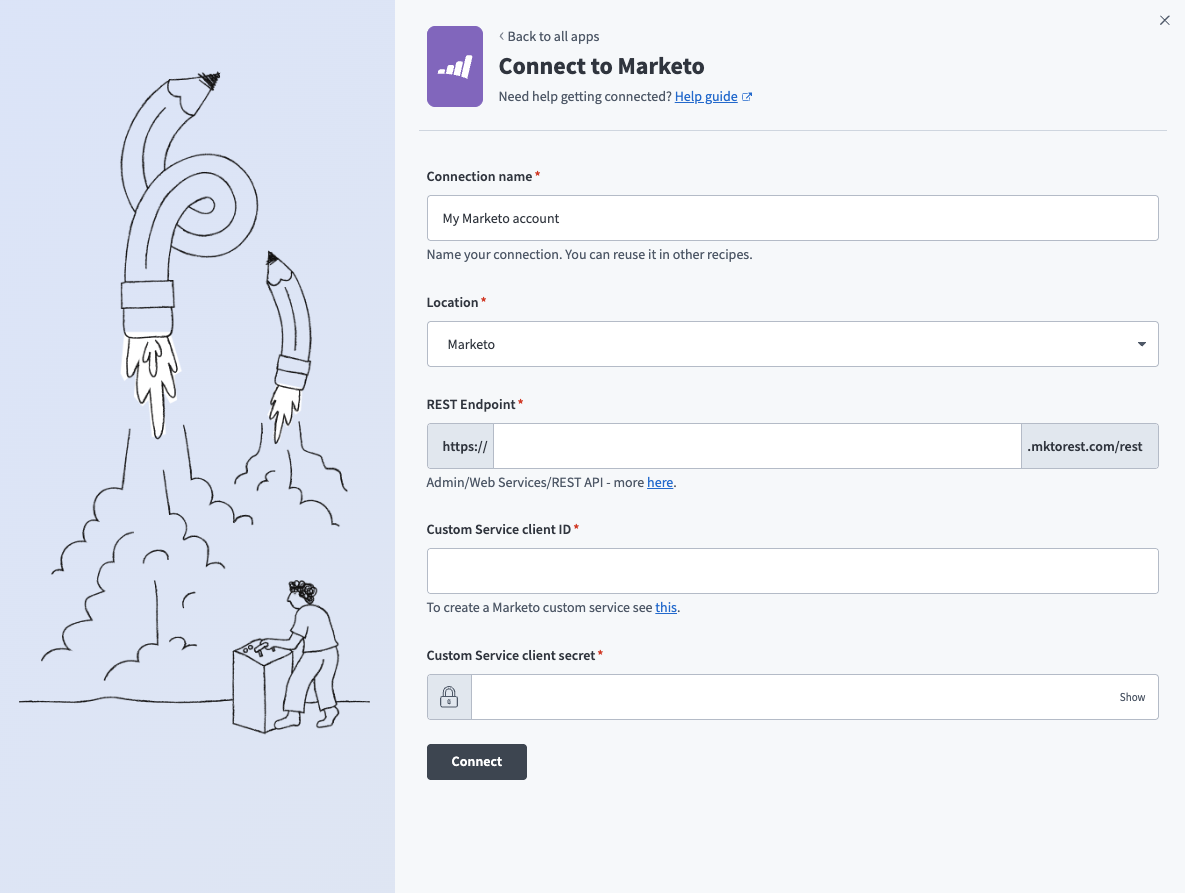 Name your connection
Use the Location drop-down menu to select the project where you plan to store the connection.
Enter the base URL of your Marketo instance in the REST Endpoint field. For example, if your REST endpoint is https://123-ABC-456.mktorest.com/rest, enter 123-ABC-456 in this field. Refer to Retrieve the REST API endpoint for more information.
Enter the Client Id from Marketo in the Custom Service client ID field. Refer to Retrieve client credentials for more information.
Enter the Client Secret from Marketo in the Custom Service client secret field. Refer to Retrieve client credentials for more information.
Click Connect.
Google Calendar connection
View Google Calendar connection setup steps
Refer to the following sections to set up your Google Calendar connection:
OAuth 2.0 authentication
Complete the following steps to set up your Google Calendar connection using OAuth 2.0:
View OAuth 2.0 authentication steps
Click Create > Connection or press C twice.
Search for and select Google Calendar as your connection on the New connection page.
Provide a name for your connection in the Connection name field.
Select the project where you plan to store the connection from the Location drop-down menu.
Select OAuth 2.0 as the Authentication type.
Click Sign in with Google, then sign in to your Google account. Ensure your Google account has sufficient permissions to manage the events and calendars you plan to use in Workato. 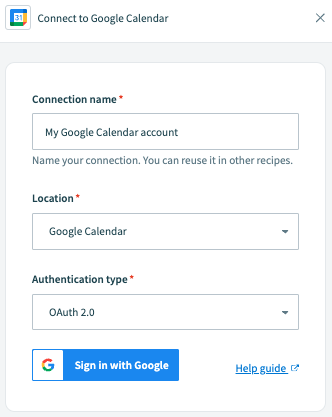 Click Sign in with Google.
Service account authentication
View Service account authentication steps
A Google service account is a specialized Google account associated with a Google Cloud Project (GCP) that can run API requests on your behalf.
Service accounts provide the following benefits:
- Continuous operation: Service accounts ensure that operations continue even if individual user permissions change.
- Dedicated permissions: Service accounts can only access projects that you share with them.
- Dedicated API quotas: You can manage a service account's API quotas through GCP and request quota increases directly from Google.
Refer to the Google service account documentation to learn more about service accounts.
Service account authentication consists of the following actions:
Minimum scopes for service account connections
The following scopes are required to connect to Google Calendar using a service account:
https://www.googleapis.com/auth/calendarhttps://www.googleapis.com/auth/calendar.eventshttps://www.googleapis.com/auth/admin.directory.resource.calendarhttps://www.googleapis.com/auth/taskshttps://www.googleapis.com/auth/userinfo.email
A 401 Unauthorized error may occur when the service account uses the Owner role or lacks required scopes. Assign the Editor role to the service account in the Google Cloud Console and confirm it includes all required scopes listed above. This ensures the service account can authenticate and access Google Calendar successfully.
Refer to the Google Calendar API scopes documentation for a complete list of supported scopes.
Set up a Google service account
View Set up a Google service account steps
Complete the following steps to set up a Google service account:
Create a service account in your GCP project.
Go to IAM & Admin > Service accounts. Ensure your dashboard is scoped to the project that contains your service account. 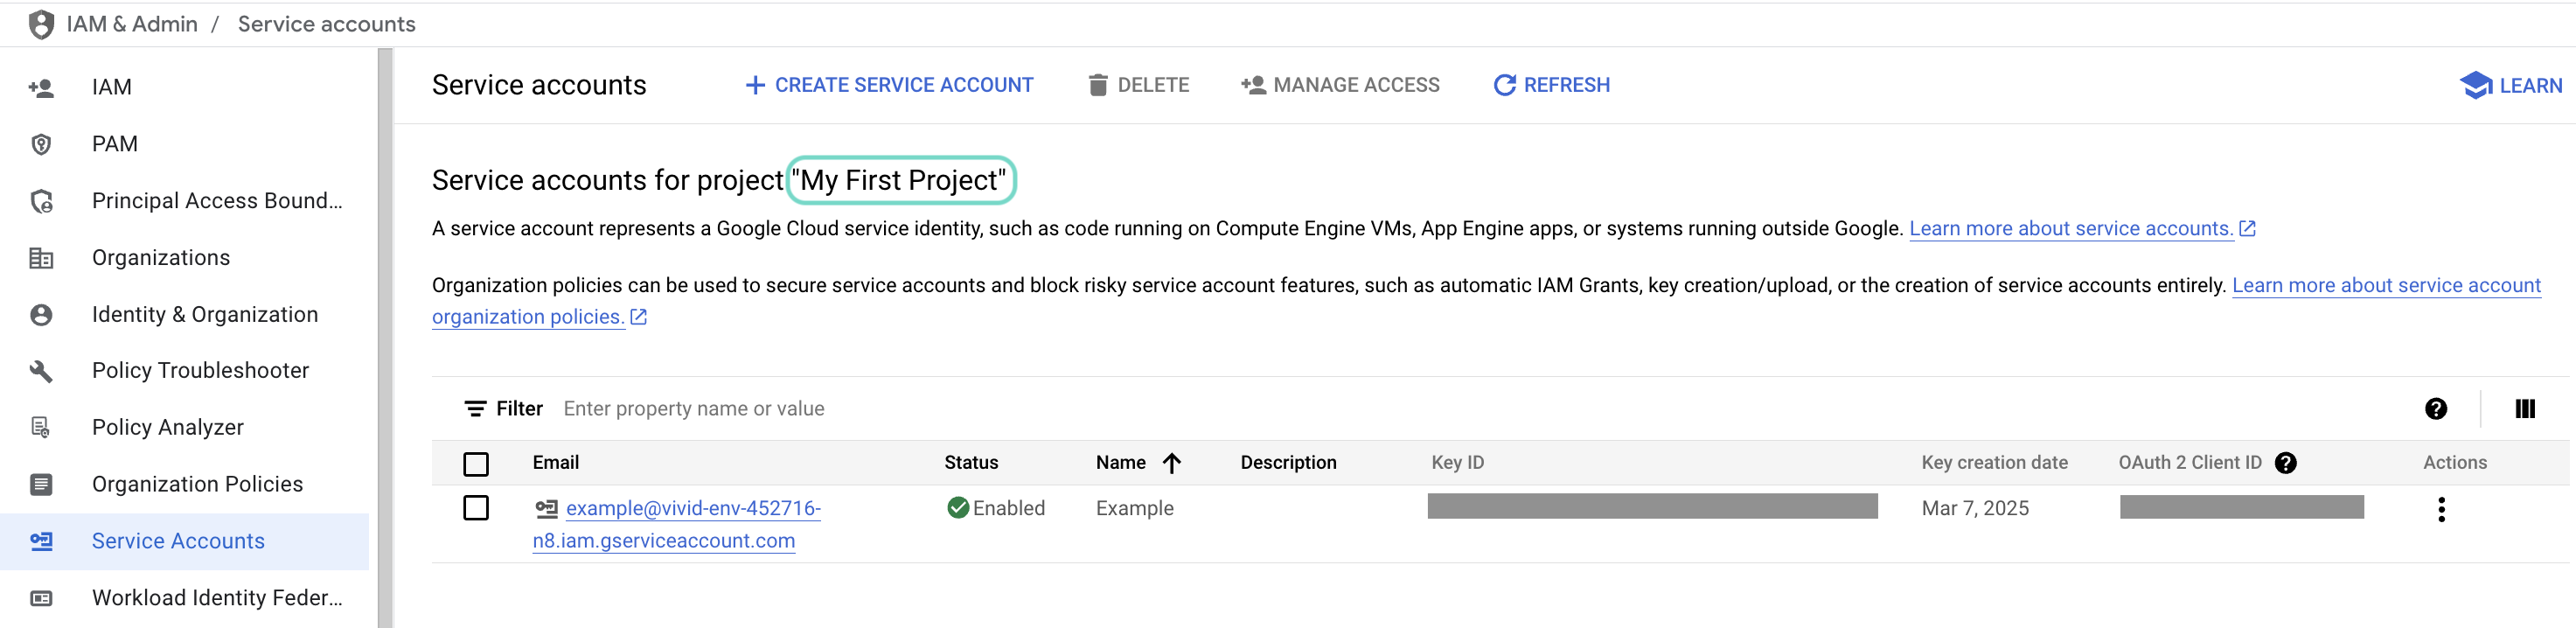 Check the scope of your dashboard.
Click the Email of the service account you intend to use. 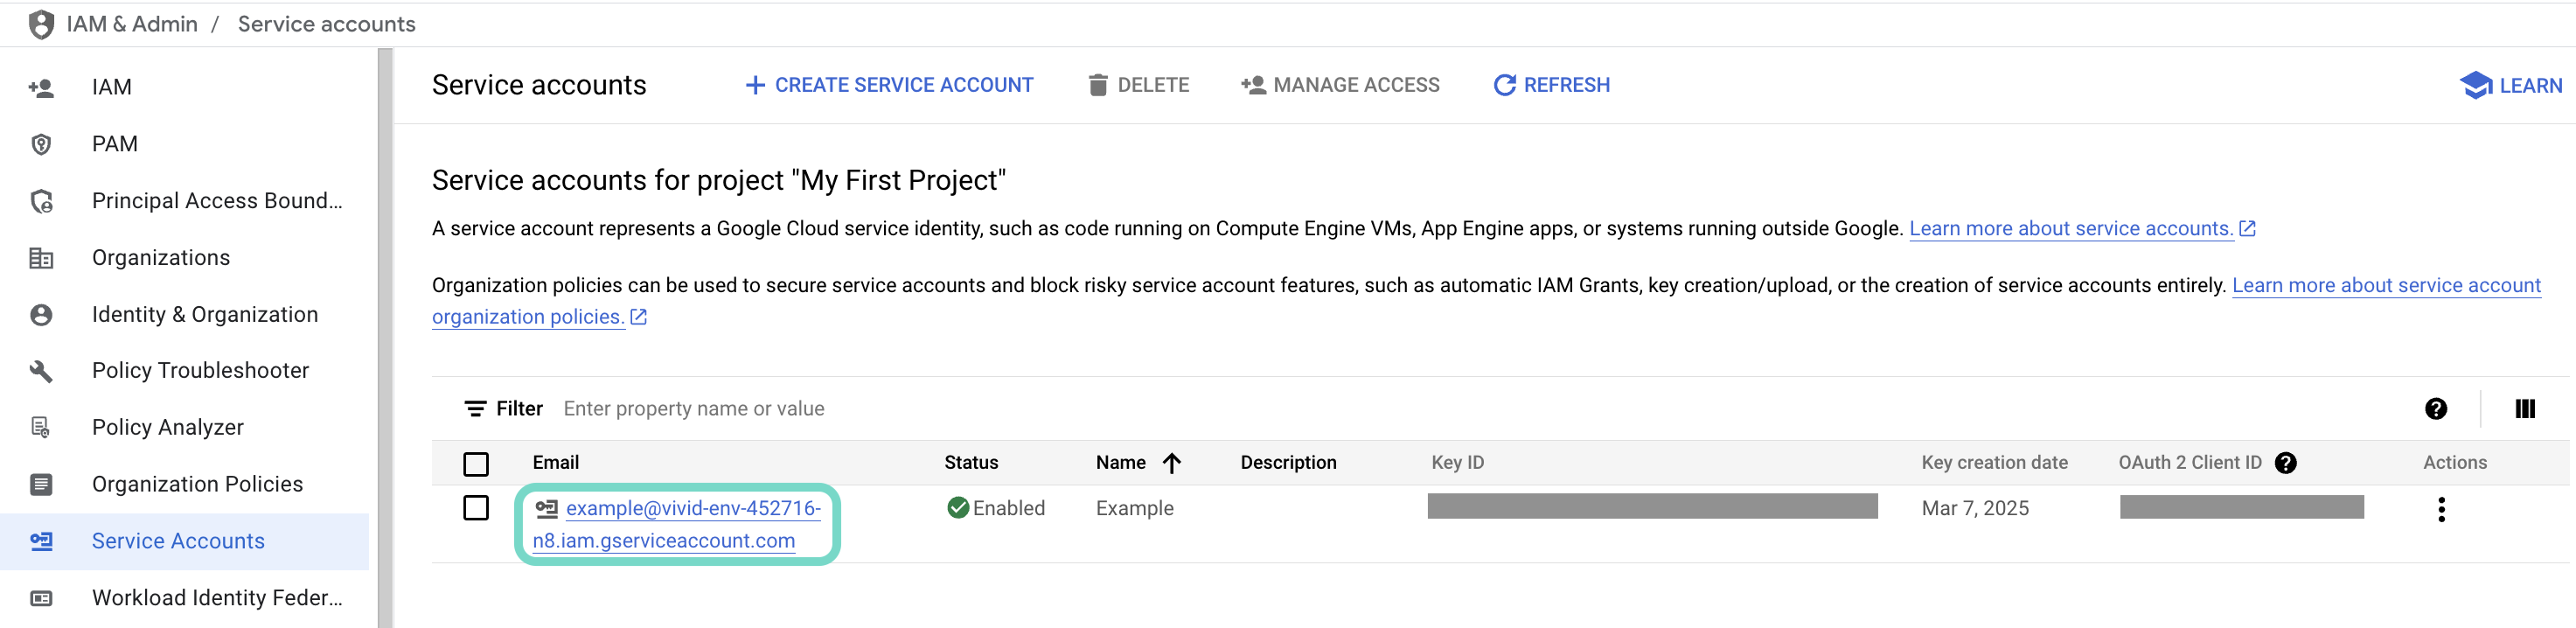 Click the Email of the service account you intend to use.
Copy the service account's Email and save it to configure your connection later. 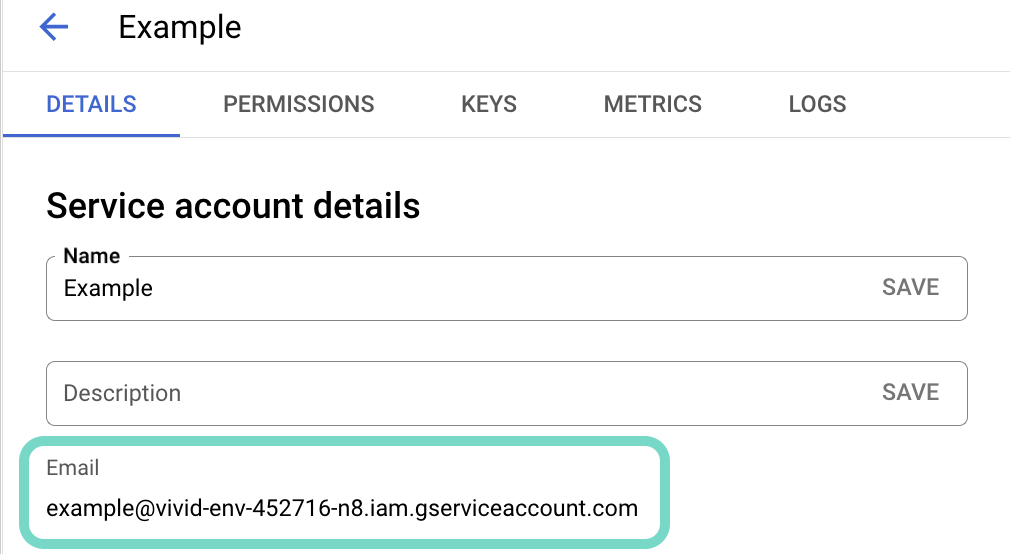 Copy the account's Email.
Go to the KEYS tab.
Generate a private key and download it in JSON format. You can only download the key once.
Open the JSON file, then copy the entire private key from -----BEGIN PRIVATE KEY----- to -----END PRIVATE KEY-----\n (inclusive) and save it to configure your connection later.
Enable the Google Calendar API
View Enable the Google Calendar API steps
You must enable the Google Calendar API before you return to Workato to finish setting up your connection.
Sign in to Google's API library.
Search for and select the Google Calendar API.
Click Enable to enable the API. 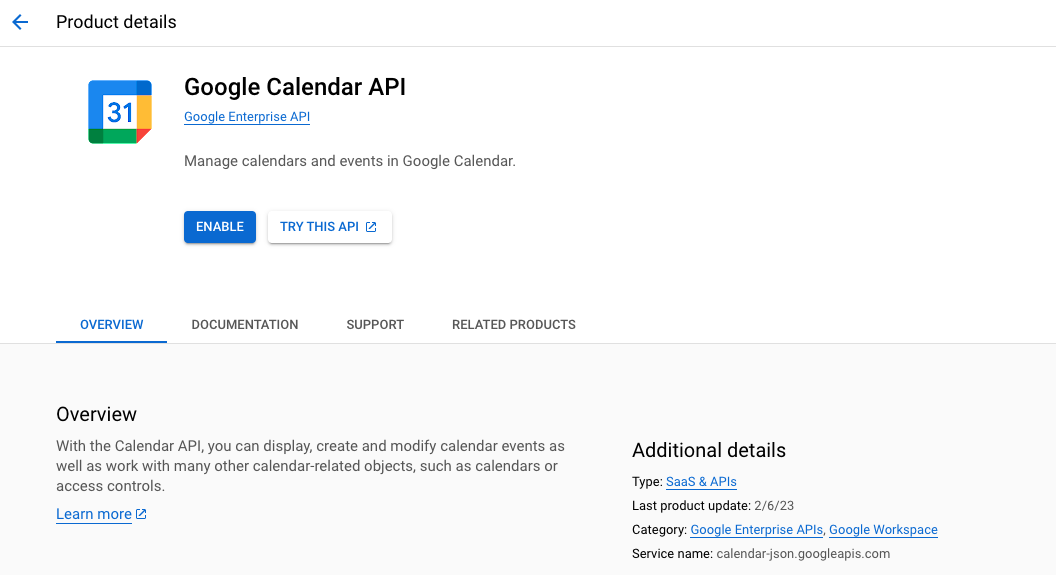 Enable the
 Google Calendar API
Complete setup in Workato
View Workato setup steps
Complete the following steps in Workato to set up your Google Calendar connection using a service account:
Click Create > Connection or press C twice.
Search for and select Google Calendar as your connection on the New connection page.
Provide a name for your connection in the Connection name field.
Use the Location drop-down menu to select the project where you plan to store the connection.
Select Service account as the Authentication type.
Enter your service account's Private key.
Provide the User email of the account you plan to impersonate.
User impersonation lets the service account act on behalf of a designated user, accessing and managing events in their Google Calendar. Impersonating a user ensures data accuracy and enforces the permissions and access controls set for that user in Google Calendar. Refer to Google's Service account impersonation guide for more information.
Click Sign in with Google to complete the setup. 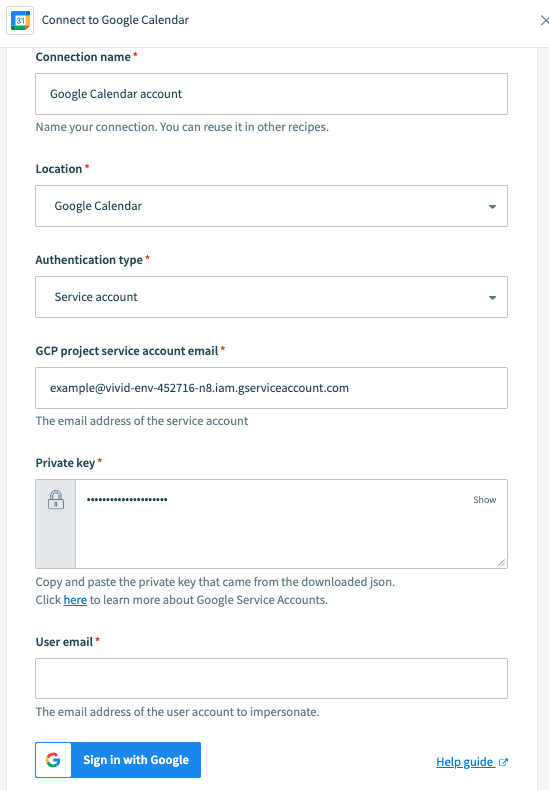 Configure Google Calendar service account connection
Slack connection (optional)
View Slack connection setup steps
REQUIRED PROJECT PROPERTY
Enable the notifications.enabled project property to use Slack for notifications.
Complete the following steps to connect to Slack in Workato:
Click Create > Connection or press C twice.
Search for Slack and select it as your app.
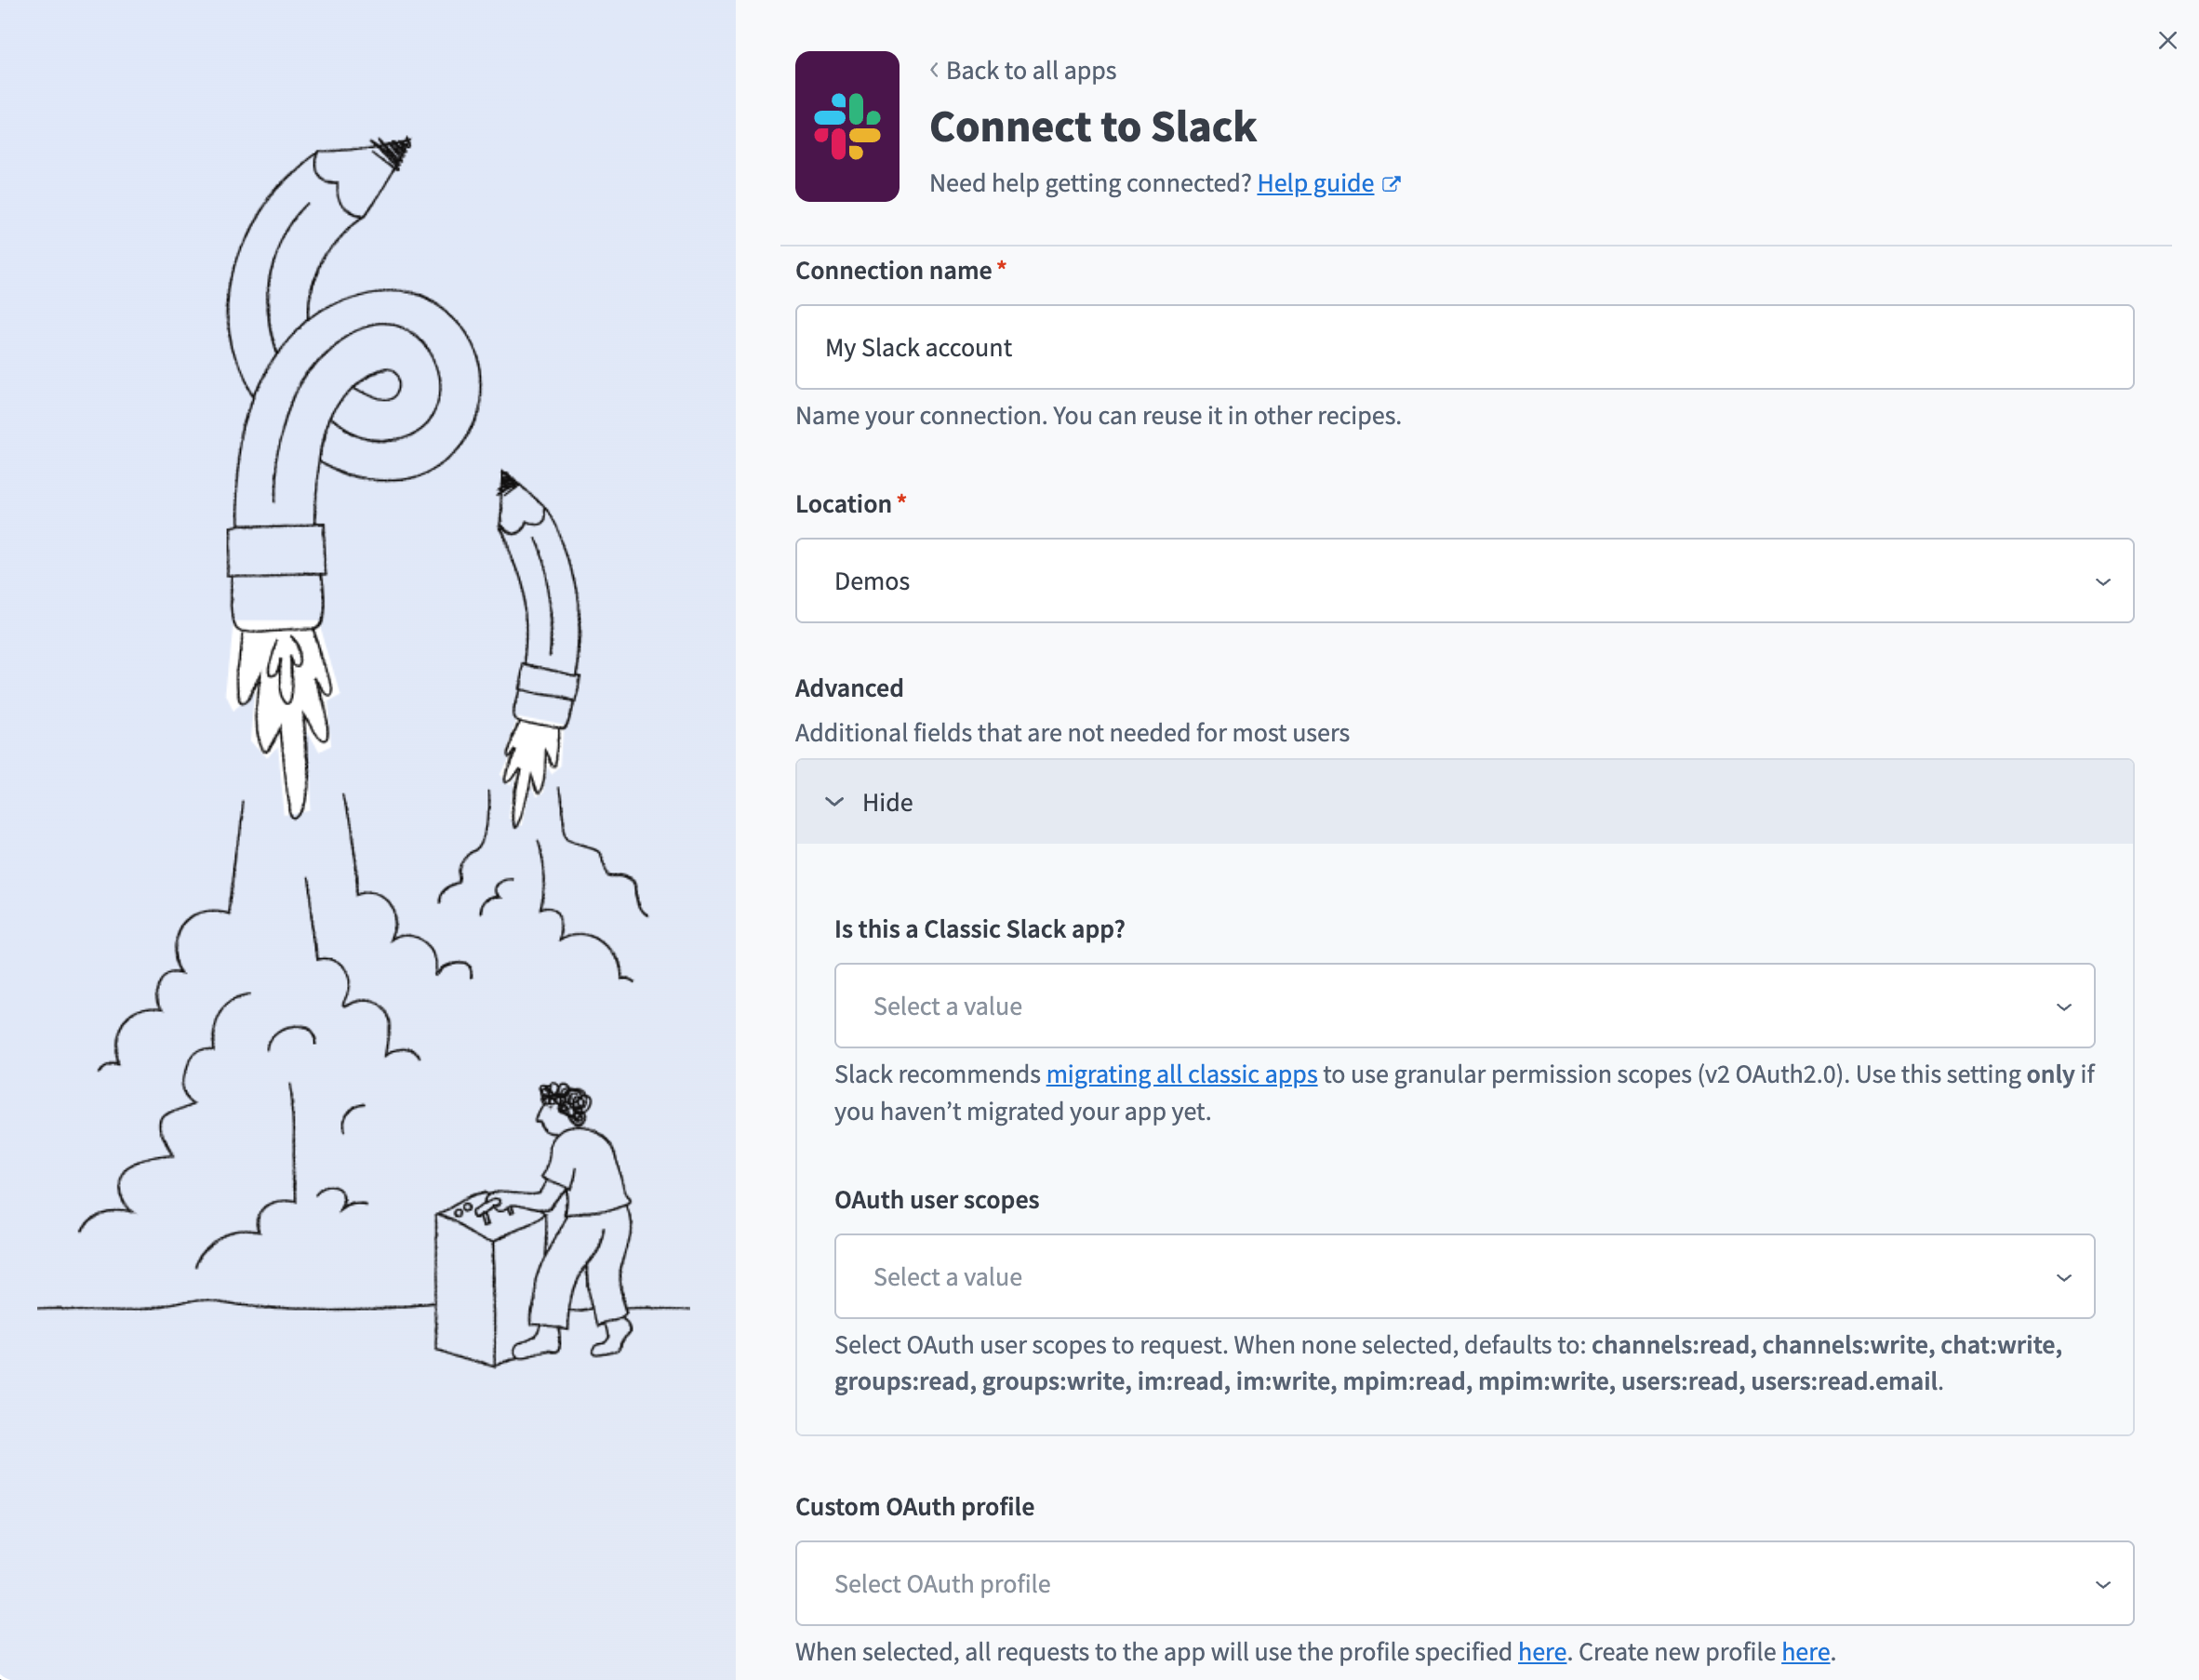
Enter a name for your connection in the Connection name field.
 Slack connection
Use the Location drop-down menu to select the project where you plan to store the connection.
Optional. Expand Advanced and use the Is this a Classic Slack app? drop-down menu to select Yes or No. Select Yes only if you haven't migrated your Slack app to granular permission scopes. Refer to Moving to granular permission scopes for more information.
Optional. Use the OAuth user scopes drop-down menu to select the OAuth user scopes to request for your connection. Leave this field empty to request the default scopes.
Optional. Use the Custom OAuth profile drop-down menu to select a custom OAuth profile for your connection. Refer to Custom OAuth profiles for Slack for more information.
Click Connect.
Click Allow to grant Workato permission to access your account.
Slack permissions
The connected account must have the OAuth scope required to post messages and access to the notification channel you select. Refer to Slack's OAuth scopes documentation for the complete list of scope capabilities.
ZoomInfo connection (optional)
View ZoomInfo connection setup steps
REQUIRED PROJECT PROPERTY
Enable the enrichment.enabled project property to use ZoomInfo for lead enrichment.
Complete the following steps to set up your ZoomInfo connection:
REQUIRED ZOOMINFO PERMISSIONS
Your ZoomInfo account must have ZoomInfo API access permissions to connect to Workato.
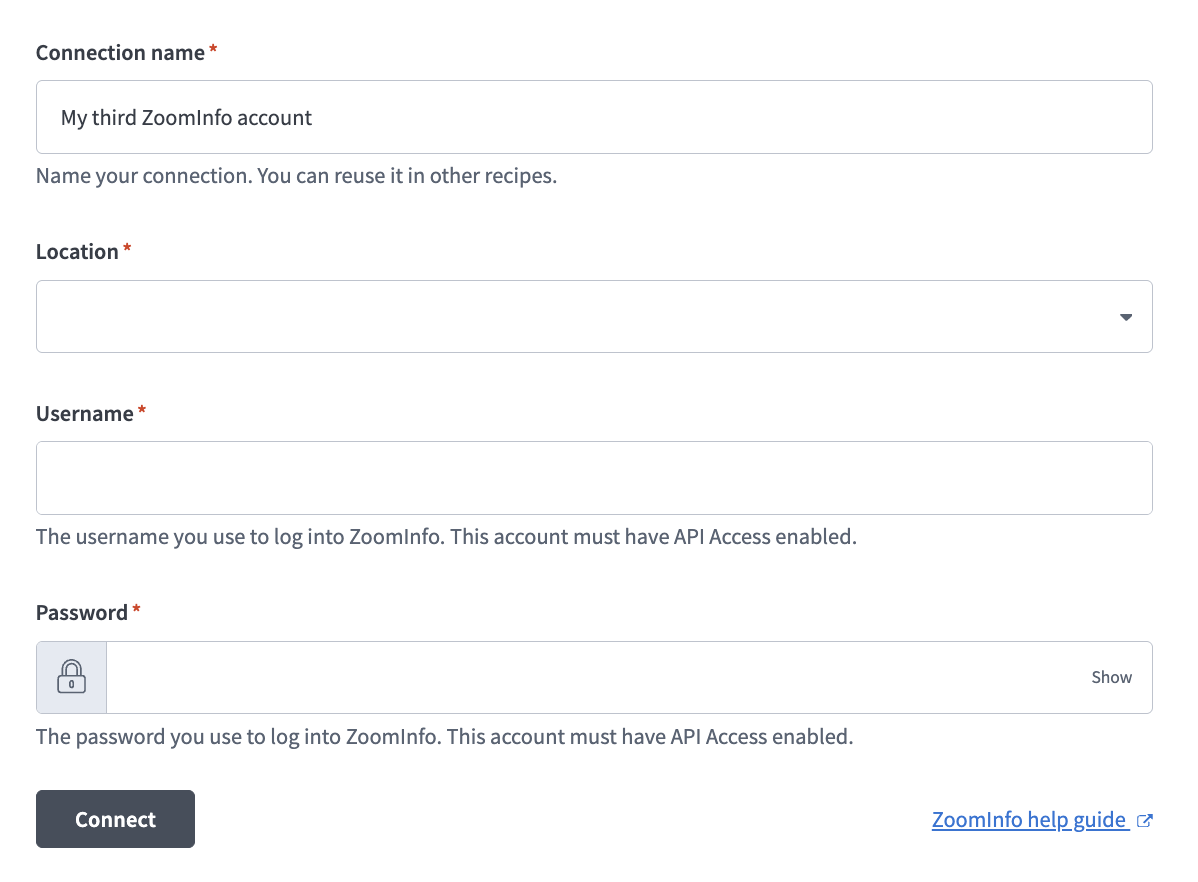
Enter a name for your connection in the Connection name field.
 Set up your ZoomInfo connection
Use the Location drop-down menu to select the project where you plan to store your connection.
Enter your ZoomInfo username in the Username field.
Enter your ZoomInfo password in the Password field.
Click Connect.
Project property configuration
The Marketing Event Program Orchestration MCP server supports the following project-level properties to control behavior and defaults:
| Project-level property | Description |
|---|---|
event_type_region_map | Enter a map that connects each event type and region to a Marketo folder ID, template program ID, naming prefix, channel, and timezone. |
marketo_lead_field_map | Enter a map that connects your Marketo lead fields, such as API name, label, aliases, and sort order, to the CSV column for lead imports. |
calendar.connection / calendar.calendar_id | Select your calendar connection and enter the ID of the target calendar for the selected provider. |
calendar.timezone_source | Select whether event times resolve by region, using event_type_region_map, or from one fixed timezone for the whole deployment. |
notifications.enabled | Enable Slack notifications for program creation and import completion. |
notifications.connection / notifications.channel | Select your messaging connection and enter the target channel. Required when notifications are turned on. |
enrichment.enabled | Enable ZoomInfo enrichment to automatically fill blank lead fields during import. |
preview.expiry_seconds | Enter how long a server-issued preview remains valid before rejecting a commit attempt as expired. Defaults to 300 seconds. |
server_limits.max_file_bytes / .max_rows / .max_poll_seconds | Enter the maximum file size, row count, and polling duration allowed for a lead import. Defaults to 9,500,000 bytes, 50,000 rows, and 600 seconds. |
audit.ledger_retention_days / .artifact_retention_days | Enter the number of days to retain ledger records and uploaded-file artifacts. |
marketo_url_template | Enter a URL template to use for links, with a placeholder for your Marketo org. |
View project-level property configuration steps
Complete the following steps to configure your project-level properties:
Sign in to your Workato account and go to Projects.
Go to the project that contains your MCP server.
Click the Settings tab.
 Click the Settings tab.
Select Project properties.
Go to the project property you plan to update and click the Edit (pencil) icon.
Go to the Value field and make your changes. For example, set notifications.enabled to false or audit.ledger_retention_days to 5.
How to use Marketing Event Program Orchestration MCP server tools
Refer to the following sections for detailed information on available tools:
open_event_intake tool
The open_event_intake tool opens the Event360 companion app to create an event program or import a lead list. Your LLM uses this tool to set up a new event program or import a registrant list into Marketo.
Try asking:
Set up a new webinar program.I have an event to add.Open Event Ops.Get this list into Marketo.
provision_event_program tool
The provision_event_program tool looks up the details for a Marketo event, presents a preview for your approval, then creates the program and books a calendar hold. Your LLM calls this tool once to retrieve information and display a preview, then calls it again after receiving approval to create the program and book the hold.
Try asking:
Set up a new webinar program for APJ next month.Create a field event in NORAM and book the calendar for it.Set up a new live event for Japan on March 3rd.Approve this event program preview.
get_lead_field_map tool
The get_lead_field_map tool returns the configured Marketo lead field catalog from the marketo_lead_field_map data table, such as the API name, label, aliases, whether the field is required, and sort order. The Event360 companion app uses this tool to create the CSV column mapping for a lead import.
Try asking:
What lead fields does this deployment support for import?Show me the required fields for a lead import.Which column maps to the Company field in Marketo?
search_event_programs tool
The search_event_programs tool finds existing Marketo event programs by name prefix on the recent-program list, or by numeric ID through a live Marketo lookup. Your LLM uses this tool to resolve a program by name or ID before importing members into it, or to answer questions about a program you've recently created.
Try asking:
What's the URL for the trade show program I created last week?Find the Q2 webinar program.Search for the NORAM field event program.Look up program 123074.
import_program_members tool
The import_program_members tool receives a lead CSV from the Event360 app, checks the file's row counts and validity, presents the results for your approval, then imports into Marketo.
Try asking:
Get this registrant CSV into the Q2 webinar program.Import these leads into the program I just created.Here's the mapping for my registrant file.Commit this lead import.
get_operation_status tool
The get_operation_status tool lists recent operations, or polls a specific operation's status when you provide an ID. You can explicitly ask for the live result or allow the tool to poll Marketo and update cached statuses automatically. Your LLM uses this tool to check progress on a program creation or lead import, or to recover an in-progress operation after you reconnect.
Try asking:
Did my lead import finish?What's the URL for the trade show program I created last week?I navigated away. What was I uploading?Check the real current status of my import, not the cached one.
Event360 MCP app
The open_event_intake tool opens the Event360 MCP app, which manages event program creation and lead list uploads. Both workflows present a preview for your approval before writing. The app also monitors the status of in-progress operations to help you resume work after you reconnect.
Getting started
View and manage your MCP server tools in the Overview page Tools section. Tool management provides the following capabilities:
TOOLS MUST BE STARTED
Your LLM can only access active tools in your MCP server connector.
Last updated: