Confluence MCP server
The Confluence MCP server enables LLMs to read and write documentation stored in Confluence Cloud through natural conversation. It provides tools to retrieve content, create pages, view attachments, update pages, and archive pages directly from AI environments without requiring direct interaction with the Confluence interface.
Uses
Use the Confluence MCP server when you plan to perform the following actions:
- Search for Confluence pages by keywords or natural language queries
- Retrieve and read page content for summarization or analysis
- Understand page hierarchy and document structure
- View attachments associated with specific pages
- Create new documentation pages in specified spaces
- Update existing pages with revised content
- Append new sections to existing pages without rewriting
- Archive pages to retire content without deletion
Example prompts
Use the following example prompts to invoke Confluence MCP server tools:
Find pages about the API authentication process.Read the onboarding documentation page.Show me the page hierarchy for the project requirements doc.What attachments are on the architecture design page?Create a new page in the Engineering space for the deployment guide.Update the troubleshooting page with the new error codes.Append this week's status update to the project log page.Archive the deprecated product specification page.
Confluence MCP server tools
The Confluence MCP server provides the following tools:
| Tool | Description |
|---|---|
| search_pages | Searches for Confluence pages that match a natural-language or keyword query. |
| get_page | Retrieves the full content and metadata of a single Confluence page. |
| get_page_hierarchy | Retrieves the parent and immediate children of a page to provide structural context. |
| get_attachments | Retrieves metadata and access URLs for attachments associated with a page. |
| create_page | Creates a new Confluence page in a space or under a specific parent. |
| update_page | Performs a full-content update of an existing Confluence page. |
| append_to_page | Appends new content to the bottom of an existing Confluence page. |
| archive_page | Archives an existing page without deleting it. |
Install the Confluence MCP server
Complete the following steps to install a prebuilt MCP server to your project:
Sign in to your Workato account.
Go to AI Hub > MCP servers.
Click + Create MCP server.
Go to the Start with pre-built MCP Servers using your connected apps section and select the prebuilt MCP server you plan to use.
Click Use this server.
Provide a name for your MCP server in the Server name field.
Use the Location drop-down menu to select the project for the MCP server.
Go to the Connections section and connect to your app account.
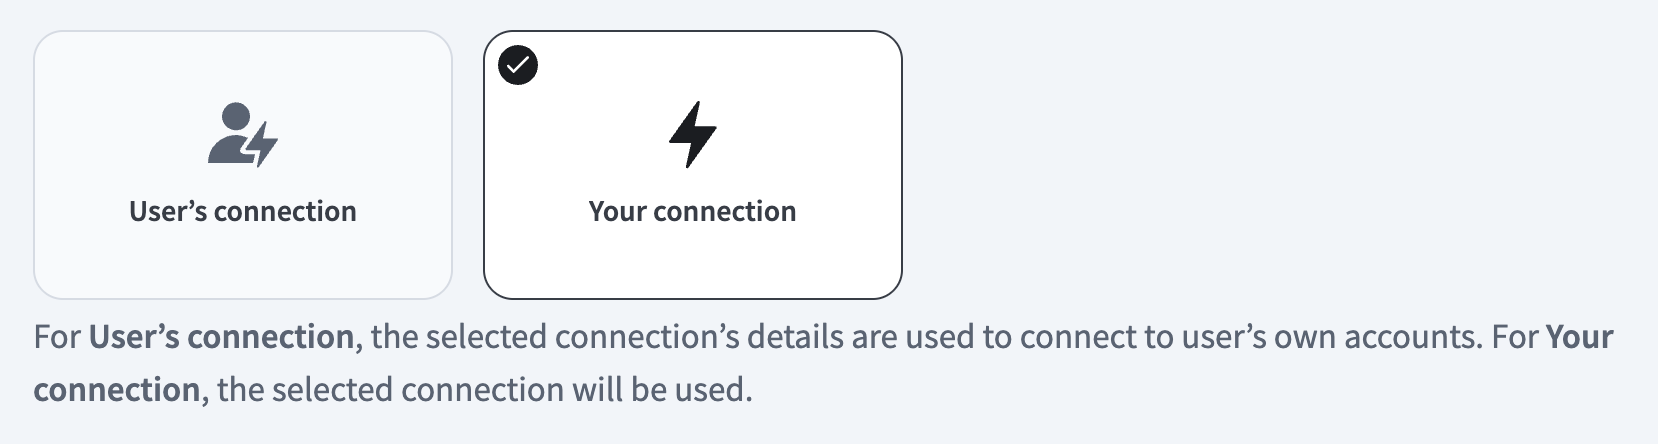
Select the connection type you plan to use for the MCP server template.
- User's connection: MCP server tools perform actions based on the identity and permissions of the user who connects to the application. Users authenticate with their own credentials to execute the skill.
- Your connection: This option uses the connection established by the recipe builder and follows the same principles as normal app connections.
 Select your connection type
VERIFIED USER ACCESS AUTHENTICATION REQUIREMENTS
Only app connections that use OAuth 2.0 authorization code grant are available for user's connection. Refer to Verified user access for more information.
Complete the app-specific connection setup steps in the following section.
Confluence connection setup
View Confluence connection setup steps
The Confluence connector supports the following authentication types:
Basic authentication
Use basic authentication with your Confluence username and password.
View basic authentication steps
Complete the following steps to set up a basic authentication connection to Confluence in Workato:
Click Create > Connection.
Search for Confluence and select it as your app.
Enter a name for your connection in the Connection name field.
 Basic connection
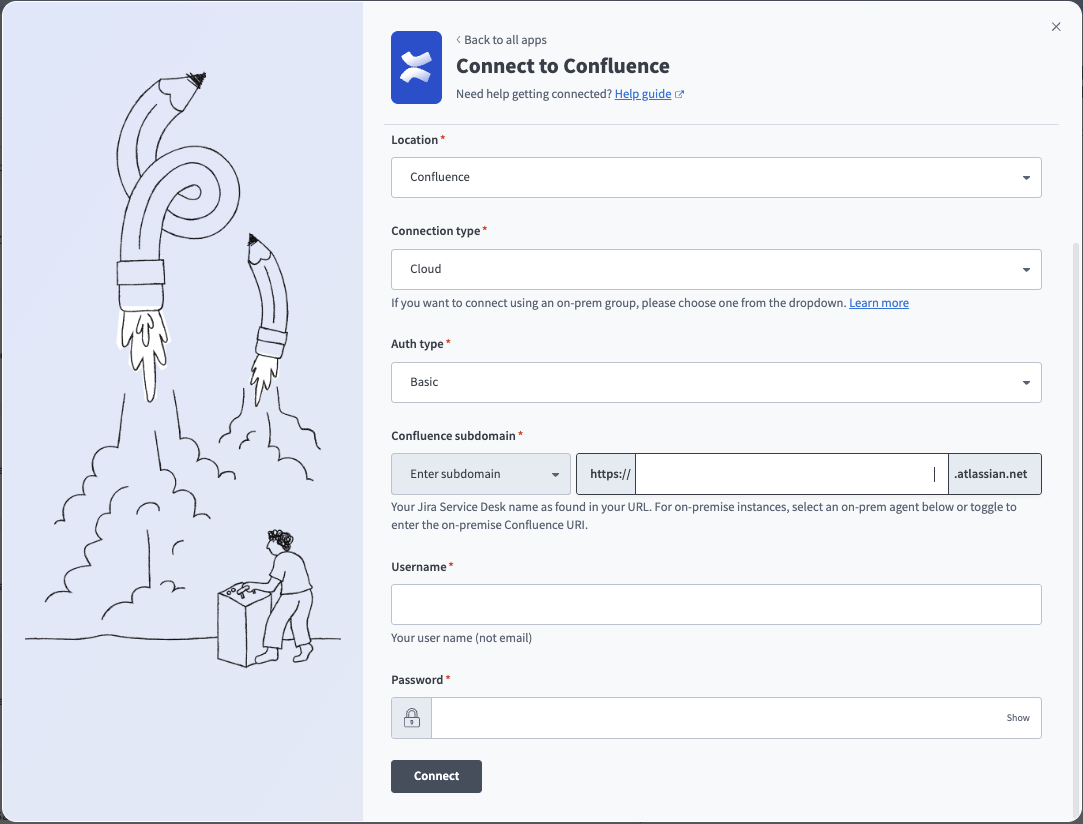
Use the Location drop-down menu to select the project where you plan to store the connection.
Use the Connection type drop-down menu to select Cloud for Confluence cloud instances or the corresponding option for on-prem connections. Refer to Connections using an on-prem agent for more information.
CLOUD EDITION REQUIRED
Confluence Data Center edition doesn't support Confluence v2 APIs. You must use a cloud connection for the Confluence MCP server and the following actions:
- Create page
- Create task
- Search labels
- Search spaces
- Get ancestors for page
- Get attachments for page
- Get children for page
- Get page by ID
- Update page
Use a Custom action if you need a feature the Data Center edition doesn't support.
Use the Auth type drop-down menu to select Basic.
Enter your subdomain for cloud instances in the Confluence subdomain field. This is typically found in the Confluence URL. For example, your subdomain is acme if your URL is https://acme.atlassian.net.
Optionally, select Enter on-prem URI from the drop-down menu and enter your Confluence URI in the Confluence domain field. This is the root URI of your on-prem Confluence host. For example, https://confluence.intranet.acme.com:7654. You might need to add Workato's IP address to the allowlist to connect. Refer to IP allowlists for more information.
Enter your Confluence Username and Password.
Click Connect.
API token authentication
You must generate an API token to use API token authentication.
Confluence setup for API token authentication
View generate API token steps
Complete the following steps to generate an API token in Confluence:
Go to the Atlassian API Tokens page.
Click Create API token.
Enter a Name and select an Expires on date.
Click Create.
Copy and save the API token for use in Workato.
Connect to Confluence with API token authentication
View connect to Confluence with API token authentication steps
Complete the following steps to set up an API token connection to Confluence in Workato:
Click Create > Connection.
Search for Confluence and select it as your app.
Enter a name for your connection in the Connection name field.
 API token connection
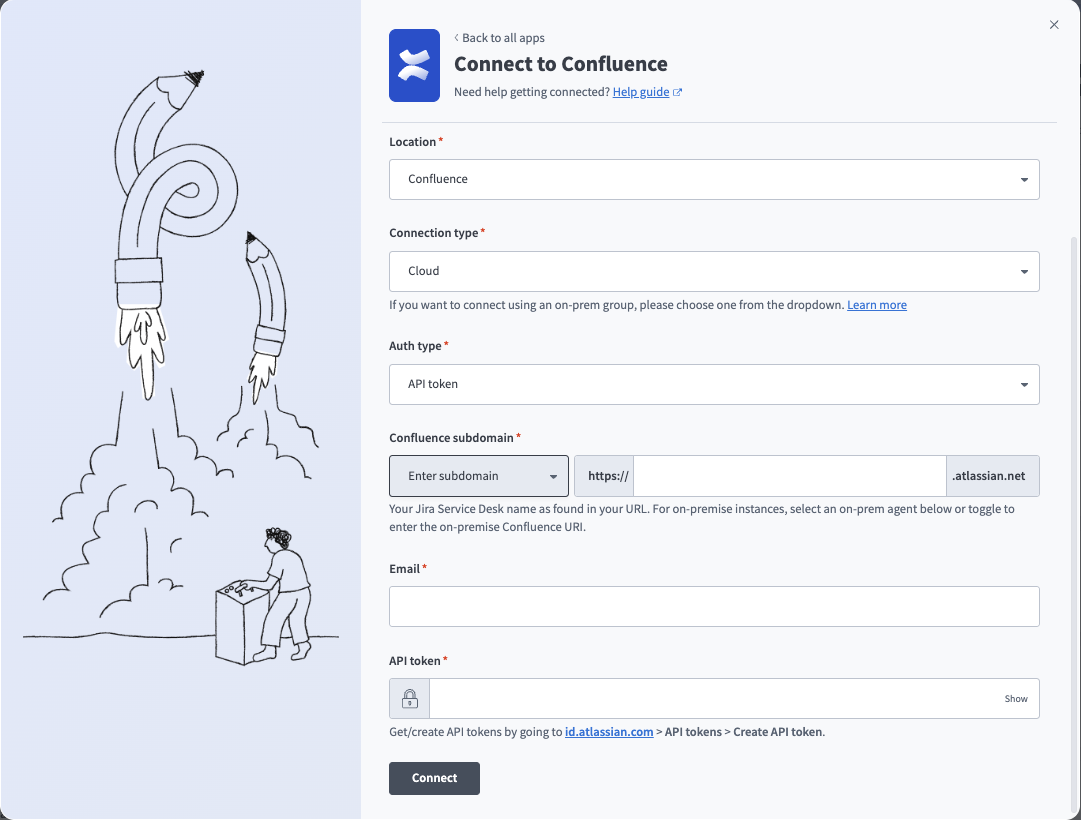
Use the Location drop-down menu to select the project where you plan to store the connection.
Use the Connection type drop-down menu to select Cloud for Confluence cloud instances or the corresponding option for on-prem connections. Refer to Connections using an on-prem agent for more information.
CLOUD EDITION REQUIRED
Confluence Data Center edition doesn't support Confluence v2 APIs. You must use a cloud connection for the Confluence MCP server and the following actions:
- Create page
- Create task
- Search labels
- Search spaces
- Get ancestors for page
- Get attachments for page
- Get children for page
- Get page by ID
- Update page
Use a Custom action if you need a feature the Data Center edition doesn't support.
Use the Auth type drop-down menu to select API token.
Enter your subdomain for cloud instances in the Confluence subdomain field. This is typically found in the Confluence URL. For example, your subdomain is acme if your URL is https://acme.atlassian.net.
Optionally, select Enter on-prem URI from the drop-down menu and enter your Confluence URI in the Confluence domain field. This is the root URI of your on-prem Confluence host. For example, https://confluence.intranet.acme.com:7654. You might need to add Workato's IP address to the allowlist to connect. Refer to IP allowlists for more information.
Enter your Email and API token.
Click Connect.
OAuth 2.0 authentication
You must generate a client ID and secret to use OAuth 2.0 authentication.
Confluence setup for OAuth 2.0 authentication
View generate client ID and secret steps
Complete the following steps to generate a client ID and secret in Confluence:
Log in to the Atlassian Developer Console.
Click Create > OAuth 2.0 integration.
Enter a Name.
Agree to the terms.
Click Create.
Click Authorization and then click Add.
Enter https://www.workato.com/oauth/callback in the Callback URL field and then click Save changes.
Click Permissions.
Click Add for the Confluence API.
Click Configure.
Click Edit Scopes under Classic scopes.
Select the following scopes:
manage:confluence-configurationread:confluence-groupsread:confluence-content.allread:confluence-content.permissionread:confluence-content.summaryread:confluence-propsread:confluence-space.summaryread:confluence-userread:page:confluencereadonly:content.attachment:confluencesearch:confluencewrite:confluence-contentwrite:confluence-filewrite:confluence-groupswrite:confluence-space
Click Save.
Select Settings.
Copy and save the Client ID and Secret for use in Workato.
Connect to Confluence with OAuth 2.0 authentication
View connect to Confluence with OAuth 2.0 authentication steps
Complete the following steps to set up an OAuth 2.0 connection to Confluence in Workato:
Click Create > Connection.
Search for Confluence and select it as your app.
Enter a name for your connection in the Connection name field.
 OAuth connection
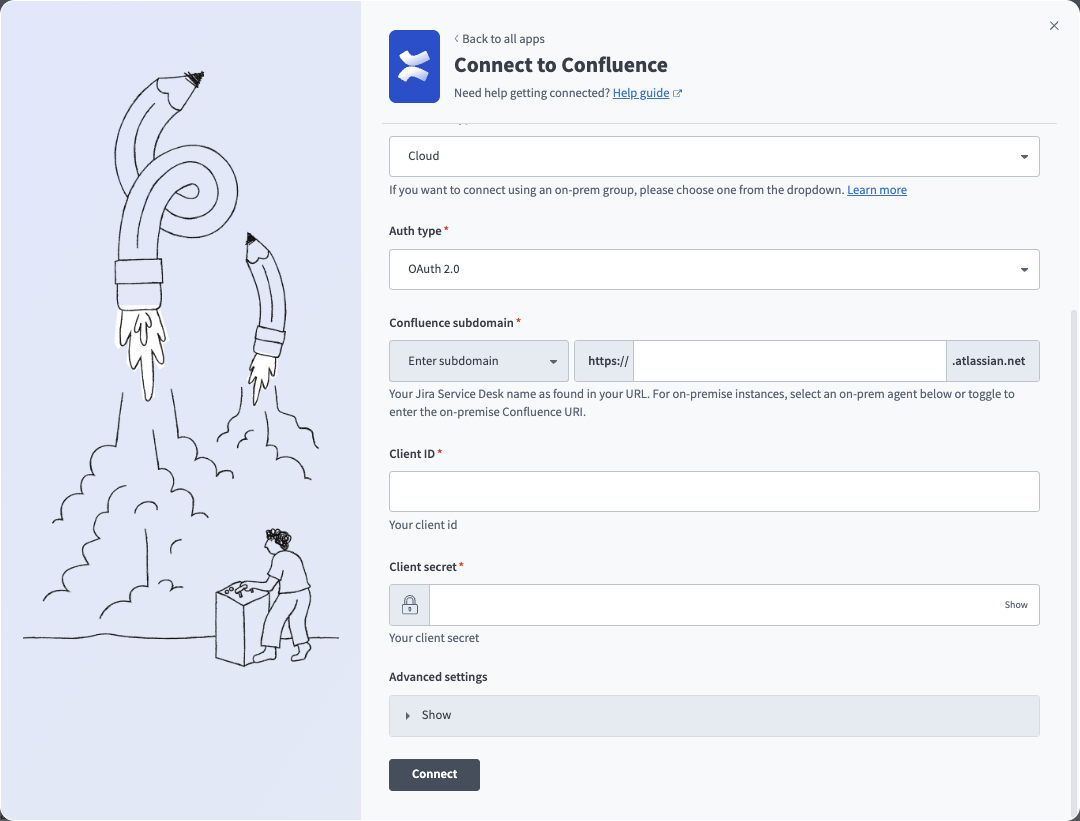
Use the Location drop-down menu to select the project where you plan to store the connection.
Use the Connection type drop-down menu to select Cloud for Confluence cloud instances or the corresponding option for on-prem connections. Refer to Connections using an on-prem agent for more information.
CLOUD EDITION REQUIRED
Confluence Data Center edition doesn't support Confluence v2 APIs. You must use a cloud connection for the Confluence MCP server and the following actions:
- Create page
- Create task
- Search labels
- Search spaces
- Get ancestors for page
- Get attachments for page
- Get children for page
- Get page by ID
- Update page
Use a Custom action if you need a feature the Data Center edition doesn't support.
Use the Auth type drop-down menu to select OAuth 2.0.
Enter your subdomain for cloud instances in the Confluence subdomain field. This is typically found in the Confluence URL. For example, your subdomain is acme if your URL is https://acme.atlassian.net.
Optionally, select Enter on-prem URI from the drop-down menu and enter your Confluence URI in the Confluence domain field. This is the root URI of your on-prem Confluence host. For example, https://confluence.intranet.acme.com:7654. You might need to add Workato's IP address to the allowlist to connect. Refer to IP allowlists for more information.
Enter the Client ID and Client secret.
Optionally, expand Advanced settings and select Classic scopes or Granular scopes.
Click Connect.
Choose a site from the Use app on drop-down menu. This is the Atlassian account your app accesses.
Click Accept.
How to use Confluence MCP server tools
Refer to the following sections for detailed information on available tools:
search_pages tool
The search_pages tool searches for Confluence pages that match a natural-language or keyword query and returns a list of matching pages you're permitted to view. Your LLM uses this tool to find, look up, identify, or search for information that may exist in Confluence.
Try asking:
Find pages about API authentication.Search for documentation on the deployment process.Look up pages related to customer onboarding.Find the troubleshooting guides in the Engineering space.
get_page tool
The get_page tool retrieves the full content and metadata of a single Confluence page. Your LLM uses this to read, open, retrieve, or summarize a specific page.
Try asking:
Read the API documentation page.Show me the content of the onboarding guide.Summarize the project requirements page.Get the deployment instructions page.
get_page_hierarchy tool
The get_page_hierarchy tool retrieves the parent and immediate children of a page to provide context for document structure and placement. Your LLM uses this to understand how a page is organized, where it sits in the documentation structure, or where a newly created page should be placed.
Try asking:
Show me the page hierarchy for the product documentation.Where does the API guide page sit in the structure?What are the child pages under the onboarding documentation?How is the engineering wiki organized around this page?
get_attachments tool
The get_attachments tool retrieves metadata and access URLs for attachments associated with a page. Your LLM uses this tool to retrieve information about attachments on a specific page.
Try asking:
What attachments are on the architecture design page?Show me the files attached to the deployment guide.List the attachments on the API documentation.What documents are attached to the requirements page?
create_page tool
The create_page tool creates a new Confluence page in a space or under a specific parent, using content generated by your LLM. Your LLM uses this tool to create, draft, or publish a new document, specification, summary, or knowledge artifact in Confluence.
Try asking:
Create a new page in the Engineering space for the deployment guide.Draft a troubleshooting page under the API documentation.Publish a new onboarding checklist in the HR space.Create a meeting notes page for today's planning session.
update_page tool
The update_page tool performs a full-content update of an existing Confluence page. Your LLM uses this tool to revise, rewrite, or replace the content of an existing page.
Try asking:
Update the API authentication page with the new OAuth flow.Revise the troubleshooting guide with the latest error codes.Rewrite the deployment instructions to include the new steps.Update the product requirements page with the revised specs.
append_to_page tool
The append_to_page tool appends new content to the bottom of an existing Confluence page without rewriting the entire page body. Your LLM uses this tool to add a section, add a log entry, post a weekly update, or append content without modifying the existing body.
Try asking:
Append this week's status update to the project log page.Add a new troubleshooting entry to the FAQ page.Post today's meeting notes to the weekly updates page.Add a new section about the feature to the product documentation.
archive_page tool
The archive_page tool archives an existing page without deleting it to preserve full recoverability and traceability. Your LLM uses this tool to retire, deprecate, or archive a page to remove it from active use without deleting it.
Try asking:
Archive the deprecated product specification page.Retire the old API documentation page.Archive the Q3 planning page now that Q4 has started.Remove the outdated onboarding guide from active documentation.
Getting started
View and manage your MCP server tools in the Overview page Tools section. Tool management provides the following capabilities:
TOOLS MUST BE STARTED
Your LLM can only access active tools in your MCP server connector.
Last updated: