Outlook Contacts MCP server
The Outlook Contacts MCP server enables LLMs to manage a user's personal contacts within Microsoft Outlook through natural conversation. It provides tools to search, retrieve, create, update, delete, and organize contact records, manage contact folders, deduplicate contacts, and apply Outlook categories as cross-cutting organizational labels without requiring direct interaction with the Outlook interface.
Uses
Use the Outlook Contacts MCP server to perform the following actions:
- Search personal contacts by name or email address
- List contacts from a folder with optional filters for company or category
- Retrieve full details for a specific contact by ID
- Create a new contact in Outlook
- Update specific fields on an existing contact
- Permanently delete a contact
- Move a contact from one folder to another
- List contact folders and check folder contents
- Retrieve full details for a specific contact folder
- Create, rename, and delete contact folders
- List all Outlook category labels in use across contacts
Example prompts
Use the following example prompts to invoke Outlook Contacts MCP server tools:
Find Sarah's contact details.Show all contacts in my Vendors folder.Show contacts tagged VIP.Get the full profile for this contact.Save Marcus as a new contact.Update the phone number for this contact.Delete this contact from my Outlook.Move this contact to the Partners folder.What contact folders do I have?Create a new folder called Prospects.Rename this contact folder.What categories have I applied to my contacts?
Outlook Contacts MCP server tools
The Outlook Contacts MCP server provides the following tools:
| Tool | Description |
|---|---|
| search_contacts | Searches personal contacts by name or email address. |
| list_contacts | Lists contacts from a contact folder, with optional filtering. |
| get_contact | Retrieves full details for a contact by ID. |
| create_contact | Creates a new contact in the user's Outlook contacts. |
| update_contact | Updates fields you specify on an existing contact. |
| delete_contact | Permanently deletes a contact from the user's Outlook contacts. |
| move_contact | Moves a contact from one contact folder to another. |
| list_contact_folders | Lists the user's contact folders. |
| get_contact_folder | Retrieves details for a contact folder you specify, including child folders. |
| create_contact_folder | Creates a new contact folder. |
| update_contact_folder | Renames an existing contact folder. |
| delete_contact_folder | Deletes a contact folder and all contacts within it. |
| list_categories | Lists all Outlook category labels currently in use across the user's contacts. |
Install the Outlook Contacts MCP server
Complete the following steps to install a prebuilt MCP server to your project:
Sign in to your Workato account.
Go to AI Hub > MCP servers.
Click + Create MCP server.
Go to the Start with pre-built MCP Servers using your connected apps section and select the prebuilt MCP server you plan to use.
Click Use this server.
Provide a name for your MCP server in the Server name field.
Use the Location drop-down menu to select the project for the MCP server.
Go to the Connections section and connect to your app account.
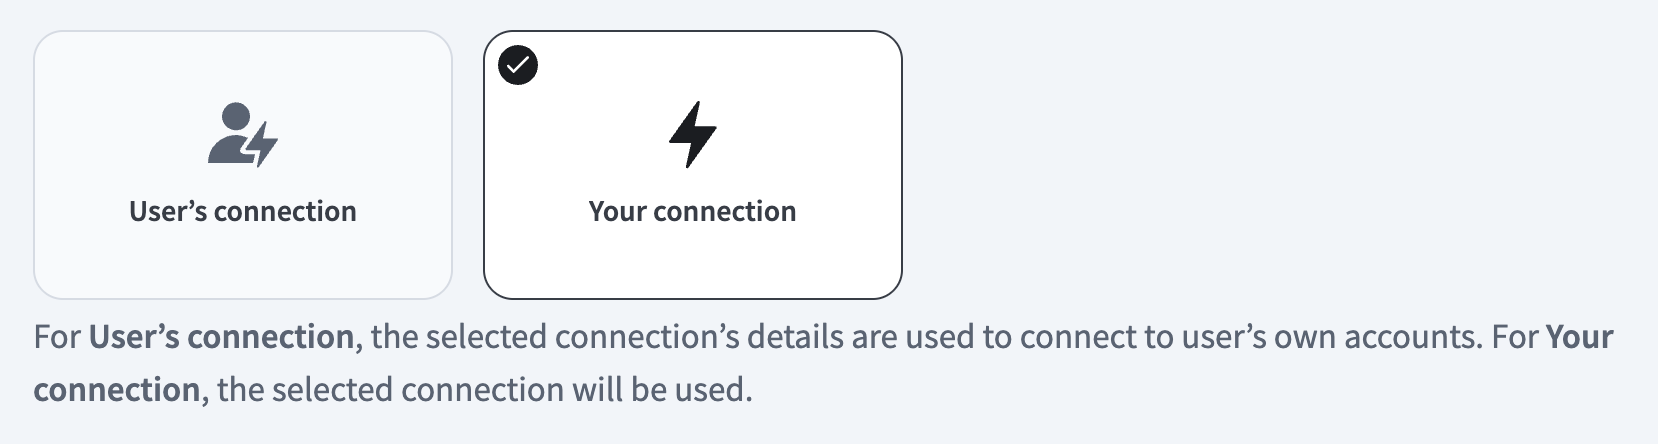
Select the connection type you plan to use for the MCP server template.
- User's connection: MCP server tools perform actions based on the identity and permissions of the user who connects to the application. Users authenticate with their own credentials to execute the skill.
- Your connection: This option uses the connection established by the recipe builder and follows the same principles as normal app connections.
 Select your connection type
VERIFIED USER ACCESS AUTHENTICATION REQUIREMENTS
Only app connections that use OAuth 2.0 authorization code grant are available for user's connection. Refer to Verified user access for more information.
Complete the app-specific connection setup steps in the following section.
Outlook connection setup
View Outlook connection setup steps
Workato supports the following connection types for Outlook:
- Authorization code grant authentication (OAuth 2.0)
- Client credentials-based authentication (OAuth 2.0)
MICROSOFT MFA ENFORCEMENT
Microsoft is rolling out mandatory multifactor authentication (MFA) gradually to different applications and accounts in phases. This enforcement continues throughout 2025 and beyond. Refer to the Microsoft Mandatory multifactor authentication for Azure and admin portals documentation for more information.
We strongly recommend enabling MFA now for all Microsoft accounts used with Workato to avoid service disruptions from short-notice enforcement changes.
Complete the following steps to maintain uninterrupted service:
Enable MFA for your Microsoft organization following the Microsoft MFA setup guide. Refer to Set up multifactor authentication for Microsoft 365 for more information.
Reconnect your Microsoft connection in Workato.
Complete the OAuth flow with MFA when prompted.
Test your recipes to ensure they work with the updated connection.
Authorization code grant authentication (OAuth 2.0)
This authentication method requires the following value for tenant-specific account types:
- Tenant ID/Domain
Register the Workato App in Azure Portal
Complete the following steps to register the Workato app and assign it permissions for authorization code grant connections:
View Register the Workato app in the Azure Portal steps
Register the Workato app in the Azure Portal
Complete the following steps to register the Workato app in the Azure portal:
Sign in to the Azure portal.
Select App registrations > + New registration.
Enter a unique name for the application.
Use the Supported account types drop-down menu to select an account type.
Select Web from the Select a platform drop-down menu.
Use the following URI for the Redirect URI:
https://www.workato.com/oauth/callbackSelect Register.
Assign permissions to your app
Complete the following steps to assign permissions to your app:
Go to your newly registered app and select Manage > API permissions.
Click + Add a permission and select Microsoft Graph.
Add the required permissions as outlined in Minimum and default scopes. Depending on your connection type, you must assign Application or Delegated permissions.
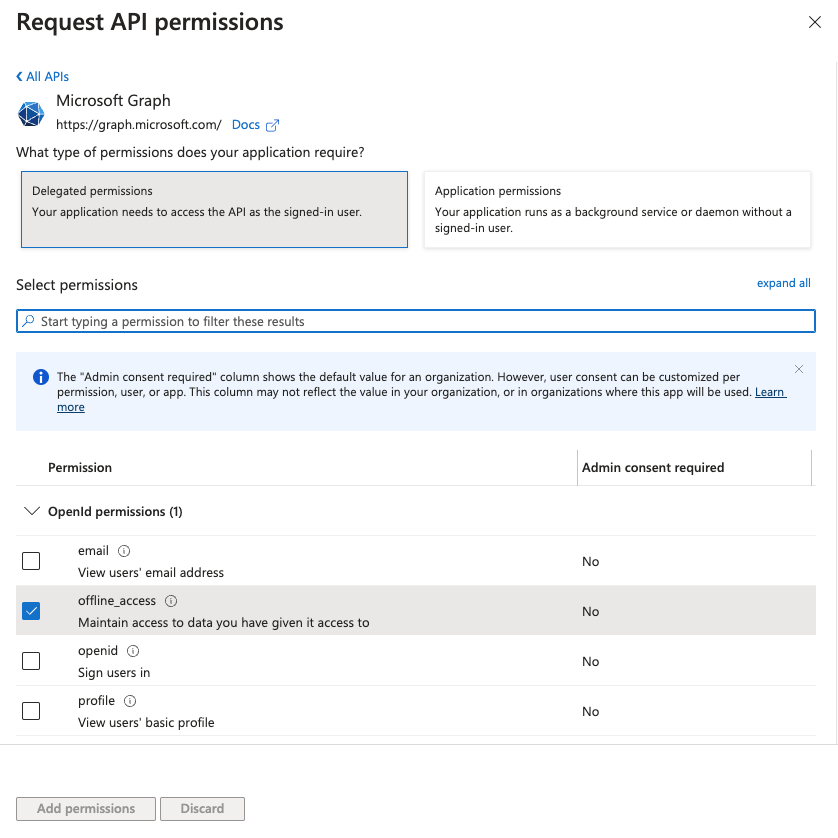 Add permissions
Click Add permissions.
Admin consent is required for specific permissions. Refer to Connect Microsoft Entra ID to the Outlook connector to learn more.
Obtain the Directory (tenant ID) from the Azure Portal
This step is required if you plan to use a tenant-specific account. You can skip this step if you plan to use a common, consumer, or organization account type for your connection.
Complete the following steps to obtain the Directory (tenant) ID from the Azure portal:
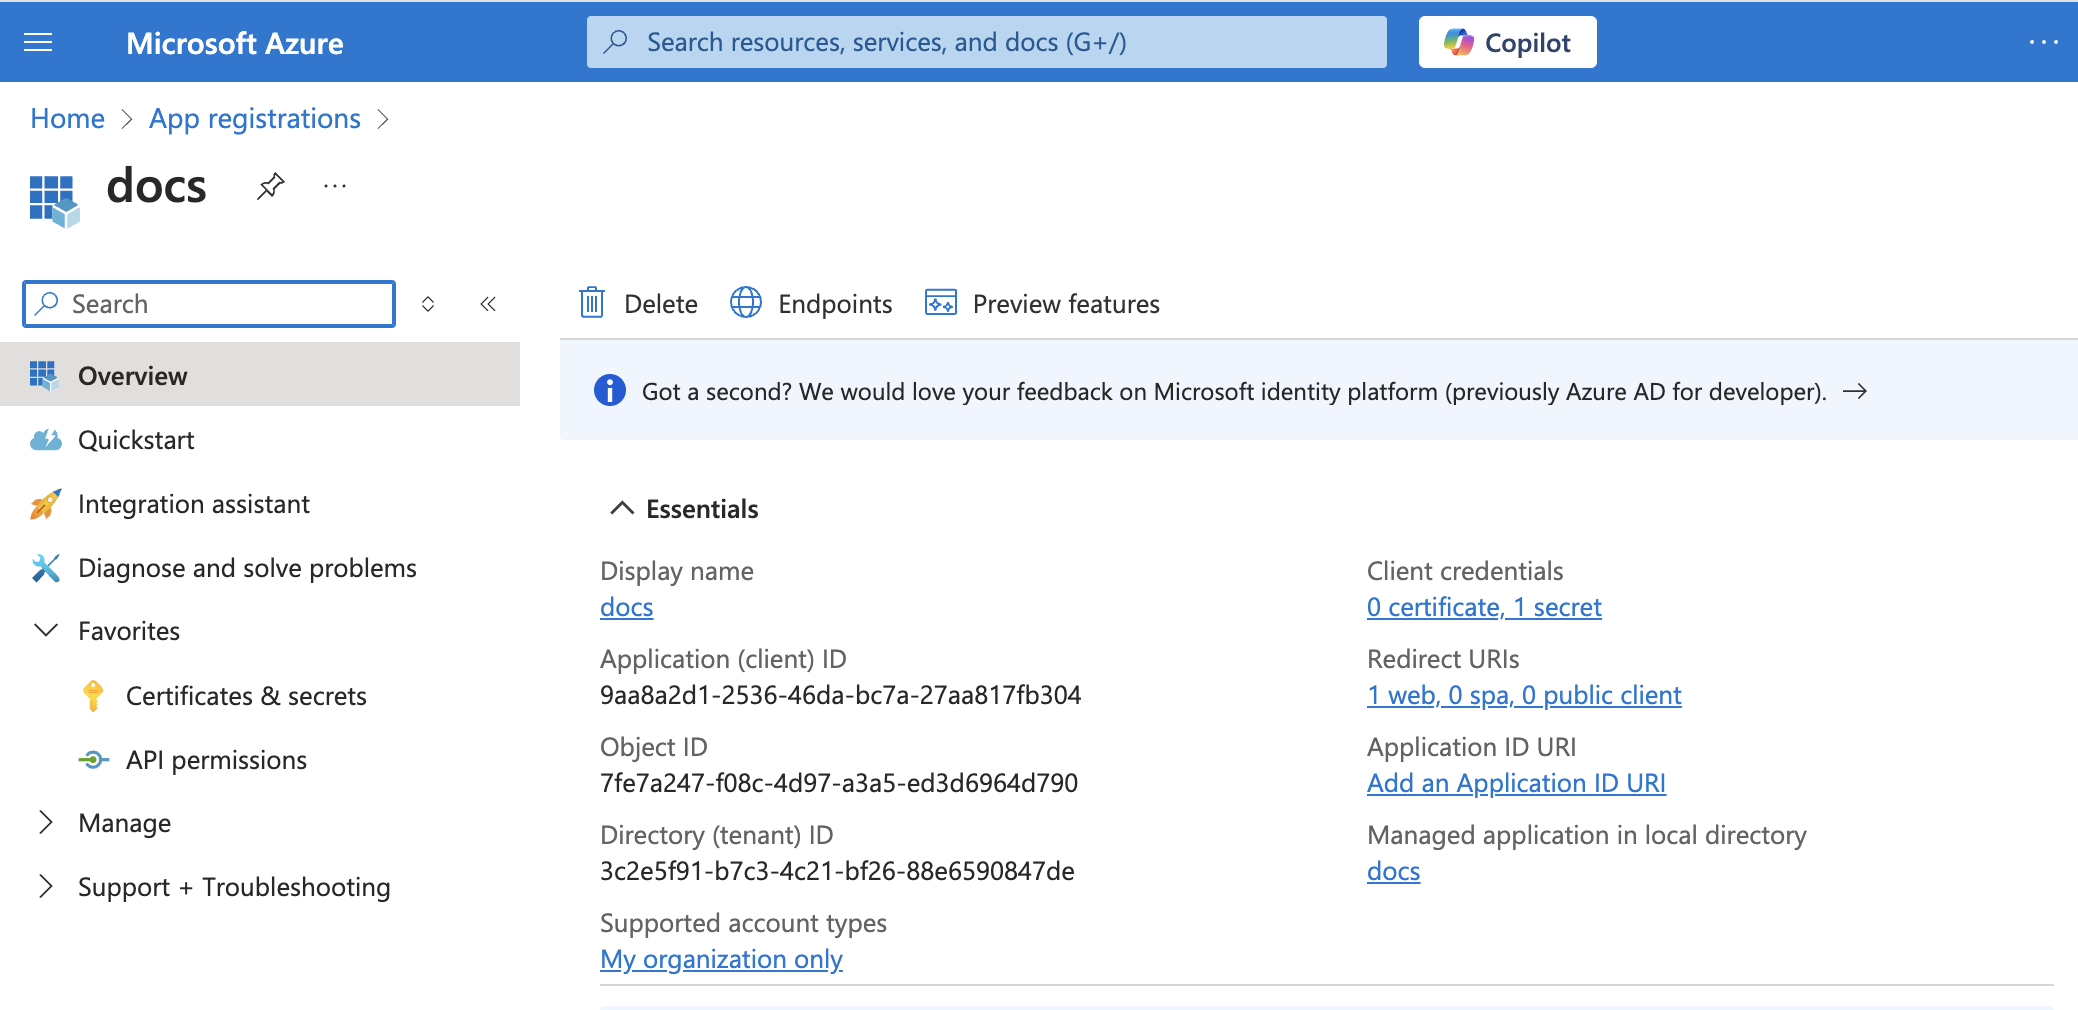
Go to the Overview > Essentials section.
 App details
Copy and save the Directory (tenant) ID for use in Workato.
Complete setup in Workato
View Complete setup in Workato steps
Complete the following steps to set up an authorization code grant connection to Outlook in Workato:
Click Create > Connection or press C twice.
Search for Outlook and select it as your app.
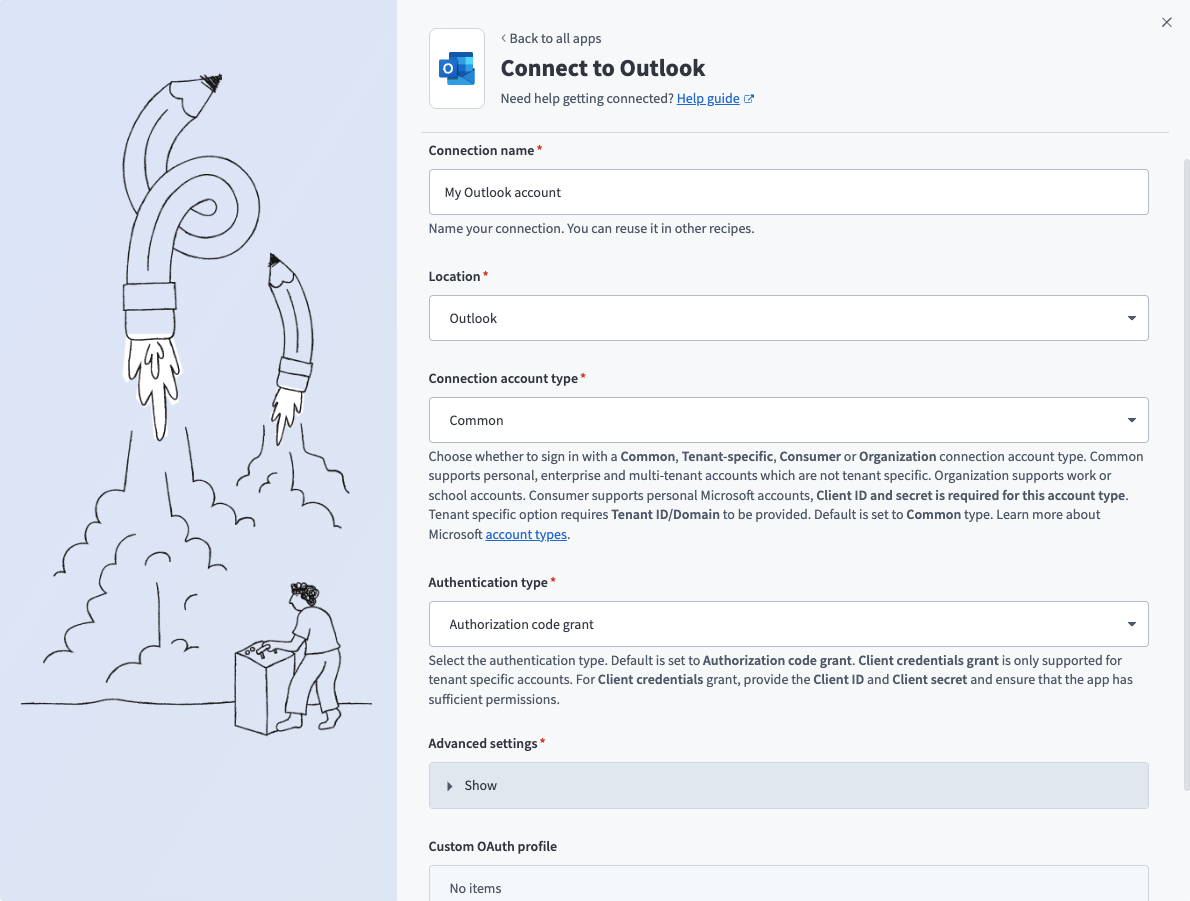
Enter a name for your connection in the Connection name field.
Use the Location drop-down menu to select the project where you plan to store the connection.
Use the Connection account type drop-down menu to select the type of account you plan to use. The available choices are Common, Tenant-specific, Consumer, and Organization.
 Common connections
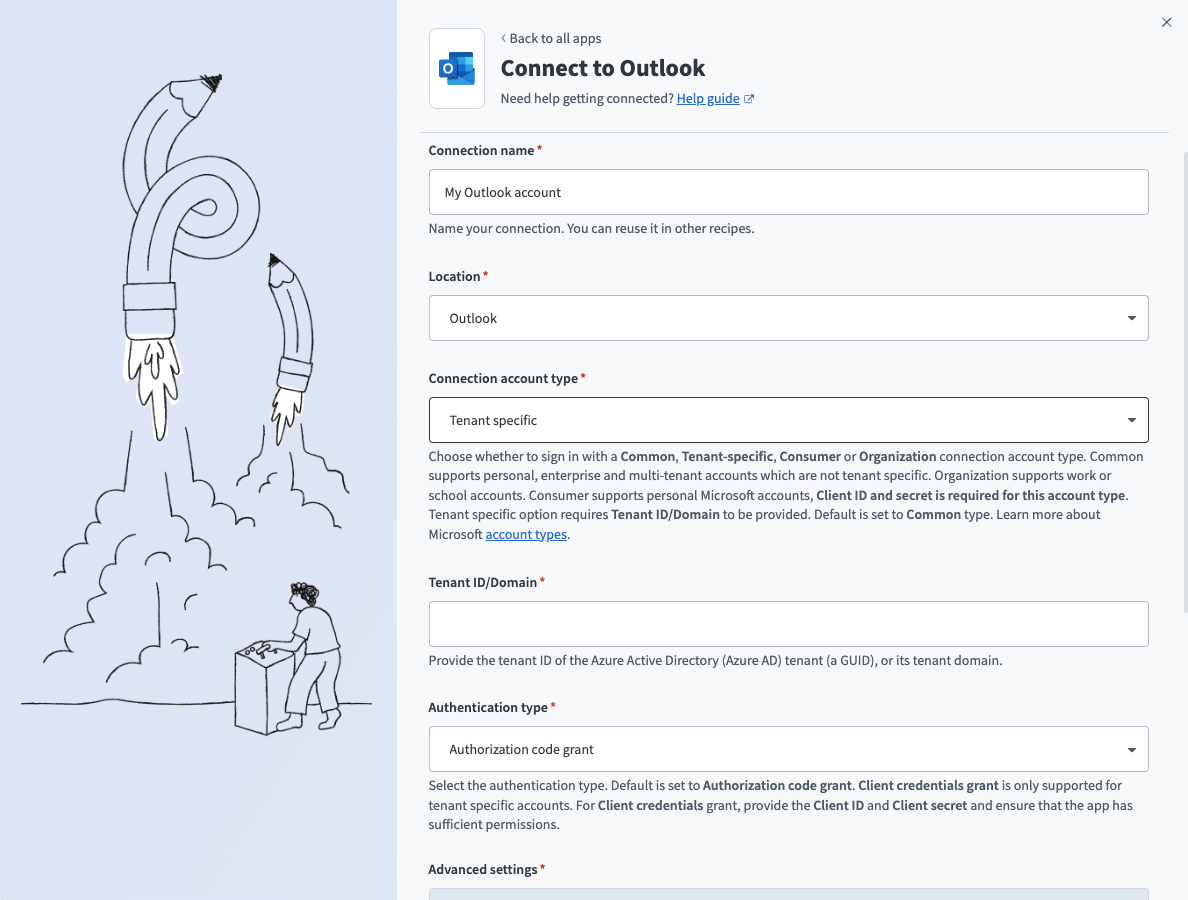 Tenant specific connections
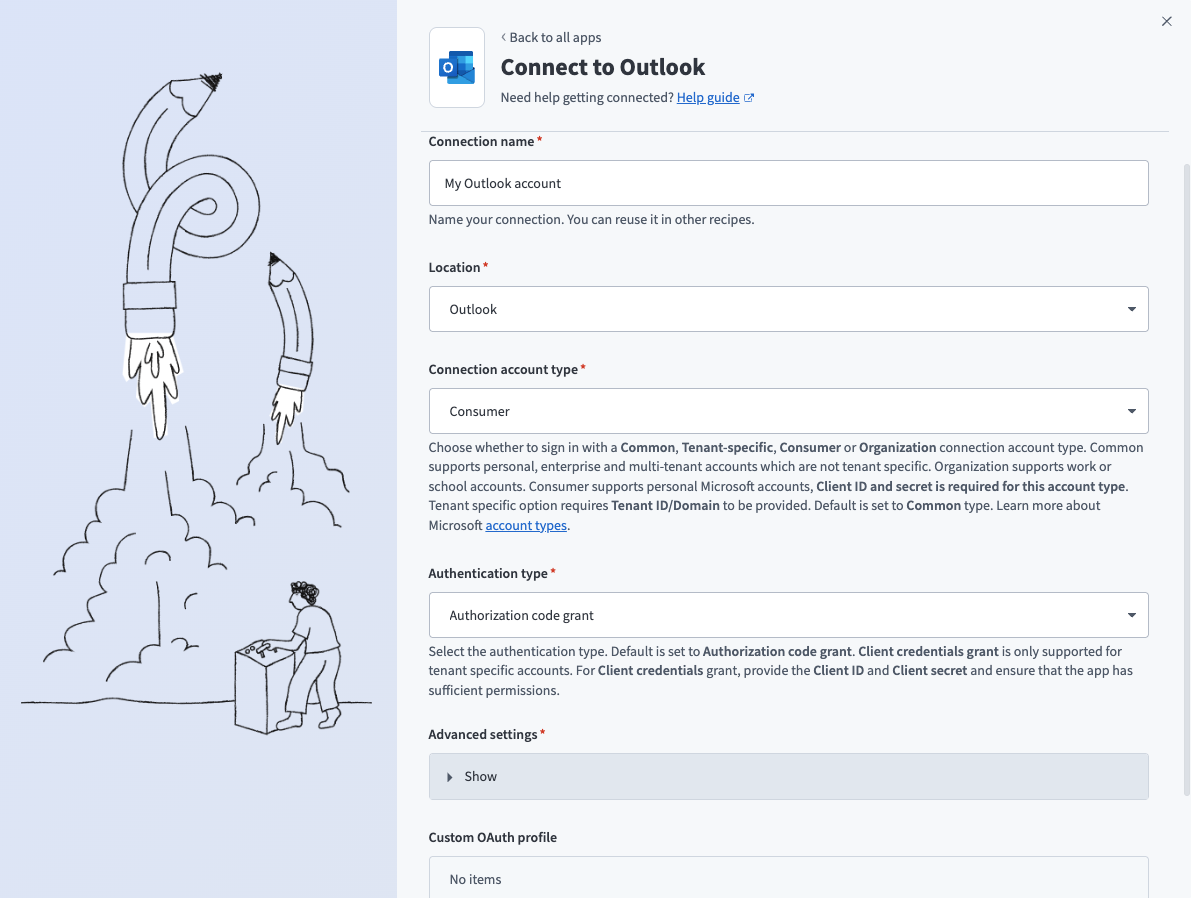 Consumer connections
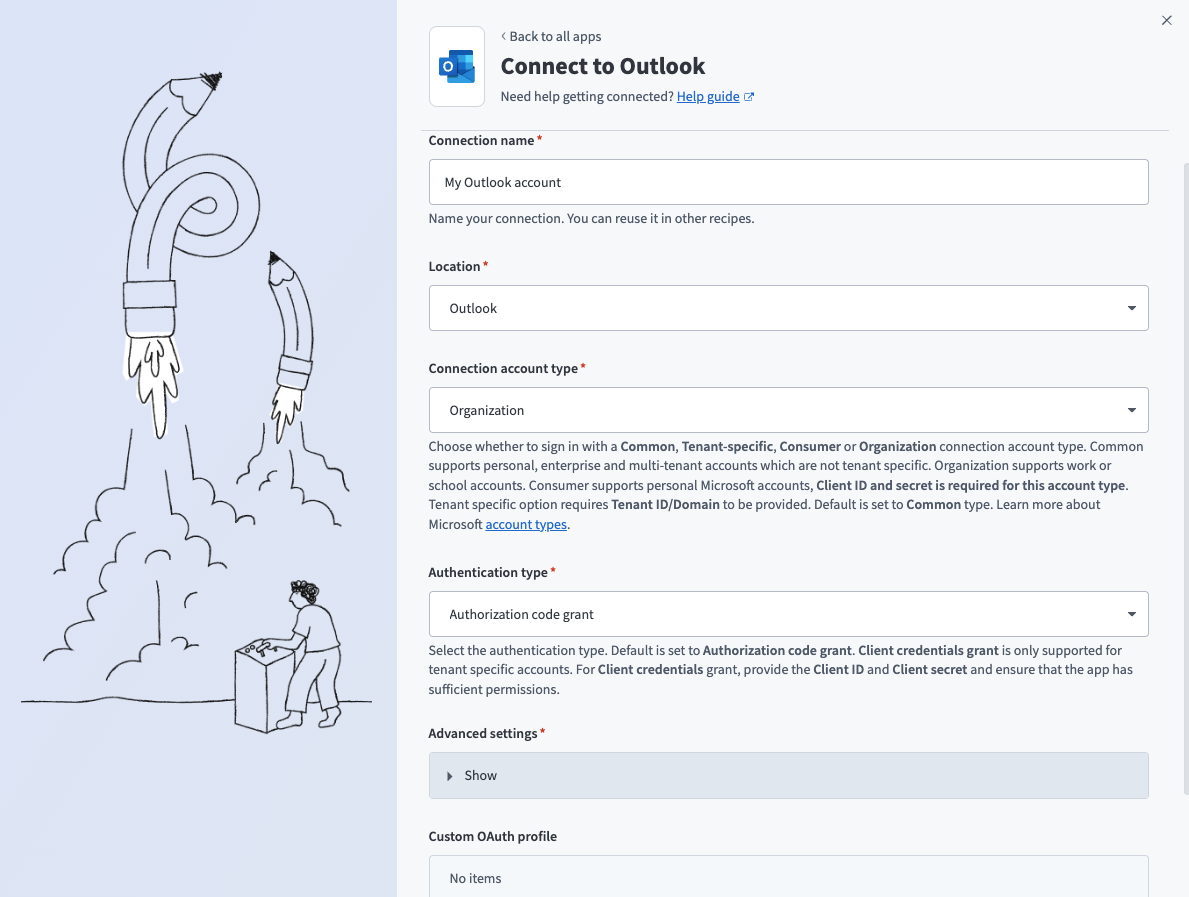 Organization connections
Use the Authentication type drop-down menu to select Authorization code grant.
Optional. The connector requests a set of scopes necessary for all triggers and actions to function properly by default. Go to the Advanced settings section to manually select the permissions instead. The minimum permissions required to establish a connection are User.Read and offline_access. Workato always requests these permissions regardless of the permissions you select. Refer to Minimum and default scopes for more information.
Optional. Use the Custom OAuth profile drop-down menu to select a custom OAuth profile for your connection. Refer to Outlook custom OAuth for more information.
Click Sign in with Microsoft.
Client credentials-based authentication (OAuth 2.0)
This method requires the following fields:
- Tenant ID/Domain
- User ID
- Client ID
- Client Secret
COMPATIBLE AUTHENTICATION
Client credentials-based authentication is only compatible with tenant-specific connections.
Register the Workato App in the Azure Portal
Complete the following steps to register the Workato app and assign it permissions for client credentials-based connections:
View Register the Workato App in the Azure Portal steps
Register the Workato App in the Azure Portal
Complete the following steps to register the Workato app in the Azure portal:
Sign in to the Azure portal.
Select App registrations > + New registration.
Enter a unique name for the application.
Use the Supported account types drop-down menu to select an account type.
Select Web from the Select a platform drop-down menu.
Use the following URI for the Redirect URI:
https://www.workato.com/oauth/callbackSelect Register.
Assign permissions to your app
Complete the following steps to assign permissions to your app:
Go to your newly registered app and select Manage > API permissions.
Click + Add a permission and select Microsoft Graph.
Add the required permissions as outlined in Minimum and default scopes. Depending on your connection type, you must assign Application or Delegated permissions.
Add permissions
Click Add permissions.
Admin consent is required for specific permissions. Refer to Connect Microsoft Entra ID to the Outlook connector to learn more.
Generate a client secret
Complete the following steps to generate a client secret:
Go to Manage > Certificates & Secrets > Client secrets.
Click + New client secret.
Provide a Description for the client secret and specify an Expires date.
Click Add.
Copy and save the client secret Value—not the Secret ID—for use in Workato.
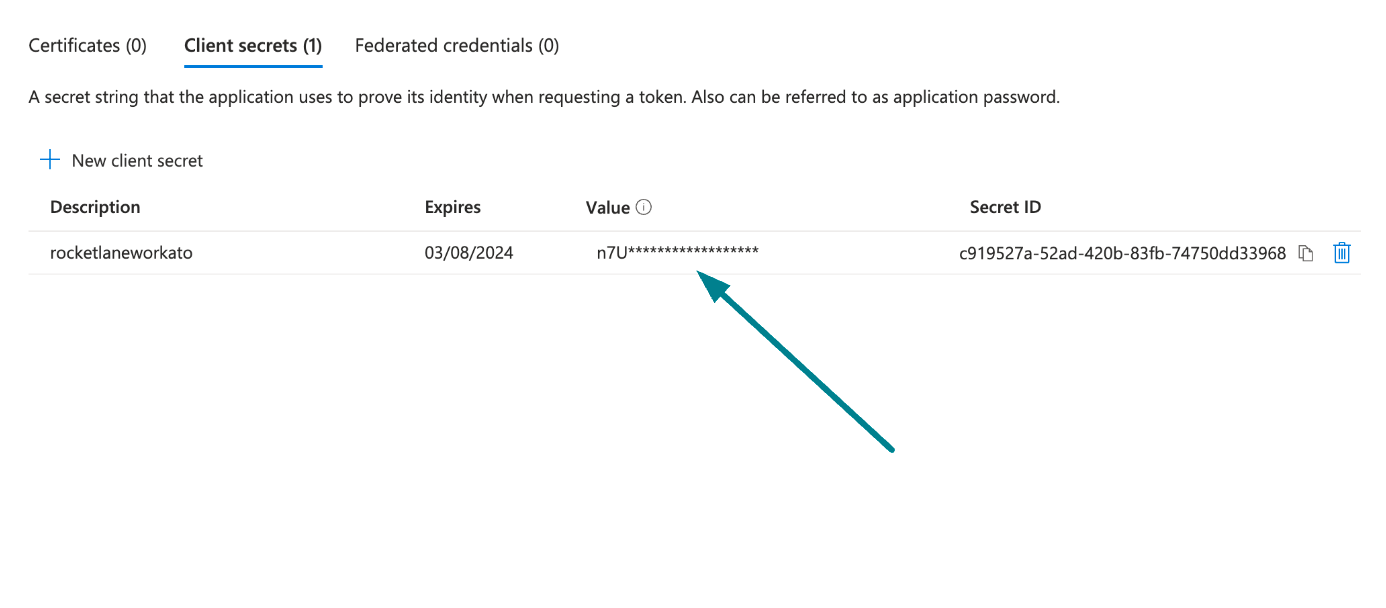 Copy and save the client secret value
Obtain the Application (client) ID, Object ID, and Directory (tenant) ID from the Azure Portal
Complete the following steps to obtain the Application ID, Object ID, and Directory (tenant) ID from the Azure portal:
Go to the Overview > Essentials section.
App details
Copy and save the Application (client) ID, Object ID, and Directory (tenant) ID for use in Workato.
Obtain the User ID from the Azure Portal
Complete the following steps to obtain the User ID from the Azure portal:
Go to Home > Users to obtain the User ID.
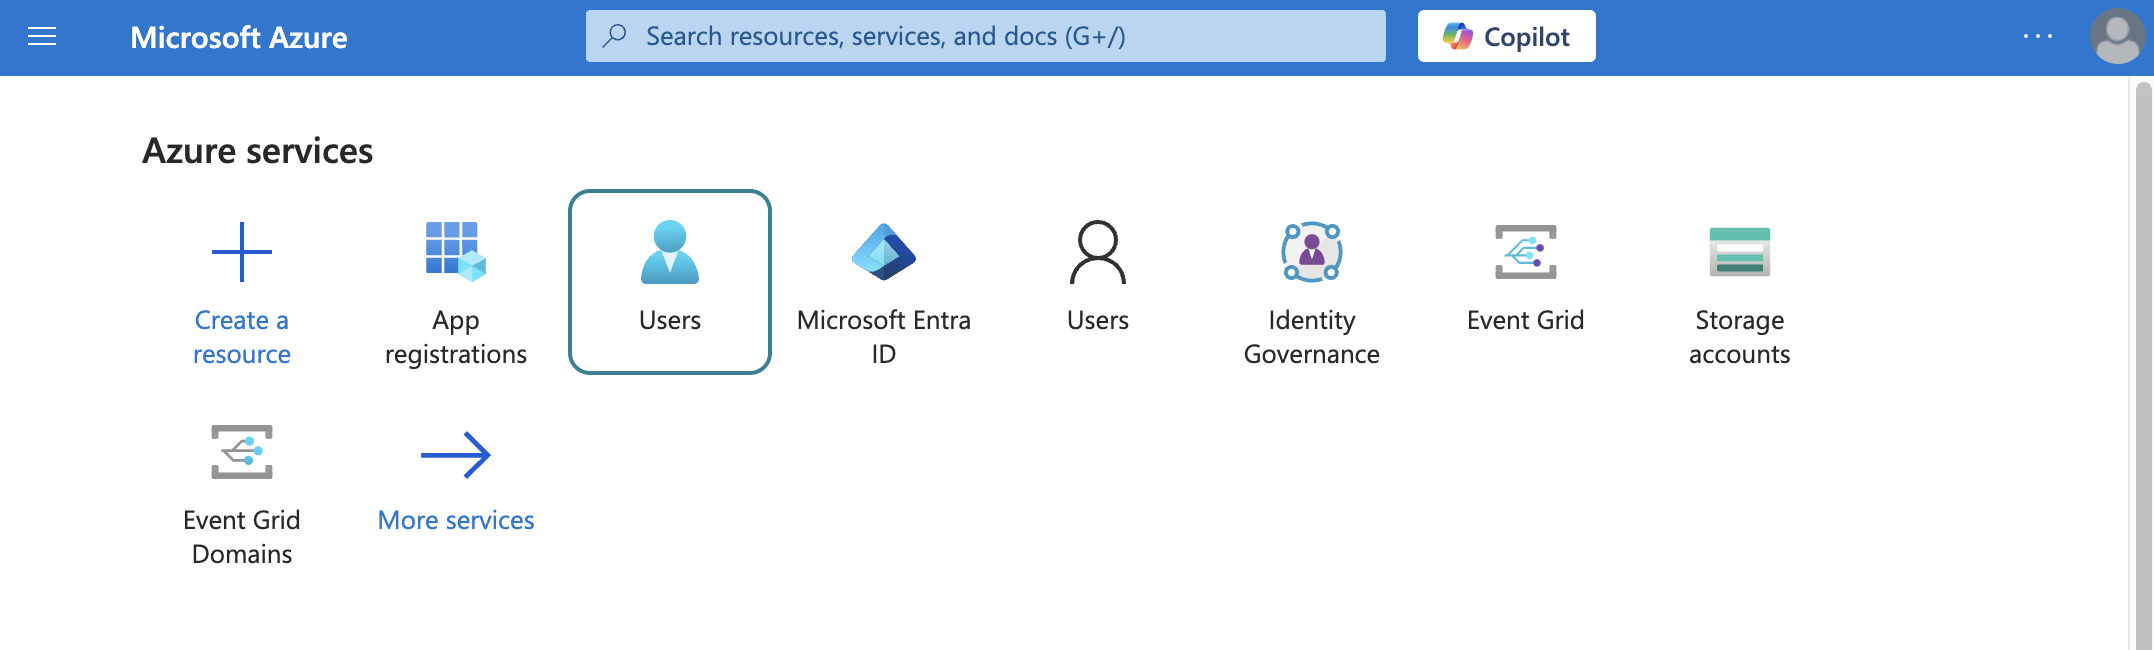 Select users
Search for and select the default user you plan to use to perform operations. This user doesn't establish the connection but is required for performing certain operations that an app can't perform. It's also required in picklists to pull user data. For example, the folder picklist populates folders belonging to the default user.
Copy and save the User principal name. Use this value as the User ID in Workato.
Return to Workato to finish setting up your connection.
Complete setup in Workato
View Complete setup in Workato steps
Complete the following steps to set up a client credentials-based connection to Outlook in Workato:
Click Create > Connection or press C twice.
Search for Outlook and select it as your app.
Enter a name for your connection in the Connection name field.
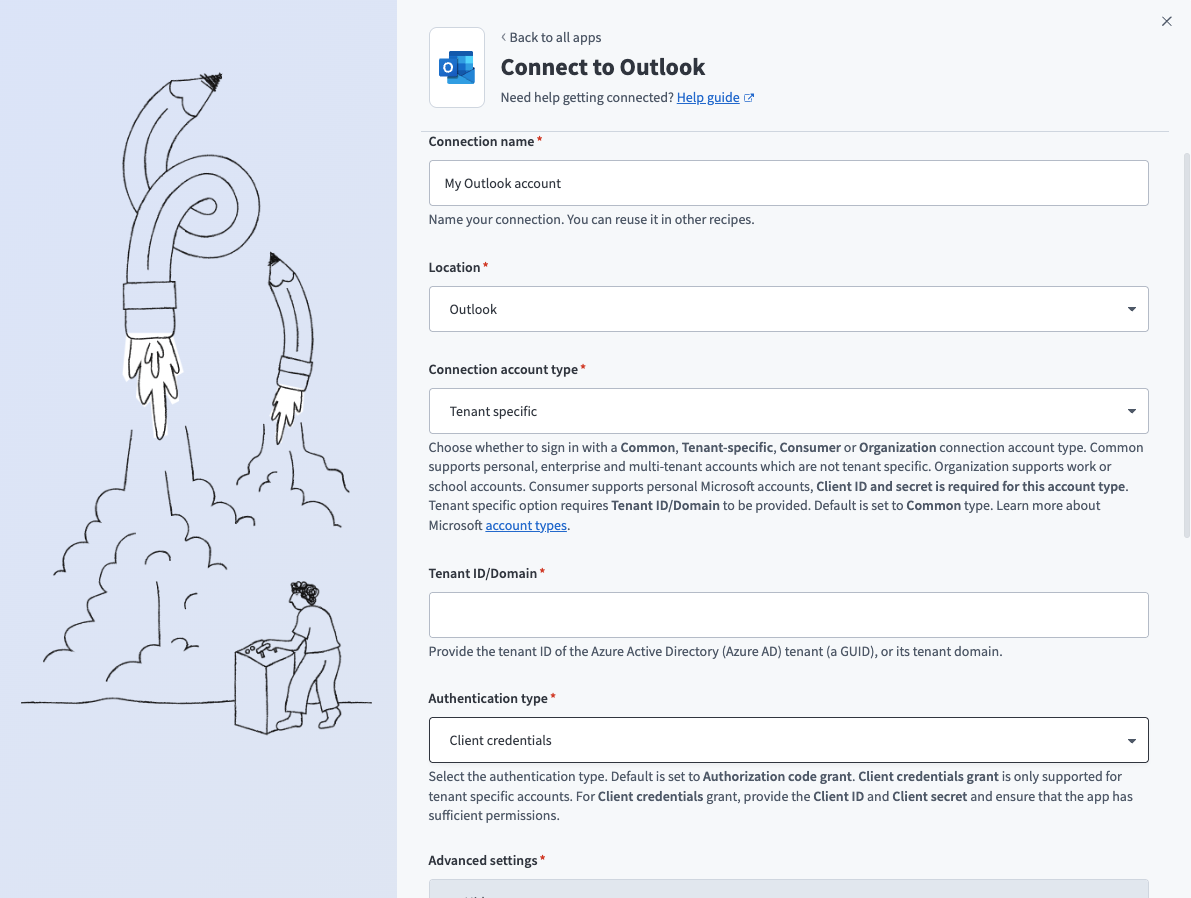 Client credentials connection
Use the Location drop-down menu to select the project where you plan to store the connection.
Select Tenant specific as the Connection account type. This option is specifically designed for users who belong to a particular organization (tenant).
Provide your Tenant ID/Domain. This is the Directory (tenant) ID for your app. Refer to Register an app in Azure for more information.
Use the Authentication type drop-down menu to select Client credentials.
Supply the User ID, Client ID, and Client secret for your app. Refer to Register an app in Azure for more information.
Click Sign in with Microsoft.
How to use Outlook Contacts MCP server tools
Refer to the following sections for detailed information on available tools:
search_contacts tool
The search_contacts tool searches personal contacts by name or email address. Your LLM uses this tool to find contacts or retrieve details for downstream actions, such as sending an email or scheduling a meeting. Try asking:
Find Sarah's contact details.Search for [email protected].Look up the contact for this person before I email them.Find the contact I need to schedule a meeting with.
list_contacts tool
The list_contacts tool lists contacts from a contact folder with optional filtering. Your LLM uses this tool to browse contacts, list everyone in a specific folder, or filter by company, folder, or category without a specific name search.
Try asking:
Show all my contacts.List everyone in my Vendors folder.Show contacts tagged VIP.List all contacts at Acme.
get_contact tool
The get_contact tool retrieves full details for a contact by ID. Your LLM uses this tool after search_contacts or list_contacts to retrieve information for a selected result, and before performing write operations such as update_contact or delete_contact to confirm current state and read array field values.
Try asking:
Get the full profile for this contact.Show me all details for this person before I update their record.Retrieve the complete contact information for this result.Get this contact's details before I delete them.
create_contact tool
The create_contact tool creates a new contact in the user's Outlook contacts. Your LLM asks for at least one identifying field, such as display name, first name, last name, or email address, before creating the record.
Try asking:
Save Marcus as a new contact.Add this person to my Outlook contacts.Create a contact for the new account manager I met today.Save this lead's details as a contact.
update_contact tool
The update_contact tool updates fields you specify on an existing contact. Your LLM uses this tool to change contact details, such as phone numbers, email addresses, job titles, or category tags.
Try asking:
Update the phone number for this contact.Change Sarah's job title to VP of Marketing.Add the VIP category tag to this contact.Update Marco's email address.
delete_contact tool
The delete_contact tool permanently deletes a contact from the user's Outlook contacts. Your LLM uses this tool only when you explicitly request deletion. Your LLM always retrieves and presents the contact to you before deleting. Deletion is permanent.
Try asking:
Delete this contact from my Outlook.Remove this person from my contacts.Permanently delete this contact record.Clean up this duplicate contact.
move_contact tool
The move_contact tool moves a contact from one contact folder to another. Your LLM identifies both the contact and the destination folder before moving.
Try asking:
Move this contact to the Partners folder.Reorganize Sarah into the Vendors folder.Transfer this contact from Prospects to Customers.Move Mei into my VIP folder.
list_contact_folders tool
The list_contact_folders tool lists the user's contact folders. Your LLM uses this tool when you ask what folders you have, or when a folder ID is needed before creating, moving, or managing contacts. Your LLM also uses this tool before creating a new folder to check for duplicate names, and before deleting a folder to retrieve the contact count.
Try asking:
What contact folders do I have?Show me all my Outlook contact folders.List my folders before I create a new one.What folders can I move this contact into?
get_contact_folder tool
The get_contact_folder tool retrieves details for a contact folder you specify, including child folders. Your LLM uses this tool when a folder ID is available and folder details or structure are needed, and before deleting a folder to retrieve the contact count.
Try asking:
Get details for the Vendors folder.Show me the subfolders inside this folder.How many contacts are in this folder before I delete it?Get the full details of this contact folder.
create_contact_folder tool
The create_contact_folder tool creates a new contact folder, with the option to create it as a subfolder. Your LLM checks existing folders through list_contact_folders before creating. Your LLM informs you if a folder with the same name already exists and asks for confirmation before proceeding.
Try asking:
Create a new folder called Prospects.Add a subfolder called Enterprise inside my Customers folder.Set up a new contact folder for this project.Create a VIP folder for my top accounts.
update_contact_folder tool
The update_contact_folder tool renames an existing contact folder. Your LLM confirms the correct folder through list_contact_folders or get_contact_folder before renaming.
Try asking:
Rename the Prospects folder to Pipeline.Change this folder's name to Active Customers.Rename my VIP folder to Priority Accounts.Update the name of this contact folder.
delete_contact_folder tool
The delete_contact_folder tool deletes a contact folder and all contacts within it. Your LLM uses this tool only when you explicitly request deletion.
Try asking:
Delete the old Prospects folder.Remove this contact folder and its contents.Clean up this unused folder.Delete the archived contacts folder.
list_categories tool
The list_categories tool lists all Outlook category labels currently in use across the user's contacts. Your LLM uses this tool before applying a category to a contact to surface existing labels and validate spelling before using update_contact or create_contact.
Try asking:
What categories have I applied to my contacts?Show me all my contact tags.What labels are available before I tag this contact?List my existing Outlook categories.
Getting started
View and manage your MCP server tools in the Overview page Tools section. Tool management provides the following capabilities:
TOOLS MUST BE STARTED
Your LLM can only access active tools in your MCP server connector.
Last updated: