Deploy a project to an environment
You can only deploy from Development to Test and from Development to Production.
This guide outlines the following steps:
- Deployment prerequisites
- Set up the deployment
- Customize the deployment
- Review changes
- Add details
- Review and finalize deployment
- Deploy from the recipe page
- Re-establish connections
FEATURE AVAILABILITY
Environments are available to customers on specific pricing plans. Refer to your pricing plan and contract to learn more.
Learn more about enablement for Embedded partners and Environments for Embedded customers.
Prerequisites
Ensure you have the following prerequisites to deploy a project to an environment:
- A Workato account with the Environments feature enabled.
- Access to the project you plan to deploy.
- The deployment privilege enabled in the main (Development) environment. You can only deploy projects from this environment.
- The deployment privilege enabled in the environment where you plan to deploy the project.
SINGLE ENVIRONMENT ACCESS
You cannot deploy projects if you only have access to one environment.
Set up the deployment
Complete the following steps to set up your deployment:
Sign in to your Workato account.
Go to the main DEV environment.
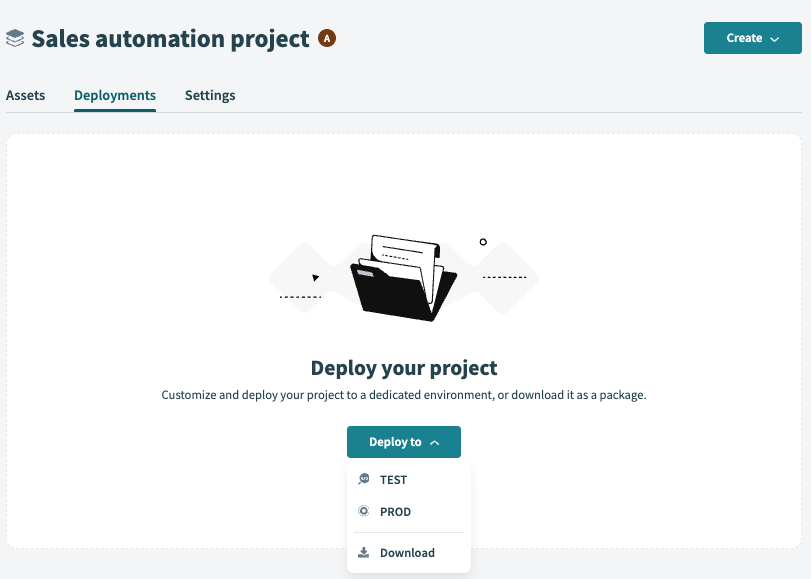
Open the project you plan to deploy and click the Deployments tab.
Click Deploy to. The following options appear in the drop-down:
- TEST
- PROD
- Download. This option creates a ZIP file of the project.
 Deploy to environment
Why can I only deploy from the Development environment?
You can only deploy projects from the Development environment because the Test and Production environments are designed for specific purposes:
- Use the Test environment to test recipes.
- Use the Production environment to run finalized recipes.
This restriction ensures consistency, prevents conflicts, and provides a complete, traceable deployment history in your project's Deployments tab.
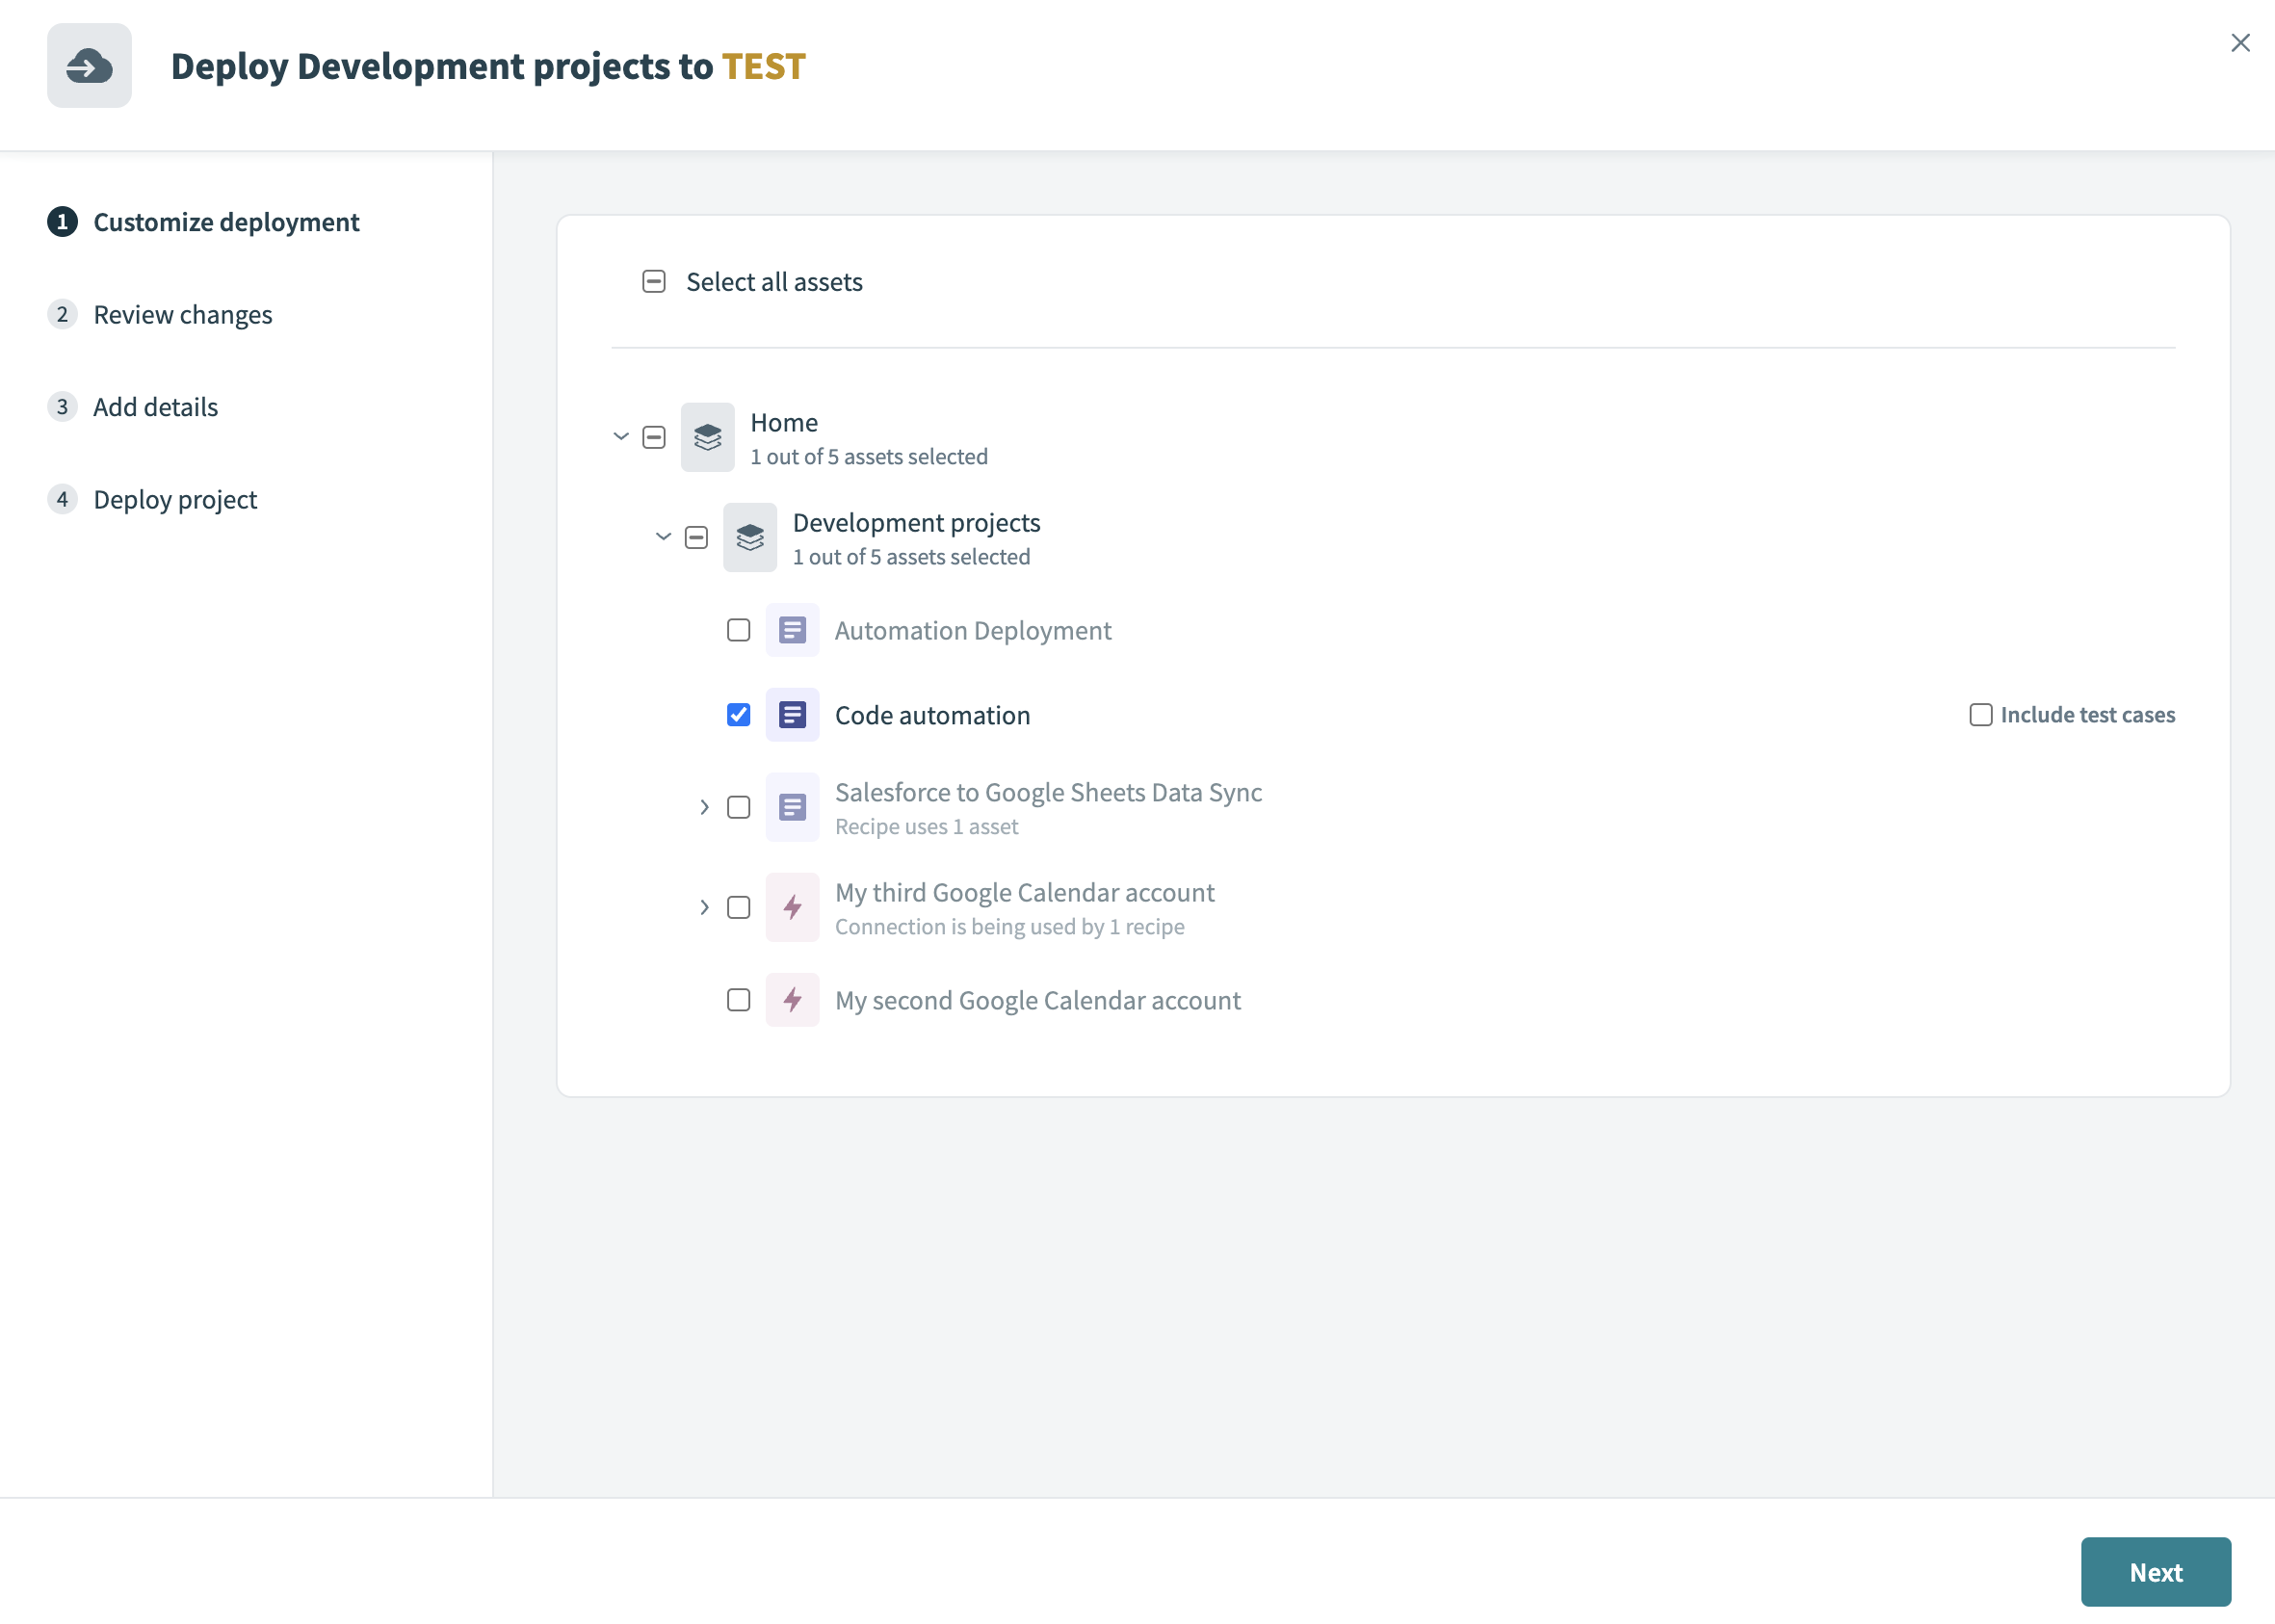
Customize the deployment
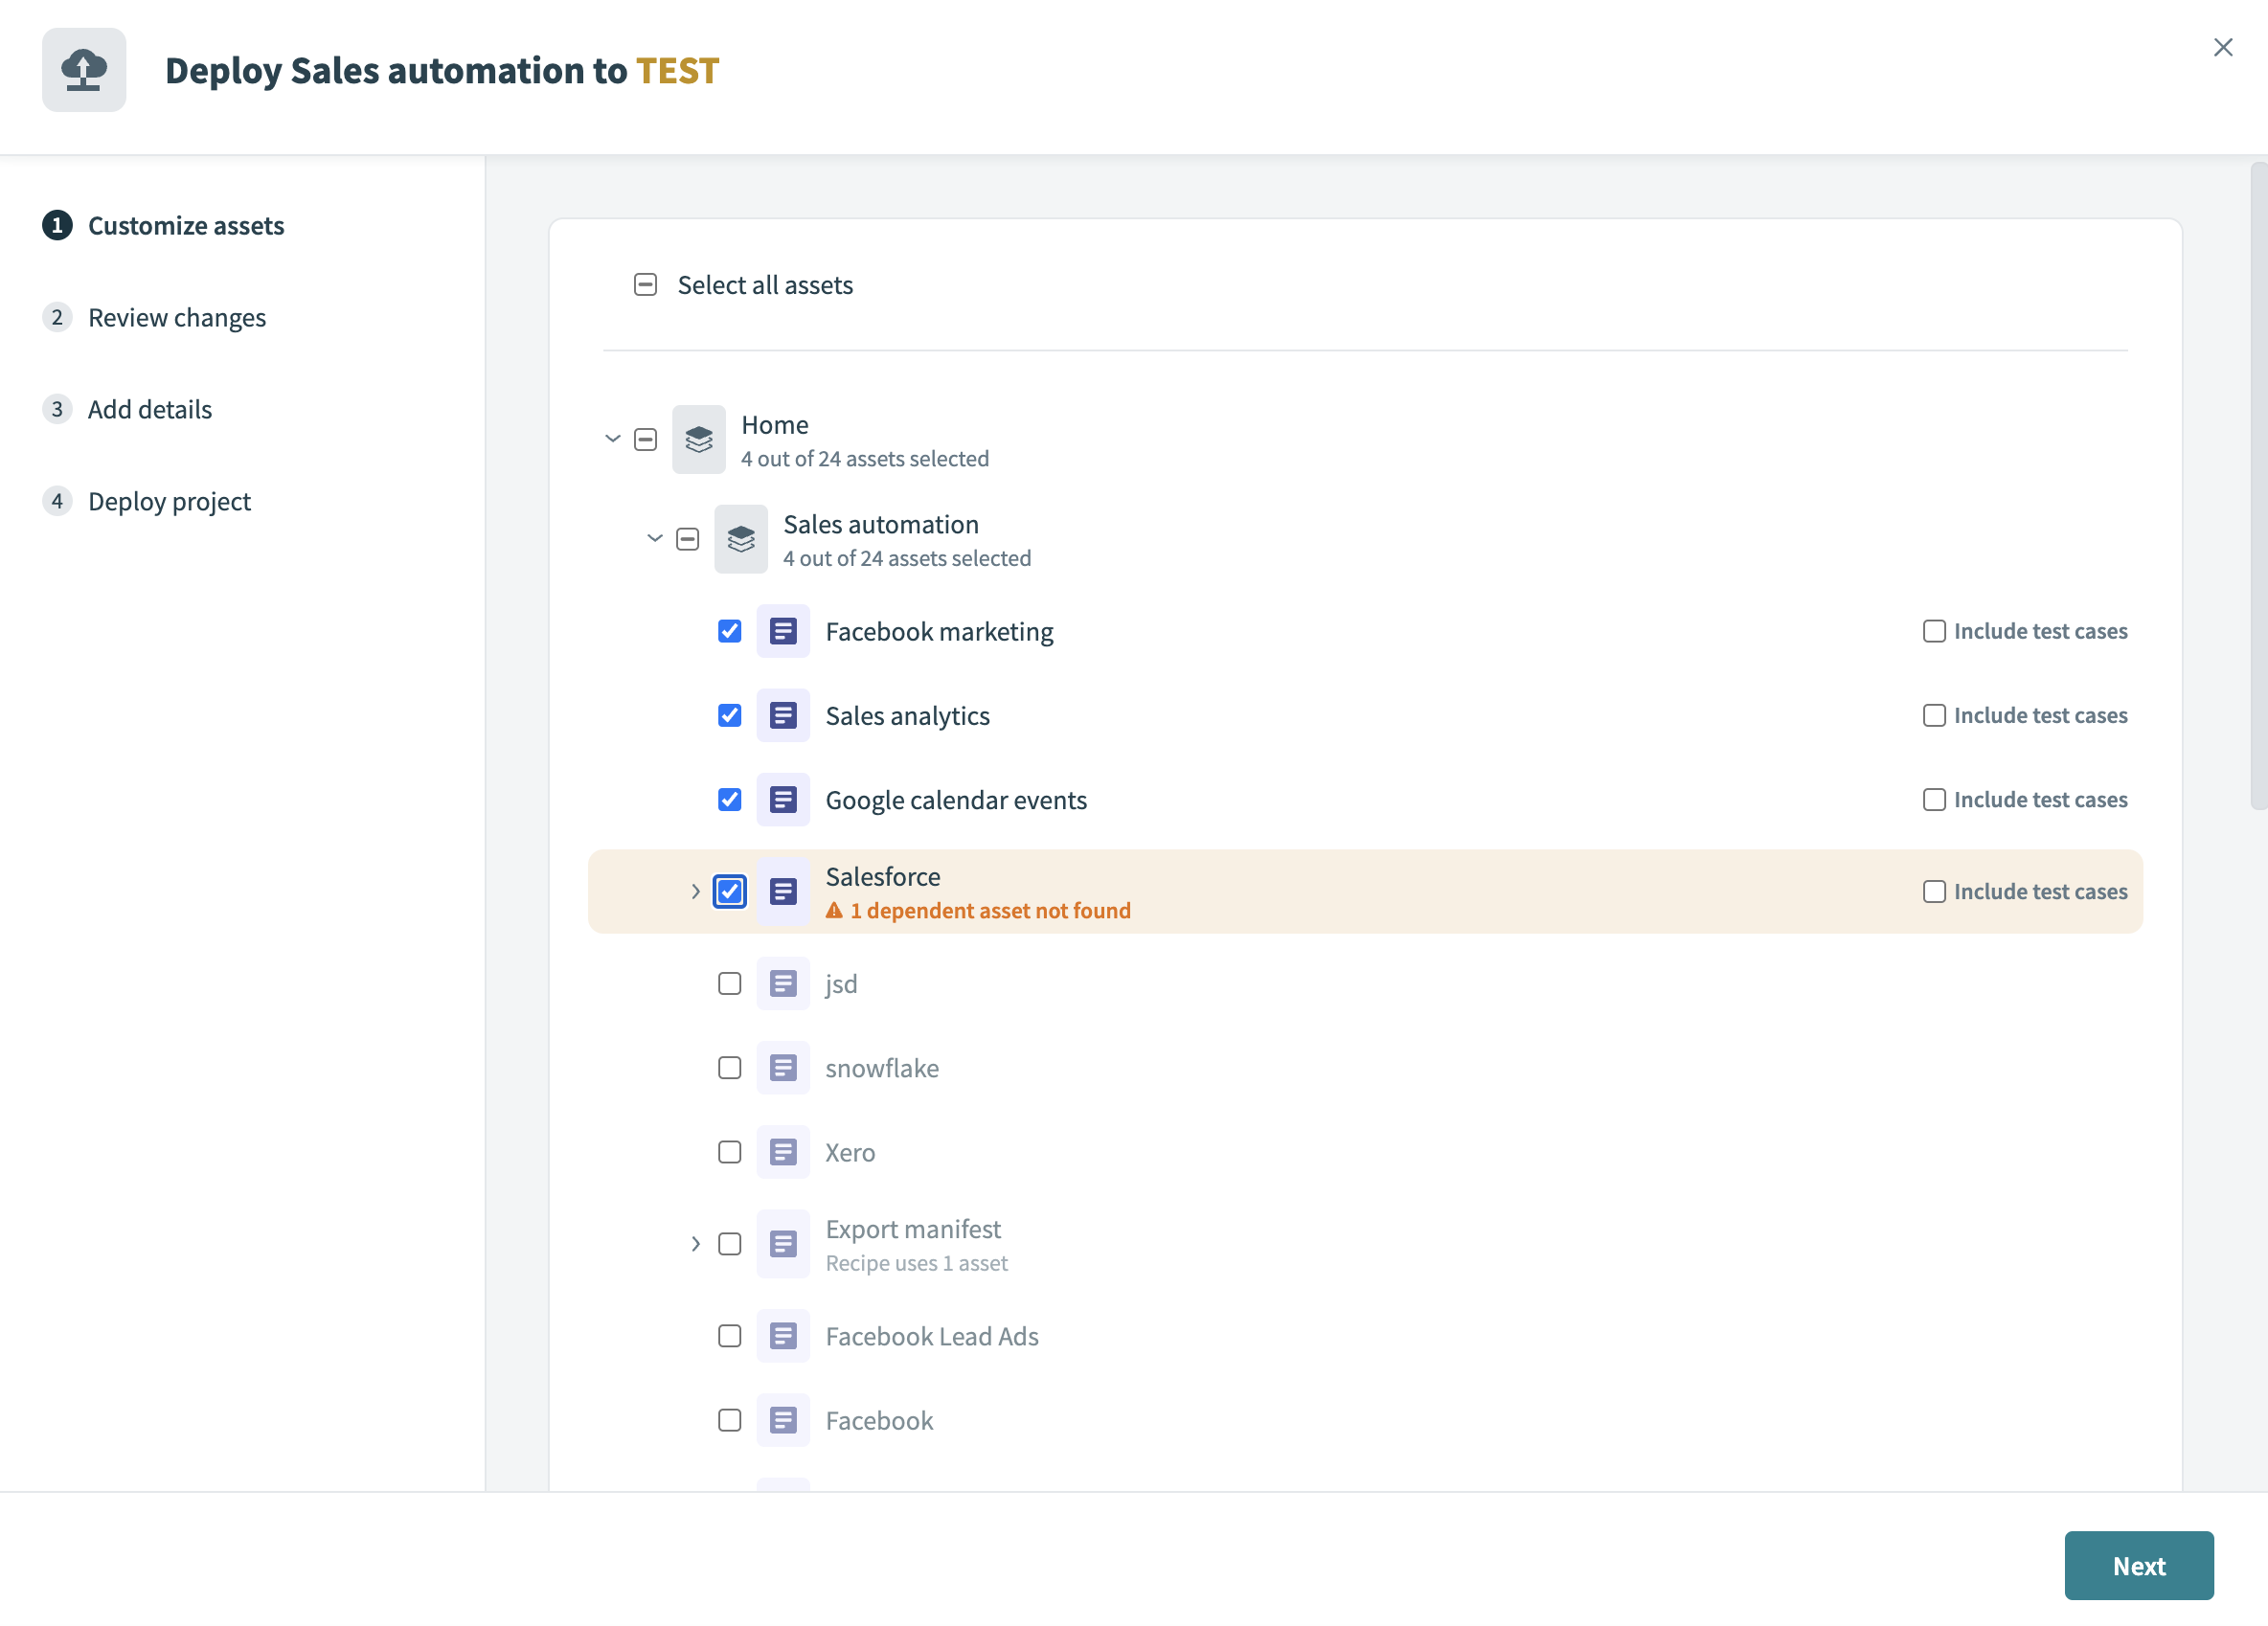
After initiating the deployment, a popup appears, allowing you to customize the deployment:
Choose whether to select all assets or customize the deployment by selecting individual assets.
Select or clear the checkbox next to each asset to specify which assets you plan to include in the deployment.
 Customize deployment
Select or clear the checkboxes to include or exclude test cases.
Ensure that all dependent assets are included. If any dependencies are missing, a warning displays indicating the missing dependencies.
Click Next to review your changes.
DEPLOYING CONNECTIONS
When deploying connections for the first time, you must reconnect them in the target environment before recipes can run, regardless of the deployment type you select.
Review changes
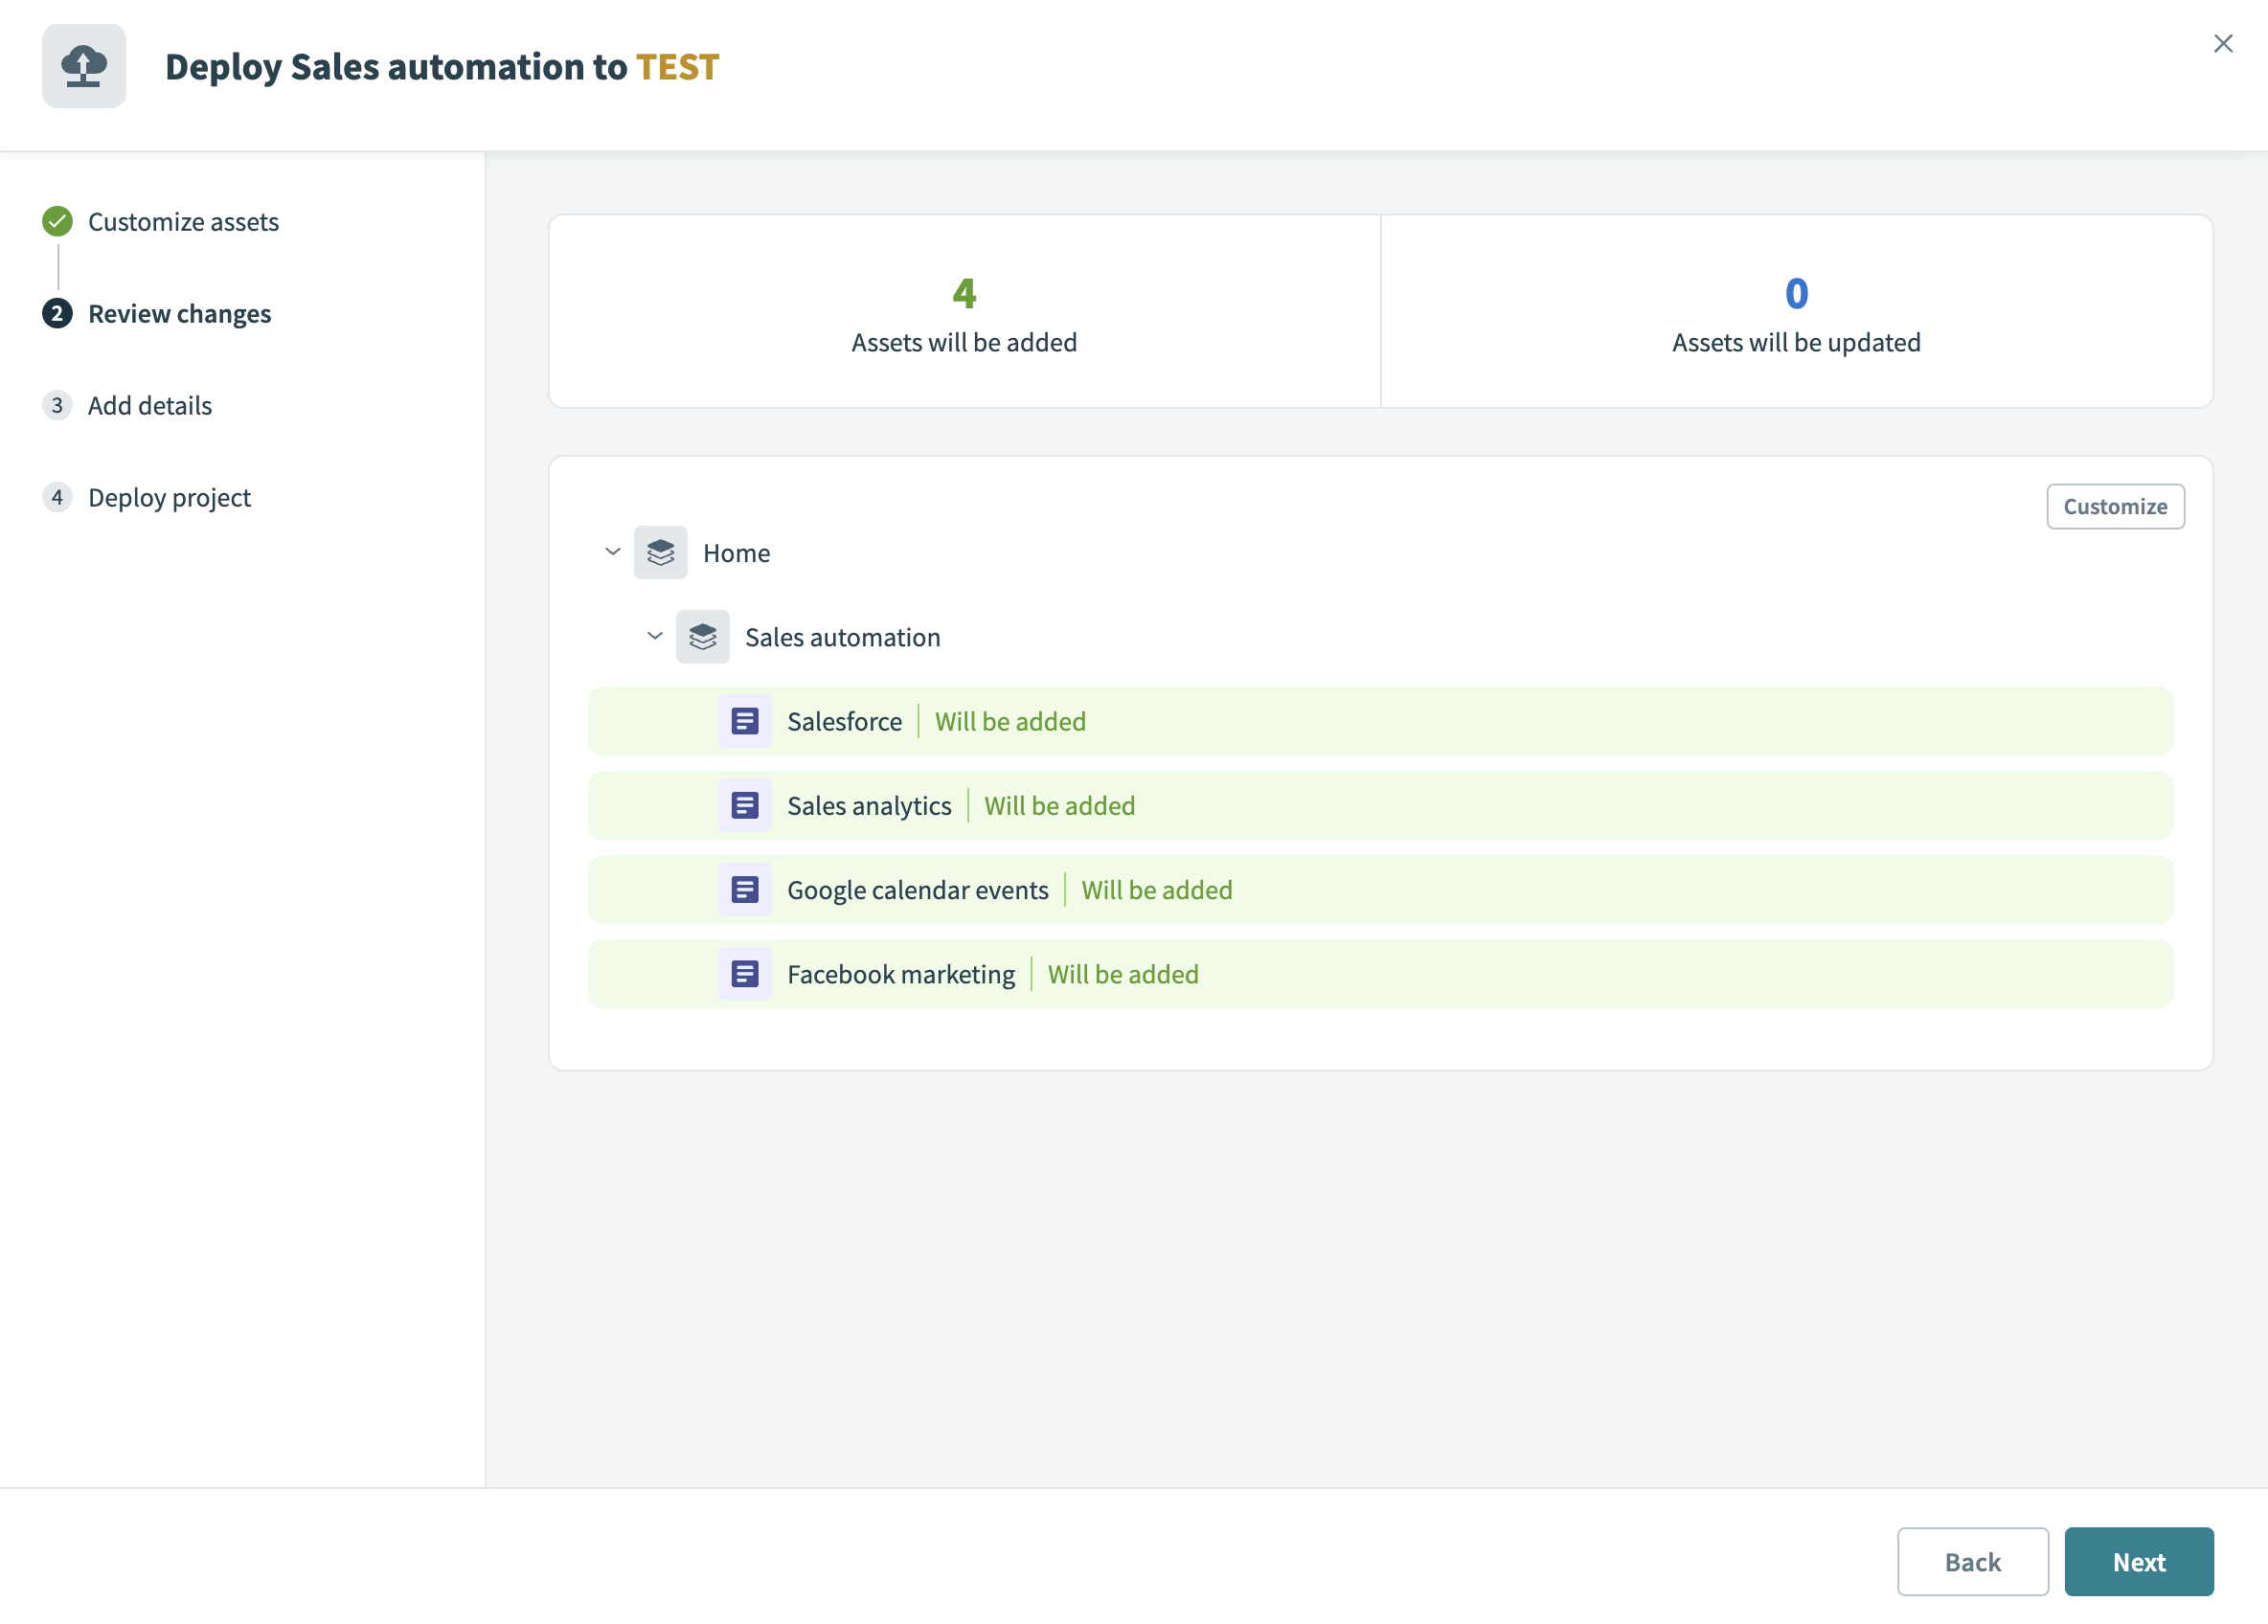
Next, complete the following steps to review the changes calculated and displayed by Workato:
Review the list of assets added or updated in the interface.
 Review changes
Click Customize to go back and make further adjustments, if required.
Click Next to add details to your deployment after reviewing the changes.
Refer to the Understanding project deployment with environments guide to learn more about how changes are detected.
Add details
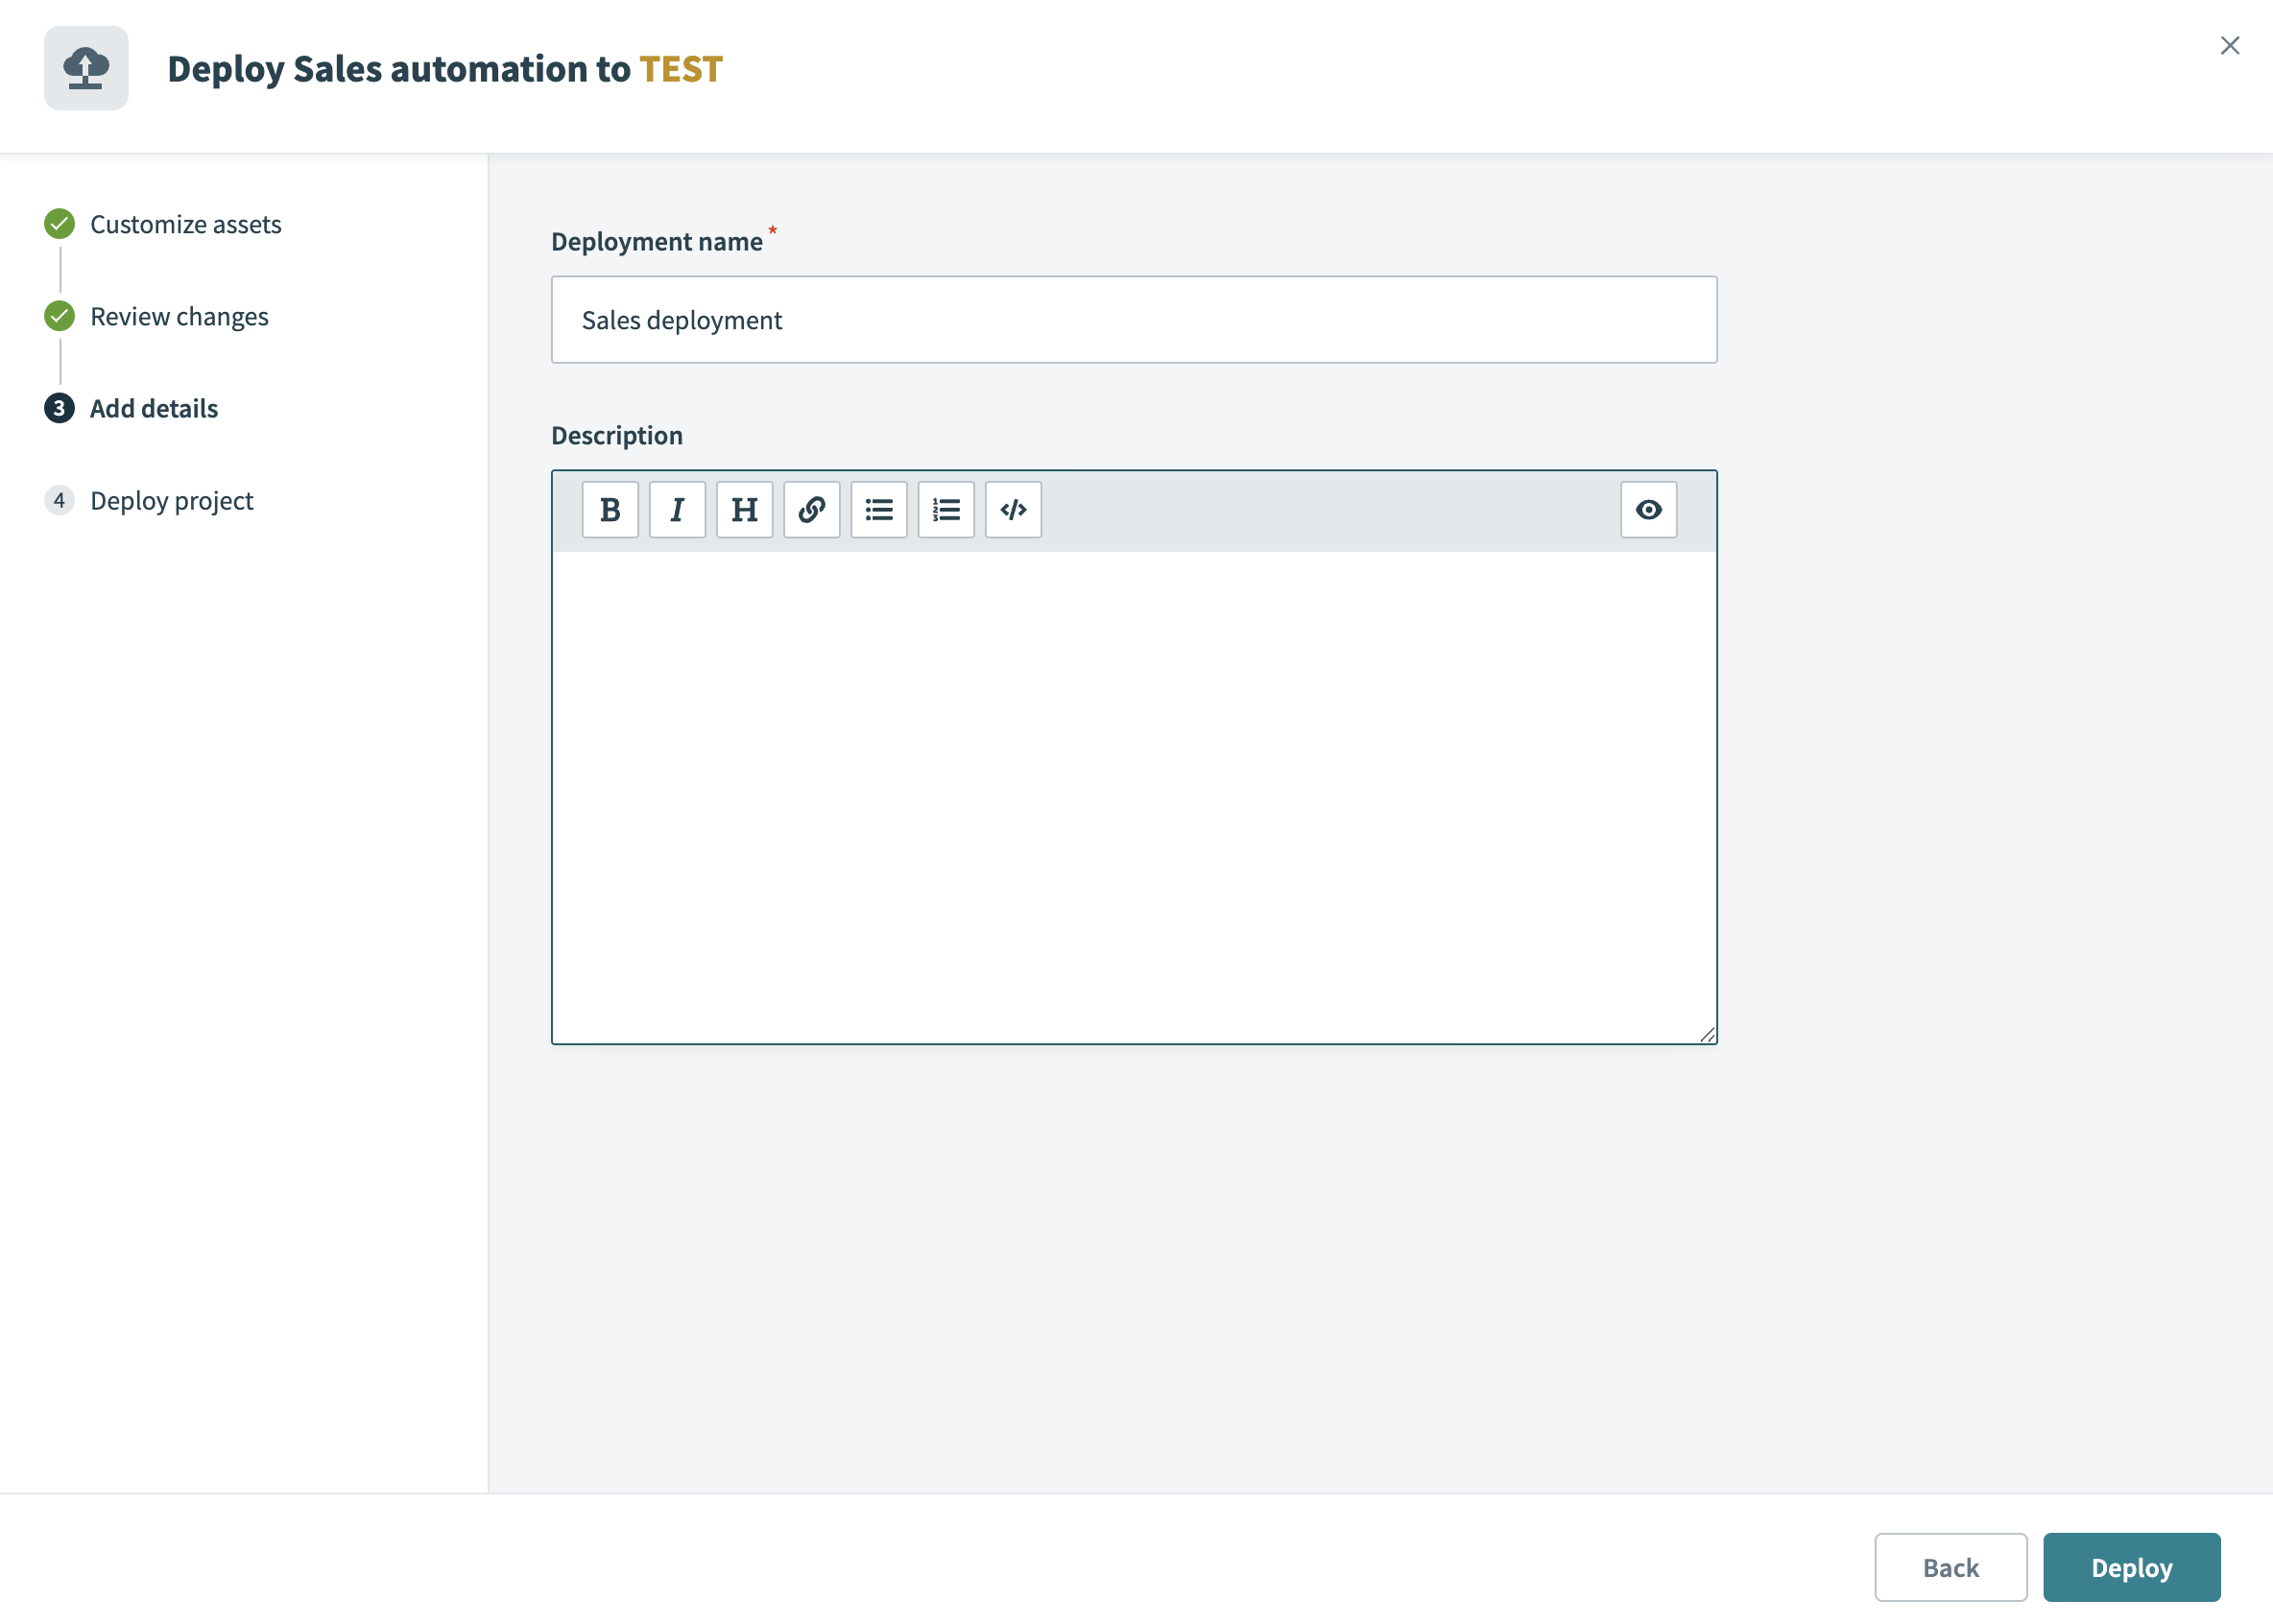
After reviewing the changes, you can add the necessary details for your deployment:
Provide a name for your deployment in the Deployment name field. This name is used in the deployment history tab.
 Add deployment details
Summarize the changes for this version of the project in the Description field.
Click Deploy to initiate the deployment.
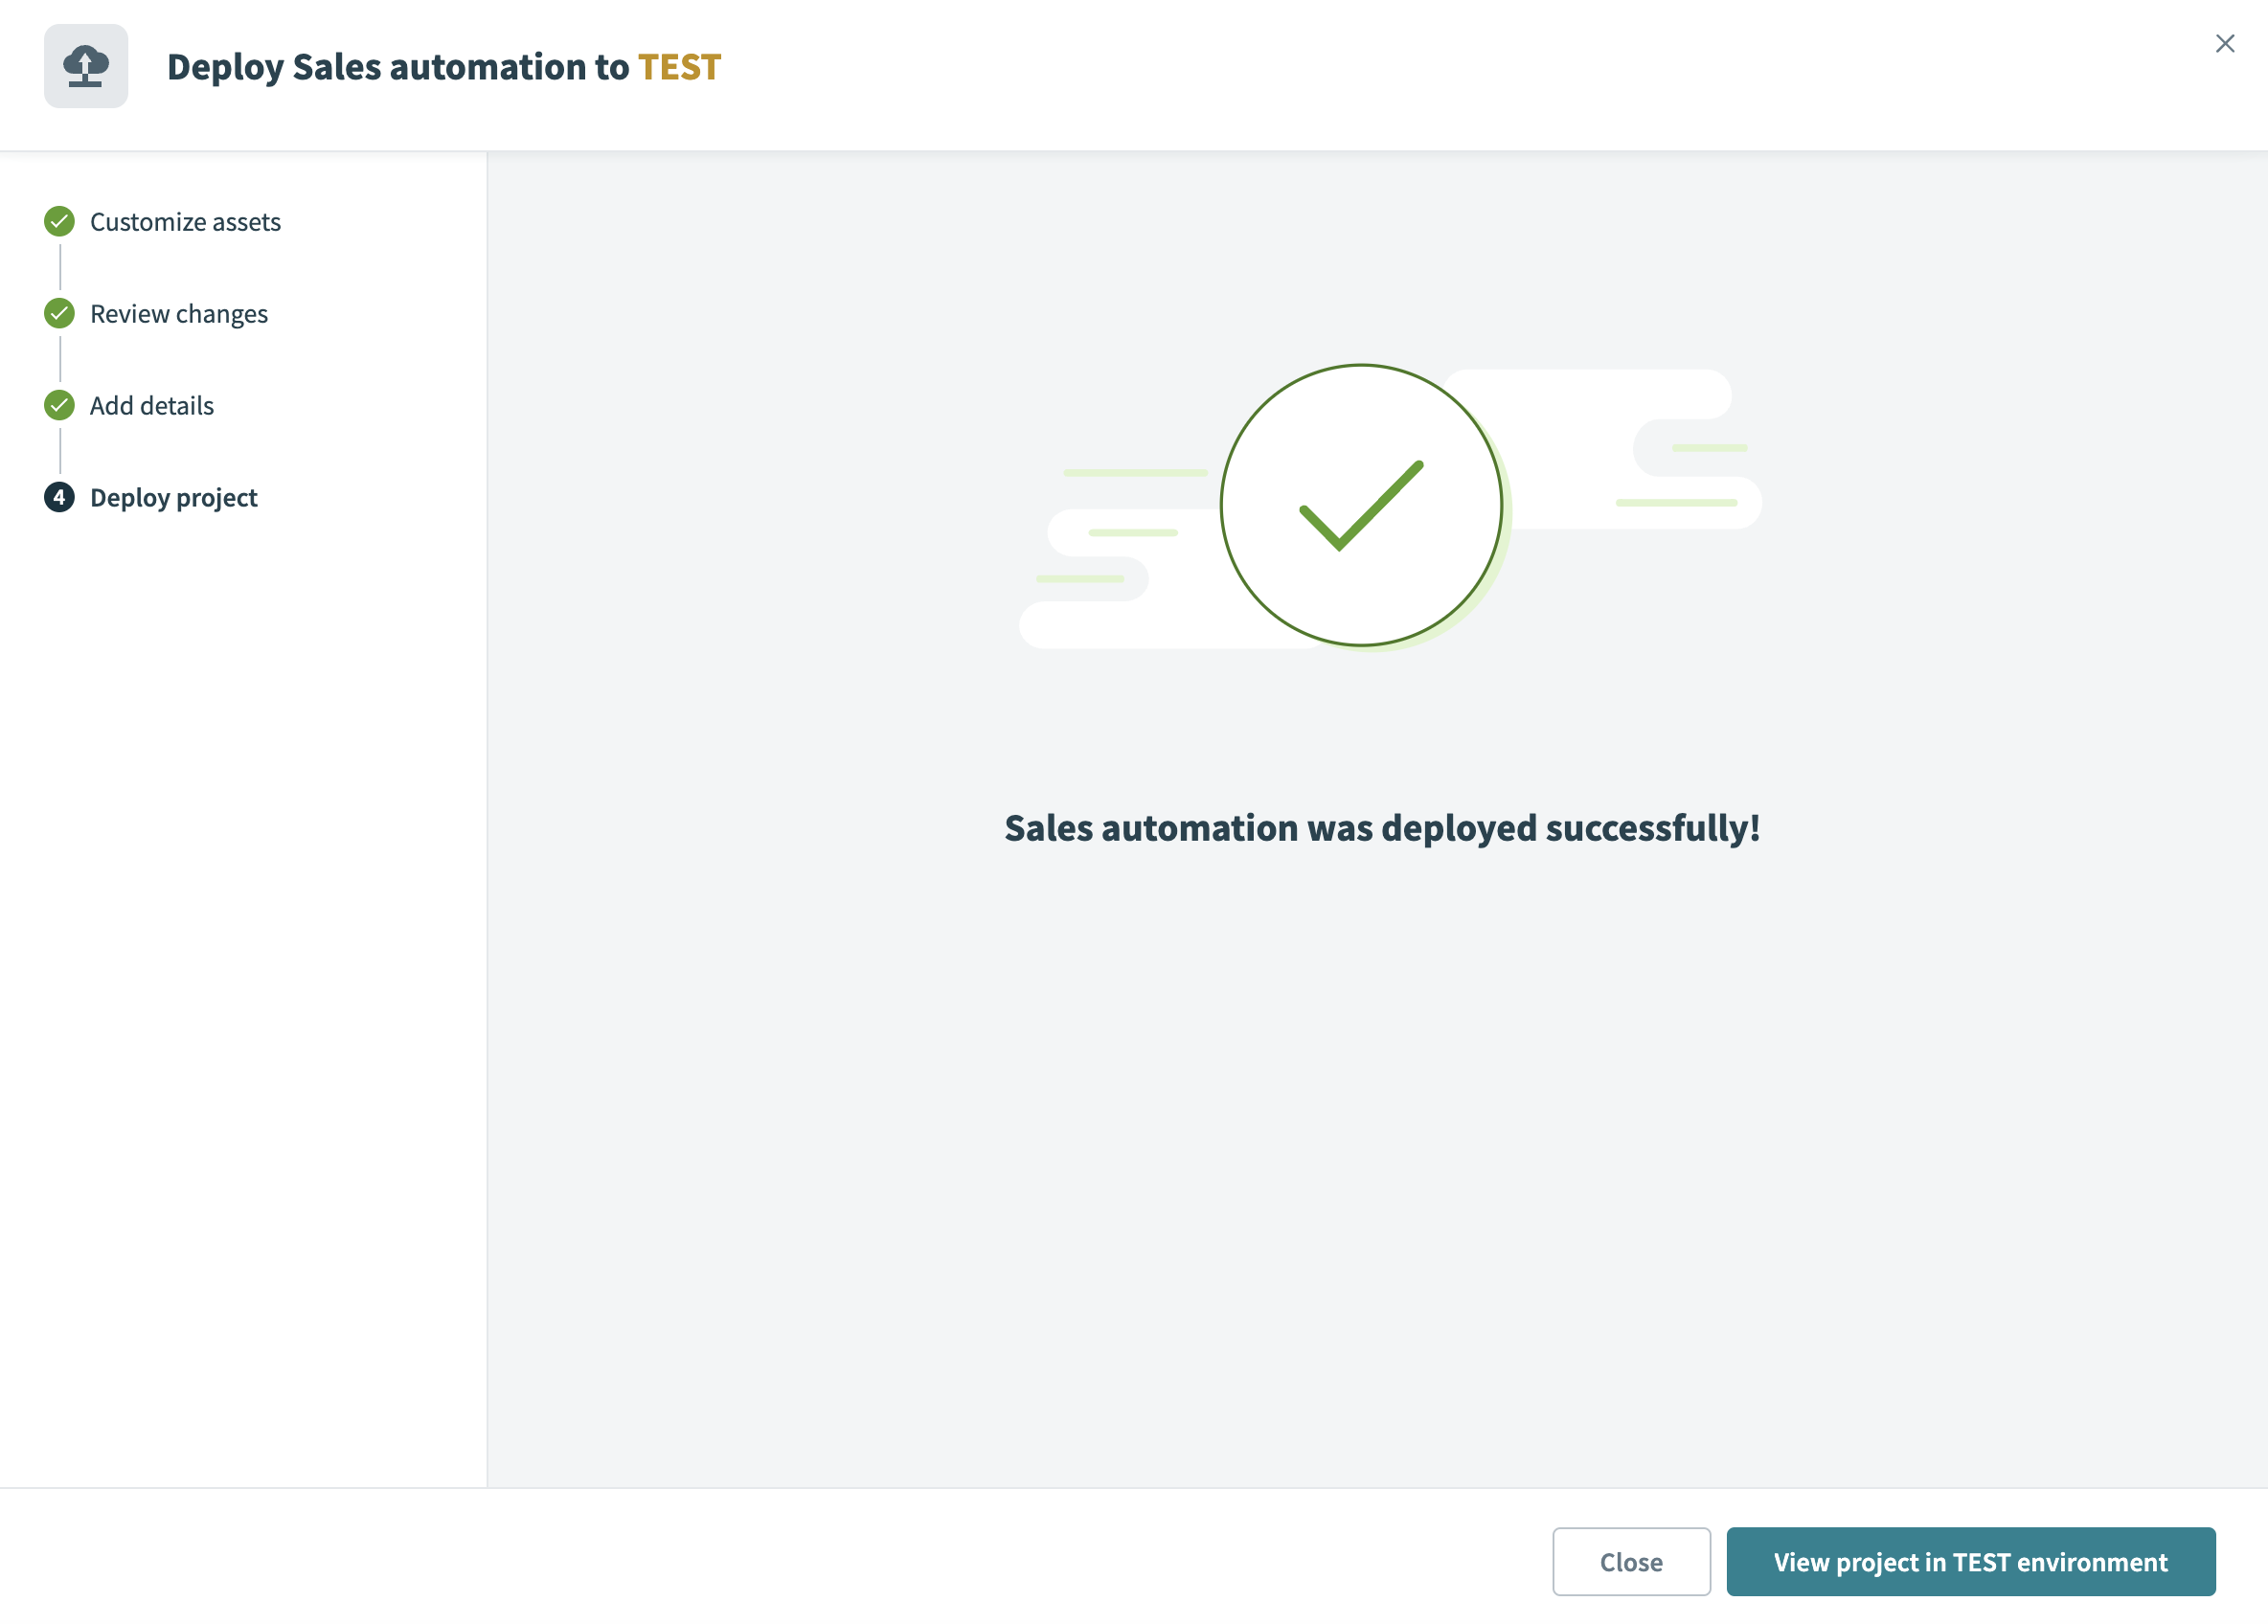
Review and finalize deployment
After Workato deploys the changes, complete the following steps to review and finalize the deployment:
Click View project in [ENVIRONMENT] to review the deployment in the relevant environment.
 View deployment
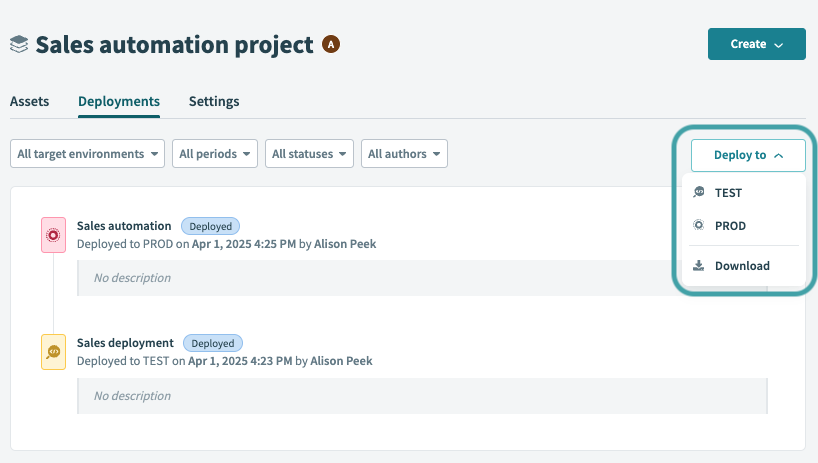
Navigate to the Deployments tab to check the status of the deployment or to redeploy if necessary.
Use the Deploy to drop-down to deploy the project again to a different environment or download the package.
 Deploy again
Deploy from the recipe page
You can deploy recipes directly from the recipe page with deployment permissions. This feature streamlines the deployment process and enables you to efficiently manage urgent updates.
Prerequisites
Complete the following prerequisites before deploying from the recipe page:
- Ensure you have deployment privileges in both the source and target environments.
How to deploy an asset from the recipe page
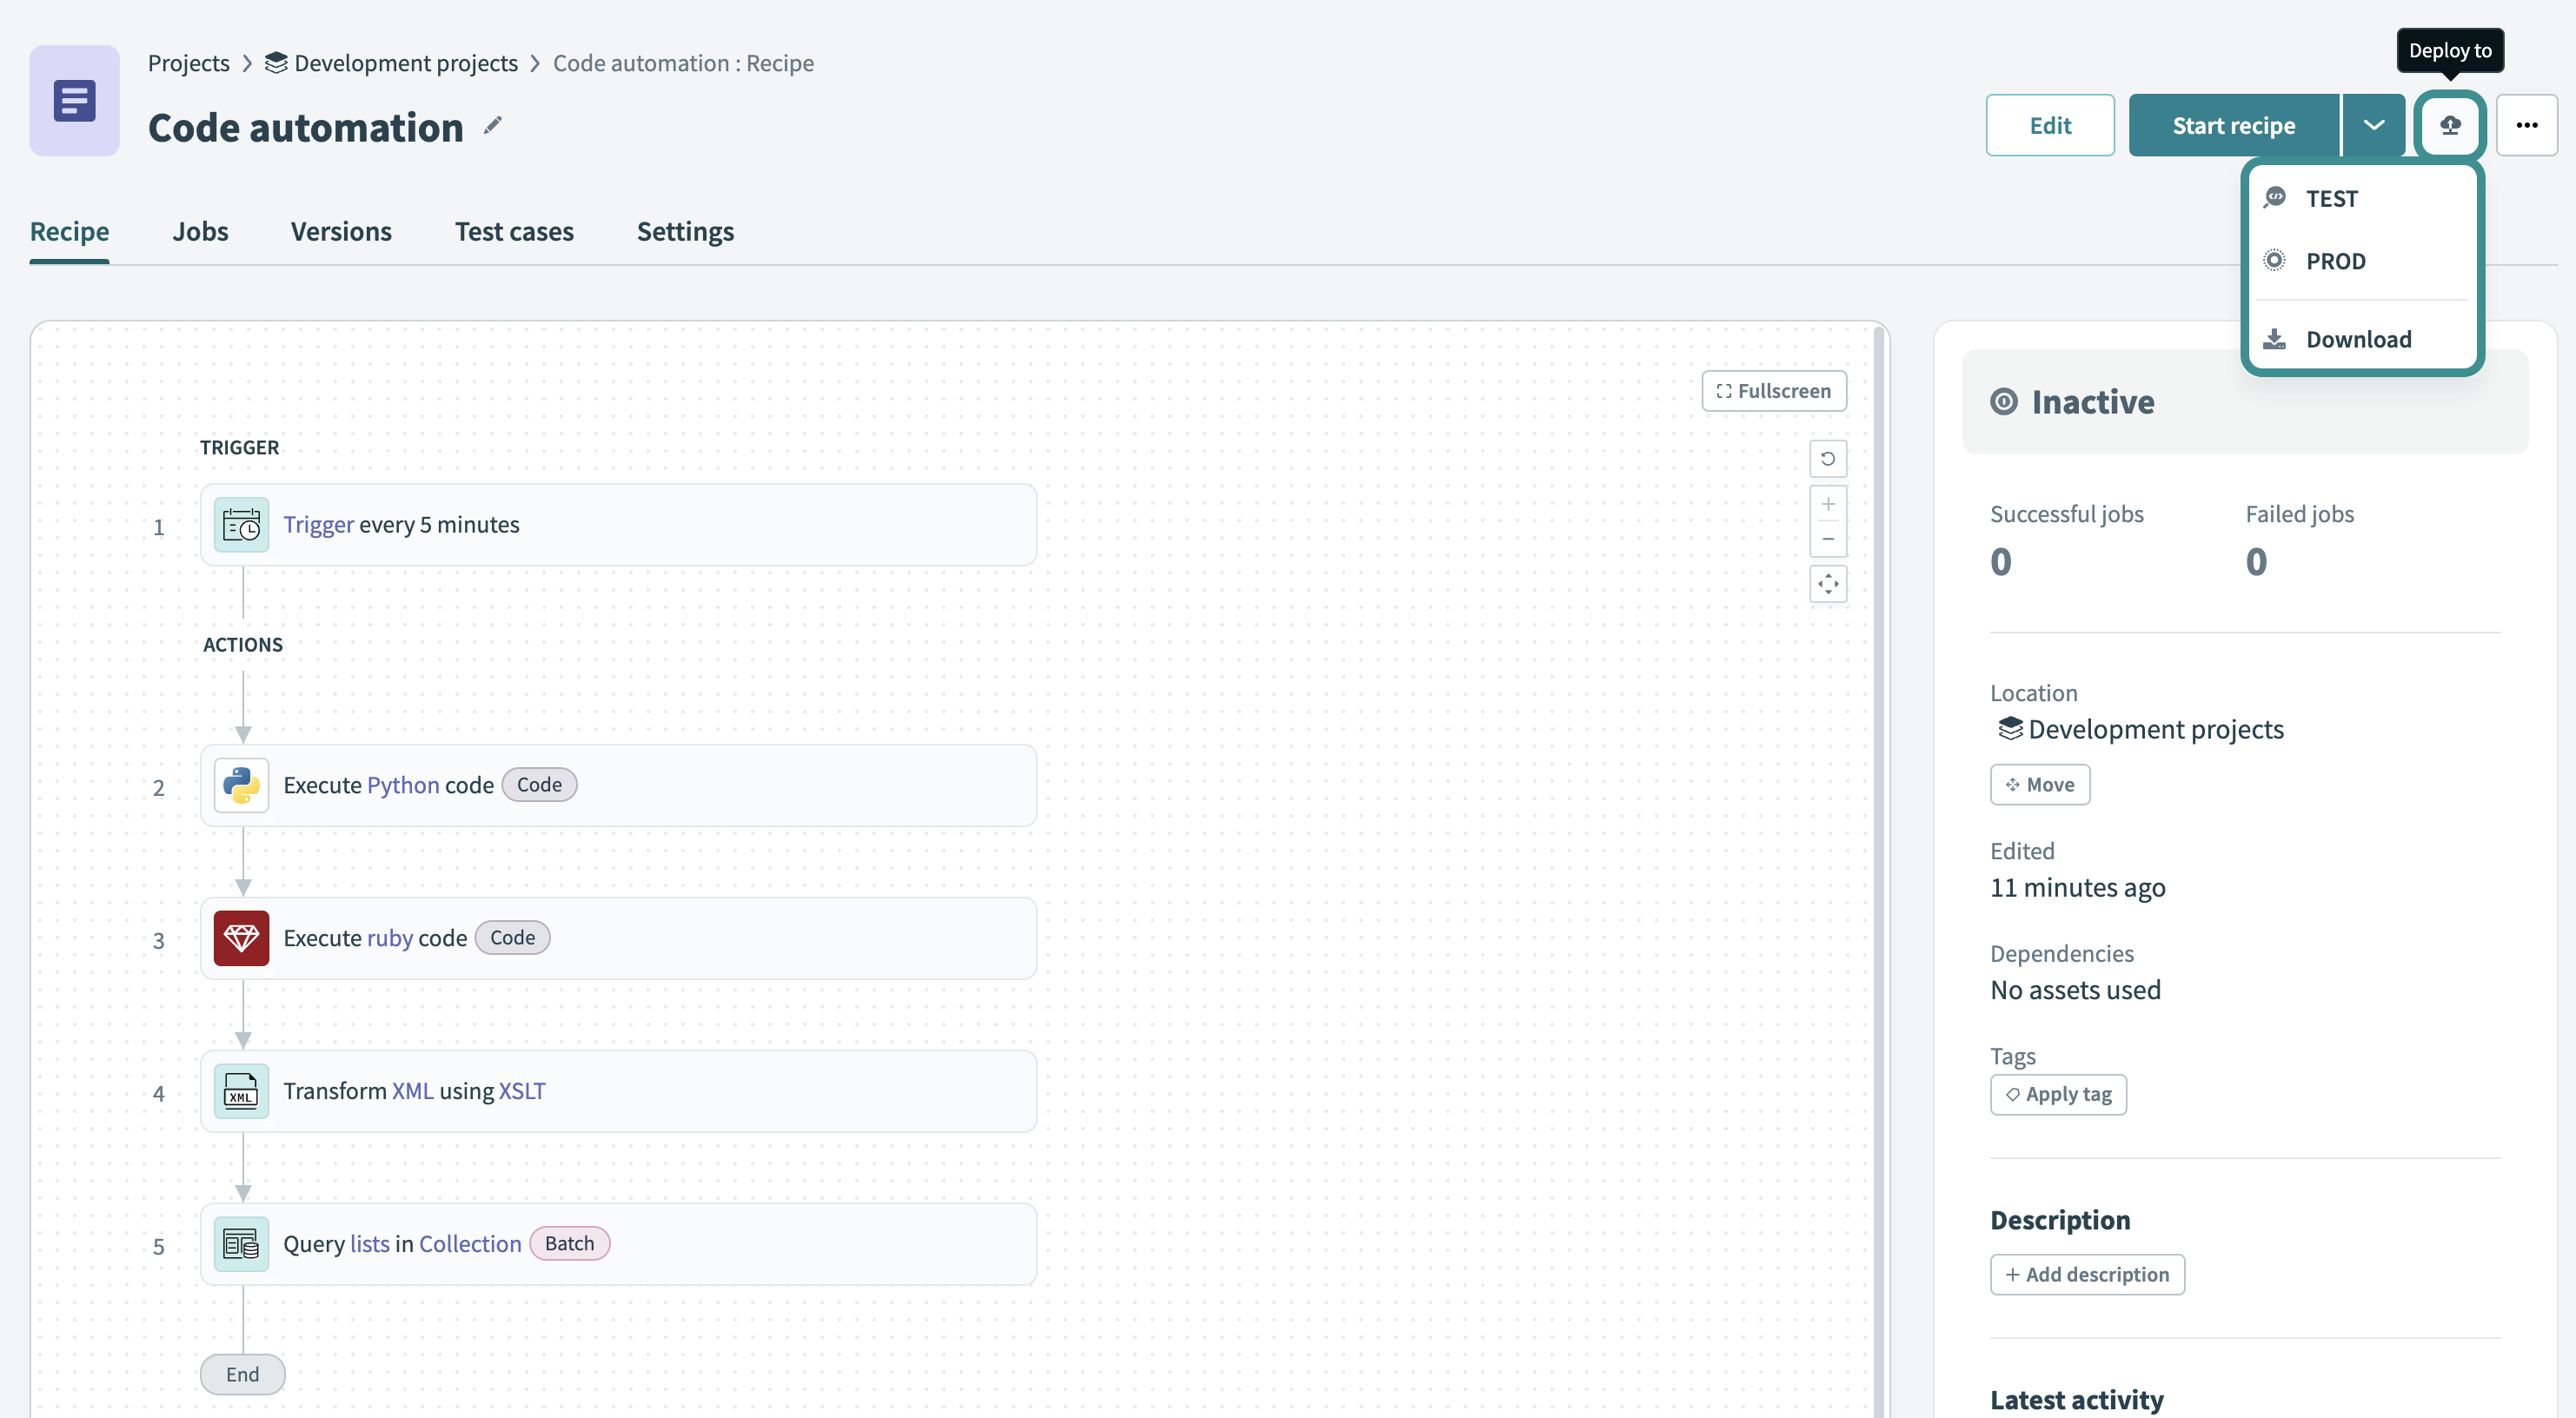
Complete the following steps to deploy directly from the recipe page:
Open the recipe you plan to deploy.
Click the Deploy to button at the top of the recipe page.
 Deploy from the recipe page
Select the target environment from the drop-down menu. Only environments where you have deployment privileges are available.
Review the deployment popup where the current asset is pre-selected. Dependent assets are automatically selected by default.
REVIEW DEPENDENT ASSETS
Review the dependent assets and customize the selection if needed to ensure only the necessary assets are included in the deployment.
 Customize assets
Click Next, review the changes, add details, and click Deploy to complete the deployment.
After deployment, you can click View project in [ENVIRONMENT] to review the deployment in that environment.
Re-establish connections
Deploying a project maintains dependent relationships in recipes. However, you must reconnect connections in the target environment the first time they are deployed. Recipes won't run until you re-establish connections.
In the target environment, re-establish connections to ensure recipes run successfully.
SANDBOX CREDENTIALS
Use sandbox credentials when working in a non-production environment as a best practice.
Resolve post-deployment errors
If you encounter an error message such as 503 Service unavailable after deploying a project to the target environment and starting a recipe, you must refresh the recipe's schema. This allows you to fix any broken external dependencies.
Complete the following steps to refresh the recipe schema:
Sign in to your Workato account.
Open the side panel and click your profile icon.
Select the environment you deployed the project to.
Select the project and the recipe where the error occurred.
Select Edit recipe.
Select Refresh to refresh the recipe schema.
 Select Refresh to refresh the recipe schema
Resolve any design-time recipe errors that Workato identifies. Fields with errors are outlined in red.
Click Save to save your changes.
Resources
Last updated: