Message template
The Message template by Workato connector enables you to create and use static Message templates for commonly used messages in your recipes. These templates use Mustache as the templating language. You can use Message templates to generate HTML, text, JSON, and XML messages. They also allow you to separate the message composition logic (what the message looks like) from the message generation logic (when the message is sent). This separation enables you to change the message format without changing the recipe that sends the message.
Workato templates are "logic-less". This means that flow logic (such as loops and conditional statements, including if and else) is not supported within templates. Templates do allow Mustache tags for variable substitution, conditional blocks and list iteration. Create tags by wrapping text in double curly brackets ({{}}).
Each Message template has an associated input schema that defines variables that must be passed to the template's tags. The recipe developer must provide values for the input schema when using the Message template within a recipe.
MESSAGE TEMPLATE ESCAPES HARMFUL ELEMENTS
Message template escapes some potentially harmful HTML elements, such as those that could lead to XML injection.
Message template example
The UI developer builds an HTML template for outgoing emails about shipped products in an order. The Message template contains CSS and it uses template variables for dynamic content.
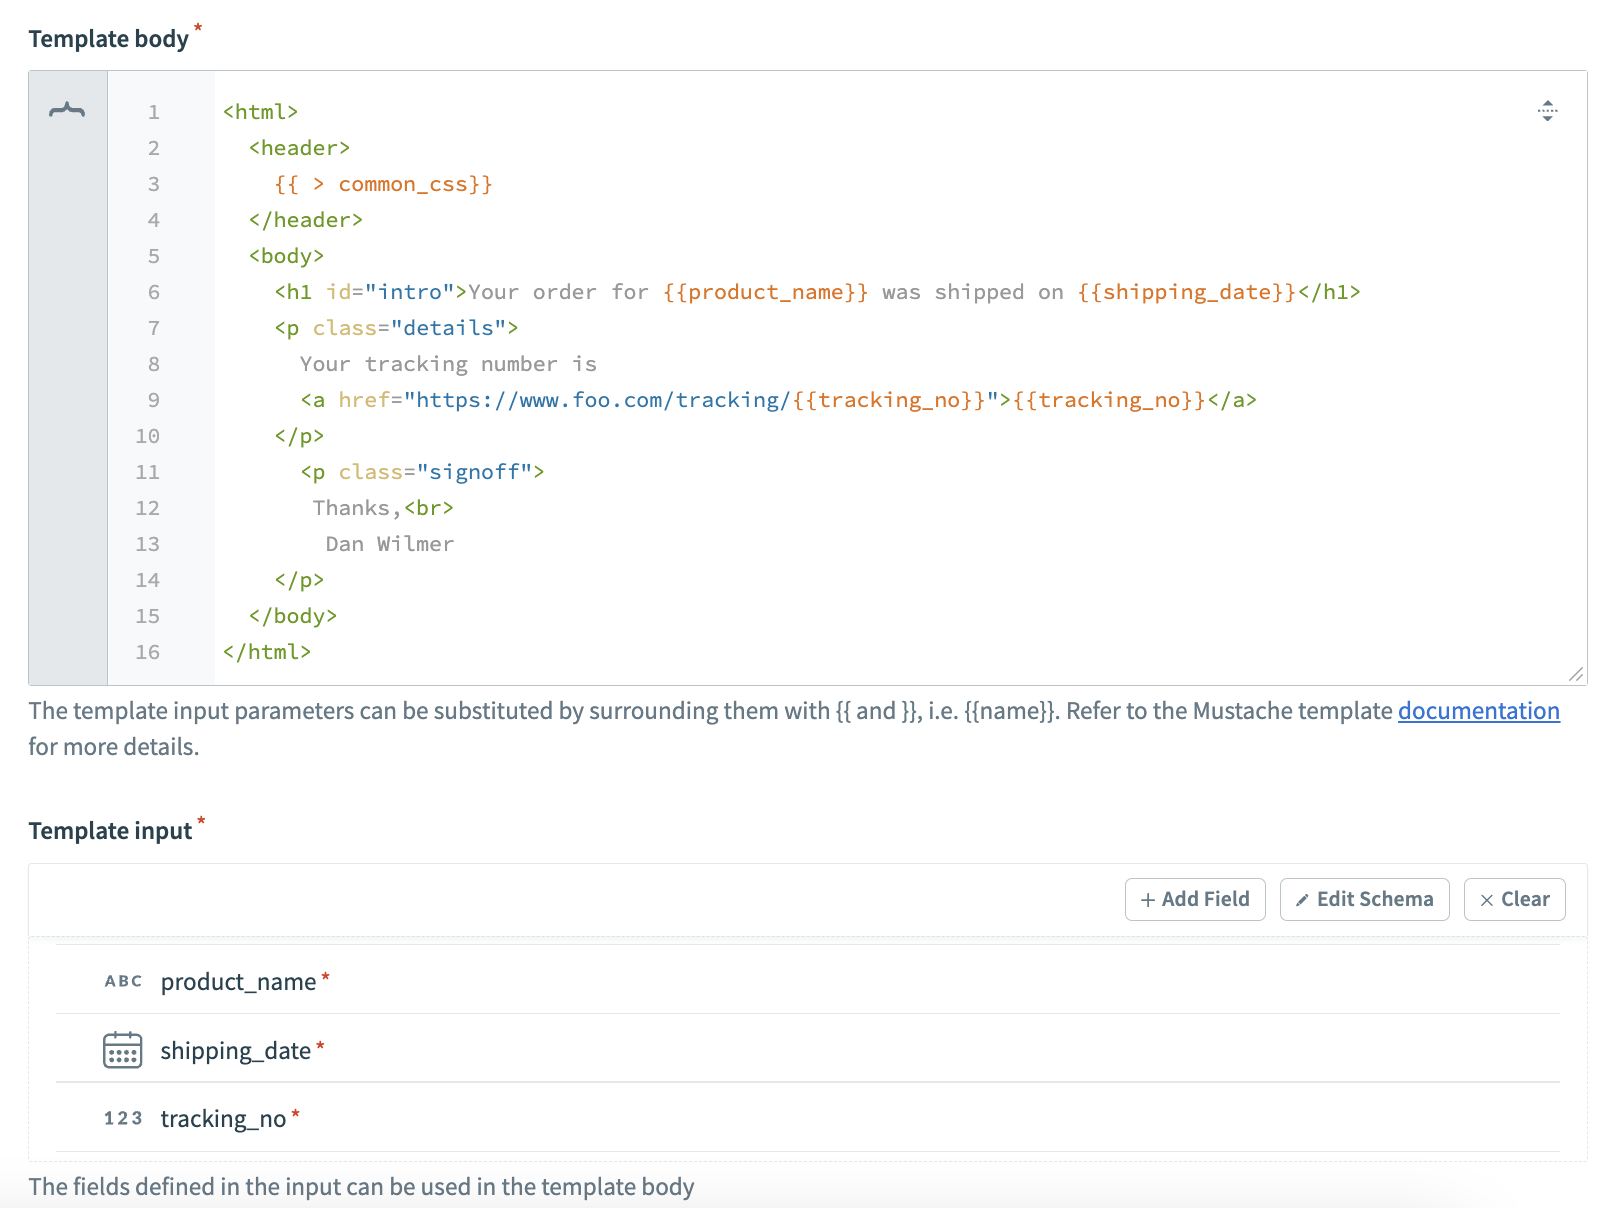 HTML template with variable substitution
The recipe developer then generates the email message by selecting the template to use and providing values for the message variables.
How to create a Message template
Complete the following steps to create a new template:
Navigate to Tools > Message templates and click + New template.
Provide the body text of the message in the Template body field. This field uses Mustache as its templating language. Refer to the Mustache documentation for more information.
Add your variables in the Template input field. You can use JSON or manually create your variables. Template variables support both scalar data types (string, integer, date, number, time, and boolean) and complex data types (object and list). You can define values for template variables in recipes using the Create message action.
 Template with defined variables
Variables
The variable tag enables you to specify placeholders in a template. Tags are variables by default, but can be made into sections, inverted sections, comments, and partials with additional syntax characters.
Variable tags are HTML escaped by default. To unescape a variable tag, use triple curly brackets or start with a &, for example: {{{email}}} or {{& email}}.
Template definition with variables example
The following template defines the variables name, email, and HTML escaped bio.
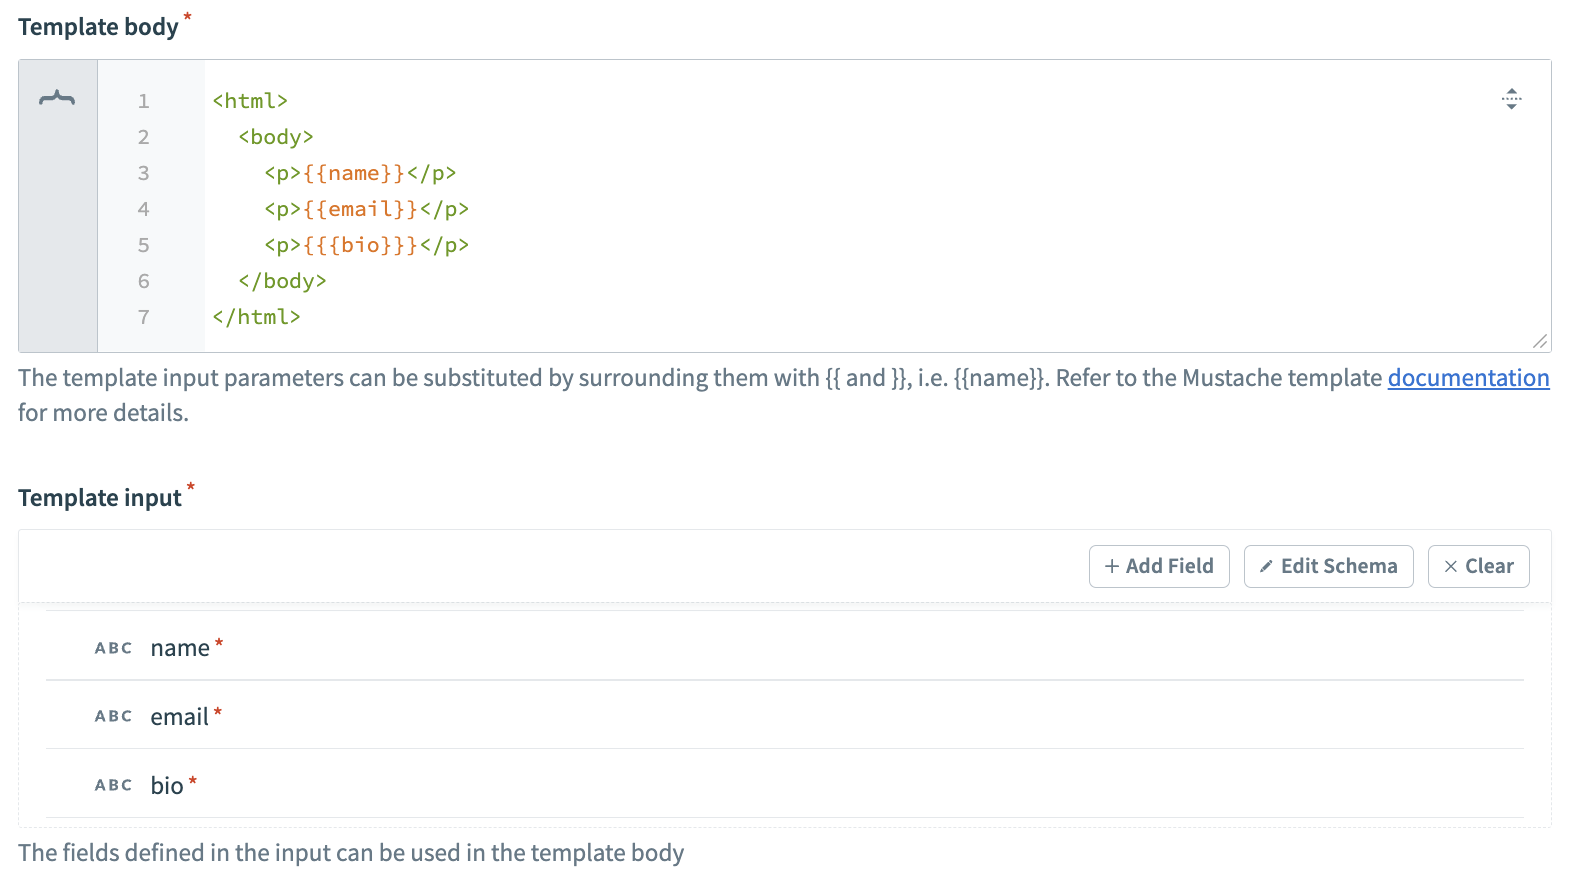 Template with variables
If we pass the following values into the template:
{
  "name": "Fiona Summers",
  "bio": "<b>President of debate club</b>"
}
We receive the following template output:
<html>
<body>
<p>Fiona Summers</p>
<p></p>
<p><b>President of debate club</b></p>
<p><strong>President of debate club</strong></p>
</body>
</html>Sections
You can use sections to render a block of text multiple times. Opening sections tags start with a #, for example: {{#user}}. Closing tags start with a /, for example: {{/user}}. The value passed into the section tag determines how many times the text block is rendered.
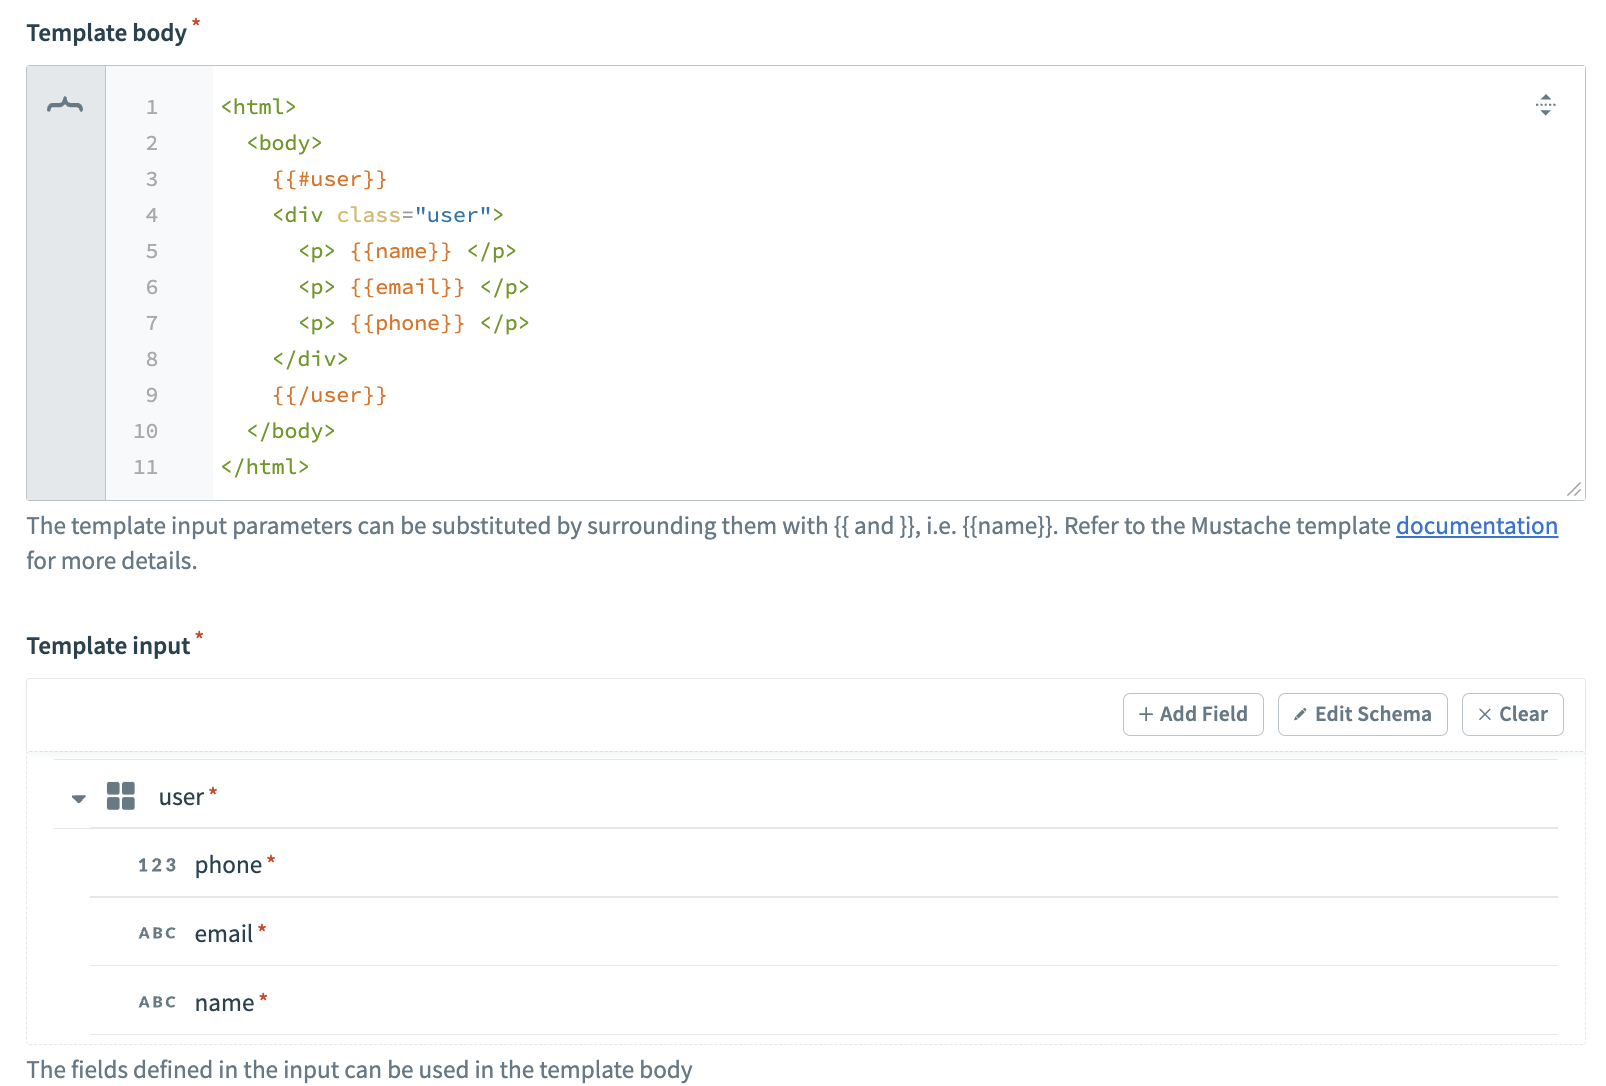
Object section
When the value of the section variable is an object, the section is rendered only once. The block has access to all the keys declared within the object.
Template definition with object section example
The following template defines an object section user with the fields name, email, and phone.
Template with an object section
If we pass the following values into the template:
{
  "user": {
    "name": "Fiona Summers",
    "email": "[email protected]",
    "phone": "650 8xx 7567"
  }
}
We receive the following template output:
<html>
  <body>
    <div class="user">
      <p> Fiona Summers </p>
      <p> [email protected] </p>
      <p> 650 8xx 7567 </p>
    </div>
  </body>
</html>
List section
When the value of section variable is a list, it is rendered multiple times. The block has access to all the keys declared in a row of the list. To retrieve multiple values in the template response, use an array.
Template definition with list section example
The following template defines a list section order_lines with the fields product_name, qty, price, and total.
 Template with a list section
If we pass the following values into the template:
{
  "id": "KA100",
  "order_lines": [
    { "product_name": "Anker USB charger", "qty": 1, "price": "15.99", "total": "15.99" },
    { "product_name": "Guard screen protector", "qty": 1, "price": "7.50", "total": "7.50" }
  }
}
We receive the following template output:
<html>
  <body>
    <table>
      <tr  class="order-lines">
        <td>Anker USB charger</td>
        <td>1</td>
        <td>15.99</td>
        <td>15.99</td>
      </tr>
      <tr  class="order-lines">
        <td>Guard screen protector</td>
        <td>1</td>
        <td>7.50</td>
        <td>7.50</td>
      </tr>
    </table>
  </body>
</html>
Inverted section
Inverted sections are rendered when a template variable is missing, false, or an empty list. Opening inverted section tags start with a ^, for example: {{^order_lines}}. Closing tags start with a /, for example: {{/order_lines}}.
Template definition with inverted section example
The following template defines an inverted section order_lines that displays an error message No error lines!! if the order_lines list is missing, false, or empty.
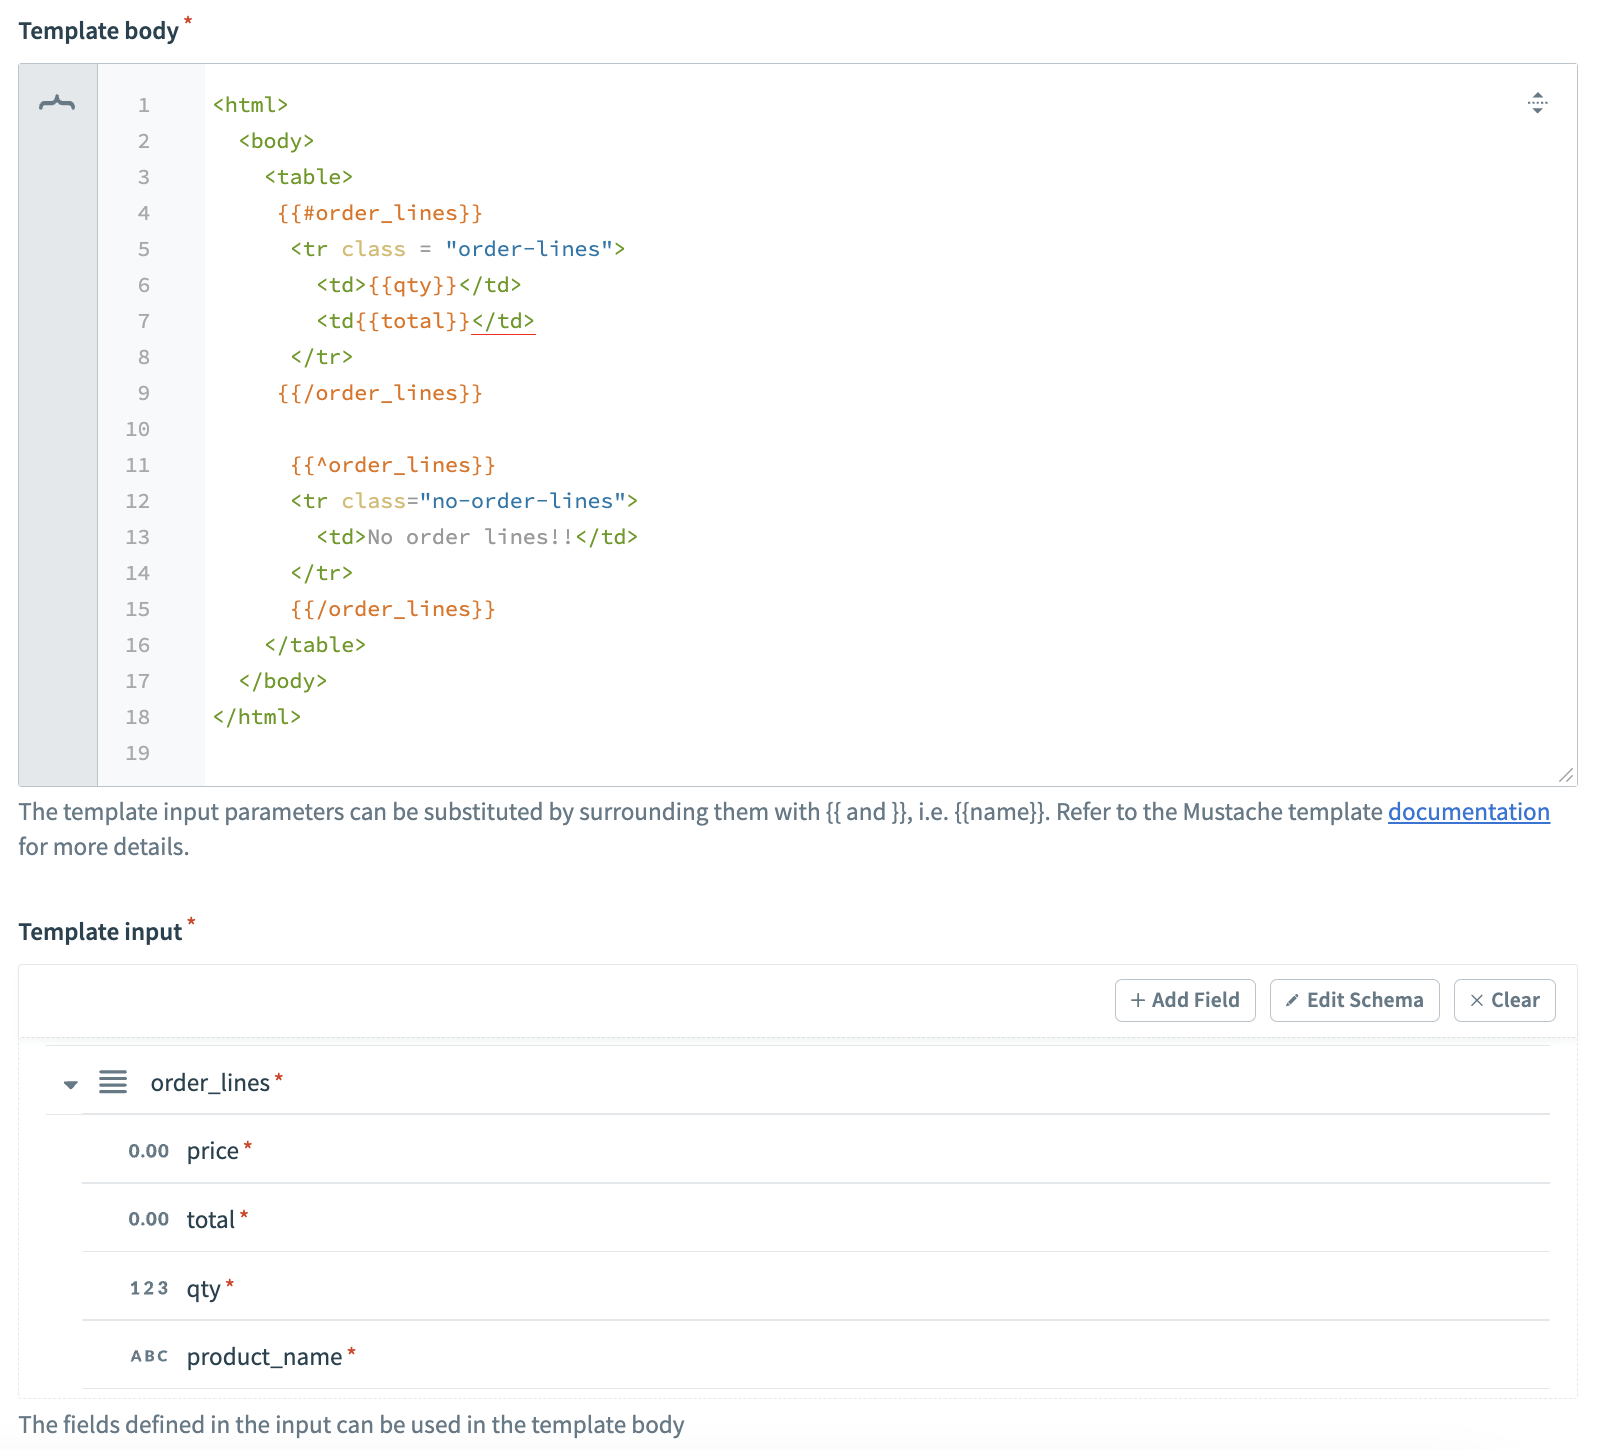 Template with inverted section
If we pass the following values into the template:
{
  "id": "KA100",
  "order_lines": []
}
We receive the following template output:
<html>
  <body>
    <table>
      <tr  class="no-order-lines">
        <td>No order lines!</td>
      </tr>
    </table>
  </body>
</html>
Comments
Comment tags begin with a !, for example: {{! comment}} Comments are ignored when a message is generated from a template.
Template definition with comments example
The following template includes the comment Render the management section for administrators.
<html>
  <body>
    {{!
      Render the management section for administrators
    }}
    {{#admin}}
    <div class="user-management">
      <a href="/admin">Manage users</a>
    </div>
    {{/admin}}
  </body>
</html>
If we pass the following value into the template:
{
  "admin": true
}
We receive the following template output:
<html>
  <body>
    <div class="user-management">
      <a href="/admin">Manage users</a>
    </div>
  </body>
</html>
Partials
Partial tags begin with a >, for example: {{> common_css }}. Partials enable you to create reusable template snippets. Workato supports nested partials. Care must be taken to avoid infinitely recursive partials.
Partials inherit the calling context of their parent.
Template/partial definition example
The following template defines the partial header.
<div class="header">
  <a href="/">Home</a>
  <a href="/users">Users</a>
  <a href="/logout">Logout</a>
  <p> {{user_name}} </p>
</div>
The following references the header partial:
<html>
  <body>
    {{> header }}
    <div class="user-management">
      <a href="/admin">Manage users</a>
    </div>
  </body>
</html>
If we pass the following values into the template:
{
  "user_name": "Fiona Summers"
}
We receive the following template output:
<html>
  <body>
    <div class="header">
      <a href="/">Home</a>
      <a href="/users">Users</a>
      <a href="/logout">Logout</a>
      <p> Fiona Summers </p>
    </div>
    <div class="user-management">
      <a href="/admin">Manage users</a>
    </div>
  </body>
</html>
Create message action
Within a recipe, use the Create message action in the Message template by Workato adapter to generate a message from a Message template.
REQUIRES AT LEAST ONE TEMPLATE
To use the Create message action, your workspace must have at least one template saved.
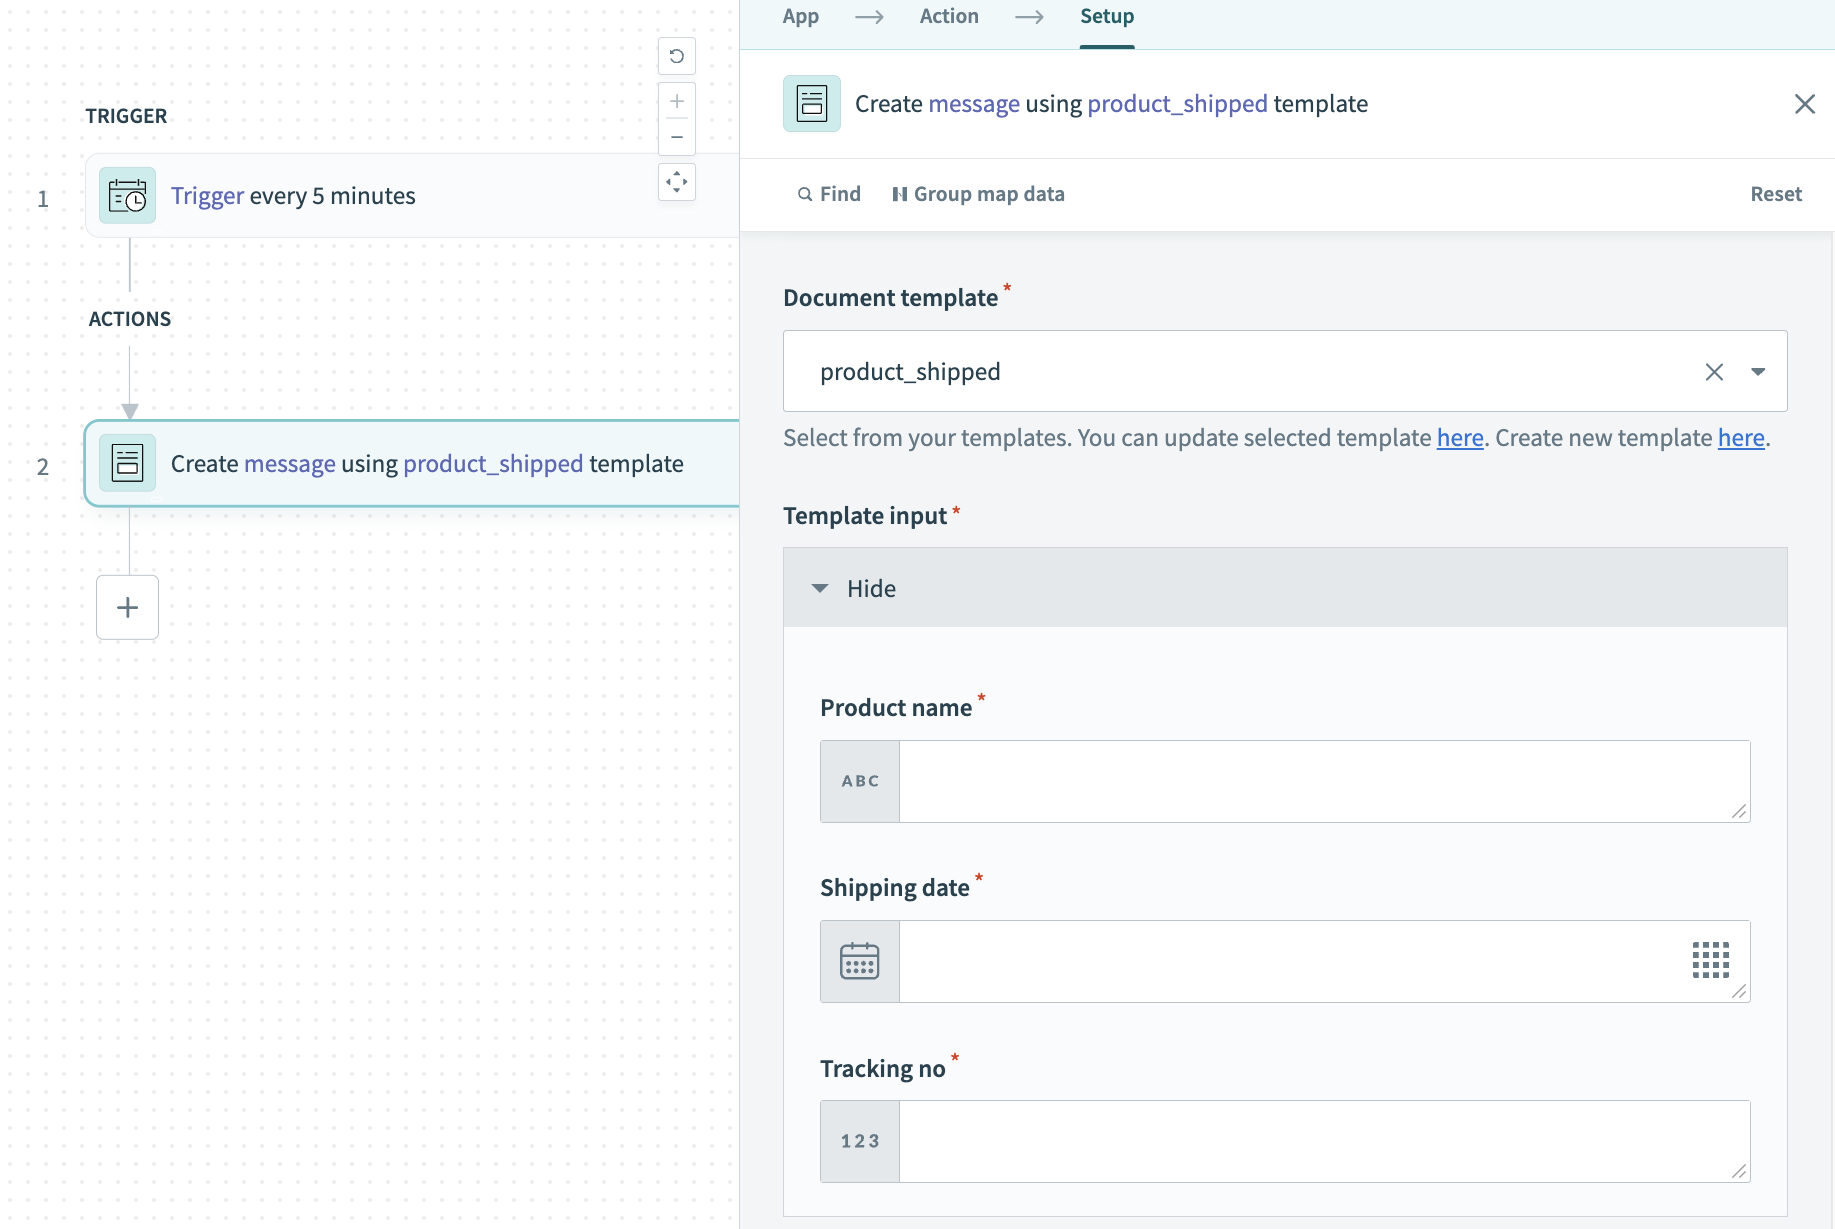 Use of the Create message action within a recipe
Input
| Input | Description |
|---|---|
| Document template | Select the template you plan to use. |
| Template input | Provide datapills or fixed values for your template's tags to use within this recipe. |
Output
| Output | Description |
|---|---|
| Document | A static string generated from the Document template, with values from the Template input field passed to their associated tags. |
Last updated: