# MCP Cloud
MCP Cloud enables you to expose endpoints to AI agents as tools or sets of tools through a remote, cloud-based Model Context Protocol (opens new window)(MCP) server. Your API recipe collections and AI gateway collections generate unique, authenticated MCP URLs. You can add this MCP URL to your LLM settings to enable an AI agent to use your API endpoint collection to answer user prompts.
FEATURE AVAILABILITY
MCP is available to all users in the US and EU data centers. MCP models are hosted in the US and EU data centers and respect data residency requirements. Contact your Customer Success representative if you're interested in using MCP.
# Create an MCP server
You can create an MCP server in the AI Hub.
Complete the following steps to create an MCP server:
Sign in to your Workato account.
Go to AI Hub and click the MCP Servers tab. A list of your existing MCP local servers displays.
Click Create an MCP server. The New MCP server wizard opens.
Enter a name for your MCP server in the MCP server name field.
Optional. Provide a description of the MCP server in the Description field.
Use the Project folder drop-down menu to select the project that contains the assets that you plan to use for your MCP server.
MCP SERVER ASSETS MUST BE IN THE SAME PROJECT
You must store all assets the same project folder. Error messages display if you select an unsupported asset type.
Select the tools you plan to use.
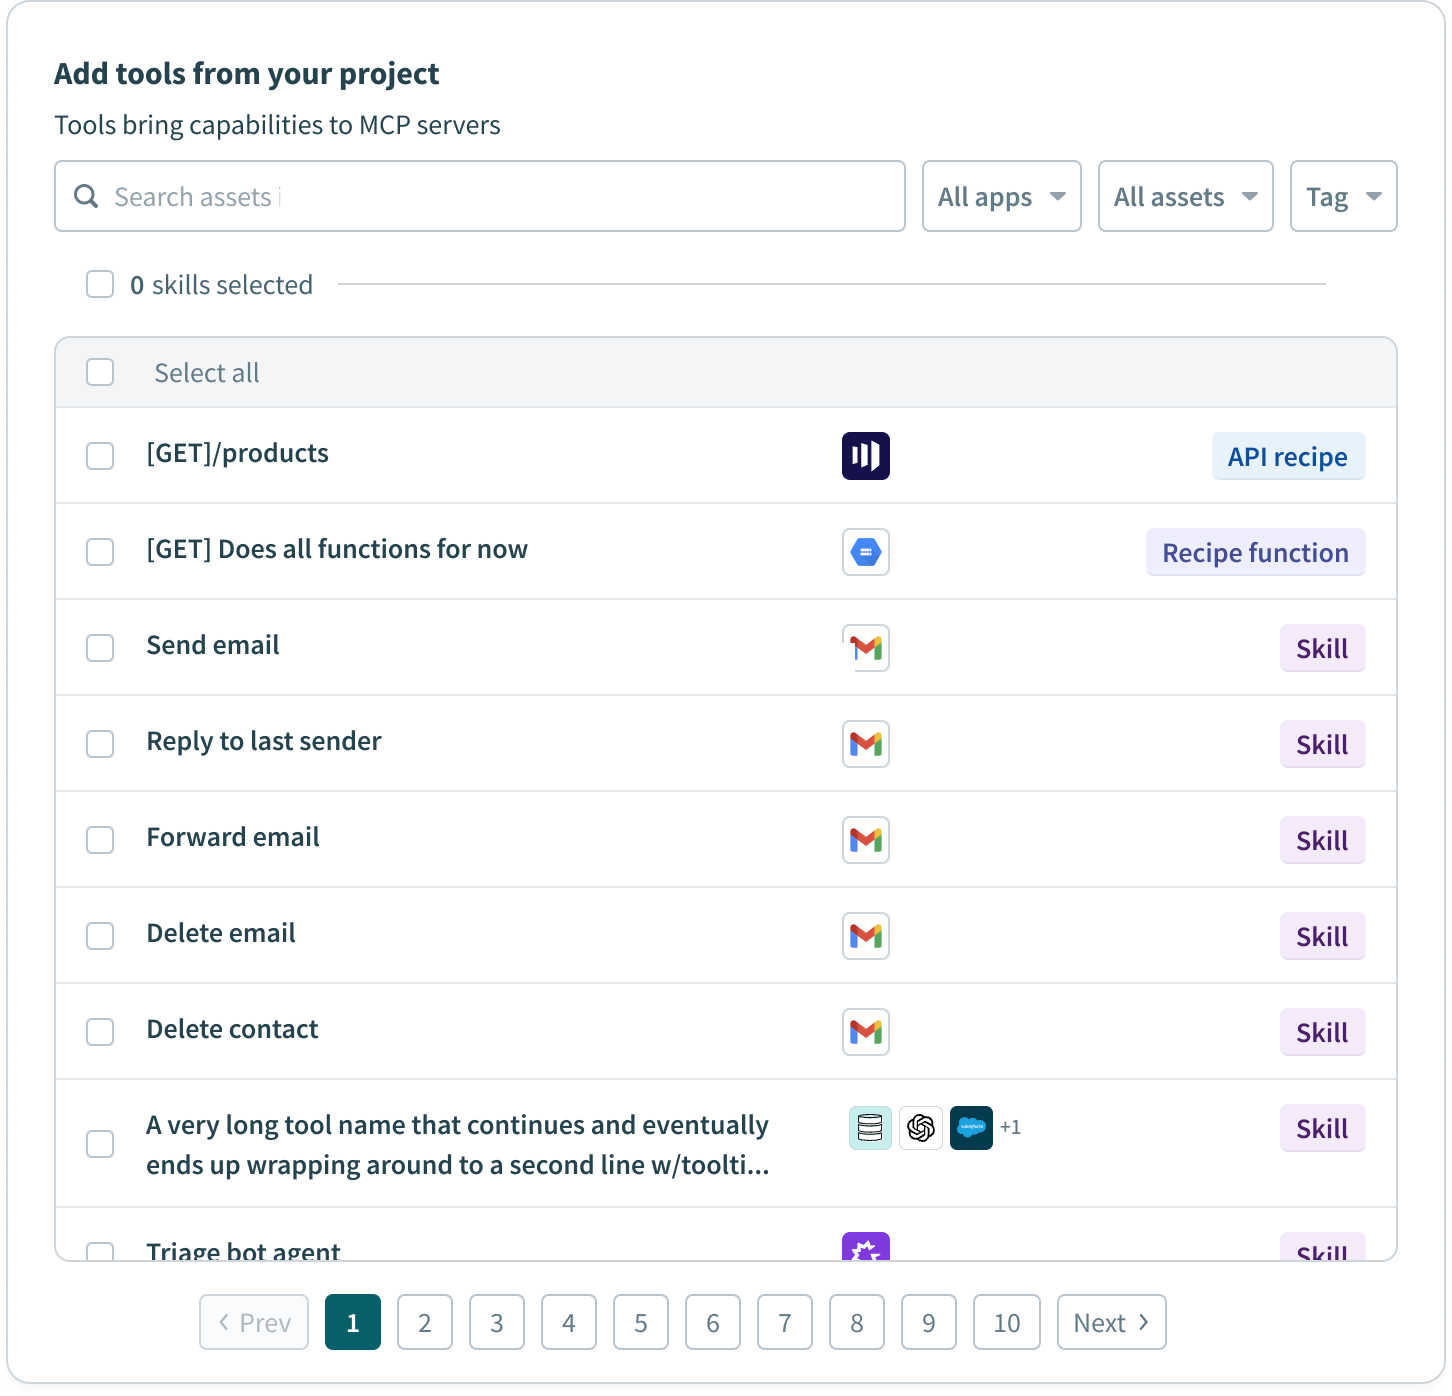 Select your MCP tools
Click Create MCP server. The MCP server Overview tab displays.
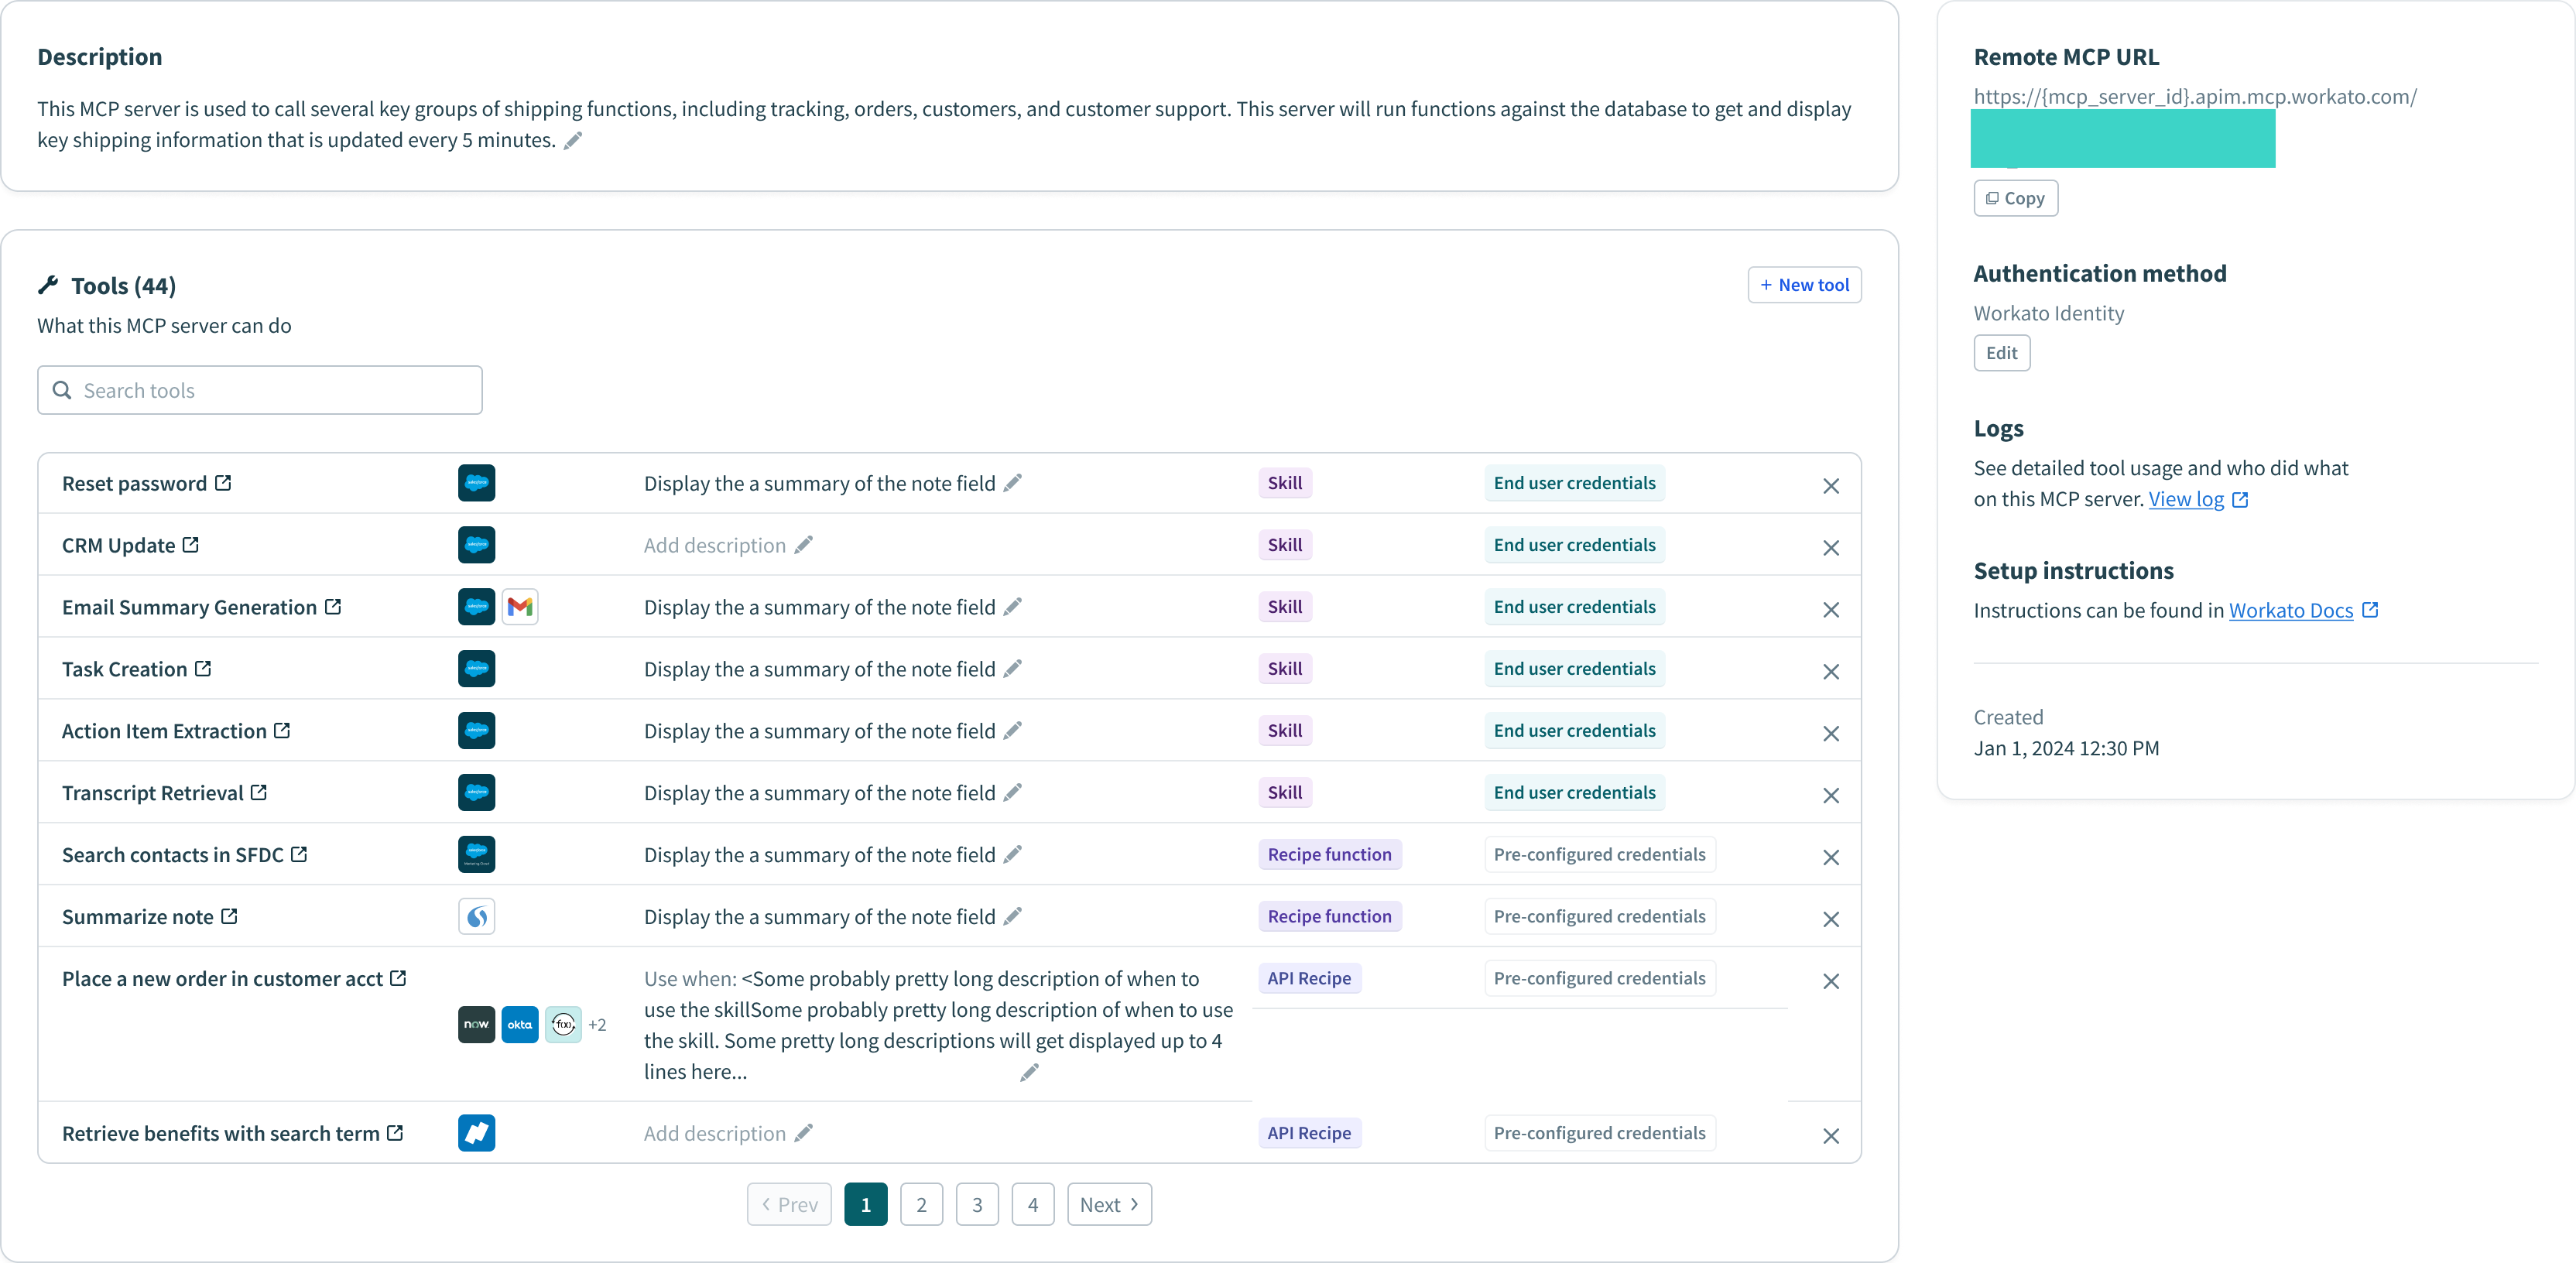 MCP server Overview tab admin view
# Access MCP servers
You can access and manage your MCP servers and retrieve your MCP URL in the AI Hub. You must authenticate your account to access MCP servers. Refer to MCP authentication for more information.
Complete the following steps to access your MCP servers:
Sign in to your Workato account.
Go to AI Hub and click the MCP Servers tab. A list of your existing MCP local servers displays.
Click the MCP server card you plan to view. The MCP server displays the following information:
- Description
- Installation link
- Tools available on the MCP server, such as
Tasks CreateandCRM Get Company Properties - The MCP remote URL
Optional. Go to the Remote MCP URL section and click Copy URL.
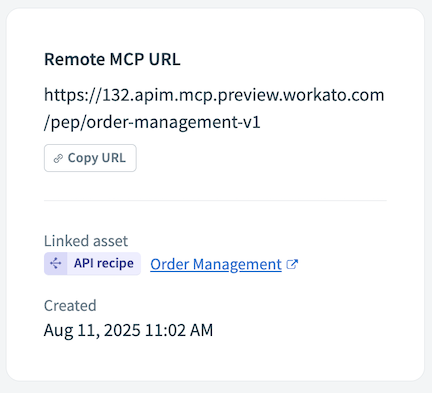 Copy the remote MCP URL
# View MCP server logs
MCP server logs include the request IP address, the ID of the user who made the request, and the MCP server creation timestamp.
Complete the following steps to access your MCP server logs:
Sign in to Workato.
Go to Projects > MCP servers.
Select the MCP server you plan to review. The MCP server Overview tab displays by default.
Go to Logs and click View log. The MCP server activity log displays.
# Add a remote MCP server to an AI model
You can use your REMOTE_MCP_URL to configure your remote server to work with your AI model, such as OpenAI or Anthropic.
Refer to the following OpenAI example steps for more information:
Sign in to Workato.
Go to AI Hub > MCP Servers.
Select the MCP server and copy the Remote MCP URL.
Go to your OpenAI account.
Select Prompts in the sidebar.
Click Tools > Create > MCP Server > +Add new.
Paste your remote MCP URL into the URL field.
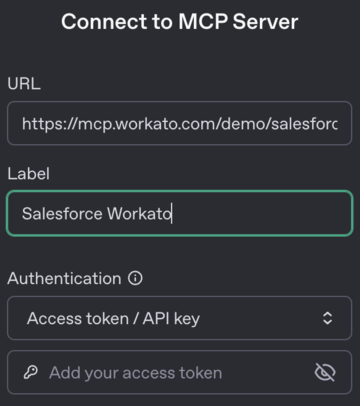 Configure your MCP Server
Add a descriptive label for your MCP server.
Ensure that Authentication is set to Access token/API key.
Add your API key to the key field.
Click Connect. The connection establishes and a list of available tools displays.
Use the Approval drop-down menu to select the approvals required for the tools listed.
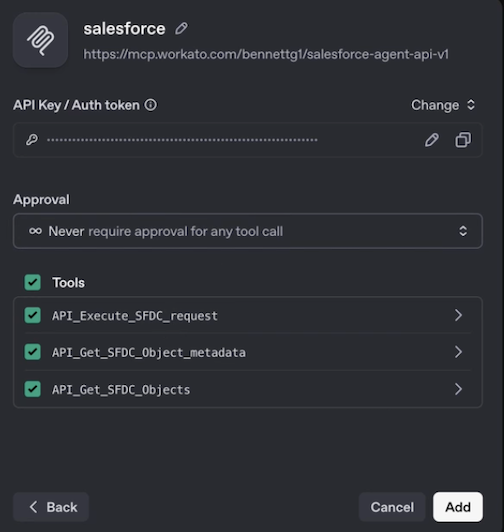 MCP Tools and Approval
Click Add to complete the setup.
# Limits
You can add custom rate limits, usage quotas, and IP restrictions to your MCP server.
Rate limits control how quickly requests can be made, acting as a throttling mechanism to prevent bursts of traffic. For example:
Hourly throttling
- Time interval:
1 hour - Tool calls:
5,000 - Result: The MCP server accepts up to 5,000 tool calls per hour across all users. This prevents sudden spikes that could overwhelm your backend systems.
Usage quota controls the total cumulative consumption over a period of time, restricting the capacity limit to manage overall resource consumption. For example:
Monthly usage quota
- Time interval:
1 month - Tool calls:
1,000,000 - Result: Your MCP server has a monthly usage quota of 1 million tool calls. All requests are blocked until the monthly quota resets after this limit is reached.
Complete the following steps to add rate limiting, usage quotas, and IP restrictions to your MCP server:
Sign in to Workato.
Go to Projects > MCP servers.
Select the MCP server where you plan to add limits. The MCP server Overview tab displays by default.
Click the Settings tab.
Click Limits in the sidebar.
Go to the Rate limit section and use the Time interval drop-down menu to specify the throttle limit for everyone using this MCP server.
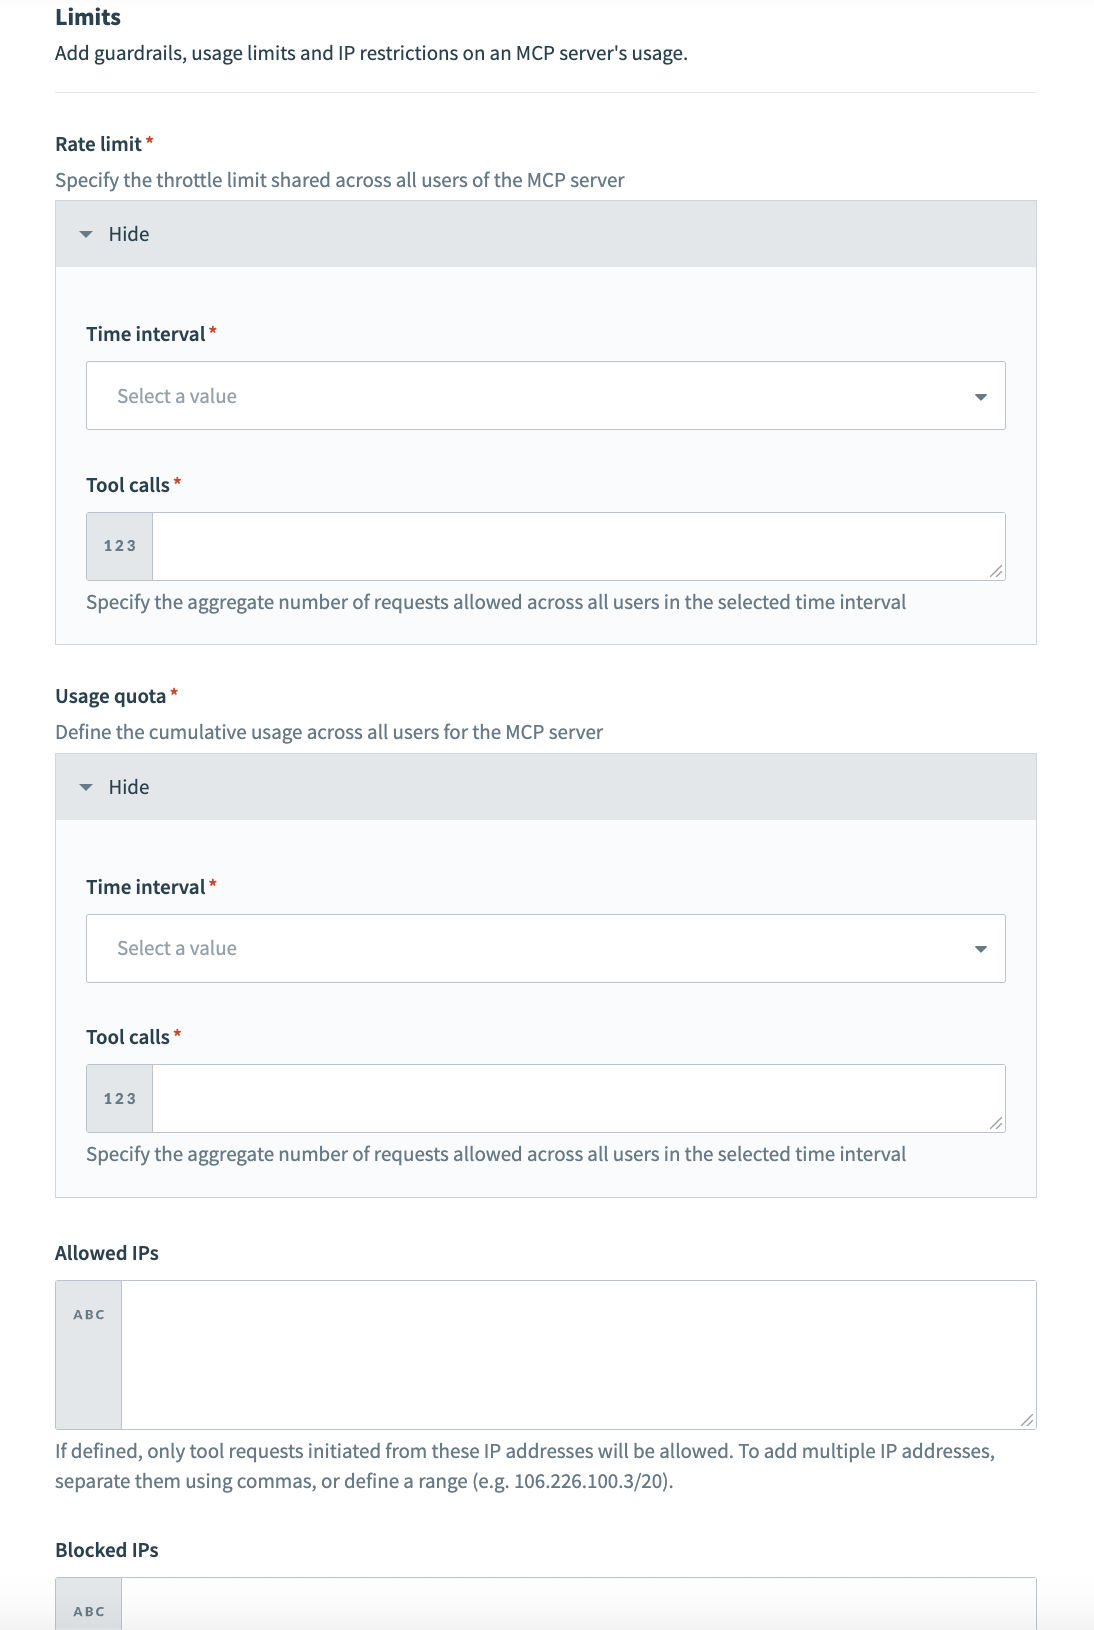 MCP server limits
Enter a value in the Rate limit section Tool calls field to specify the aggregate number of requests allowed for all users in the selected time interval.
Go to the Usage quota section and use the Time interval drop-down menu to specify the cumulative usage limit for everyone using this MCP server.
Enter a value in the Usage quota section Tool calls field to specify the aggregate number of requests allowed for all users in the selected time interval.
Optional. Go to the Allowed IPs field and add the IP addresses you plan to provide with access to the MCP server. Separate multiple IP addresses with commas. Only tool requests initiated from these IP addresses are allowed.
Optional. Go to the Blocked IPs field and add the IP addresses that you plan to block from using the MCP server. Blocked IP addresses take precedence over allowed IP addresses.
Click Save.
Last updated: 11/24/2025, 5:24:50 PM