CyberArk Identity SAML role sync configuration
Integrate Workato with CyberArk Identity to manage SAML role synchronization and ensure that your users' roles are updated when they log in through SAML SSO.
Set up role sync for standard Workato environments: DEV (default), PROD, and TEST, as we recommend this for consistent role management.
Prerequisites
Ensure that you have successfully configured the SAML SSO within your CyberArk Identity platform. For guidance, go to the CyberArk Identity SAML Documentation.
Ensure that you enabled just-in-time provisioning in Workato.
Ensure that you use SAML SSO enforcement for your team or organization.
Ensure that you enabled role syncing in Workato.
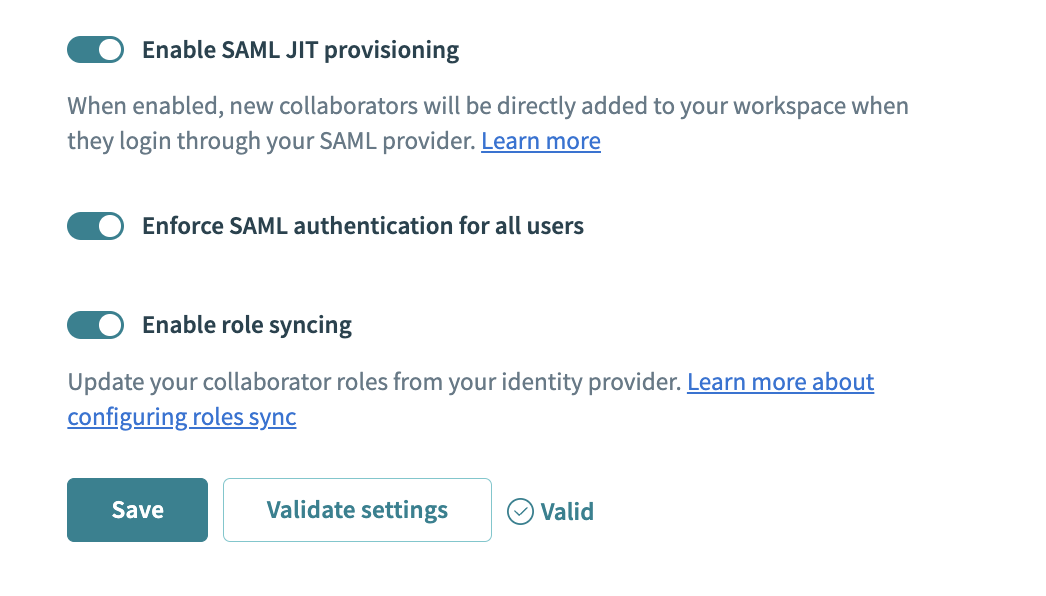 Enable role sync in Workato
Configure custom user attributes in CyberArk Identity
To set up custom user attributes for Workato environments within CyberArk Identity, follow these steps:
Log in to your CyberArk Identity admin console.
Navigate to Settings > Customization in your CyberArk Identity admin portal.
Click Additional Attributes to manage custom attributes.
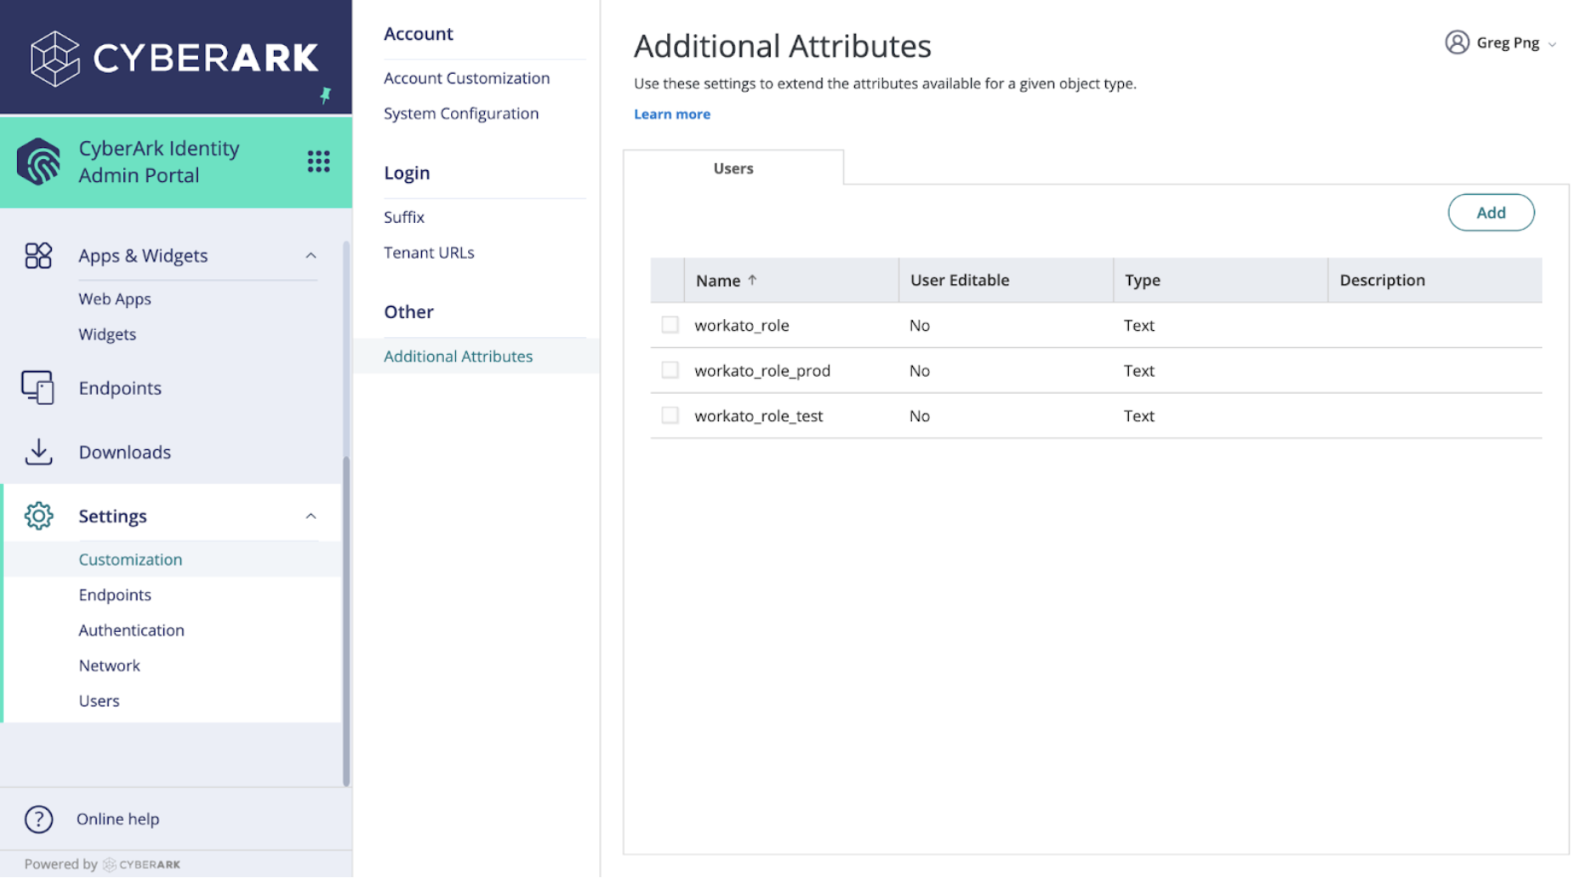 Create custom user attributes for SAML role sync
Select Add to create a new attribute.
Define the attributes for various Workato environments by adding the following:
workato_role: This attribute maps to the DEV environment.workato_role_test: This attribute maps to the TEST environment.workato_role_prod: This attribute maps to the PROD environment.
Select the attribute type as Text from the drop-down menu. Repeat this for each attribute.
Ensure the User Editable box is unchecked, unless you intend for users to modify this attribute from their portal.
Click Add to save each attribute.
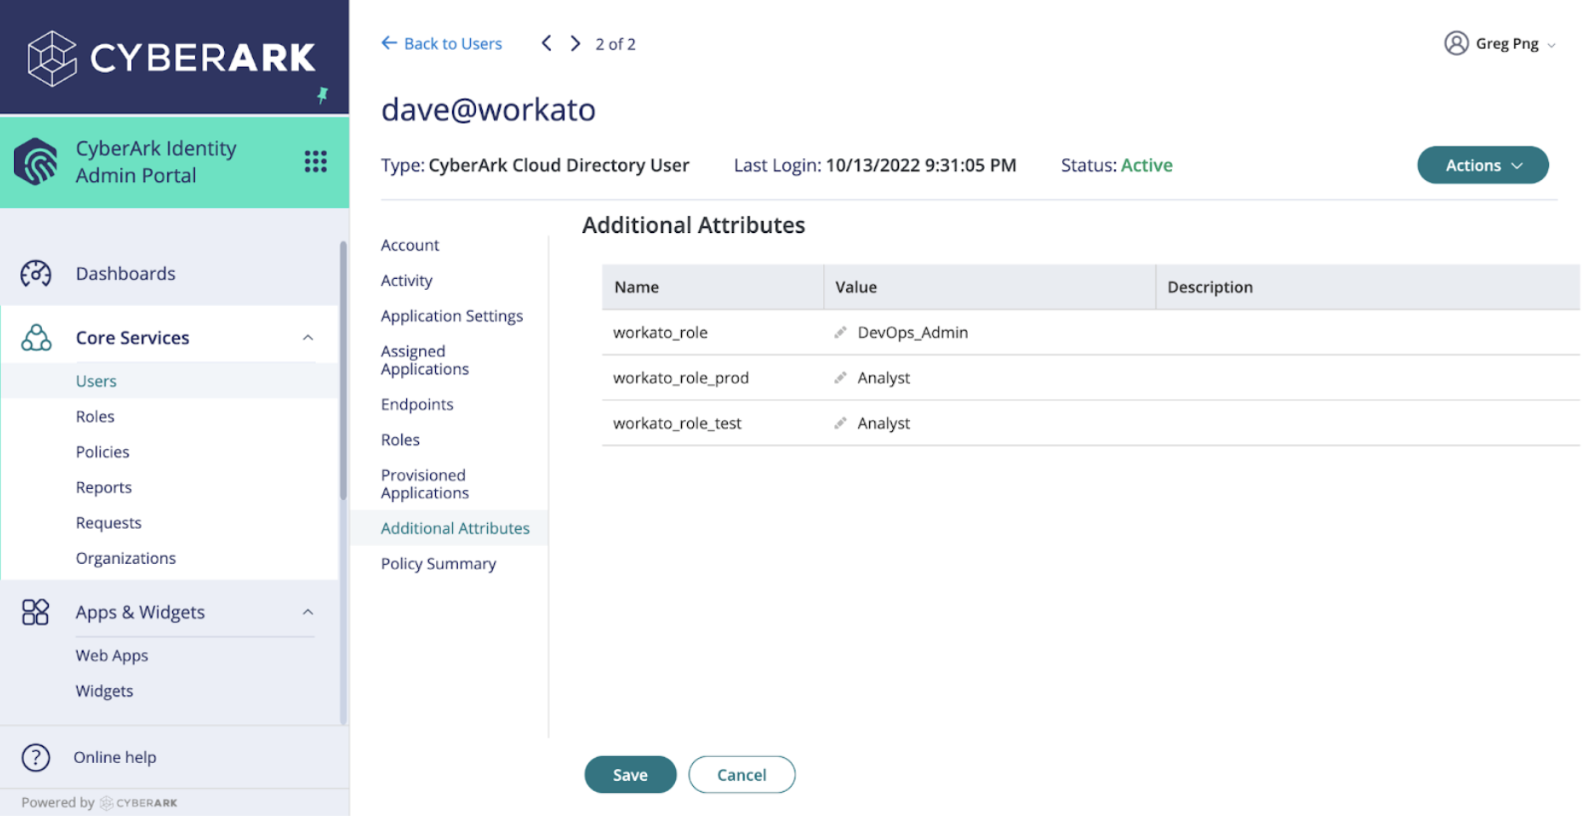
Configure the values for each user based on the roles you plan to assign within each Workato environment.
ROLE MAPPINGS
How Workato interprets these values depends on your workspace model:
- Legacy permissions model: Values map to legacy collaborator roles such as Admin, Analyst, Operator, or custom roles.
- New permissions model: Values map to environment roles such as Environment admin, Environment manager, Member, or custom environment roles.
 Define attribute types and role values
By completing these steps, you'll have successfully configured custom user attributes in CyberArk Identity, which can be utilized for SAML role synchronization with Workato.
Configure Workato roles in the CyberArk Identity portal
CUSTOM ROLES IN WORKATO
Ensure any custom roles are already defined in Workato before you sync them with SAML assertions. If you reference a role that isn’t defined, users default to Operator in workspaces using the legacy permissions model, or Member in workspaces using the new permissions model. Role names are case-sensitive.
The following steps show you how to set up the necessary SAML response attributes for role synchronization in Workato:
Log in to CyberArk and navigate to Apps & Widgets > Apps.
Select the Workato SAML app from the list to configure it.
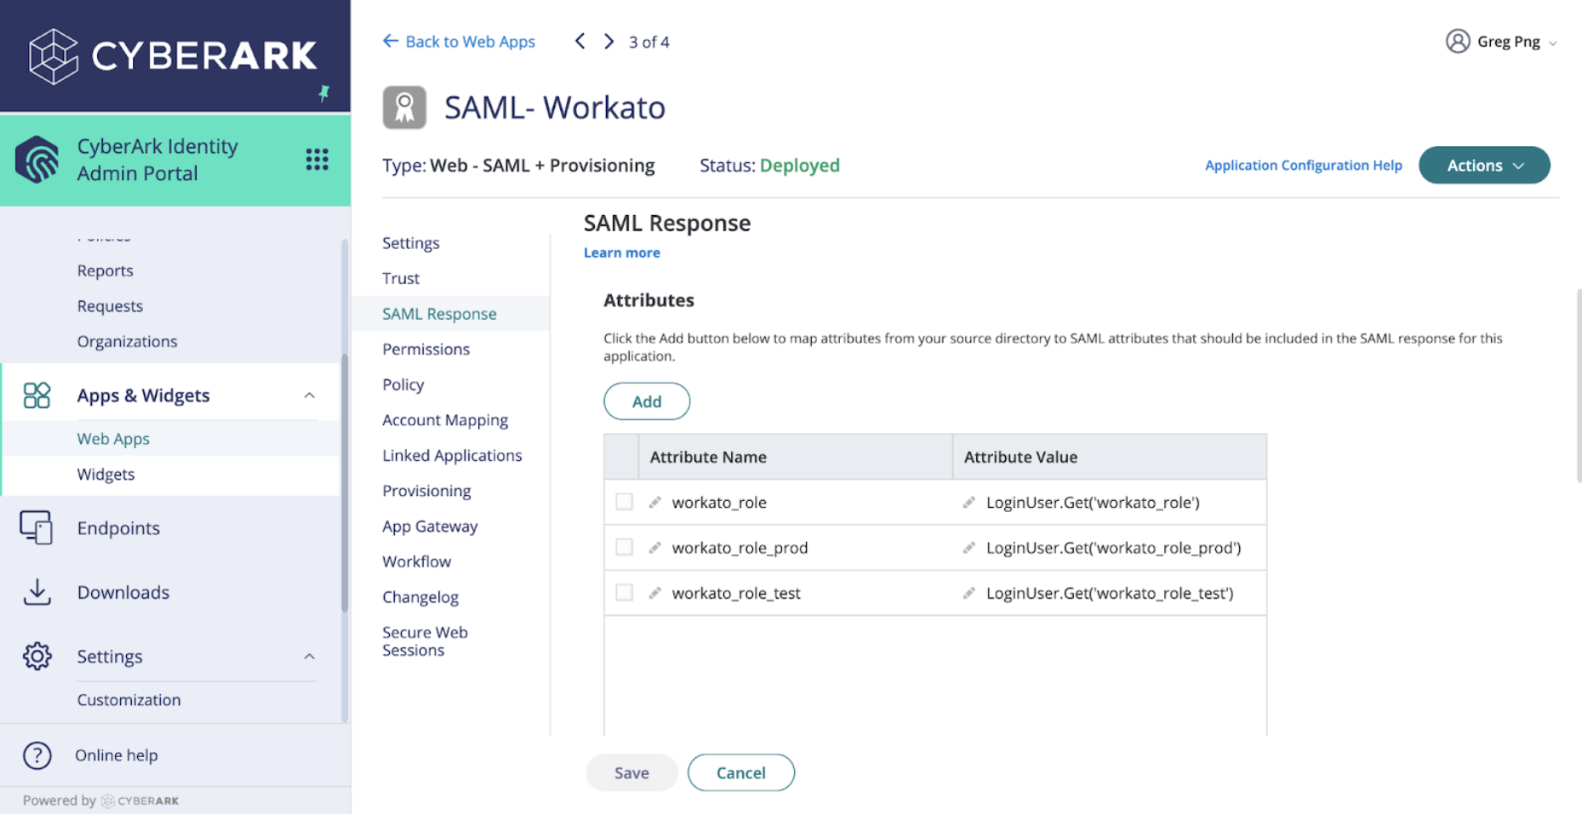
Click SAML response to set up the attributes that Workato receives during SSO.
 Set up SAML response attributes
Click Add to create new attribute statements.
Specify the attribute names and values based on the custom user attributes you defined earlier. Refer to the following table:
| Attribute Name | Attribute Value |
|---|---|
workato_role | LoginUser.Get('workato_role') |
workato_role_prod | LoginUser.Get('workato_role_prod') |
workato_role_test | LoginUser.Get('workato_role_test') |
Ensure that you Save your settings to apply the changes.
Change roles in the CyberArk Identity portal
To change a user's Workato role:
Log in to your CyberArk Identity admin console.
Select the user and the environment you plan to change.
Enter the new role value and click Save.
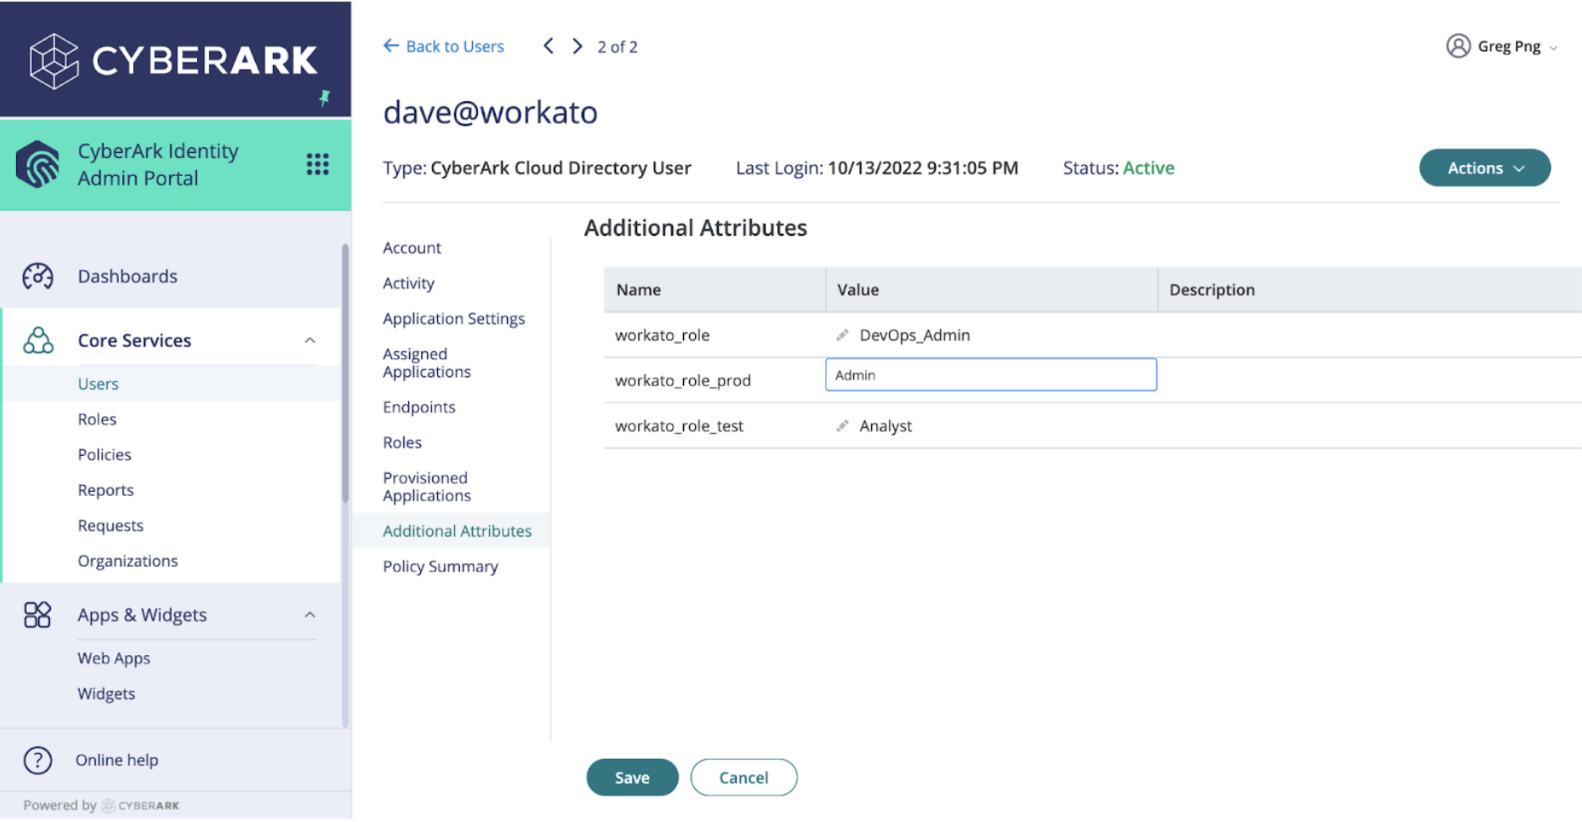 Update user roles in CyberArk Identity
The user's access privileges in Workato are updated on their next login through SAML SSO.
You can verify the user’s updated role privileges from the Activity Audit tab on Workato.
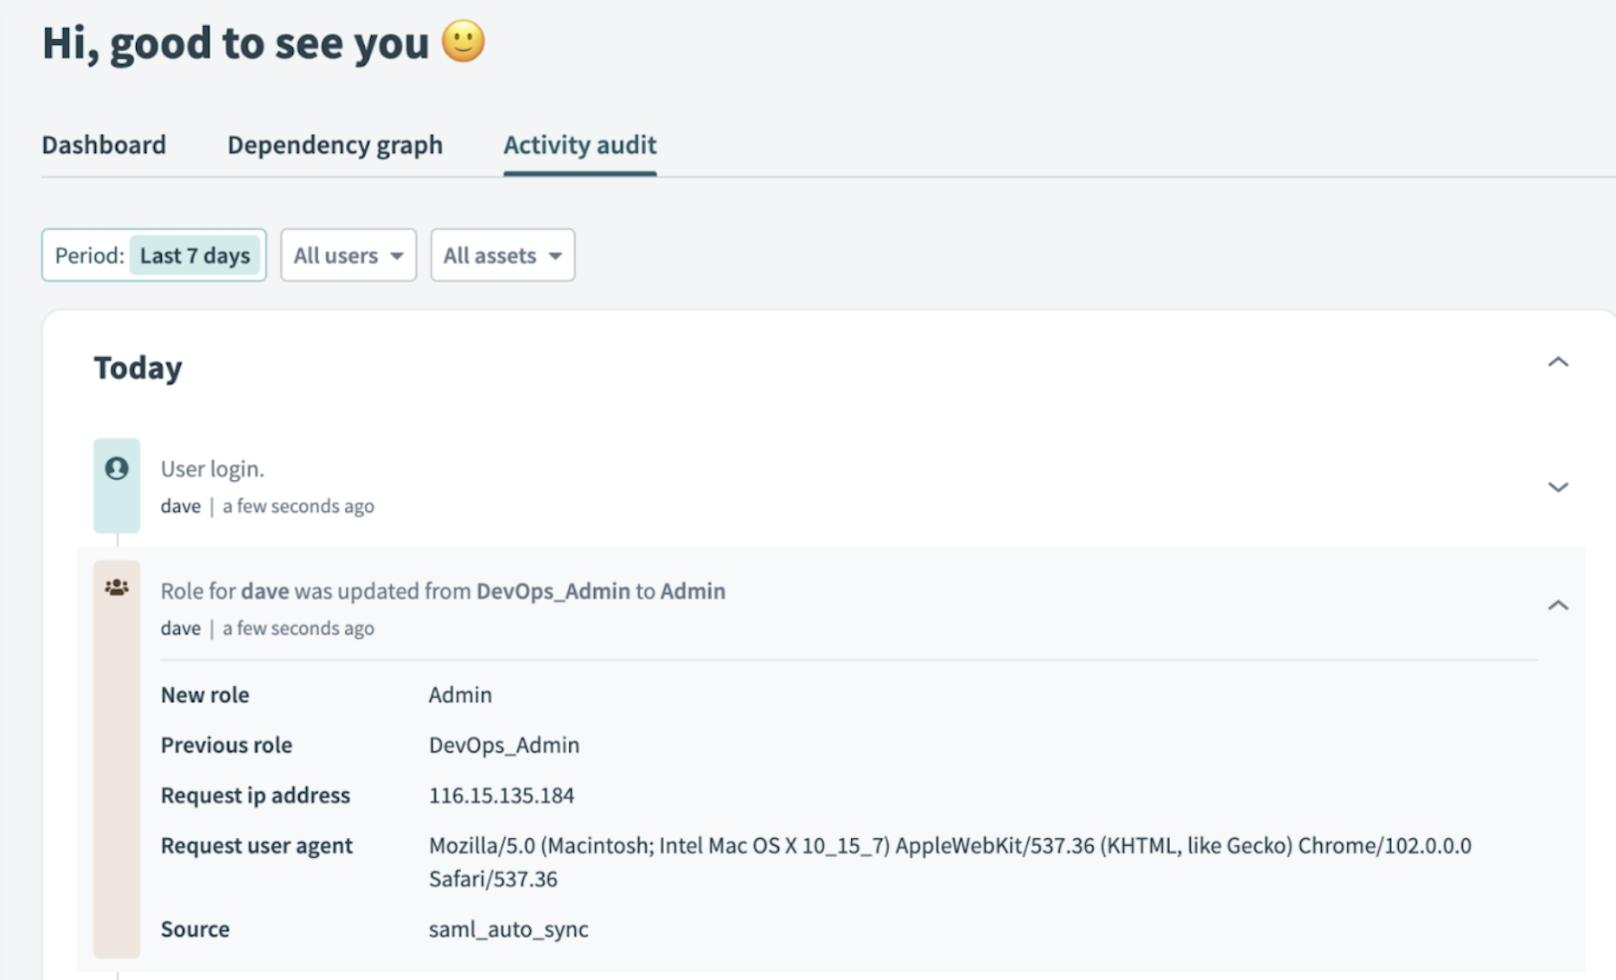 Confirm role updates in Workato's activity audit
Verify with the SAML tracer extension
Use the SAML Tracer browser extension to verify the values passed in SAML assertions. You should see the workato_role, workato_role_test, and workato_role_prod attributes successfully passed.
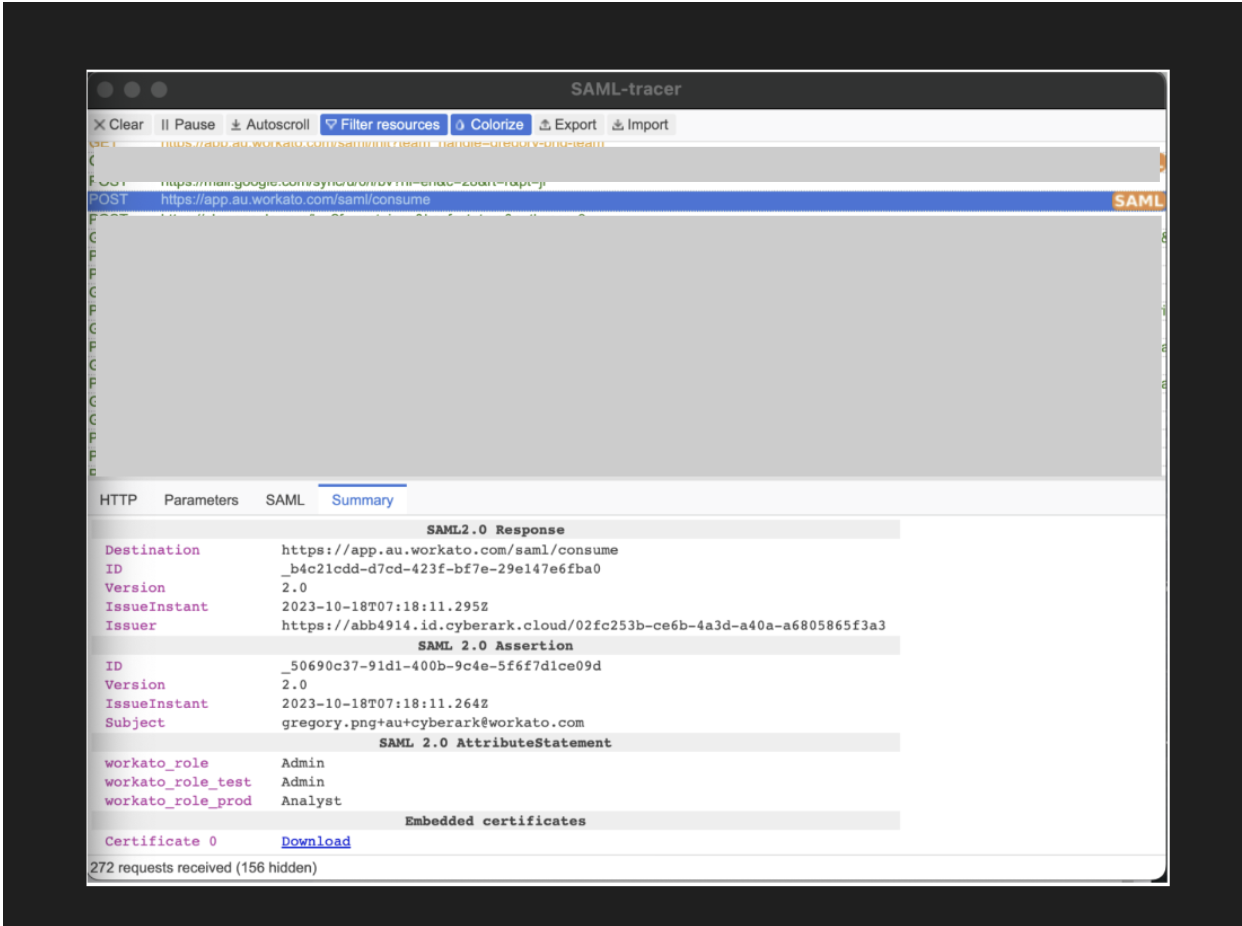 Check SAML assertion values with SAML tracer extension
Last updated: