# Set up HashiCorp Vault secrets engines for workspaces
Switching to workspace-specific secrets management causes all previously configured external secret references to stop working.
# Prerequisites
To complete the steps in this guide, you must have the following:
In Workato:
- An account with the Data Monitoring/Advanced Security & Compliance capability. For more information, contact your Workato Customer Success Manager.
In HashiCorp Vault:
- HashiCorp Vault Key-value (KV) secrets engine version 1 or 2.
- An account with AppRole auth method (opens new window) enabled.
- One or more AppRole (opens new window)s configured.
# Select the scope for secrets management
Sign in to Workato.
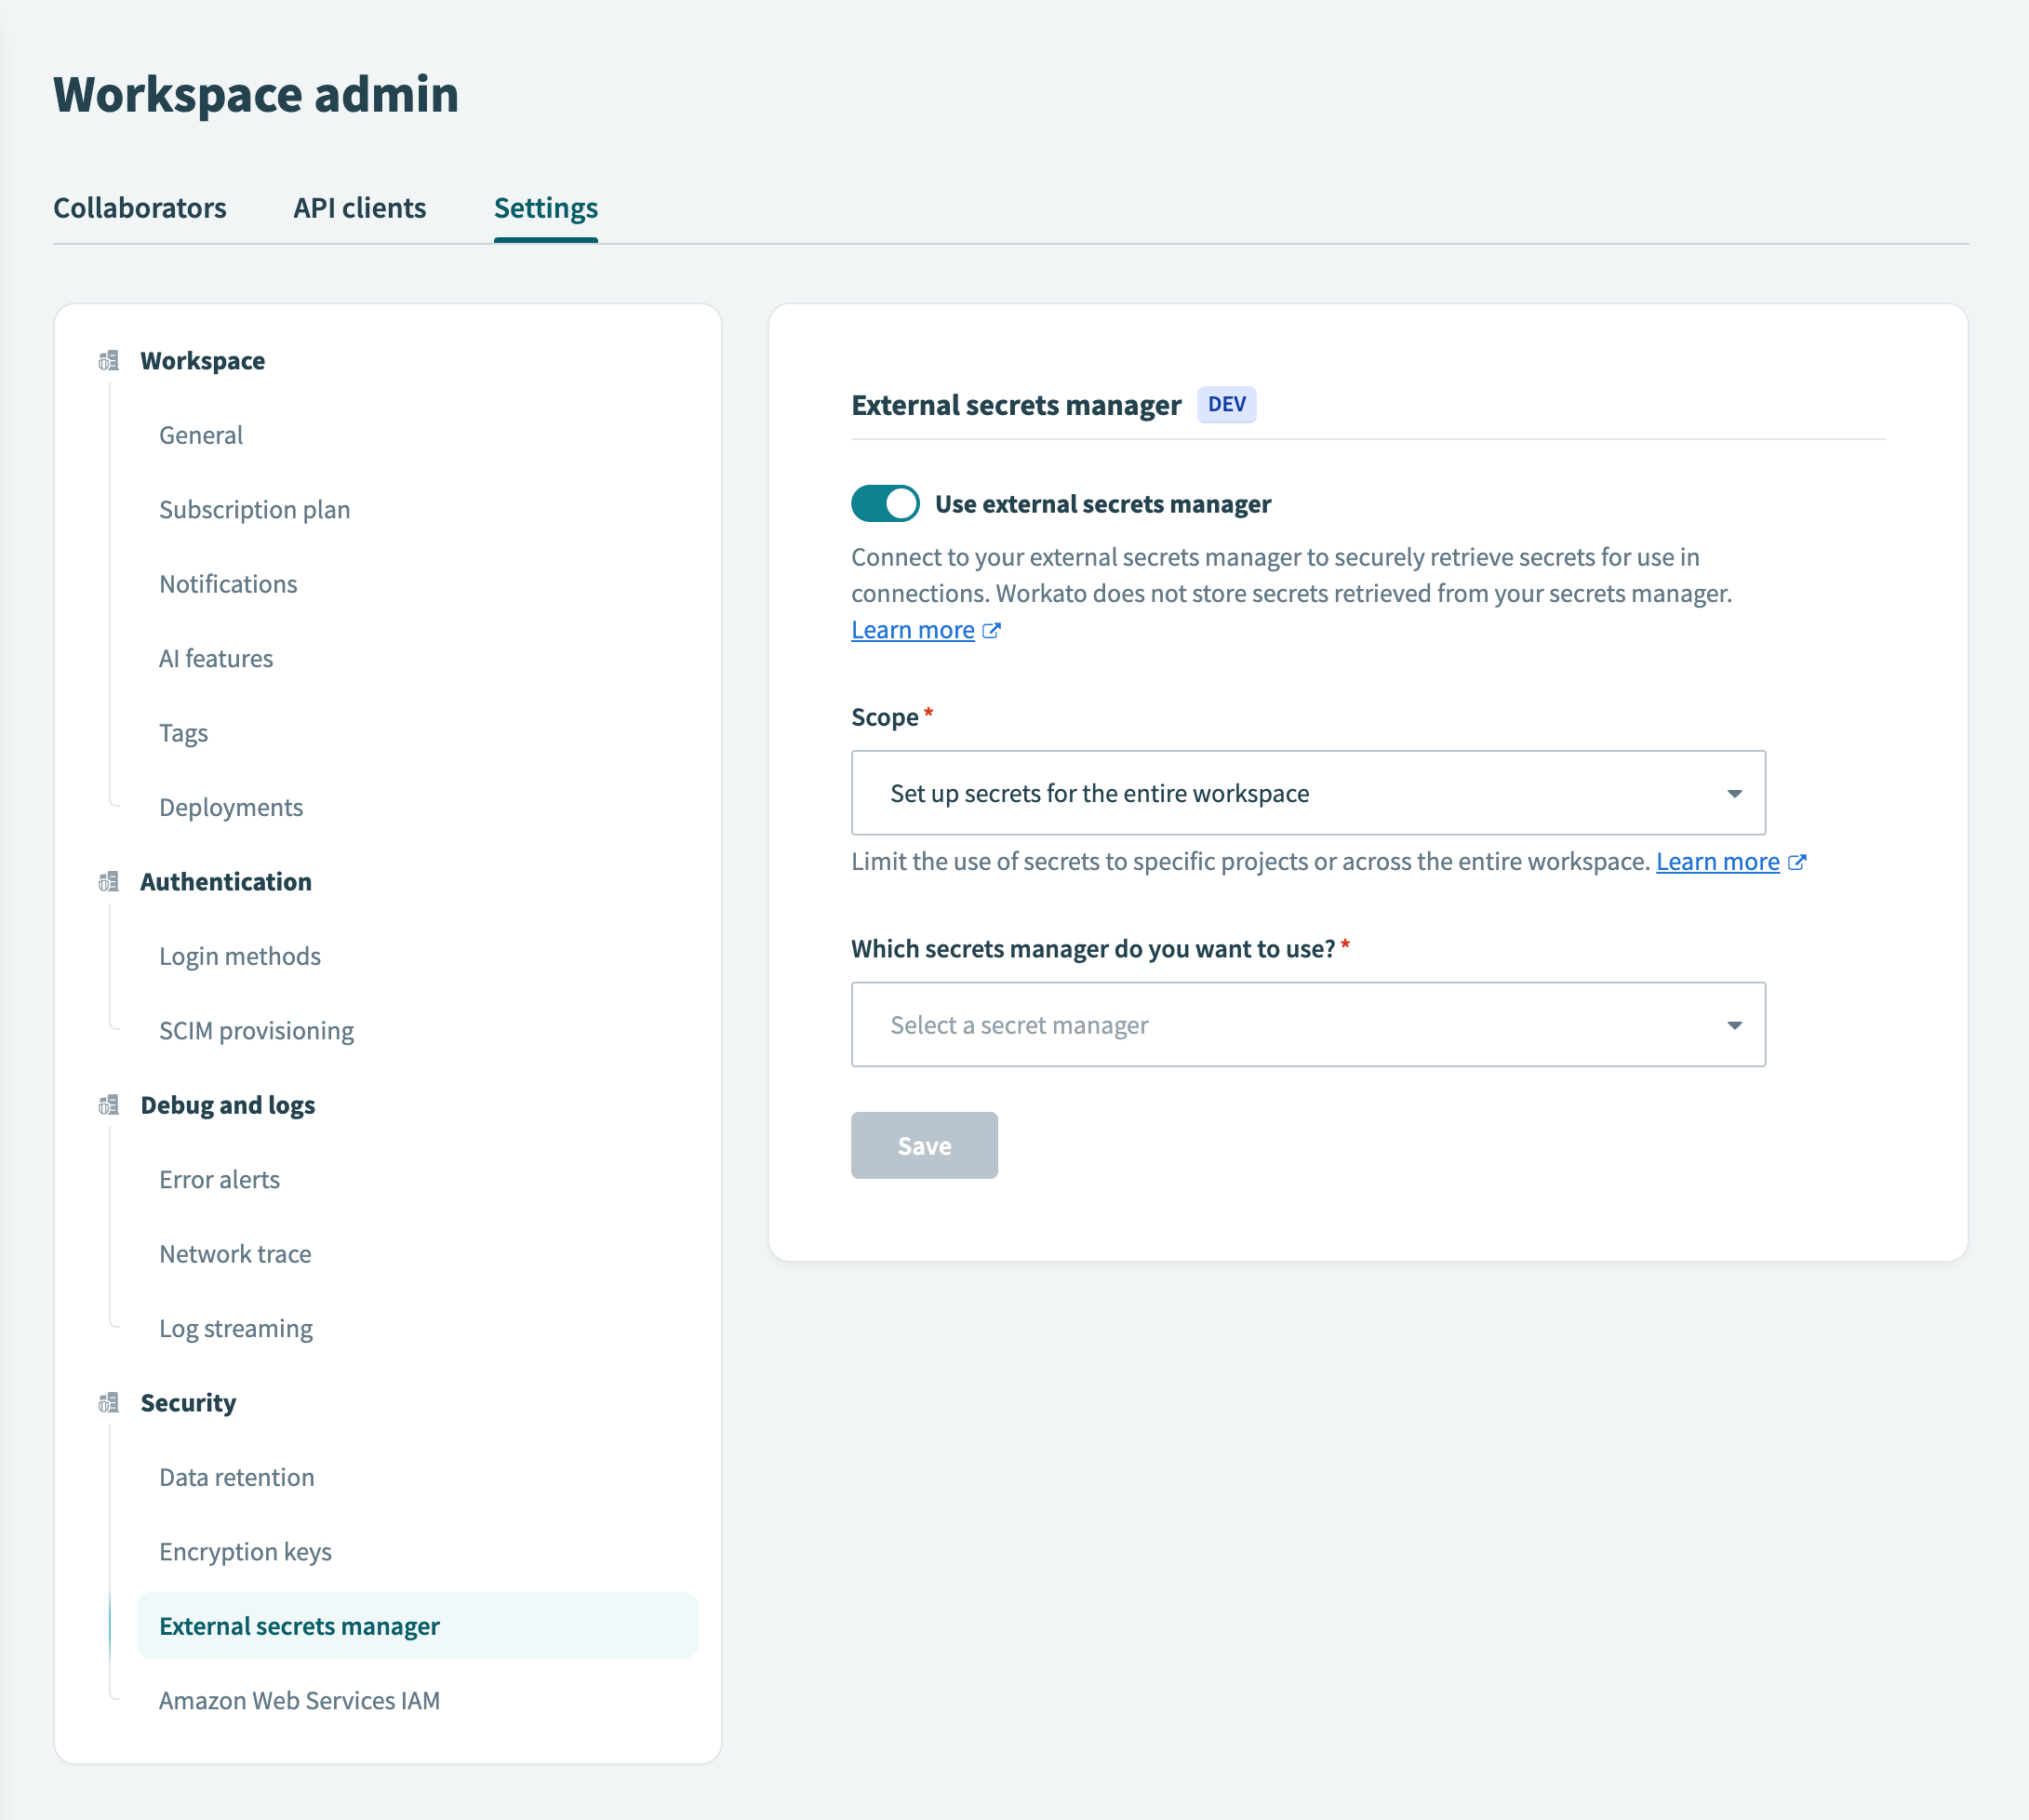
Go to Workspace admin > Settings > External secrets manager.
Select the Set up secrets management for the entire workspace option from the Scope drop-down menu.

# Select the secrets manager
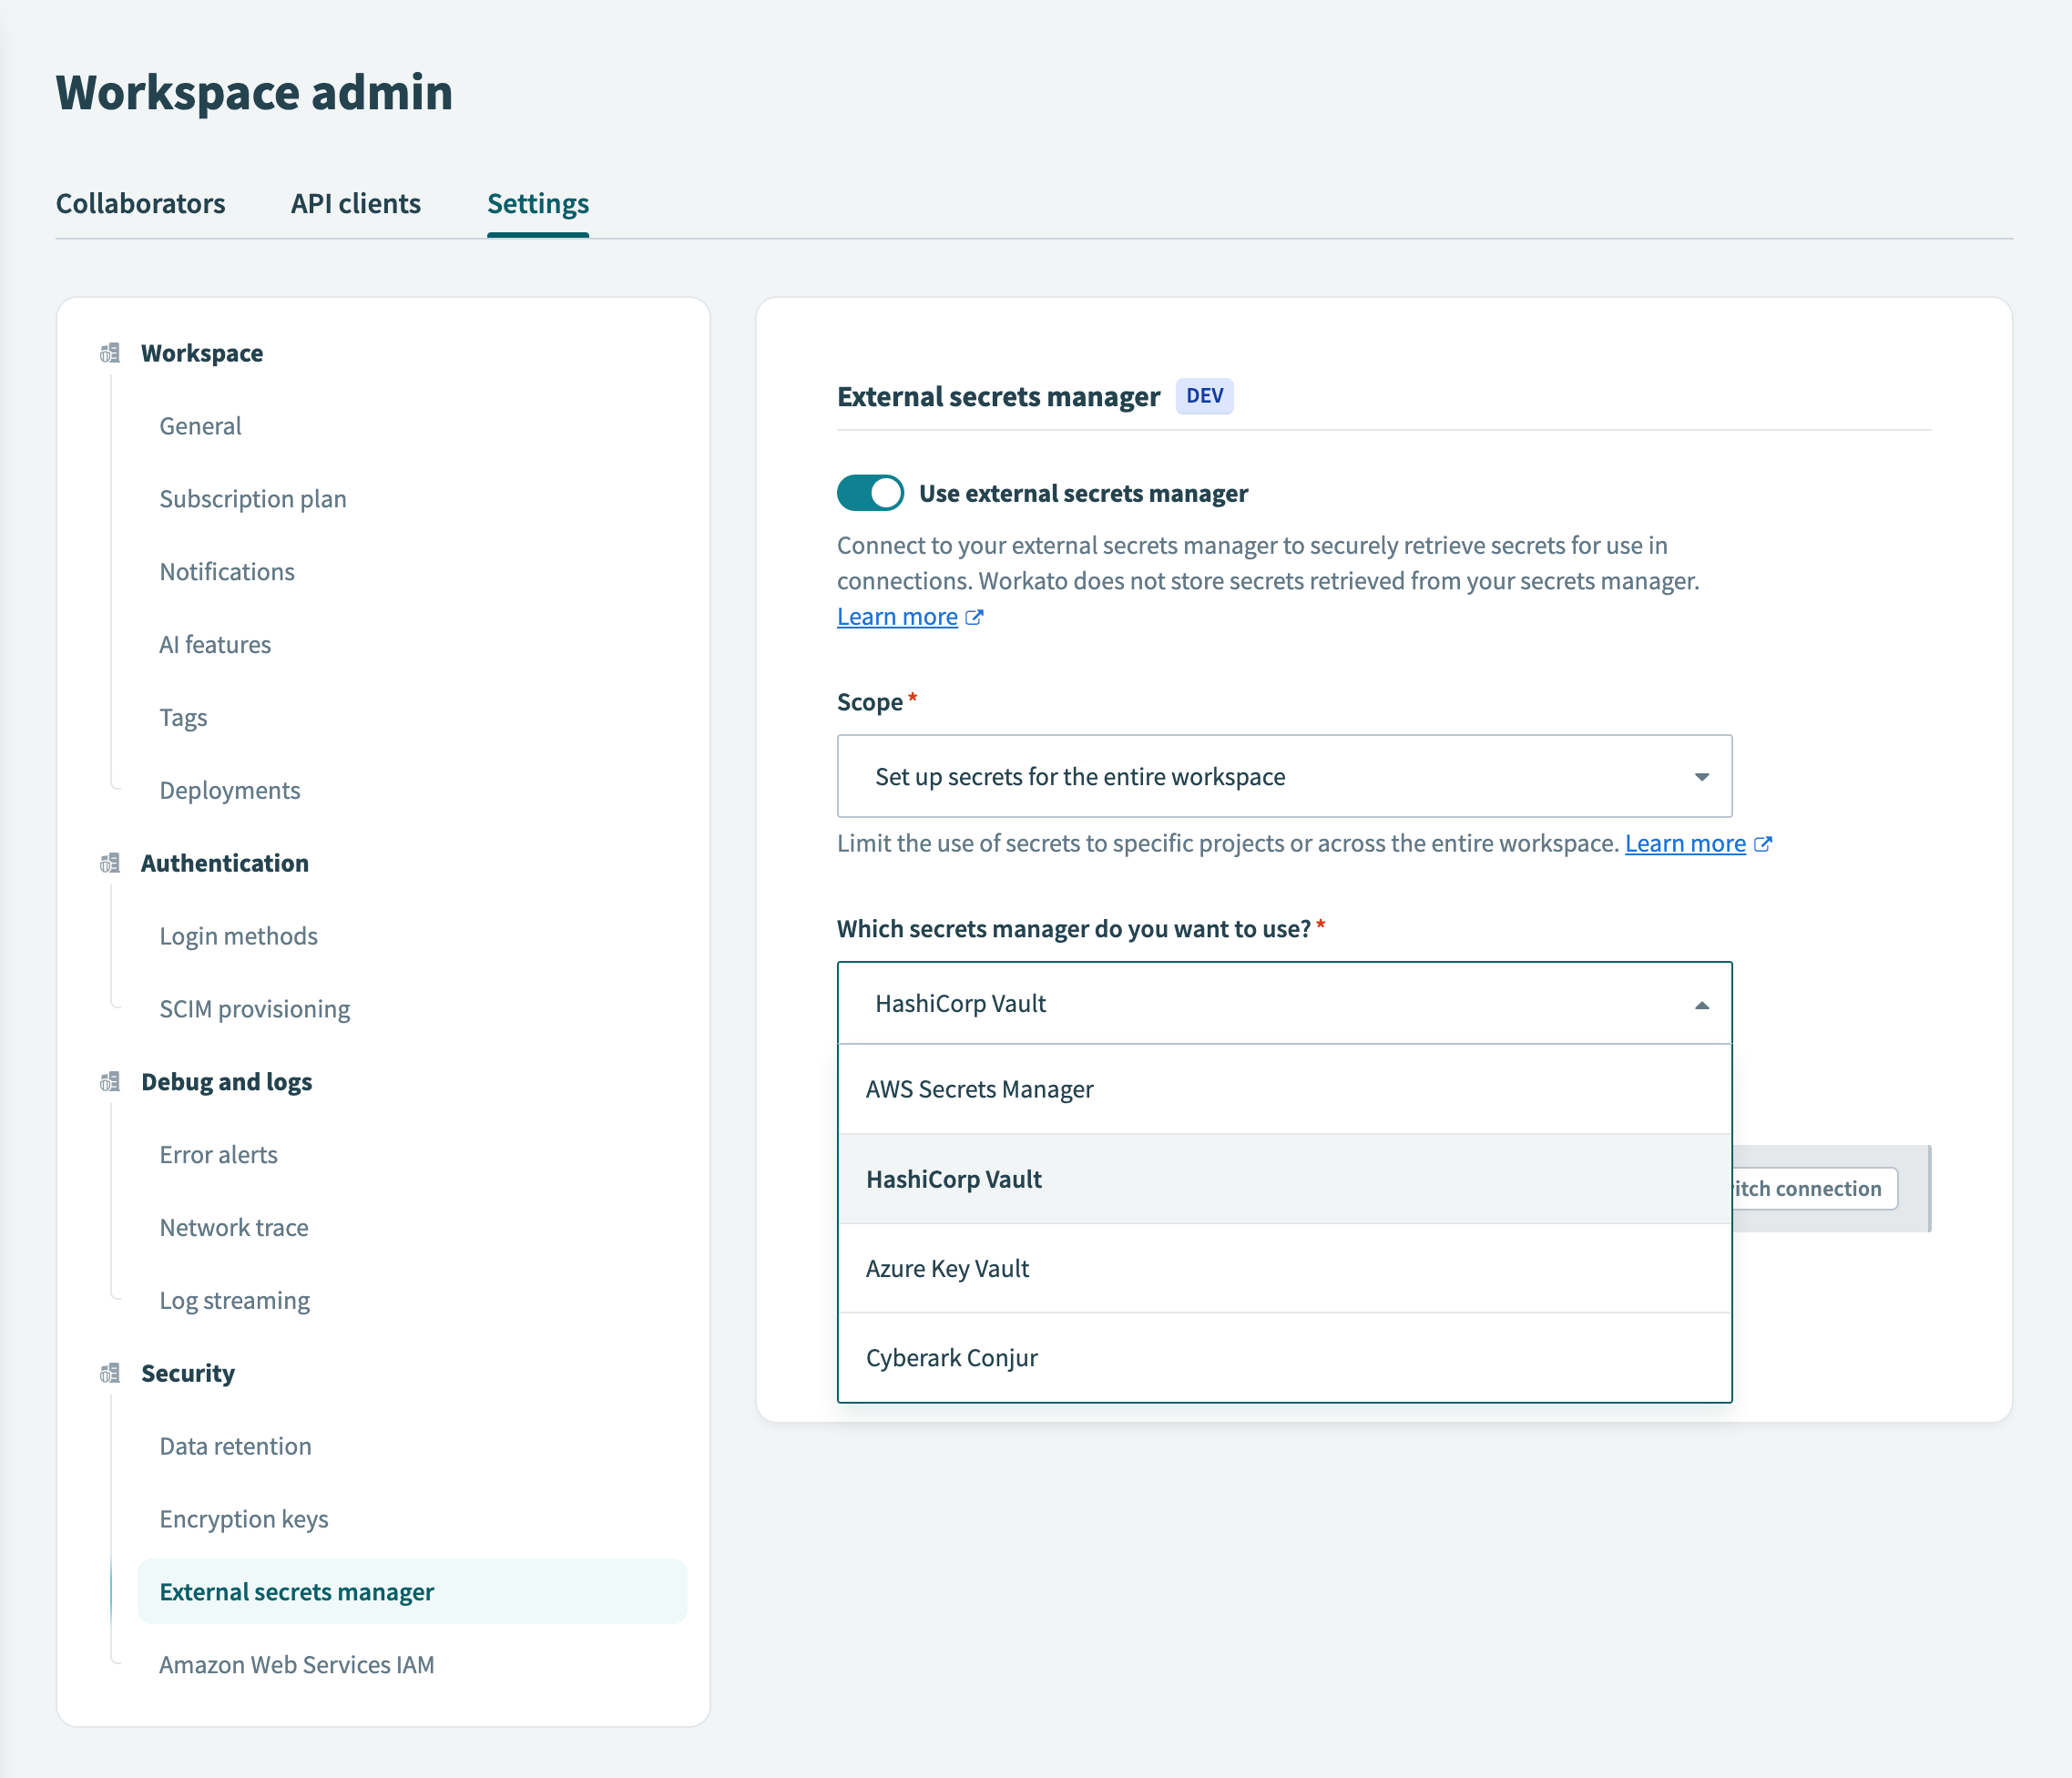
Select HashiCorp Vault from the Which secrets manager do you want to use? drop-down menu.

# Configure the connection in Workato
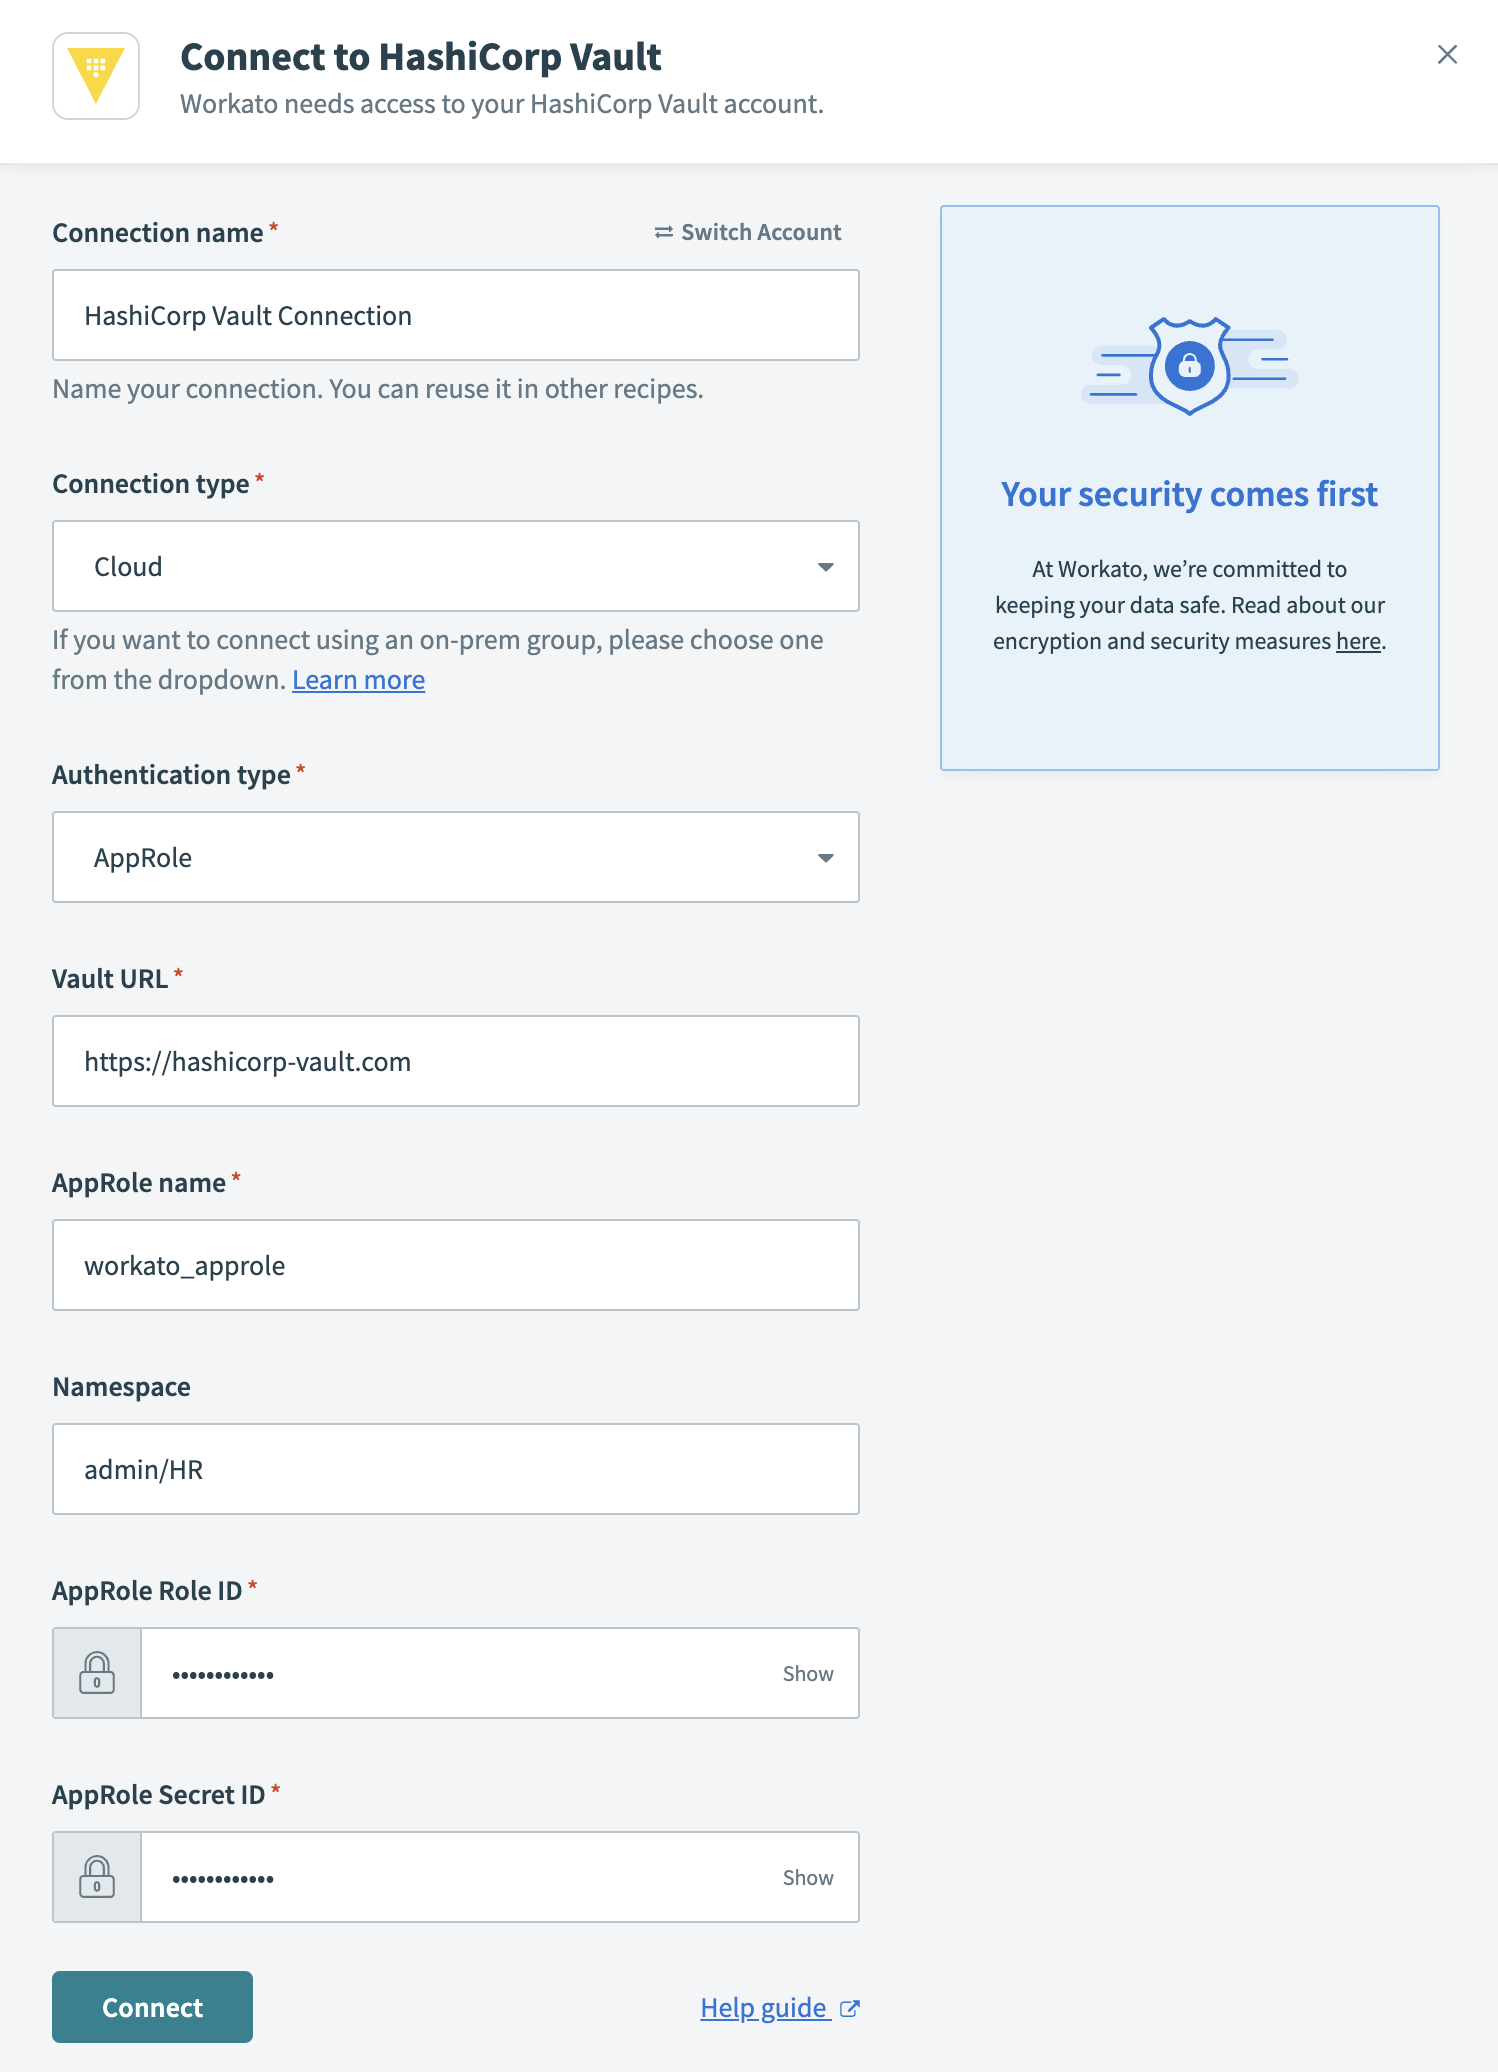
 Connect to HashiCorp Vault
- Connection name
- Name your HashiCorp Vault connection.
- Connection type
- To connect to HashiCorp Vault using an on-prem group, select the group name from the drop-down menu. Otherwise, to use a direct connection, select Cloud.
- Authentication type
- Select AppRole from the drop-down.
- Vault URL
- Enter the Vault URL of your Hashicorp Vault instance. It should follow this form
https://<instance_name>.<company_name>.com:123.instance_name
The name of your HashiCorp Vault instance.
company_name
The name of your organization.
Namespace
Optional. The name of the namespace that contains the secret(s) you plan to use in Workato. Namespaces (opens new window) are a set of features that enable you to define granular control and secrets management within your organization.
In our example, we grant Workato access to the
admin/HRnamespace.
- AppRole name
- The AppRole you plan to use. An AppRole is a set of Vault policies and login constraints that determines which secrets you can access.
# Obtain the AppRole ID and AppRole Secret ID from HashiCorp Vault
AppRole is a login credential split into two parts- the AppRole ID and AppRole Secret ID. You must obtain both to authenticate to Workato. The AppRole ID can be considered similar to a username- its value remains constant and associated with its corresponding AppRole. On the contrary, the AppRole Secret ID is similar to a password or unique key and you can prompt HashiCorp Vault to refresh this credential, if needed.
In HashiCorp Vault click >_ to open the control panel.
![]() Open the control panel
Open the control panel
Enter the following command:
vault read auth/<approle_name>/role/<role_name>/role-id
<approle_name>The AppRole you have configured in HashiCorp Vault.
<role_name>The name of the Workato role you plan to connect to.
Example:
vault read auth/workato_approle/role/workato/role-id
HashiCorp Vault returns the AppRole ID unique to your AppRole:
Key     Value
role_id 12a3bc45-6de7-8910-11fg-h4ij12XXXXXX
Copy and paste this value into the AppRole ID field in Workato.
Obtain the AppRole Secret ID by entering the following command to the control panel in HashiCorp Vault:
vault write -force auth/<approle_name>/role/<role_name>/secret-id
Example:
vault write -force auth/workato_approle/role/workato/secret-id
HashiCorp Vault generates an AppRole Secret ID for your AppRole:
Key                 Value
secret_id           ed0a642f-2acf-c2da-232f-1b2130XXXXXX
secret_id_accessor  a240a31f-270a-4765-64bd-94ba1fXXXXXX
Copy and paste the secret_id value into the AppRole Secret ID field in Workato.
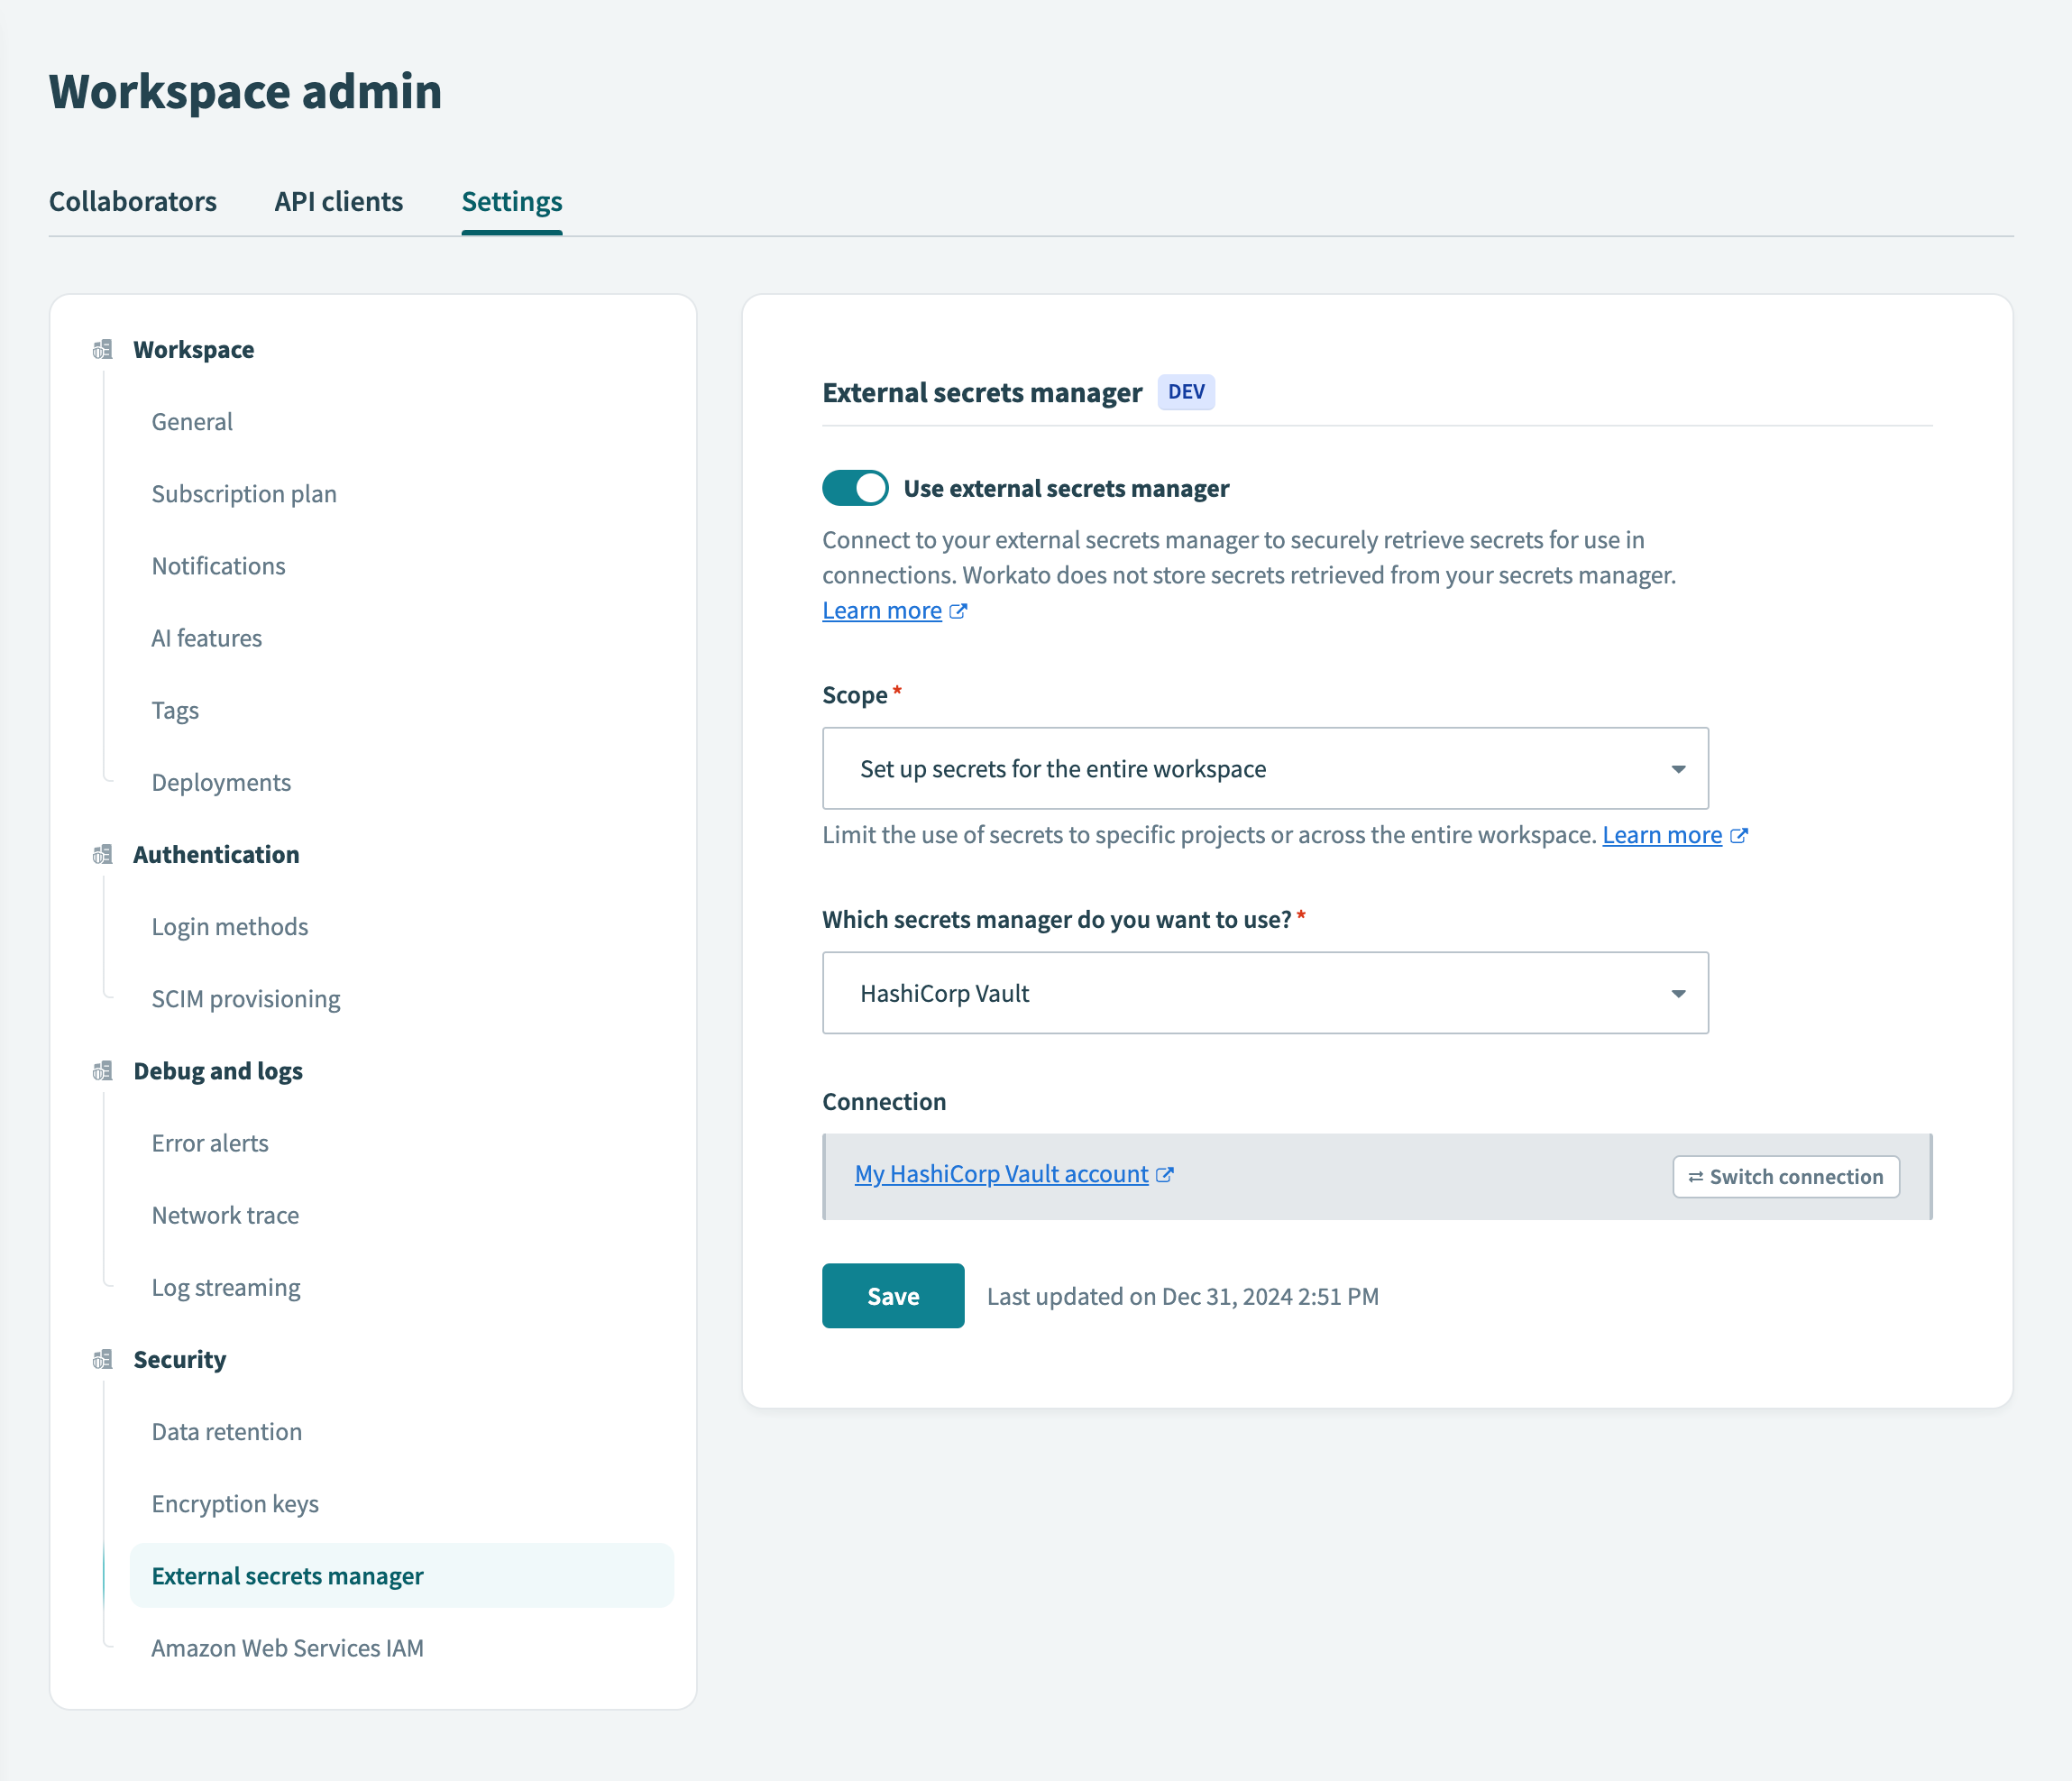
Click Connect. Workato displays the name of the HashiCorp Vault connection:
 Connection successful
FURTHER READING
Last updated: 10/14/2025, 4:38:57 PM