# Tabs
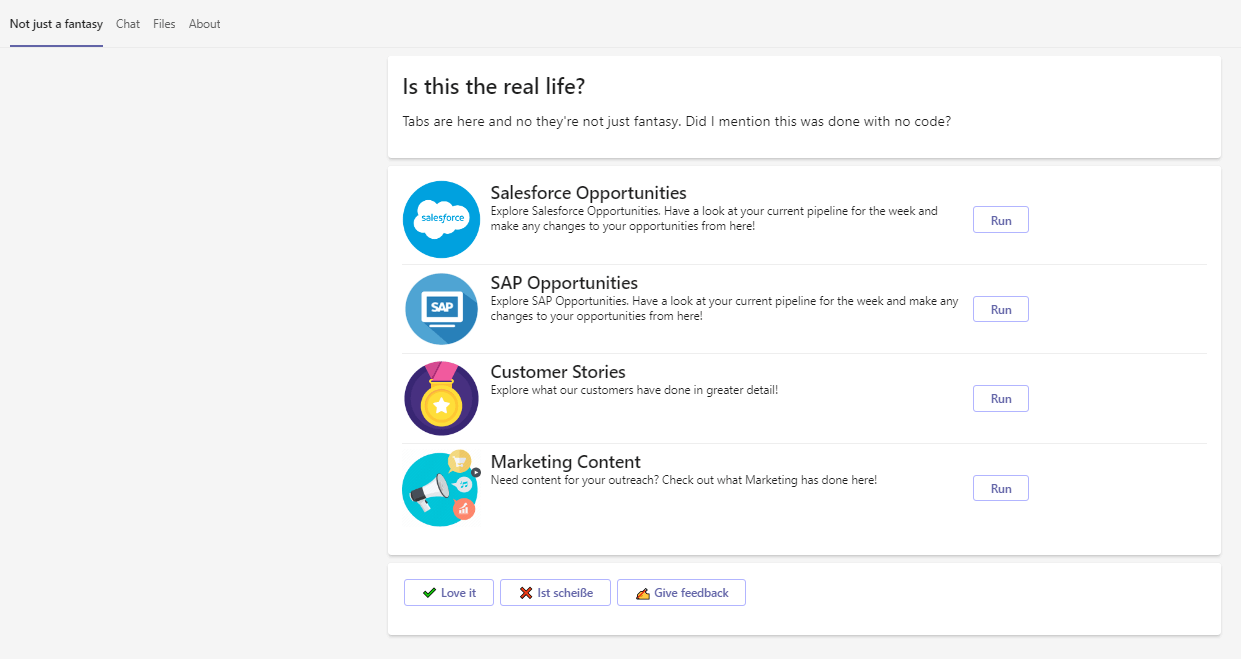
You can create rich, dynamic, and interactive tabs for your Enterprise Workbot. Tabs are rendered using Adaptive Cards, making them fully customizable. Bots can have multiple tabs, and they will appear in the order in which they are defined in the app manifest.

Tabs rendered using Adaptive Cards are only available as Personal tabs. Tabs are only available to Enterprise Workbots.
DEPRECATION NOTICE: MICROSOFT ADAPTIVE CARDS TABS
Microsoft is rolling out a new Microsoft Teams client that does not support (opens new window) the use of Adaptive Cards in Microsoft Teams tabs. Workbot Tabs will not be displayed in the new Microsoft Teams client.
Microsoft has not provided any comparable replacement for this functionality. We recommend either putting your onboarding content into custom help messages, or implementing your own web-based tab (opens new window) (outside of Workato).
Please see Microsoft new Teams client release schedule (opens new window) to see when the new client will be automatically enabled for your account.
This functionality has been deprecated and we don't allow the creation of new tabs on the Workato platform.
# Setup Requirements
To set up a tab, you'll need an Enterprise Workbot.
# Step 1: Adding tab(s) to the app manifest
Find your enterprise Workbot, click on the horizontal ellipsis and choose Download app package.
Unzip the contents of the package into a specified location and open the manifest.json file in a text editor (e.g. Atom, SublimeText, etc).
[Optional] Install a JSON formatter to your text editor (for example, pretty-json (opens new window)) to view and edit manifest.json file easily.
Increment version, e.g. if originally the version was 1.0.0, update it to 1.0.1.
Add your tab under staticTabs. Specify one-word entityId that will be used in the Tab opened trigger during recipe setup, e.g.:
{
         "entityId": "PendingPTORequests",
         "name": "Pending PTO requests",
         "contentBotId": "{your_bot_id}",
         "scopes": [
            "personal"
          ]
}
NOTE
Your tab(s) should be on the same level as the conversations and about tabs; your bot ID can be found under botId.
Save the file, and zip the manifest along with the rest of the contents of the package. There should be 3 files in total; color.png, manifest.json, outline.png.
NOTE
Tabs will be rendered in the order they appear in, from left to right.
# Step 2: Updating your enterprise Workbot
Search for your enterprise Workbot and click on its name.
Under New version, click on Upload file.
Select the new zip file containing the updated manifest.json file.
NOTE
If done right, it should say that the app was successfully updated.
It can take some time for the updated app to appear in Microsoft Teams clients.
# Step 3: Create a tab recipe
Complete the following steps to create a tab recipe:
NOTE
Each tab will require its own recipe to trigger.
Create a new recipe and choose the Tab opened trigger.
Enter the entityId - this should be exactly the same as the one in the manifest.
[Optional] Add actions from other apps, so that the Show tab with Adaptive Cards action downstream may use it.
Add the Show tab with Adaptive Cards action and add one or more cards.
Save & start the recipe.
# Step 4: View the tab(s) in Microsoft Teams
Log off and close the Microsoft Teams client.
Run Microsoft Teams and open a DM with your enterprise Workbot.
NOTE
You should see your tab(s) near the top.
Click on it and it should render the cards as defined in your recipe.
Last updated: 10/23/2025, 8:27:15 PM