# AgentX Support - Data tables
Data tables allow you to store structured information that the AI agent can reference in flows to dynamically respond to customer queries. You can create data tables directly in AgentX Support or import them from Google Sheets.
FEATURE AVAILABILITY
This feature requires data table access in your AgentX Support account.
# Create a data table
Complete the following steps to create a data table:
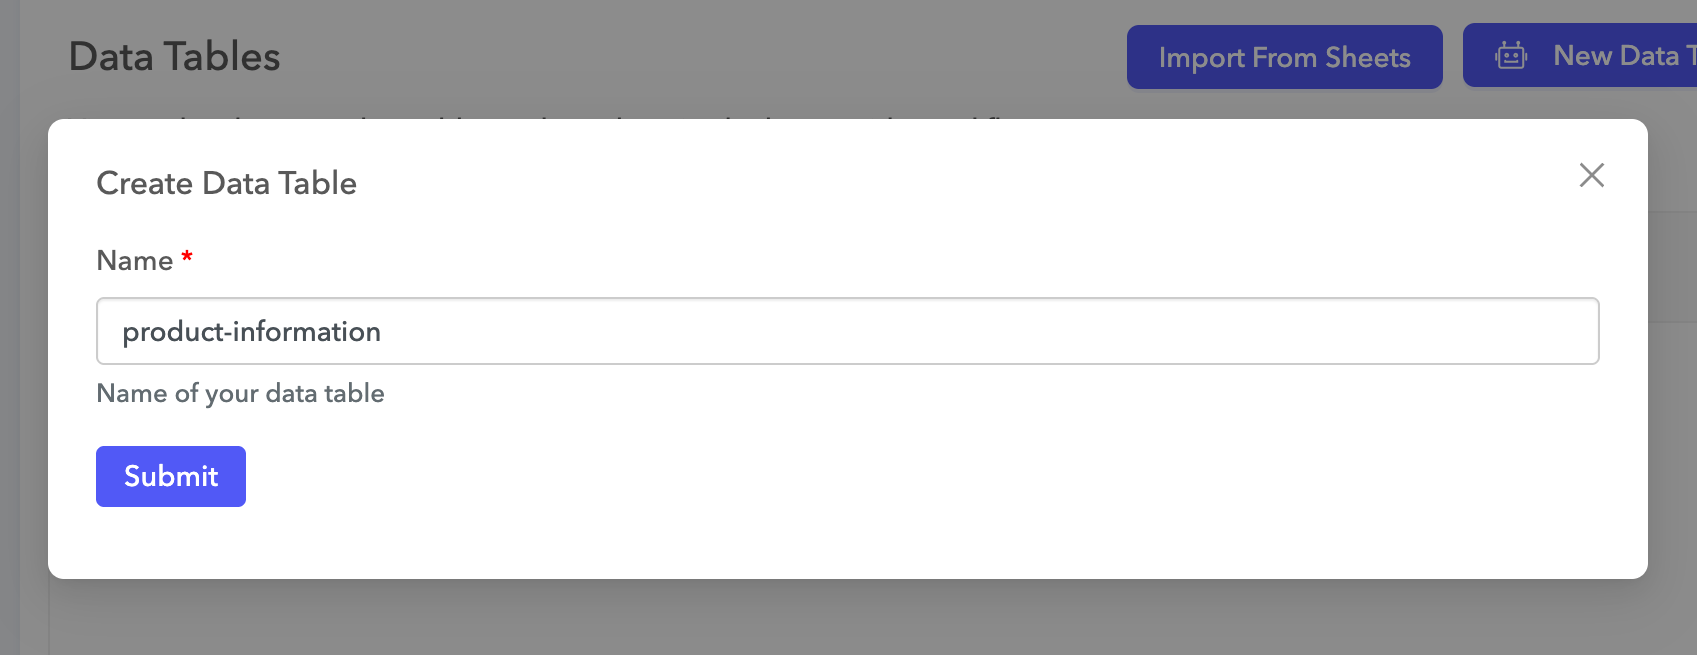
Go to Advanced > Data Table.
Click New Data Table.
Enter a name for the data table in the Name field. For example, product-information.
 Create the data table
Click Submit to create the data table.
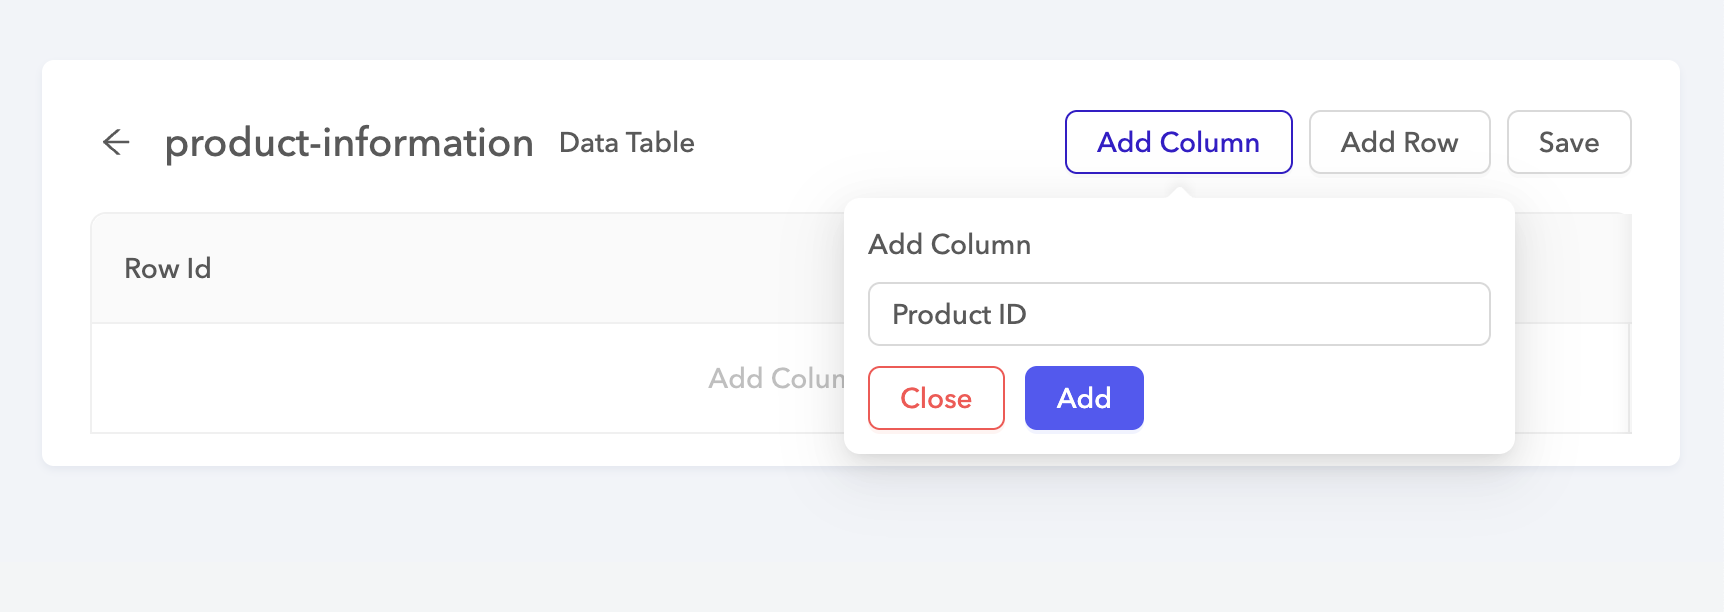
Click Add Column and enter a column name.
 Add a column
Click Add.
Continue adding columns to your data table.
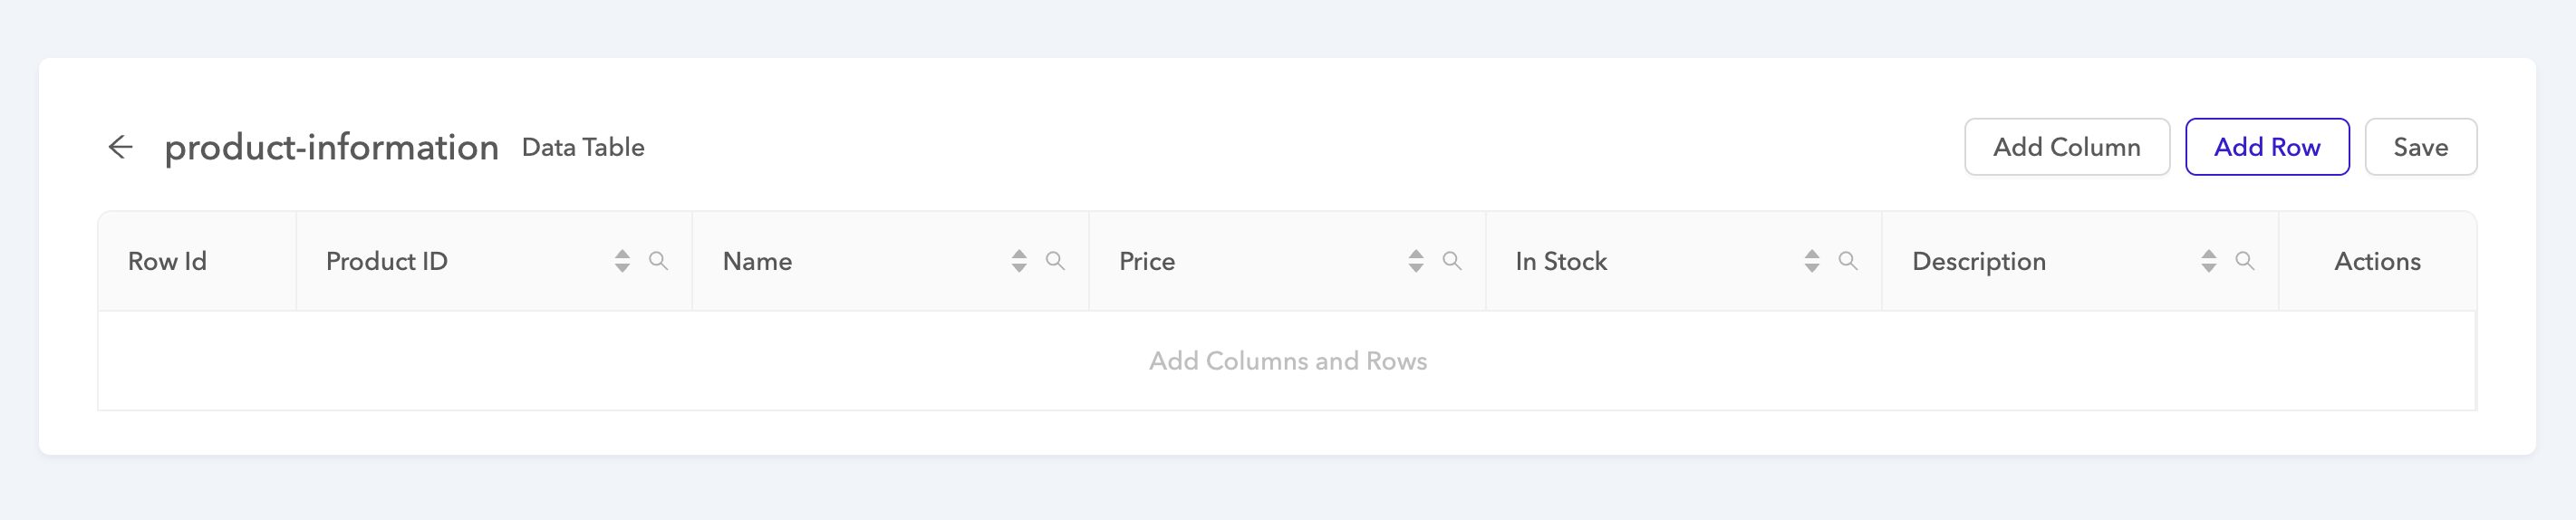
Click Add Row to add rows to the data table.
 Add rows
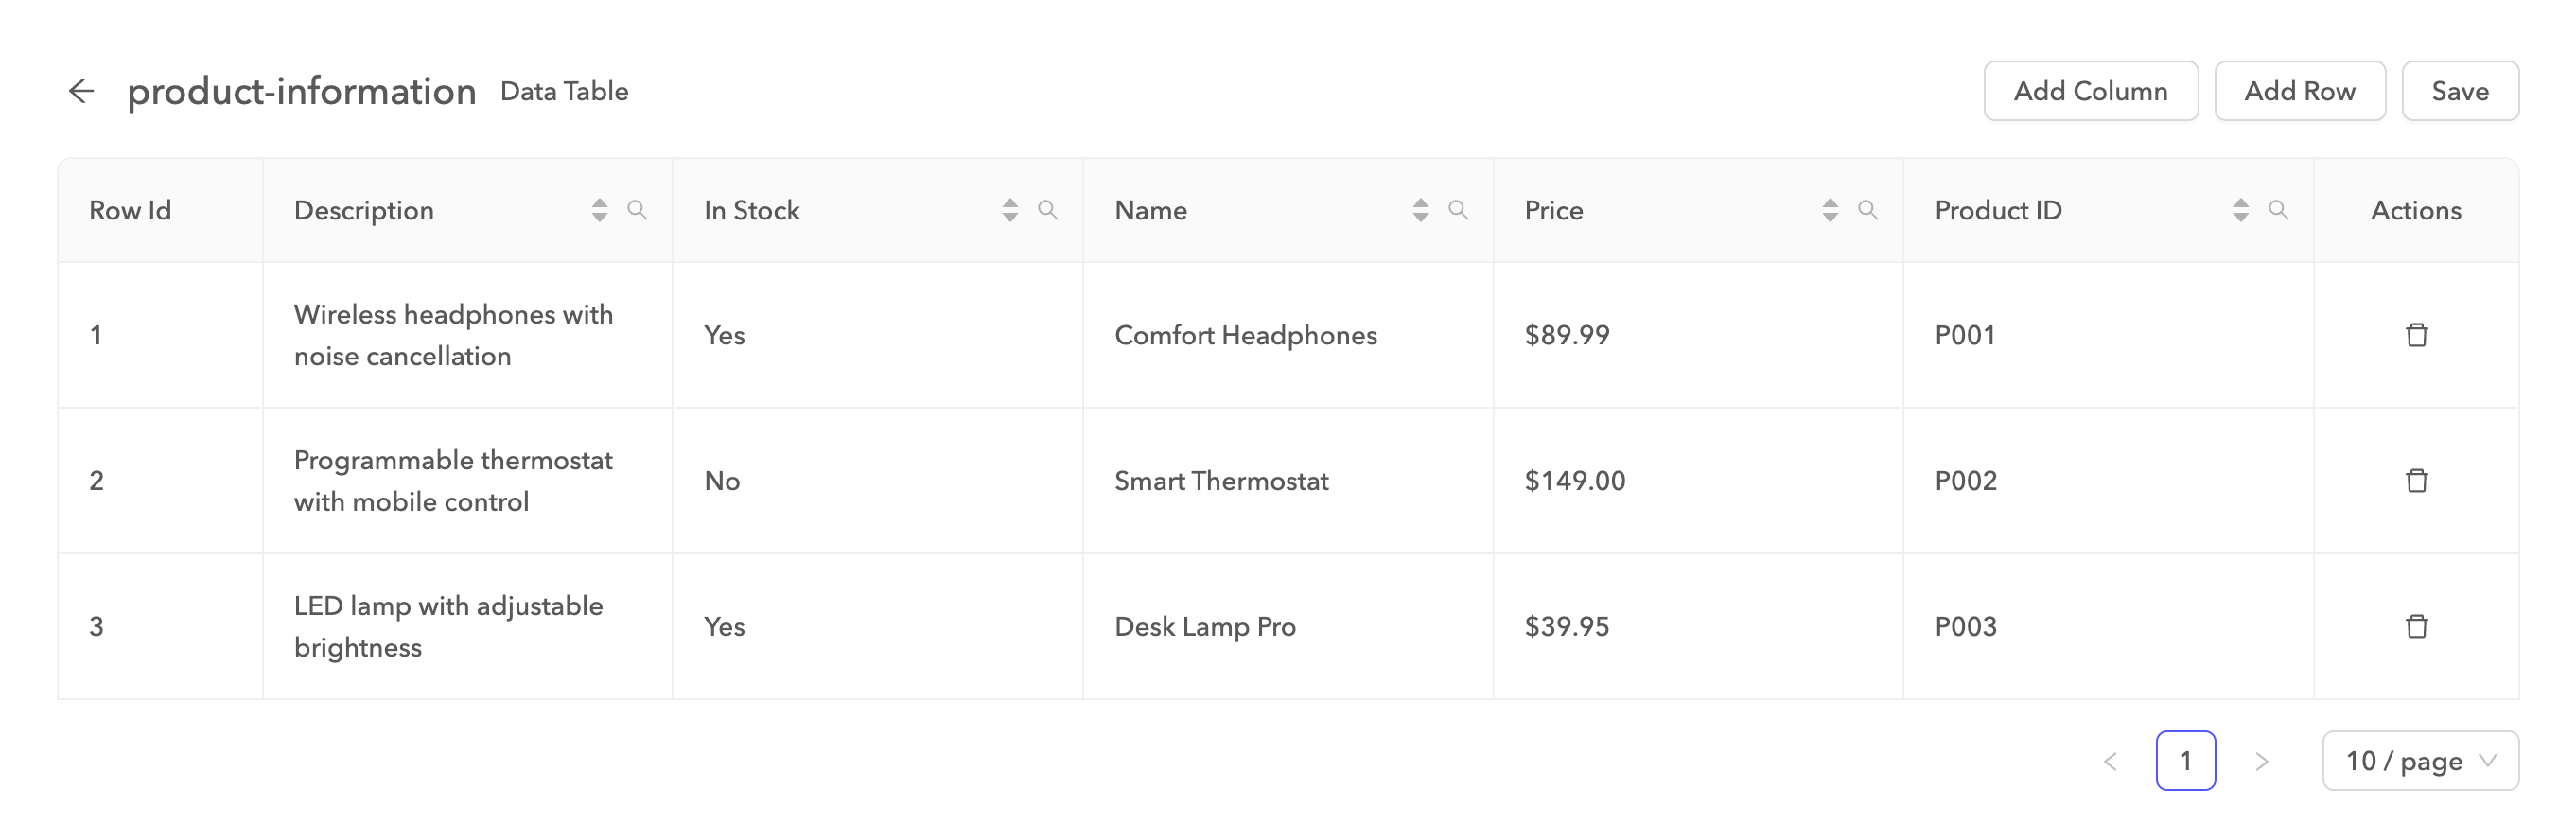
Fill in the rows.
 Fill in the data table
Click Save.
# Import a Google Sheet as a data table
You can maintain your data table in an external Google Sheet shared within your organization and teams and import the sheet into AgentX Support.
Sign in to your Google Sheets account.
Share the Google Sheet you plan to import with the AgentX Support integration account:
Open a new tab and sign in to AgentX Support.
Go to Advanced > Data Table.
Click Import from Google Sheet.
Enter a name for the data table in the Data Table Name field.
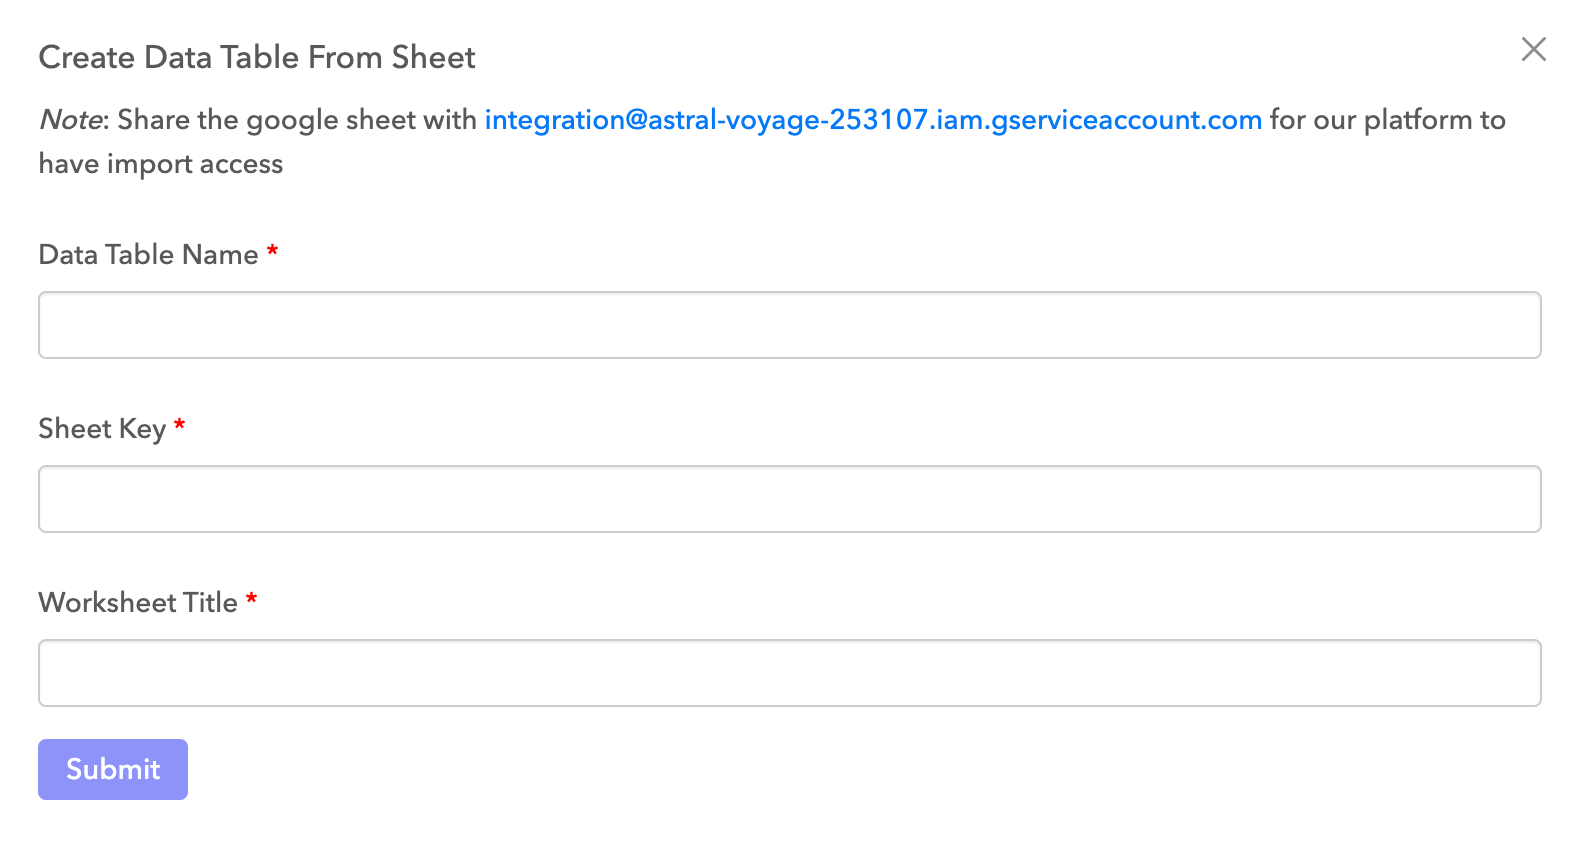 Enter details about the data table to import
Enter the sheet key in the Sheet Key field.
The sheet key is the long string of characters that appears after docs.google.com/spreadsheets/d/ and before the next slash in the URL.
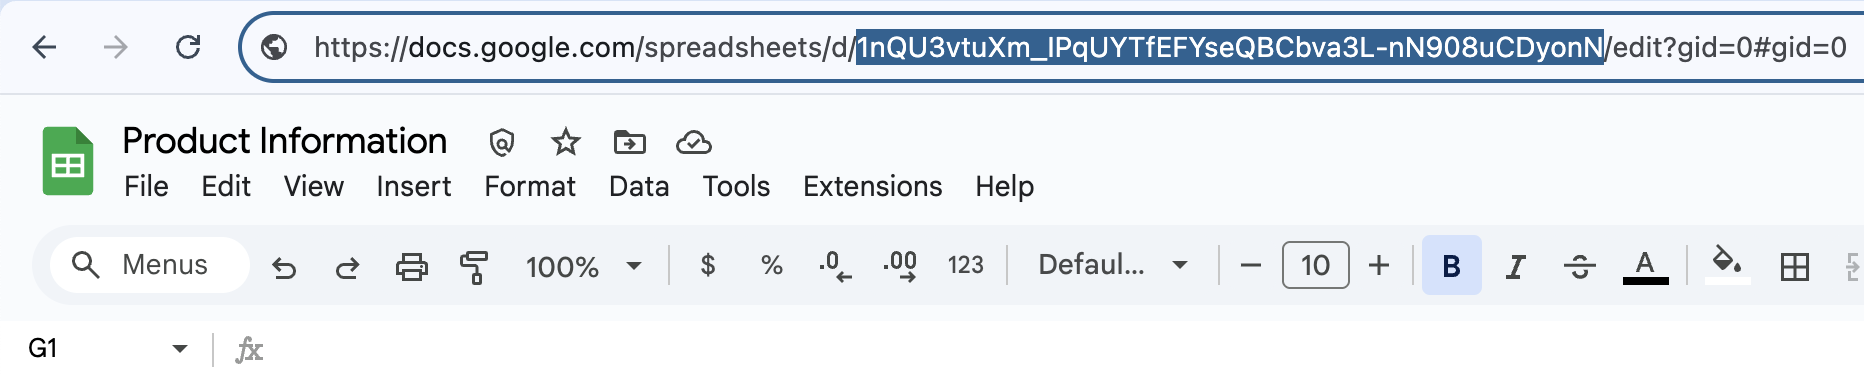 Enter the sheet key
Enter the name of the sheet you plan to import in the Worksheet Title field.
Click Submit.
UPDATING IMPORTED TABLES
To update a table imported from Google Sheets, repeat the import steps.
# Supported operations
The following operations are available for retrieving data from data tables:
| Operation | Description |
|---|---|
| Lookup | Retrieves a single record using a key-value pair. |
| Search | Retrieves multiple records based on a key-value match. |
| Get All | Retrieves all records in the data table. |
# Use a data table in a flow
You can reference data tables in flows by using the Data Table add-on.
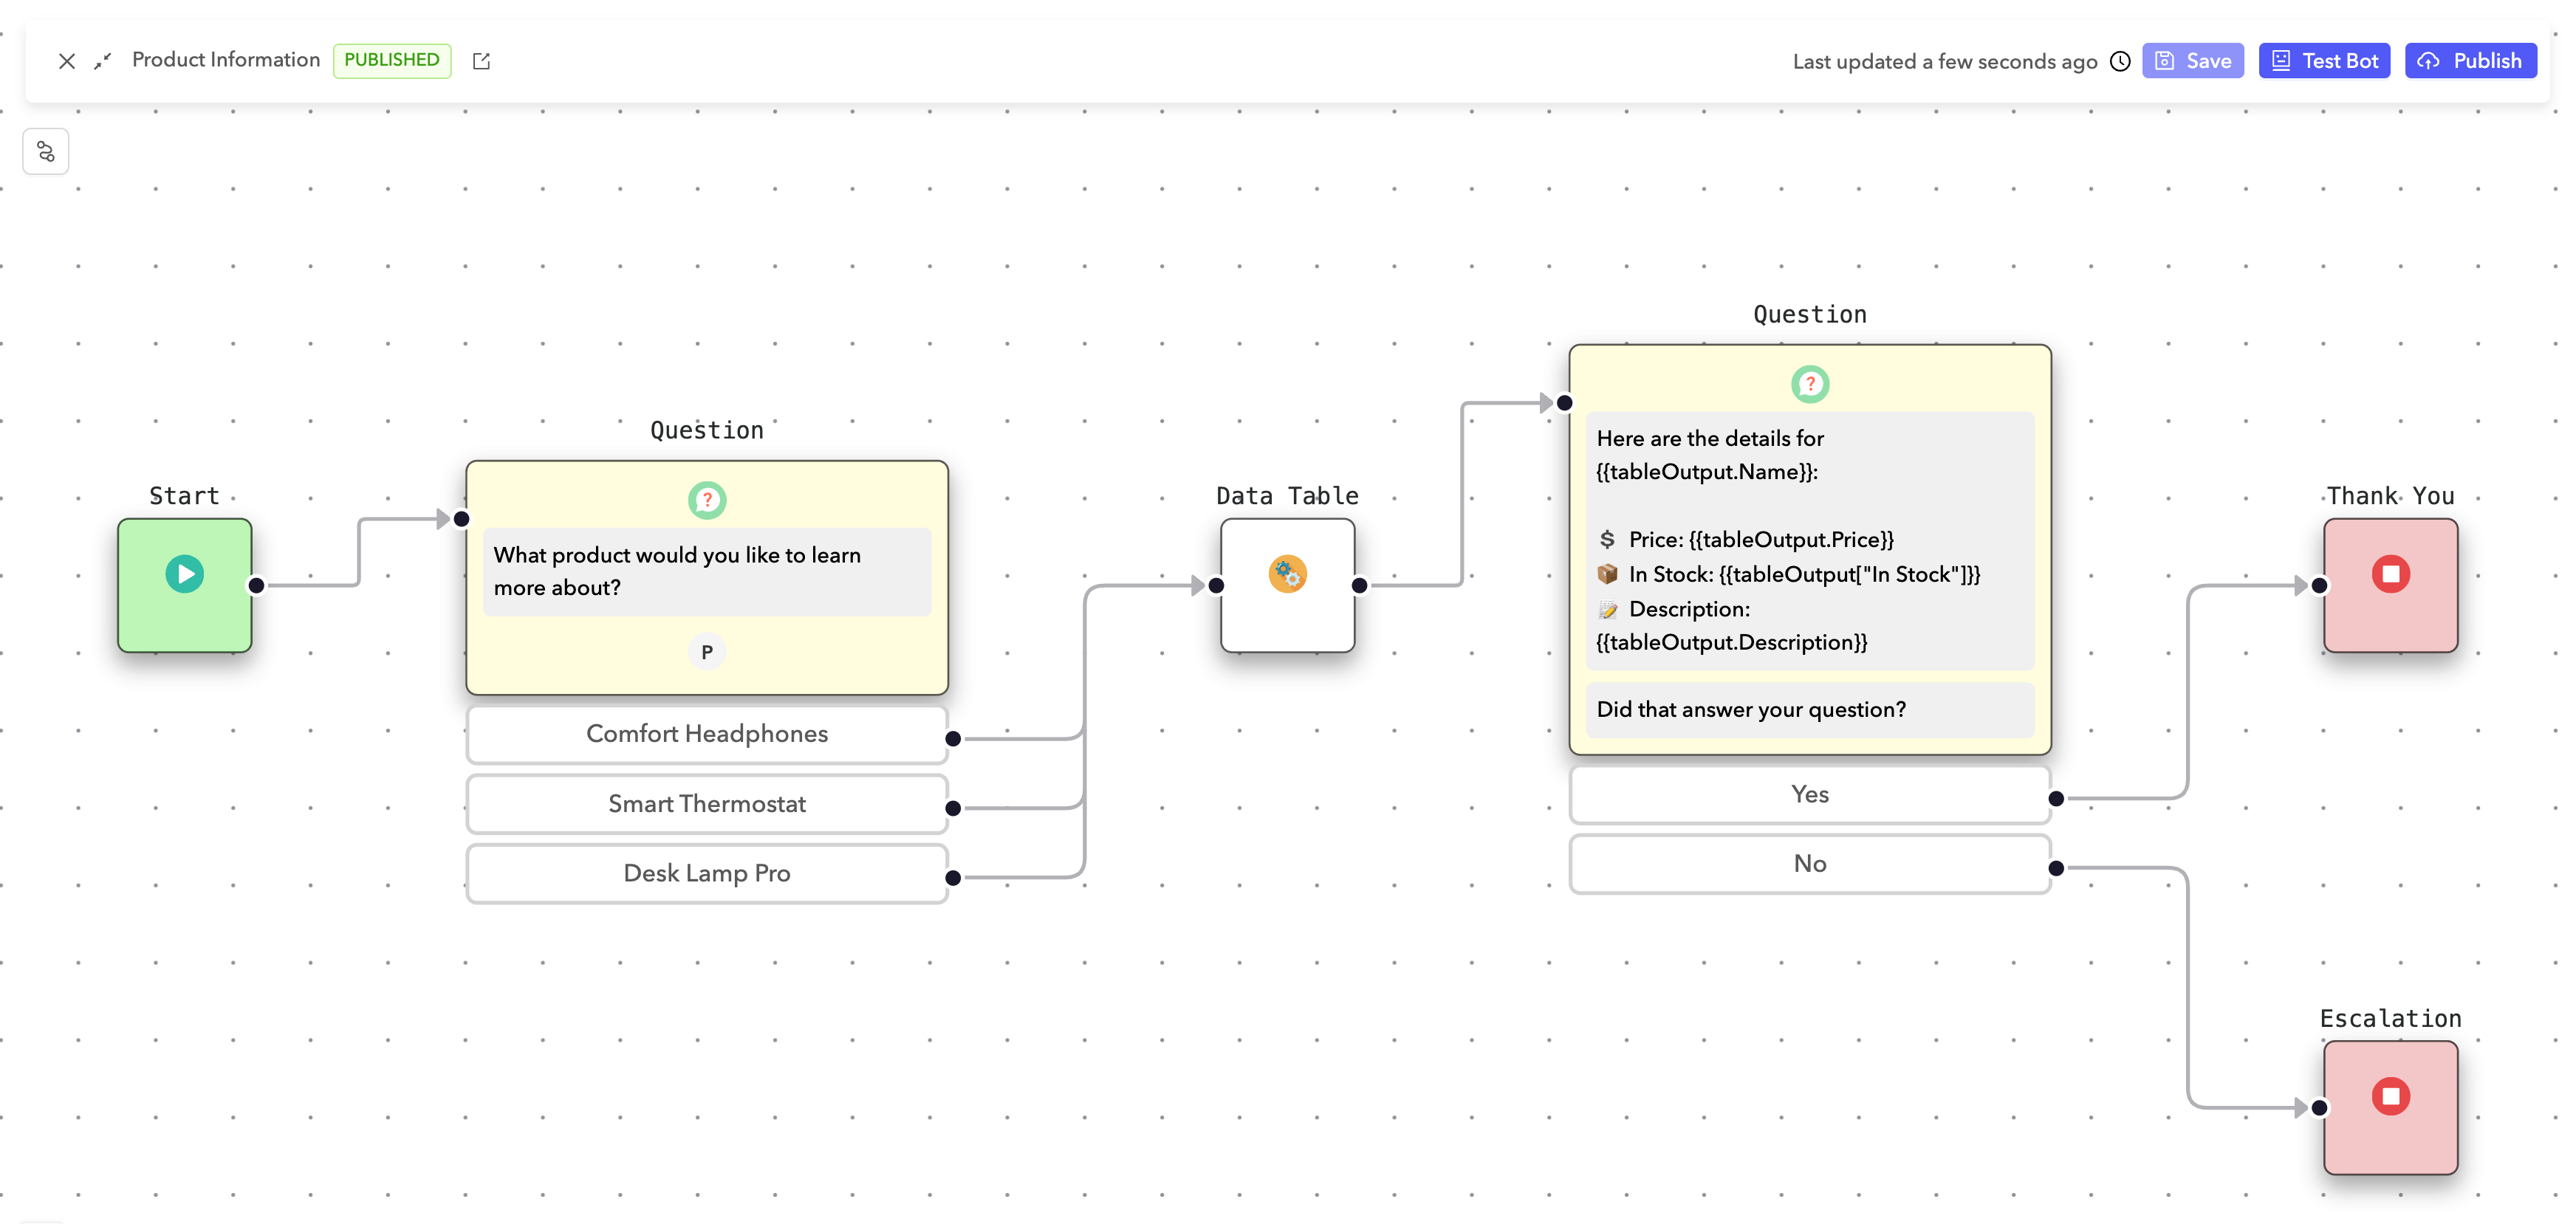 Completed flow
In this example, the AI agent looks up product information based on the user's selection and returns relevant details such as price, availability, and description.
Create a skill named Product Information.
This skill is activated when users ask about available products.
Open the Product Information flow and add a Question node asking which product the user wants more information on.
You can use Quick Replies to ensure the user's selection matches one of the product names in the table.
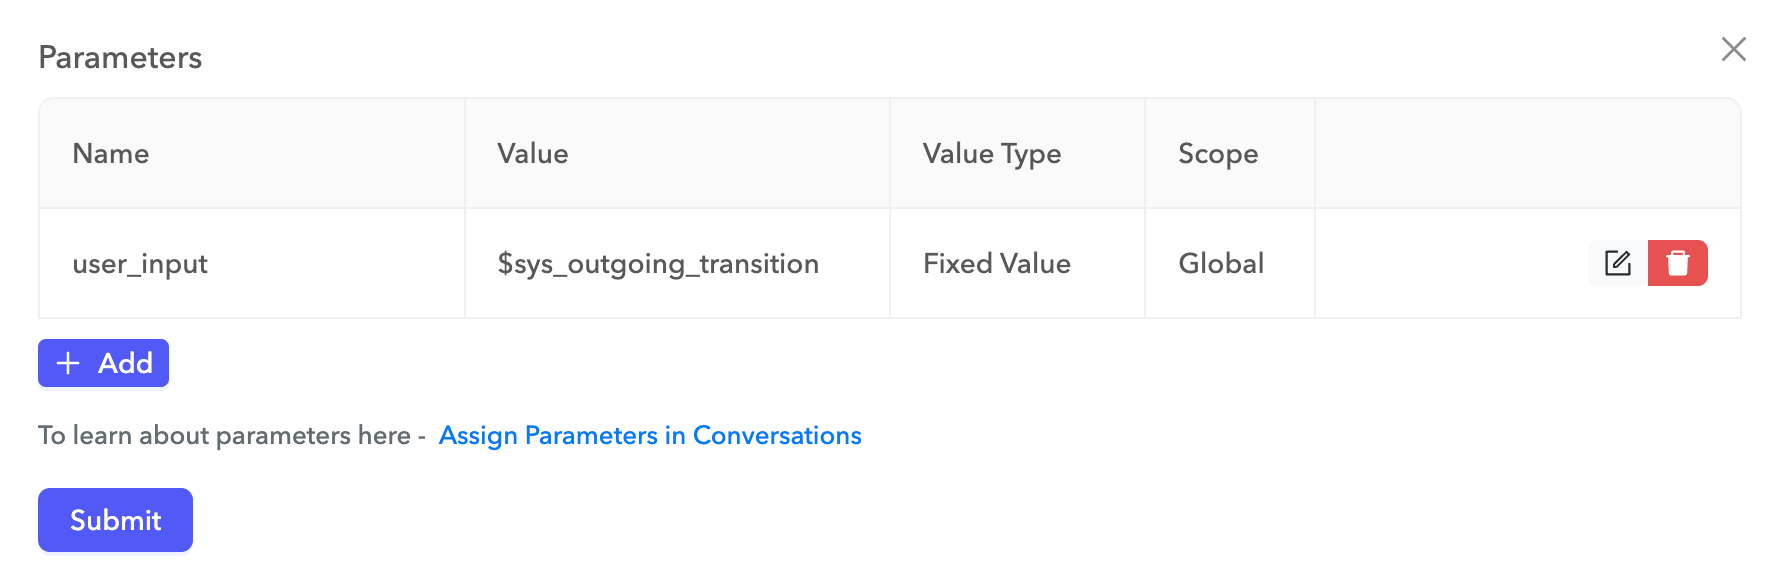
Assign a parameter to the question node:
- Name:
user_input - Value:
$sys_outgoing_transition
The value $sys_outgoing_transition is a fixed parameter value that stores the user's selection.
 User input parameter
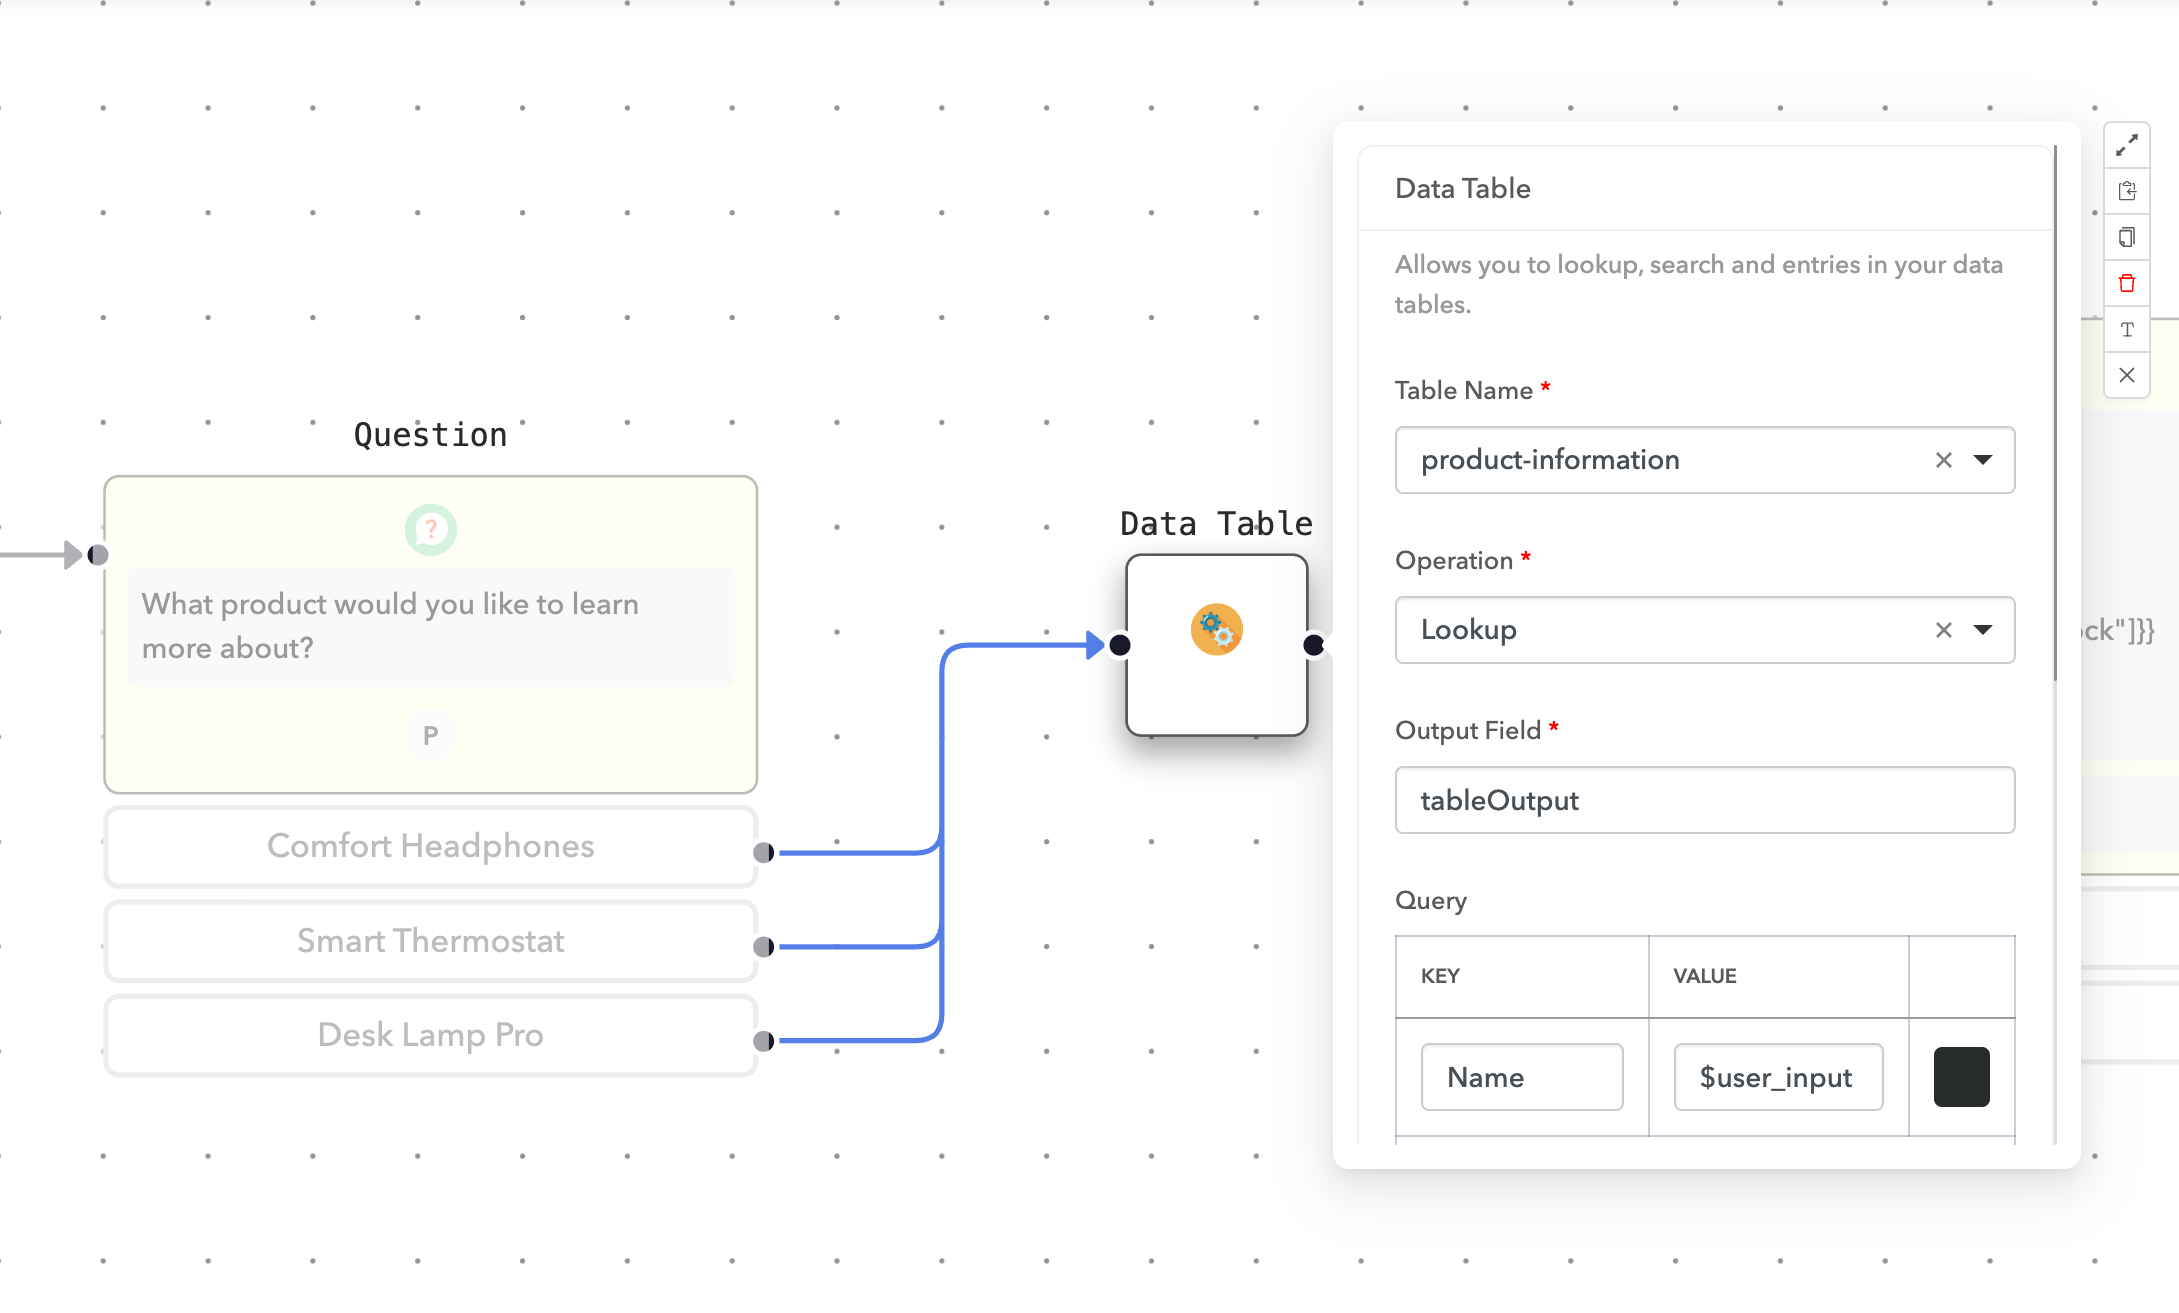
Drag the Data Table node into the flow.
Configure the node:
- Table Name:
product-information - Operation:
Lookup
 Configure the data table node
Add a Query to find the product by name:
- Key:
Name - Value:
$user_input
When this node runs, it stores the matching record in a tableOutput object, where each column from the table is a key.
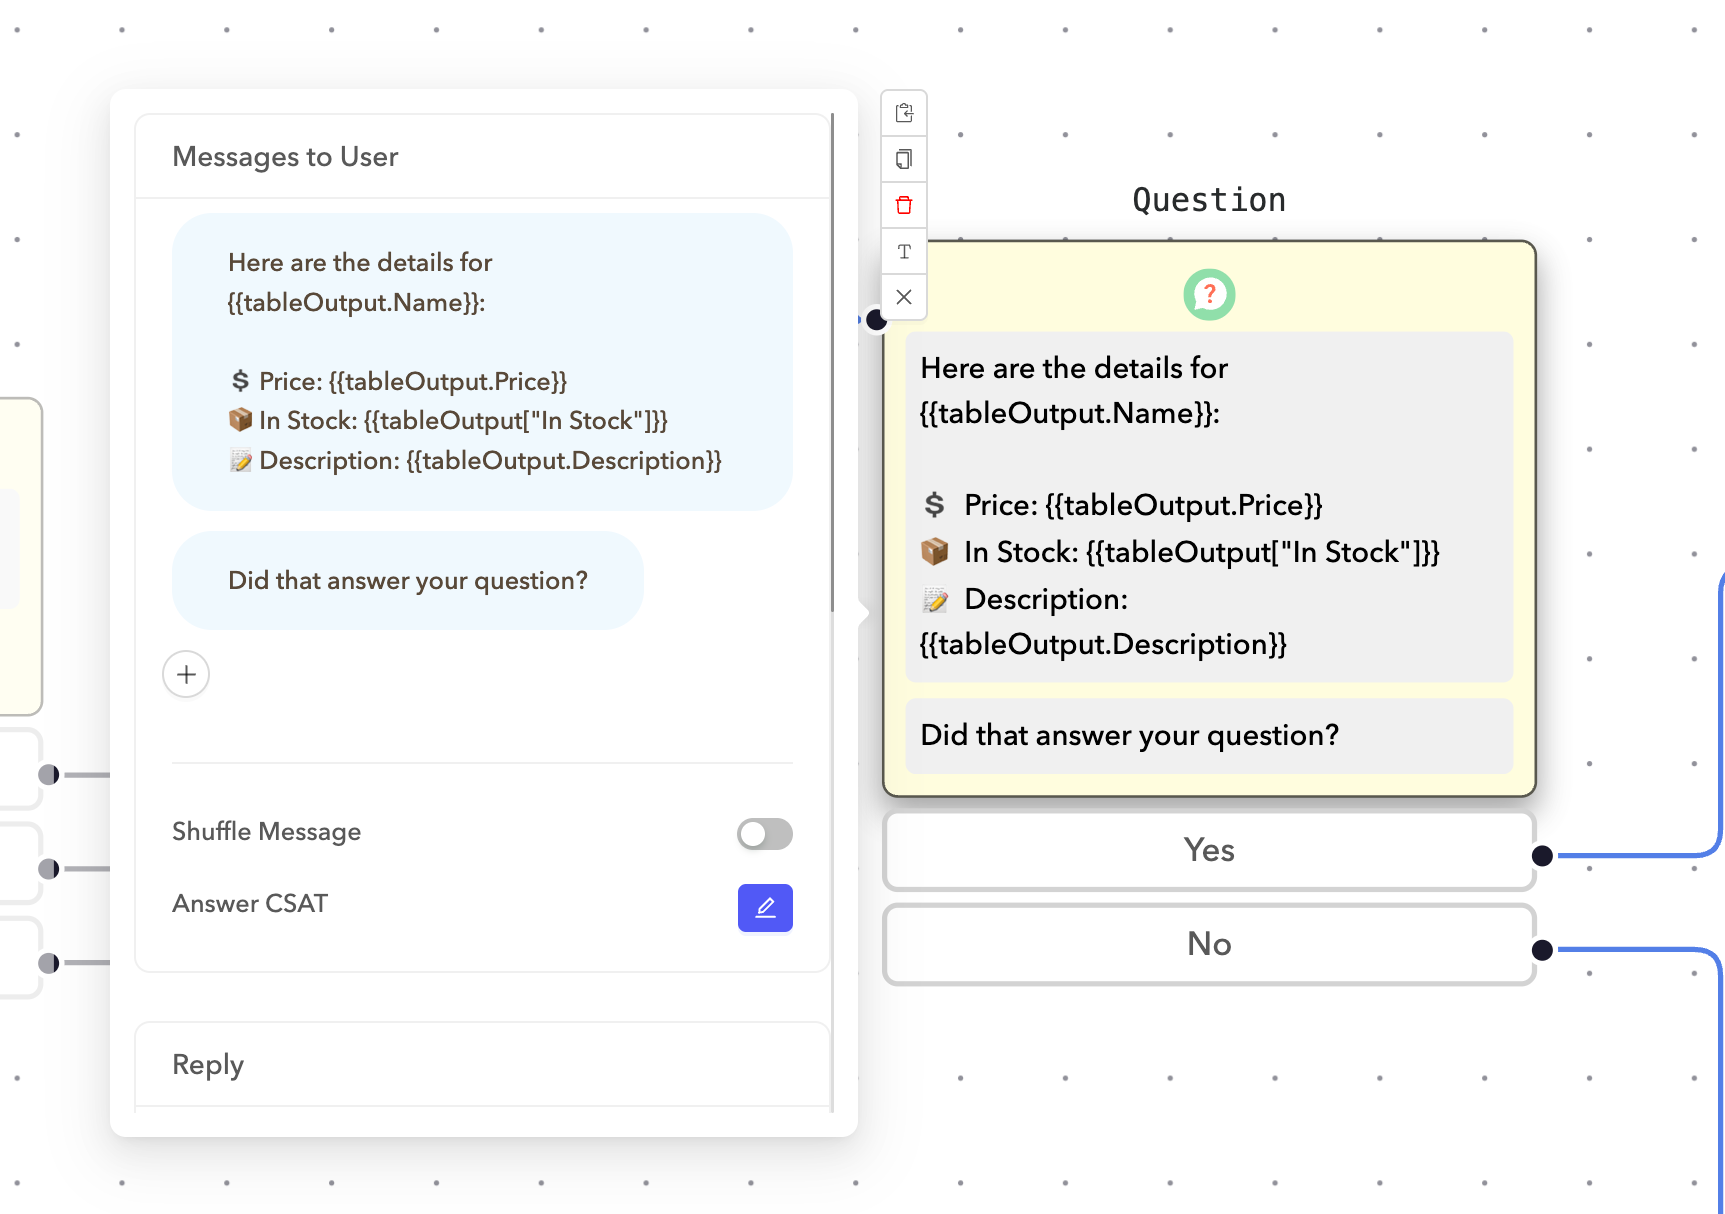
Add a Message node to present the product information using values from tableOutput.
 Product details
This example uses the following message:
Here are the details for {{tableOutput.Name}}:

💲 Price: {{tableOutput.Price}}
📦 In Stock: {{tableOutput["In Stock"]}}
📝 Description: {{tableOutput.Description}}
The rendered output:
Here are the details for Comfort Headphones:
💲 Price: $89.99
📦 In Stock: Yes
📝 Description: Wireless headphones with noise cancellation
BRACKET NOTATION
Use bracket notation to reference column names that contain spaces or special characters.
Optional. Add a follow-up message asking whether the information was helpful. Use quick replies (Yes, No) that route to either a Thank You or Escalation ending node.
Click Save to save your changes.
Click Publish to publish the flow.
Last updated: 4/1/2026, 9:14:56 PM