API endpoint caching
API caching improves recipe performance by reducing duplicate API requests.
Workato temporarily stores responses in a cache when you enabled this feature. If a recipe sends a duplicate request within the retention period, Workato returns the cached response instead of calling the endpoint again.
Benefits:
- Faster response times in recipe actions
- Fewer total jobs
- Decreased job duration
- Reduced traffic between applications
PREREQUISITES
You must have the following prerequisites to use API endpoint caching:
- Access to the API Platform feature
- The API platform privilege
Limits and quotas
Only successful GET requests that return a 2xx status code can be cached.
| Description | Limit | Notes |
|---|---|---|
| Maximum cache key size | 10 kB | NA |
| Maximum cache entry value size | 10 kB | Requests exceeding this limit do not cache even when successful. Contact your Workato Customer Success Manager to adjust this limit. |
| Maximum cache entry count per user ID | 10,000 entries | If exceeded, entries are flushed, from oldest to newest, to accommodate new entries. To adjust this limit, contact your Workato Customer Success Manager for support. |
| API response and cache limits | 100 KB | NA |
Enable endpoint caching
Configure the following fields in an endpoint's Settings tab or during endpoint creation to enable API caching:
| Input field | Description |
|---|---|
| Cache response | Enable or disable API caching. |
| Time-to-live period | Enter the time in seconds to retain API responses in the cache. The default value is 600 seconds (10 minutes) and the maximum is 3600 seconds (60 minutes). Refer to the Cache retention section for more information. |
| Cache key parameters | Select the parameter(s) to use as a cache key. |
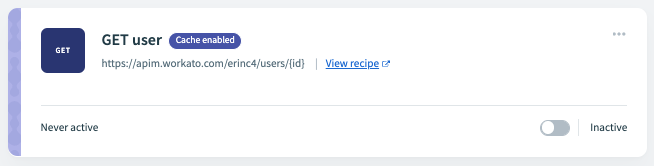
Endpoints with caching enabled have the Cache enabled badge:
Cache retention
The Time-to-live field defines the amount of time that the cache retains each response.
For example, if you set the retention period to 600 seconds:
- Requests at 400 seconds access the response from the cache.
- Requests at 800 seconds call the endpoint, store the new response in the cache, and restart the retention period.
Each user ID has a cache limit of 10,000 entries. When this limit is reached, the oldest entries are flushed to accommodate newer entries.
Cache keys
The Cache key parameters field defines path and query string parameters to use as a cache key. If a request matches the key during the retention period, the request returns the matching entry from the cache.
Path parameter example
You can set a path parameter such as /users/{id} as the cache key to store responses based on a user's id.
The following request returns the cached response for the user ID 12345, if it exists:
curl  -X GET https://api.myworkatoexample.com/docs/users/12345 \
      -H 'API-TOKEN: YOUR_TOKEN'
Query string example
You can set a query string such as /users?id={value} as the cache key to store responses based on a user's id.
The following request returns the cached response for the user ID 12345, if it exists:
curl  -X GET https://api.myworkatoexample.com/docs/users?id=12345 \
      -H 'API-TOKEN: YOUR_TOKEN'
Monitor endpoint caching
You can view details about cached responses on the API platform > Logs page. Requests that retrieved a response from the cache have a Cached badge.
Clear cached endpoint data
Cached entries clear automatically, based on the retention period you define. You can also complete the following steps to manually clear an endpoint's entire cache:
Go to Platform > API platform > API collections.
Click the collection that contains the endpoint you plan to clear.
Click ... (more) on the endpoint you plan to clear.
Click Clear cached responses. A confirmation modal displays.
Click Clear cache.
Re-validate cached entry
You can re-validate a cached entry by including the Cache-Control: max-age=0 header in a request. For example:
curl https://api.myworkatoexample.com/docs/users/12345 \
-H 'Authorization: Bearer ACCESS_TOKEN' \
-H 'Cache-Control: max-age=0'Last updated: