Google Vault
Google Vault is an information governance and eDiscovery tool for Google Workspace. Vault allows you to retain, hold, search, and export Google Workspace data.
API version
The Google Vault connector uses the Google Vault API v1
Prerequisites
Before you establish a connection to Google Vault, complete the following steps:
- Create an admin role with Vault privileges
- Assign Vault roles to users
- Configure OAuth 2.0 for authorization
- Delegate domain-wide authority to the service account
After you complete these prerequisites, proceed to connect to Google Vault on Workato.
Create an admin role with Vault privileges
Complete the following steps to create an admin role with the required Vault privileges:
Sign in to the Google Admin console using a super administrator account. You must use a super administrator account to complete these steps.
Go to Menu > Account > Admin roles in the admin console.
Click Create a new role.
Enter a name and description for the role. For example, name the role based on the privileges it grants.
Click Continue.
Expand the Google Vault section.
Select the required privileges for the role. Refer to the Vault Privileges reference for more information.
Click Continue.
Review the privileges you selected, then click Create Role.
Assign Vault roles to users
Complete the following steps to assign Vault roles to users:
Go to Menu > Directory > Users in the admin console.
Find the user in the list. Refer to the Find a user account article for more details.
Click the user’s name to open their account page.
Scroll to and click Admin roles and privileges.
Click Turn on next to the prebuilt or custom role. If Turn on doesn’t appear, click under Roles to reveal the switches.
Click Save.
Configure OAuth 2.0 for authorization
Complete the following steps to configure OAuth 2.0 for your app:
Open the Google Cloud console and go to Menu > APIs & Services > OAuth consent screen.
Select the user type for your app, then click Create.
Click Add or Remove Scopes. Select the minimum scopes required for your app. For this connector, include the following:
Click Save and Continue after selecting the required scopes.
Delegate domain-wide authority to the service account
SERVICE ACCOUNT AUTHENTICATION
You can use a service account to authenticate without a personal user account. For consistent use, Workato recommends service account authentication.
Complete the following steps to delegate domain-wide authority:
Open the Google Admin console and go to Menu > Security > Access and data control > API Controls.
Select Manage Domain Wide Delegation in the Domain wide delegation pane.
Click Add new.
Enter the service account’s Client ID in the Client ID field. You can find your service account's client ID on the Service accounts page.
Enter the required scopes in the OAuth scopes field. For this connector, include the following scope:
https://www.googleapis.com/auth/ediscovery.
Click Authorize.
Create a connection to Google Vault on Workato
Workato supports JWT authentication to connect to Google Vault.
Complete the following steps to connect Google Vault to Workato:
Click Create > Connection.
Search for and select Google Vault on the New connection page.
Provide a name for your connection in the Connection name field.
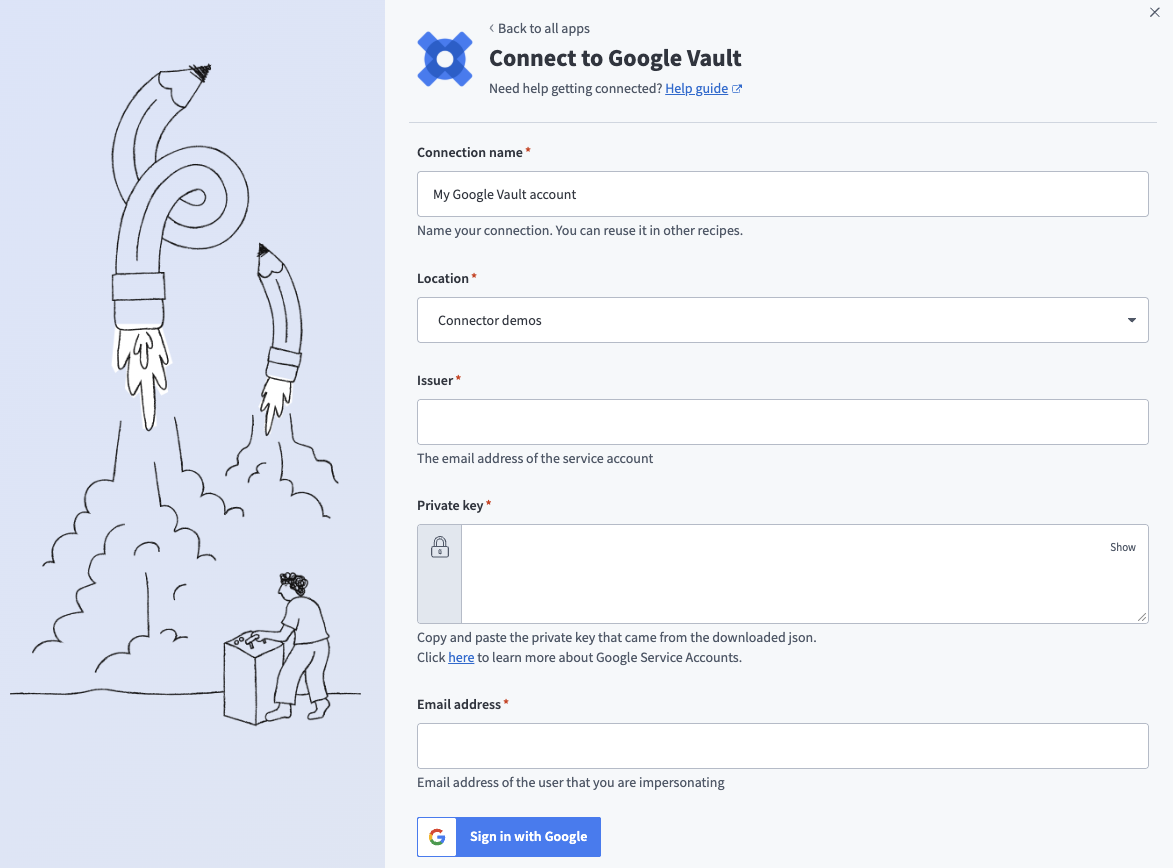 Google Vault connection
Use the Location drop-down menu to select the project where you plan to store the connection.
Enter your service account email address in the Issuer field.
Paste the private key from the downloaded JSON file in the Private key field.
Enter the user email address that serves as the primary subject of the JWT in the Email address field.
Click Sign in with Google to complete the connection.
Last updated: